Basketcase-Hardtail-Springer-Sportster
#1
 06-27-2009, 12:59 PM

I am transferring this thread over from another private forum.
The following contains graphic descriptions and images of some of the most vile and depraved acts of chopping imaginable. Under no circumstances should this be viewed or read by children. If you are offended by unthinkable terror of rampant lunatics with saw blades, MIG, TIG, torches, and sledgehammers twisting and contorting cold steel without remorse, you should not proceed beyond this point. We refuse to be held responsible for any mental or physical discomfort resulting from the failure to heed this warning.
I picked up the 1991 Hardtail Springer Basketcase Sportster today. I picked it up for $1,000.00 from a friend who had it sitting in his garage for the last 8 years, along with 4 boxes of parts. It has most of the parts necessary to assemble it but it will need a few more items to get it up and running, if we were to add paint to the total, I am looking at about $3,000.00 needed for the build and alot of hours to get things assembled, fabricated and polished up.
Here it is:
Last edited by RudeDog; 06-27-2009 at 01:01 PM.
#2
06-27-2009, 01:02 PM
I have not done a complete assessment of everything I need yet, but judging from what I saw in the boxes as I was unloading them I will need new engine gaskets, hand controls, engine bolt set (including head bolts), a few front and rear brake components, and some rechroming and/or powdercoating. It was stored in the garage by both previous owners but due to it being torn down and sitting for more than 8 years (my buddy bought it as a basketcase also) there is alot of corrosion on the aluminum pieces and some minor rust spots on the chrome parts.
I suspect this project will take me through next winter to get it completely done (build it, ride it for a short time, to make sure all is well, then tear it down and paint it up) and in the process I am sure I will opt to get more "bling" than I am willing to purchase at this time. The, speculated, cash out of my pocket at this time is only $3,000.00.
Extras that came with the project to get me to buy it are the springer forks, Invader wheels, Softail fuel tanks, Softail rear fender, Softail oil bag and miscellaneous engine add ons. If it were a standard Sportster in rough condition and in boxes I would have offered him only $500.00.
I will keep you posted as to the progress of the build.
#3
06-27-2009, 01:03 PM
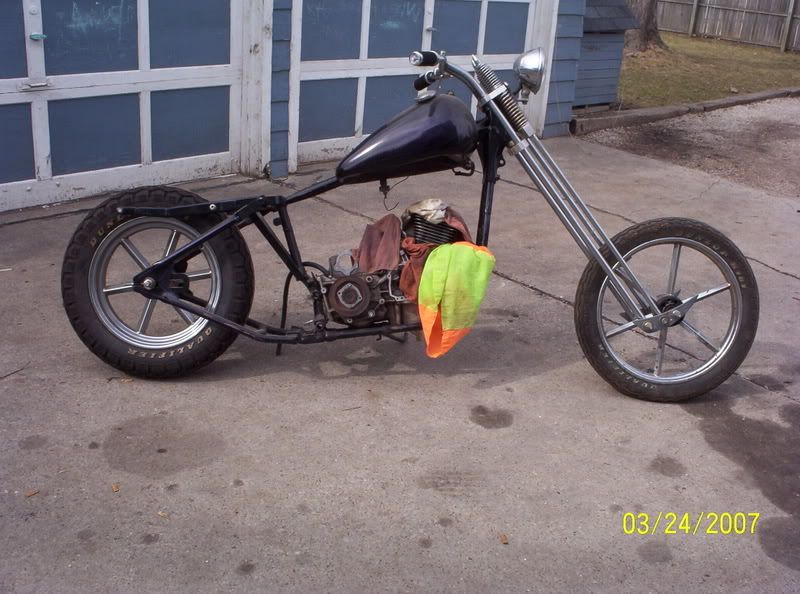
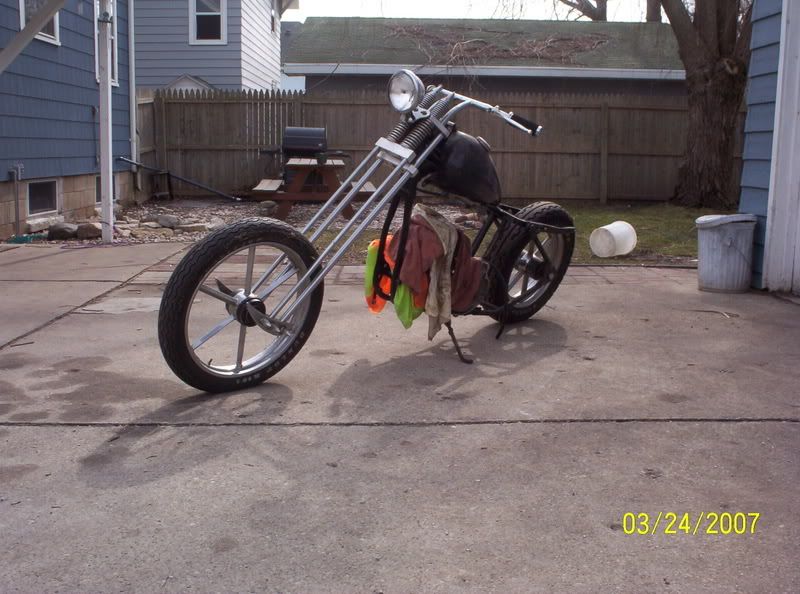
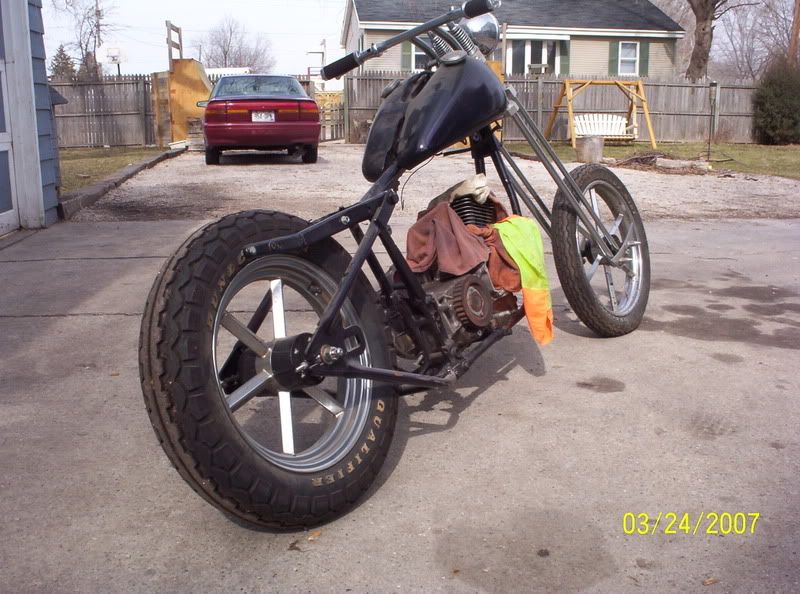
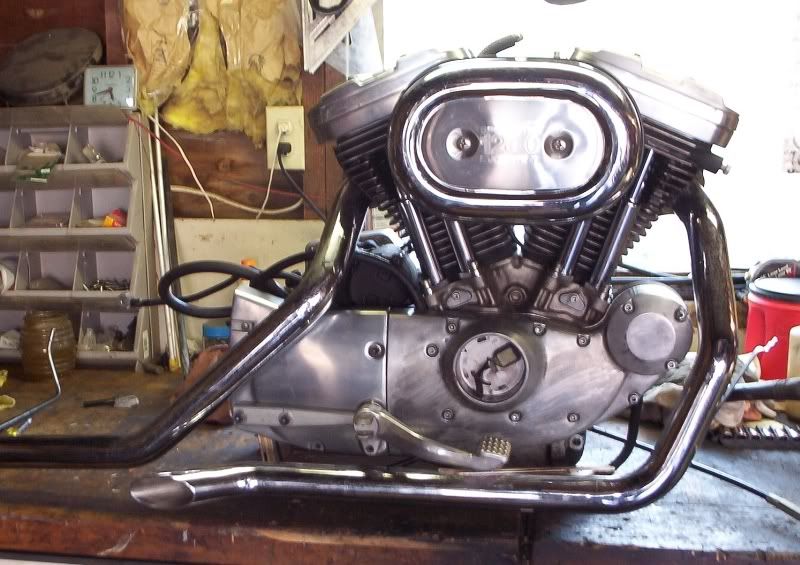
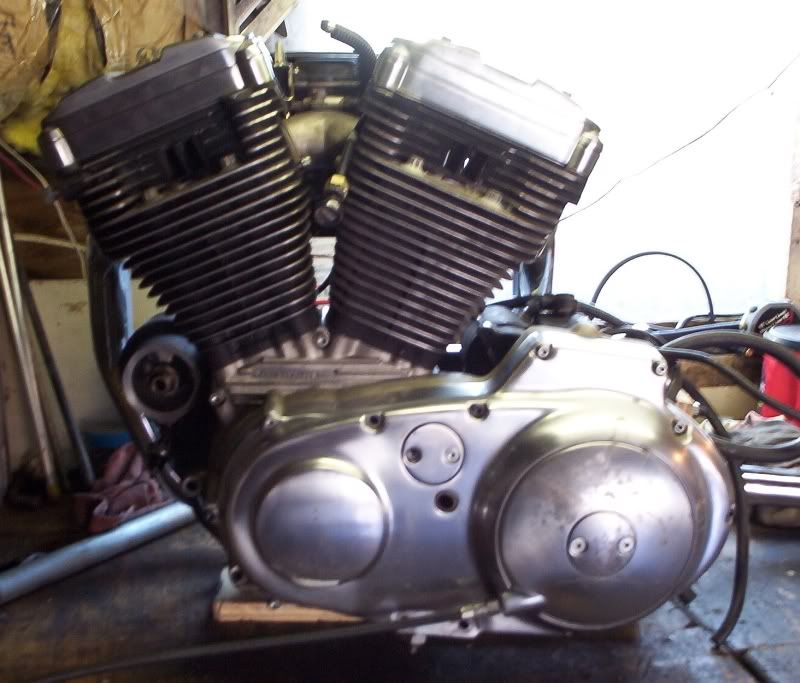
Today I assembled the engine as far as I could with the parts supplied. I will need a shifter lever and mounting hardware, some assorted hex head cap screws, new rings and a complete engine gasket kit. The engine is more clean and complete than what I expected. The other things I noticed I will need are a complete wiring kit, rear brake kit, and... I should have made a list! :censored:
Here are some pictures of the assembled engine (not torqued or sealed, just assembled):
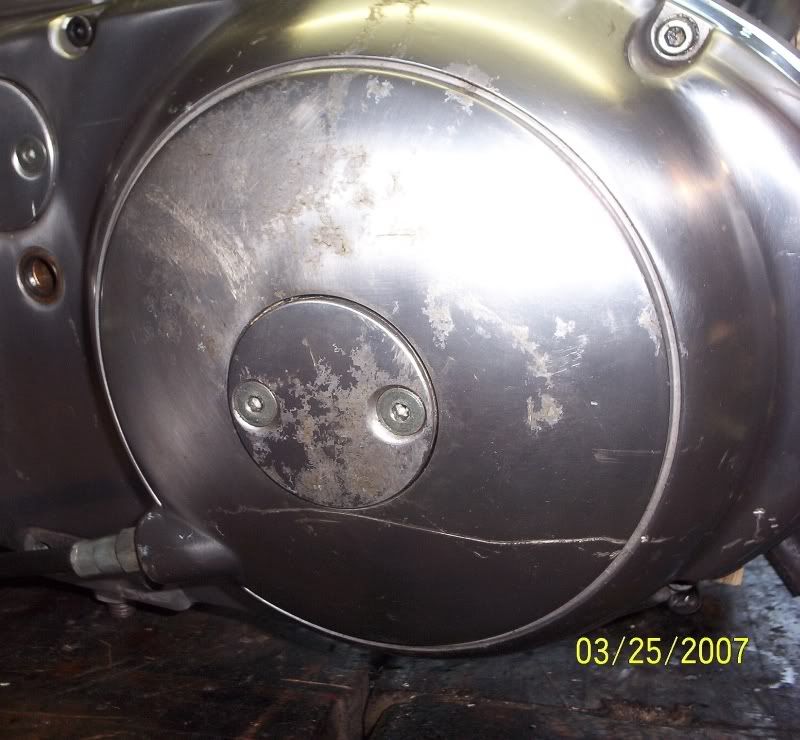
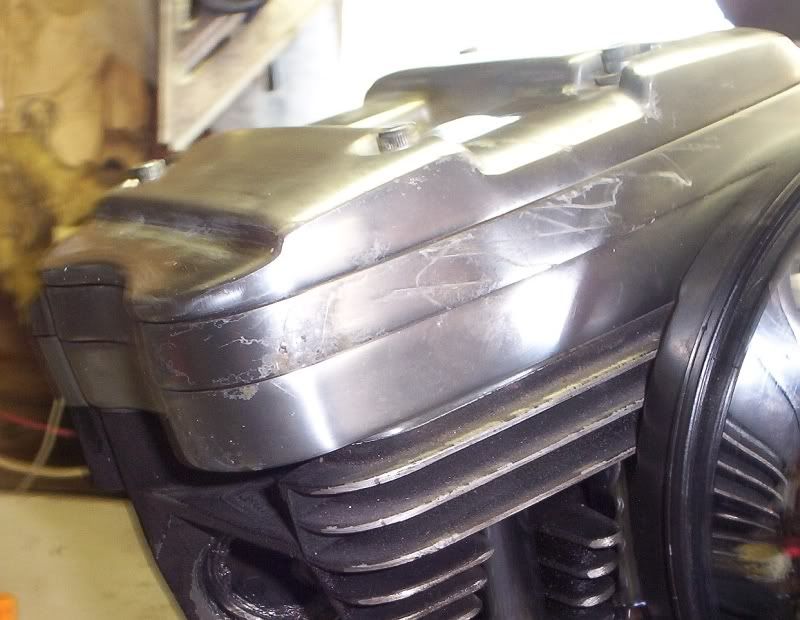
Now for the rough stuff. DO NOT ATTEMPT to polish aluminum if you have no clue what you are doing. I will be able to get this guys mess cleaned up:


Here are some pictures of the assembled engine (not torqued or sealed, just assembled):
Now for the rough stuff. DO NOT ATTEMPT to polish aluminum if you have no clue what you are doing. I will be able to get this guys mess cleaned up:
#4
06-27-2009, 01:04 PM
OUCH! That is exactly what I said when I pulled the parts out of the boxes. The good news is the inner parts (the ones that count) are in fairly good shape and the castings are marked as being cast in 1991. I have a bit of experience in polishing aluminum and these should not pose a threat, just time.
#5
06-27-2009, 01:04 PM
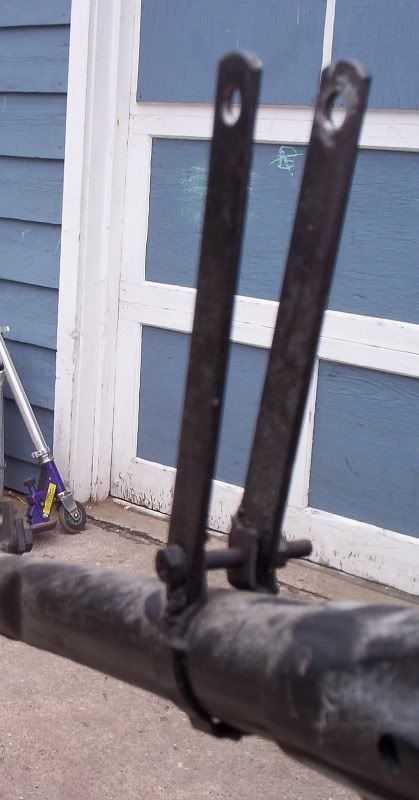
Man the guy that started this did not have a clue. Looks like he used whatever was lying around in the garage, the front of the tank is held up with a hose clamp and 2 1/8 x 3/4 pieces of steel and the rear is bolted to a piece of 1" channel. I will have a picture of this mess maybe tomorrow for all of you to enjoy with me.


#7
06-27-2009, 01:06 PM
I have found a couple of "do-it-yourself" simple wiring diagrams and instructions on the net and I have decided to buy wire and connectors instead of buying a complete wiring harness.
UPDATE:
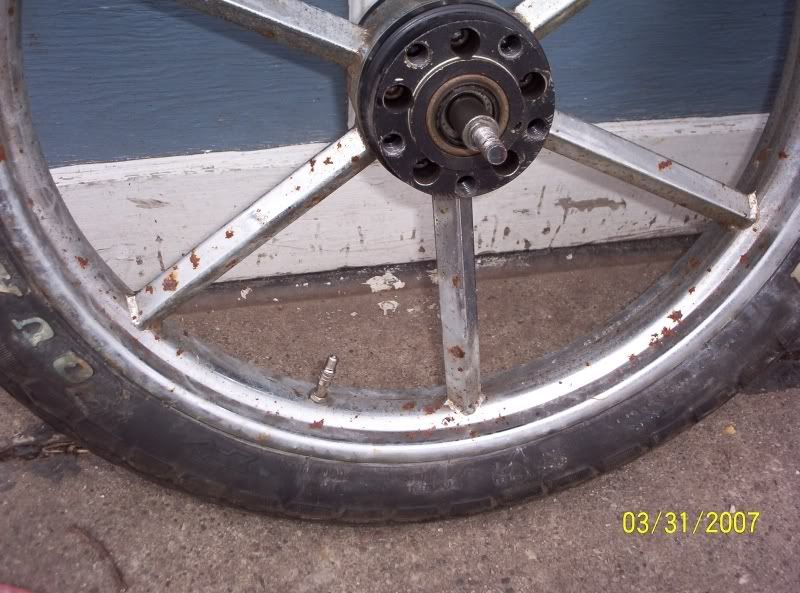
I managed to get the rims and forks cleaned up. I went out and bought some gel type rust remover and that stuff kicks a$$. After about 3 hours with this stuff and a toothbrush they turned out almost like new.
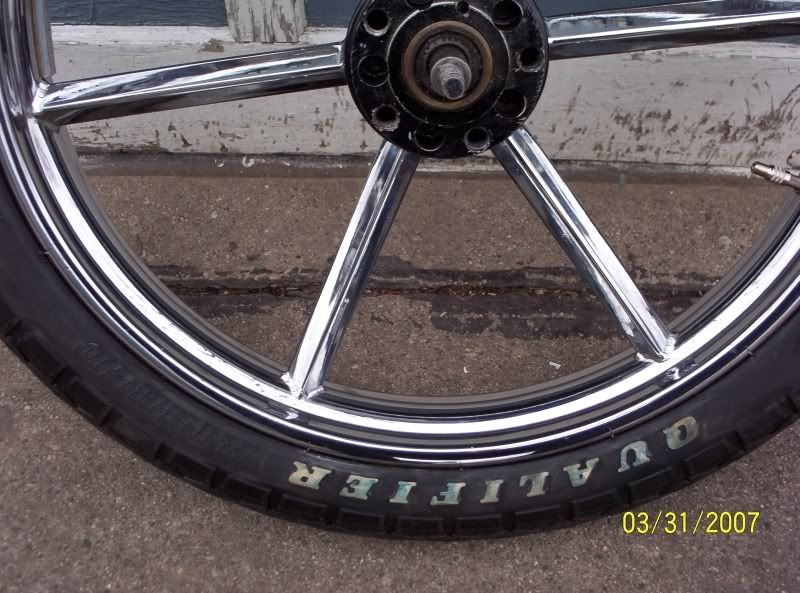
Here is a comparison of the finished rear and the untouched front:

A closeup of the front before:
And a closeup after:
UPDATE:
I managed to get the rims and forks cleaned up. I went out and bought some gel type rust remover and that stuff kicks a$$. After about 3 hours with this stuff and a toothbrush they turned out almost like new.
Here is a comparison of the finished rear and the untouched front:
A closeup of the front before:
And a closeup after:
Trending Topics
#8
06-27-2009, 01:09 PM
It performed a miracle on those rims. It is called Permatex "rust dissolver gel", Item #81756.

It says in the directions not to leave it on chrome plated parts for longer than 5 minutes but I tried it on an extra part I had lying around and the chrome held up to the stuff for 25 minutes so I went for it. I gobbed the stuff on and let it set for 20 minutes, then I scrubbed it with a toothbrush till the heavy spots were gone and just rinsed it off with the hose and dried it with a towel.
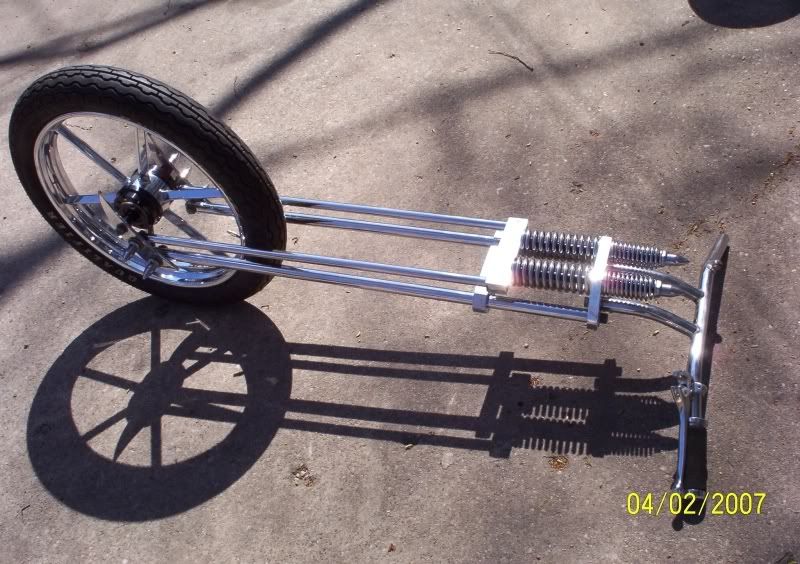
I am currently doing the springer as I am typing this. I should have pictures later tonight.
It says in the directions not to leave it on chrome plated parts for longer than 5 minutes but I tried it on an extra part I had lying around and the chrome held up to the stuff for 25 minutes so I went for it. I gobbed the stuff on and let it set for 20 minutes, then I scrubbed it with a toothbrush till the heavy spots were gone and just rinsed it off with the hose and dried it with a towel.
I am currently doing the springer as I am typing this. I should have pictures later tonight.
#9
06-27-2009, 01:10 PM
UPDATE:
I did not get the springer back together as there were alot of flaws to get out of the aluminum parts. I managed to get everything polished up and almost all back together but not completely.
The other update...
Is $156.00 too much for an unmolested 1984 Sportster frame? I won an Ebay auction for a 1984 Sportster frame that my engine will bolt right into. I will have to adjust the neck rake to accomodate the springer front end and I think I will stick with the hardtail rear end, thus the front and rear will be chopped to keep the "chopper" in the name.
I did not get the springer back together as there were alot of flaws to get out of the aluminum parts. I managed to get everything polished up and almost all back together but not completely.
The other update...
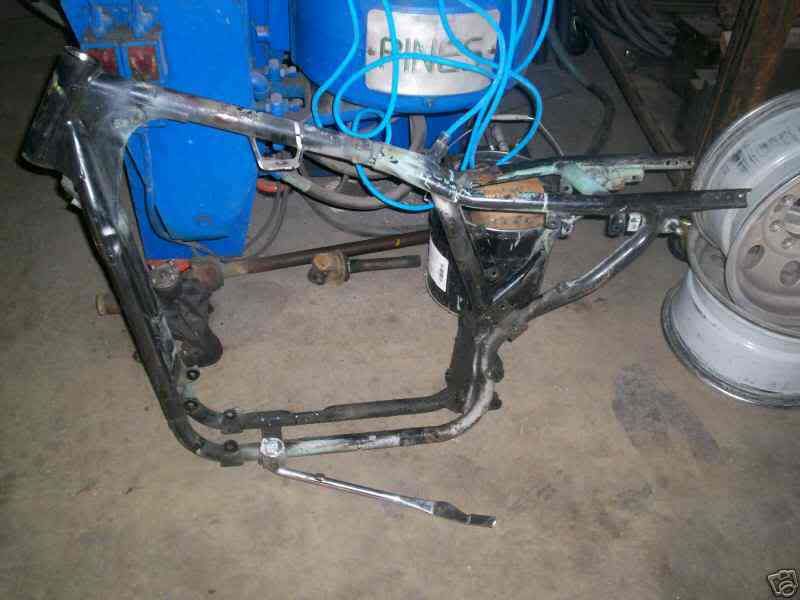
Is $156.00 too much for an unmolested 1984 Sportster frame? I won an Ebay auction for a 1984 Sportster frame that my engine will bolt right into. I will have to adjust the neck rake to accomodate the springer front end and I think I will stick with the hardtail rear end, thus the front and rear will be chopped to keep the "chopper" in the name.
#10
06-27-2009, 01:11 PM