step by step walk through of rocker cover gasket replacment
#1
 03-14-2009, 08:32 PM

hope this is in the right spot, if not if one of the mods would move it for me, thank you 
ok well i test road today and looks like i was sucessfull in replaceing both bottom and top rocker gaskets, thanks to folks on here and the manual it was fun and painless.
hopfully this will help some of you at some point who want to learn to do it yourself.
if you need to pull the tank off the bike, i didn't need to do this becuse i cleaned it up under there, this is not a thread for tank removal but if your willing to tackle this the tank should be no issue for you.
put the bike on a jack so the rear tire is off the ground, pull the spark plugs and put the bike in 5th gear, to do this just put in in 2nd, then roll the tire till it stops, then put it in 3rd and so on until yr in 5th
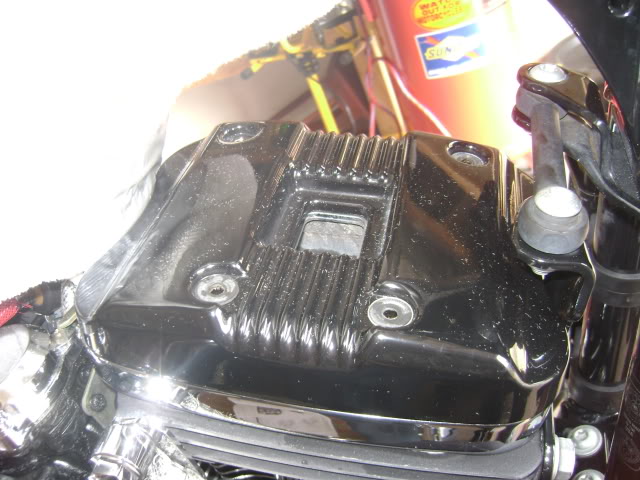
remove the four screws holding on the top rocker, its best to open them all evenly to an extent, doesn't have to be perfect.
after the top rocker is removed and the bike is in 5th gear on the jack you will need to turn over the engine in order to get the pushrods at there lowest point, there is not a lot of "up and down" movement in the rods so it is easy to see when they are both at there resting points.


if your not sure just turn the engine over a few times to see all the hights the pushrods can go to and leave them at the lowest point, the camshaft arms will look like there resting almost horizontal with the rocker.
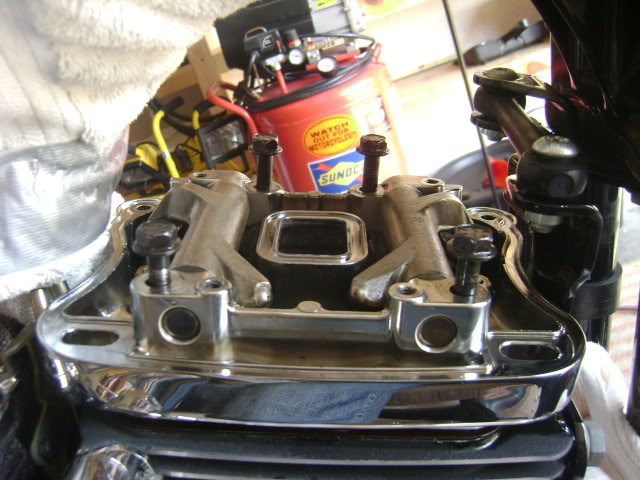
after this pull the breather assebley out with a torx and place it to the side, now you can remove the upper rocker gaskets and throw them away, note if the little spunge falls out of the breather assebley just stuff it back in, no worries


now you are ready to start disasembleing the bottom rocker. first thing is to unscrew the 2 alans on the primary side of the bike on top of the rocker, these come out easy and don't need anything special

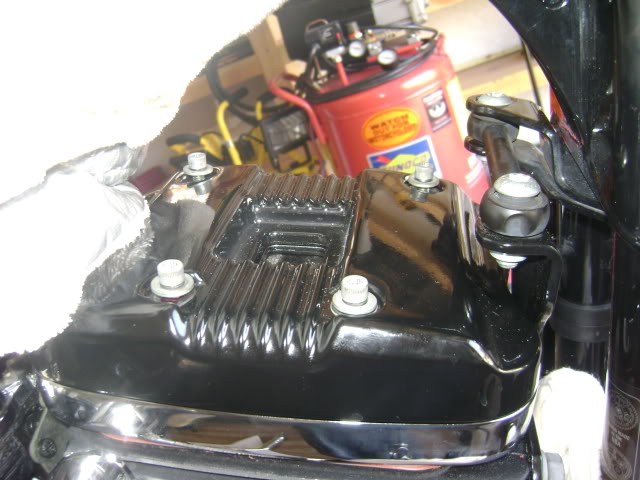
next take out the 3 bolts on the bottom of the rocker, this should be done evenly, 1/2 a turn to a full turn at a time

after these are out you can tackle the big 4 bolts that are holding the rocker onto the jug, its very important to remove these evenly, the book says a 1/4 to 1/2 turn at a time, i did a 1/2 to a full turn but i kept the cross pattern the book talked about so the rocker came up evenly, this disperses the stress when the bolts are cumming up.
alright now all ya gotta do is lift up the bottom rocker and put it aside, be carfull not to bang the pushrods while your removing the rocker. at this point i twisted the pushrods to see what they felt like, the book says they should be able to be "hand turned" before ya put the bottom rocker back on.
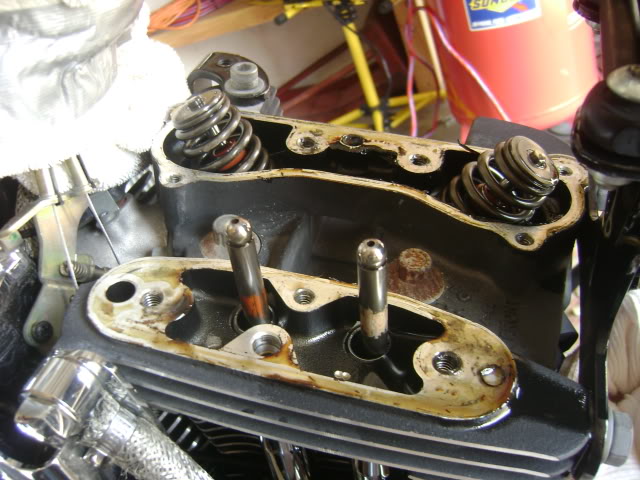
pull off the old gasket
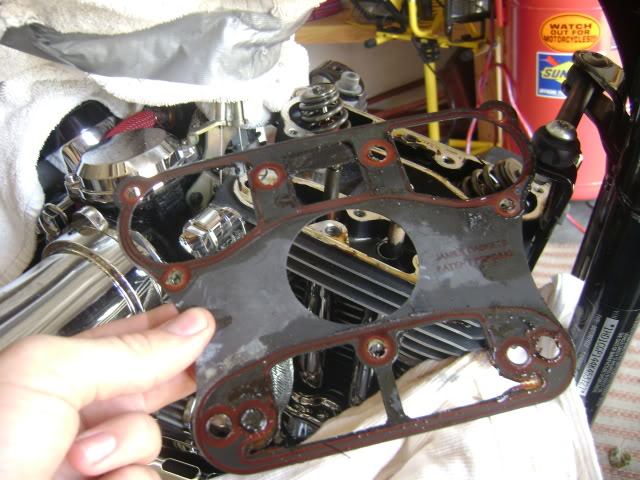
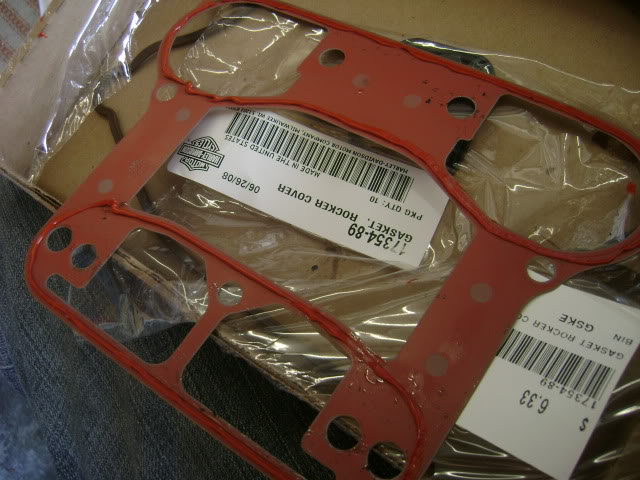
replace with new one, note, new harley gaskets don't look the same as the old ones, i actully went back to harley and told them they gave me the wrong gasket and they said that HD changed them for some reason so just be awaire of that, you can see the old and new ones in the pics i'm posting.
i put a thin layer of high temp rtv silicone head gasket maker on the gaskets before i insaled to get a secure fit
i put a thin layer on top too so that in between the rockers would secure as well, this pic is before the silicone was on, before putting the new gasket on wipe down the area well with a rag, get all oil and crud off the jug, this will make for a secure fit
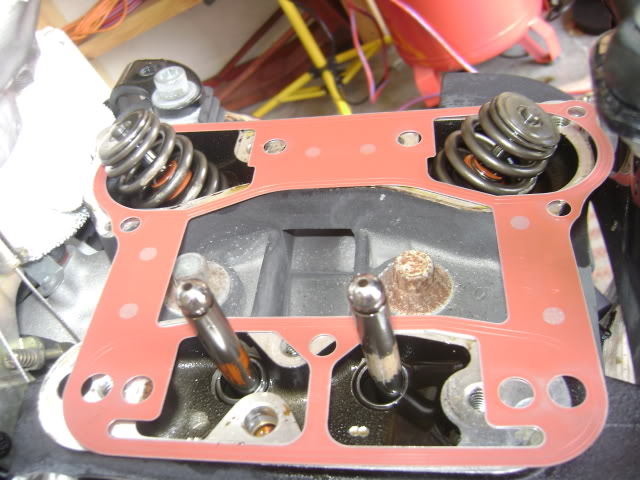
when putting the bottom rocker back on make sure the push rods are resting on the crankshaft properly and on the valve springs properly, they should fit right on
i use red loctight on ALL of the bolts for reasembley
now you go in reverse order that you took the bolts off, first you do the big 4 bolts, notice the bottom rocker doesn't sit flat on the jug, the bolts will compress the rocker to the jug, this needs to be done in order and in a cross pattern so that the rocker evenly comes down onto the jug, torque them to spec 18-22 ft lbs, then you are ready for the 3 bolts wich should be toqued to 135-155 in lbs then the two small alans on the primary side which can just hand tightend, but if yr a stickler also 135-155 in lbs
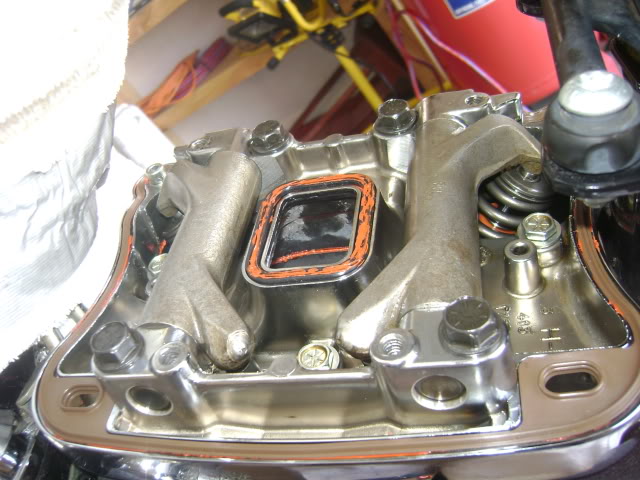
now clean well where the other 2 gaskets go and lay a very thin layer of silicone in the ridges ment to hold the gasket
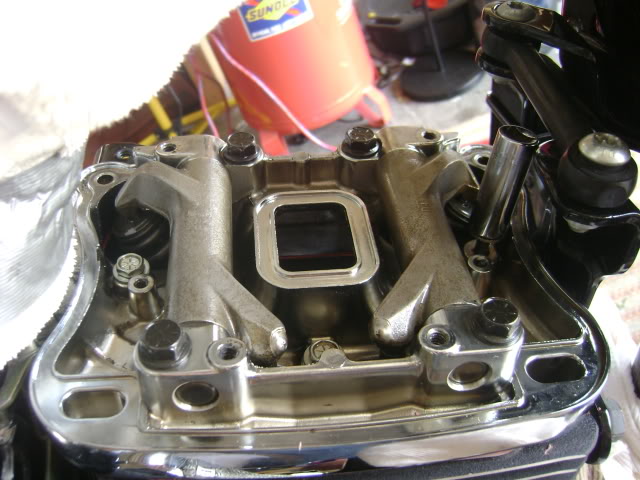
and a thin layer on the top of the inner gasket
don't forget the breather assebley!!! i did, it sucked,
tighten it down
clean off the inside of the top rocker and place it on tighten the 4 alans back down, i just do a 1/4 turn past tight.
depending on the silicone it might ask you to let the bike sit for anywhere from 1 to 24 hrs, i waited 16-18 just to be safe becuse i don't wanna have to go back in for a long time
and BAM!!!!!! ya did it yr done!!!!! go ride that beeoootch and have some fun
ok well i test road today and looks like i was sucessfull in replaceing both bottom and top rocker gaskets, thanks to folks on here and the manual it was fun and painless.
hopfully this will help some of you at some point who want to learn to do it yourself.
if you need to pull the tank off the bike, i didn't need to do this becuse i cleaned it up under there, this is not a thread for tank removal but if your willing to tackle this the tank should be no issue for you.
put the bike on a jack so the rear tire is off the ground, pull the spark plugs and put the bike in 5th gear, to do this just put in in 2nd, then roll the tire till it stops, then put it in 3rd and so on until yr in 5th
remove the four screws holding on the top rocker, its best to open them all evenly to an extent, doesn't have to be perfect.
after the top rocker is removed and the bike is in 5th gear on the jack you will need to turn over the engine in order to get the pushrods at there lowest point, there is not a lot of "up and down" movement in the rods so it is easy to see when they are both at there resting points.
if your not sure just turn the engine over a few times to see all the hights the pushrods can go to and leave them at the lowest point, the camshaft arms will look like there resting almost horizontal with the rocker.
after this pull the breather assebley out with a torx and place it to the side, now you can remove the upper rocker gaskets and throw them away, note if the little spunge falls out of the breather assebley just stuff it back in, no worries
now you are ready to start disasembleing the bottom rocker. first thing is to unscrew the 2 alans on the primary side of the bike on top of the rocker, these come out easy and don't need anything special
next take out the 3 bolts on the bottom of the rocker, this should be done evenly, 1/2 a turn to a full turn at a time
after these are out you can tackle the big 4 bolts that are holding the rocker onto the jug, its very important to remove these evenly, the book says a 1/4 to 1/2 turn at a time, i did a 1/2 to a full turn but i kept the cross pattern the book talked about so the rocker came up evenly, this disperses the stress when the bolts are cumming up.
alright now all ya gotta do is lift up the bottom rocker and put it aside, be carfull not to bang the pushrods while your removing the rocker. at this point i twisted the pushrods to see what they felt like, the book says they should be able to be "hand turned" before ya put the bottom rocker back on.
pull off the old gasket
replace with new one, note, new harley gaskets don't look the same as the old ones, i actully went back to harley and told them they gave me the wrong gasket and they said that HD changed them for some reason so just be awaire of that, you can see the old and new ones in the pics i'm posting.
i put a thin layer of high temp rtv silicone head gasket maker on the gaskets before i insaled to get a secure fit
i put a thin layer on top too so that in between the rockers would secure as well, this pic is before the silicone was on, before putting the new gasket on wipe down the area well with a rag, get all oil and crud off the jug, this will make for a secure fit
when putting the bottom rocker back on make sure the push rods are resting on the crankshaft properly and on the valve springs properly, they should fit right on
i use red loctight on ALL of the bolts for reasembley
now you go in reverse order that you took the bolts off, first you do the big 4 bolts, notice the bottom rocker doesn't sit flat on the jug, the bolts will compress the rocker to the jug, this needs to be done in order and in a cross pattern so that the rocker evenly comes down onto the jug, torque them to spec 18-22 ft lbs, then you are ready for the 3 bolts wich should be toqued to 135-155 in lbs then the two small alans on the primary side which can just hand tightend, but if yr a stickler also 135-155 in lbs
now clean well where the other 2 gaskets go and lay a very thin layer of silicone in the ridges ment to hold the gasket
and a thin layer on the top of the inner gasket
don't forget the breather assebley!!! i did, it sucked,
tighten it down
clean off the inside of the top rocker and place it on tighten the 4 alans back down, i just do a 1/4 turn past tight.
depending on the silicone it might ask you to let the bike sit for anywhere from 1 to 24 hrs, i waited 16-18 just to be safe becuse i don't wanna have to go back in for a long time
and BAM!!!!!! ya did it yr done!!!!! go ride that beeoootch and have some fun
#2
04-16-2009, 09:20 AM
Cruiser
Join Date: Dec 2008
Location: Oregon
Posts: 151
Likes: 0
Received 0 Likes
on
0 Posts
#3
04-16-2009, 11:32 AM
#4
04-24-2009, 12:08 AM
Cruiser
Join Date: Mar 2009
Location: Louisiana
Posts: 105
Likes: 0
Received 0 Likes
on
0 Posts
#5
04-24-2009, 07:23 AM
yeah she was leakin
, whenever i go to bike week i always come back with some battle damage becasue of the extreem heat conditions, it wasn't leakin bad but i can't stand it when my scoot leaks, i gotta fix it pronto
#6
04-24-2009, 08:01 AM
Cruiser
Join Date: Mar 2009
Location: Louisiana
Posts: 105
Likes: 0
Received 0 Likes
on
0 Posts
Well, I'll be taking off just the top portion of the boxes this Sunday to bring to the PC on Monday (along with some brackets, bar clamps, and other small things). I should be able to just undo the four bolts on the top and off it comes right? Just gotta run by harley today and get the gaskets. Can you get them seperate, or do the upper and lower gaskets come all together in a kit?
Last edited by whodatfan; 04-24-2009 at 08:28 AM.
#7
05-06-2009, 09:04 PM
Cruiser
Join Date: Dec 2008
Location: Oregon
Posts: 151
Likes: 0
Received 0 Likes
on
0 Posts
That was put there to make sure other readers take note that there is a difference in some of the torgue values.
Good job. Your work will surely help a lot of people with the leaky rocker blues.
Trending Topics
#8
05-06-2009, 09:48 PM
Well, I'll be taking off just the top portion of the boxes this Sunday to bring to the PC on Monday (along with some brackets, bar clamps, and other small things). I should be able to just undo the four bolts on the top and off it comes right? Just gotta run by harley today and get the gaskets. Can you get them seperate, or do the upper and lower gaskets come all together in a kit?
#9
02-02-2010, 10:01 AM
i removed my back rocker cover and had some comments.
gas tank must be removed. undue both tank hoses and one electric connection.
Also the rear cover has a wire going down into it. This must be disconnected so you can get the cover and lower rocker piece off bike.
Dont forget where to plug them back in. I also put some electrical grease in the connections and also on some of the others that are now exposed with tank off.
#10
02-02-2010, 07:22 PM

For what it is worth.
The rear cover is difficult to work on.
Some bikes have very little space.
If that is the case.
Consider removal of front bottom motor mount and stabilizer..
This will drop motor forward and give about 1/2 inch or more to work rear allen bolts off.
Use cut allen bits (just a little more than the L part) or stick a cut small piece of a 3/16 ?? allen size bit into allen bolt and use a sears midget 3/16 ??? wrench set to turn allen bolt..some bikes are next to impossible to torq all four to speck on the bike..
J and P cycle has a slim tool that could be used to check torque if you want to.