
Installing a 23" wheel and wrapped fender on a bagger with pics
#1
 05-24-2012, 10:00 AM


How to install a 23” front wheel and wrapped HogPro fender on your bagger.
This thread is for those that are interested in seeing what is involved in stalling your own wheels, fenders etc. Sure, there are those of you out there who already know, but I thought a simple how to would be helpful for those who do not know how. I have taken pics step by step to illustrate the simplicity of this procedure in hopes of helping those who do not do their own work to venture out into the garage and get this done themselves.
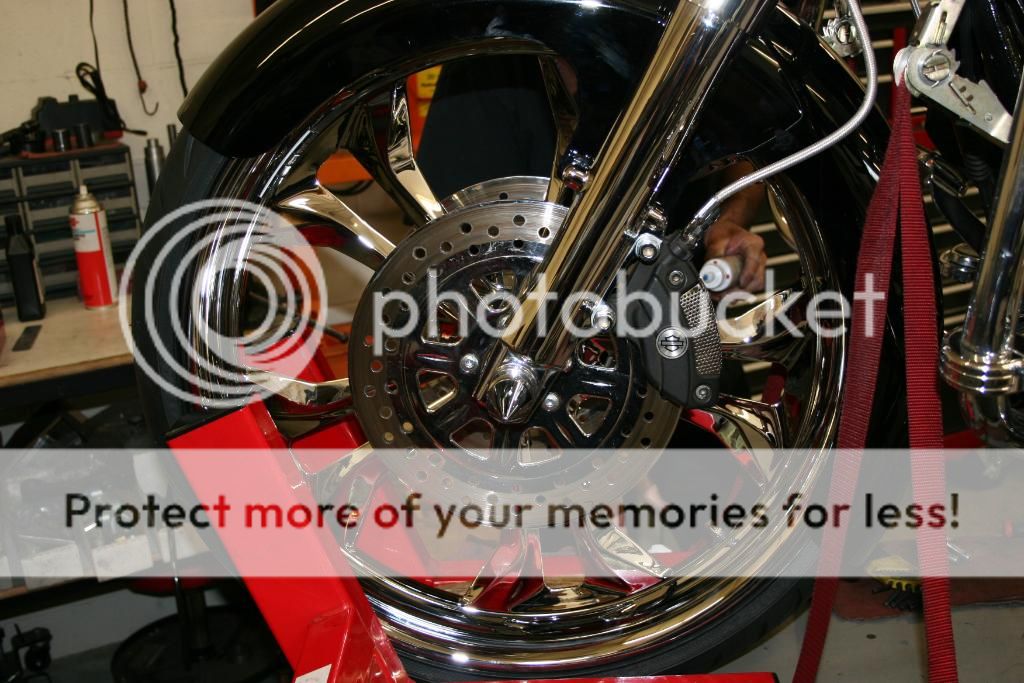
Let’s start with the front wheel. First thing to do is to remove the front calipers and get them out of the way. Remove the two bolts hold the calipers to the front fork lowers. If you have the stock caliper bolts they are 12 point 10mm. Yup, the forks and all components are made in Japan making the bolts metric even on a Harley. This bike has aftermarket chrome allen’s as opposed to the 12 point bolts. Once the bolts are out slide the calipers off rotors and hang them behind the crash bar (if you have one) to keep them out of the way of parts they could damage.

Next you need to loosen the axle nut. This bike has a custom hidden axle which is a bit different but hold one side with a wrench or socket and loosen the nut on the other side. Once the nut is off the axle remove the washers and set them aside. Slide the axle out of the wheel. Put the washers and spacers nut back on the axle in the proper order so you do not confused later on.
Hopefully you already have your bike on a lift as that is necessary. Raise the lift a bit to allow the fender to clear the tire and slide the tire out of the fender and put it aside. Careful of the rotors when you lean it against something as you do not want to bend them.
Now that the wheel is out of the way we can get to removing the front fender. The fender is held on by four bolts to the lower fork legs. Unbolt the four bolts, supporting the fender with your hand as you go so that the fender does not fall off and get damaged. Once the bolts have all been removed carefully remove the fender and set it aside in a safe place. I like to put it on a towel to ensure there is no damage.
Here you can see the bolts that need to be removed to take the fender off.
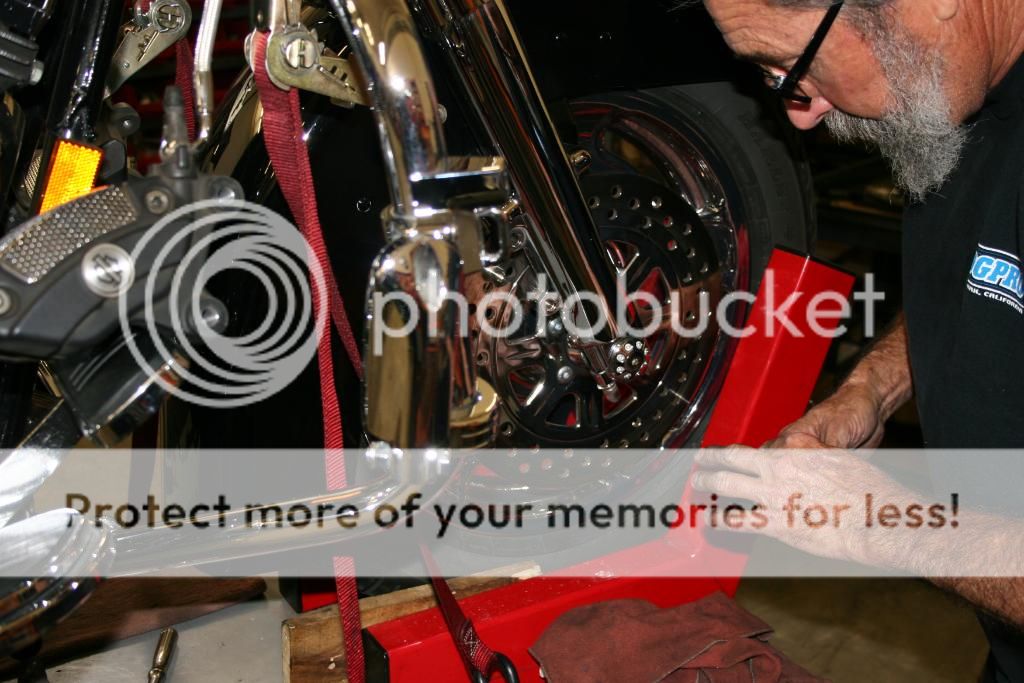
The next step is bolt on the new 23” wrapped fender. This fender mounts a little bit differently than the stock fender. There are two brackets that go in-between the fender and the lower forks that the bolts thread through. There are a few washers and such to ensure that the paint does not retain damage. This is easier with two sets of hands but can be done easy enough by one careful person. Slide the bolts through the first bracket and fender and secure them with the nut. Do the same for the second side of the fender and you are done.
As you can see here at the shop we have two sets of hands to ease the install and ensure that the fender will not get scratched.
[IMG]]http://i1021.photobucket.com/albums/af337/drvtwinnn1/stuff/IMG_9402.jpg[/IMG]

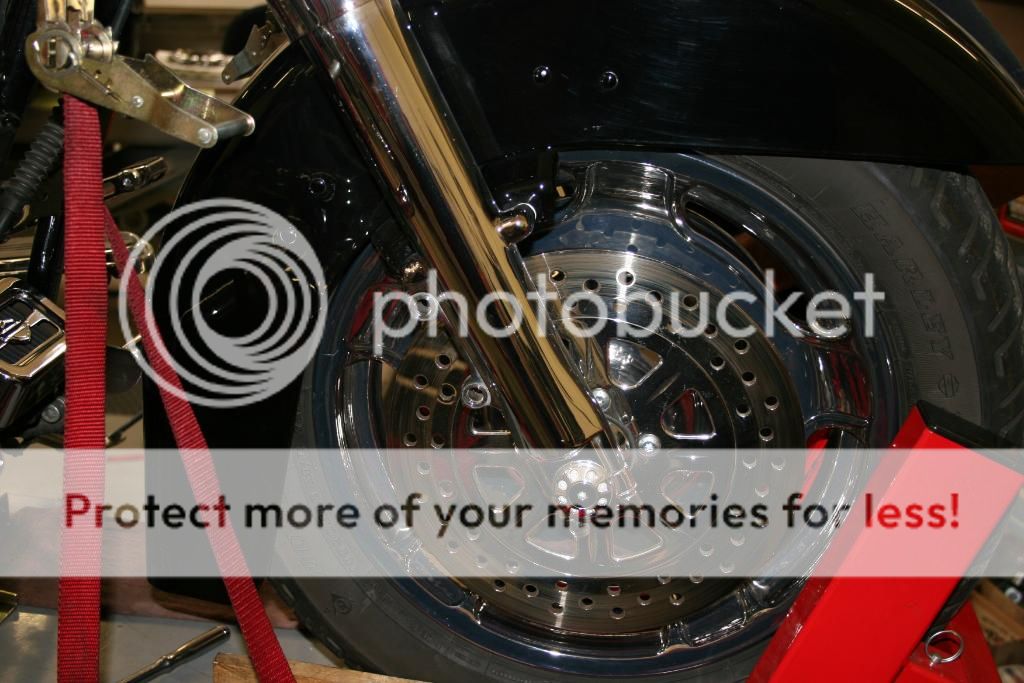
Here you can see the bracket that mounts between the fender and the lower forks. Also, the low profile of the fender really changes the character of the bike. I really like the way this fender gives the front of the bike a sleek look and how it hugs the tire. Can you say sick?
Side Profile

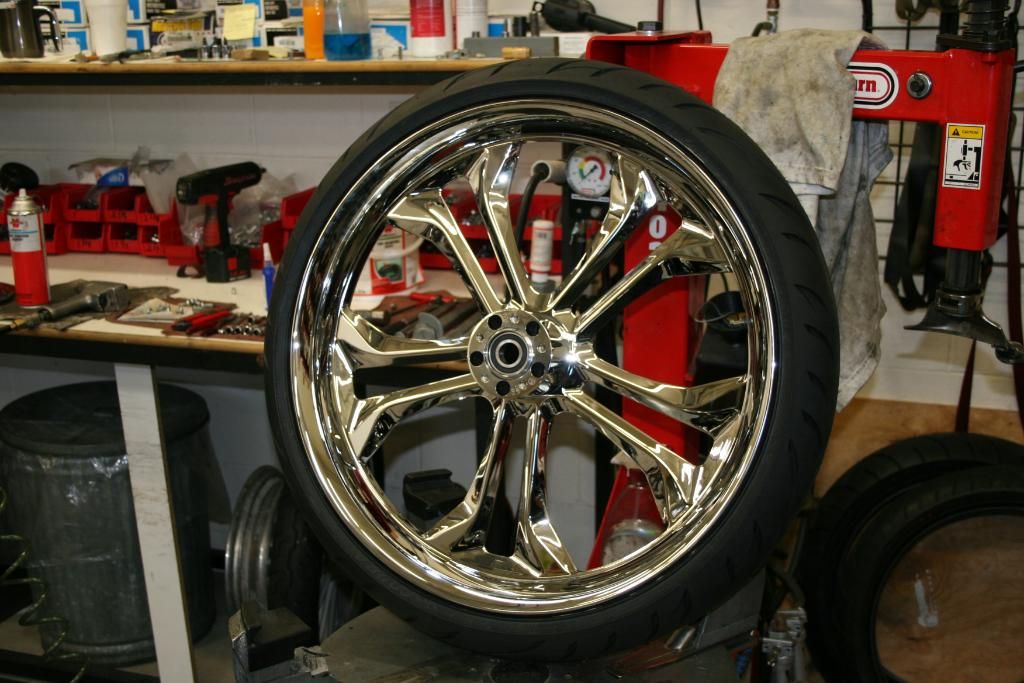
Here is the 23" Titan wheel in chrome that is going on the bike. We used the same rotors that were on the current rim as per the customers request. This sure is a beefy looking wheel.
We are now ready to mount the wheel under the new fender. Roll the wheel into place. SLOWLY lower the lift so that the holes for the axle line up with the hole in the wheel.

Slide your axle in a little and then position the first spacer in place. Remember we put everything back on the axle in order so we know where it goes, right? Once the axle has cleared the first spacer slide it through the wheel and position the second spacer in place. Slide the axle through the second spacer and the other side of the forks until it stops. I like to use anti seize on my axle prior to install to ensure it will not get rusted in place. If you have ever tried to removed an axle that is rusted to the bearings you will always use anti seize too. You don’t need too much. I put a few dabs and brush it on with a paint brush in a thin coat over the entire axle. You will know you have used too much if there is anti seize oozing out of the hub by the bearings.

Once the axle is back in put the washer on the end and screw the nut back on. Torque the nut on the end of the axle properly. If you have axle covers put them back on. Slide the calipers back over the rotors and bolt back on torquing properly as well. It is important not to grab your front brake lever while the calipers are off the wheel to aid in the ease of reinstallation. Once the calipers are back on the discs pump the lever a few times until you have proper brake pressure. We use a 5/16" nut taped to the tire to check the tire to fender clearance. Tape the nut on the tire and spin the wheel around. If it spins without any contact to the inside of the fender you are good to go.

The front wheel and fender is now done. See, that was easy.
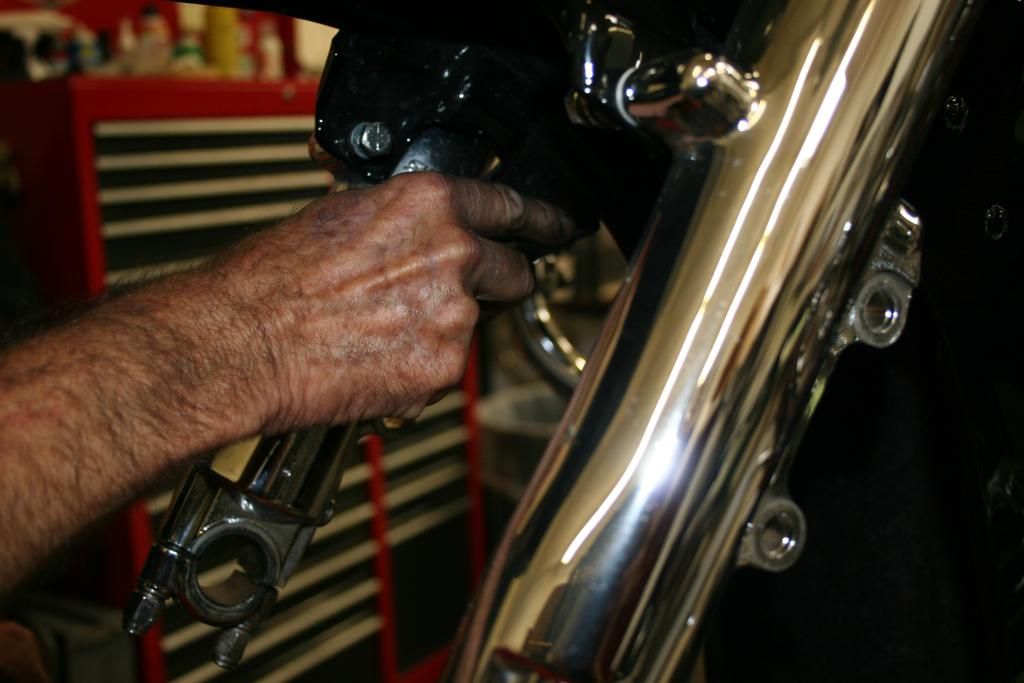
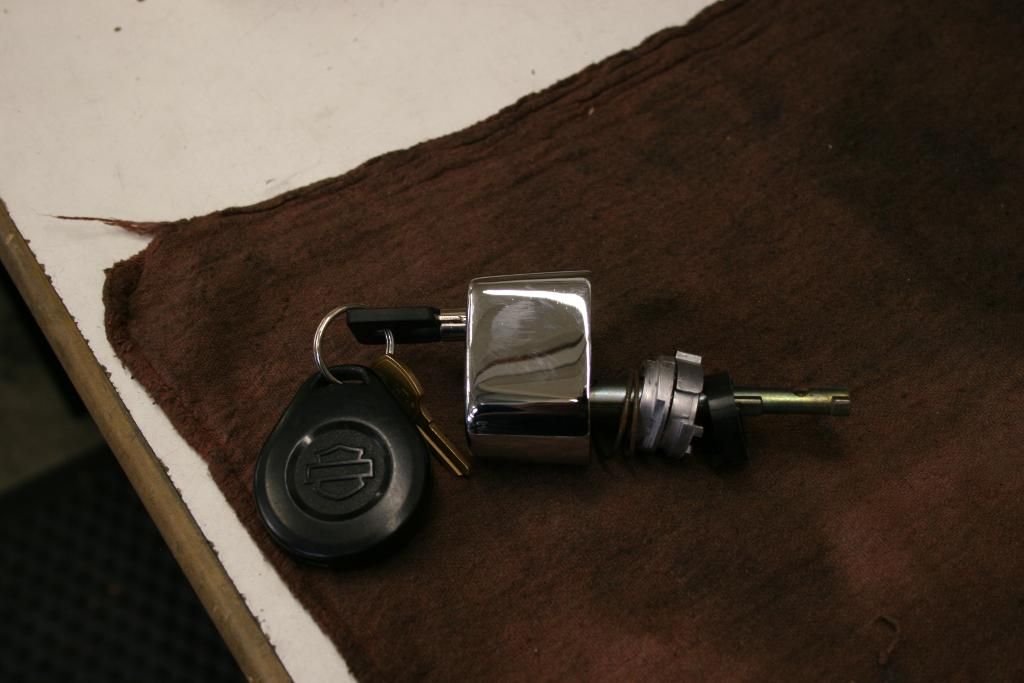
Moving on to the forks, there are quite a few school of thought as to how to handle this when adding a 23" wheel on a bagger. This bike is only getting thicker fork oil right now due to the customers budget restraints. Were this my bike I would handle this differently as I do not what to have to be concerned with the crashbar or lower triple tree hitting the fender, much less a brand new freshly painted fender. Gaining access to the top of the forks in order to drain and fill the shocks is much simpler than you might think on a Street Glide. First the ignition must be removed. Our tech uses his finger to release the ignition from under on this 08 SG. He slides off the ignition and ignition plate and sets them aside for safe keeping. The tank is always covered just in case something should get dropped to protect the integrity of the paint.


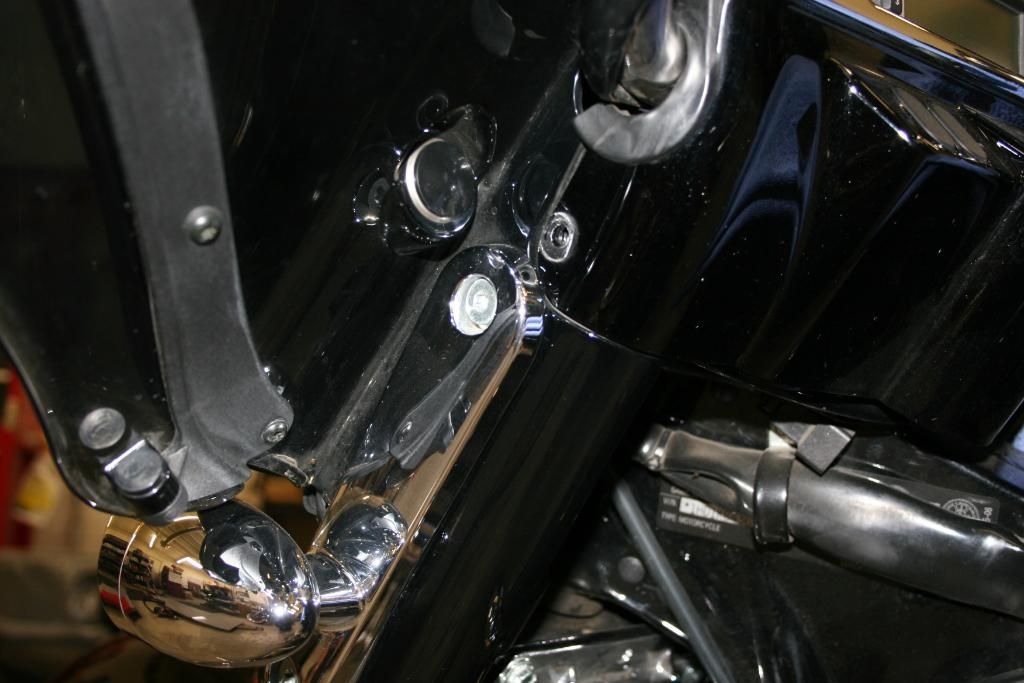
Next the cover behind and over the top of the forks is removed by removing several screws. You can see one of the screws has already been removed in this pic.
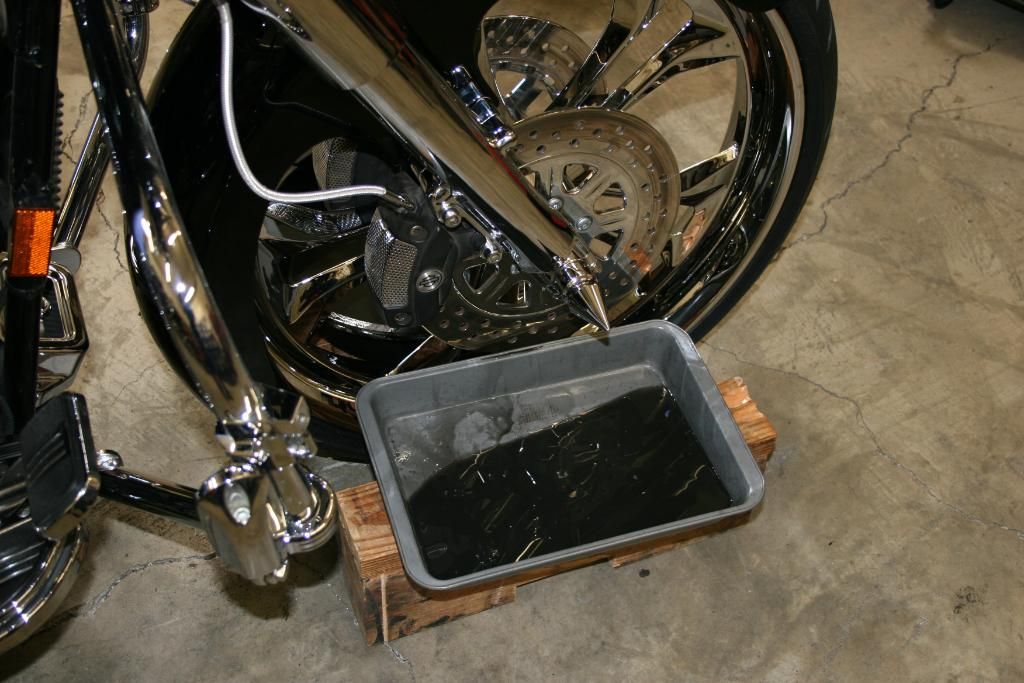
Once you remove that piece you have access to the top of the forks and can remove the cap with a 1 3/8" wrench. We place a drain pan under each of the forks on a block of wood so it is closer to the forks so that the oil draining does not make a mess. Pull the drain plug from each lower fork and let it drain.
We let it drain until empty and then hit it with a bit of cleaning solvent to help clean out the inside of the forks, the springs, damper rods, etc. Once that is done we put the drain plugs back in with new copper crush washers and fill the forks with the heavy oil as per spec in the service manual. To reassemble reverse the steps that we have illustrated here and give the bike a test ride. It is important to get the same amount of fork oil in each fork so that they will both respond event to imperfections in the road.
Here is the finished product with the 23" front wheel and wrapped front fender ready to roll. Please note that the customer opted to use the rotors that he was currently running for now and they do not clock properly with the wheel. I will update pics when he gets the Titan rotors on the wheel as it will look quite a bit better.


If you have questions please feel free to ask, email or phone us and we will be more than happy to help in any way that we can. thanks for reading and have a great day.
This thread is for those that are interested in seeing what is involved in stalling your own wheels, fenders etc. Sure, there are those of you out there who already know, but I thought a simple how to would be helpful for those who do not know how. I have taken pics step by step to illustrate the simplicity of this procedure in hopes of helping those who do not do their own work to venture out into the garage and get this done themselves.
Let’s start with the front wheel. First thing to do is to remove the front calipers and get them out of the way. Remove the two bolts hold the calipers to the front fork lowers. If you have the stock caliper bolts they are 12 point 10mm. Yup, the forks and all components are made in Japan making the bolts metric even on a Harley. This bike has aftermarket chrome allen’s as opposed to the 12 point bolts. Once the bolts are out slide the calipers off rotors and hang them behind the crash bar (if you have one) to keep them out of the way of parts they could damage.
Next you need to loosen the axle nut. This bike has a custom hidden axle which is a bit different but hold one side with a wrench or socket and loosen the nut on the other side. Once the nut is off the axle remove the washers and set them aside. Slide the axle out of the wheel. Put the washers and spacers nut back on the axle in the proper order so you do not confused later on.
Hopefully you already have your bike on a lift as that is necessary. Raise the lift a bit to allow the fender to clear the tire and slide the tire out of the fender and put it aside. Careful of the rotors when you lean it against something as you do not want to bend them.
Now that the wheel is out of the way we can get to removing the front fender. The fender is held on by four bolts to the lower fork legs. Unbolt the four bolts, supporting the fender with your hand as you go so that the fender does not fall off and get damaged. Once the bolts have all been removed carefully remove the fender and set it aside in a safe place. I like to put it on a towel to ensure there is no damage.
Here you can see the bolts that need to be removed to take the fender off.
The next step is bolt on the new 23” wrapped fender. This fender mounts a little bit differently than the stock fender. There are two brackets that go in-between the fender and the lower forks that the bolts thread through. There are a few washers and such to ensure that the paint does not retain damage. This is easier with two sets of hands but can be done easy enough by one careful person. Slide the bolts through the first bracket and fender and secure them with the nut. Do the same for the second side of the fender and you are done.
As you can see here at the shop we have two sets of hands to ease the install and ensure that the fender will not get scratched.
[IMG]]http://i1021.photobucket.com/albums/af337/drvtwinnn1/stuff/IMG_9402.jpg[/IMG]
Here you can see the bracket that mounts between the fender and the lower forks. Also, the low profile of the fender really changes the character of the bike. I really like the way this fender gives the front of the bike a sleek look and how it hugs the tire. Can you say sick?
Side Profile
Here is the 23" Titan wheel in chrome that is going on the bike. We used the same rotors that were on the current rim as per the customers request. This sure is a beefy looking wheel.
We are now ready to mount the wheel under the new fender. Roll the wheel into place. SLOWLY lower the lift so that the holes for the axle line up with the hole in the wheel.
Slide your axle in a little and then position the first spacer in place. Remember we put everything back on the axle in order so we know where it goes, right? Once the axle has cleared the first spacer slide it through the wheel and position the second spacer in place. Slide the axle through the second spacer and the other side of the forks until it stops. I like to use anti seize on my axle prior to install to ensure it will not get rusted in place. If you have ever tried to removed an axle that is rusted to the bearings you will always use anti seize too. You don’t need too much. I put a few dabs and brush it on with a paint brush in a thin coat over the entire axle. You will know you have used too much if there is anti seize oozing out of the hub by the bearings.
Once the axle is back in put the washer on the end and screw the nut back on. Torque the nut on the end of the axle properly. If you have axle covers put them back on. Slide the calipers back over the rotors and bolt back on torquing properly as well. It is important not to grab your front brake lever while the calipers are off the wheel to aid in the ease of reinstallation. Once the calipers are back on the discs pump the lever a few times until you have proper brake pressure. We use a 5/16" nut taped to the tire to check the tire to fender clearance. Tape the nut on the tire and spin the wheel around. If it spins without any contact to the inside of the fender you are good to go.
The front wheel and fender is now done. See, that was easy.
Moving on to the forks, there are quite a few school of thought as to how to handle this when adding a 23" wheel on a bagger. This bike is only getting thicker fork oil right now due to the customers budget restraints. Were this my bike I would handle this differently as I do not what to have to be concerned with the crashbar or lower triple tree hitting the fender, much less a brand new freshly painted fender. Gaining access to the top of the forks in order to drain and fill the shocks is much simpler than you might think on a Street Glide. First the ignition must be removed. Our tech uses his finger to release the ignition from under on this 08 SG. He slides off the ignition and ignition plate and sets them aside for safe keeping. The tank is always covered just in case something should get dropped to protect the integrity of the paint.
Next the cover behind and over the top of the forks is removed by removing several screws. You can see one of the screws has already been removed in this pic.
Once you remove that piece you have access to the top of the forks and can remove the cap with a 1 3/8" wrench. We place a drain pan under each of the forks on a block of wood so it is closer to the forks so that the oil draining does not make a mess. Pull the drain plug from each lower fork and let it drain.
We let it drain until empty and then hit it with a bit of cleaning solvent to help clean out the inside of the forks, the springs, damper rods, etc. Once that is done we put the drain plugs back in with new copper crush washers and fill the forks with the heavy oil as per spec in the service manual. To reassemble reverse the steps that we have illustrated here and give the bike a test ride. It is important to get the same amount of fork oil in each fork so that they will both respond event to imperfections in the road.
Here is the finished product with the 23" front wheel and wrapped front fender ready to roll. Please note that the customer opted to use the rotors that he was currently running for now and they do not clock properly with the wheel. I will update pics when he gets the Titan rotors on the wheel as it will look quite a bit better.
If you have questions please feel free to ask, email or phone us and we will be more than happy to help in any way that we can. thanks for reading and have a great day.
Last edited by Hogpro; 05-24-2012 at 01:13 PM.
#2
05-24-2012, 12:15 PM
Cruiser
Join Date: Sep 2011
Location: california
Posts: 194
Likes: 0
Received 0 Likes
on
0 Posts
#4
05-24-2012, 12:41 PM
Cruiser
Join Date: Sep 2011
Location: california
Posts: 194
Likes: 0
Received 0 Likes
on
0 Posts
#6
05-24-2012, 01:00 PM
Cruiser
Join Date: Sep 2011
Location: california
Posts: 194
Likes: 0
Received 0 Likes
on
0 Posts
#7
05-24-2012, 01:05 PM
Trending Topics
#8
05-24-2012, 01:10 PM
#9
05-24-2012, 01:17 PM
I think that all depends on What you are looking for out of the build. The trike trees have a less of a degree of rake than the HHI trees. I have customers that have used both. Then there is the HHI rake builders kit which comes with the weld in new neck. On our shop Street glide we used Progressive Mono Tube cartridges int eh forks, and added some heavy duty fork oil which is okay but not perfect. We still have to be a bit careful over steep driveways, potholes, etc. We also added the HHI 6 piston chrome caliper so you can see the entire wheel on right side with a 13" rotor. Here is a video of the Street Glide.
http://www.youtube.com/watch?v=rBJ20P3LNho
http://www.youtube.com/watch?v=rBJ20P3LNho

