
Biketronic Stereo Amplifier Installation on a 2016 FLTRU Road Glide Ultra.
#1
 09-11-2016, 06:30 PM

Join Date: Jul 2009
Location: Orange County Texas
Posts: 1,507
Likes: 0
Received 22 Likes
on
14 Posts
First Step
Before we get started turn the bike on, allow the stereo to power up and turn the volume on the stereo all the way down. Turn off the bike. Also, It is good to be low on fuel. Part of the install will require the removal of the gas tank and the lighter the tank the better.
Second Step
Disconnect the battery. This is a safety step to prevent damage from accidently shorting something out. Later in the installation you going to have to connect a power wire to the battery so you might as well take both connections off. Position the connection away from the battery terminals so they can't work their way back and touch the post.
Time to remove the Fairing.
This is a fairly easy task which I have done before. Now is a good time to place a towel over the front fender to protect it from anything you may drop. Also a few zip lock bags and a sharpie to I.D. where the screws and parts came from is a good idea.
a. Remove the Windshield, by removing the two screws in the side plate on either side of the windshield. Lift off the wind shield and put someplace it won't be damaged.
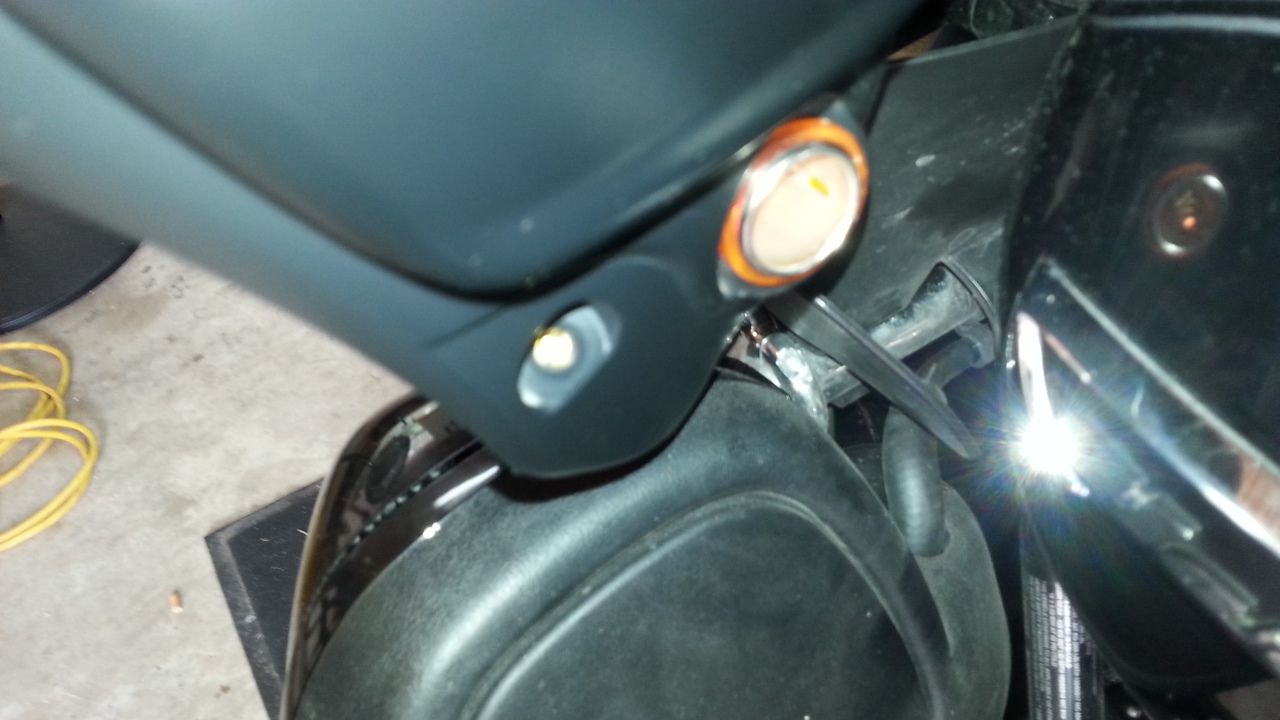
b. Remove the Allen head bolt on the back of the turn signals. (Both Sides)
c. Remove the two air deflector on the back edge of each side of the fairing. (Both Sides)
d. Pop off the speaker grills and remove the Allen bolts in the outside lower corners.
e. The fairing should be now free, pull the fairing a couple of inches forward and disconnect the two wires at the top, these go to the turn signals. The fairing is now ready to be removed and set aside to a safe place. Lift of the air deflector cover and the air vent assembly.
Remove Head Light Assembly
This is also no big deal, the head light is retained by four Allen bolts. The two below the head light assembly and two above. The bottom two are easy, the two on top are set back at about four inches. A long shaft Allen is needed here. Once the bolts are removed pull the head light out and disconnect the harness. Set aside the head light to a safe place.
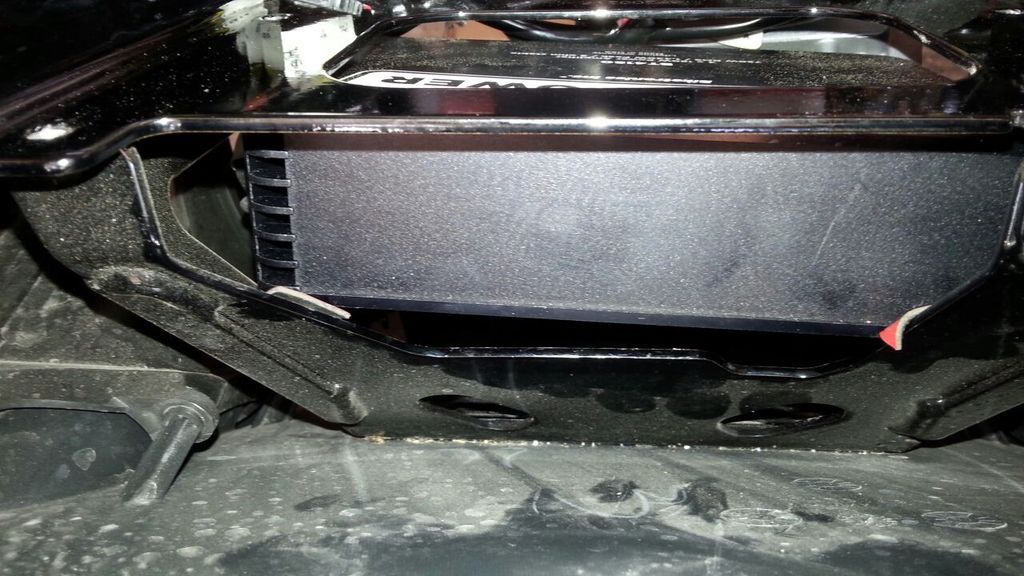
Amp Install
Next is the install of the amp and bracket. The Biketronics installation says to slide the amp up and in and the install the bracket. The Instruction are pretty vague.
The problem is there are two main wiring harnesses coming through the fairing to frame bracket. The chore here is the bracket has to go up and drop behind these harnesses.
Since I could not see what was interfering with the install I decided to remove the stereo so I could see what was going on. I removed the four bolt retaining the stereo and flipped it forward without disconnecting the harnesses. Once I could see what was going on I see removing the stereo is not necessary. However, Removing the stereo allow me to take a piece of rope and tie the amp up to a location where it is the max out of the way and I'm not have to hold the amp while installing the bracket.
I think I discovered the best way to install the bracket. The large harness to the left is un-pliable while the one to the right (Facing the front of the bike) has some slack.
With the legs of the bracket facing left, insert the left side leg behind the heavy harness and while rotating the bracket up and in pull the slack out of the right harness and over the right leg of the bracket and the bracket will drop behind the harnesses where it needs to be.
Since I really don't have a good set of instructions I decided to deviate a little more. I place the amp against the radio bracket to see its final resting point. the amp rest against the corner of the upright bracket which are angled to force the amp to it's highest position. I decide to put some double sided tape where the amp would contact the bracket.
I then put some double sided tape on top of the amp and rotate the amp up and stick it to the bottom of the radio bracket. The will hold the amp where I want it while installing the bracket and insulate the amp from vibrating against and exposed metal.
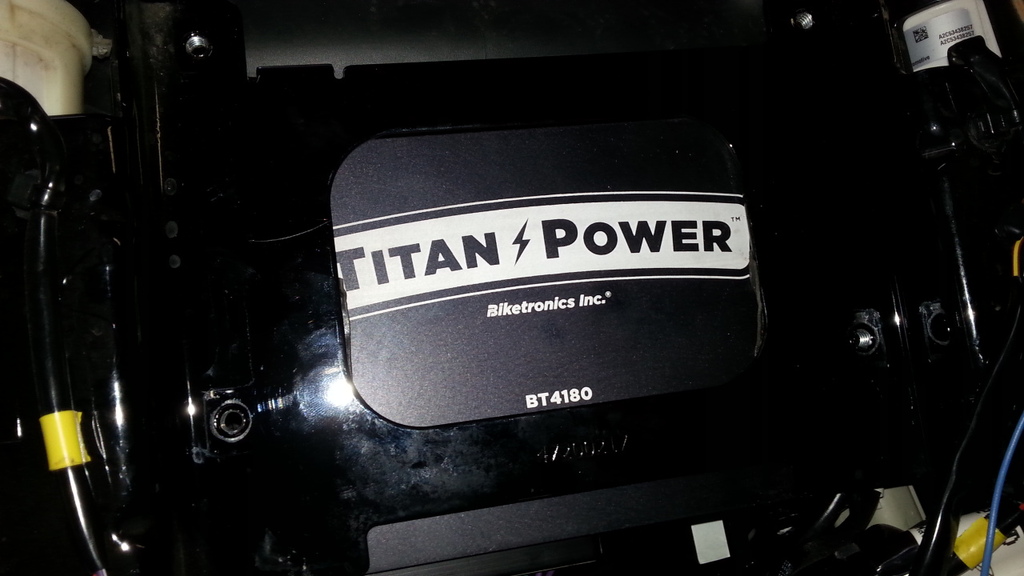
Next is to complete installation of the bracket. At this point the bracket is sitting near where it needs to be without the bolts installed. Peel the protective cover off the double sided tape on the bracket and slide it up just far enough to install the two bolts and washes and hand tighten. Now slide the bracket up until it contacts the amp. Apply pressure on the bracket up and tighten bolts. Install the power cable into the amp and loosen the left bolt and place the ground wire under the bolt and tighten the bolts till their final torque.
Flip the radio and reinstall retaining bolts.
The amp is now installed and it is actually sandwiched between the factory radio bracket and the Biketronics bracket.
Now Take A Brake!
Next Item is to install wiring.
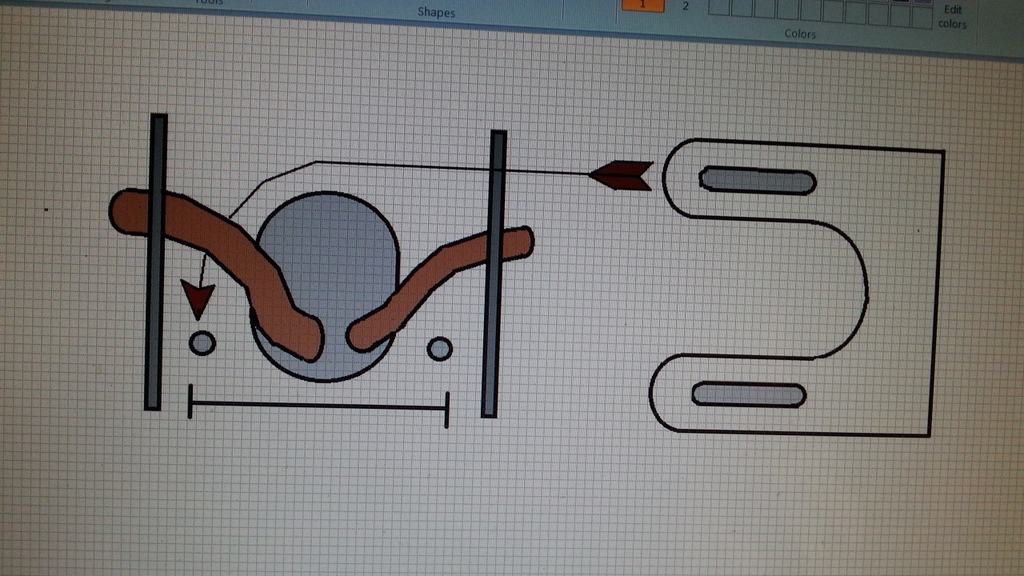
As per the instructions this install is plug n pay. But! there Are no instruction on where to place the wires. The first thing I realized is the adaptor plug is huge but take your time review the attached pictures. The Big PITA is the power supply wire to the battery. To accomplish this you have to remove the gas tank.
Remove the console. One Allen head at the front of the tank one 10mm at the back of the tank. Remove the gas cap and lift the console of and lay it towards the back of the bike. Replace the gas cap. Remove the vent line and unplug the harness and lay them towards the back of the bike. Two torx at the back of the tank, two torx at the front under the rubber covers. All that's left is to remove the fuel line from the bottom of the tank. Pick up on the fitting and down on the hose. Tank is now free, lift of and set aside.
Open up the wire trough and run the wire from the Battery positive to the front of the bike. (for safety remove the fuse to keep from shorting thing out while running the wire.) Leave the fuse out till everything else is done. Reinstall the tank in reverse order. Good time to put a coat of wax under the console.
Once all your wiring connections are completed reinstall the battery connections.
Install the front speakers.
Biketronics recommends sealing the speaker enclosures. I don't know if this is necessary but I did seal the enclosures. pretty straight forward job.
Install the rear speakers. Also straight forward.
Continue Wiring
The biggest obstacle to the wiring at this point is the two line levelers. There is not a lot of wire coming out of the line levers nor is there much wire coming out of the Brake Out Harness.
The best place I have found to place the line levelers is on the underside of the steal framework to the left side of the radio. I removed the double sided tape on the back of the line levelers and replaced it with Velcro. Since the area I'm placing the line levers is pretty much inaccessible I wanted an easy way to remove them if needed, hence velcro.
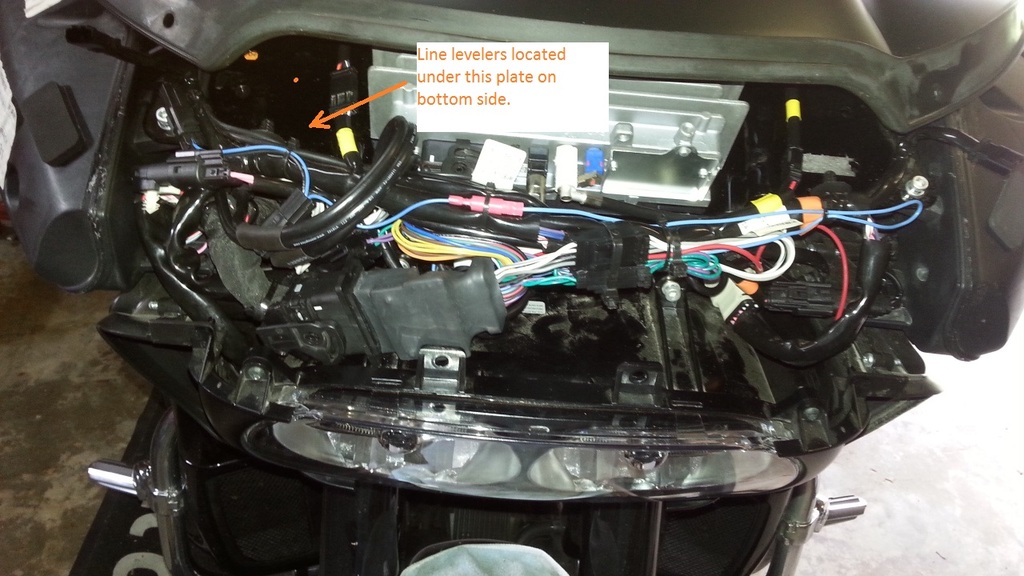
Finish up the wiring a per the diagrams, tie everything up with zip ties and you should be ready to test the system.
Install the Amp power fuse and turn on the ignition. Allow to power up and accept the warning screen. Now if you turned the volume down all the way as I suggested you can bump up the volume and check everything. If you didn't turn the volume down, Be ready to.
Now if everything tested ok your ready to reassemble everything that you have taken apart.
Good Luck
I'm not completing the assembly at this time, I have a couple of other little projects under the fairing.
I am a smoker, and have previously installed a cigarette lighter. Is a bit difficult to get the lighter back in the hole at night. So, I am replacing the lighter with one that lights up.
The other project is a Taiddan garage door opener. The part is on it's way but not here yet.
Have Fun
Before we get started turn the bike on, allow the stereo to power up and turn the volume on the stereo all the way down. Turn off the bike. Also, It is good to be low on fuel. Part of the install will require the removal of the gas tank and the lighter the tank the better.
Second Step
Disconnect the battery. This is a safety step to prevent damage from accidently shorting something out. Later in the installation you going to have to connect a power wire to the battery so you might as well take both connections off. Position the connection away from the battery terminals so they can't work their way back and touch the post.
Time to remove the Fairing.
This is a fairly easy task which I have done before. Now is a good time to place a towel over the front fender to protect it from anything you may drop. Also a few zip lock bags and a sharpie to I.D. where the screws and parts came from is a good idea.
a. Remove the Windshield, by removing the two screws in the side plate on either side of the windshield. Lift off the wind shield and put someplace it won't be damaged.
b. Remove the Allen head bolt on the back of the turn signals. (Both Sides)
c. Remove the two air deflector on the back edge of each side of the fairing. (Both Sides)
d. Pop off the speaker grills and remove the Allen bolts in the outside lower corners.
e. The fairing should be now free, pull the fairing a couple of inches forward and disconnect the two wires at the top, these go to the turn signals. The fairing is now ready to be removed and set aside to a safe place. Lift of the air deflector cover and the air vent assembly.
Remove Head Light Assembly
This is also no big deal, the head light is retained by four Allen bolts. The two below the head light assembly and two above. The bottom two are easy, the two on top are set back at about four inches. A long shaft Allen is needed here. Once the bolts are removed pull the head light out and disconnect the harness. Set aside the head light to a safe place.
Amp Install
Next is the install of the amp and bracket. The Biketronics installation says to slide the amp up and in and the install the bracket. The Instruction are pretty vague.
The problem is there are two main wiring harnesses coming through the fairing to frame bracket. The chore here is the bracket has to go up and drop behind these harnesses.
Since I could not see what was interfering with the install I decided to remove the stereo so I could see what was going on. I removed the four bolt retaining the stereo and flipped it forward without disconnecting the harnesses. Once I could see what was going on I see removing the stereo is not necessary. However, Removing the stereo allow me to take a piece of rope and tie the amp up to a location where it is the max out of the way and I'm not have to hold the amp while installing the bracket.
I think I discovered the best way to install the bracket. The large harness to the left is un-pliable while the one to the right (Facing the front of the bike) has some slack.
With the legs of the bracket facing left, insert the left side leg behind the heavy harness and while rotating the bracket up and in pull the slack out of the right harness and over the right leg of the bracket and the bracket will drop behind the harnesses where it needs to be.

Since I really don't have a good set of instructions I decided to deviate a little more. I place the amp against the radio bracket to see its final resting point. the amp rest against the corner of the upright bracket which are angled to force the amp to it's highest position. I decide to put some double sided tape where the amp would contact the bracket.

I then put some double sided tape on top of the amp and rotate the amp up and stick it to the bottom of the radio bracket. The will hold the amp where I want it while installing the bracket and insulate the amp from vibrating against and exposed metal.

Next is to complete installation of the bracket. At this point the bracket is sitting near where it needs to be without the bolts installed. Peel the protective cover off the double sided tape on the bracket and slide it up just far enough to install the two bolts and washes and hand tighten. Now slide the bracket up until it contacts the amp. Apply pressure on the bracket up and tighten bolts. Install the power cable into the amp and loosen the left bolt and place the ground wire under the bolt and tighten the bolts till their final torque.
Flip the radio and reinstall retaining bolts.
The amp is now installed and it is actually sandwiched between the factory radio bracket and the Biketronics bracket.
Now Take A Brake!
Next Item is to install wiring.
As per the instructions this install is plug n pay. But! there Are no instruction on where to place the wires. The first thing I realized is the adaptor plug is huge but take your time review the attached pictures. The Big PITA is the power supply wire to the battery. To accomplish this you have to remove the gas tank.
Remove the console. One Allen head at the front of the tank one 10mm at the back of the tank. Remove the gas cap and lift the console of and lay it towards the back of the bike. Replace the gas cap. Remove the vent line and unplug the harness and lay them towards the back of the bike. Two torx at the back of the tank, two torx at the front under the rubber covers. All that's left is to remove the fuel line from the bottom of the tank. Pick up on the fitting and down on the hose. Tank is now free, lift of and set aside.
Open up the wire trough and run the wire from the Battery positive to the front of the bike. (for safety remove the fuse to keep from shorting thing out while running the wire.) Leave the fuse out till everything else is done. Reinstall the tank in reverse order. Good time to put a coat of wax under the console.
Once all your wiring connections are completed reinstall the battery connections.
Install the front speakers.
Biketronics recommends sealing the speaker enclosures. I don't know if this is necessary but I did seal the enclosures. pretty straight forward job.
Install the rear speakers. Also straight forward.
Continue Wiring
The biggest obstacle to the wiring at this point is the two line levelers. There is not a lot of wire coming out of the line levers nor is there much wire coming out of the Brake Out Harness.
The best place I have found to place the line levelers is on the underside of the steal framework to the left side of the radio. I removed the double sided tape on the back of the line levelers and replaced it with Velcro. Since the area I'm placing the line levers is pretty much inaccessible I wanted an easy way to remove them if needed, hence velcro.

Finish up the wiring a per the diagrams, tie everything up with zip ties and you should be ready to test the system.
Install the Amp power fuse and turn on the ignition. Allow to power up and accept the warning screen. Now if you turned the volume down all the way as I suggested you can bump up the volume and check everything. If you didn't turn the volume down, Be ready to.
Now if everything tested ok your ready to reassemble everything that you have taken apart.
Good Luck
I'm not completing the assembly at this time, I have a couple of other little projects under the fairing.
I am a smoker, and have previously installed a cigarette lighter. Is a bit difficult to get the lighter back in the hole at night. So, I am replacing the lighter with one that lights up.

The other project is a Taiddan garage door opener. The part is on it's way but not here yet.
Have Fun
#2
09-11-2016, 10:03 PM
Great write up. I did my install back a month or so ago with lots of help from Tailwind and Ultrawalt. Got a little fine tuning to do, but I'm liking it. Looking to do a little upgrading on the pod speakers and probably add some component speakers up front in the near future.
What speakers did you go with?
What speakers did you go with?
#4
09-12-2016, 08:13 AM
#5
09-12-2016, 08:22 PM
Join Date: Jul 2009
Location: Orange County Texas
Posts: 1,507
Likes: 0
Received 22 Likes
on
14 Posts
I was pretty picky about wire routing and location and I spent a lot of time making myself happy with what and where the wiring was going.
Now that I've done it once I'm sure I could complete the job in a couple of hours in a comfortable to work location.
I did talk to Mike at Biketronic after I completed the install and discussed the wire lengths of the interconnect harness. Specially the length of the connections that connect to the line levelers. There's a lot of places in the Road Glide fairing that the line levelers could be placed. But not many with only 5 to 6 inches of wiring to work with.
I'm very happy with the system and the Biketronics product. What's really surprising is I'm getting the previous full volume sound level at less than half volume.
All in a
#6
09-13-2016, 06:40 PM
I completed mine over the long holiday weekend but I spent a lot of time making notes while I was doing it. The biggest hold up was trying to figure out how to get the bracket in place. Plus I was working in a very hot garage so I probably only worked on it 30 min at a time. Texas is not cool place this time of year and my garage has no insulation.
I was pretty picky about wire routing and location and I spent a lot of time making myself happy with what and where the wiring was going.
Now that I've done it once I'm sure I could complete the job in a couple of hours in a comfortable to work location.
I did talk to Mike at Biketronic after I completed the install and discussed the wire lengths of the interconnect harness. Specially the length of the connections that connect to the line levelers. There's a lot of places in the Road Glide fairing that the line levelers could be placed. But not many with only 5 to 6 inches of wiring to work with.
I'm very happy with the system and the Biketronics product. What's really surprising is I'm getting the previous full volume sound level at less than half volume.
All in a
#7
09-13-2016, 09:24 PM
Yep, I can relate. I live in the Houston area and same deal, work on it a few minutes, dry off and a couple of times of this, change shirts, and drink a lot of water. The biggest obstacle for me was getting the amp bracket in as well. Had to get my boss out to place the amp on the mount and then push it back to bolt it in without letting the amp slide off. The adhesive that came with it was not that good. As for the RCA cables, way too long and bulky.
Texas Rapier, what speakers did you go with?
Trending Topics

Thread
Thread Starter
Forum
Replies
Last Post
sportsterleroy
Touring Models
4
06-27-2009 07:04 AM