* HOW TO * under fifty bux *


#202
 12-23-2007, 09:21 PM
here is a better shot of my rear turn sig relocate. i just took it offand striped it for powder coating.not technicaly under 50$ cuz i bought the kit from HD when i got the bags, but a year later i gotthe EZ brackets and they needed to be moved again.
two holes are for bolts to bottem of plate bracket. the hole on the left is for wires. JB weld HD posts inside ends of pipe.


two holes are for bolts to bottem of plate bracket. the hole on the left is for wires. JB weld HD posts inside ends of pipe.
#203
12-24-2007, 12:40 PM
I was messinaroundand gettin rid of a6 pack in the garage over the weekend and this is what I came up with for my voltage regulator........
I have the black finned Derby cover and timing cover on my 06 Streetbob and that was the motivations.
First I took the voltage reg. off, real easy.... two allen head bolts and fish the wiring out, pay attention to the route of the wires to it all goes back in the same (real basic stuff here)

Then take a flat file and start filing the edges if the fins off. I used a small peice of cardboard so I could file em flat and protect the side of the next fin

also, I found that the finer file you use the better, my rough file made for a quicker job but also wanted to chip the black off the side of the fins
Here it is with all the edges filed. The top edges were a painto get to, I used duct tap to protect the black that I didn't want scratched. I also used a lil 150 grit sand paper to take out some of the file marks after it was all done.

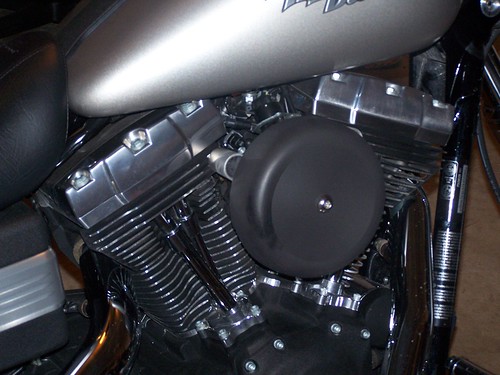
and Here it is back on the bike... matching the look of thecylinders, derby cover, and the timming cover.

I have the black finned Derby cover and timing cover on my 06 Streetbob and that was the motivations.
First I took the voltage reg. off, real easy.... two allen head bolts and fish the wiring out, pay attention to the route of the wires to it all goes back in the same (real basic stuff here)
Then take a flat file and start filing the edges if the fins off. I used a small peice of cardboard so I could file em flat and protect the side of the next fin
also, I found that the finer file you use the better, my rough file made for a quicker job but also wanted to chip the black off the side of the fins
Here it is with all the edges filed. The top edges were a painto get to, I used duct tap to protect the black that I didn't want scratched. I also used a lil 150 grit sand paper to take out some of the file marks after it was all done.
and Here it is back on the bike... matching the look of thecylinders, derby cover, and the timming cover.
#204
12-24-2007, 12:41 PM

ORIGINAL: lee
cheap old school footrests chop the end off a couple of railroad pins,now the trick to keep it cheap get a mate to drill them out at work.saving you alot of cash on drill bits.
cheap old school footrests chop the end off a couple of railroad pins,now the trick to keep it cheap get a mate to drill them out at work.saving you alot of cash on drill bits.
Nice job.
mud

#205
12-24-2007, 12:42 PM
ORIGINAL: x2lee
Hey a link to clutch66's stainless steel mods right here.
https://www.hdforums.com/m_2614301/mpage_1/key_/tm.htm
Another fine craftsman on the forums...
Hey a link to clutch66's stainless steel mods right here.
https://www.hdforums.com/m_2614301/mpage_1/key_/tm.htm
Another fine craftsman on the forums...
Yep, nice stuff from C66.
mud
#206
12-24-2007, 12:42 PM
ORIGINAL: XKROME
here is a better shot of my rear turn sig relocate.
i just took it offand striped it for powder coating.
not technicaly under 50$ cuz i bought the kit from HD when i got the bags,
but a year later i gotthe EZ brackets and they needed to be moved again.
two holes are for bolts to bottem of plate bracket.
the hole on the left is for wires. JB weld HD posts inside ends of pipe.
Jay, from the looks of it, this could be done for way under 50 bux
by using a piece of DOM tubing.
Course if the HD part is at hand, you use it
mud
#207
12-24-2007, 12:45 PM
ORIGINAL: DYJ
I was messinaroundand gettin rid of a6 pack in the garage over the weekend and this is what I came up with for my voltage regulator........
I have the black finned Derby cover and timing cover on my 06 Streetbob and that was the motivations.
First I took the voltage reg. off, real easy.... two allen head bolts and fish the wiring out, pay attention to the route of the wires to it all goes back in the same (real basic stuff here)
Then take a flat file and start filing the edges if the fins off. I used a small peice of cardboard so I could file em flat and protect the side of the next fin
also, I found that the finer file you use the better, my rough file made for a quicker job but also wanted to chip the black off the side of the fins
Here it is with all the edges filed. The top edges were a painto get to, I used duct tap to protect the black that I didn't want scratched. I also used a lil 150 grit sand paper to take out some of the file marks after it was all done.
and Here it is back on the bike... matching the look of thecylinders, derby cover, and the timming cover.
And great description and photos.
mud
#208
12-24-2007, 02:09 PM
Tourer
Join Date: Mar 2007
Location: Dallas, Texas
Posts: 494
Likes: 0
Received 0 Likes
on
0 Posts
Someone did this on another post, but i was unable to find it.
I got real tired of that ugly football and just couldn't find a replacement for the AC cover that i liked anywhere. Head down to your local Dollar General store and pick up a 2 quart saucepan for 6 bucks.
Cut the top rim of the saucepan at about 2 3/4 inches from the bottom. at the top of the ring, in the pic below, you'll see where the handle was on the pan. i used a dremmel to cut all the way around the pan.
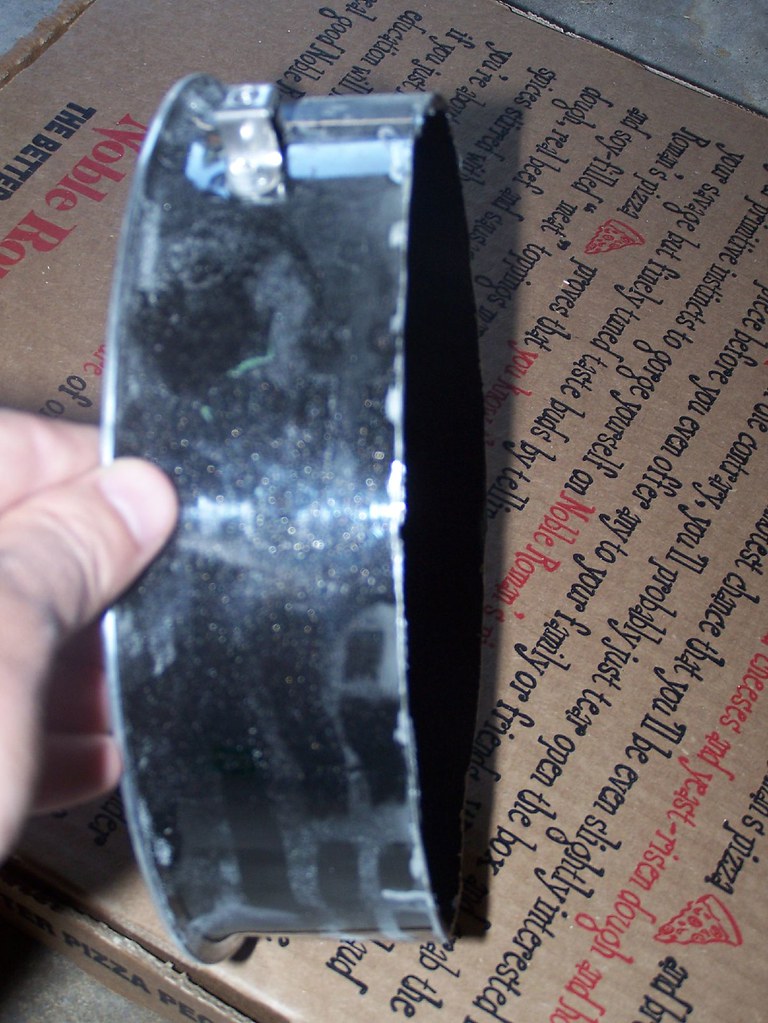
Then sand the entire thing to rough up the cover so your chosen color of paint will stick.
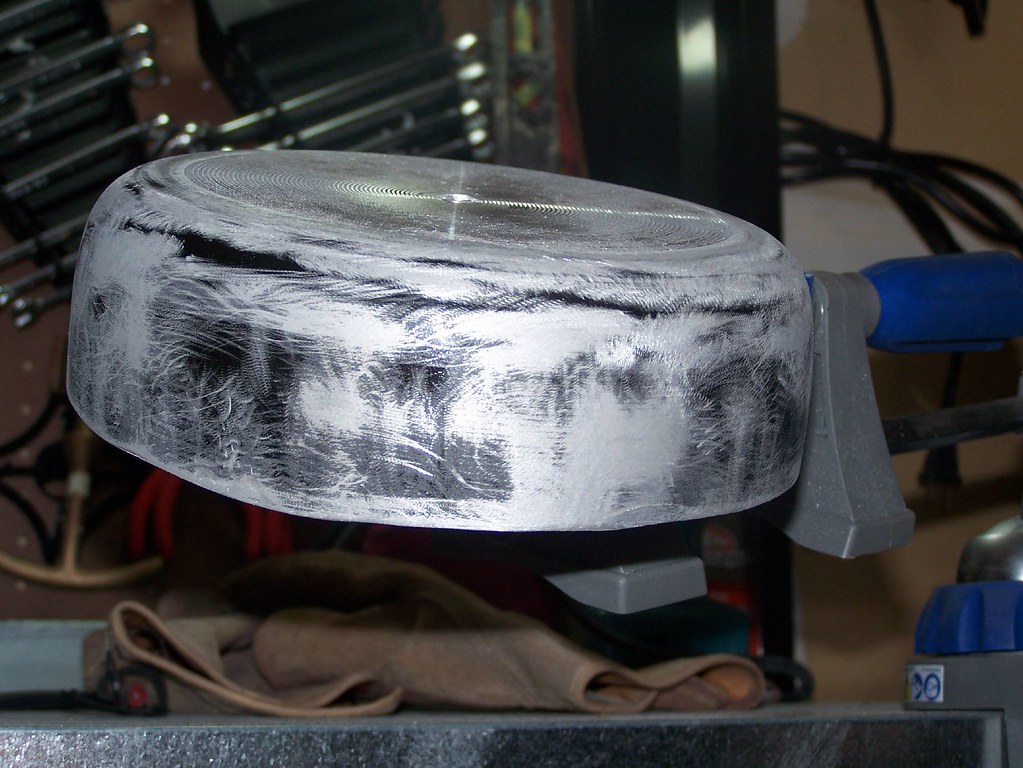
I cut an indention in the bottom to allow more air in to the AC, but the 2 3/4 inch height will give about a half inch of open space all the way around for air to get to the cleaner. BTW, this is after the Stage 1 was done, so it's not the stock AC. Then just paint and drill a hole in the middle. Bolt right on with the existing bolt and you're good to go.
With the paint, i think it came to 8 bucks.
I got real tired of that ugly football and just couldn't find a replacement for the AC cover that i liked anywhere. Head down to your local Dollar General store and pick up a 2 quart saucepan for 6 bucks.
Cut the top rim of the saucepan at about 2 3/4 inches from the bottom. at the top of the ring, in the pic below, you'll see where the handle was on the pan. i used a dremmel to cut all the way around the pan.
Then sand the entire thing to rough up the cover so your chosen color of paint will stick.
I cut an indention in the bottom to allow more air in to the AC, but the 2 3/4 inch height will give about a half inch of open space all the way around for air to get to the cleaner. BTW, this is after the Stage 1 was done, so it's not the stock AC. Then just paint and drill a hole in the middle. Bolt right on with the existing bolt and you're good to go.
With the paint, i think it came to 8 bucks.
Last edited by strich; 03-24-2010 at 04:03 PM.
#209
12-24-2007, 05:35 PM
another cheap mod beef the front end,purchase ally tube cut to size spray black,fit some rubber o-rings top & bottom,very easy job
[IMG]local://upfiles/8786/97248D689BAC4008ABC54C61533F80D2.jpg[/IMG]
[IMG]local://upfiles/8786/7B8F848700AE4FA29F76F8FF906DAE89.jpg[/IMG]
[IMG]local://upfiles/8786/F19908D879A14BF2B5803F9D94516AB9.jpg[/IMG]
[IMG]local://upfiles/8786/97248D689BAC4008ABC54C61533F80D2.jpg[/IMG]
[IMG]local://upfiles/8786/7B8F848700AE4FA29F76F8FF906DAE89.jpg[/IMG]
[IMG]local://upfiles/8786/F19908D879A14BF2B5803F9D94516AB9.jpg[/IMG]
#210
12-24-2007, 05:45 PM
Good one strich. looks great.
A real rainRider too.
I think there are a couple variations.
I do believe MascMan used the lid from saucepan.
mud
A real rainRider too.
I think there are a couple variations.
I do believe MascMan used the lid from saucepan.
mud
ORIGINAL: strich
Someone did this on another post, but i was unable to find it.
I got real tired of that ugly football and just couldn't find a replacement for the AC cover that i liked anywhere. Head down to your local Dollar General store and pick up a 2 quart saucepan for 6 bucks.
Cut the top rim of the saucepan at about 2 3/4 inches from the bottom. at the top of the ring, in the pic below, you'll see where the handle was on the pan. i used a dremmel to cut all the way around the pan.
[IMG]local://upfiles/27609/FF3473229A6C4BFE954292CAB84E4B62.jpg[/IMG]
Then sand the entire thing to rough up the cover so your chosen color of paint will stick.
[IMG]local://upfiles/27609/B20A930B561C4291B2009A6F45712A3C.jpg[/IMG]
I cut an indention in the bottom to allow more air in to the AC, but the 2 3/4 inch height will give about a half inch of open space all the way around for air to get to the cleaner. BTW, this is after the Stage 1 was done, so it's not the stock AC. Then just paint and drill a hole in the middle. Bolt right on with the existing bolt and you're good to go.
With the paint, i think it came to 8 bucks.