Dyna Glide ModelsSuper Glide, Super Glide Sport, Super Glide Custom, Dyna Glide Convertible, Super Glide T-Sport, Dyna Glide Police, Dyna Switchback, Low Rider, Street Bob, Fat Bob and Wide Glide.
Great posts everyone, found some great ideas to try.
Just recently did the mirror flip and works great.
Also did a custom belt guard bye drilling various sized hole in random locations.
Sry no pics yet.
Cheers
I made my own vent grills for my 2015 RG. Just took some measurements and cut out a template with cardboard. I then cut both of them out of an old aluminum mesh I had.
Mud,
I'm in the process of tour pack removal on my 06 Ultra. Kit is installed, it was a breeze.
I'm now in the process of doing some mods to the wiring to make it quick disconnect from speakers as well.
Basically I would like those photos of mods you did to needle nose pliers to crimp the Deutsch connectors, if you can post them again?
The links have lost their connectivity over the years.
Thanks,
Jerry
Originally Posted by mud
.
****AMP fitting release tool****
.
I've received several emails over the last two years asking about
extracting wires from the ever so popular AMP connectors.
HD uses these in several locations on their machines.
Here's the last one:
mud,
I picked up the short standoffs at the dealer today and wanted to
install them tonight but am unsure about the process.
Someone on the forum said you cut the wire for each signal and splice into it,
but the directions don't say anything to that effect.
They mention something about undoing the plug from the rear tail light area instead.
I've never done any electrical work on my bike before
so I'm not really sure if these mod is out of my league.
Any chance you might be able to decipher the instructions
and give me some tips on doing the install?
Thanks,
******, yeah nice to hear from you.
I am a strong believer in NOT cutting wires.
Yes, remove the lens, then unplug the fitting.
Really very simple to disassemble the electrical connectors
so you can pull the wires thru the standoffs.
I've heard quite a few folks on the forums
brag on how fast they can cut the wire and then solder.
Sadly, that bit of misinformation is a joke.
I can extract several before you can even get out
the snips, soldering gun, solder, shrink wrap, heat gun, etc.
Patience is a virtue while mastering this technique on the first wire.
After that, they get easier.
I can release them in a matter of seconds now.
Same is true for the other connectors that HD uses -
Deutsch, Packard, Delphi -
NO need to BUY SPECIAL extraction tools for any of these.
Here ya go:
Remove the two screws that hold the taillight to it's housing.
Use a small screwdriver to push the lock tab down a little,
and pull the fitting out.
.
.
.
.
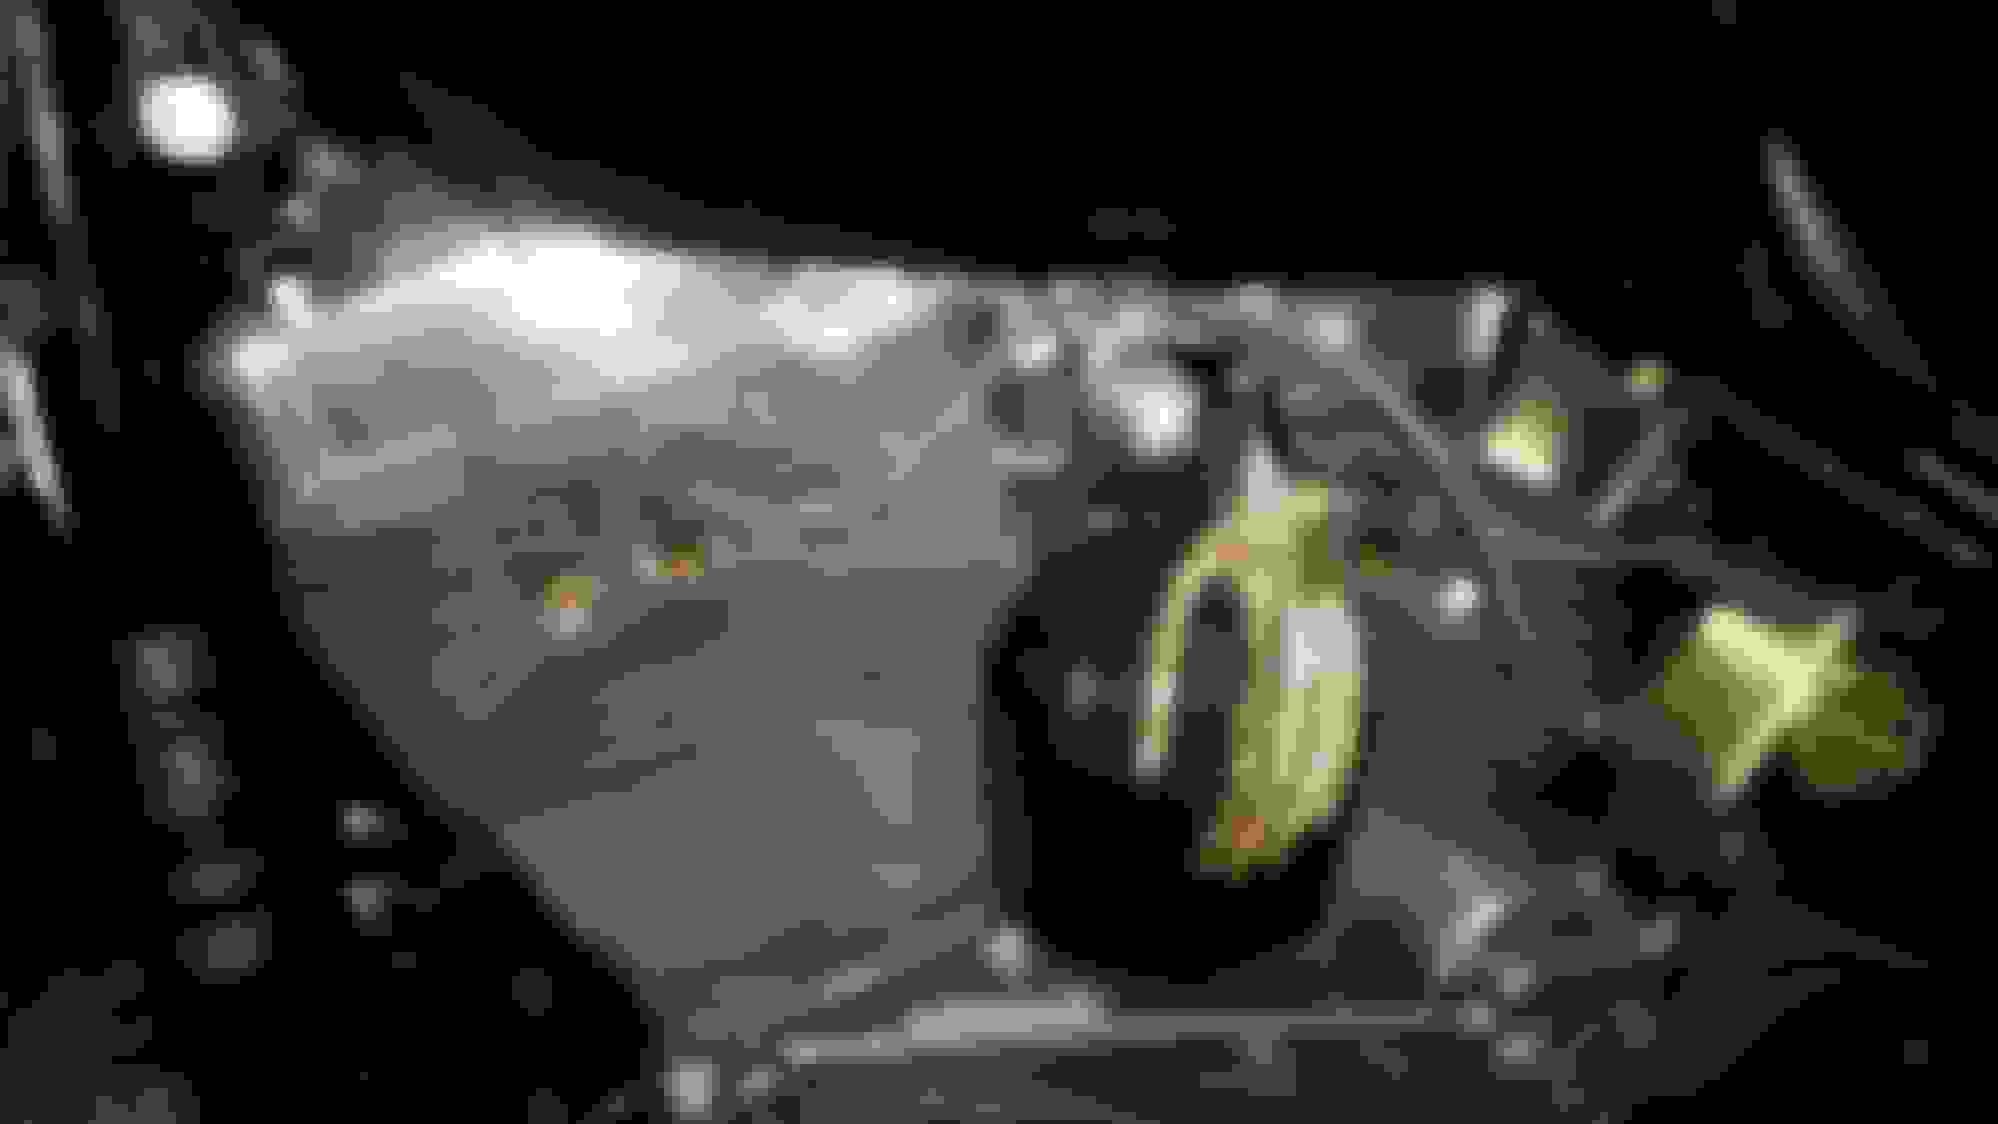
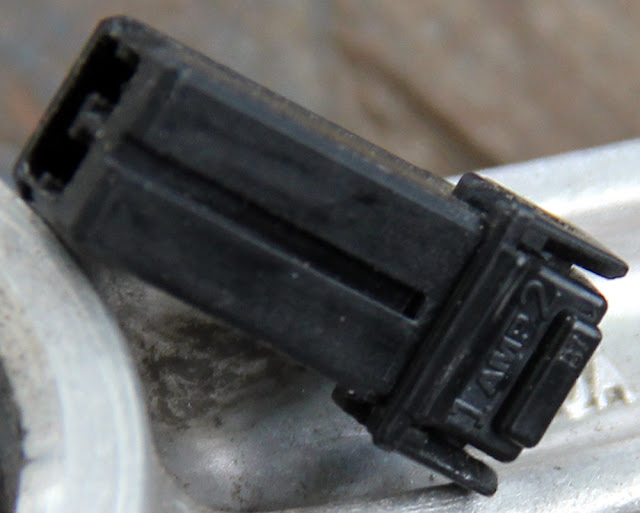
This image below shows the 2 hole AMP and the tip of the 16 gauge wire I use.
Blue arrow shows a slight bend, and the tip is hammered flat.
Red is the first lock to undo. This is what holds the wires in the fitting.
Green is the tab that you released in the first step above,
it locks the fitting to it's receiver.
Green on the right is opened way up for some of the pix farther down.
Don't bend it out or you will ruin the fitting.
They are cheap, fifty cents or so.
.
.
.
.
Blue below, better shot of the 16 ga tip.
.
.
.
.
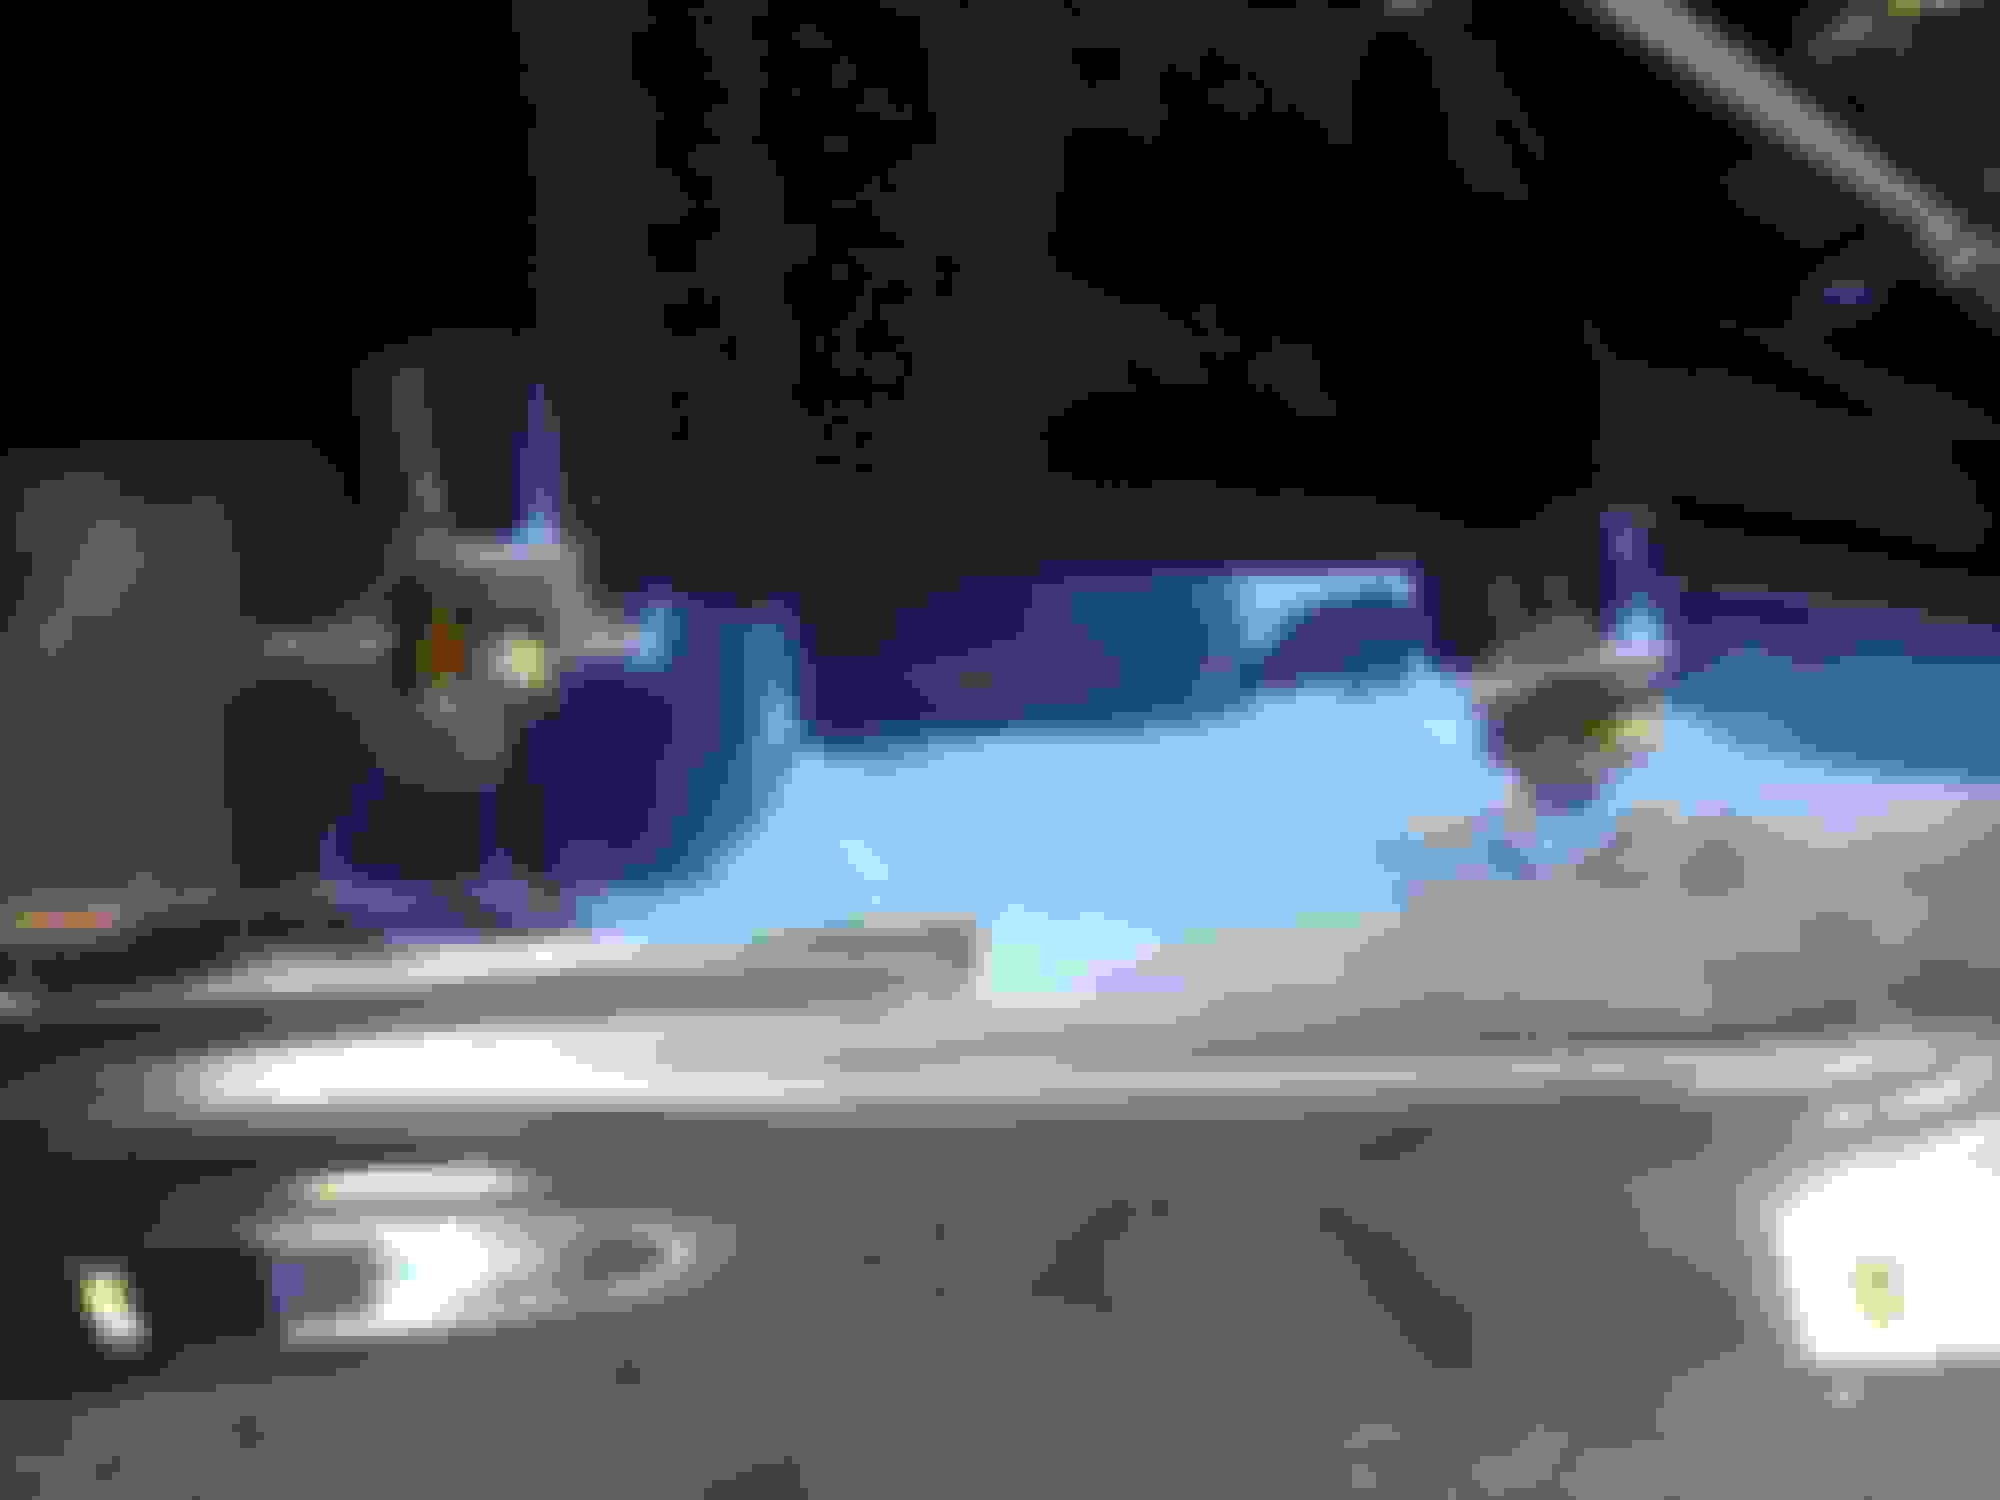
Next image you see I put an S bend in my release tool so I can control it better.
Also here you see that I have the turn indicator wire pushed fully IN
while raising the lock tang inside.
.
.
.
.
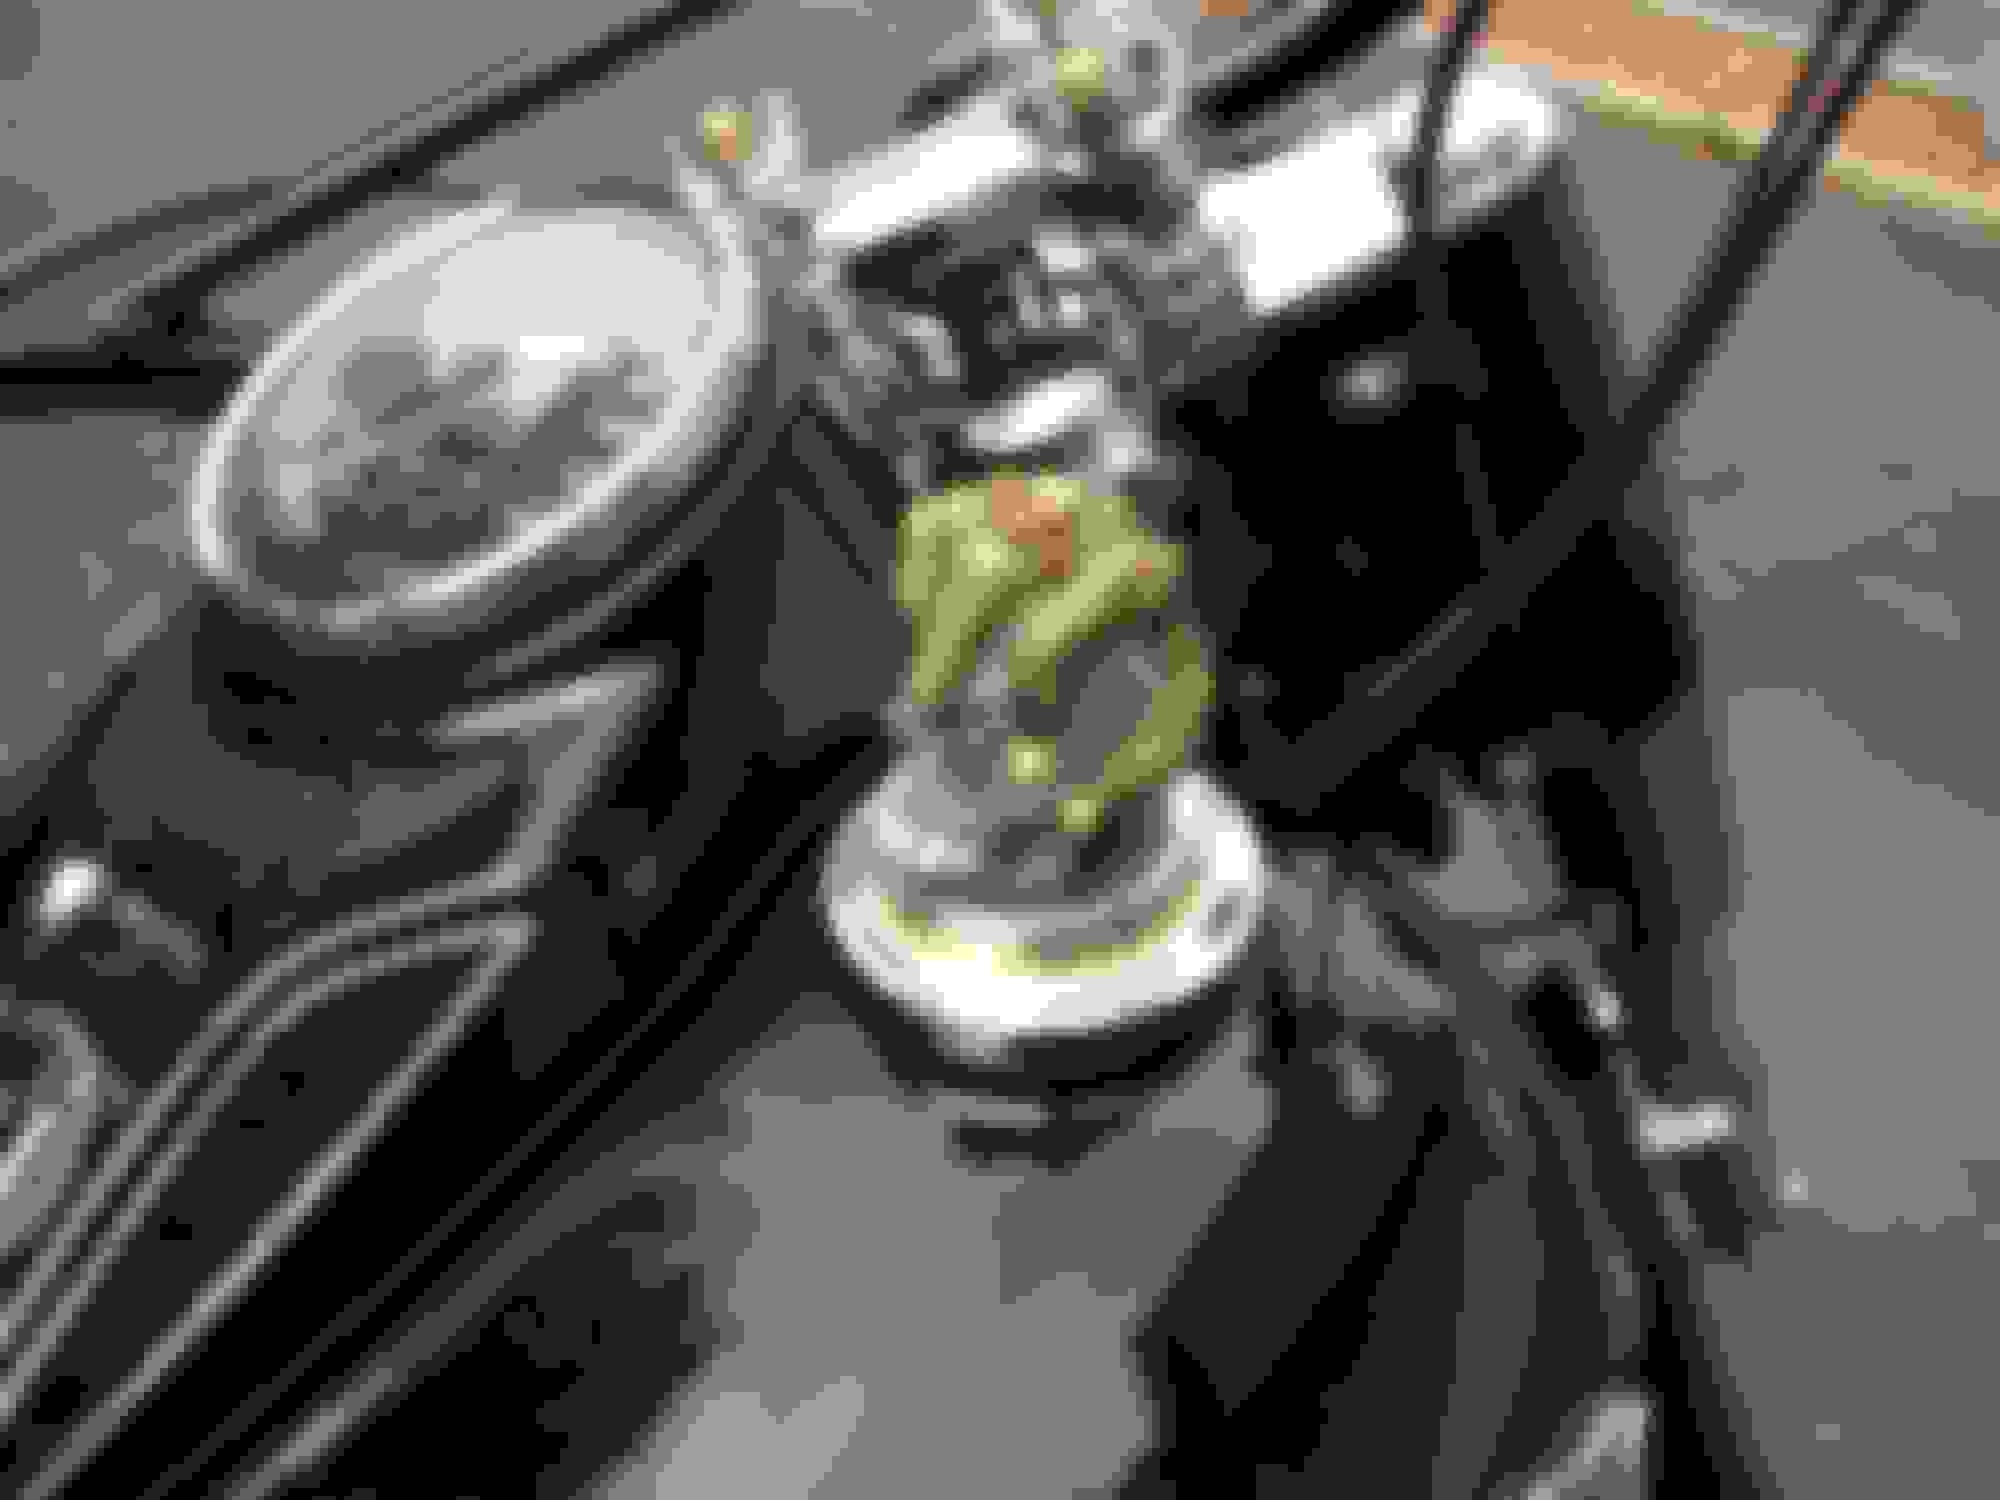
Now, below, once you have the lock tang lifted,
extract the wire.
.
.
.
.
Don't forget to pay attention to which wire comes from which side of the fitting.
There are small numbers on the housing.
In this case. 1 is purple, 2 is black.
.
.
.
.
Next two images illustrate where the tang is, and where the tip of my tool needs to be.
Green is pulled way up here simply for the photo.
.
.
.
.
I suggest buying a couple of new sockets so you can fold this way wide open
for your first try at this. If need be.
Little blue arrow indicates how far the end of the tang lifting wire needs to be.
.
.
.
.
I made two video tutorials.............................
These are great fittings, but, they are not watertight.
Green below shows a generous dab of dielectric compound on the tip of a little brush.
Red - the fitting is full
.
. .
.
.
.
.
.
Above - HD rear standoffs.
Below - close standoff on left. Stock on right.
.
.
.
.
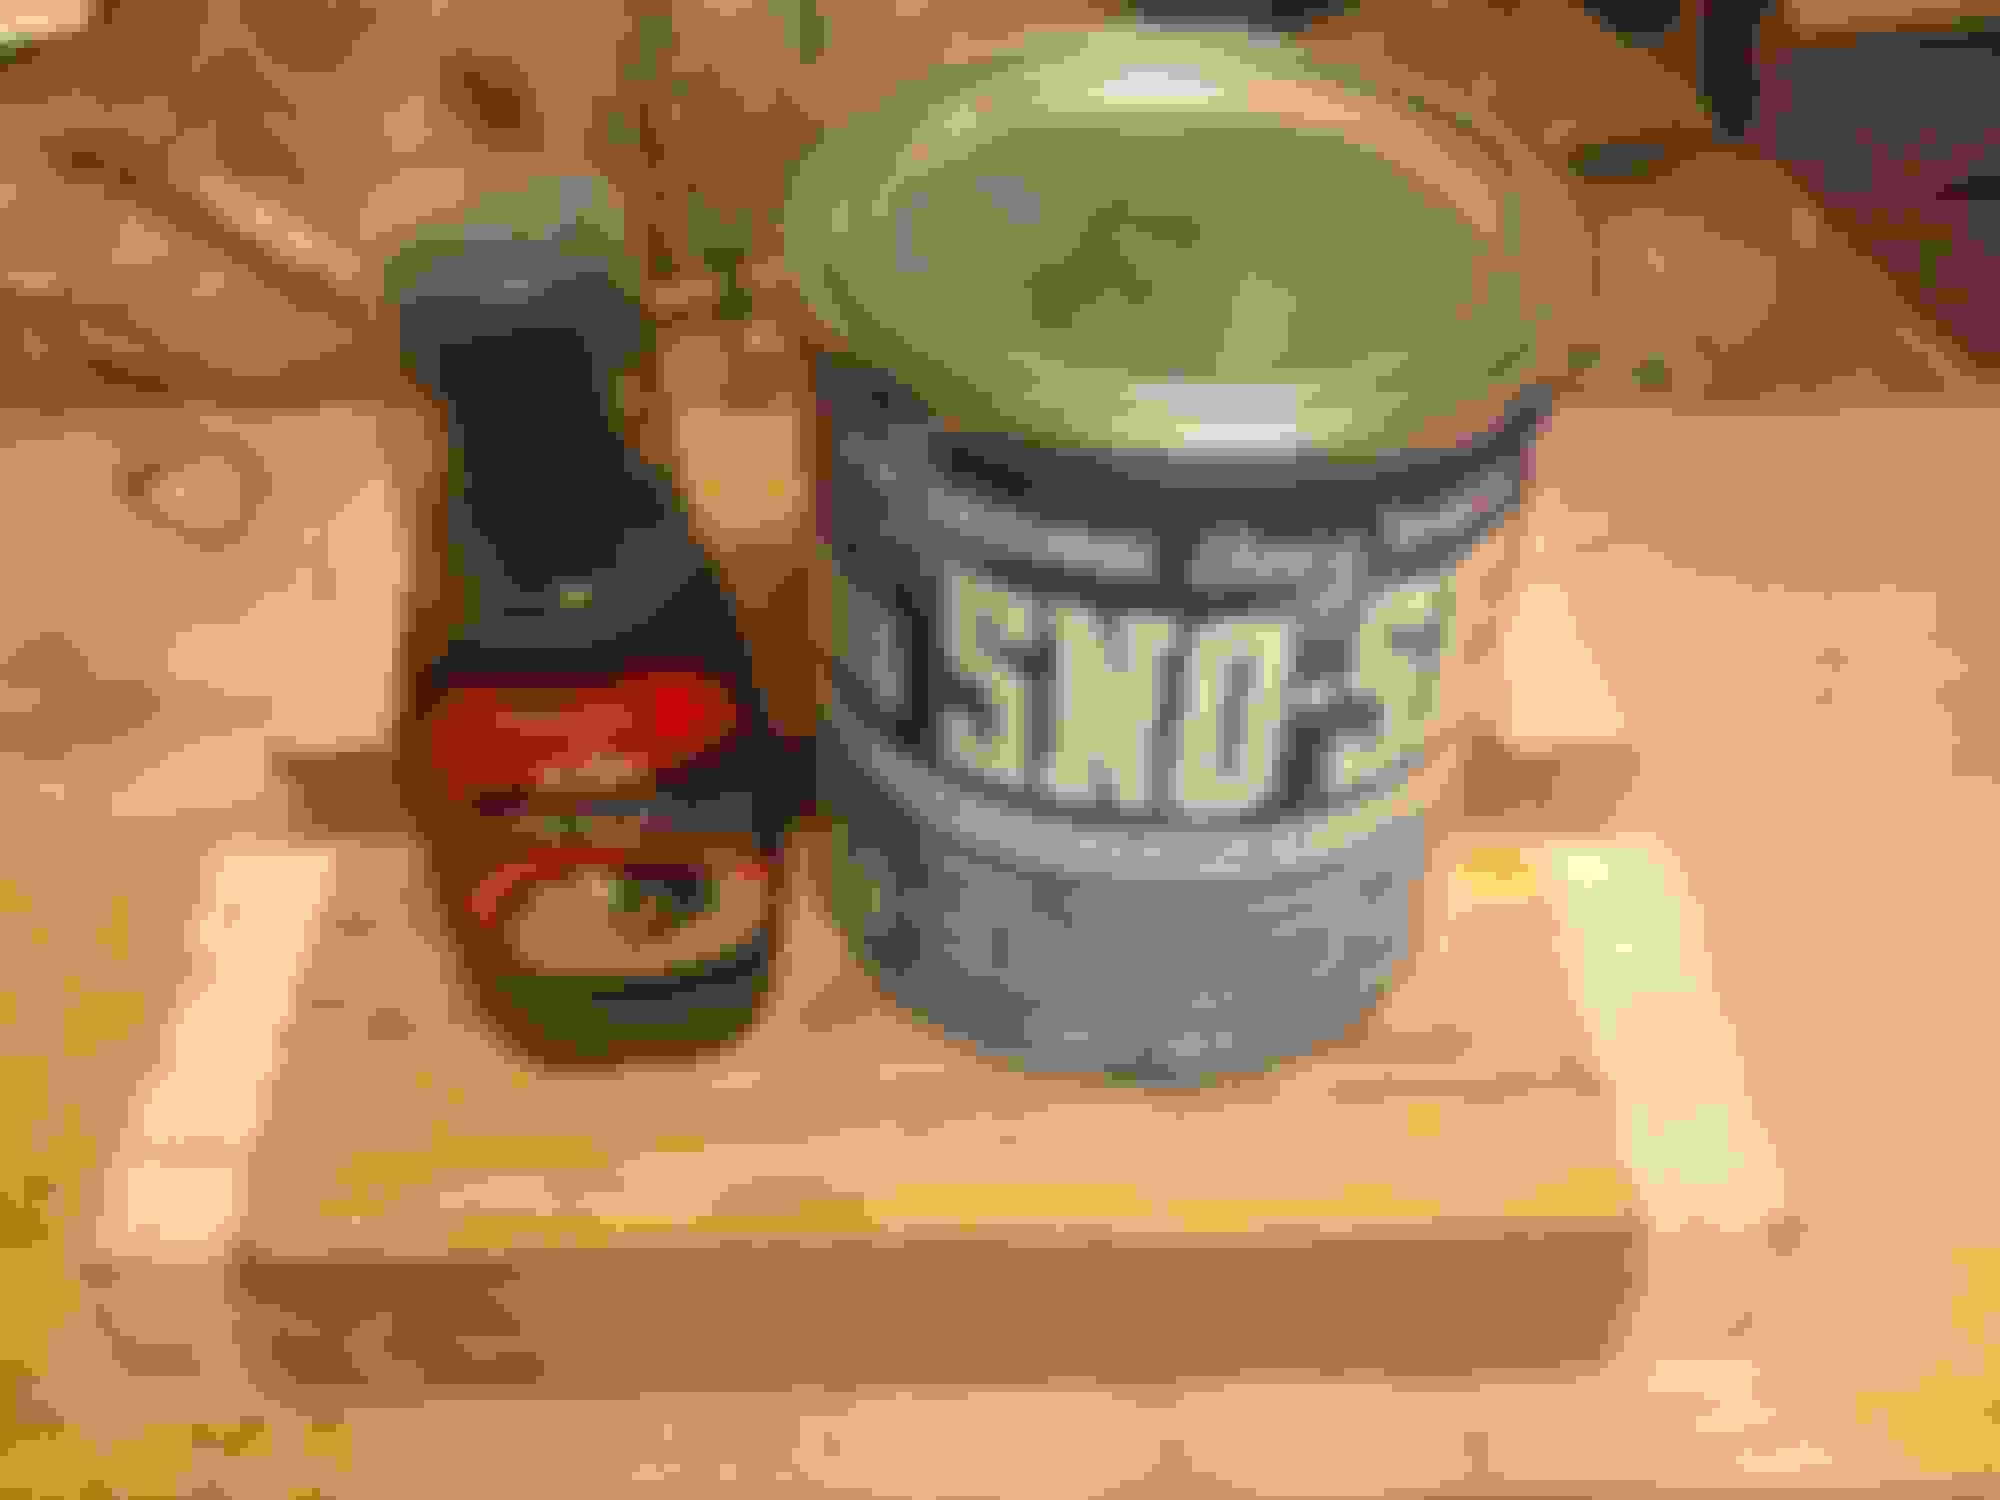
I bought a used leather tool bag on eBay. It was deformed, faded, and dirty.
I filled a bucket with hot water and left it in the bathtub.
I put the leather bag in the bucket of hot water and left it there over night.
I made a couple of blocks that fit the inside of the bag perfectly.
The next morning I pulled the bag out of the water and rinsed off the oil and dirt.
I put the blocks in the bag. It was a tight fit.
I let the bag dry with the blocks inside and the flaps closed.
Once dry, I used shoe leather die on the bag and let it dry again.
Once it was dry, I put SNO-SEAL on it.
Thanks.
I bought a second bag, just like the first, on eBay and did the same thing to it.
I am going to attach them to the fender struts and use them as mine saddle bags.
 01-28-2016, 02:35 AM


 .
.