**Screaming Eagle Compensator**
#1
 04-15-2010, 03:33 PM

.
.
I've had a lot of folks ask me about this Compensator.
Took these photos a couple years ago when I poked and stroked my 88 incher to 121.
this is a really well built component................
.
.
2006 HD FXDI..............
.
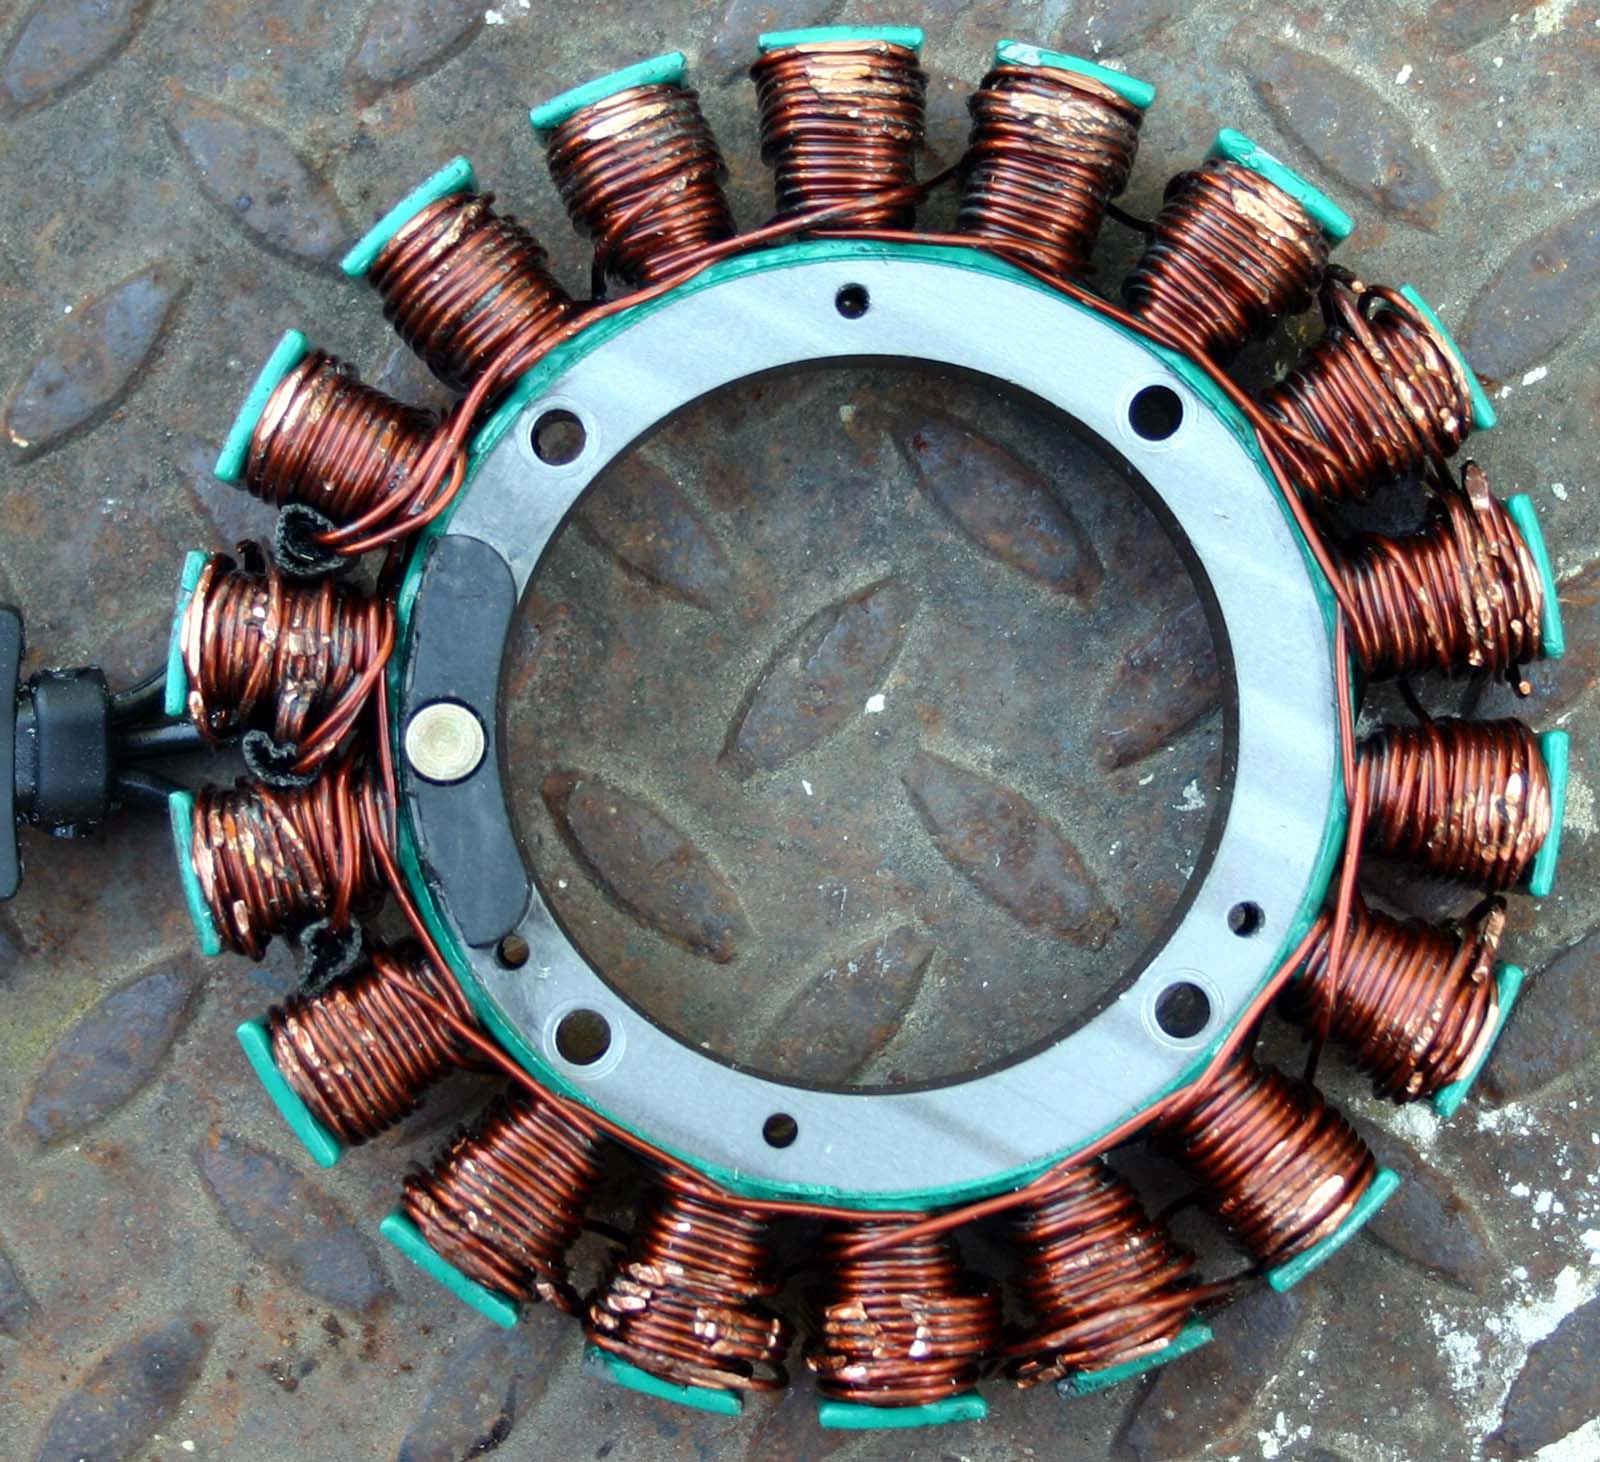
here's my stator after the rotor bolts worked loose........
.
.
.
.

.
.
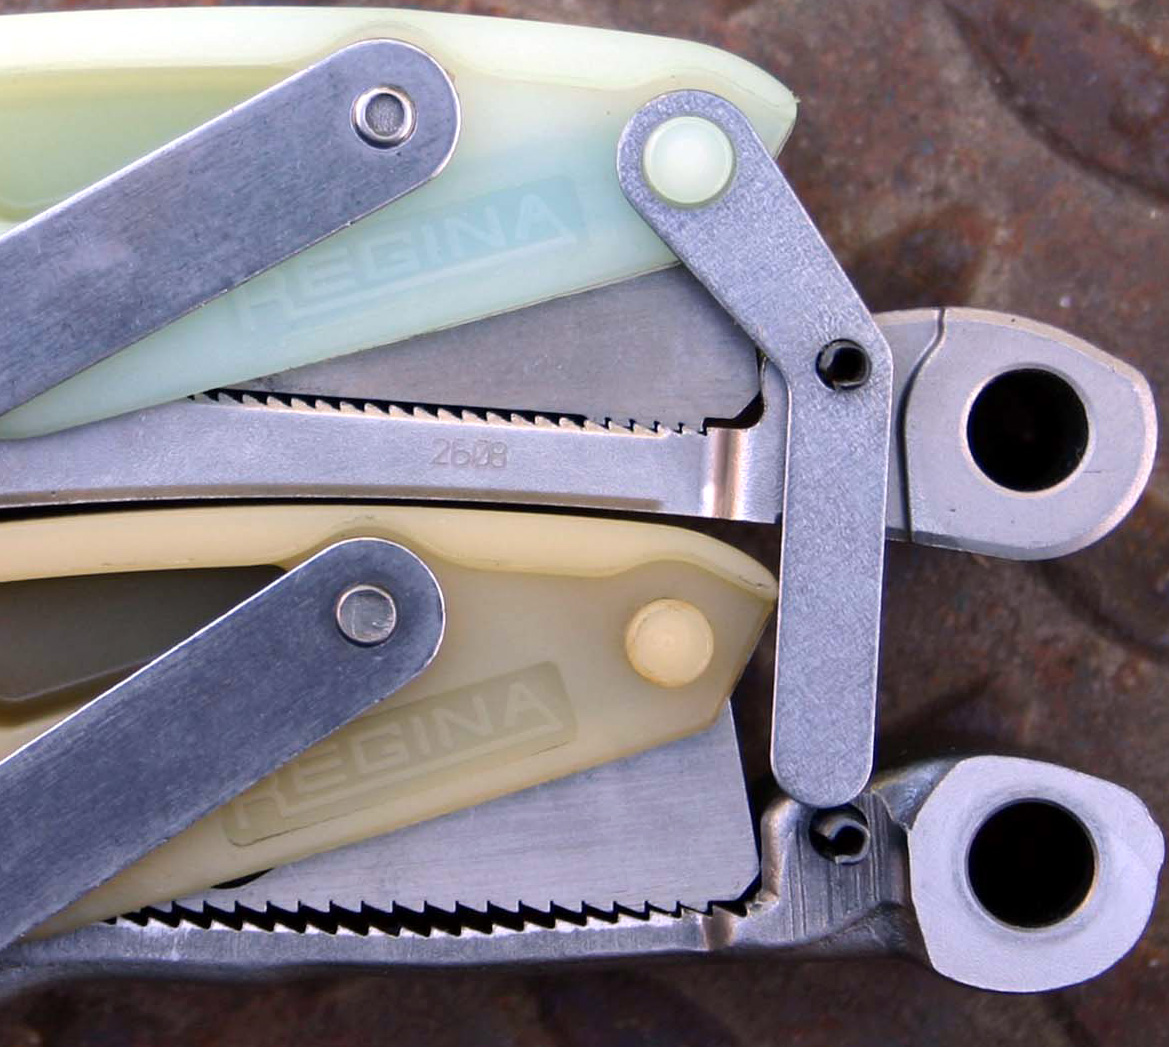
below,
.......the tensioner on top is part # 39929-06A
.......original equipment also shown 39929-06
.
.

.
.
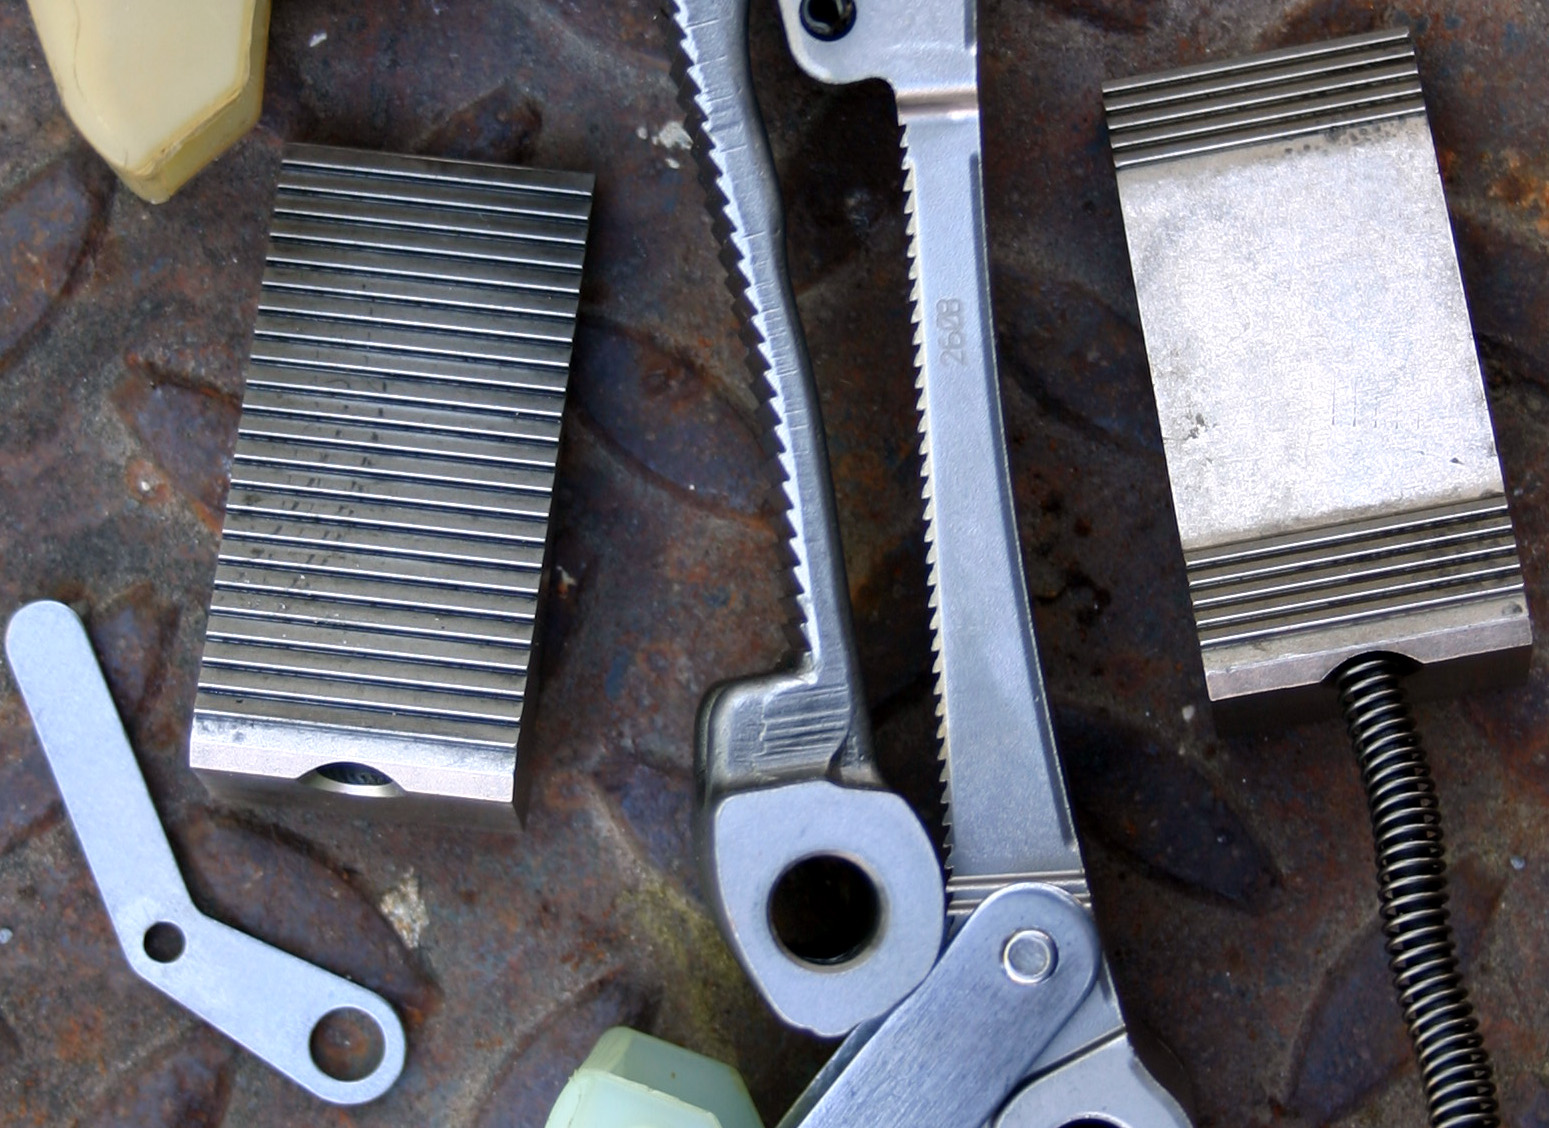
above, and the two pix below,
you see the -06A component is considerably beefed up.
.
.
.
.
.
.
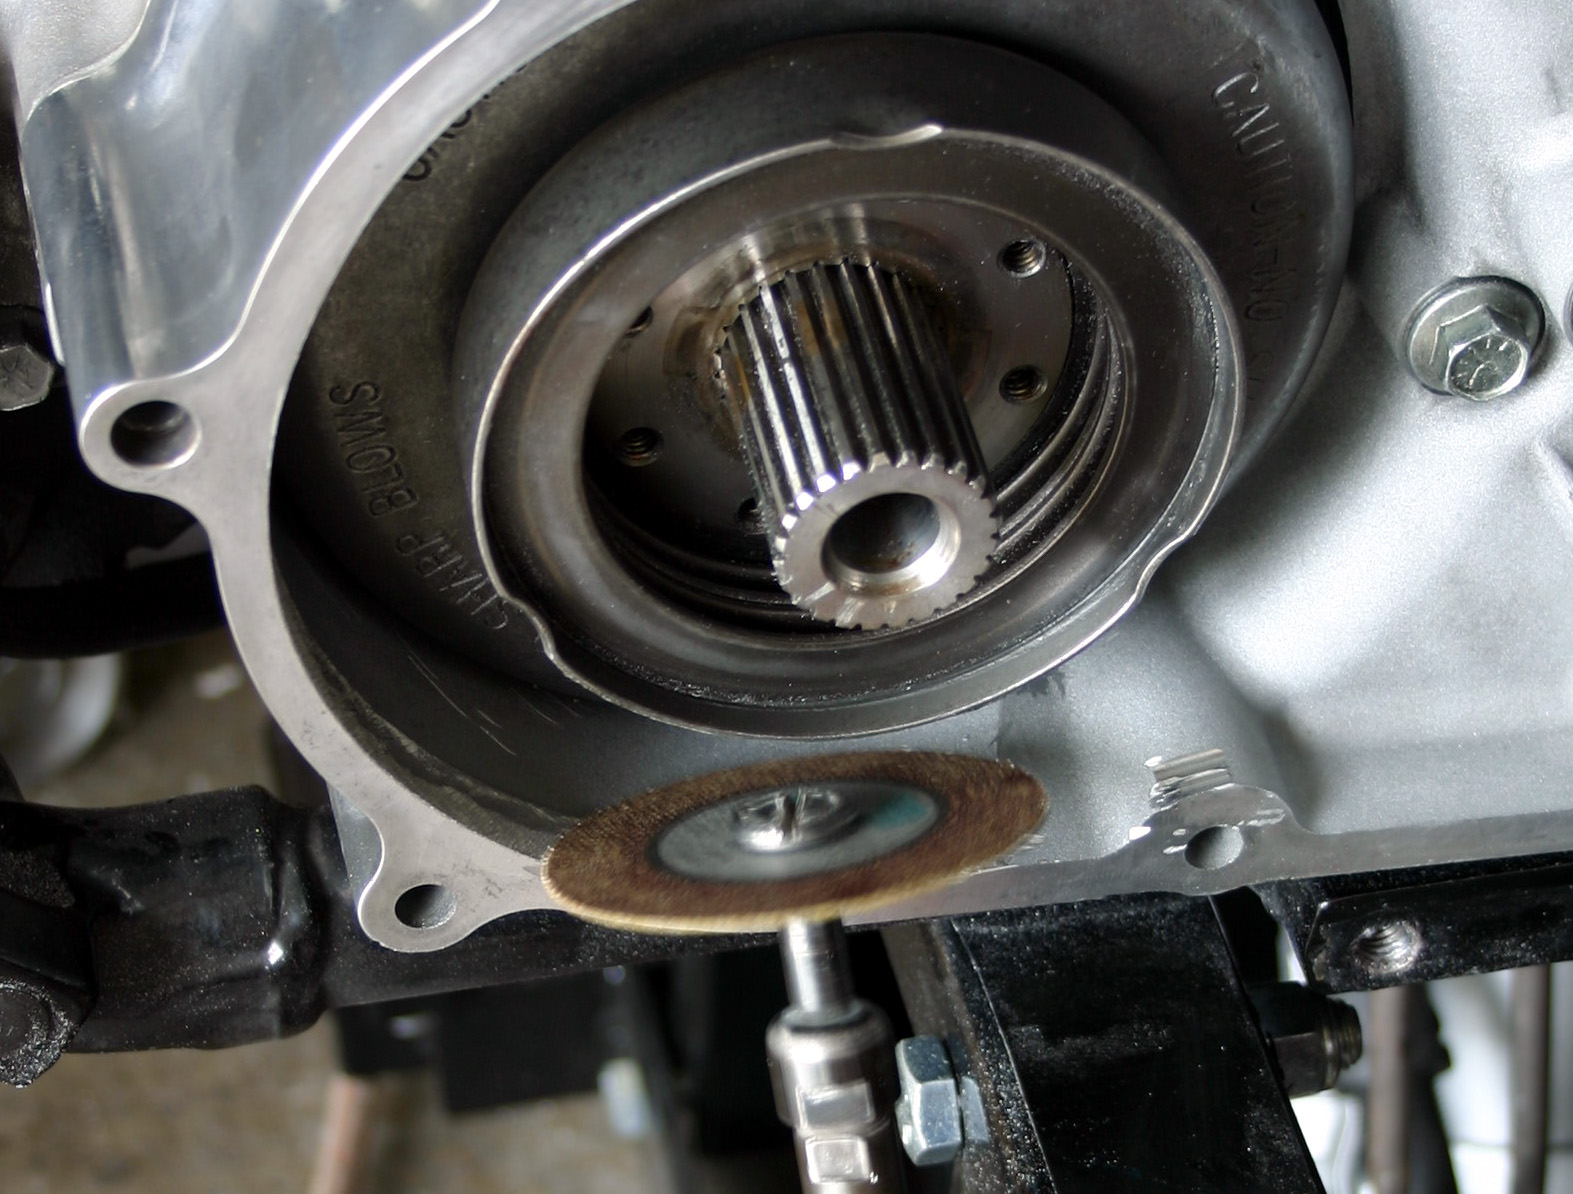
On some machines, the rotor will come out with the inner primary cover in place.
I used a high speed grinder with a thin 2" wheel,
and removed about 1/16" from the lip of the inner primary cover
from about 6 oclock to 9 oclock
There are some blue marks in some of the pix farther down.
.
.
.
.
below, looking at the original rotor,
you see the bolts are gone,
and the lightweight compensator spring is also shown.
.
.

.
.
below is the original compensating sprocket and sliding cam assembly
.
.

.
.
next picture below shows the Screaming Eagle compensating sprocket and sliding cam assembly.
Part # for the Screaming Eagle Compensator Assembly is 40274-08
.
.

.
.
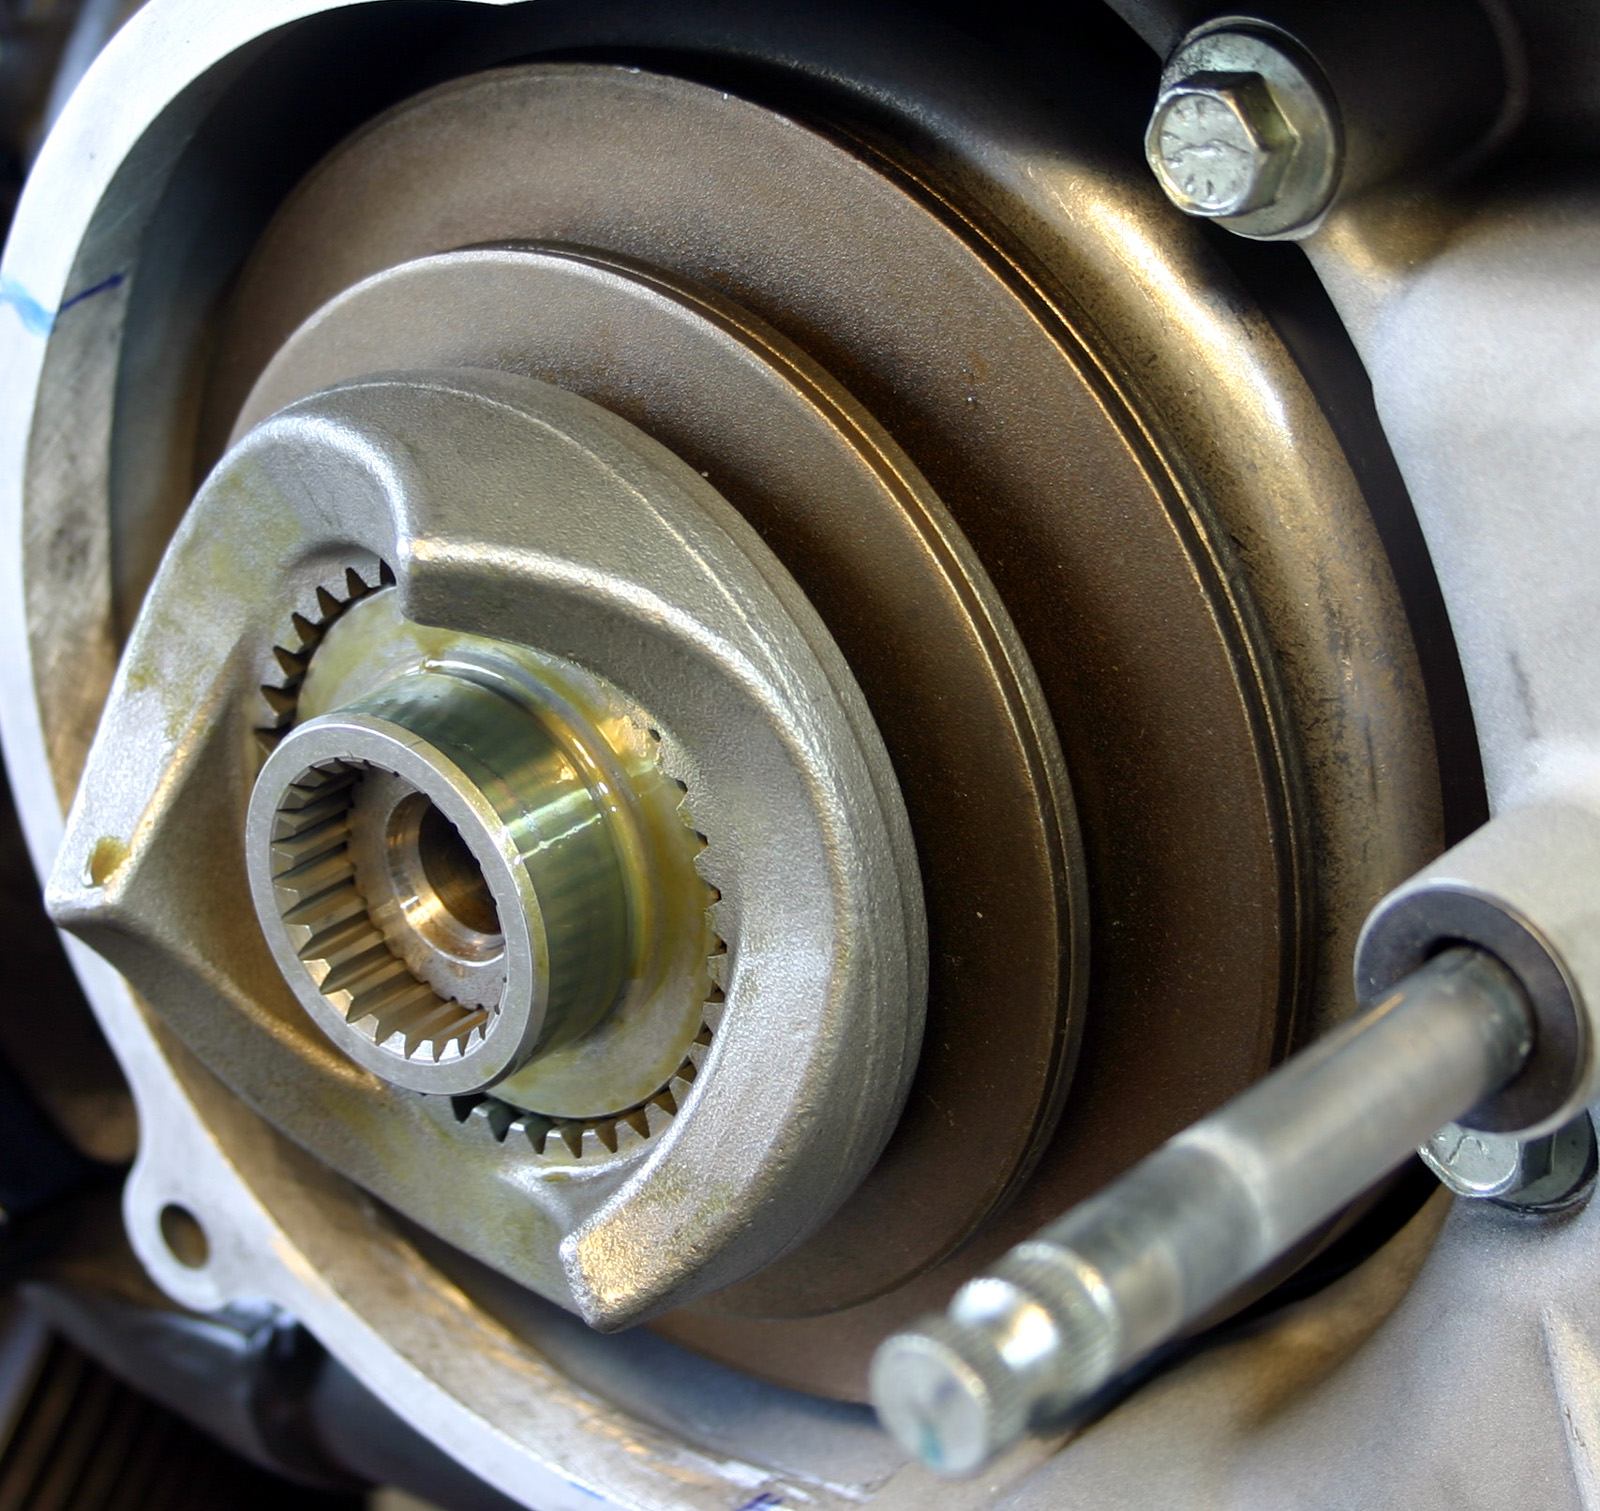
frontside of the the Screaming Eagle compensating sprocket and sliding cam assembly is below.
.
.

.
.
below,
these five cupped discs is the Spring Pack in the the Screaming Eagle kit.
.
.

.
.
below, the new stator part #30017-07
use new bolts part #3050
T27 is the wrench size and they torque to 55-75 INCH pounds
blue marks show where material needs trimming for removal/install of rotor.
material is removed from the inside edge. Not from the gasket surface.
.
.

.
I've had a lot of folks ask me about this Compensator.
Took these photos a couple years ago when I poked and stroked my 88 incher to 121.
this is a really well built component................
.
.
2006 HD FXDI..............
.
here's my stator after the rotor bolts worked loose........
.
.
.
.
below,
.......the tensioner on top is part # 39929-06A
.......original equipment also shown 39929-06
.
.
.
above, and the two pix below,
you see the -06A component is considerably beefed up.
.
.
.
.
On some machines, the rotor will come out with the inner primary cover in place.
I used a high speed grinder with a thin 2" wheel,
and removed about 1/16" from the lip of the inner primary cover
from about 6 oclock to 9 oclock
There are some blue marks in some of the pix farther down.
.
.
.
below, looking at the original rotor,
you see the bolts are gone,
and the lightweight compensator spring is also shown.
.
.
.
below is the original compensating sprocket and sliding cam assembly
.
.
.
next picture below shows the Screaming Eagle compensating sprocket and sliding cam assembly.
Part # for the Screaming Eagle Compensator Assembly is 40274-08
.
.
.
frontside of the the Screaming Eagle compensating sprocket and sliding cam assembly is below.
.
.
.
below,
these five cupped discs is the Spring Pack in the the Screaming Eagle kit.
.
.
.
below, the new stator part #30017-07
use new bolts part #3050
T27 is the wrench size and they torque to 55-75 INCH pounds
blue marks show where material needs trimming for removal/install of rotor.
material is removed from the inside edge. Not from the gasket surface.
.
.
.
.
...verify all #s with your supplier for your application...
.
.
...to continue in the post following...
.
.
.
...verify all #s with your supplier for your application...
.
.
...to continue in the post following...
.
.
Last edited by mud; 07-15-2012 at 03:54 PM. Reason: refresh images
#2
04-15-2010, 03:33 PM
.
.
.
...continued from the previous posting...
.
.
...verify all #s with your supplier for your application...
.
.
.
.
...continued from the previous posting...
.
.
...verify all #s with your supplier for your application...
.
.
.
here below, is the new Alternator Rotor Assembly, and Shaft Extension.
.
.
here below, is the new Alternator Rotor Assembly, and Shaft Extension.
.
.

.
next, the Spring Pack is installed over the Shaft Extension.
.
.

.
next is the Sliding Cam Ramp.....
.
.
.
now below, the Compensating Sprocket.
.
.

.
following is the lockPatched bolt, the Sprocket Retainer, and the Thrust Washer.
.
.

.
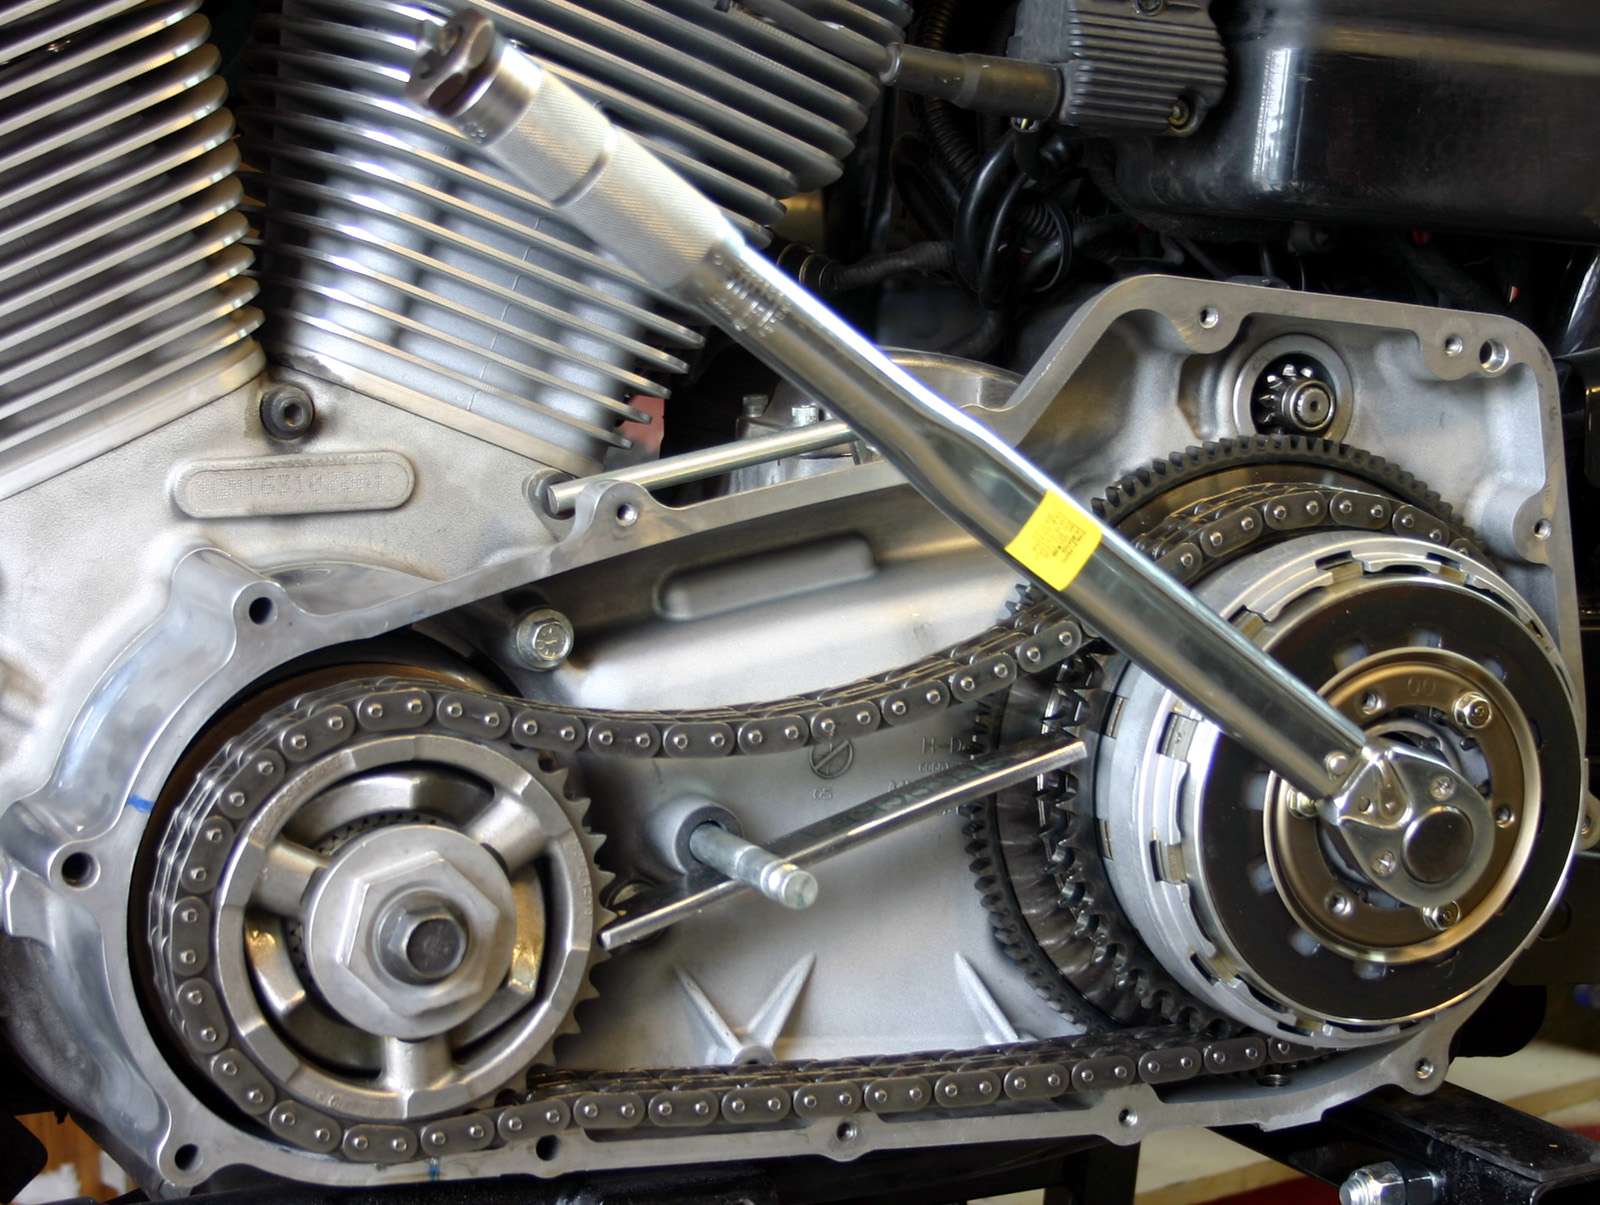
Hold the Sprocket Retainer with a 1 3/4 Box End Wrench (or, I used a Spud Wrench),
use a 3/4" socket to torque the lockPatched bolt to 100 FOOT pounds.
then back it off ONE FULL TURN,
then torque to 140 FOOT pounds.
.
.

.
below, the Clutch Hub Nut is REVERSE thread.
TWO drops Red ThreadLocker.
Use a 1 3/16" socket and torque to 80 FOOT pounds.
.
.
.
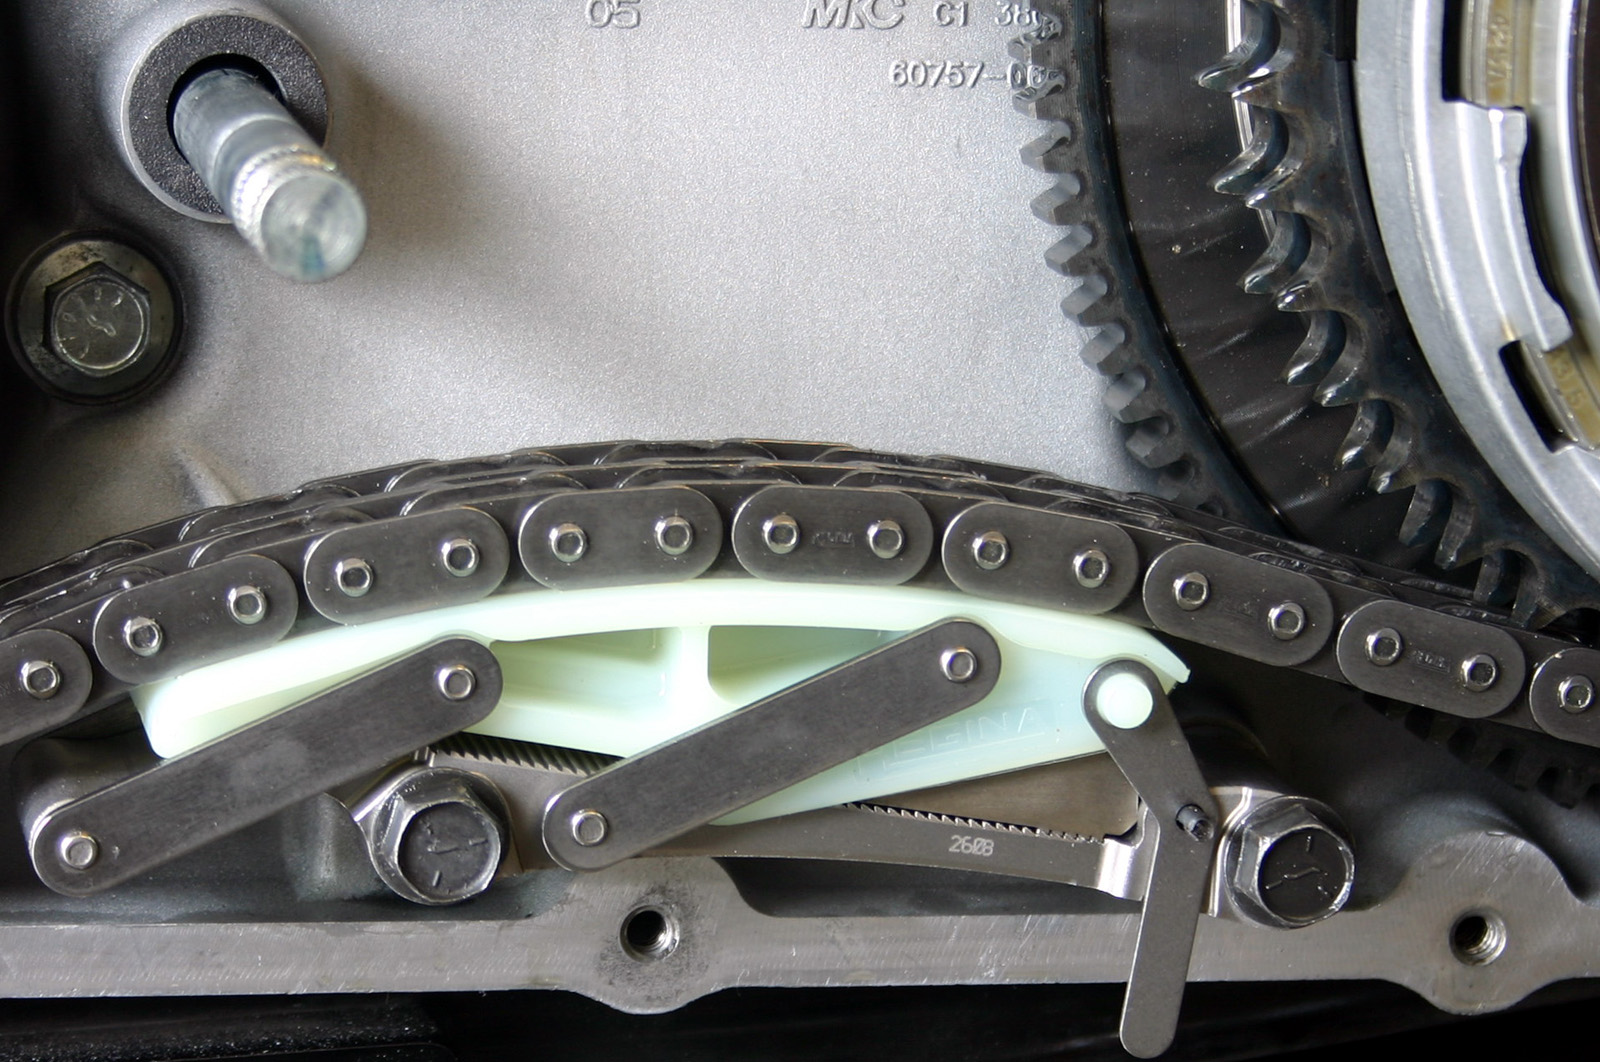
Next, The Tensioner.
BLUE ThreadLocker.
Torque to 15-19 FOOT pounds.
.
.


.
You can use a tie wrap in place of the HD retainer shown below.
.
.
.
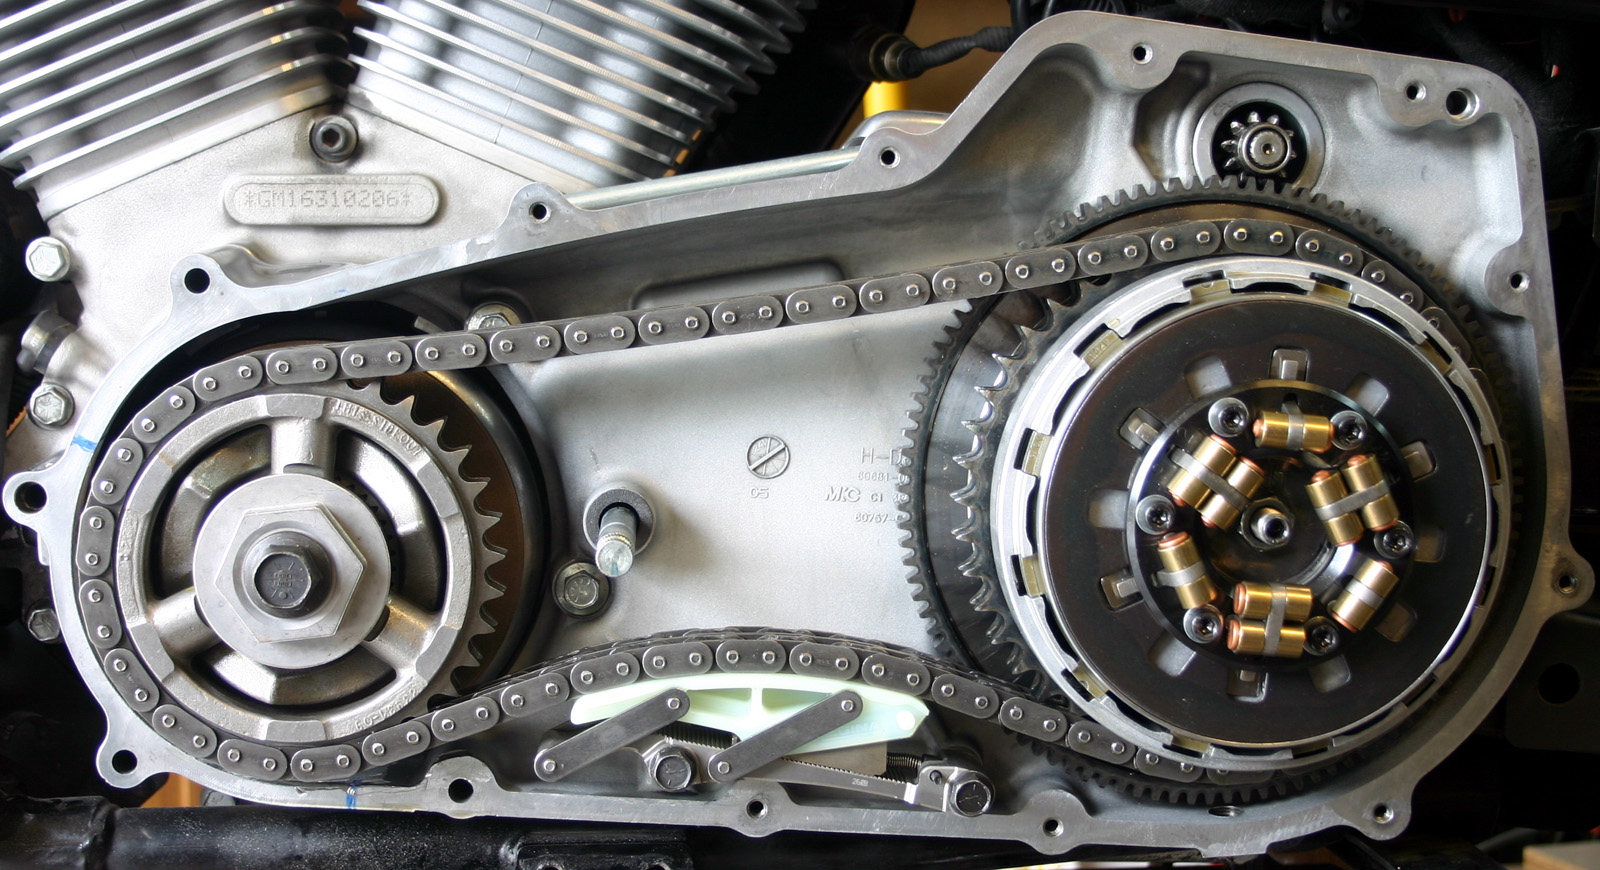
That's it.
Ready for the Outer Primary Cover
.
.
.
DON'T forget the to slide the new Tower Gasket over the Shifter shaft.
sticky side in.
.
.

.
One more important item
.....add lubricant.....
and on the road again..........
.
.

.
here's a link to the Instruction Sheet and Part Number breakdown.............
.
Last edited by mud; 07-24-2012 at 05:03 PM. Reason: .........update instruction sheet link
#3
04-15-2010, 03:41 PM

Ultimate HDF Member
#4
04-15-2010, 04:20 PM

#5
04-15-2010, 04:56 PM
Road Captain
Join Date: Mar 2008
Location: fallbrook, socal
Posts: 682
Likes: 0
Received 0 Likes
on
0 Posts
#6
04-15-2010, 07:09 PM
.
.
.
.
.
thanks mr dope.
and no, I don't have anything for the 30 tooth conversion.
I couldn't use that 30T on the street with my motor.
When I get the frogskins coming in again I'm going to chain drive final
so I can quick swap the rear sprocket
down lower for strip trips
and higher for street terrorizing.
.
.
.
.
.
.
paul I don't know that there is a *point* that this is necessary.
I was needing a new stator/rotor due to my neglect at some preventive welding on the stock components.
not much more greenbacks for the SE unit.
when you compare side by side with the stock package,
the SE is obviously far superior in construction and design.
.
.
.
.
.
.
yessir and thanks as well mopar..........
your first question - yes, if you have the early design stator, part # 30017-01B
part # 30017-07 is required with this compensator.
your second question - I don't know that it is *needed*.
I also edited this link into my earlier posting.
the Instruction Sheet and Part Number breakdown.............
.
.
.
.
.
.
thanks mr dope.
and no, I don't have anything for the 30 tooth conversion.
I couldn't use that 30T on the street with my motor.
When I get the frogskins coming in again I'm going to chain drive final
so I can quick swap the rear sprocket
down lower for strip trips
and higher for street terrorizing.
.
.
.
.
.
paul I don't know that there is a *point* that this is necessary.
I was needing a new stator/rotor due to my neglect at some preventive welding on the stock components.
not much more greenbacks for the SE unit.
when you compare side by side with the stock package,
the SE is obviously far superior in construction and design.
.
.
.
.
.
yessir and thanks as well mopar..........
your first question - yes, if you have the early design stator, part # 30017-01B
part # 30017-07 is required with this compensator.
your second question - I don't know that it is *needed*.
I also edited this link into my earlier posting.
the Instruction Sheet and Part Number breakdown.............
.
.
.
#7
04-15-2010, 09:55 PM
Road Captain
Join Date: Mar 2008
Location: fallbrook, socal
Posts: 682
Likes: 0
Received 0 Likes
on
0 Posts
Trending Topics

#9
09-03-2010, 07:18 PM

Does the SE compensator kit 40274-08, contain the new spring pack and the sliding cam assembly? Are there any other items that have to be purchased to do this conversion on a 2007 Road King Classic. Mine sounds like the primary is coming apart when you take off from a dead stop or lug the engine any at all. From what I have read here, it sounds like my problem is the compensator sprocket.
Update on noise from primary case. See the attached pics taken during the dismantle of my primary. No wonder I was hearing all the noises from there.
Update on noise from primary case. See the attached pics taken during the dismantle of my primary. No wonder I was hearing all the noises from there.
Last edited by Flaming Fatboy; 09-06-2010 at 09:32 PM. Reason: Add attachments & update progress