stripped exhaust stud...read and learn (LONG)
#1
 08-19-2011, 12:04 AM

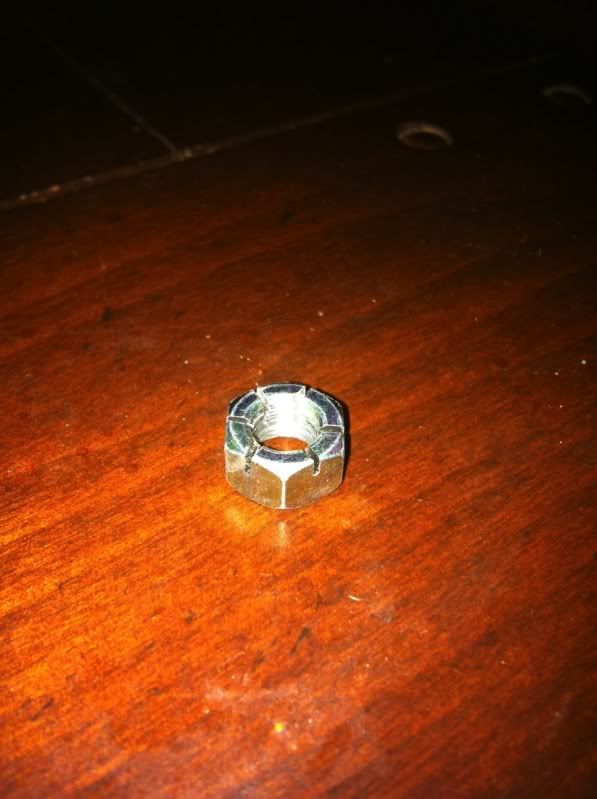
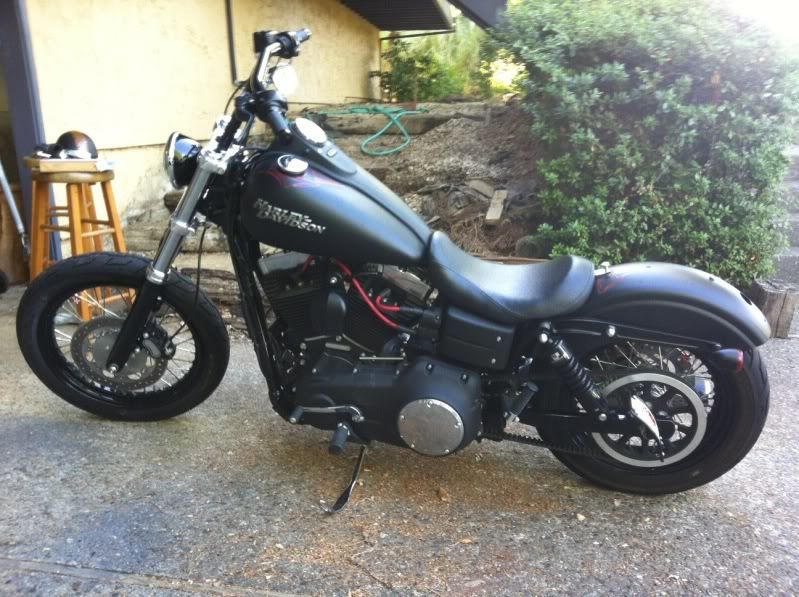
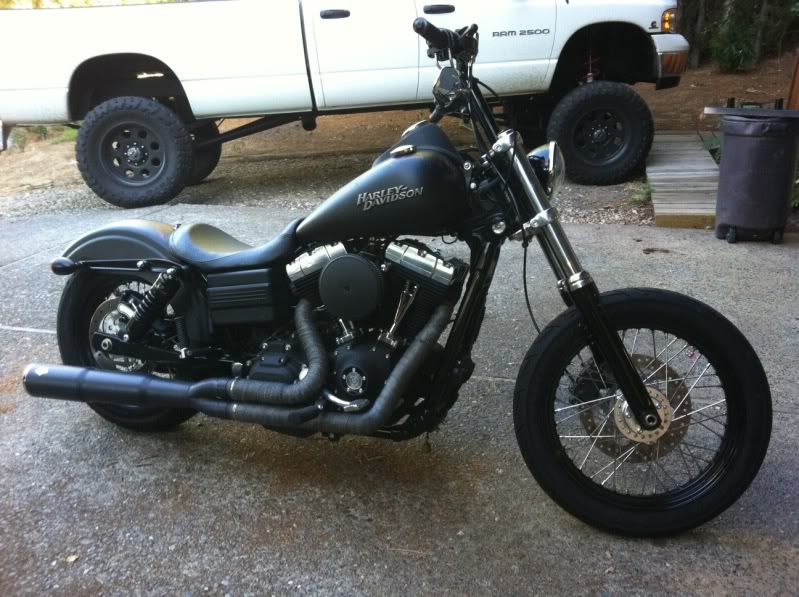
So I got my propipe this week from HDF member Lockednloaded. I also installed a 2" tank lift, painted the fork lowers black, installed PM grips, and removed the front fender. Got the bike up on the lift and started tearing the stock exhaust off, enjoying myself, excited to get the new pipe on and in turn leaving bits and pieces of the stock crap all around. I wrapped the headers, test fit the new pipe and began installing everything. I got the front pipe on, put the exhaust stud nuts on finger tight and moved to the rear cylinder. Put the pipe on, threaded on the lower (rear most) exhasut stud nut which i picked up off the floor, amidst the mess of stock crap. No problems so far...almost done! Grab another nut, and proceed to put it onto the front stud on the rear cylinder. Due to the stud being so tight to the cylinder, I could barely get it on with my fingers, so I grabbed the socket and began to torque it down. It went about a turn and a half before I felt it get really tight. Something's not right, so I pull it off. Only to find the first two threads on the exhaust stud to be stripped and mauled. Now panic begins to set in and I'm confused as to how this happened. I sit down and stare at everything. As I stare at the nut I took back off it looks just like an exhaust stud flange nut...just like the other three I had already put on with no problems. Upon further inspection I notice it is COARSE (or standard) thread and the exhaust stud is FINE thread! In my haste to install and lack of organization, I had mixed up an exhaust nut with one of the identical looking flange nuts which came off the stock exhaust support bracket! Now I'm thinking WTF am I gonna do? I can't fit a die in there because of its proximity to the jug. I can't fit a stud remover in there for the same reason as well. So after a sleepless night of thinking I'll have to remove the jug, I call my dad. He thought we could carefully grind down a die, while keeping it cool and TIG it to a socket. Upon lookin at a die up close, we saw the clean out holes in the die, wouldn't allow us to grind it small enough to fit. We thought about it all morning and came up with an idea....if we take a 5/16" x 24 grade 8 nut and tweak it a bit, it might work as a homemade die of sorts. So we took the aforementioned nut and placed several relief cuts about halfway through it using a dremel tool with a thin cut off wheel. We then put in a burr and beveled the first two threads of the nut at approximately 45 degrees. We then cut two threads (the two bad ones) off the exhaust stud and using a small file, carefully dressed the end of the freshly cut stud. We placed the nut in a socket and slowly began to thread the nut onto the exhaust stud. After two turns with moderate pressure, it began to spin freely. We thought maybe it had just stripped off the stud again, but upon taking the socket off we could see it had cleanly rethreaded the exhaust stud! I backed it off and tried a NEW exhaust nut and WHAM!!!! It spun right on. Huge relief and important, albeit basic, lesson learned...KEEP YOUR WORKSPACE CLEAN, STAY ORGANIZED, AND DONT RUSH. I'm sure ya'll know these things, I thought I did, but I guess not. Here's a pic of the modified nut and the finished product. Sorry for the lengthy, wordy post...
Last edited by 018245; 08-19-2011 at 12:14 AM.
#2
08-19-2011, 12:11 AM
Outstanding HDF Member
#3
08-19-2011, 01:18 AM
Platinum Sponsor
Join Date: Nov 2010
Location: Red Banks, Mississippi
Posts: 17,464
Received 3,940 Likes
on
2,295 Posts
Good work man! I know that sinking feeling when a fun project turns into a hassle. I go slower now than in years past, but usually only have to do things once.
Your bike is looking good!
Kevin
Your bike is looking good!
Kevin

#4
08-19-2011, 01:42 AM


#7
08-19-2011, 06:56 AM
Club Member
Join Date: Feb 2008
Location: Passaic County, NJ
Posts: 11,474
Likes: 0
Received 23 Likes
on
18 Posts
Trending Topics
#8
08-19-2011, 08:18 AM
Advanced
Join Date: Jun 2009
Location: Aurora, Wisconsin
Posts: 81
Likes: 0
Received 0 Likes
on
0 Posts
#9
08-19-2011, 12:12 PM
the relief cuts allow the material removed during the thread cutting process a place to escape from the new threads, instead of grinding into them and ruining them again...similar to the clean out holes on a die...or at least that was our thinking. In theory i suppose you could argue they also allow the nut to flex a bit as it goes over the messed up portion of the stud...although i doubt theres much flex in a grade 8 nut
#10
08-19-2011, 12:35 PM
Club Member
Join Date: Feb 2008
Location: Passaic County, NJ
Posts: 11,474
Likes: 0
Received 23 Likes
on
18 Posts
the relief cuts allow the material removed during the thread cutting process a place to escape from the new threads, instead of grinding into them and ruining them again...similar to the clean out holes on a die...or at least that was our thinking. In theory i suppose you could argue they also allow the nut to flex a bit as it goes over the messed up portion of the stud...although i doubt theres much flex in a grade 8 nut