3 wire to 5 wire headlight swap (how to, with pictures)
#1
 01-01-2012, 09:39 PM

I know this mod can be used by more than just Dyna riders, but I figure since we Dyan riders are like the (cooler, smarter, and better looking) step-children of the Harley world, I'd share it here in the Dyna forums. Hope someone can find this helpful. Also, thanks to 8541hog for the tips that gave me the bit of reassurance I needed before I could cut the first wire!
Here goes...
First off, I bought a DBI 7" H4 headlight bucket from eBay, it had 5 wire connection (Y/Y/W/B/B) to accommodate high/low beam as well as passing lamps, like the stock light on a Softail Deluxe. I wanted to swap out the stock bucket on my FXD and keep the ability to add the passing lamps if I decide to do so in the future. To do this, I decided the best way was to keep the wires and make my life easier down the road if I do want to add lights, was to get some Molex connectors. I put a two point Molex in on the auxiliary light wires and added a four point (wired like the stock one) in on the main lines to the bucket. This way, I can also swap out to a different bucket and all I'll need to do is wire a Molex onto any bucket I want to use and plug it in!
Now for the pics...
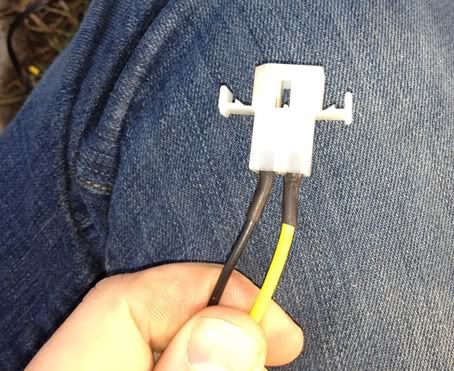
Here's the Molex connectors that I got from Radio Shack:

Here are the wiring diagrams for the stock harness from the manual:


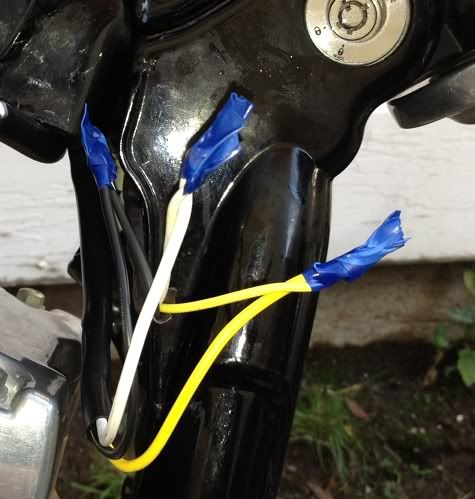
Wires outside new bucket (spade Y=aux/low, bound Y=low beam, W=high beam, thick B=main ground, thin B=aux ground):
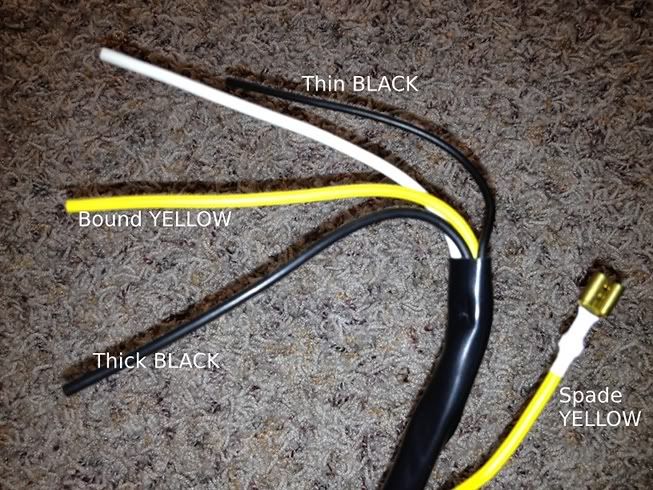
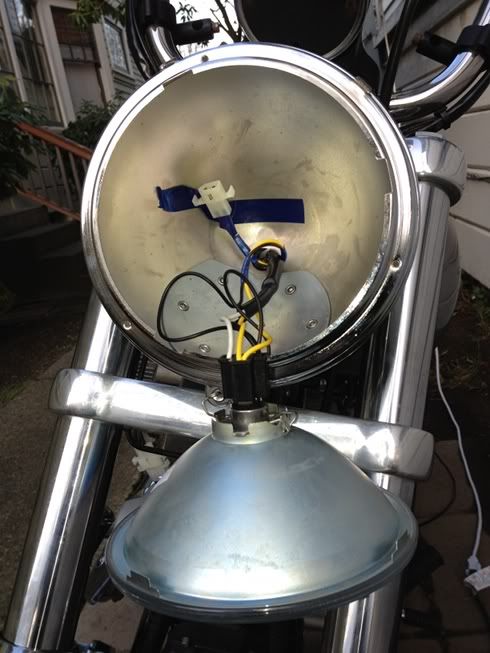
Wires inside of new bucket (spade Y=aux hot, bound Y=low beam, W=high beam, thick B=main ground, thin B=aux ground):

NOW IS THE TIME TO UNHOOK YOUR BATTERY CONNECTION! Remove the negative first, then the positive.
Place a towel over your front fender, trust me. As I was literally saying to myself, "As soon as I finish taking this screw out, I need to put a towel over my fender to keep it safe." I dropped my screwdriver on it and put a tiny little ding on it Nothing too bad, but you know how it is. Screw you Murphy, and the law you rode in on!
Open stock bucket and remove socket from light, set light/housing aside.
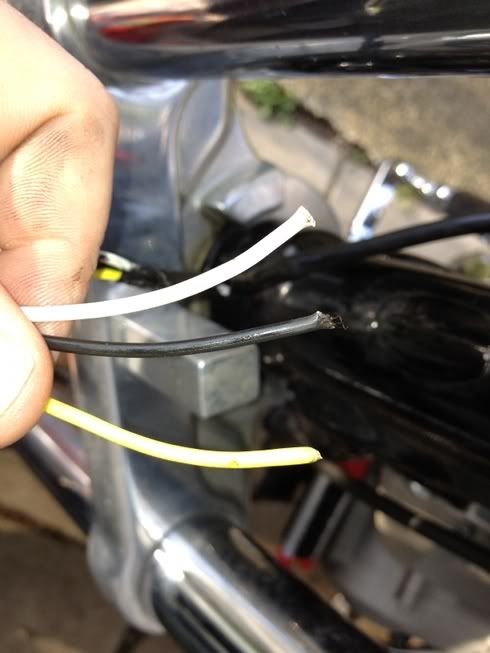
Stock harness inside stock bucket (Y=low beam, W=high beam, B=ground):

Cut the wires off stock harness and remove stock bucket (and sell it to someone on the forum!):
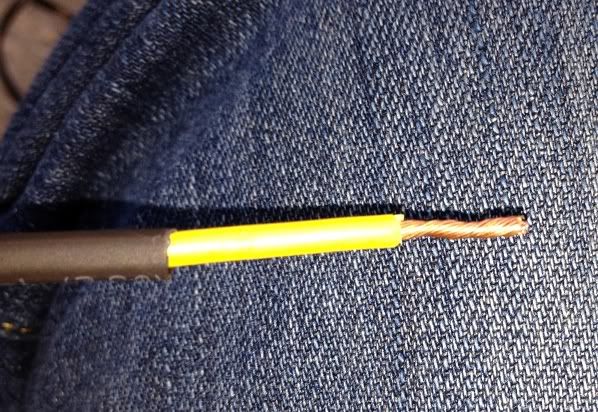
On new bucket, cut spade clip off aux/low, pull into bucket and cut to about 6", place heat shrink on (don't shrink yet), tin wire (solder) place female Molex clip on wire, solder and shrink heat shrink around wire, shielding, and about 1/16" of Molex clip:
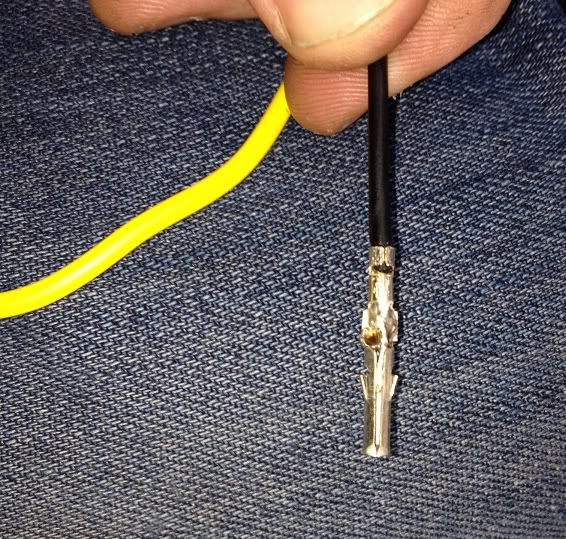
On new bucket, pull aux ground wire into bucket, cut to about same length of aux/low wire, add heat shrink, tin wire (solder), and repeat the last step of adding the female Molex clip.
Snap Molex clips into female Molex housing:
This two point connector is what will be used to add aux lighting in the future. Just connect the male end of the Molex connector to whatever lighting you want to add and snap them together. For now, I am securing the female Molex safely tucked into the back of the bucket to keep it out if the way for the rest of the job:

This is where I removed the plastic wiring cover under the neck/back bone to get to all the wires. I got frustrated because I couldn't find the headlight wiring harness and so, naturally, I forgot to take a picture of where the cover is located. Just look under the neck/backbone and trust me, you'll find it.
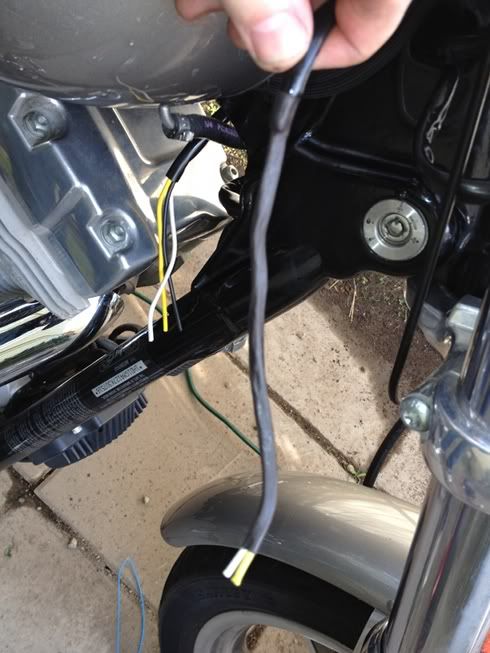
Next, I put the new bucket on the stock mounting block and shoved the Y/W/B wires down through the cluster of wires and and whatnot in the neck (a little lube, AKA baby powder, helps A LOT):
Now, shrink wrap the stock wires together and force them down through the neck too... don't worry... you can do it... they will fit... I promise:
All wires pulled through! See, I told you they could all squeeze through there:
Now that you have the wires together, cut back the shrink wrap that you just put on the stock wires about 2-3", strip all of the wires about a 1/2" or so, twist together, and add copious amounts of electrical tape to insulate (I do this to test it out before soldering anything and closing it all up to verify it will all work as planned):
Attach new light to socket in new bucket and make sure none of the wires are touching each other in bucket or anywhere else on (or to) the bike, if all is well, reconnect battery terminals and... cross your fingers!
Turn the key to get electricity flowing and verify lights work (high and low) and that you haven't blown any fuses. (I was fortunate enough to be in the clear).
If nothing has gone wrong yet, good job!
REMOVE TERMINALS FROM BATTERY AGAIN!!!
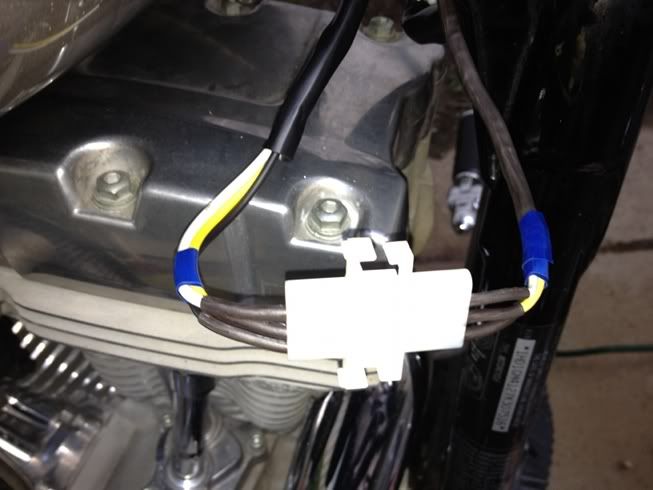
Now remove tape from the splices of the wires that you pulled through the neck and connect Molex clips and assemble the connectors (I chose to match the factory diagram and go with W>2, Y>3, B>4 and go from stock wires male to wires to new bucket female. So long as you match up the correct lines, you can do it however you want) and connect the two side of the Molex connectors:
Now, reconnect the battery's terminals, yes again, and test it all out again, yes again. If everything comes on and your bike doesn't blow up, good job!
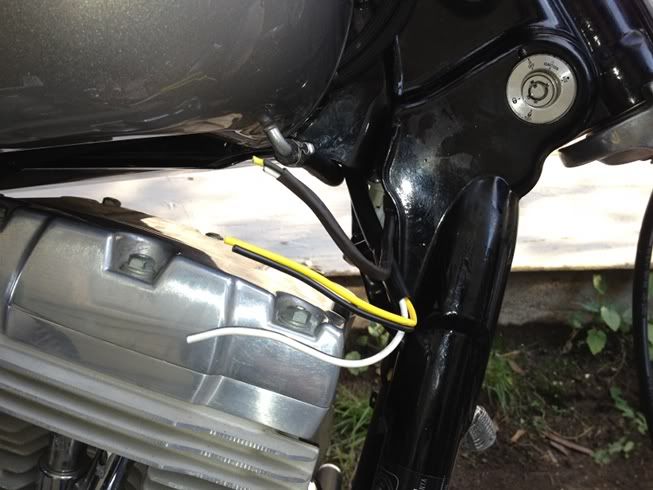
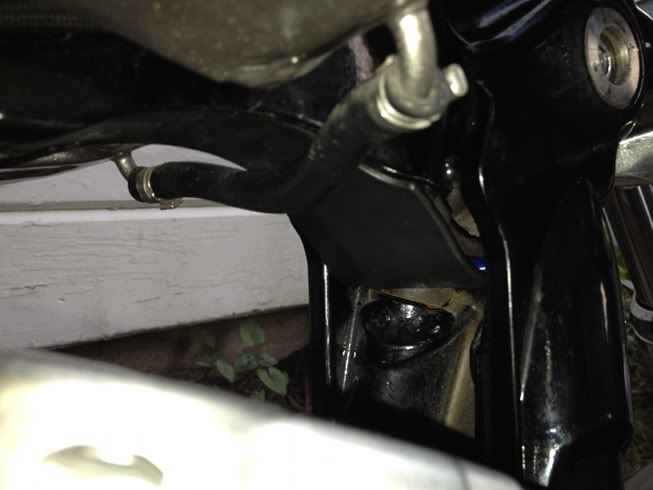
Now you can shove all the wires back into the neck/backbone and put the cover back on... this time I took a picture:
I suggest checking the functionality one last time before you sew it all up and call it done. Check everything - start the bike, check the blinkers, four-ways, horn, high/low beams, and make sure you didn't screw anything up shoving everything back into the neck.
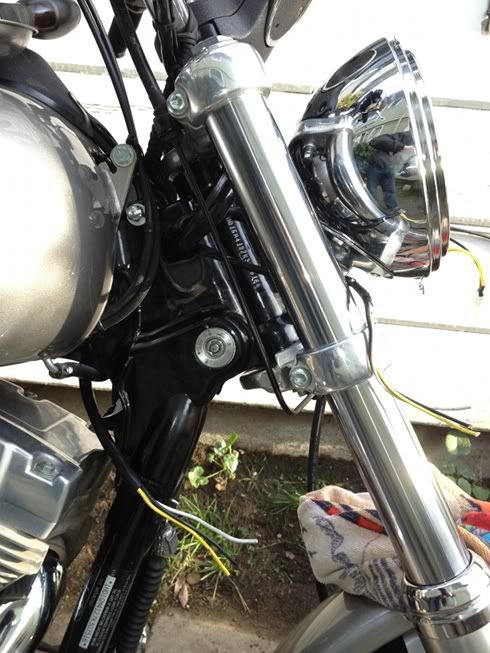
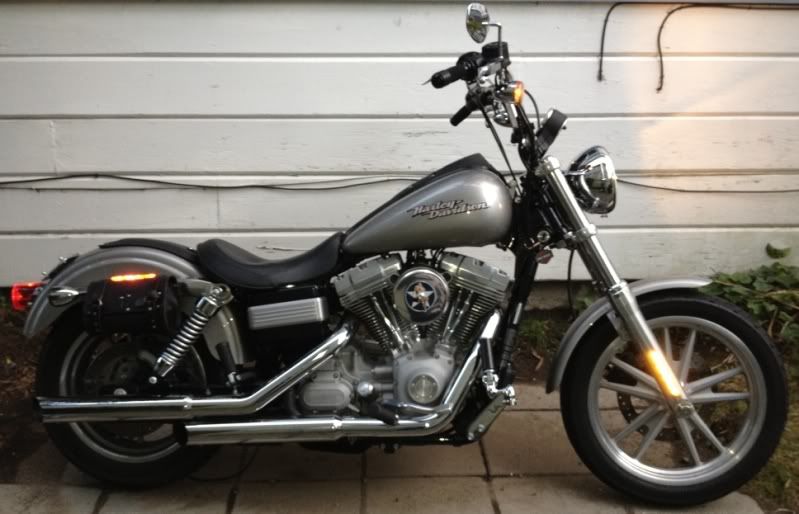
If all is well, you're ready to adjust your headlight vertically and horizontally. It should look something like this:
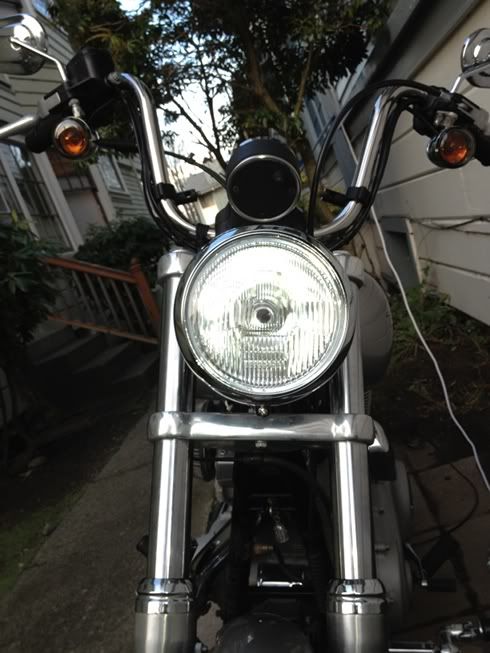
And/or this:
I hope this has been helpful. I wish I could've found something like this before I spent all day figuring out how I wanted to go about this.
Parts costs were:
New light/bucket = $60 (eBay)
Heat shrink, Molex connectors = about $20 (Radio Shack)
Unfortunately, I don't drink, so I didn't drink any beer. So by this forum's logic and reasoning, I have no idea how long this actually takes. I guess zero beers means it literally took NO TIME! That's gotta be a world record or something!
Ride safe,
Jimmy
Here goes...
First off, I bought a DBI 7" H4 headlight bucket from eBay, it had 5 wire connection (Y/Y/W/B/B) to accommodate high/low beam as well as passing lamps, like the stock light on a Softail Deluxe. I wanted to swap out the stock bucket on my FXD and keep the ability to add the passing lamps if I decide to do so in the future. To do this, I decided the best way was to keep the wires and make my life easier down the road if I do want to add lights, was to get some Molex connectors. I put a two point Molex in on the auxiliary light wires and added a four point (wired like the stock one) in on the main lines to the bucket. This way, I can also swap out to a different bucket and all I'll need to do is wire a Molex onto any bucket I want to use and plug it in!
Now for the pics...
Here's the Molex connectors that I got from Radio Shack:
Here are the wiring diagrams for the stock harness from the manual:
Wires outside new bucket (spade Y=aux/low, bound Y=low beam, W=high beam, thick B=main ground, thin B=aux ground):
Wires inside of new bucket (spade Y=aux hot, bound Y=low beam, W=high beam, thick B=main ground, thin B=aux ground):
NOW IS THE TIME TO UNHOOK YOUR BATTERY CONNECTION! Remove the negative first, then the positive.
Place a towel over your front fender, trust me. As I was literally saying to myself, "As soon as I finish taking this screw out, I need to put a towel over my fender to keep it safe." I dropped my screwdriver on it and put a tiny little ding on it Nothing too bad, but you know how it is. Screw you Murphy, and the law you rode in on!
Open stock bucket and remove socket from light, set light/housing aside.
Stock harness inside stock bucket (Y=low beam, W=high beam, B=ground):
Cut the wires off stock harness and remove stock bucket (and sell it to someone on the forum!):
On new bucket, cut spade clip off aux/low, pull into bucket and cut to about 6", place heat shrink on (don't shrink yet), tin wire (solder) place female Molex clip on wire, solder and shrink heat shrink around wire, shielding, and about 1/16" of Molex clip:
On new bucket, pull aux ground wire into bucket, cut to about same length of aux/low wire, add heat shrink, tin wire (solder), and repeat the last step of adding the female Molex clip.
Snap Molex clips into female Molex housing:
This two point connector is what will be used to add aux lighting in the future. Just connect the male end of the Molex connector to whatever lighting you want to add and snap them together. For now, I am securing the female Molex safely tucked into the back of the bucket to keep it out if the way for the rest of the job:
This is where I removed the plastic wiring cover under the neck/back bone to get to all the wires. I got frustrated because I couldn't find the headlight wiring harness and so, naturally, I forgot to take a picture of where the cover is located. Just look under the neck/backbone and trust me, you'll find it.
Next, I put the new bucket on the stock mounting block and shoved the Y/W/B wires down through the cluster of wires and and whatnot in the neck (a little lube, AKA baby powder, helps A LOT):
Now, shrink wrap the stock wires together and force them down through the neck too... don't worry... you can do it... they will fit... I promise:
All wires pulled through! See, I told you they could all squeeze through there:
Now that you have the wires together, cut back the shrink wrap that you just put on the stock wires about 2-3", strip all of the wires about a 1/2" or so, twist together, and add copious amounts of electrical tape to insulate (I do this to test it out before soldering anything and closing it all up to verify it will all work as planned):
Attach new light to socket in new bucket and make sure none of the wires are touching each other in bucket or anywhere else on (or to) the bike, if all is well, reconnect battery terminals and... cross your fingers!
Turn the key to get electricity flowing and verify lights work (high and low) and that you haven't blown any fuses. (I was fortunate enough to be in the clear).
If nothing has gone wrong yet, good job!
REMOVE TERMINALS FROM BATTERY AGAIN!!!
Now remove tape from the splices of the wires that you pulled through the neck and connect Molex clips and assemble the connectors (I chose to match the factory diagram and go with W>2, Y>3, B>4 and go from stock wires male to wires to new bucket female. So long as you match up the correct lines, you can do it however you want) and connect the two side of the Molex connectors:
Now, reconnect the battery's terminals, yes again, and test it all out again, yes again. If everything comes on and your bike doesn't blow up, good job!
Now you can shove all the wires back into the neck/backbone and put the cover back on... this time I took a picture:
I suggest checking the functionality one last time before you sew it all up and call it done. Check everything - start the bike, check the blinkers, four-ways, horn, high/low beams, and make sure you didn't screw anything up shoving everything back into the neck.
If all is well, you're ready to adjust your headlight vertically and horizontally. It should look something like this:
And/or this:
I hope this has been helpful. I wish I could've found something like this before I spent all day figuring out how I wanted to go about this.
Parts costs were:
New light/bucket = $60 (eBay)
Heat shrink, Molex connectors = about $20 (Radio Shack)
Unfortunately, I don't drink, so I didn't drink any beer. So by this forum's logic and reasoning, I have no idea how long this actually takes. I guess zero beers means it literally took NO TIME! That's gotta be a world record or something!
Ride safe,
Jimmy
Last edited by XjldX; 09-14-2012 at 01:06 PM. Reason: Correction regarding battery terminal removal.
#2
01-01-2012, 10:20 PM

Club Member
The problem with undoing the positive terminal first is accidental arching when the wrench hit metal. I have seen numerous people ruin a good set of chrom heat shields when the wrench hits the pipe trying to loosen the positive terminal. ALWAYS take the negative terminal off a battery first. Also if it is an old battery venting gases the spark can make the battery explode.
#4
01-02-2012, 07:23 AM
Well done, but you did it the hard way....I applaud you for digging in and doing it yourself, I know electrical can psyche some people, but I hope you did not misinterpret what I said to cause you to do it that way.
If you were going to clip the leads, it would have been much easier to clip only the wires in the stock headlight, maintaining the stock harness connectors, and running those wires into the new headlight. This way you would have only 1 connection to make instead of 3 or 4 that you made.
Again, well done, and enjoy the new light.
#5
01-02-2012, 10:01 AM
Yeah, I know I went about a little more involved than I needed to, but I wanted to tackle the challenge. And I did, in fact, cut the wires inside the old bucket and wire them to the new bucket, I just did it with Molex connectors instead of butt splices in the neck and it still only took one connection. The only extra connection I made was the one for the aux lights. I did that one so my options are a little more open in the future.
Thanks again and I am already much happier with my new light. Looks and function, it's exactly what I wanted.
Thanks again and I am already much happier with my new light. Looks and function, it's exactly what I wanted.
#6
11-01-2016, 08:55 PM

This is great info.
My situation is a bit different and wondering if anyone can help. My 2000 NightTrainFXSTB has a headlamp
with 3 wires. High Beam, Low Beam and Ground. The new replacement headlamp came in and only has 2
wires, High and Low. So will I have to create my own ground to the inner dome chassis?
My situation is a bit different and wondering if anyone can help. My 2000 NightTrainFXSTB has a headlamp
with 3 wires. High Beam, Low Beam and Ground. The new replacement headlamp came in and only has 2
wires, High and Low. So will I have to create my own ground to the inner dome chassis?

Thread
Thread Starter
Forum
Replies
Last Post
DrPlastic
Sportster Models
7
12-27-2007 09:26 AM