Poor man and his S&S crank
#11
 01-09-2016, 10:34 PM

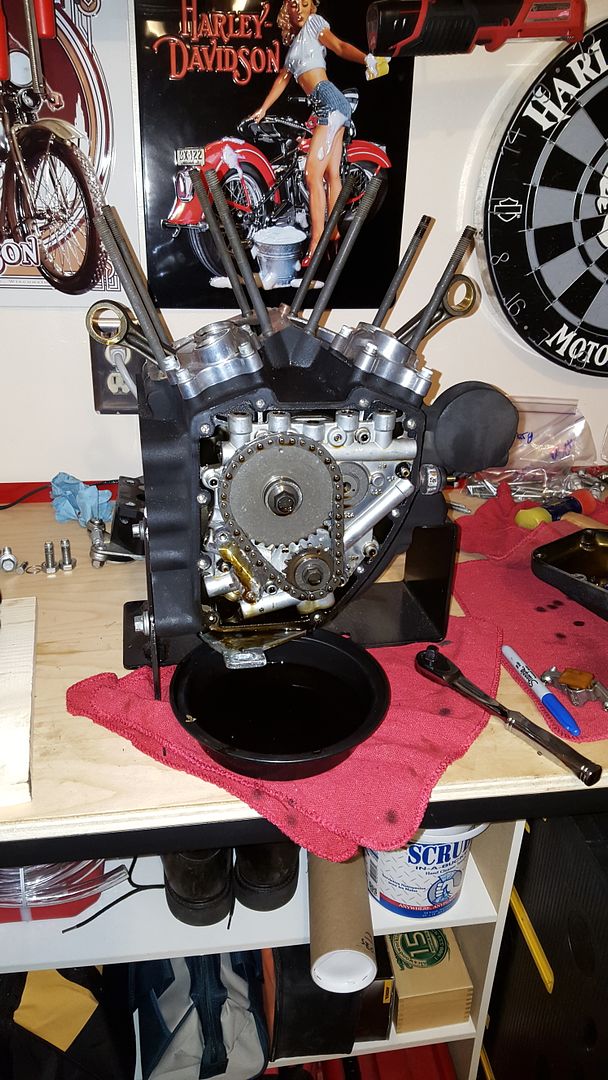
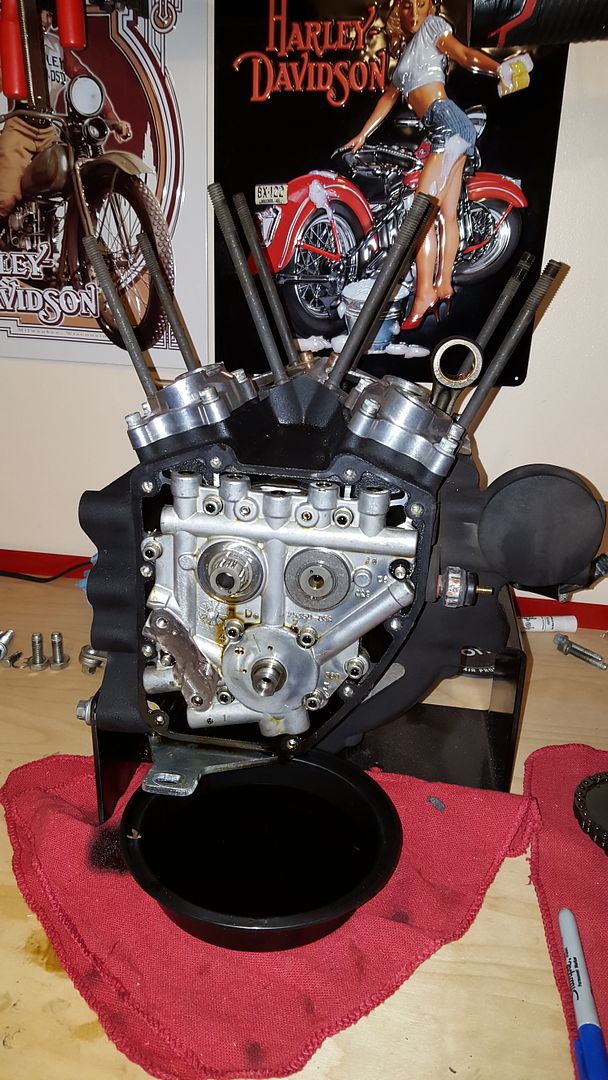
Cam cover off:
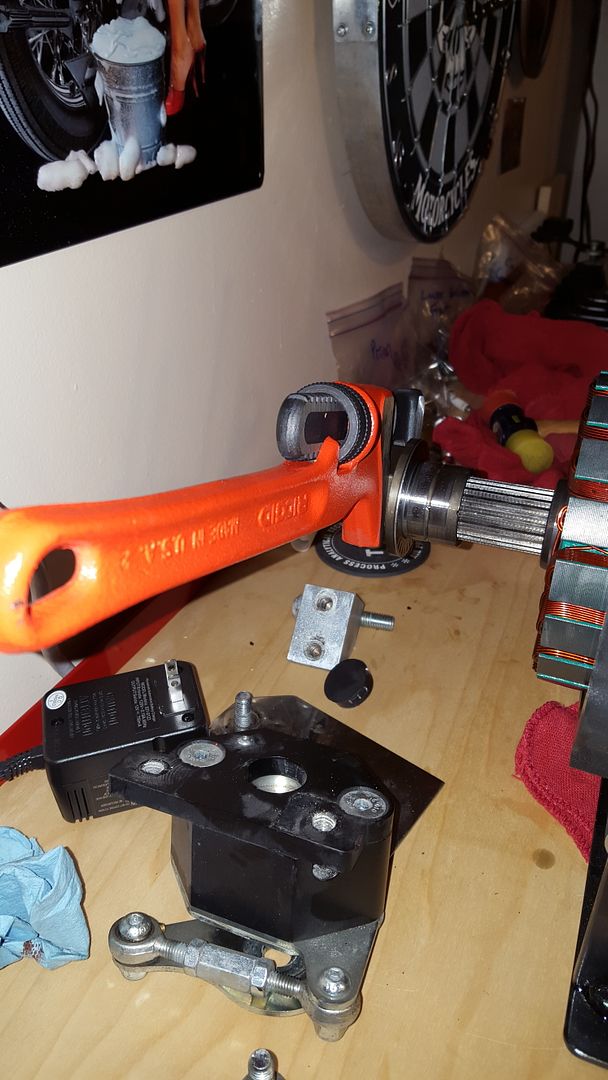
Didn't think to buy a cam gear locking tool ahead of time for removal of the rear cam and pinion crank bolts so came up with this. I took part of the 2014 Compensator which is splined and slit it over the sprocket shaft. It has a giant nut integral to it which I held with a Ridgid wrench I use for tightening axle nuts, it has flat jaws:
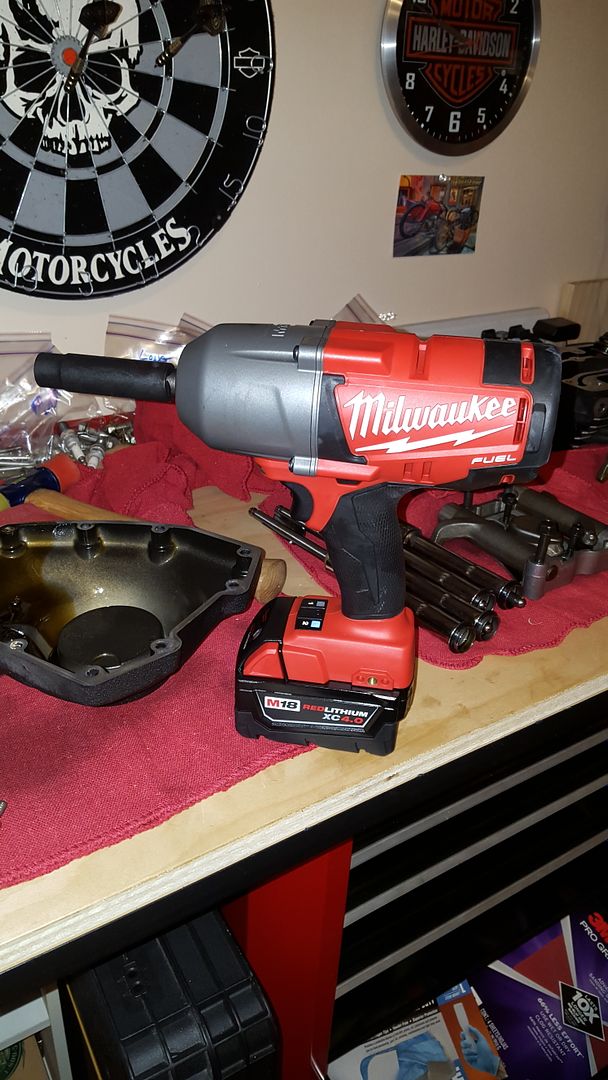
Brought Mr. Impact back out:
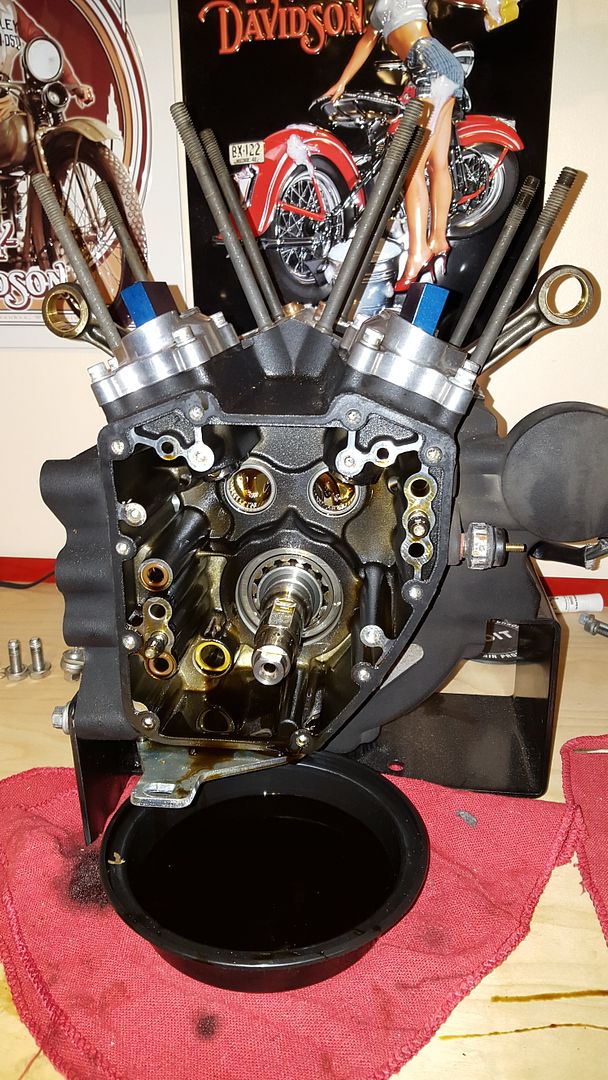
Gear bolts out:
Gears off:
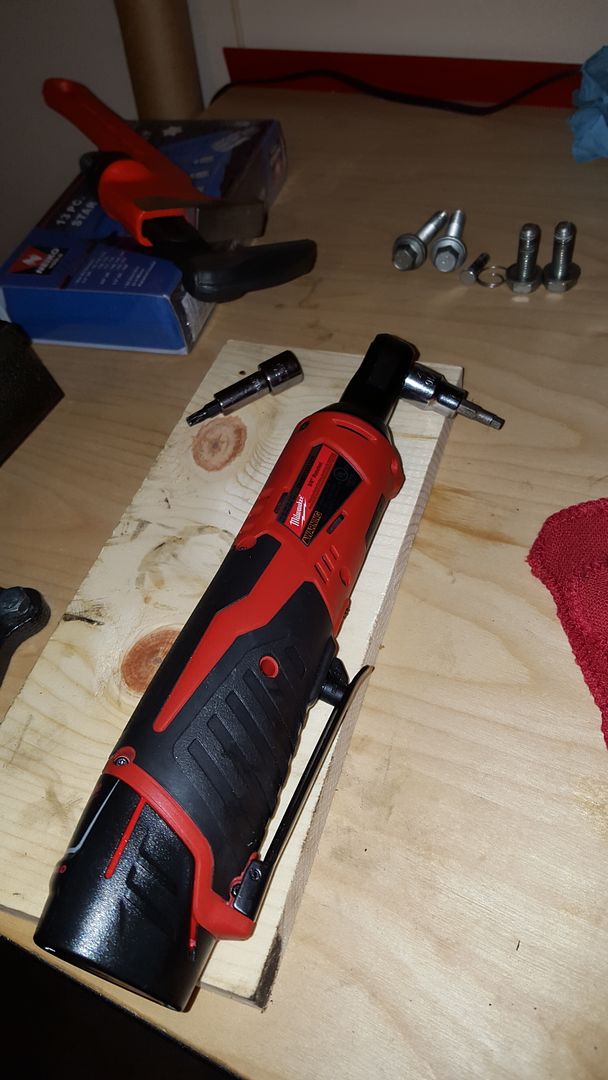
I love this tool. Electric ratchet. Makes disassembly go so much quicker. I don't really use for assembly as much maybe to get the bolt close then I go manual:
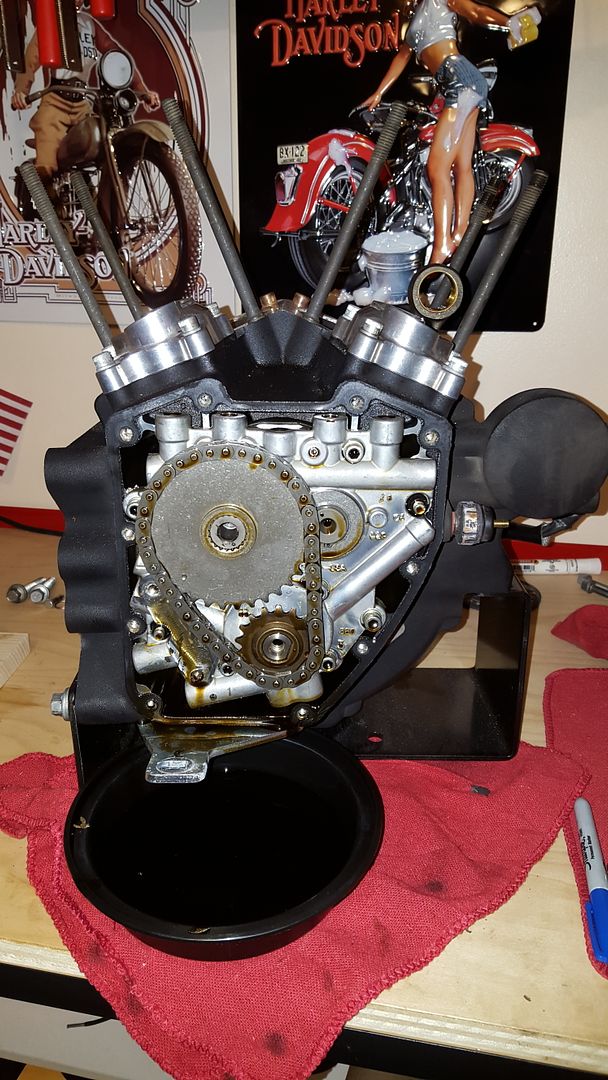
Cam support plate off:
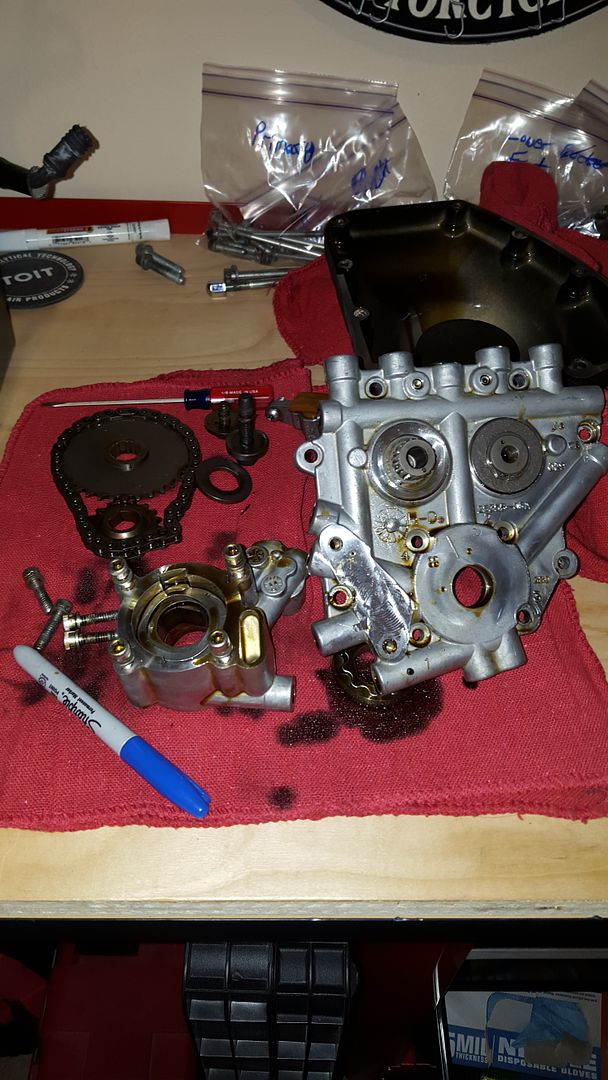
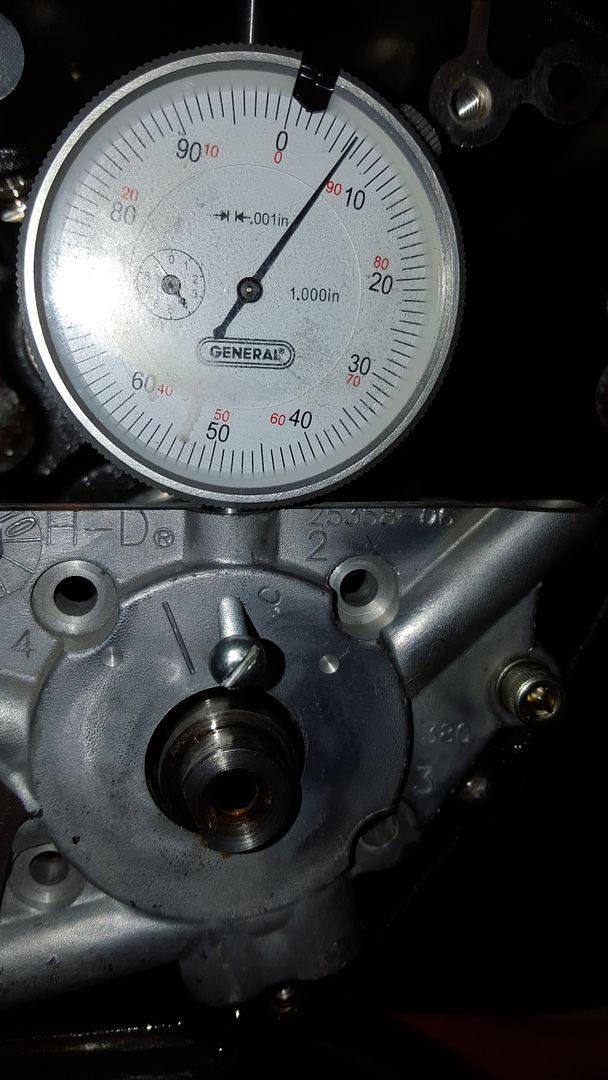
Here's my poor man's runout tool. It's an old cam plate cut in a mill by the local Indy with a bore drilled through the center perpendicular to the crankshaft:
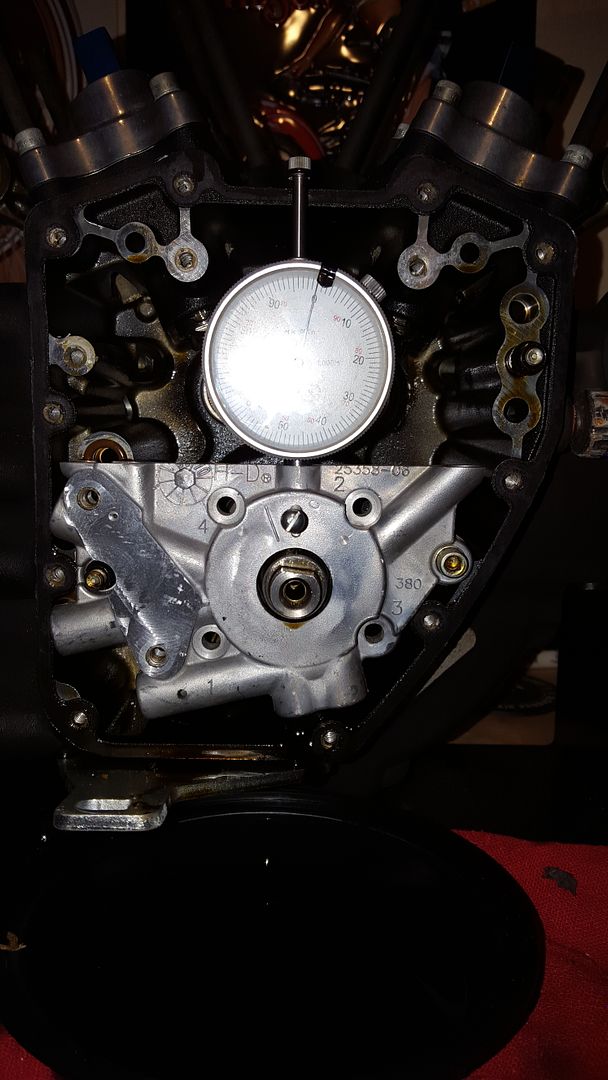
0.0065" runout. Not bad, but not great either. It passes Harley's 0.012 "acceptable" tolerance.

Didn't think to buy a cam gear locking tool ahead of time for removal of the rear cam and pinion crank bolts so came up with this. I took part of the 2014 Compensator which is splined and slit it over the sprocket shaft. It has a giant nut integral to it which I held with a Ridgid wrench I use for tightening axle nuts, it has flat jaws:

Brought Mr. Impact back out:

Gear bolts out:

Gears off:

I love this tool. Electric ratchet. Makes disassembly go so much quicker. I don't really use for assembly as much maybe to get the bolt close then I go manual:

Cam support plate off:


Here's my poor man's runout tool. It's an old cam plate cut in a mill by the local Indy with a bore drilled through the center perpendicular to the crankshaft:

0.0065" runout. Not bad, but not great either. It passes Harley's 0.012 "acceptable" tolerance.

#12
01-09-2016, 10:59 PM
Seasoned HDF Member

#14
01-09-2016, 11:20 PM
The tank lift definitely helped in gaining clearance. Was still a little tight but I've been into the rockers once before so I knew what I was getting into.
#15
01-09-2016, 11:20 PM
#16
01-09-2016, 11:59 PM
Ahhh, the Thread I have been waiting for!  was going to ask about what holds that gauge in place in the sawed off cam plate but then saw the screw. .065" is a touch worse than my .061"(before Darkhorse fixed it) but I bet that S&S is no worse than about .001".
I bet that blood was produced by the tb fasteners! They are a bitch to loosen and then the just let go fast!
Getting real excited abou you splitting the case, tell us all the tricks!
I bet that blood was produced by the tb fasteners! They are a bitch to loosen and then the just let go fast!
Getting real excited abou you splitting the case, tell us all the tricks!
Last edited by HD Pilot; 01-10-2016 at 12:11 AM.


#19
01-10-2016, 01:40 AM
Road Warrior
Very nice Matt I'll be following along! Man that s&s assembly is a nice unit huh?! Until now I was under the impression that all the s&s flywheels required a Timken. I just went in their site and saw the 4-3/8" assembly is available with a race to use the roller style bearings. Just out of pure curiosity what's the reason to stick with the lefty bearing instead of going Timken? Are you planning on splitting the cases and doing all the work yourself?
I like what your doing here, get the bottom end built and solid and you can upgrade everything up top like heads, even bigger jugs and make as much power as you want later and not have to worry about the crank ever again. Keep the pics coming I've been waiting for a winter build!
I like what your doing here, get the bottom end built and solid and you can upgrade everything up top like heads, even bigger jugs and make as much power as you want later and not have to worry about the crank ever again. Keep the pics coming I've been waiting for a winter build!
Last edited by monster715; 01-10-2016 at 01:45 AM.
#20
01-10-2016, 07:49 AM
Great thread so far! Your build reminds me of some of my 1/4 mile Chevy motors I built in the 90s.... Build that lower end bullet proof, and the rest will fall in line.
Never been in an HD motor, so this is a good start to my education. Thanks for taking the time to detail, and photograph all your steps.
Never been in an HD motor, so this is a good start to my education. Thanks for taking the time to detail, and photograph all your steps.

