Electrical Questions 1972 XLH
#1
 06-13-2007, 06:33 PM

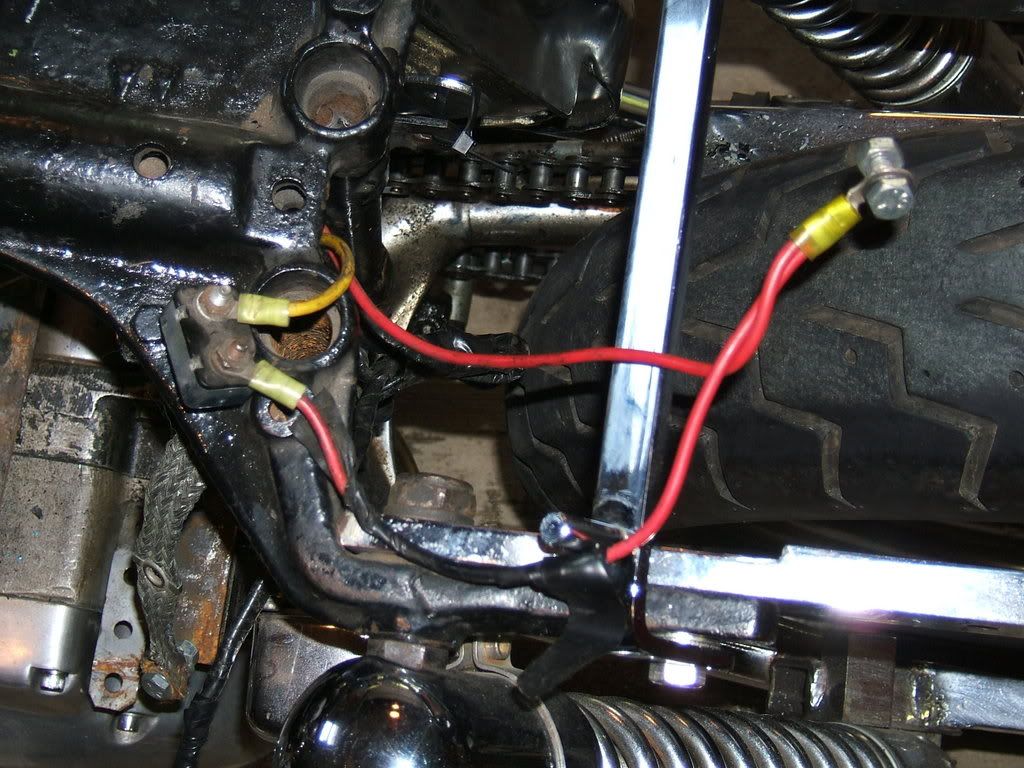
I'm just about ready to put my bike back together, and unfortunately, I forgot to mark some of the wires. Below is a picture of the wires in question looking down from the primary side of the bike.
I am certain that this piece below was mounted onto the front of the fender. I misplaced the bracket that was holding it, but am wondering if it would be okay if I just velcroed it in place or attached it some other way? I'm pretty sure this has something to do with the brakelight, but am not positive.
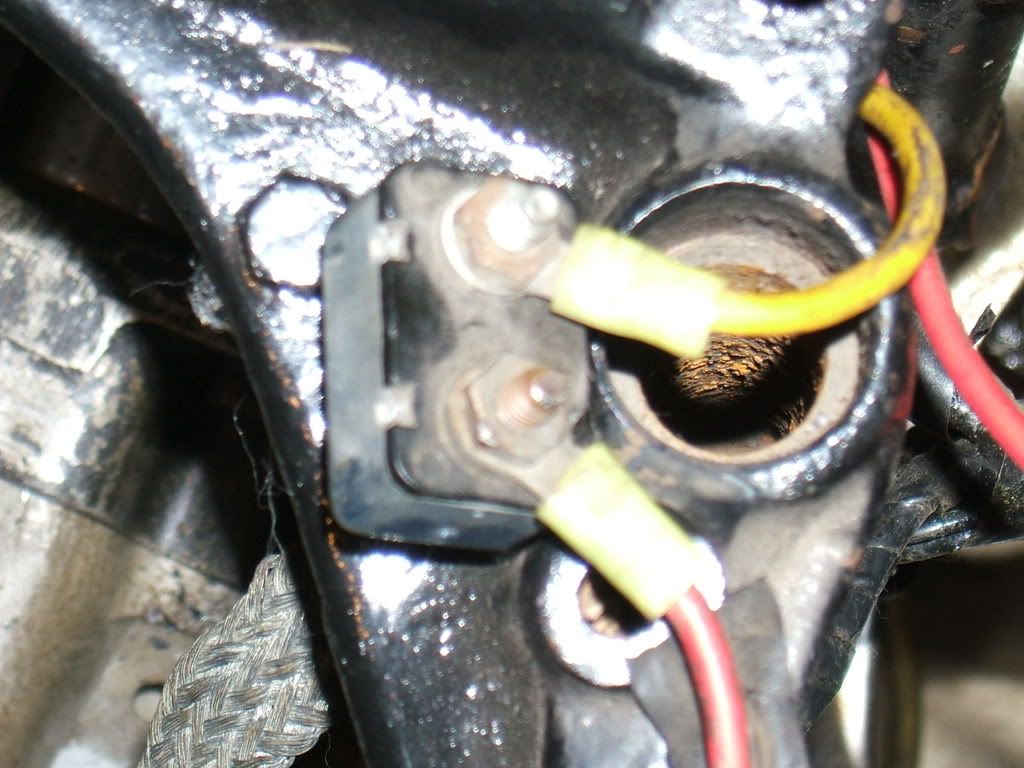
Below is the other end of the above picture. I cannot remember where this bolted onto. There is a hole in the front of the fender where this would fit, but I'm just not sure. Any help anyone can give would be much appreciated.
I am certain that this piece below was mounted onto the front of the fender. I misplaced the bracket that was holding it, but am wondering if it would be okay if I just velcroed it in place or attached it some other way? I'm pretty sure this has something to do with the brakelight, but am not positive.
Below is the other end of the above picture. I cannot remember where this bolted onto. There is a hole in the front of the fender where this would fit, but I'm just not sure. Any help anyone can give would be much appreciated.
#2
06-13-2007, 07:48 PM
Outstanding HDF Member
bdavis.....
Looking at the first photo the item with the red and the yellow wire looks to me like it the overload breaker. I am only going by what the picture looks like.
If I am correct, the double red wires will attach to the plus terminal of your battery. However, the original has only one red wire going from the battery plus post to the overload breaker, so you need to see where the other red wire (that disappears into the frame tube) terminates. The yellow wire that disappears into the frame top tube will go to your ignition switch. This is the case for a 1970 and 1971 XLCH. Again, what year and model machine do you have?
Also, if this item is the overload breaker it should be mounted under the battery tray. The yellow wire seems too short to allow that, so this may not be the overload breaker.
Find out where that yellow wire and that other red wire ends. Do you already have the positive battery wires (not showing up in the photo)? Get back with that info and we can see if we can track down the identity of the item better.........pg
ps: Yes, as Cal said, you have most likely stripped out the aluminum case. You will need to have a Helicoil installed before you try to ride the bike, or even start it for that matter.
edit note is in order here:
I just checked my diagrams and other posts and it seems that you have a 1972 with an electric starter, which would make the machine an XLH.
If that is the case, then the double red wire will attach to your starter solenoid, which is the same post that your positive battery cable is connected to. The connection is physically different, but the result is the same as stated above. You still need to track the red and yellow wires to be certain where they terminate before declaring the item as the overload breaker.

#4
06-15-2007, 05:09 PM
Okay, I took the best look that I could and came up with the following:
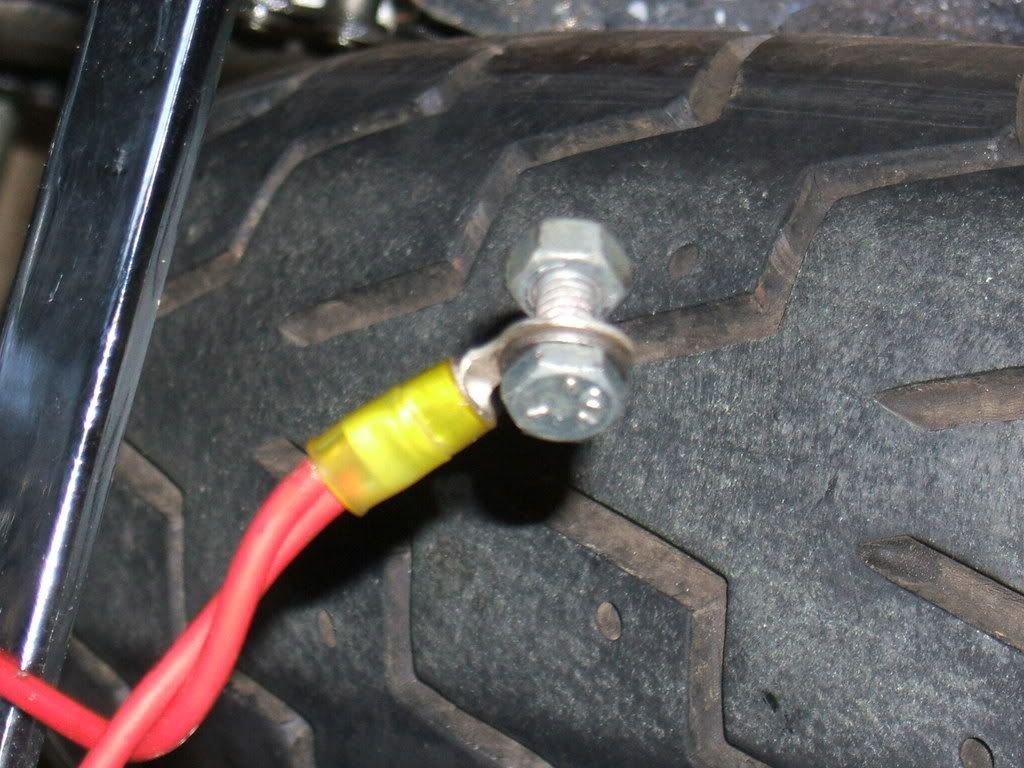
*The red wire with the bolt simply connects to the red wire on the small metal unit and then goes to the "B" terminal of the generator.
*The yellow wire is only about 10" long and then is spliced several ways. One splice looks like it goes to the ignition and then on to the headlight. Another splice goes to the brake light. The third splice is very hard to see. It goes in the general direction of the starter but looks like it might be hooked into a part that is directly behind the starter (I'm not sure what it is).
The only things that I unhooked when I took the bike apart were the unit the yellow and red wires are attached to, the red wire with the bolt, and the battery cables. What I need to know is the following if anyone can help:
1) Does the metal unit with the red and yellow wires need to be attached to something that is metal? When I took it off it was sitting on a metal bracket attached to the front of the back fender.
2) What should I bolt the other red wire onto?
3) For battery cables I have one flat, braided one that is bolted to the frame. I'm assuming that is the negative. I have another black coated cable that is bolted to the small unit behind the starter (it is directly under the battery).
You'll have to forgive my ignorance. I have the service manual and I cannot find a drawing of what I am trying to explain.
Thanks,
Barry
#5
06-15-2007, 06:05 PM
Outstanding HDF Member
Big question here:
You say the red wire connects to the 'B' terminal of the generator? Or did you mean to say the voltage regulator?
I have attached a wiring diagram for your machine out of my factory manual, along with a color code and list of all of the numbered items on your bike.
The item with the red and yellow wire is #10.....the overload breaker. I have called out and clouded this item with orange tint on the wiring diagram.
I strongly urge you to use this diagram to carefully check the connection of each and every wire, before you hook up the battery. Take nothing for granted, especially if you see a bunch of wires spliced together, and it sounds like you do.
If you don't want to spend the time doing the check, then be sure to have a fire extinguisher nearby......................pg
[IMG]local://upfiles/8331/373959C243A846248E7F3B8D071F0997.jpg[/IMG]
[IMG]local://upfiles/8331/75D0C556E9DF44BF854B29C32662FD69.jpg[/IMG]
#6
06-15-2007, 06:43 PM
#7
06-15-2007, 07:53 PM
Outstanding HDF Member
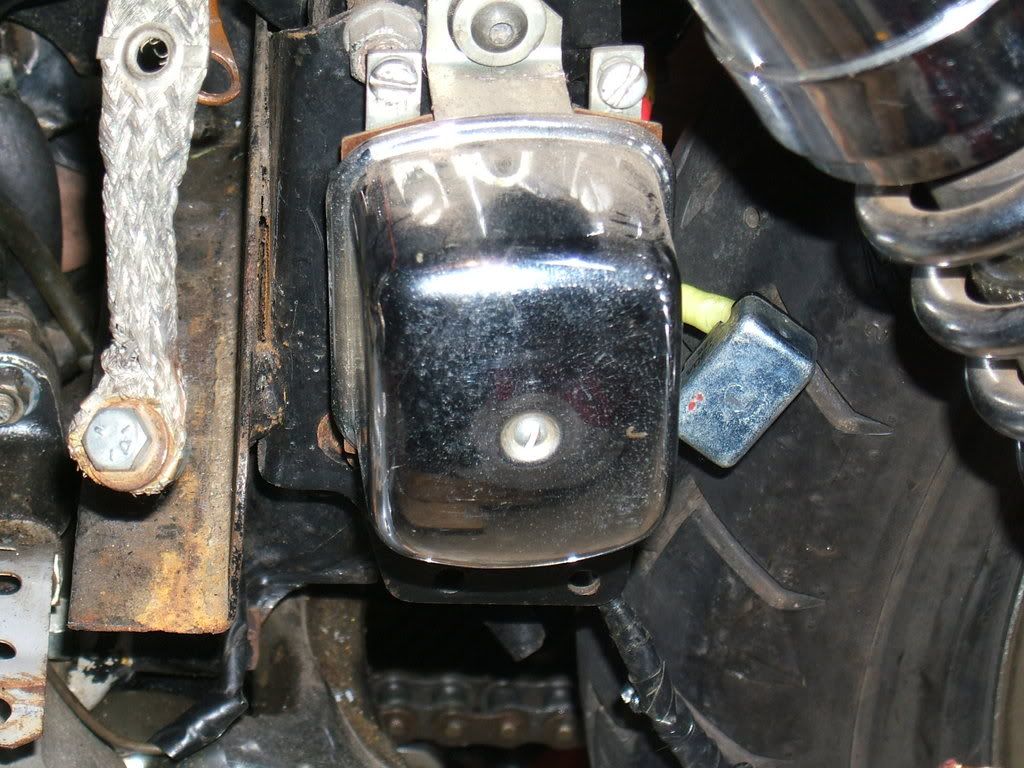
OK, the old picture worth a thousand words thing.......
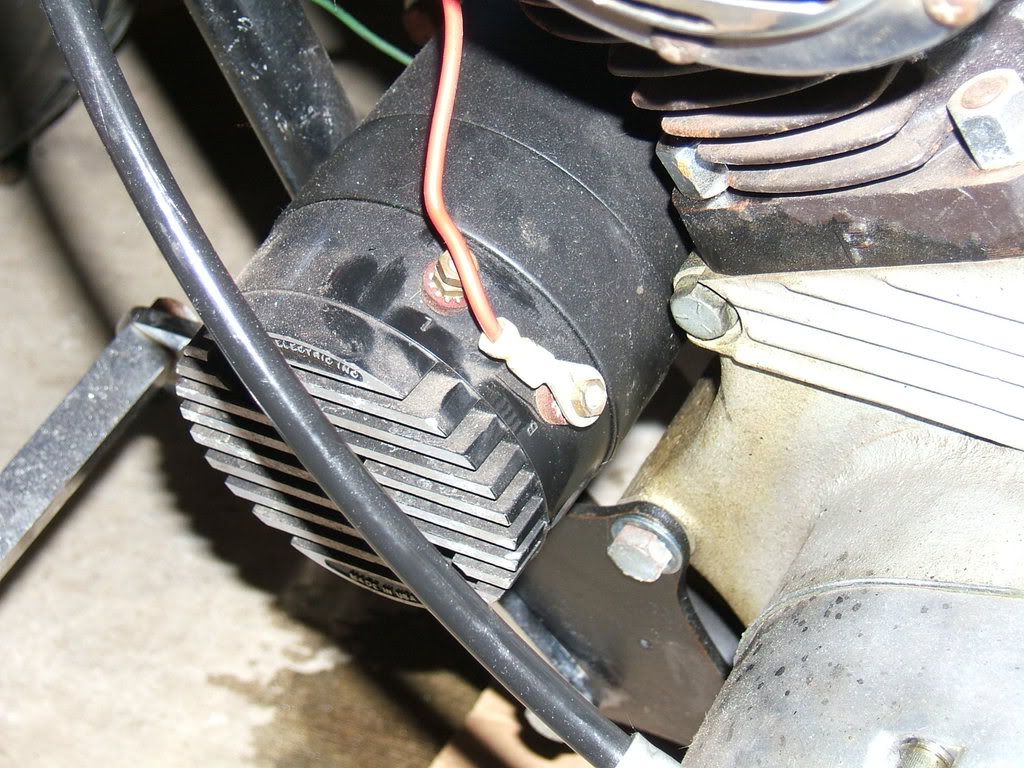
Yes, that is the generator indeed in the first photo.
And yes, that is the voltage regulator in the second photo.
The generator is not a standard issue from the factory. Or, I should say at least the end of it is not factory. This appears to me to be an aftermarket bolt on. I think it is a solid state regulator, that replaces the voltage regulator.
What is the name on the end of it? Contact them for wiring instructions.
Another member(s) can help you with this. Do another post and request Calbutcher or Sepixl for their assistance........pg
Trending Topics
#8
06-16-2007, 09:09 AM
PG,
Thank you for all your help. I especially appreciate your willingness to scan and upload documents from your manual.
I have finally figured out that the bolt on the red wire posts to the positive terminal of the battery along with the battery cable.
The only question I have left concerns the the overload breaker. Does that have to be mounted anywhere in particular? It was mounted to the rear fender with a metal bracket previously. Somehow I've misplaced the bracket, but could put something together for it if necessary.
Thanks Again,
Barry
#9
06-16-2007, 10:37 AM
Outstanding HDF Member
Barry.....
The O/L breaker can be mounted anywhere and at any position.....with these suggestions:
I would keep the terminal side facing down.
I would mount it somewhere out of the weather (that rear fender location is just that).
The reason is because the terminals are hot, so you do not want a short to happen. After you get it mounted and have the bike running you may want to go back and paint both terminals with some liquid electrical insulation, which you can buy in a can at Lowe's. Keep us posted on the progress...........pg
#10
06-18-2007, 03:27 AM
Your generator looks alike it has build in solid state regulator and IF I remember right you only need to run that orange wire from generator to battery ( fuse would be good)
Here is picture of 73-75 frame fuses are originally connected like here.
Atleast in my old -74 XLH regulator and starter relay was attached under battery, that cromed mechanical regulator isn't connected to harness...
Here is picture of 73-75 frame fuses are originally connected like here.
Atleast in my old -74 XLH regulator and starter relay was attached under battery, that cromed mechanical regulator isn't connected to harness...

Thread
Thread Starter
Forum
Replies
Last Post