
Installing 2" Pullback Bars FLHTK (Pics included)
#1
 02-15-2014, 05:00 PM


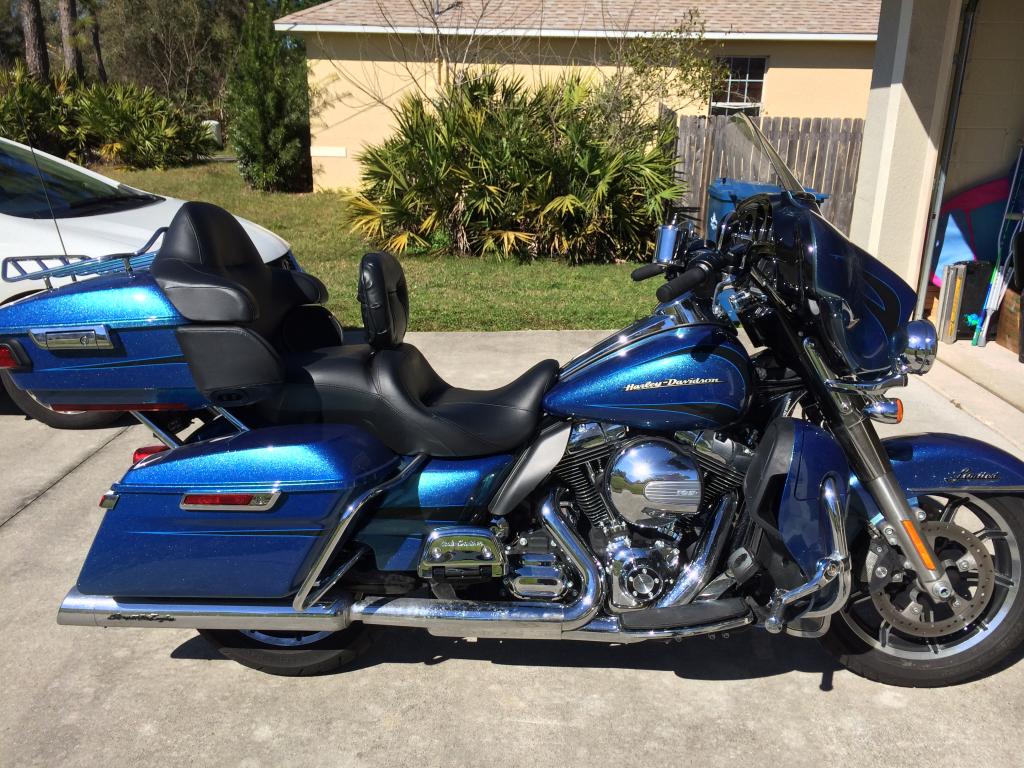
Went out and got my 2" Pullback bars from Harley this morning.
This will be my 4th Ultra to get them. I'm 5'8" and I've always had to ride slightly leaned forward with both hands on the bars, and have to lean a lot more when doing full lock turns.
Bars used are Part # 56176-08
I did not get ANY extra stuff regardless of what the parts guys will tell you.
For Poops and Grins, I got an estimate for the job from a dealership for $1500 parts and labor.
Doing this myself cost me $150 for the bars after discount, and 2 hours of my time. I started at 2:30 and finished at 4:30 using hand tools and no assistance.
I've always been able to do the job on previous ones without the "extra" stuff (I usually re-routed the clutch cable out of the inner fairing hole and routed down along the bars giving me a nice hole to mount a 12v socket on the previous years)
Anyways.....Here we GO!
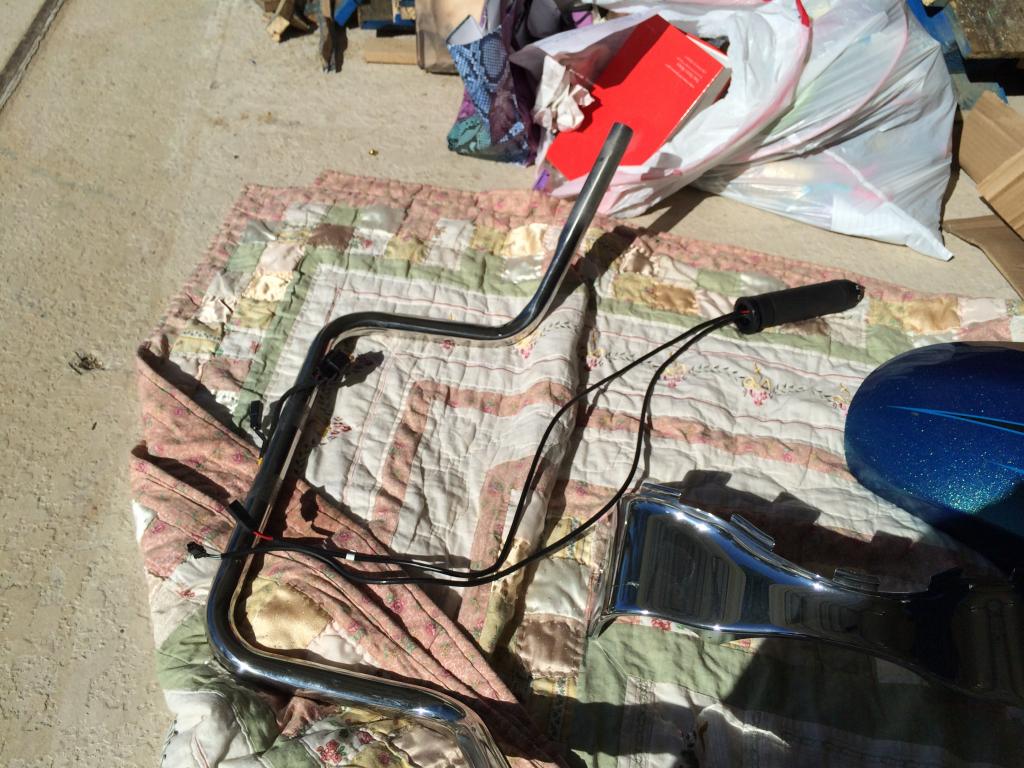
First Picture: Stock Bars:
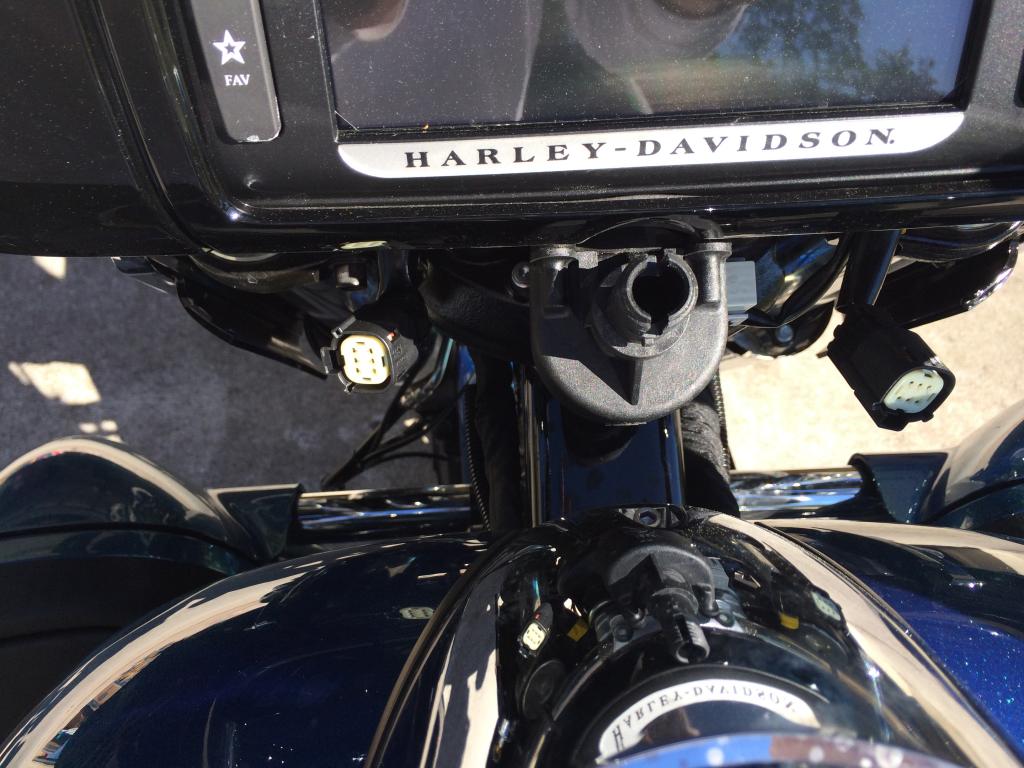
Step one, Remove front outer fairing cap. FYI, easier on the '14's then previous year.
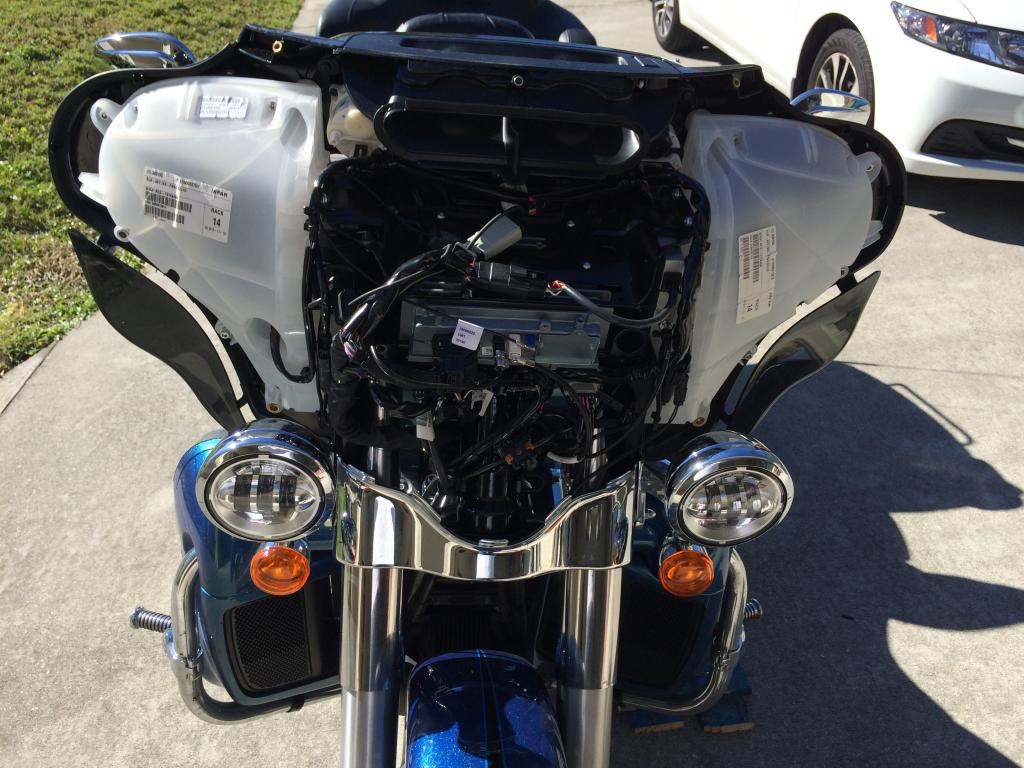
Step two, remove ignition and lock nut and guide ring
Step 3, remove 1 screw from each side of switch panel
Step 4, Unplug switch banks.
Back side of switch bank
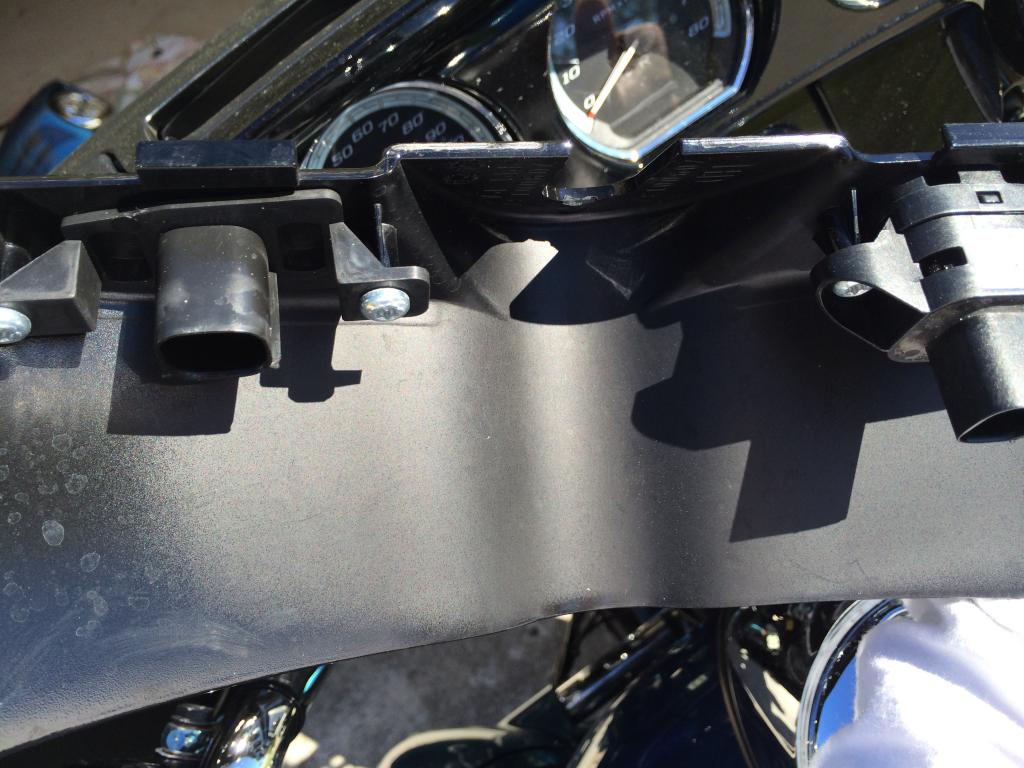
Step 5, Remove Spots/front turn signals retaining Acorn nuts (see image 4) Remove Spots/signals (there are connectors there)
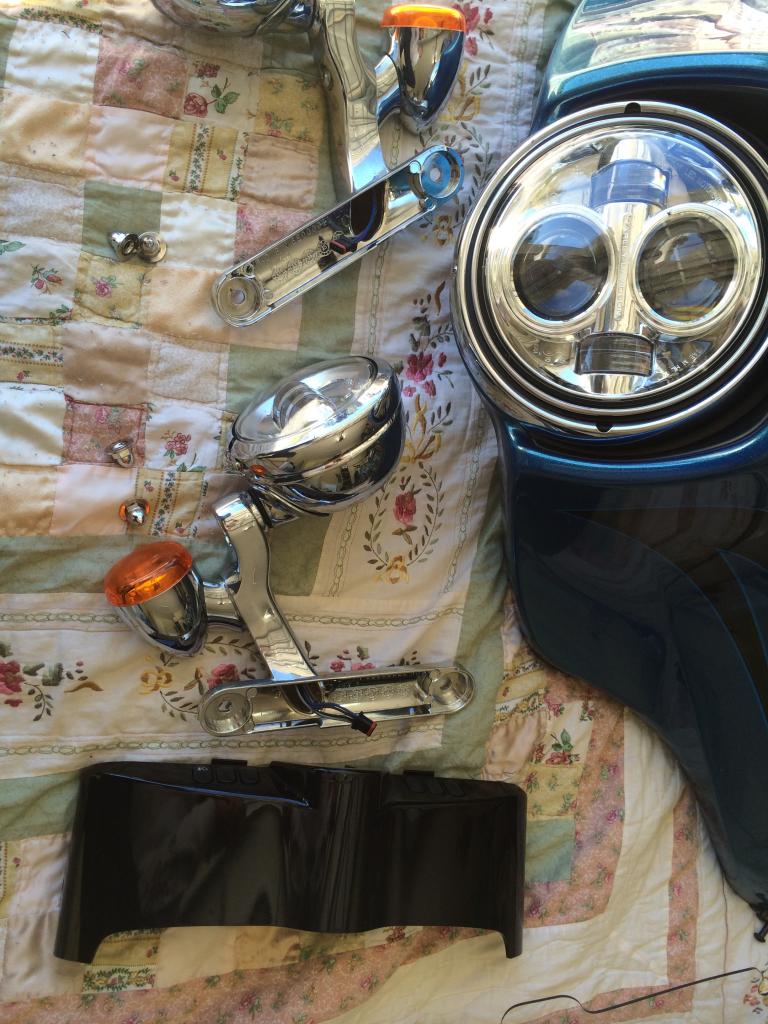
Next Remove switch gear housings and levers. (Note: there is a little retaining tab you will need to use a small flat blade or pick tool to release. I've included photos)

---------------------------------
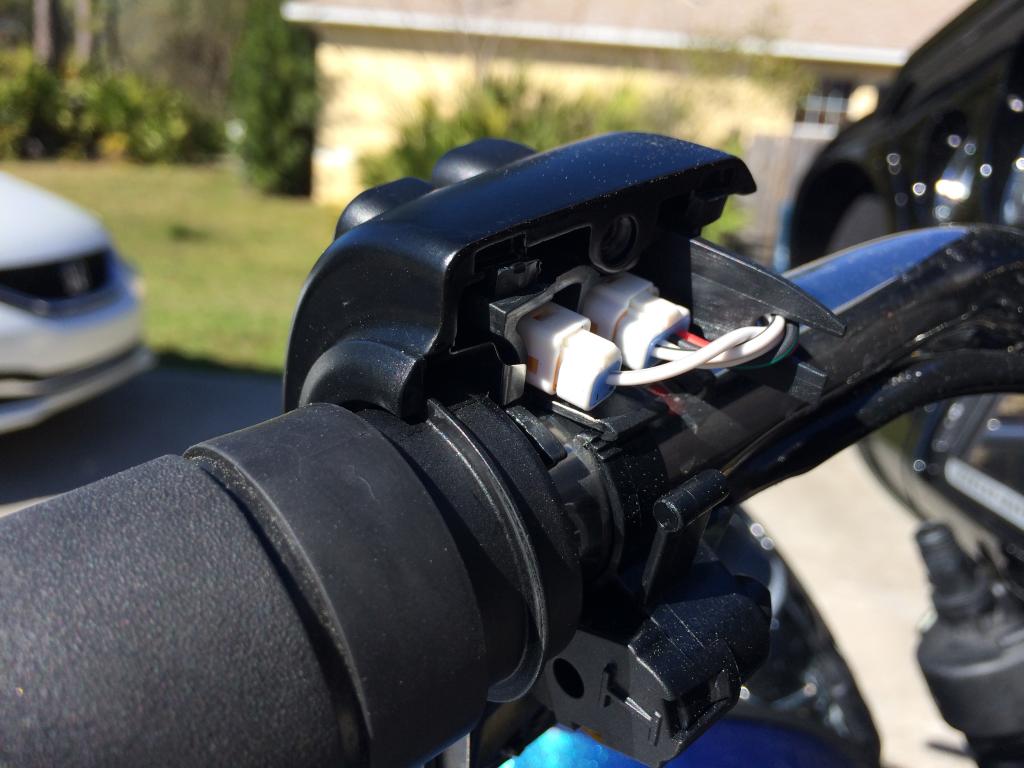
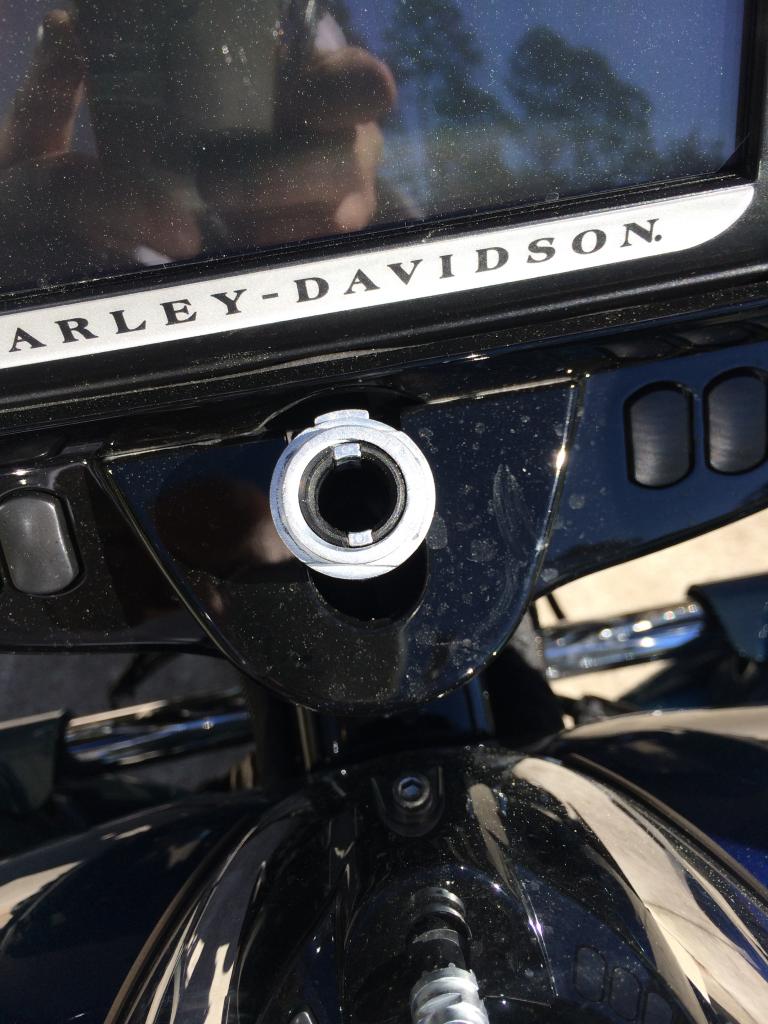
On the right (throttle side) grip, pop the small disc cap to gain access to the heated grip power connector and gently pull outward to unplug the power connector.
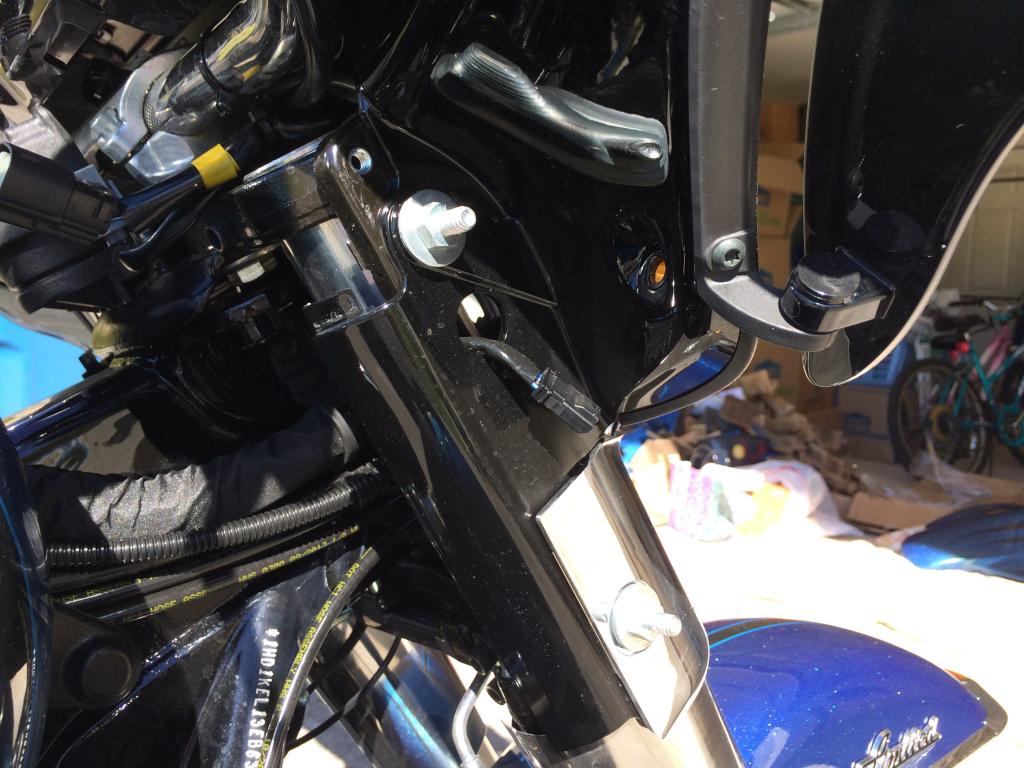
Next remove the 2 Studs that retained your spots/front turn signals and then angle the inner fairing/frame/electronics assembly forward.
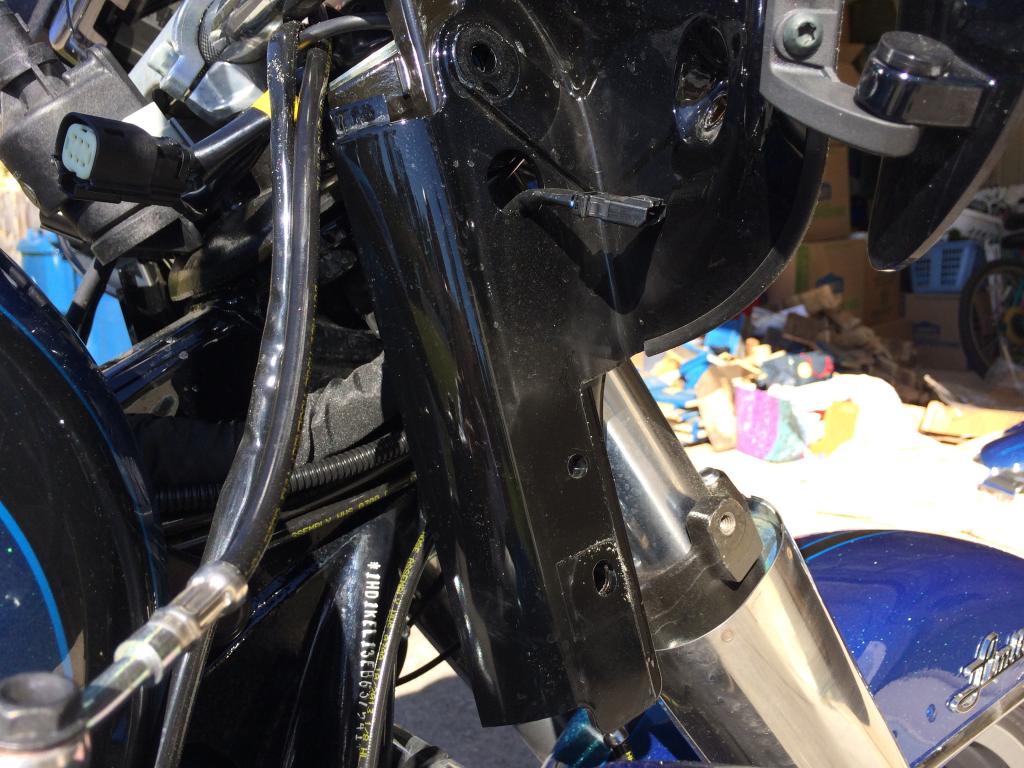
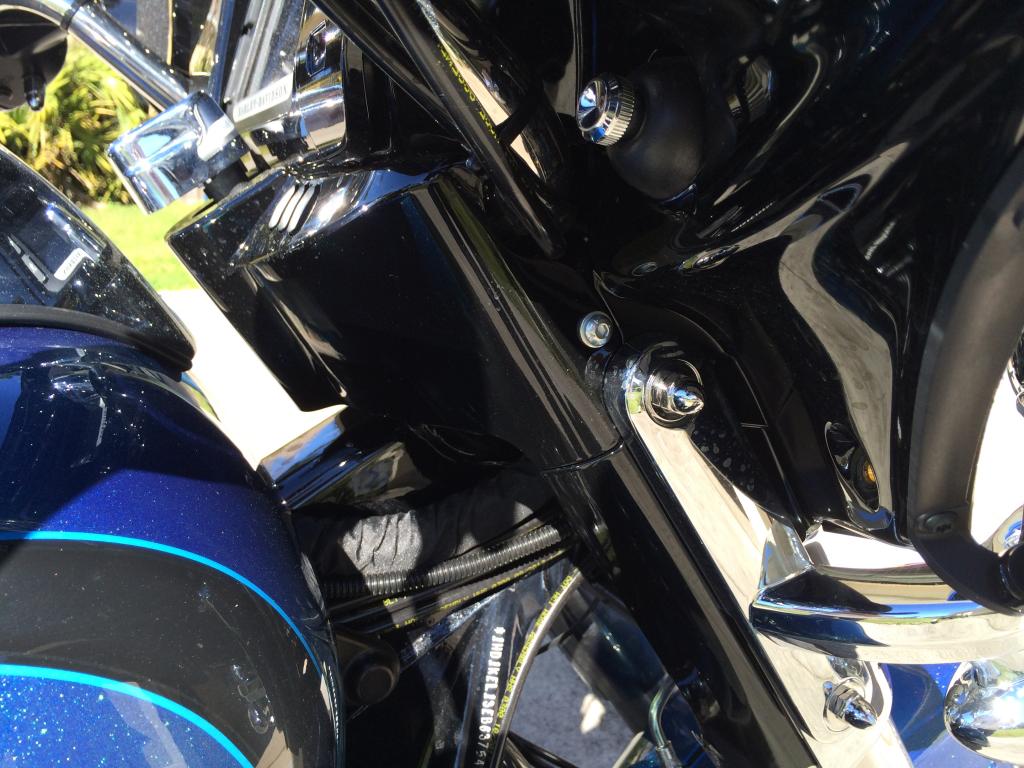
You now have access to the clamp. Before you remove it, disconnect the heated grip power connector (left side) and the twist grip connector (right side) you do not need to disconnect the right side heated connector that loops back to the bars, unless it's routed through something.
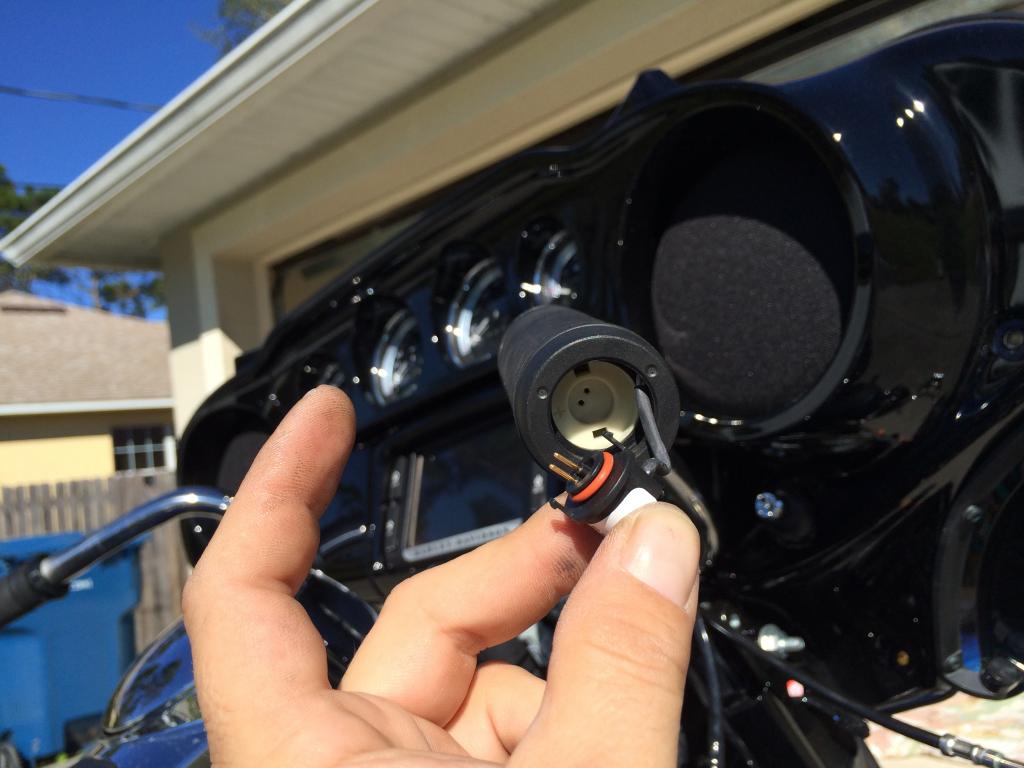
Once the Bars are off, slide off the throttle grip separating it from the twist grip sensor. Slide out the twist grip sensor while feeding the harness into the center of the bar only far enough to gain access to the mid line connectors (2)
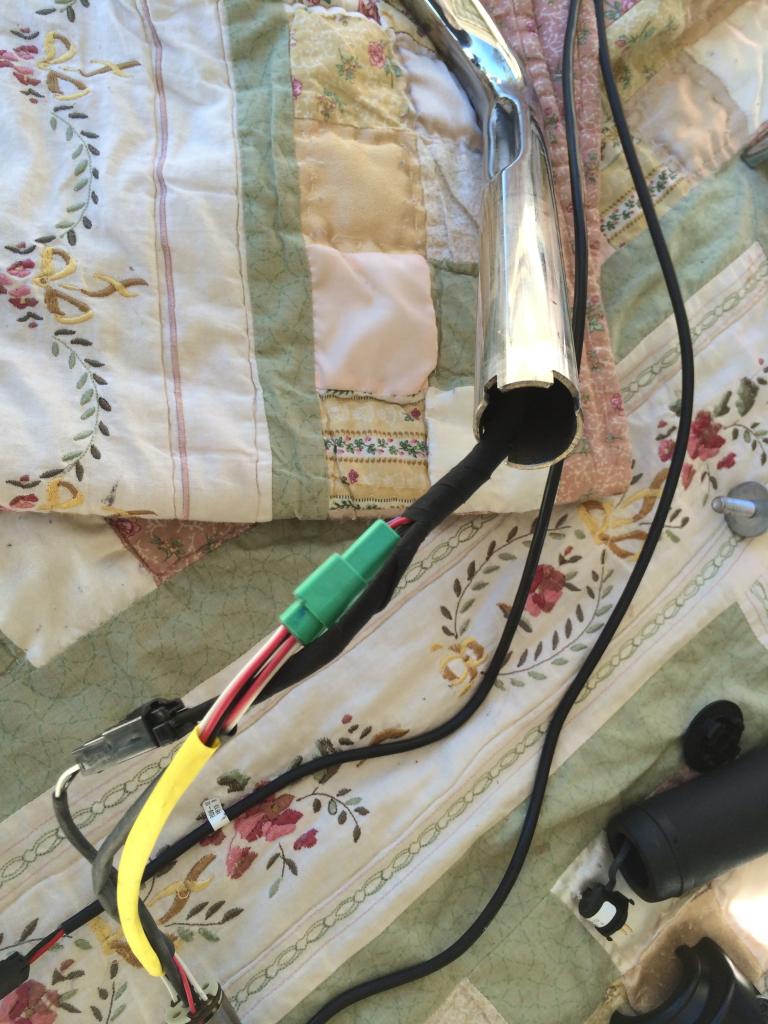
The left side grip and harness can be pulled out all together.
Finally re-assemble everything in reverse order. I didn't take any pictures going back together, cause I really didn't think I needed to.
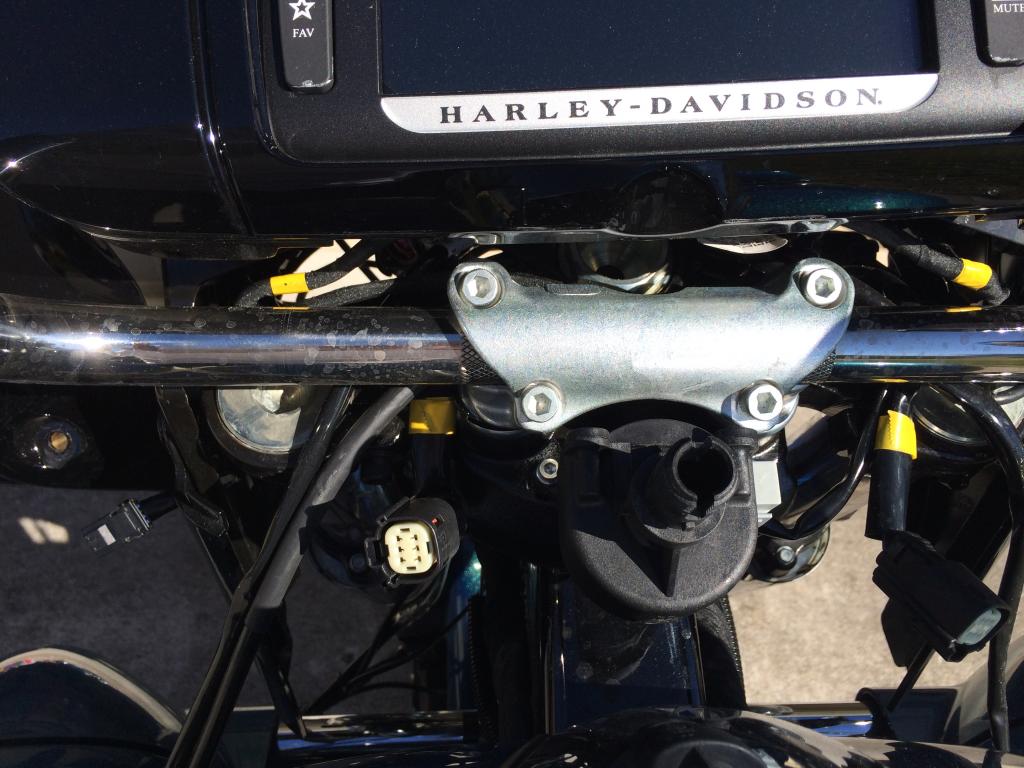
PRO TIP!!! Before you tighten down the bar clamp, slide the fairing back over it's stud holes, put the studs back in a few threads. Set the bars with 1/4' - 1/2" clearance to the inner fairing at it's closest point. Any more and you will run into tank contact issues at full steering lock.
Oh, Also, I had to slightly loosen the banjo bolt holding the front brake hose to the master cylinder to rotate the banjo a little on re-assembly, only loosen it enough to spin the banjo with some force, any more and you risk leaking fluid or introducing air which will require a trip to the dealer to have the ABS Bled with the Digi-Tech.
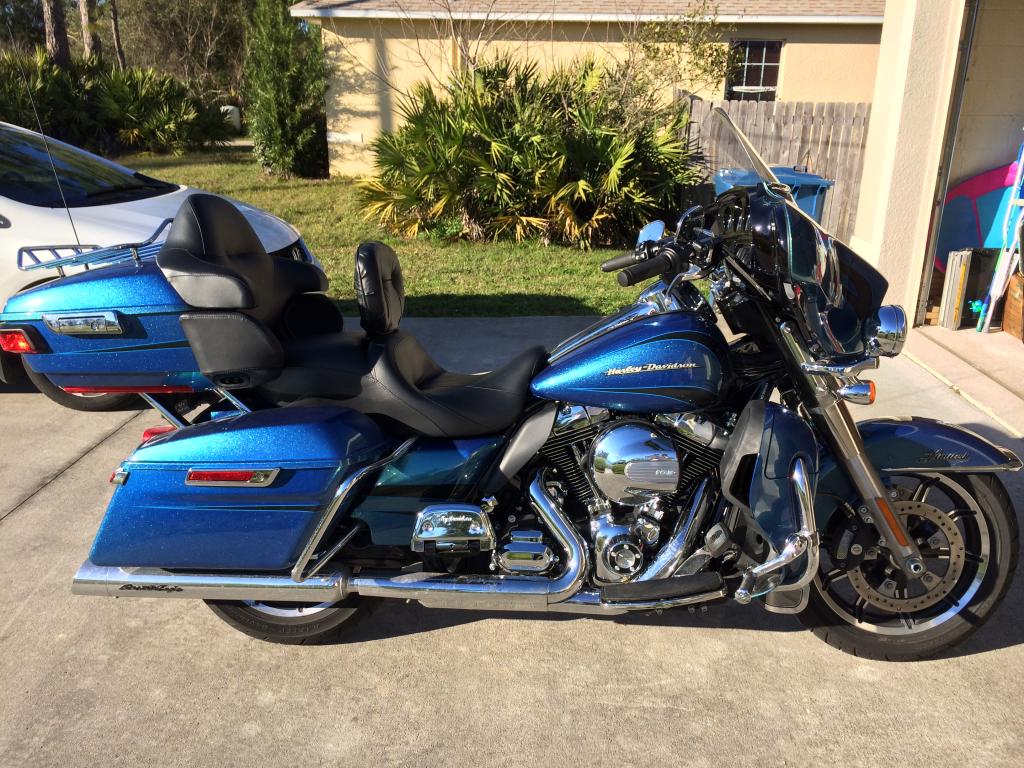
After Photo:
This will be my 4th Ultra to get them. I'm 5'8" and I've always had to ride slightly leaned forward with both hands on the bars, and have to lean a lot more when doing full lock turns.
Bars used are Part # 56176-08
I did not get ANY extra stuff regardless of what the parts guys will tell you.
For Poops and Grins, I got an estimate for the job from a dealership for $1500 parts and labor.
Doing this myself cost me $150 for the bars after discount, and 2 hours of my time. I started at 2:30 and finished at 4:30 using hand tools and no assistance.
I've always been able to do the job on previous ones without the "extra" stuff (I usually re-routed the clutch cable out of the inner fairing hole and routed down along the bars giving me a nice hole to mount a 12v socket on the previous years)
Anyways.....Here we GO!
First Picture: Stock Bars:
Step one, Remove front outer fairing cap. FYI, easier on the '14's then previous year.
Step two, remove ignition and lock nut and guide ring
Step 3, remove 1 screw from each side of switch panel
Step 4, Unplug switch banks.
Back side of switch bank
Step 5, Remove Spots/front turn signals retaining Acorn nuts (see image 4) Remove Spots/signals (there are connectors there)
Next Remove switch gear housings and levers. (Note: there is a little retaining tab you will need to use a small flat blade or pick tool to release. I've included photos)
---------------------------------
On the right (throttle side) grip, pop the small disc cap to gain access to the heated grip power connector and gently pull outward to unplug the power connector.
Next remove the 2 Studs that retained your spots/front turn signals and then angle the inner fairing/frame/electronics assembly forward.
You now have access to the clamp. Before you remove it, disconnect the heated grip power connector (left side) and the twist grip connector (right side) you do not need to disconnect the right side heated connector that loops back to the bars, unless it's routed through something.
Once the Bars are off, slide off the throttle grip separating it from the twist grip sensor. Slide out the twist grip sensor while feeding the harness into the center of the bar only far enough to gain access to the mid line connectors (2)
The left side grip and harness can be pulled out all together.
Finally re-assemble everything in reverse order. I didn't take any pictures going back together, cause I really didn't think I needed to.
PRO TIP!!! Before you tighten down the bar clamp, slide the fairing back over it's stud holes, put the studs back in a few threads. Set the bars with 1/4' - 1/2" clearance to the inner fairing at it's closest point. Any more and you will run into tank contact issues at full steering lock.
Oh, Also, I had to slightly loosen the banjo bolt holding the front brake hose to the master cylinder to rotate the banjo a little on re-assembly, only loosen it enough to spin the banjo with some force, any more and you risk leaking fluid or introducing air which will require a trip to the dealer to have the ABS Bled with the Digi-Tech.
After Photo:
The following 13 users liked this post by JT_HD:
2015UltraLimited (03-03-2016),
BrandonSmith (10-21-2019),
goblue90 (10-09-2019),
Just Me (09-01-2016),
justbike1 (01-24-2017),
and 8 others liked this post.
#2
02-15-2014, 06:56 PM
#4
02-16-2014, 05:31 PM
However after about 4-5 hours of riding I was still developing the pain in the neck and between the shoulder blades from having my head tilted up slightly due to the reach.
After riding today about 8 hours, I no longer had any pain, and was able to recline back against the backrest and relax, both feet up on the highway pegs, and both hands on the bars with arms relaxed.
The following users liked this post:
Pinkily82 (06-14-2018)
#5
02-16-2014, 06:13 PM
#6
02-16-2014, 08:12 PM
Seasoned HDF Member
#7
02-16-2014, 09:14 PM
Tourer
Join Date: Jan 2014
Location: Plainview, NY
Posts: 496
Likes: 0
Received 0 Likes
on
0 Posts
Trending Topics

#9
02-17-2014, 04:33 PM
Awesome write up - I know some dealers who should read and study this as they are saying it can't be done or that you need a whole bunch of extra parts.
So no issues with the cables and/or hydraulic lines being tight or binding? Plenty of free play for full left and right steering?
So no issues with the cables and/or hydraulic lines being tight or binding? Plenty of free play for full left and right steering?
Only contact issue is full right lock the front brake hose sometimes barely touches the tank, but it's flexible hose. I think rocking the banjo back a touch will alleviate, but I'm really not concerned with it.
#10
02-17-2014, 04:35 PM
It's a hose, not a cable and no adjustments were needed. The front brake hose needed the banjo bolt very slightly loosened to slightly turn the brake line downward a touch.