How to: Update your FLT to late model tins and bags
#1
 10-26-2014, 02:08 PM


there's a couple threads covering this that are all split up, or take 7 pages to get the overall details. so i thought i could show my efforts to accomplish the transformation and share a little bit of info i've learned.
if you've got a touring bike older than 1994, then this may be helpful. I wanted to build what looked to be a new road king, but with my current bike. much cheaper to modify then buy a new bike. it's no where near done, just far enough along to make this post.
the touring frames hardly changed from 1980-2008. just some mounting tabs, battery box, and other slight variations. so this project is really basic. some of the bolt on stuff like tanks, seats, etc are a little different. you'll want all 94-96 or 97 and up.
here's my collection of parts:
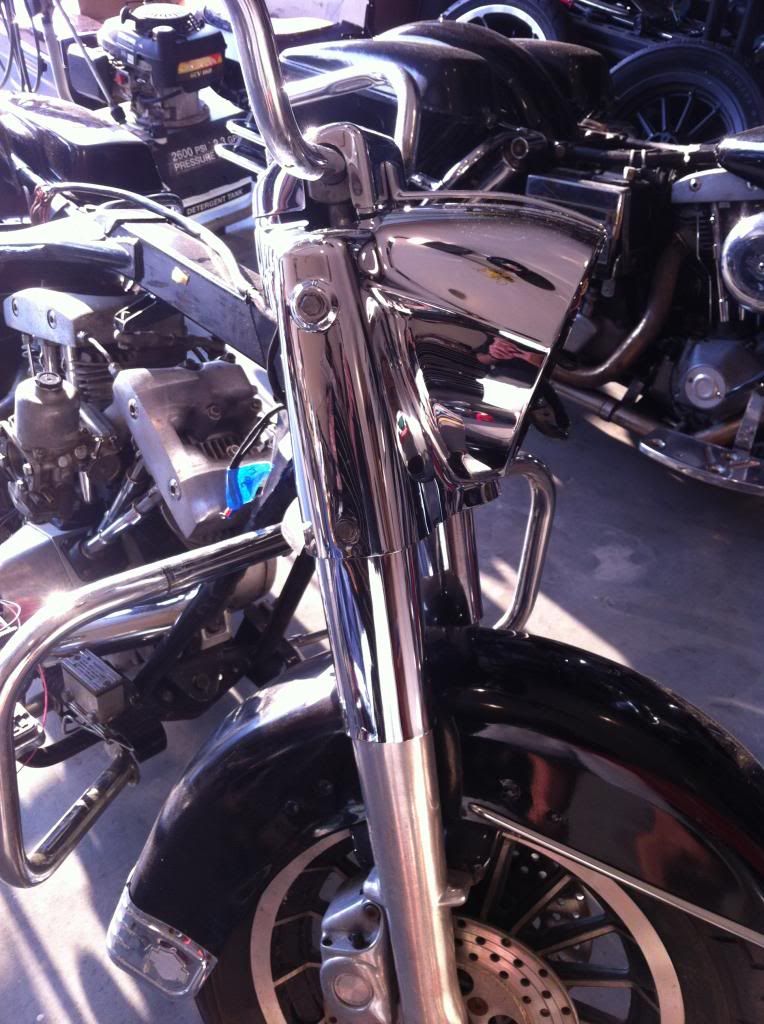
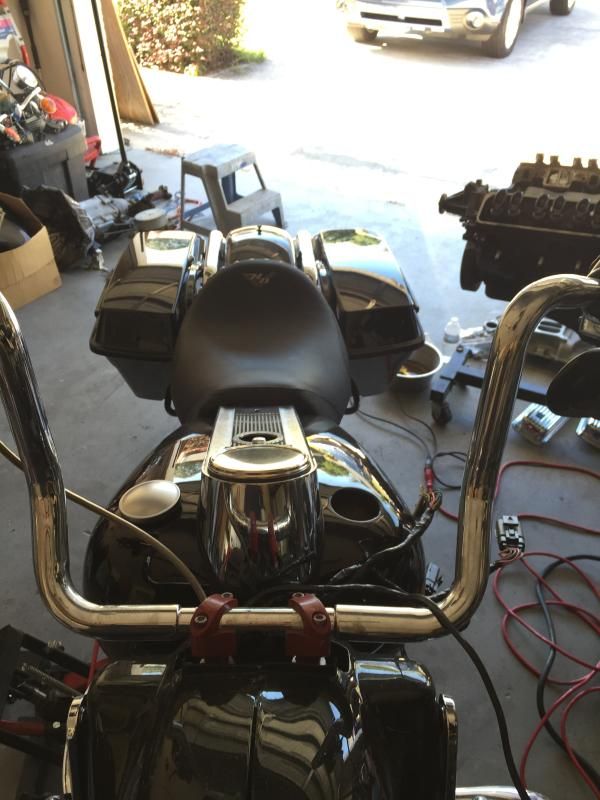
2002 Road King nacelle
2005 Road King Seat
2002 Road King gas tank
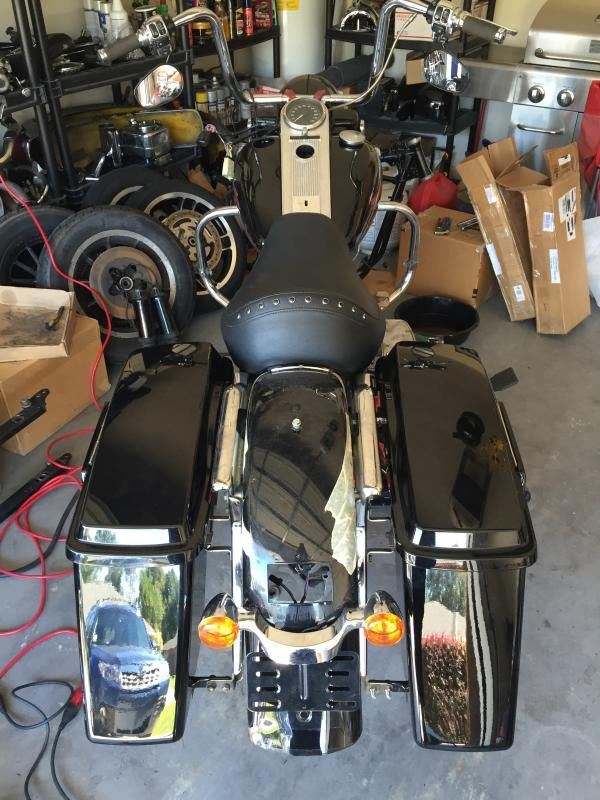
2008 Street Glide Fenders
2011 Street Glide saddle bags
Easy stuff first
Road king headlight is a straight bolt on. no issues here
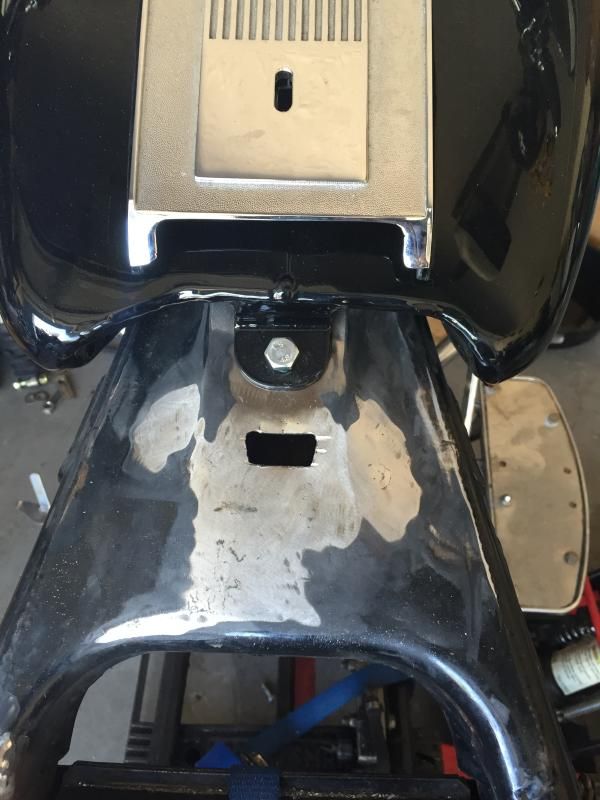
next is the gas tank. the front mount line right up. you'll have to cut off the old rear mounts on the frame for the new tank to sit down all the way. then you just drill a hole in the back bone to attach the rear mount. you can just tap the hole, but the metal is thin. so a nutzert or do what i did and weld a nut into the opening. now is a good time to weld up the other 5 or 6 holes in the area.
this pic also shows the slot you'll have to cut for the front seat mount. pretty straight forward. just measure twice, cut once.
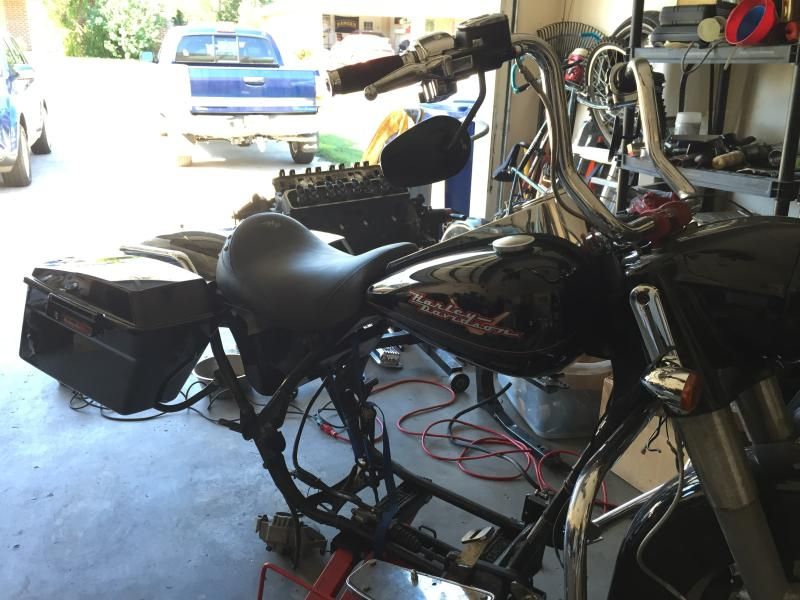
next up is the saddle bag mounts. there is a slight difference in the frame for the height of the seat area. the saddlebag mounts that incorporate crash bars won't work. but you have two other options.
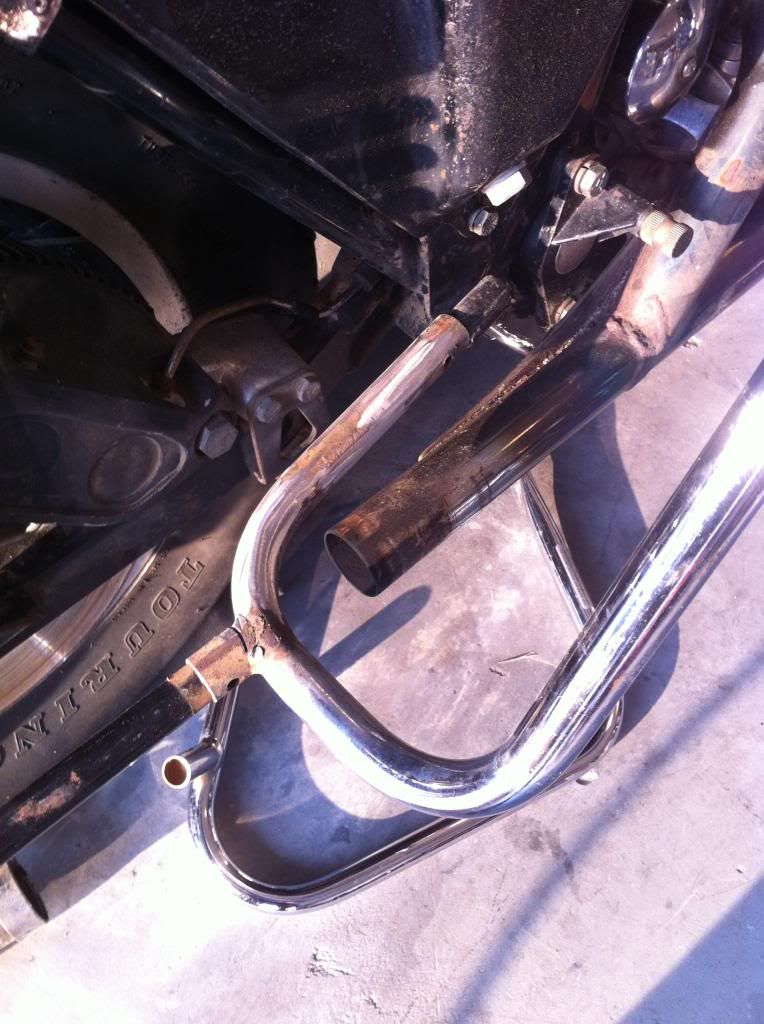
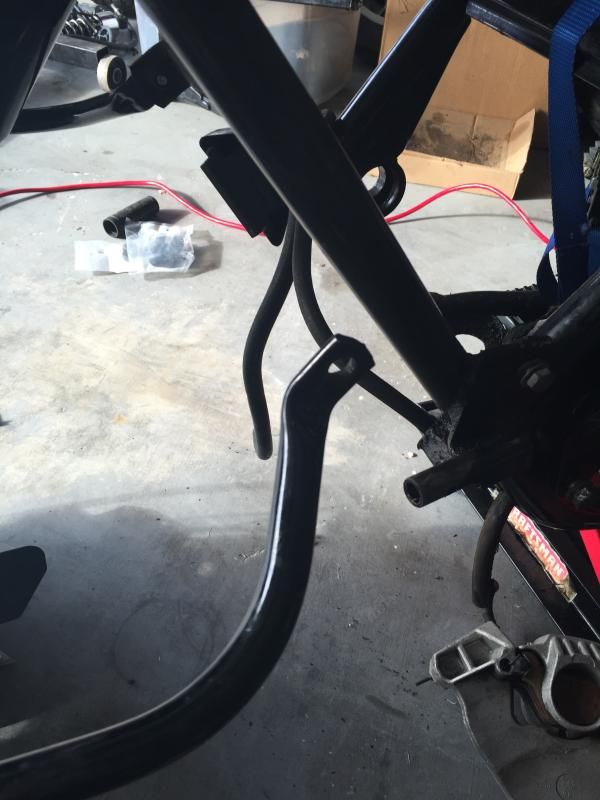
1: use your old style crash bars. and use the new style lower bar. they will connect together. but you'll have to shorten the lower bar about an inch (see pic below). You will also have to cut off the battery box entirely if using the late model side covers. or trim the battery box enough to clear the new bags and trim the old side cover and install
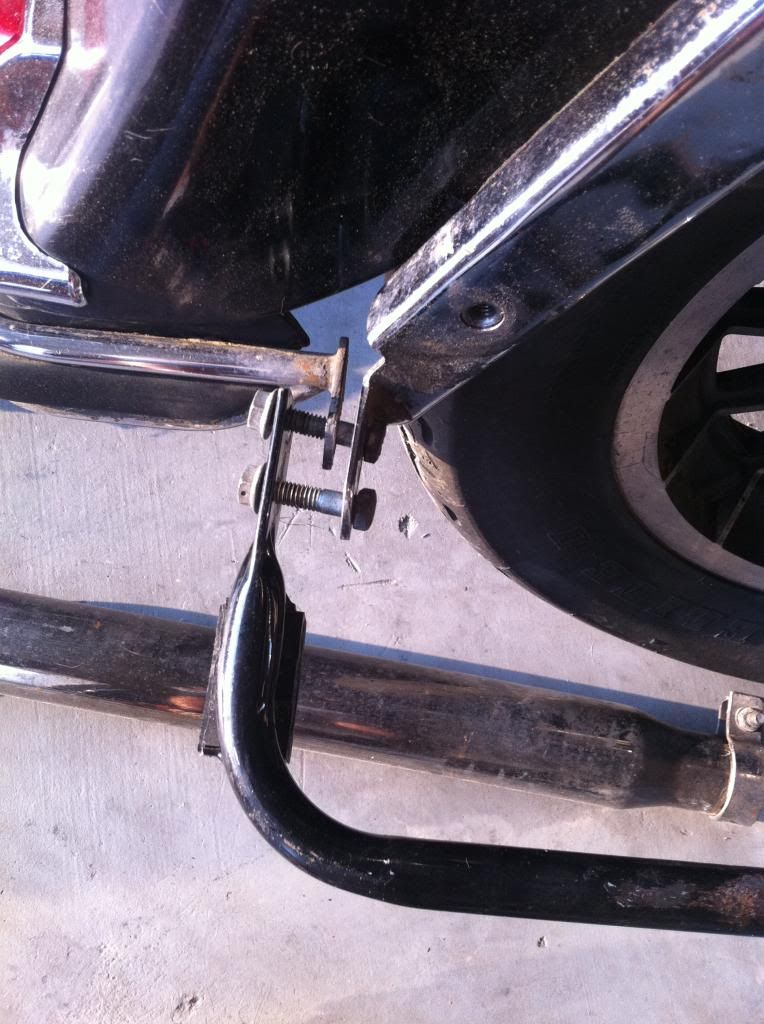
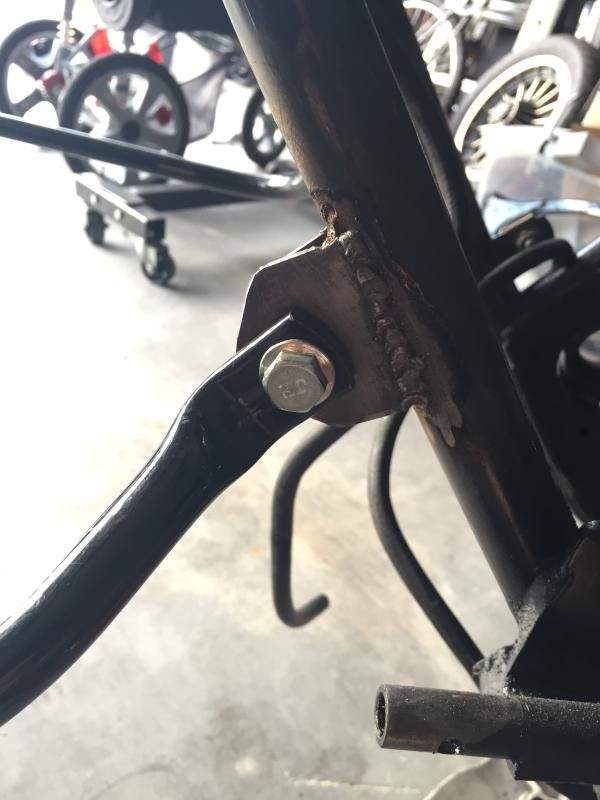
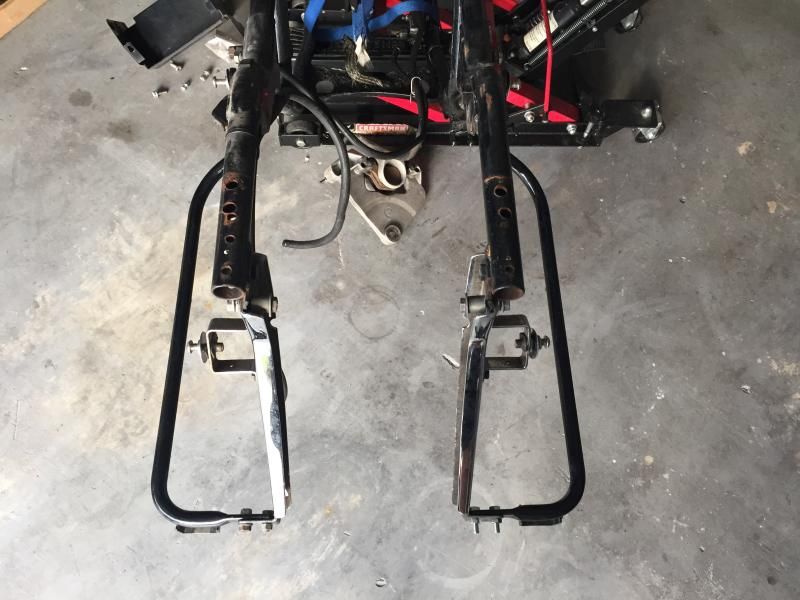
2: you can use the saddlebag mounts without the crash bars. the left side bar just bolts right up. but you'll have to fab the right side mount. very simple to do. just mount your bags up to get a good position. measure everything and make sure it's square to the other side. some flat stock makes it super easy. I added a gusset on the back side for peace of mind. don't mind my booger welds...
nothing there
fixed
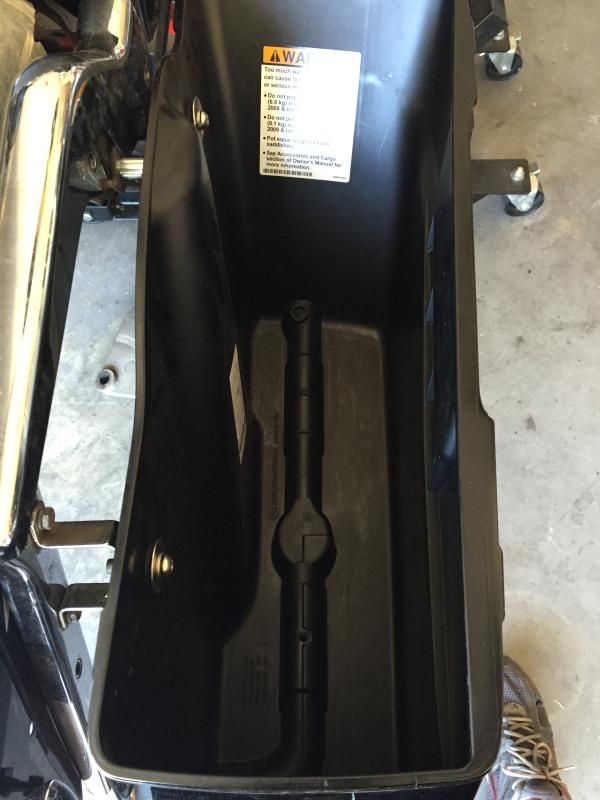
now you need to put your battery under the seat. easy way is to get a 93-96 battery box.
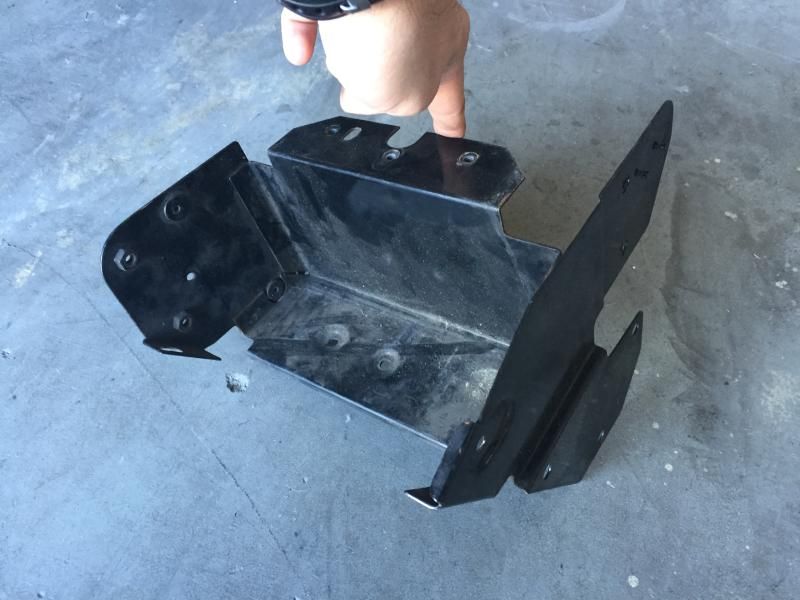
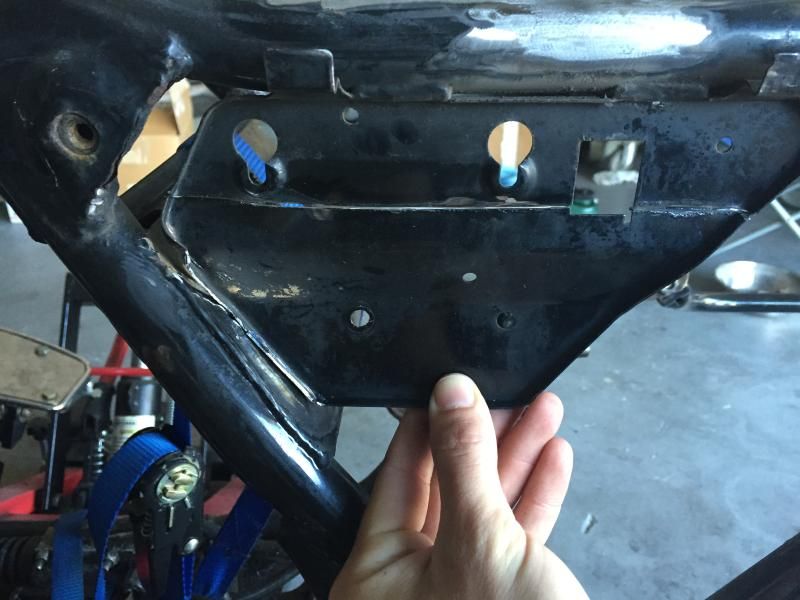
you'll have to trim this plate to fit the new battery box in. i left the top portion for the rear brake resevior.
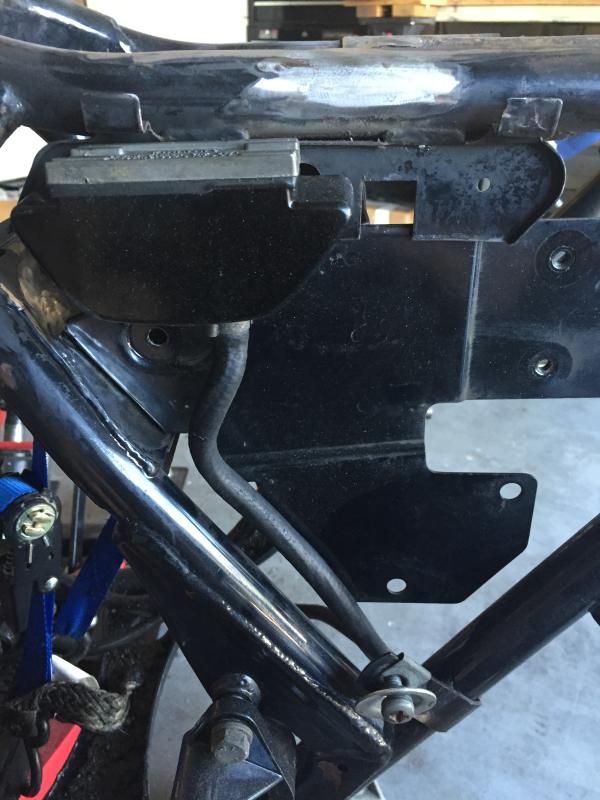
that sucker bolts right up. just had to drill one of the holes, two were already there
the last thing is your oil tank. you can keep the side mounted one by trimming the battery box until it clears. but you'll have to use a newer sportster battery and may not get as many cranking amps as desired. or you can change to a 93-98 transmission which incorporates the oil pan on the bottom. that's what i'm doing. only because my trans needs a new 5th gear and second gear. those two gears cost half as much as a 93-98 trans. so i'm doing the switch now.
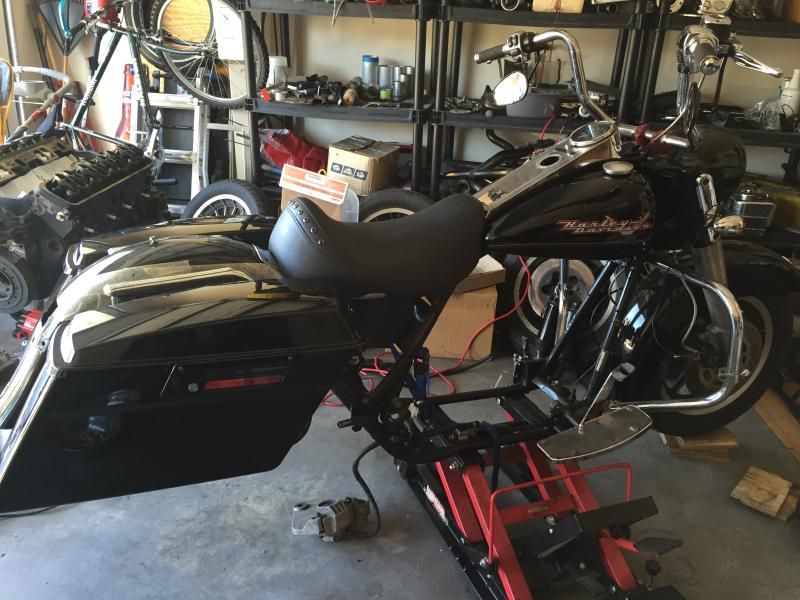
now you can mock everything up and stare at your new bike. let me know if i'm forgetting anything and i'll update the post. i'll add some finished pics later this year as well.
Mike

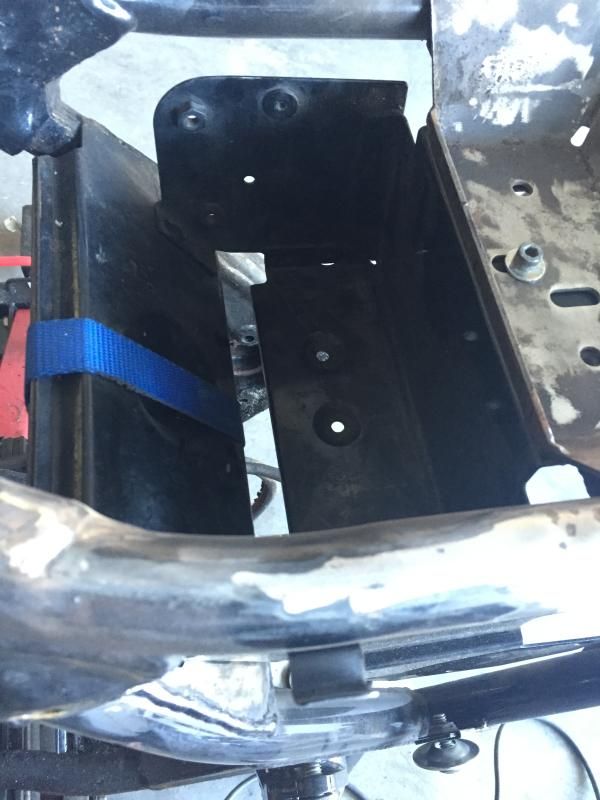
look at all that room.....
if you've got a touring bike older than 1994, then this may be helpful. I wanted to build what looked to be a new road king, but with my current bike. much cheaper to modify then buy a new bike. it's no where near done, just far enough along to make this post.
the touring frames hardly changed from 1980-2008. just some mounting tabs, battery box, and other slight variations. so this project is really basic. some of the bolt on stuff like tanks, seats, etc are a little different. you'll want all 94-96 or 97 and up.
here's my collection of parts:
2002 Road King nacelle
2005 Road King Seat
2002 Road King gas tank
2008 Street Glide Fenders
2011 Street Glide saddle bags
Easy stuff first
Road king headlight is a straight bolt on. no issues here

next is the gas tank. the front mount line right up. you'll have to cut off the old rear mounts on the frame for the new tank to sit down all the way. then you just drill a hole in the back bone to attach the rear mount. you can just tap the hole, but the metal is thin. so a nutzert or do what i did and weld a nut into the opening. now is a good time to weld up the other 5 or 6 holes in the area.
this pic also shows the slot you'll have to cut for the front seat mount. pretty straight forward. just measure twice, cut once.

next up is the saddle bag mounts. there is a slight difference in the frame for the height of the seat area. the saddlebag mounts that incorporate crash bars won't work. but you have two other options.
1: use your old style crash bars. and use the new style lower bar. they will connect together. but you'll have to shorten the lower bar about an inch (see pic below). You will also have to cut off the battery box entirely if using the late model side covers. or trim the battery box enough to clear the new bags and trim the old side cover and install


2: you can use the saddlebag mounts without the crash bars. the left side bar just bolts right up. but you'll have to fab the right side mount. very simple to do. just mount your bags up to get a good position. measure everything and make sure it's square to the other side. some flat stock makes it super easy. I added a gusset on the back side for peace of mind. don't mind my booger welds...
nothing there

fixed


now you need to put your battery under the seat. easy way is to get a 93-96 battery box.

you'll have to trim this plate to fit the new battery box in. i left the top portion for the rear brake resevior.

that sucker bolts right up. just had to drill one of the holes, two were already there


the last thing is your oil tank. you can keep the side mounted one by trimming the battery box until it clears. but you'll have to use a newer sportster battery and may not get as many cranking amps as desired. or you can change to a 93-98 transmission which incorporates the oil pan on the bottom. that's what i'm doing. only because my trans needs a new 5th gear and second gear. those two gears cost half as much as a 93-98 trans. so i'm doing the switch now.
now you can mock everything up and stare at your new bike. let me know if i'm forgetting anything and i'll update the post. i'll add some finished pics later this year as well.
Mike


look at all that room.....

#3
12-27-2017, 05:59 PM

#4
12-28-2017, 05:57 AM

Seasoned HDF Member
#6
12-28-2017, 06:58 AM
Seasoned HDF Member
#7
12-28-2017, 07:02 AM

Stellar HDF Member
Trending Topics
#8
12-28-2017, 09:00 AM
Seasoned HDF Member
#9
12-28-2017, 11:21 AM
Seasoned HDF Member
Yep....been there done that. I plugged the oil return...bought a spacer for the oil fill...drilled and tapped the spacer for the new oil return...piece of cake.
https://www.ebay.com/itm/Oil-Spout-F...lZ07eK&vxp=mtr


Thread
Thread Starter
Forum
Replies
Last Post
laserman2431
Sportster Models
6
07-18-2012 07:49 PM