Converting an 81 FLT to a Road King, picture heavy
#1
 04-06-2014, 08:36 PM


I sold my 1984 FLHS to expand our family and went 6 months without a shovelhead. I built a few bikes to profit some funds and get back on a proper ride. We drove 6 hours last week to get a 1981 FLTC for $1,900. The bike is a bastard with a state assigned VIN, delkron cases, but very original otherwise (enclosed chain assembly, wiring harness intact, original running gear).
It was half taken apart, hadn't been registered or ran since 2007 and was filthy. the gentlemen had passed away in 07, so unknown engine size and details or why some parts were taken off. I spent some time with a pressure washer and got it all cleaned up. I was pleasantly surprised in it's condition.
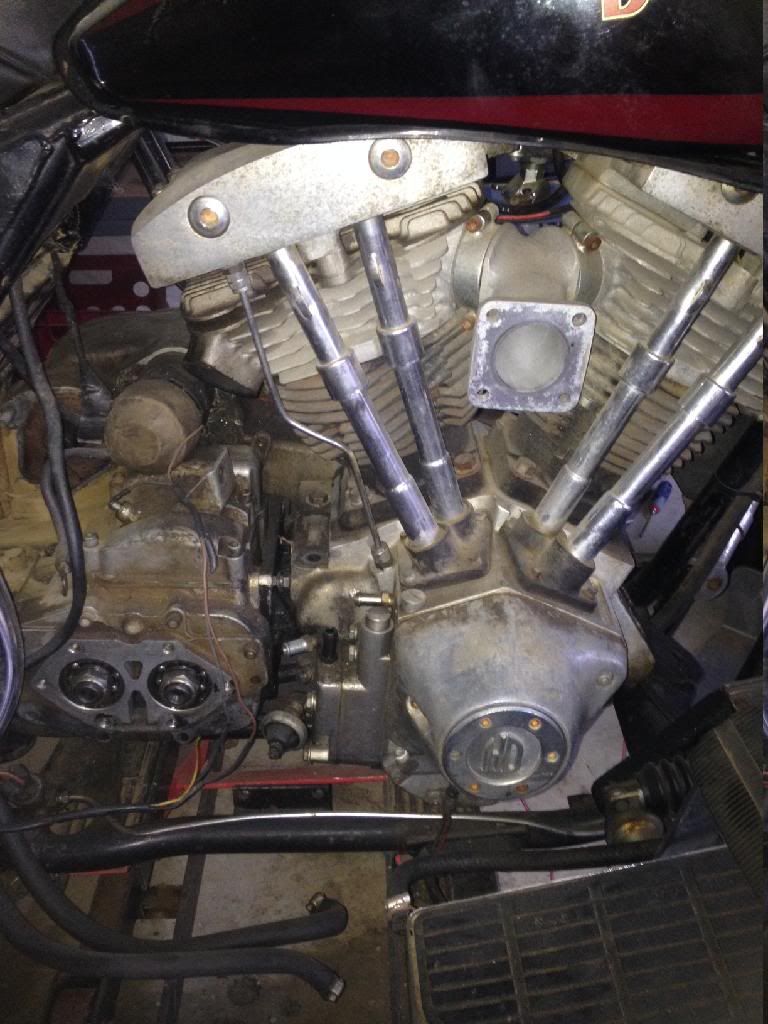
First effort was to comb through it and attempt to run the motor to identify any major issue it could have. I spent most of the day purging the oil lines, oiled the cylinders, checked over the wiring, put some oil on the primary chain, filled the trans.... once i gave it power the lights came on properly and I got excited. hit the start button to start circulating oil and just got a click at the starter relay. The starter solenoid was toast. the new one should be in tomorrow and i'll update the drivetrain condition.
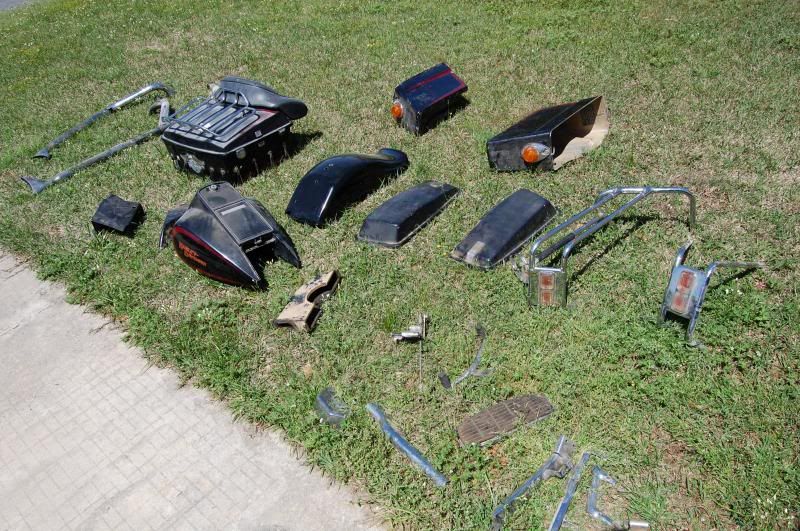
In the mean time I found a NOS 2005 road king 2 piece seat on ebay, ordered a 95 FL battery tray (more on that later), road king nacelle, and other misc pieces.
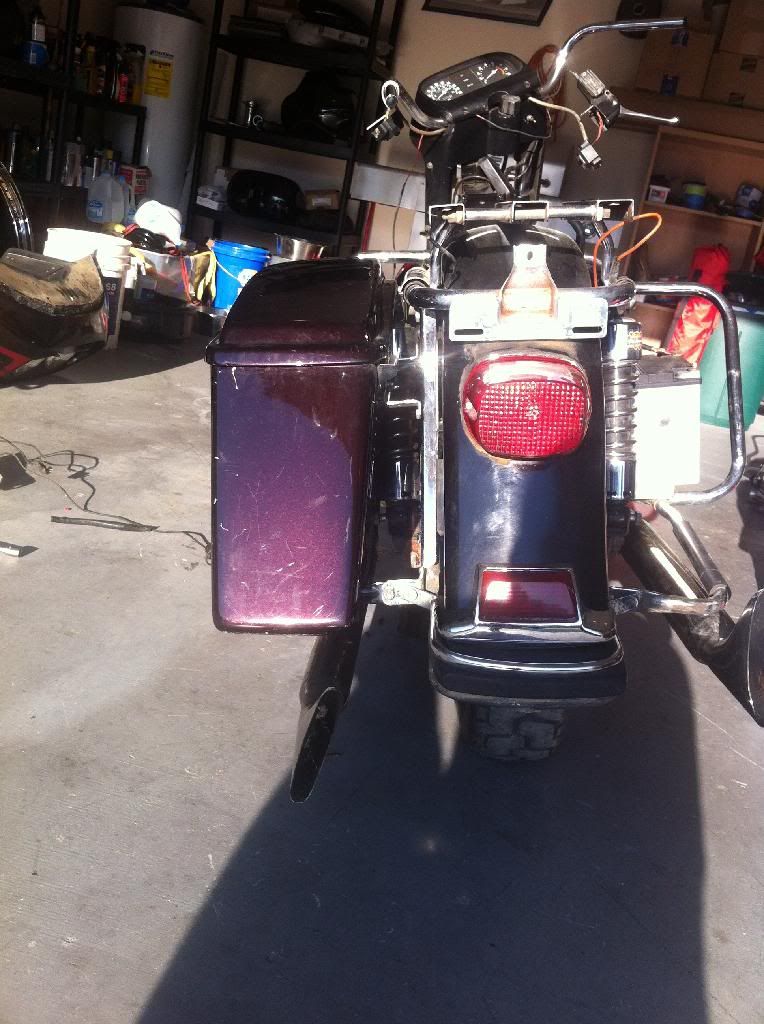
Today I was super lucky and picked up a set of complete hard bags from a 2000 road king, mounting brackets, full exhaust with heat shields and screaming eagle mufflers all for $120. These will be grafted onto the bike.
The next couple weeks i'll continue to gather parts and figure out some final details. then it'll get completely tore down and gone through. feedback is appreciated if you have some advice or experience. I'll be painting for the first time on this bike, as well as some other maintenance level items like rebuilding the trans and clutch setup. Ideally the motor will run good and i'll just freshen up the top end.
that's most of the story, here's some pics.
Thanks
Mike
here's how it was stored for a while
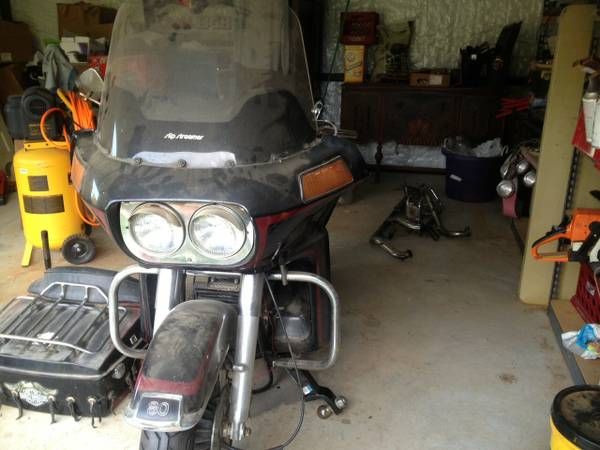
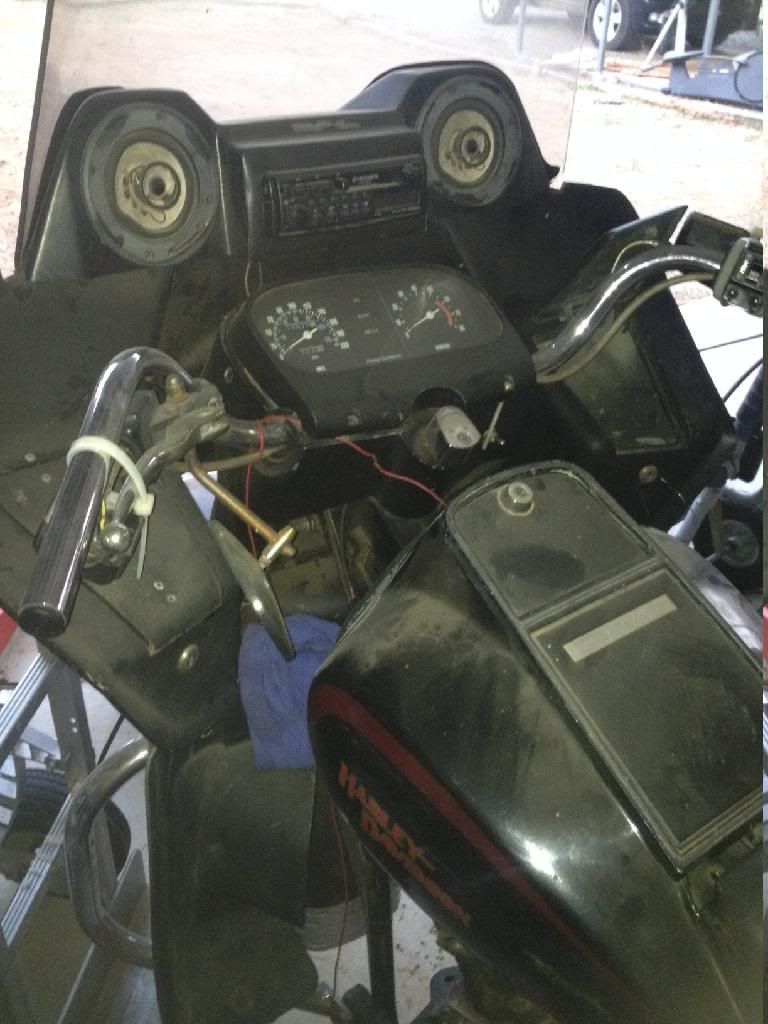
back home getting ready to clean it up
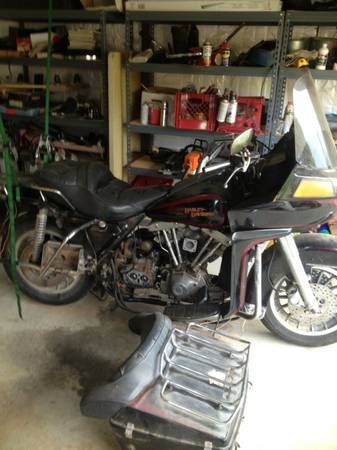
then after the initial wash and degreasing
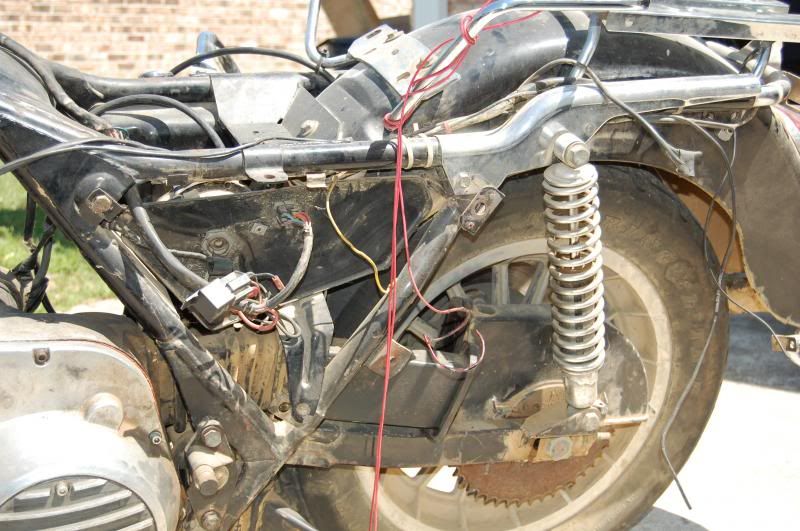
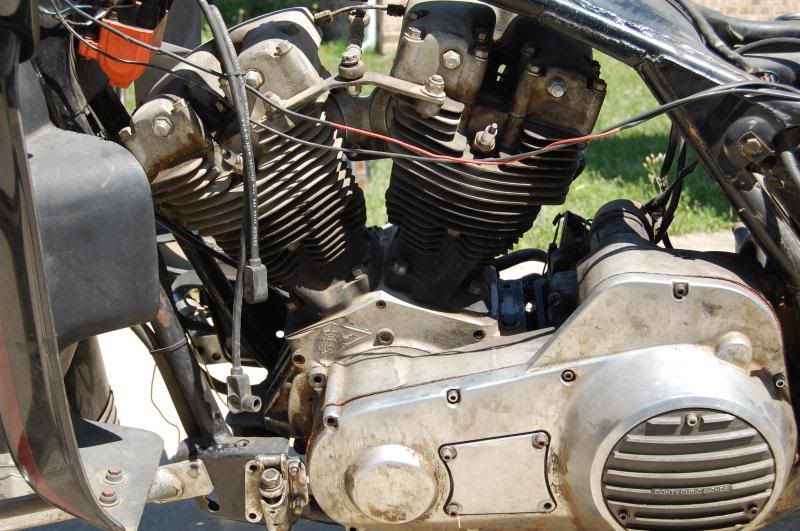
It was half taken apart, hadn't been registered or ran since 2007 and was filthy. the gentlemen had passed away in 07, so unknown engine size and details or why some parts were taken off. I spent some time with a pressure washer and got it all cleaned up. I was pleasantly surprised in it's condition.
First effort was to comb through it and attempt to run the motor to identify any major issue it could have. I spent most of the day purging the oil lines, oiled the cylinders, checked over the wiring, put some oil on the primary chain, filled the trans.... once i gave it power the lights came on properly and I got excited. hit the start button to start circulating oil and just got a click at the starter relay. The starter solenoid was toast. the new one should be in tomorrow and i'll update the drivetrain condition.
In the mean time I found a NOS 2005 road king 2 piece seat on ebay, ordered a 95 FL battery tray (more on that later), road king nacelle, and other misc pieces.
Today I was super lucky and picked up a set of complete hard bags from a 2000 road king, mounting brackets, full exhaust with heat shields and screaming eagle mufflers all for $120. These will be grafted onto the bike.
The next couple weeks i'll continue to gather parts and figure out some final details. then it'll get completely tore down and gone through. feedback is appreciated if you have some advice or experience. I'll be painting for the first time on this bike, as well as some other maintenance level items like rebuilding the trans and clutch setup. Ideally the motor will run good and i'll just freshen up the top end.
that's most of the story, here's some pics.
Thanks
Mike
here's how it was stored for a while


back home getting ready to clean it up


then after the initial wash and degreasing

The following users liked this post:
rockher_man (06-14-2020)
#2
04-06-2014, 08:46 PM


the bum starter solenoid. hopefully this is why the parts had been previously removed

today's score of parts

and here's the current, short list of things on my mind. plenty of work ahead of me

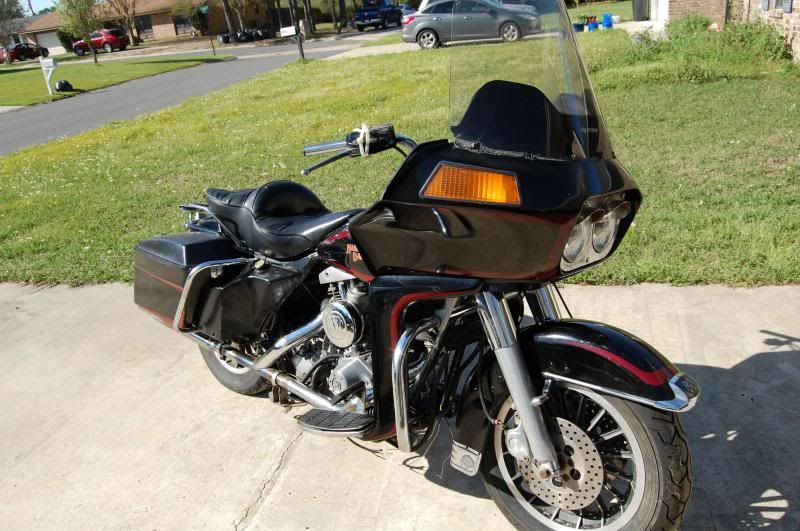
lastly, these two bikes are my goal and inspiration for the build. 21" wheel, clean and low. just a fun cruiser to ride to work and on the weekends. nothing special or flashy. 90% sure i'll be going silver, but the black always looks good.


#3
04-07-2014, 07:18 AM
Seasoned HDF Member
The following users liked this post:
rockher_man (06-14-2020)
#4
04-07-2014, 08:40 AM
#5
04-07-2014, 09:24 PM
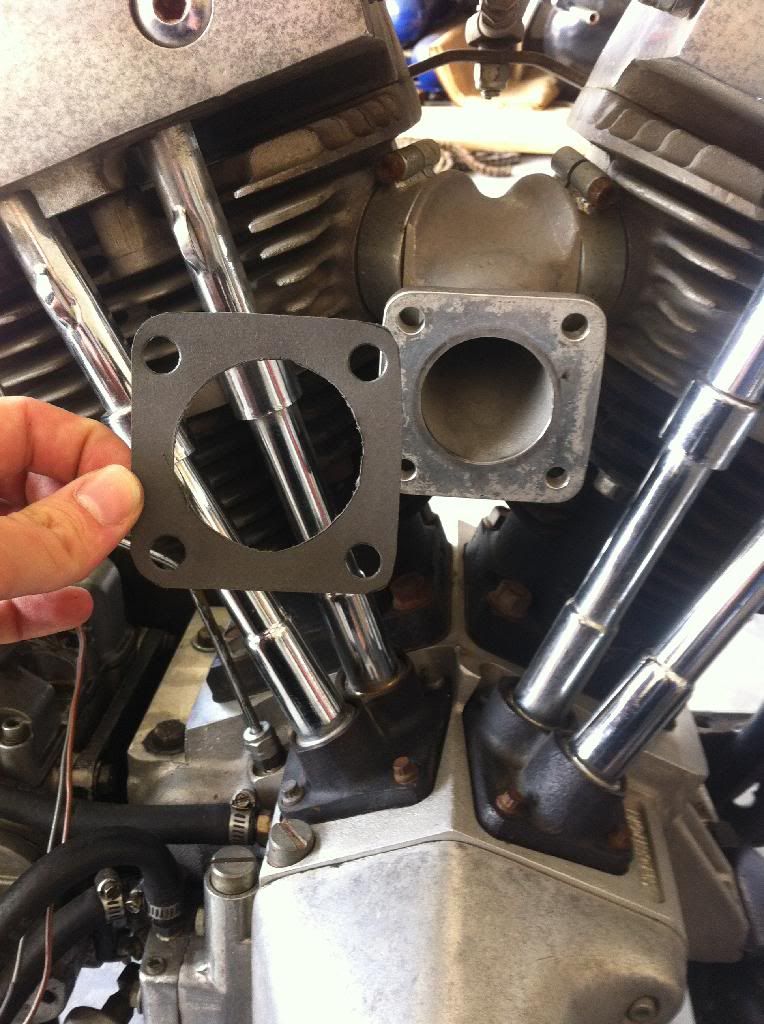
Got the new starter solenoid and hoped to start the bike. Made a gasket for the SU carb and prepped for some loud noises to echo in the garage. But I have no spark during cranking. It's really odd, when you turn the power on both plugs spark. Then do nothing when cranking. Turn the key off, back on and zap. Just once. Getting an Ultima ignition anyways, so I'll order it now and keep moving forward.
Also put some old progressive shocks on I has on the shelf. Came off my old FLH. Bolted right up, just need to replace the rubber bushings.
Mike
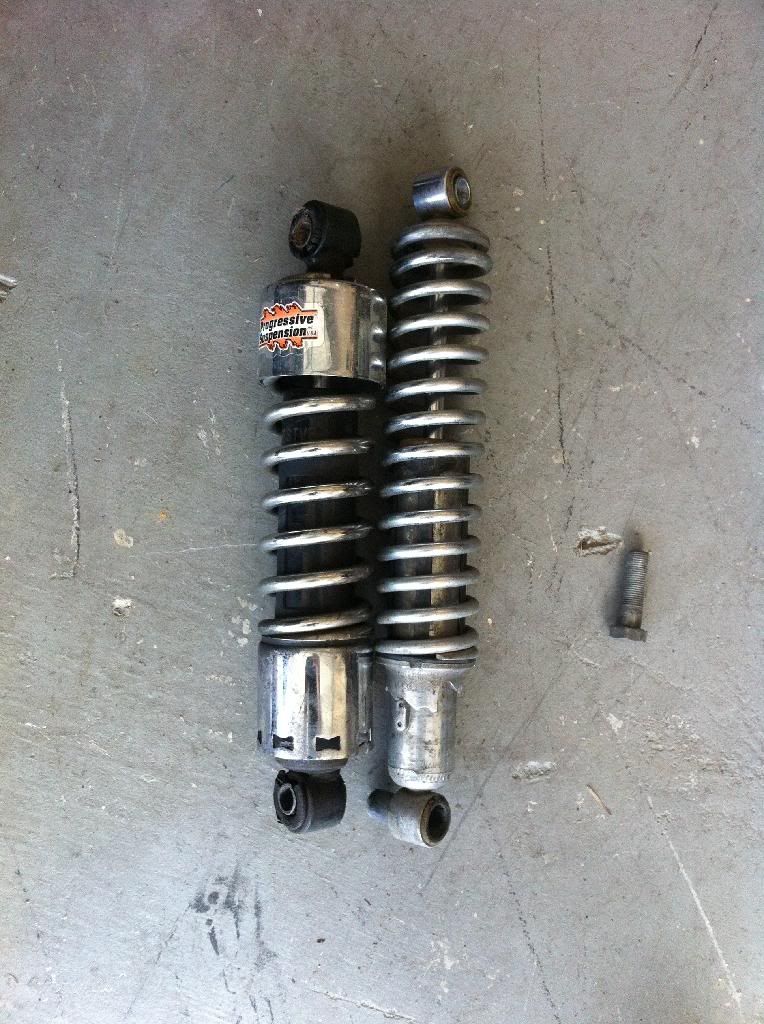
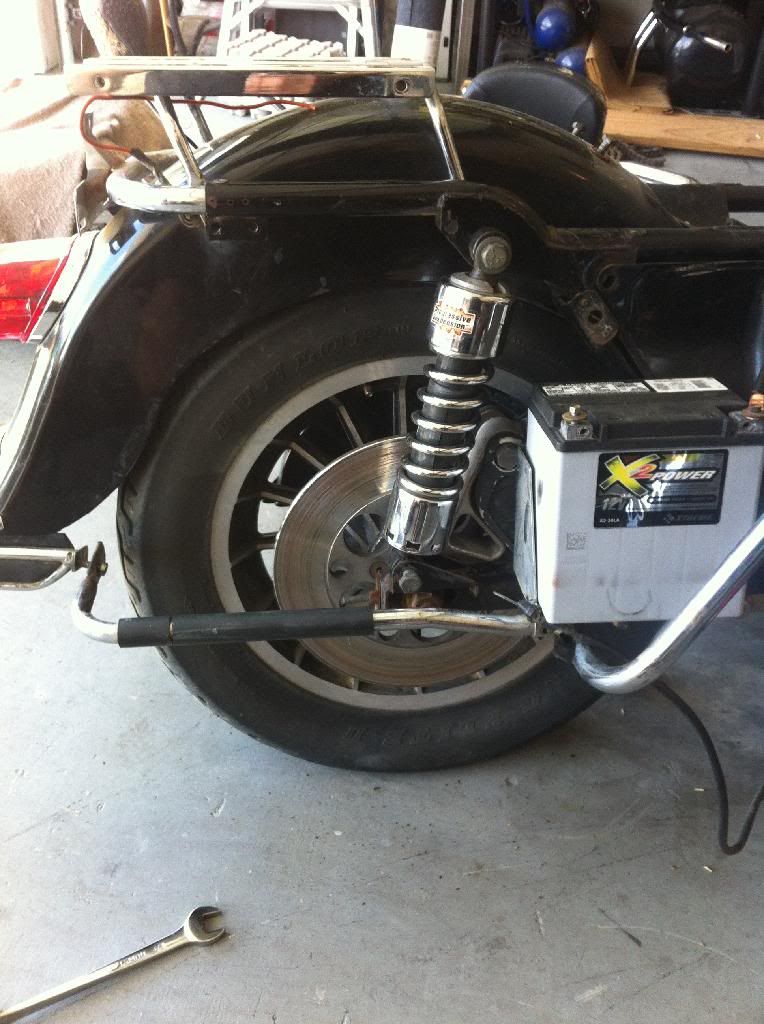
Also put some old progressive shocks on I has on the shelf. Came off my old FLH. Bolted right up, just need to replace the rubber bushings.
Mike
#6
04-07-2014, 09:36 PM
Seasoned HDF Member
#7
04-08-2014, 05:52 AM
Seasoned HDF Member
Actually it is very easy...with so many people building touring bikes...ebay is full of "cast off" parts to help you achieve your goal...I am doing a very similar build, and have already done all of the mods that are on your "fab" list. The actual frame changed very little up to 08...so by drilling a hole here, and welding a tap there...there newer parts are virtually bolt on. Good luck...will be watching.
Last edited by Tom84FXST; 04-08-2014 at 06:33 AM.
Trending Topics
#8
04-08-2014, 09:05 AM
Actually it is very easy...with so many people building touring bikes...ebay is full of "cast off" parts to help you achieve your goal...I am doing a very similar build, and have already done all of the mods that are on your "fab" list. The actual frame changed very little up to 08...so by drilling a hole here, and welding a tap there...there newer parts are virtually bolt on. Good luck...will be watching.
thaks tom. yeah, i'm not too worried about most of it. pretty simple to make stuff work. got the newer bags, and happend to get the brackets. 93-96 battery tray fits with minor triming. 05 RK seat, 07 softail gas tank. it's all the same crap with some mounting tabs and clearancing.
but your bike is a whole new level of awesome. i need to go back and read it again for some tips and inspriration.
thanks
mike
#9
04-09-2014, 07:22 PM
i confirmed that the ignition was bad after getting my volt meter back. went through all the steps in the manual. so ultima ignition to the rescue.
had some more time so i played with the bags. the original brackets are still in place. so i placed the left bag on to see what would happen. it would have worked just fine. but the bracket had a rubber isolater, and the bag had it's own rubber grommets. so it sat high, and the rear exhaust hanger was in the way.
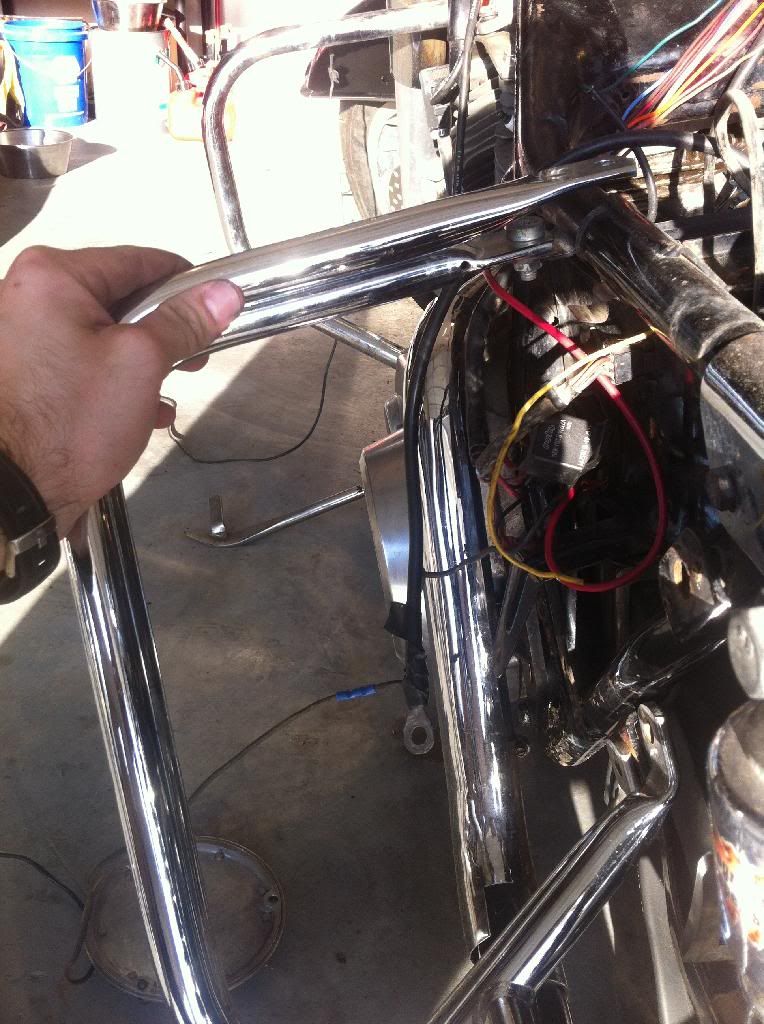
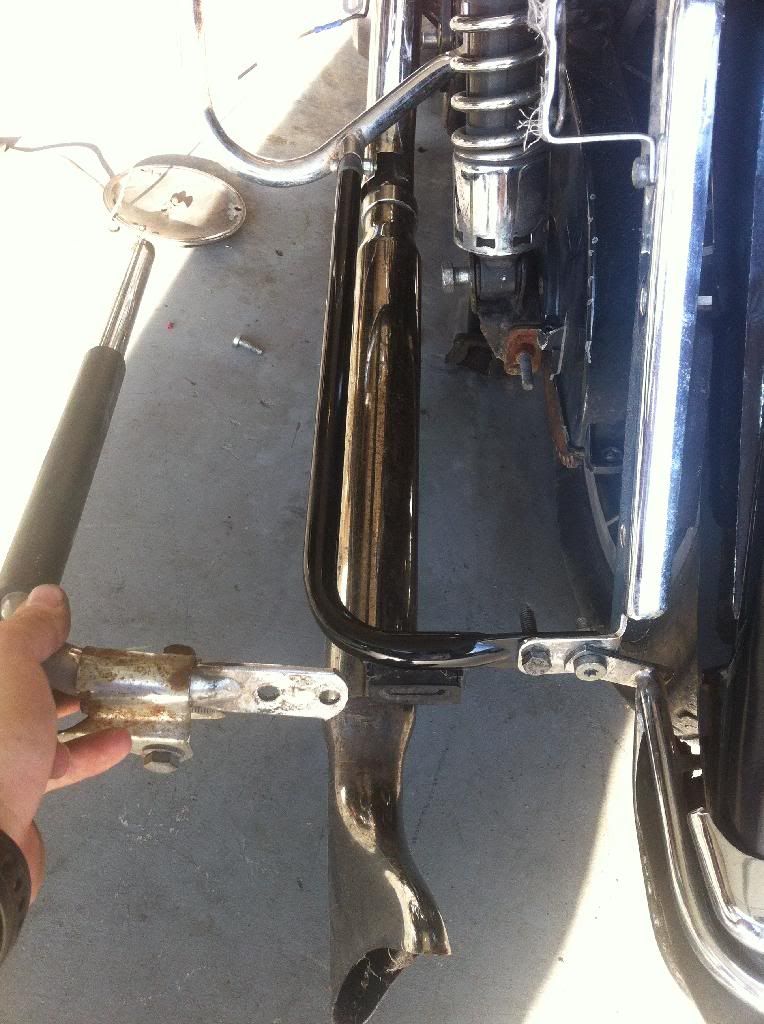
so i put the late model brackets on the bike. i noticed that the top portion of the crash guard stood out further than the 81 did. pic below. using the stock mounting location, it pushed the bracket out at a weird angle and wouldn't work. so i can move the top mount, or....
i put the lower bar of the mounting bracket onto the hoop crash bar. they went together no problem. this kept the proper alignment, maintained the rubber grommets, and allows me to bolt up late model mufflers. so this will be the route i take. well if the surface rust cleans up on the forward crash bars. otherwise i'll make new mounts for the late model ones.
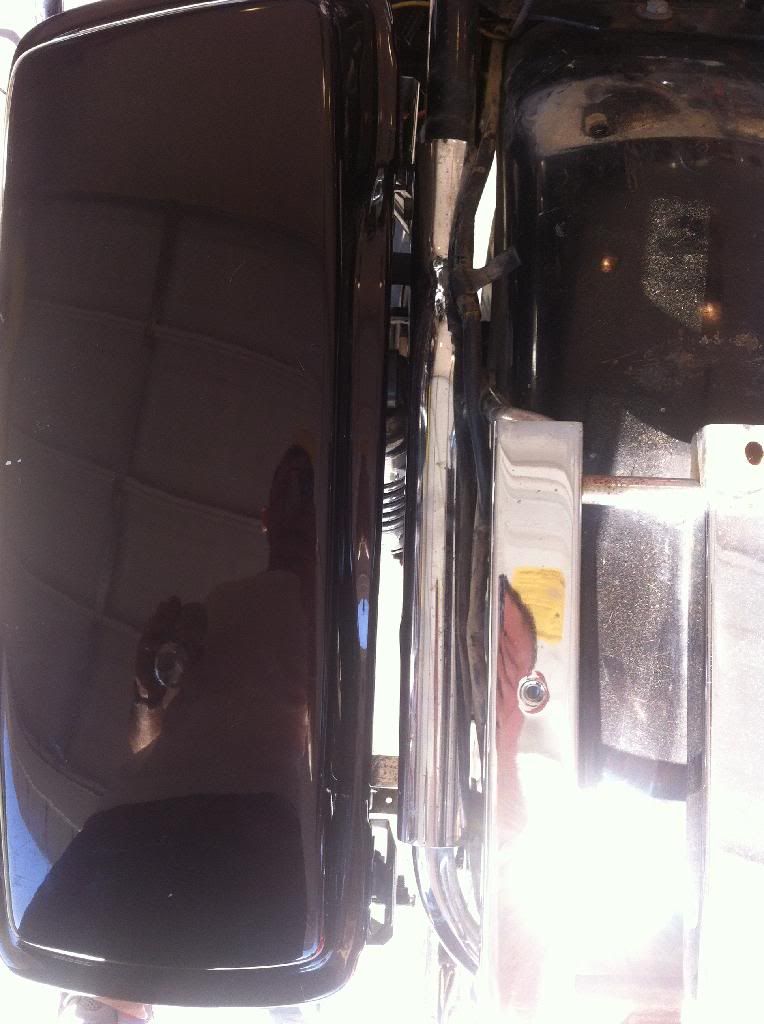
so the bags fell right into place, but were a little close to the frame up top. with the rear tab clipped in, it opened and closed fine. but when i added the front pin to completely secure them, the lid would touch the frame when closing. you can also see in the pic that they are tilting inward a little up top. once i have the bike on the lift, i'll get everything level and space out the mounting tabs.
i'm debating to keep the original pins to secure the bags, or just put nut and bolt to prevent thieves. I may just make a spacer instead of moving the mounts if that's the course of action.
thanks
mike
late model bracket is the loose one. shows that the upper bar is longer than the FLT
black bar is the late model, dirty chrome is the FLT. newer one just swapped out no problem
bag clipped on for initial mock up
and here you can see it's pretty tight at the lids. so i'll space that out some
had some more time so i played with the bags. the original brackets are still in place. so i placed the left bag on to see what would happen. it would have worked just fine. but the bracket had a rubber isolater, and the bag had it's own rubber grommets. so it sat high, and the rear exhaust hanger was in the way.
so i put the late model brackets on the bike. i noticed that the top portion of the crash guard stood out further than the 81 did. pic below. using the stock mounting location, it pushed the bracket out at a weird angle and wouldn't work. so i can move the top mount, or....
i put the lower bar of the mounting bracket onto the hoop crash bar. they went together no problem. this kept the proper alignment, maintained the rubber grommets, and allows me to bolt up late model mufflers. so this will be the route i take. well if the surface rust cleans up on the forward crash bars. otherwise i'll make new mounts for the late model ones.
so the bags fell right into place, but were a little close to the frame up top. with the rear tab clipped in, it opened and closed fine. but when i added the front pin to completely secure them, the lid would touch the frame when closing. you can also see in the pic that they are tilting inward a little up top. once i have the bike on the lift, i'll get everything level and space out the mounting tabs.
i'm debating to keep the original pins to secure the bags, or just put nut and bolt to prevent thieves. I may just make a spacer instead of moving the mounts if that's the course of action.
thanks
mike
late model bracket is the loose one. shows that the upper bar is longer than the FLT

black bar is the late model, dirty chrome is the FLT. newer one just swapped out no problem

bag clipped on for initial mock up

and here you can see it's pretty tight at the lids. so i'll space that out some

#10
04-09-2014, 07:31 PM
Seasoned HDF Member
The following users liked this post:
rockher_man (06-14-2020)