This Is NOT A BUILD: CrossBones The 3rd

#22
 02-05-2015, 02:02 PM

Nice job skeez. Sorry to hear about your past bad luck, but it could be good fortune also. Depends on how you look at it. I read a post a while back where a guy extended down the jiffy stand and then placed pennies in each gap of the spring coils. Then push the stand back up and the spring will stay extended out to relieve the pressure. Makes sense to me. You may do this in reverse to get it back on. Put end of spring in vice, pull on it real hard and have your boys put coins in between the coils of the spring. Let go of end of spring and it should stay out. Slip it back on. Sounds good to me but what do I know. lol
#23
02-05-2015, 02:56 PM
Nice job skeez. Sorry to hear about your past bad luck, but it could be good fortune also. Depends on how you look at it. I read a post a while back where a guy extended down the jiffy stand and then placed pennies in each gap of the spring coils. Then push the stand back up and the spring will stay extended out to relieve the pressure. Makes sense to me. You may do this in reverse to get it back on. Put end of spring in vice, pull on it real hard and have your boys put coins in between the coils of the spring. Let go of end of spring and it should stay out. Slip it back on. Sounds good to me but what do I know. lol
Everything is looking up at the moment except that now I have to opposite problem of too much work...which is great for the bank account but not so good for wrenching time.
That actually sounds like a good idea for removing the spring.
I had an incident some years ago where it popped off after hitting a deep pothole that was hidden by rain water in the middle of the night. If it wasn't for the help of a gentleman who owned a car shop right next door I would have had to tie the stand up to the frame and ride it home that way. He got down on the ground and managed to get it back on with a pair of vice grips but it wasn't easy and it must have taken at least 20 minutes of tugging on it while I sat on the bike to hold it upright. Since then I was always terrified of the idea of ever having to remove the jiffy stand.
Last edited by Skeezmachine; 02-05-2015 at 03:00 PM.
#24
02-10-2015, 09:12 AM
As I said before, I had a delay with the bars because I found a flaw in the powder coating and took them back to have them redone. They came out perfect the second time around and I got to the task of wiring them and getting them ready for install. My main concern was with the 90 degree bends at the bottom. We did my brother's z bars some time ago with 90 degree bends at both top and bottom and we had to remove the black conduit from his wire bundles in order to make it easier to get the whole thing through. I didn't want to do that to mine. Also, I had already wired one side of my bars before I noticed the bad finish so I was aware of the challenges ahead so I was better prepared the second time.
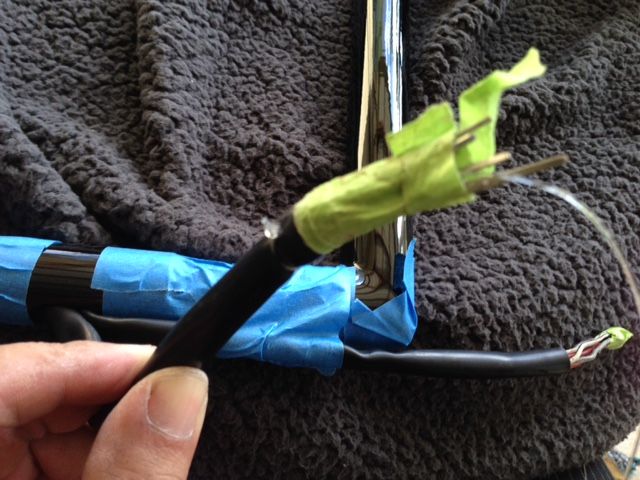
Using some thicker fishing line (40 pond test leader) I cut a length of about 3 feet and tied a small nut to one end and dropped it into on hole, maneuvering the bars to get it to drop out of the center opening. Instead of tying the other end to my bundle of wires I made a noose and slipped this just behind the pins where it would tighten as I pulled and the pins would keep it in place. I taped everything over, feeding the line out the end so that as I pulled the wires through the tip of the bunch would lead through the bends as much as possible.
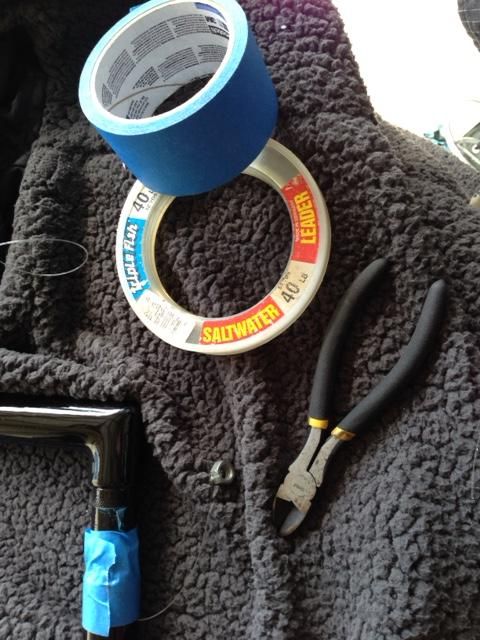
(Materials for running the wires through)
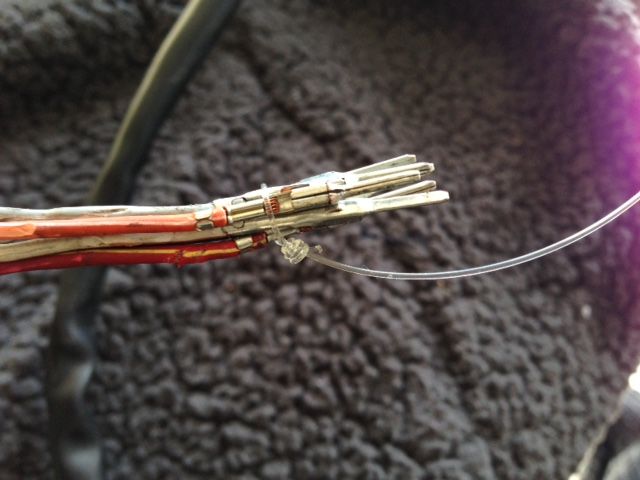
(Noose just behind the pins...)
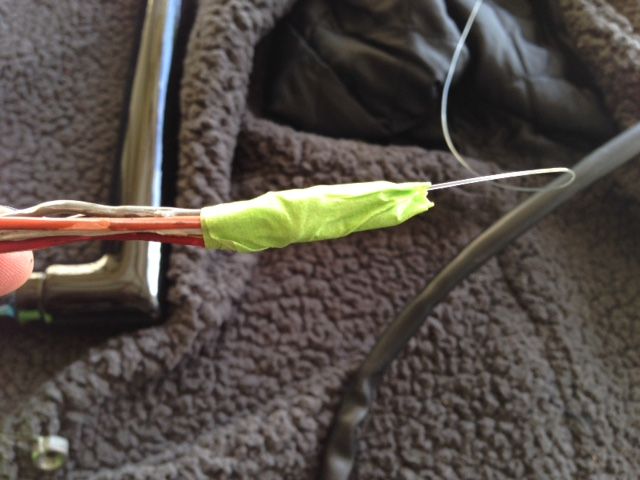
(...and taped off.)
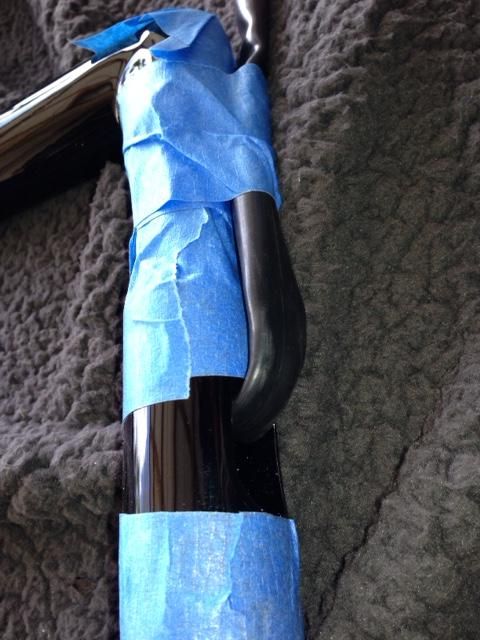
(Right side pulled through and then taped off tight to one side to clear the center opening as much as possible to work the other wire bundle through.)
(With the second set of wires, I pulled the plastic conduit close to the pins and placed the noose over it instead of just the wires. I did this because with the first set, the conduit was getting hung up while the wires themselves were getting pulled through. With this method everything pulled through together. I made it a little tighter, especially because this is the left side wiring which has 2 more wires than the right but it still worked out great.)
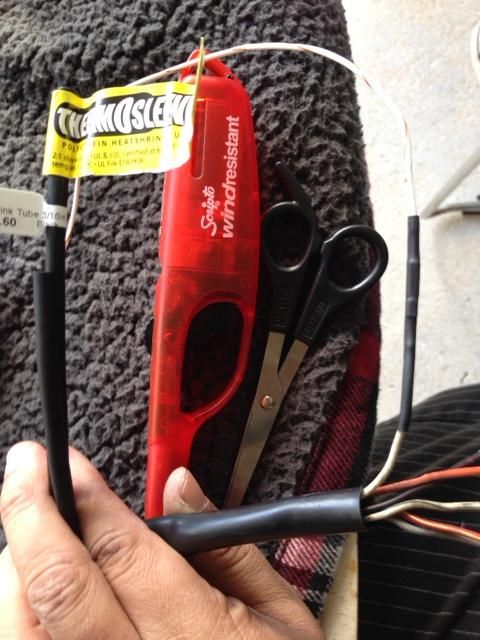
(Adding the wire extensions. I bought this kit used so there was no heat shrink so I purchase a length of 3/16 heat shrink. A good pair of scissors to cut the pieces and a windproof BBQ lighter (burns more like a torch) to heat the wrap made completing the extensions about a 10 minute job.)
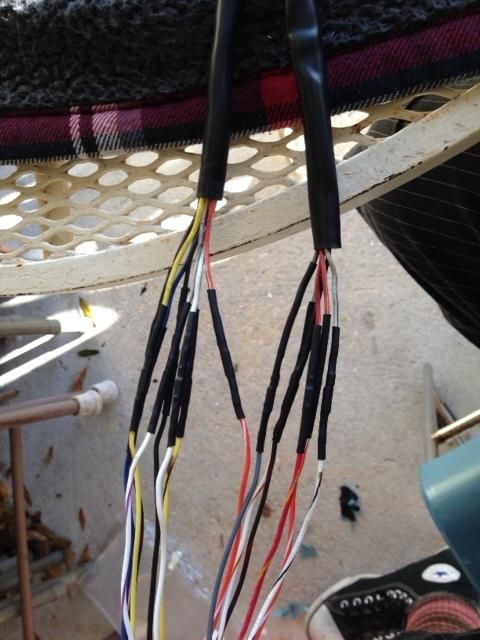
(All the connections made...)
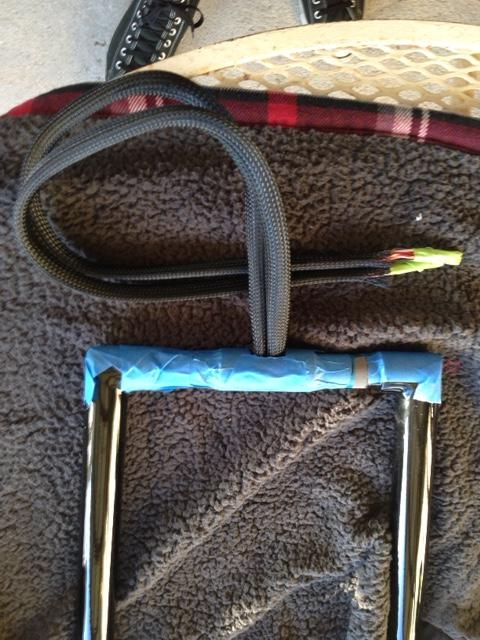
(Lastly, the braided sleeve for looks and the bars are ready to throw on the bike. Besides the braided sleeve, I also added an extension the black conduit that goes over all the wires. We didn't do this on my brother's bars and as a result you can see all the colored wires through the outer sleeve.)
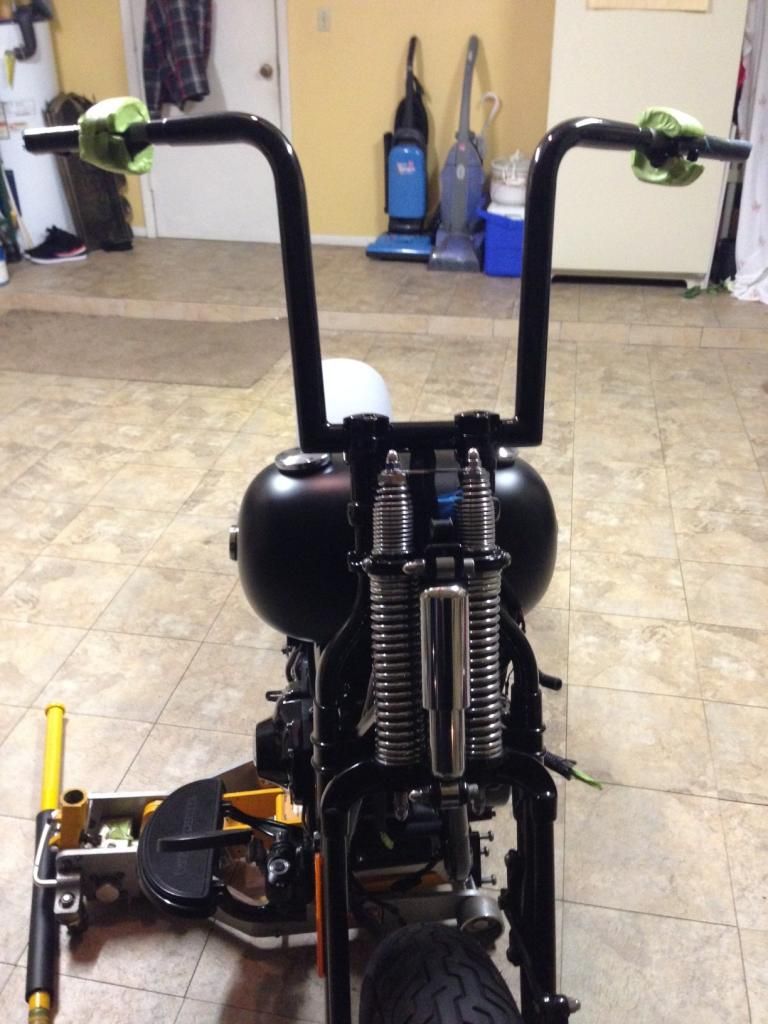
(The bars on the bike. Everything is torqued down. No; those are not tennis ***** on the ends!)
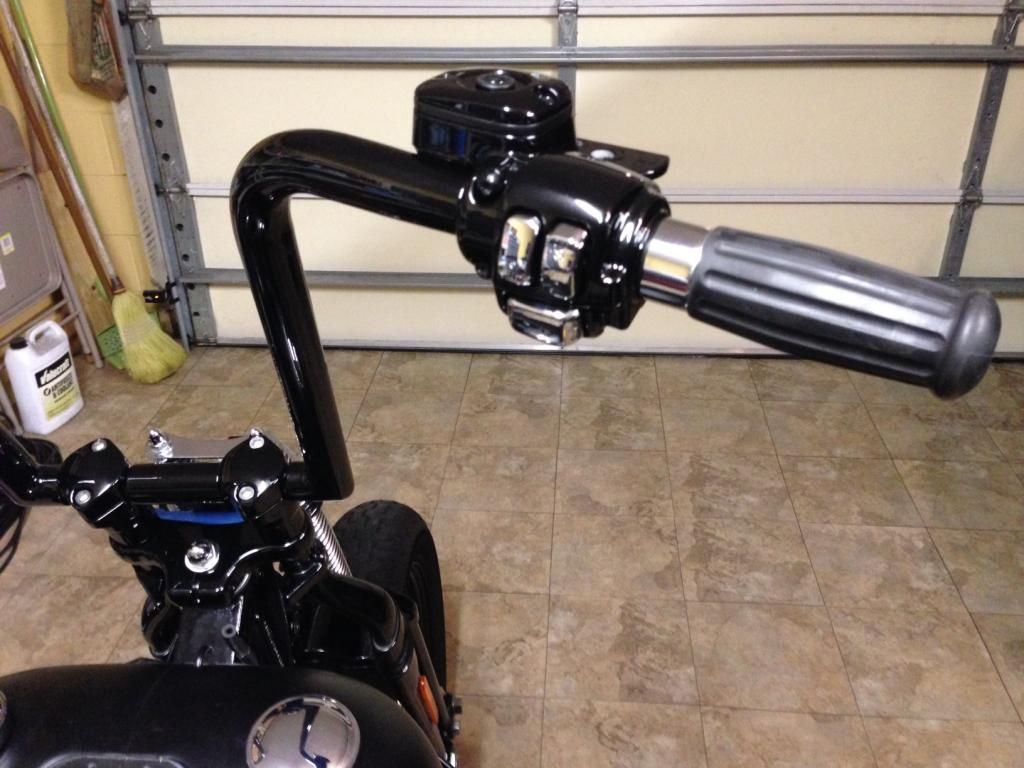
(Controls are on. Everything got a fresh coat of gloss black. I had to dismantle the master cylinder and then rebuild it with a fresh guts from Harley. I took a page from Forum member Redbeard's book and filed down all the casting marks on the controls to give them a much smother look. Switched out the stock satin black switches with chrome for a nice bit of contrast. Jury is still out on whether I want to do gloss black levers or chrome. Also, I'm going to be going with the same style of grips but I'll be purchasing a new pair. These are my old ones which I used just so I could get the controls positions properly.)
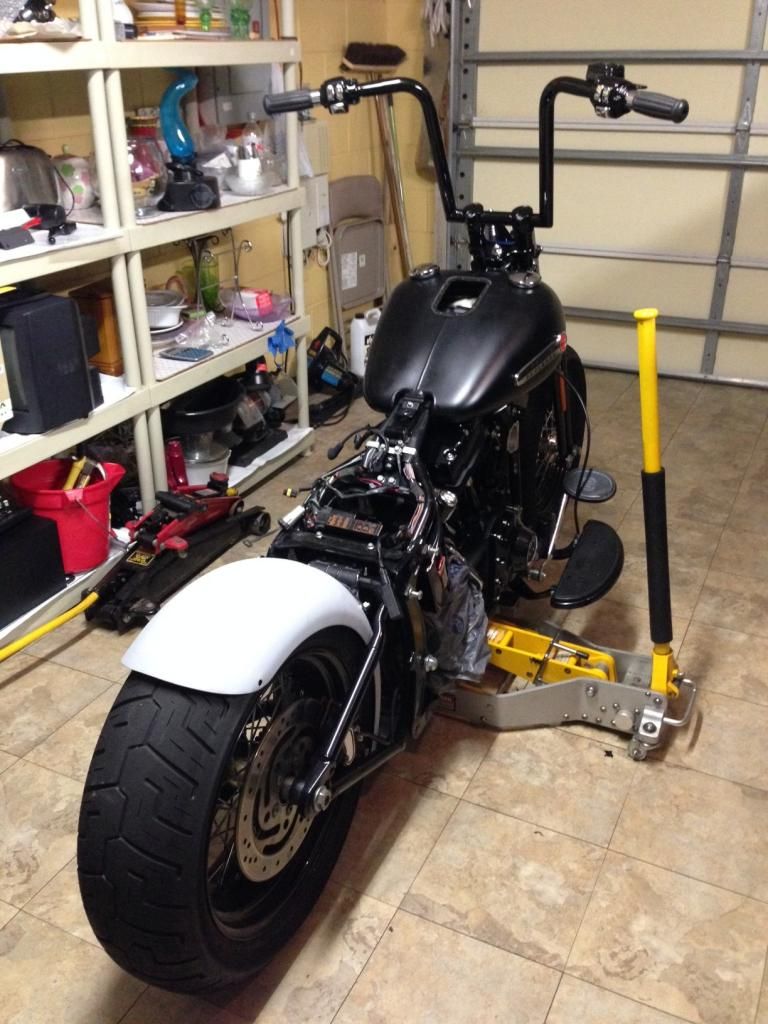
(Another view. Still lots of changes to come but with my old tank and the new fender still mocked up I am getting a clear picture of the final product and I am feeling pretty good about it all so far.)
More to come...
Using some thicker fishing line (40 pond test leader) I cut a length of about 3 feet and tied a small nut to one end and dropped it into on hole, maneuvering the bars to get it to drop out of the center opening. Instead of tying the other end to my bundle of wires I made a noose and slipped this just behind the pins where it would tighten as I pulled and the pins would keep it in place. I taped everything over, feeding the line out the end so that as I pulled the wires through the tip of the bunch would lead through the bends as much as possible.

(Materials for running the wires through)

(Noose just behind the pins...)

(...and taped off.)

(Right side pulled through and then taped off tight to one side to clear the center opening as much as possible to work the other wire bundle through.)

(With the second set of wires, I pulled the plastic conduit close to the pins and placed the noose over it instead of just the wires. I did this because with the first set, the conduit was getting hung up while the wires themselves were getting pulled through. With this method everything pulled through together. I made it a little tighter, especially because this is the left side wiring which has 2 more wires than the right but it still worked out great.)

(Adding the wire extensions. I bought this kit used so there was no heat shrink so I purchase a length of 3/16 heat shrink. A good pair of scissors to cut the pieces and a windproof BBQ lighter (burns more like a torch) to heat the wrap made completing the extensions about a 10 minute job.)

(All the connections made...)

(Lastly, the braided sleeve for looks and the bars are ready to throw on the bike. Besides the braided sleeve, I also added an extension the black conduit that goes over all the wires. We didn't do this on my brother's bars and as a result you can see all the colored wires through the outer sleeve.)

(The bars on the bike. Everything is torqued down. No; those are not tennis ***** on the ends!)

(Controls are on. Everything got a fresh coat of gloss black. I had to dismantle the master cylinder and then rebuild it with a fresh guts from Harley. I took a page from Forum member Redbeard's book and filed down all the casting marks on the controls to give them a much smother look. Switched out the stock satin black switches with chrome for a nice bit of contrast. Jury is still out on whether I want to do gloss black levers or chrome. Also, I'm going to be going with the same style of grips but I'll be purchasing a new pair. These are my old ones which I used just so I could get the controls positions properly.)

(Another view. Still lots of changes to come but with my old tank and the new fender still mocked up I am getting a clear picture of the final product and I am feeling pretty good about it all so far.)
More to come...
#26
02-15-2015, 03:30 PM
Skeez, Im really sorry to hear about your misfortune and commendyou for hanging in there for your two beautiful boys someday you will get paidback 10 fold for your efforts. Also have to commend you on your transformationon your Bonz, that thing is looking sweet!!! I really like where you’re goingwith it keep up the good work all around and definitely keep us updated..
#27
02-16-2015, 10:28 AM
Great write-up description and fantastic work. From one X-Bones owner to another, "you're the man."
BTW: when you take off and add a new gas tank did you ever have the gasket go bad such that gas leaked out, and then you had to replace the gasket? I know you have to put in a new gasket every time the tank is removed.
Sorry to hear about the wife leaving.
BTW: when you take off and add a new gas tank did you ever have the gasket go bad such that gas leaked out, and then you had to replace the gasket? I know you have to put in a new gasket every time the tank is removed.
Sorry to hear about the wife leaving.
My boys and I have been on our own for over two years now so we've gotten used to it for the most part, but thanks for the thoughts.
I don't want to steer you in the wrong direction concerning the gas tank top plate seal. I've yet to remove one that looked like it wouldn't work anymore and needed to be replaced. The thing about the top plate seal as well as the little screws with seals on them for the top plate is that I think they are less about keep gas in the tank than they are about keeping the weather out. The seal I just took off my Bones has over 60K miles and it looks no better or worse than the new one I have to replace it with. That said, I am not an expert on how these things break down and if it would be that bad of an idea to reuse it. I think if my bike were much newer with less miles then I wouldn't have a problem with using the same top plate seal and maybe even the screws. The only reason I have replacements for my new tank is that I am changing out the fuel filters and the kit that I bought from Harley includes a new top seal and top plate screws.
#28
02-16-2015, 10:57 AM
Skeez, Im really sorry to hear about your misfortune and commendyou for hanging in there for your two beautiful boys someday you will get paidback 10 fold for your efforts. Also have to commend you on your transformationon your Bonz, that thing is looking sweet!!! I really like where you�re goingwith it keep up the good work all around and definitely keep us updated..
As for the bike?
Glad to hear yall like it so far. What stinks above all is that at the start I had the perfect vision of where I was going to go with it and just needed the right parts and the time to get things moving. As things progress, I start second guessing here and there and in some cases setting myself back because of it. Sometimes the change of heart is a result of stumbling on a part or idea that I chance on while I am researching something else. It's hard not to get sidetracked!
At the moment, my biggest undecided points are:
1. Exhaust style.
2. Gas Cap/Fuel Gauge
3. Foot pegs.
4. Levers (chrome or black)
5. Mirrors ( I may have figured this one out provided I can find what I am picturing.)
Next weekend I should have some time to tinker so hopefully I will have another decent update.
#29
02-16-2015, 05:30 PM
#30
02-16-2015, 10:45 PM