Hey Skeez... even though it sounds like some bad life stuff goin on...you've got your head on straight and that's the most important thing. Looking forward to your progress on the bike.
Skeez, I got here late and will be here to follow your progress in all that you're happy to share here. Thanks!
You seem like the kind of person capable at getting his way and I admire that.
Keep on keepin on brother!
First off; Thanks to everyone for being supportive of a fellow rider! It's good to feel that through this hobby of mine I have some distant friends out there.
I had been holding out to do any updates because I felt like I had nothing real significant to report. That said, I noticed going through my pics the other day that I kept running into stuff that I had worked on. I decided to start reporting again if only to give myself more motivation to get back on track with my scoot and get her finished. After all, the finish line isn't that far off and I just need few good weekends to at least get her back on the road, if not finished altogether.
So first off I'll just go over my license plate bracket. No big deal here. I know I wanted an axle mount. I wanted it curved and I wanted it to hold the light as well. I already had the old Ford style tail light for years and it was finally going to get some use.
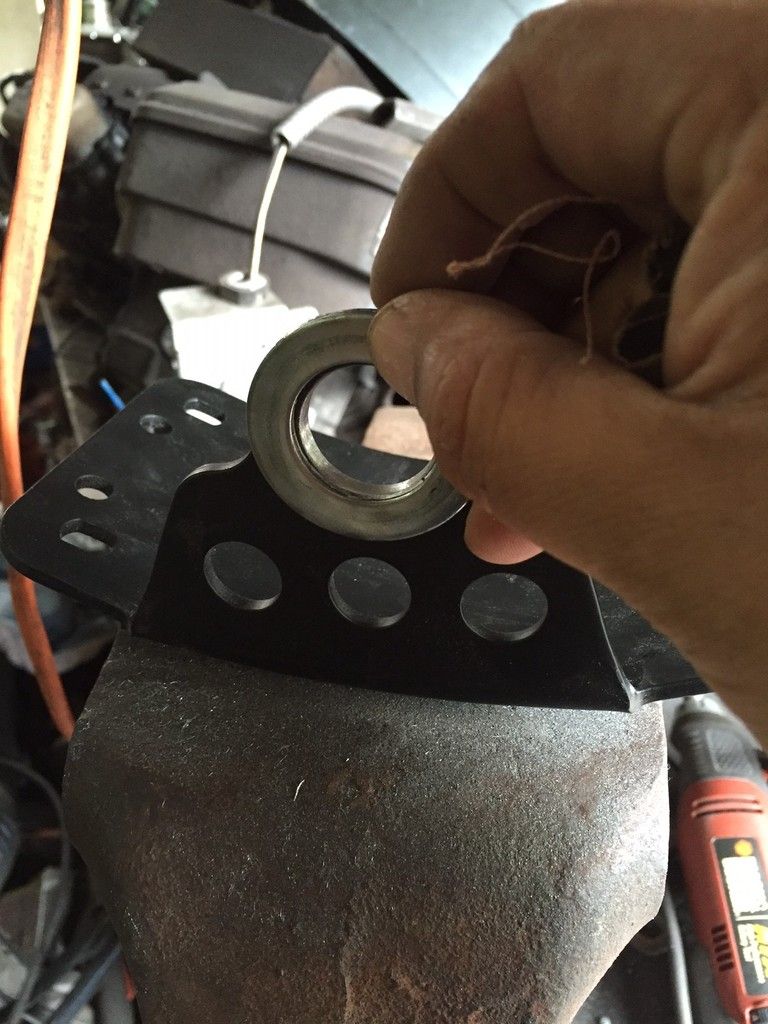
The unit I ordered was off eBay. I wasn't 100% sure that it would be the right size for my axle but assumed that could be remedied if it wasn't. As it turns out, the hole for the axle on the piece was not big enough so I was going to have to expand it to fit. Also, the unit is very well made which consequently makes it pretty heavy. I figured that I could lighten it up a bit by drilling out some holes into the plate to get rid of some of the metal and to give it a bit of a custom look that should coordinate with some of my other parts that I have drilled out in a similar fashion.
I start by expanding the mounting hole using my stock axle washer as a guide. As a side note, installing this tag mount means that said washer becomes obsolete because the axle is not long enough to accommodate both. One thing I didn't want to do is just make the hole bigger. As you may be able to tell from the pic, the lower diameter around the mounting hole was the exact width of the stock washer. If I just drilled the hole out from the center it would significantly reduce the size of this lower radius which I feared would make the bracket more prone to breaking. As such I not only had to drill out the hole but I had to offset it upwards to keep the width of the lower radius intact. I did this work using my high speed Dremel and a variety of grinding attachments. This method was necessary to avoid cutting away at the lower radius of the hole as explained above.
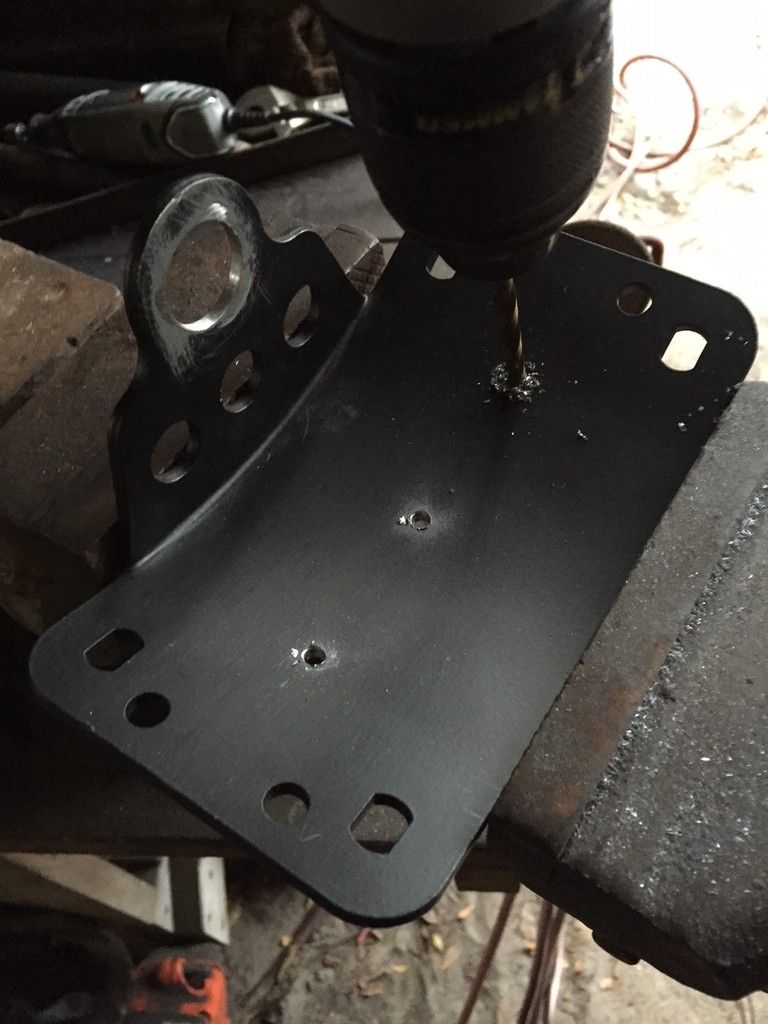
Once I got the mounting hole done I marked and punched where I was going to drill out the back plate to make it lighter. The following pics show only three holes but I will probably do a few more. I want to get rid of some of the weight without compromising rigidity. This thing is pretty solid but I know that road vibrations and bumps can take more of a toll on a part than one might think.
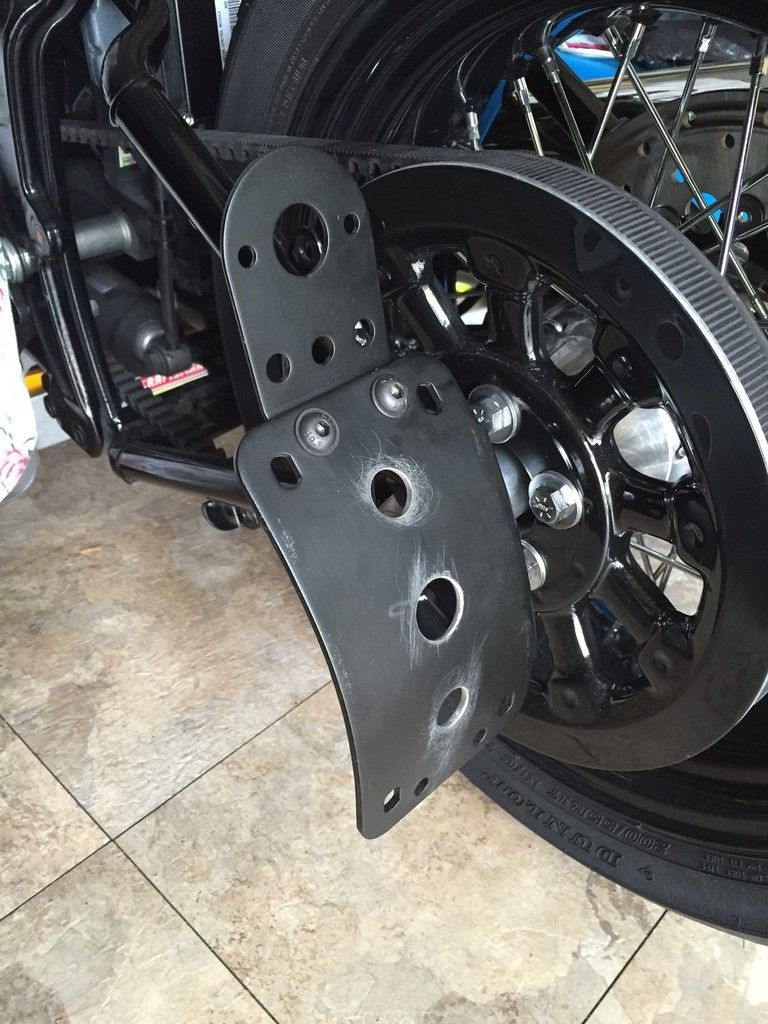
I decided that before I put any more work into finishing this thing up I should at least mock it up and get some idea of how it's going to look as well as try to determine any other adjustments or mods it might need that I can't think of with it off the bike.
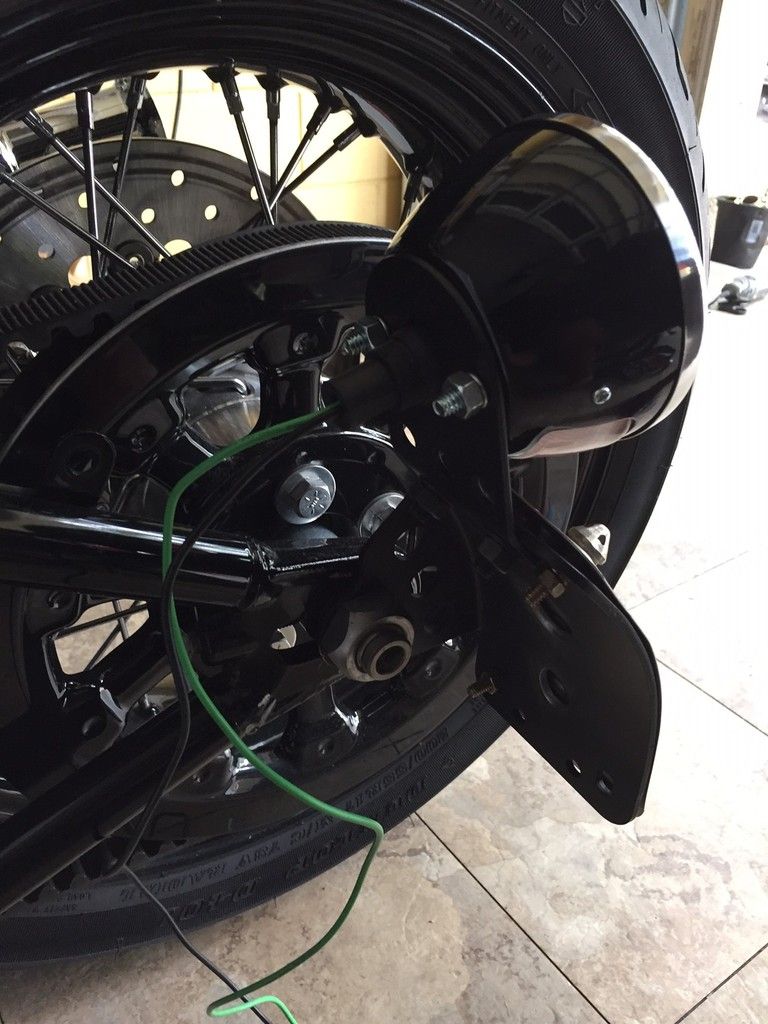
With the tail light mounted...
And a view from the back...with poor lighting!
Even without torquing the axle nut down to spec I could tell that this thing is going to hold up pretty solid. Going to finish drilling out the holes in the plate. Since this unit is designed for either left or right applications, the tail light mount is a separate piece that bolts on to either end of the unit. The bad thing is that the bolts provided for that (or any bolts for that matter) really prevent the tag from mounting flush against the plate. Talk about a really poor design feature. I plan to solve this one of two ways. I will either counter sink the holes and use counter sunk screws to mount the piece. This way I have the option to remove the light if I ever want to change up my lighting set up. The other solution might be that I just weld the two pieces together since most likely I will never run this unit on the right side of the bike and there will be no need to ever flip the mount. Whichever way I go I will update this post to show my solution.
Oh yeah...and finally the part will get stripped and coated gloss black.
Last edited by Skeezmachine; 04-22-2016 at 11:11 AM.
Nice work Skeezemachine! I like that a lot. I bet Benjamin is going to follow suit...
If you ever ran across one of these stop lights I think it would be extra cool!
Any thought toward just drilling two holes in your plate and using the bracket bolts to hold it on? Could put two on the bottom to match if you like.
I wonder about countersinking and compromising the bracket... there's a fair amount of weight with a wind load, bouncing on the road as unsprung weight and some vibration on that stop light bracket so it needs to be strong. Just a thought for you.
So to refresh everyone...I decided on this Shadetree fender because I got a good deal from a forum member on it. Normally I don't think I would have gone with this choice given that the price point for a new kit seems well above what it is actually worth. Especially when you consider how much work has to be done to the kit after purchase in order to get it ready for the road.
Since this kit was used it was already drilled. After mocking it up I was pleased with how it fit on the bike except the the front lower part of the fender was way too long and came down past the frame of the bike. As evident from some bending and scratches that were on that portion of the fender when I received it, it is never good for anything to come down lower than the frame of the bike because chances are it might hit or drag. Fortunately trimming this area off for a proper fit meant that any damage that was there was removed completely.
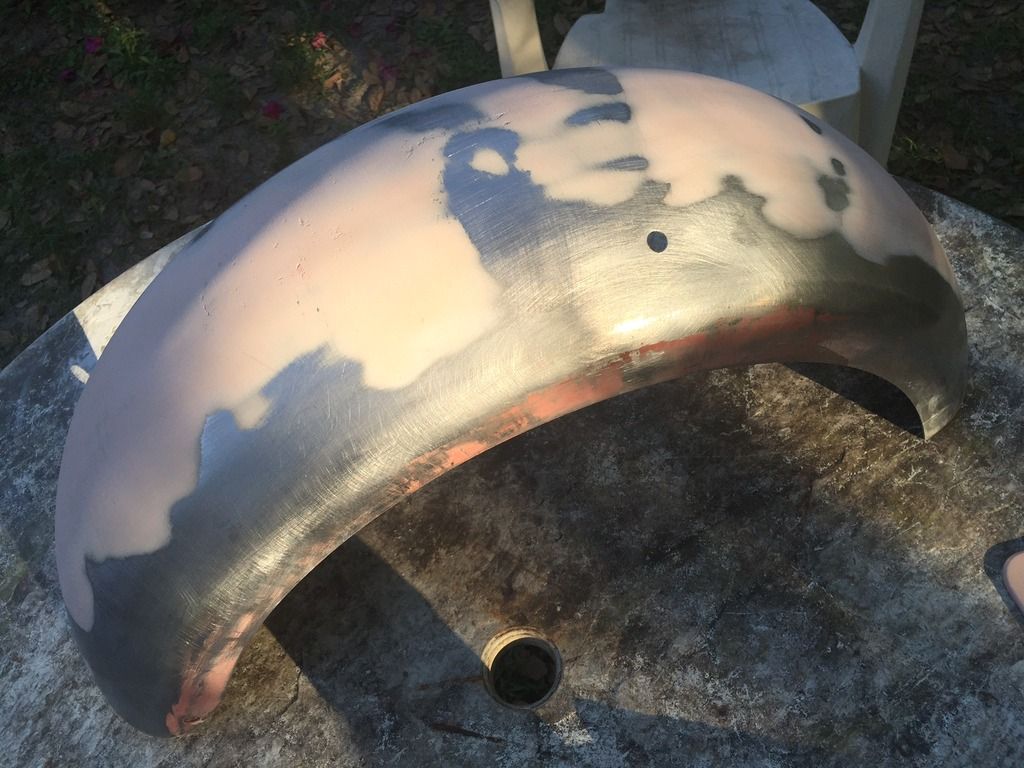
A good pas with an orbital sander and a grinder with a heavy wire wheel preceded by a good coat of paint stripper got rid of the paint job that was on the fender and got the bare metal to a nice finish, ready for body work.
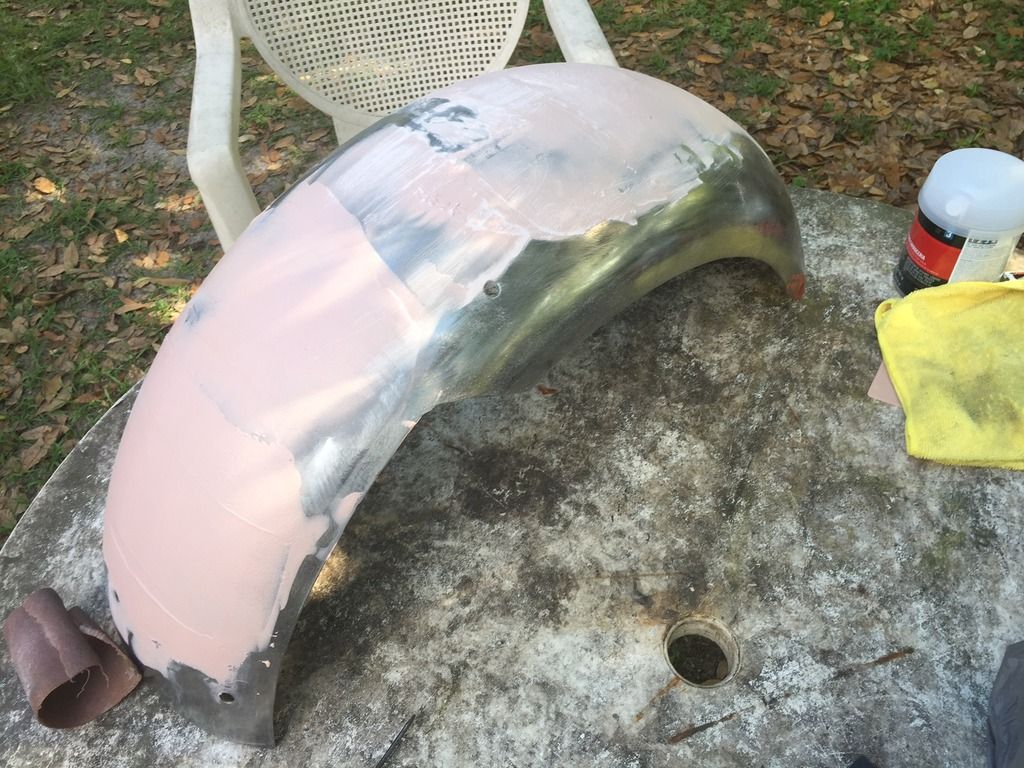
These fenders are two pieces of rolled and welded steel. This means that the very crown of the fender has some flatness to it rather than being nice and round. In order to get a good radius, it was necessary to apply some body filler to build up these flat spots lightly and then sand them to a nice round shape. I have never worked with body filler, only having made minor repairs using glazing putty. I went with Bondo brand, read the instructions and dove it. My first coat didn't go so well. I think I added too much hardener to the mix and once I tried to spreading it the material began to set rather quickly. This made for a very rough coat. I am happy to say that by the second application of filler I got the hang of applying the material and should be able to give the fender a pretty good finish on my next session with it.
First application of filler. Looks rather ghastly.
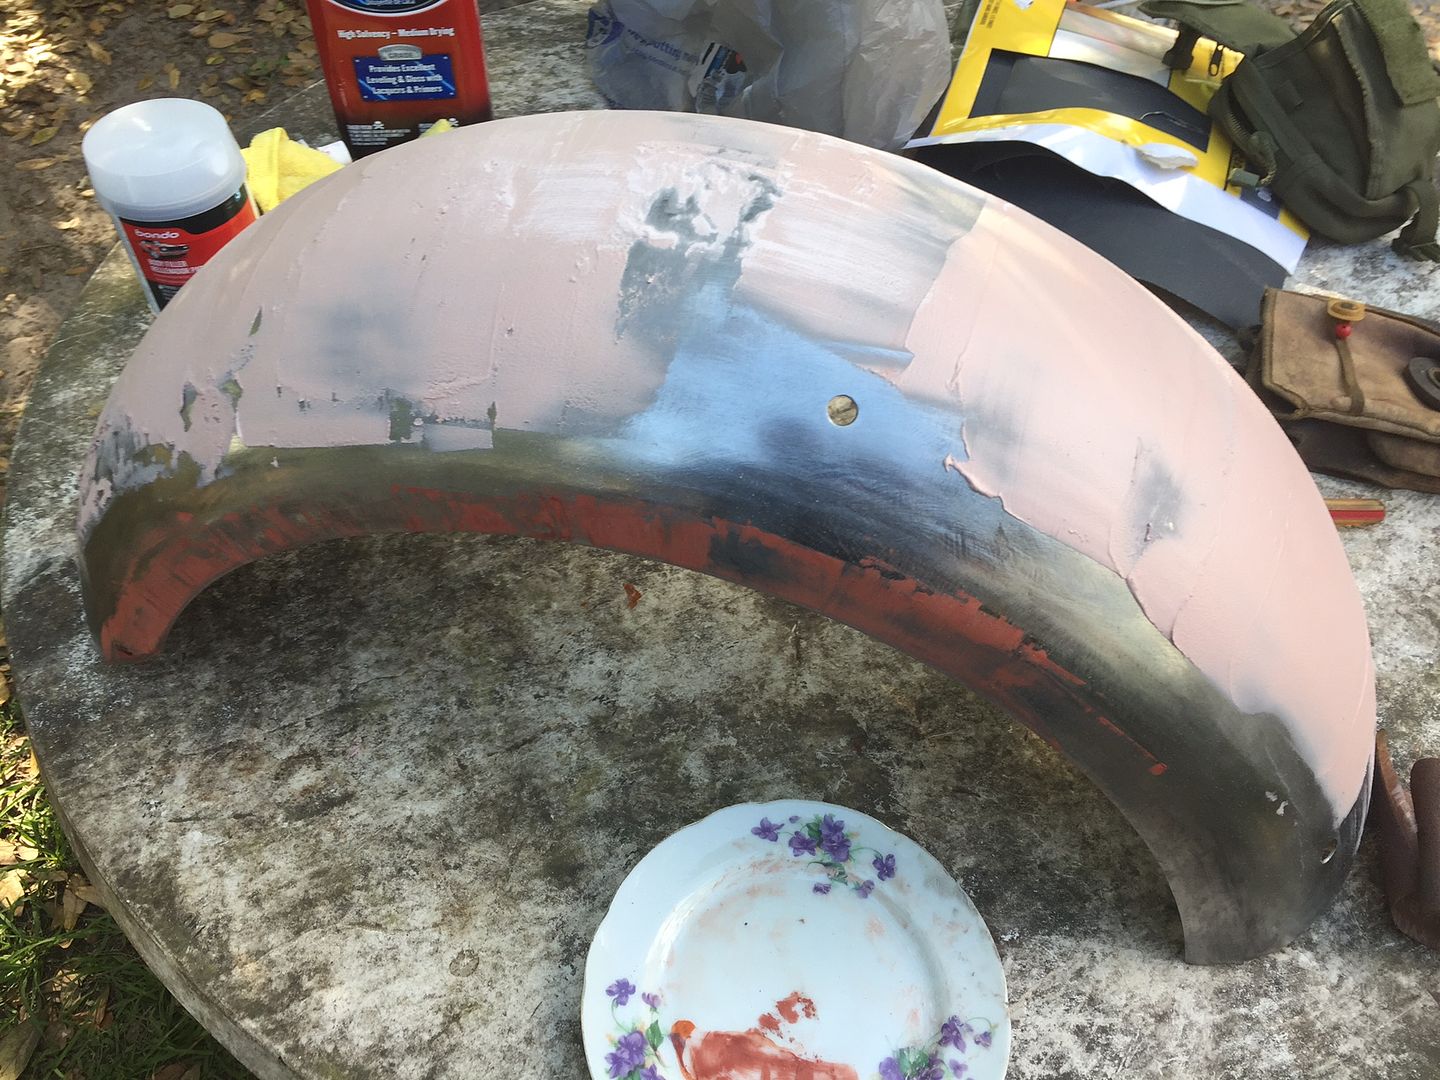
After the first sanding. Had to take most of the material back off, sparing it on the most flat parts of the fender.
I know. Not much to show for my efforts. I will be spending time finishing up this step in the process this coming weekend so I will make sure to update this post as soon as I have more to share.
I'm gonna have to take a Saturday or Sunday, sit home with some coffee and read all of these awesome threads....I have a Slims S...I want to start tearing into it soon.....awesome work Skeez....
I'm gonna have to take a Saturday or Sunday, sit home with some coffee and read all of these awesome threads....I have a Slims S...I want to start tearing into it soon.....awesome work Skeez....
Cool!
Besides just being able to share for the "why not" of it I figured that rather than others learning from me, I will probably learn more from others as they respond to what I do.
I have been riding since 08 and logged close to 60K miles on my Bones before I tore it down but I am otherwise a total novice at all of this. Hence, throwing this stuff up on a thread is sort of like having a few friends around to help me sort things out as I go along. So if at any point you feel like lending a thought or two, please feel free to do so.
Since you asked for advice, I'm not a body man but I've got a fair amount of bondo and Centauri in my lungs from the 80's.... my memory from days gone by tell me that those pin holes in your bondo are going to cause you fits down the road, you mixed it too hot as you noted and pulled air into the mix causing those air holes.
You can fill them with putty but I suspect it'll pop out down the road.
If nobody pipes in, see if you can find a good body man for advice, I'm afraid you might need to sand all of that out and try again but don't take my word - ask someone who knows. I'd hate for your paint to bubble on you later so it's worth asking.
 10-08-2015, 07:46 AM