DIY Cheap Mods
#921
 06-30-2014, 01:58 AM


Hello fellow DIYers. I think my 2 mods I have done on my Breakout this week qualify me for this thread as I spent a total of $6 on both.
1st mod- I have Freedom Performance radius pipes and they are quite loud, I was quoted $410 for a pair of their "quiet baffles". Maybe they are not that loud then!!!(baffle is welded in and their "quiet baffle" replaces the whole back end of the pipe)
Did a little research on quiet baffle design and got on the lathe at work and machined up a pair of baffles out of Stainless steel. Tack welded on a little retaining block, tapped a 1/4" thread in it and drilled a hole in the side of the pipes to hold them in. They slide right in the end and the retaining screw is under the heat shield out of sight. They have done exactly what I was after, definitely quieter at idle, but still got a nice note when on the throttle.
2nd mod- Removed the stock license plate holder from under the rear fender and attacked it with an angle grinder. Only left 2 little tabs hanging out the back to attach the number plate to. Smoothed all edges and drilled 2 holes to mount license plate. Cut wires to plate light and soldered wires for 2 license plate bolts with inbuild LED's(cost $6 off ebay). Re-attached to bike and the result is a much smaller & neater plate and light.
I have attached a few pics of the baffles and also before and after the license plate chop.
Cheers
Harty
what do u use for a brake light?
#922
06-30-2014, 09:22 PM
I would have kept at least the bar light; figure some way to mount it. Why?
My sis gets rear-ended at a stoplight with just one of those cateye taillights, and now has a 22k Shovelhead and a permanent limp.
Add in a brand new Nightster on a test ride, and some doof slams on the brakes before a green light...seven broken ribs, broken collarbone, and now surgury on the shoulder...friggin' cagers...
My motto: Loud Lights Save Lives!!!
#923
07-01-2014, 06:49 AM

Intermediate
Join Date: Apr 2014
Location: australia
Posts: 35
Likes: 0
Received 0 Likes
on
0 Posts
Hey Matt. The Breakout goes so fast there is never anyone behind me, so I don't need a brakelight. 
Nah only joking. On the Breakout the tail lights,brake lights and indicators are all rolled into the one unit. I wondered about that too when I first looked at the bike, "where are the tail & brake lights". The red bit I removed from the rear fender was just the reflector that was stuck on.
Cheers,
Harty
#924
07-01-2014, 07:08 PM
A little hard to see in this pic, I also removed the turn signal standoffs so turns do not stick out. First had plate mounted without a frame, looked a little unfinished so added frame and found a cheap led light and mounted it to frame. Plugged original license plate holder holes in fender and hit them with touch up paint. Using rtb module with custom dynamic led's turns. To borrow a quote - bright lights save lives.
#925
07-12-2014, 06:05 PM
Stellar HDF Member
Another garage door opener Mod
Used Part number2106-0151 from NAMZ Custom cycle Products
This is the water proof momentary switch used on Road Kings for OD switching
Pre wired keychain garage door opener with tails
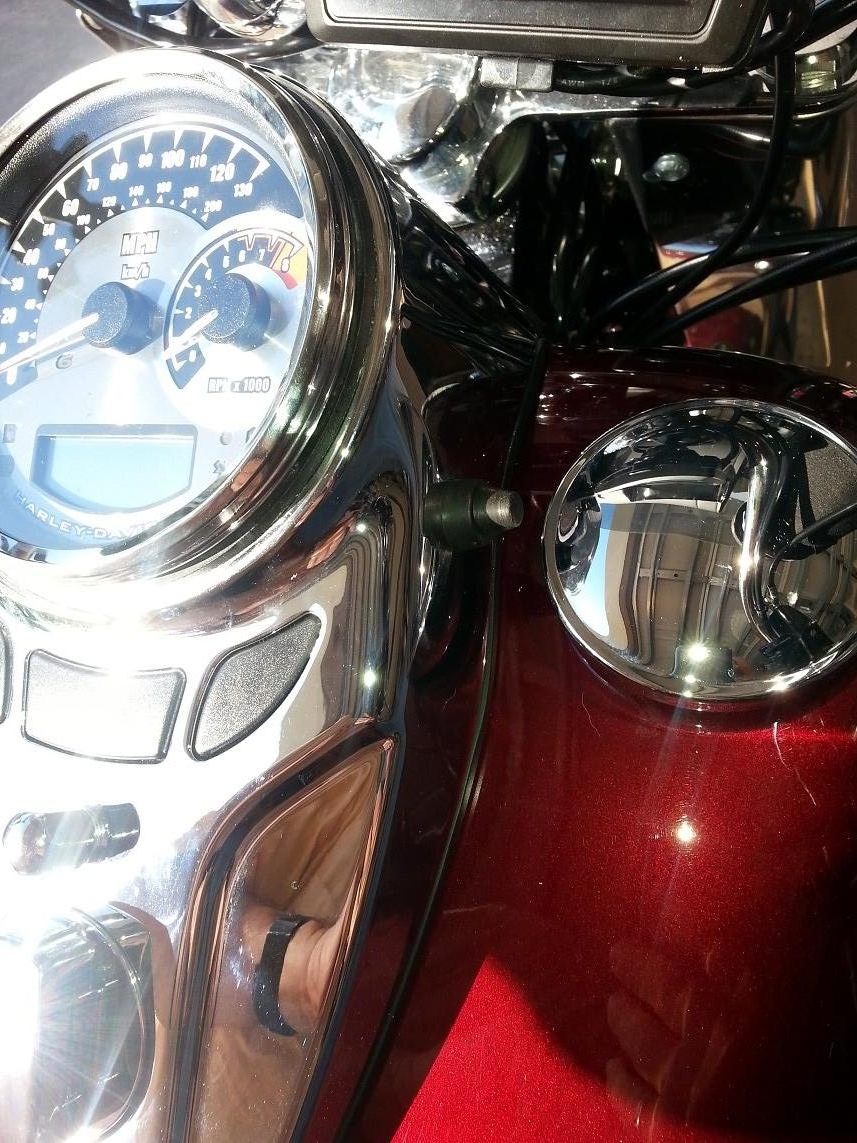
Drilled hole in Console near gas tank
Attached momentary switch used caps to twist wires together (to make battery changes easier)
Used Mastic tape to attach opener case to front of inside f console
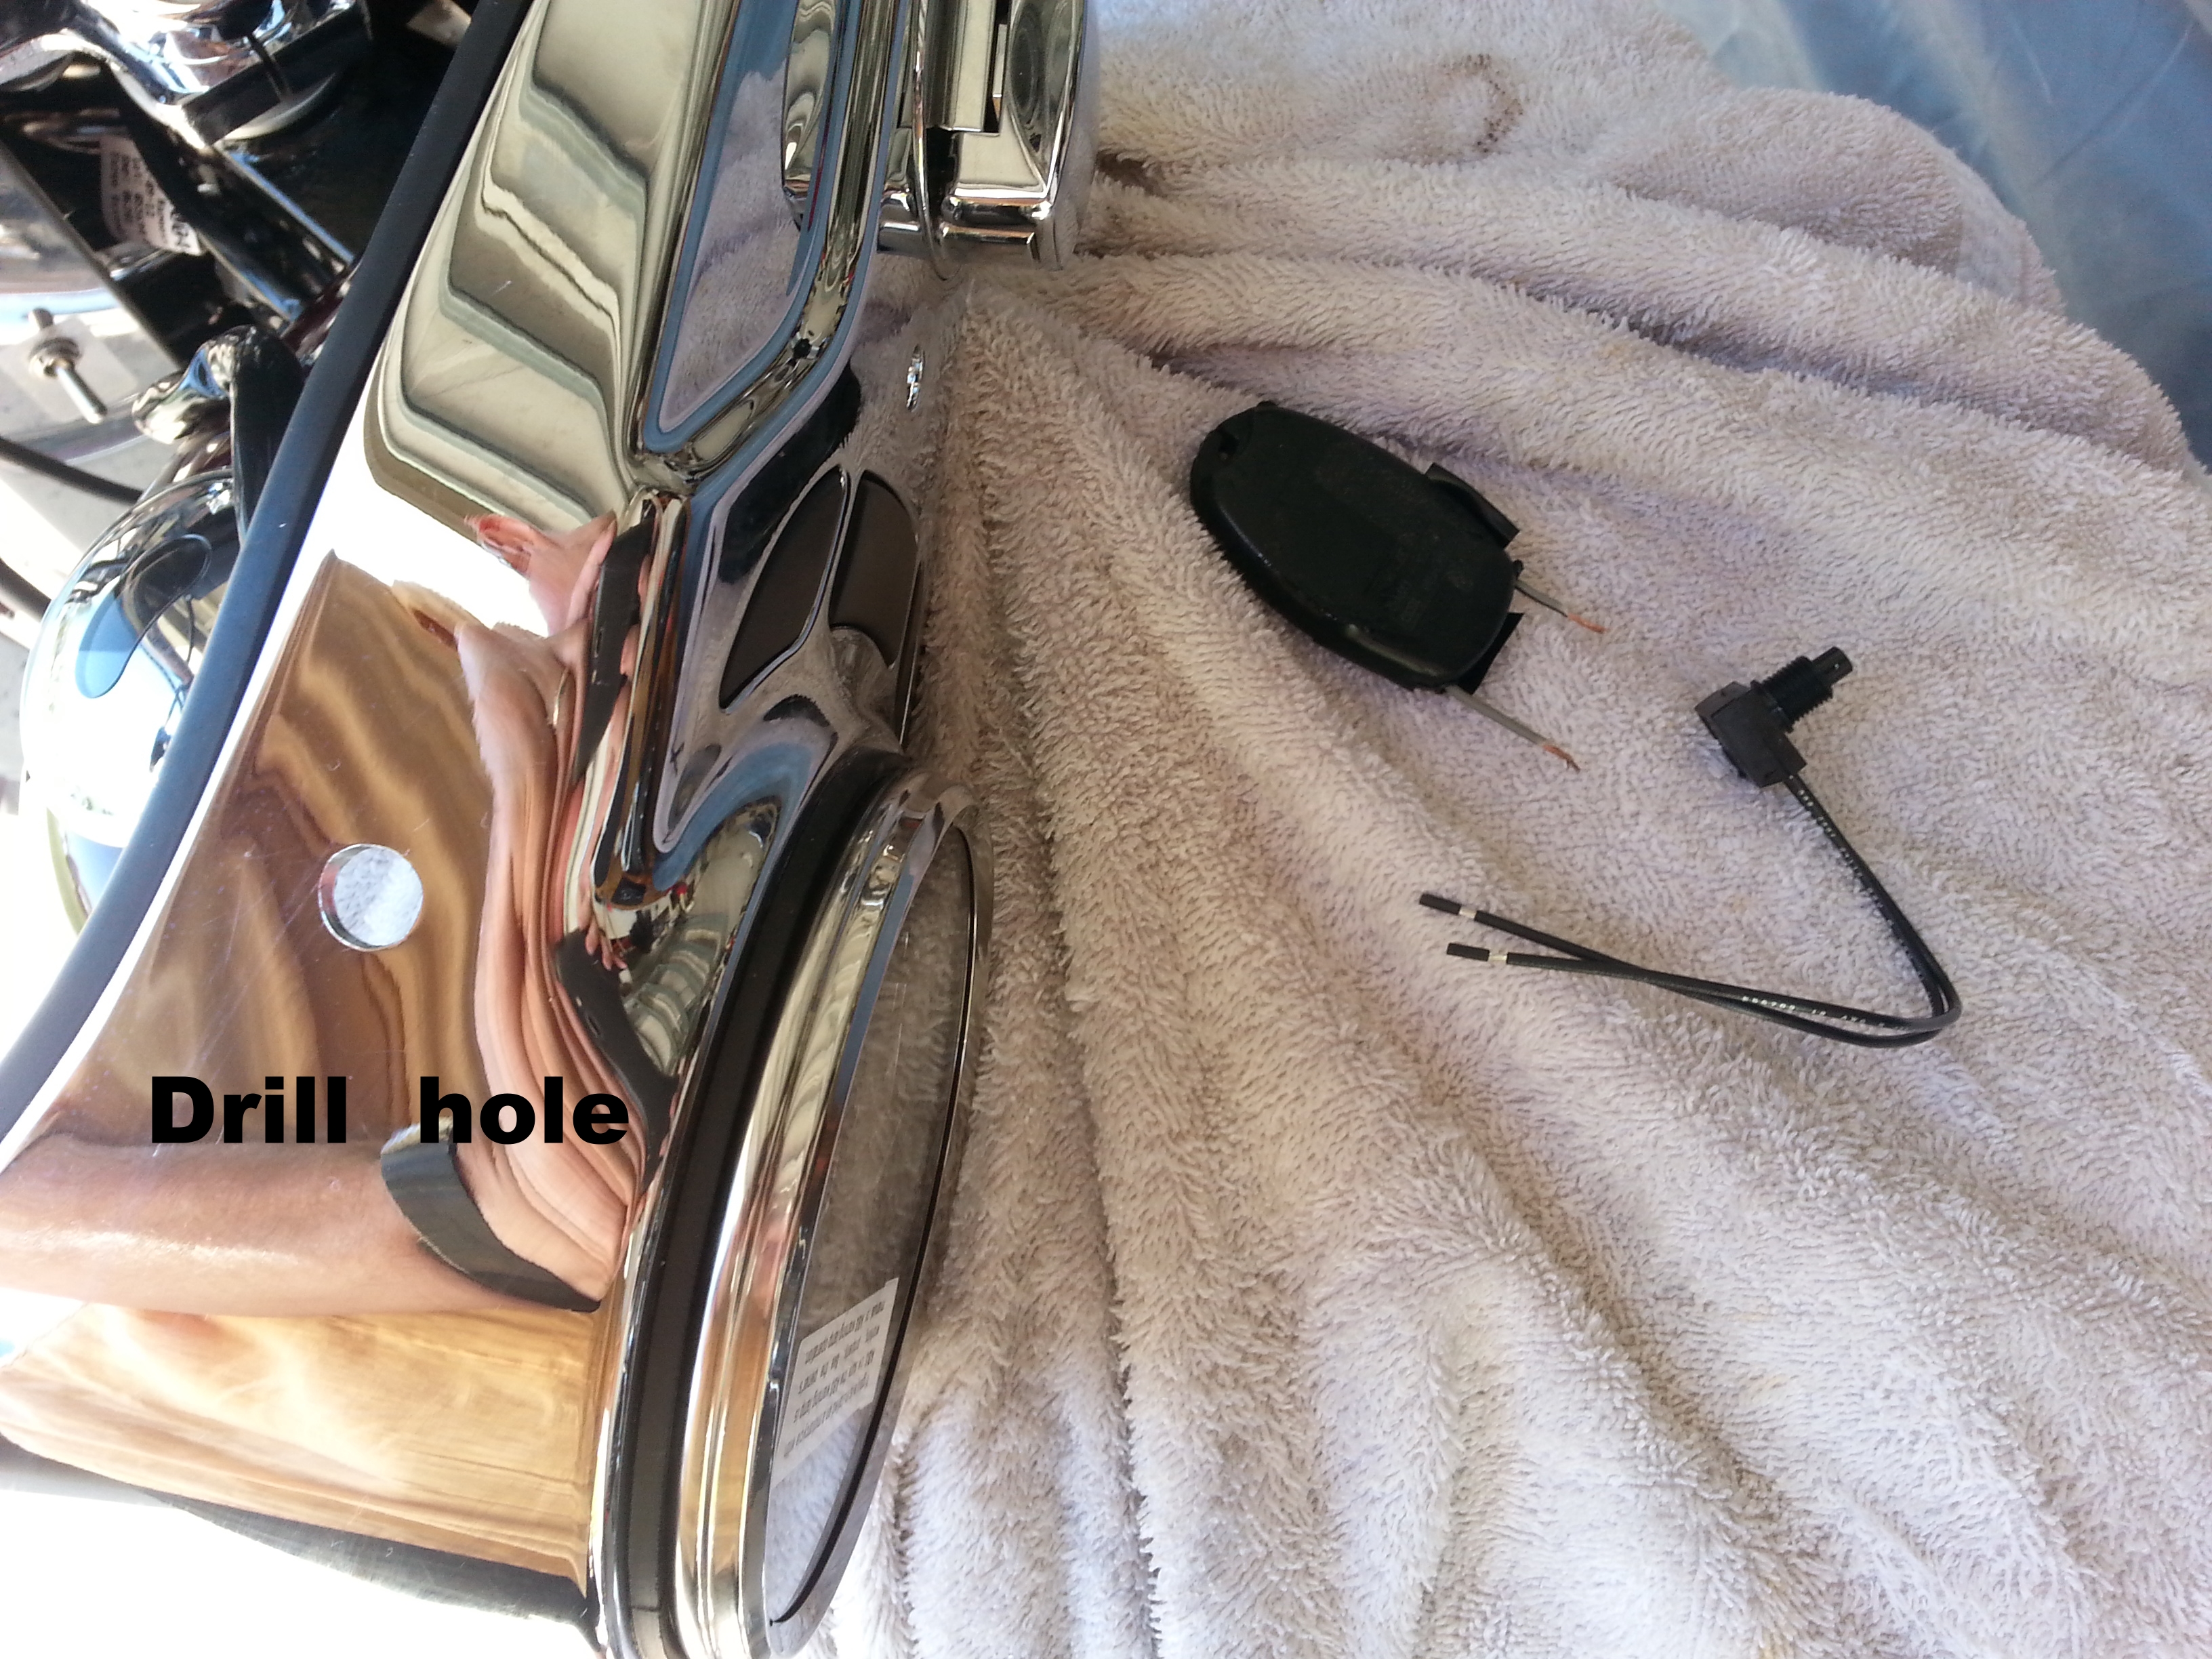
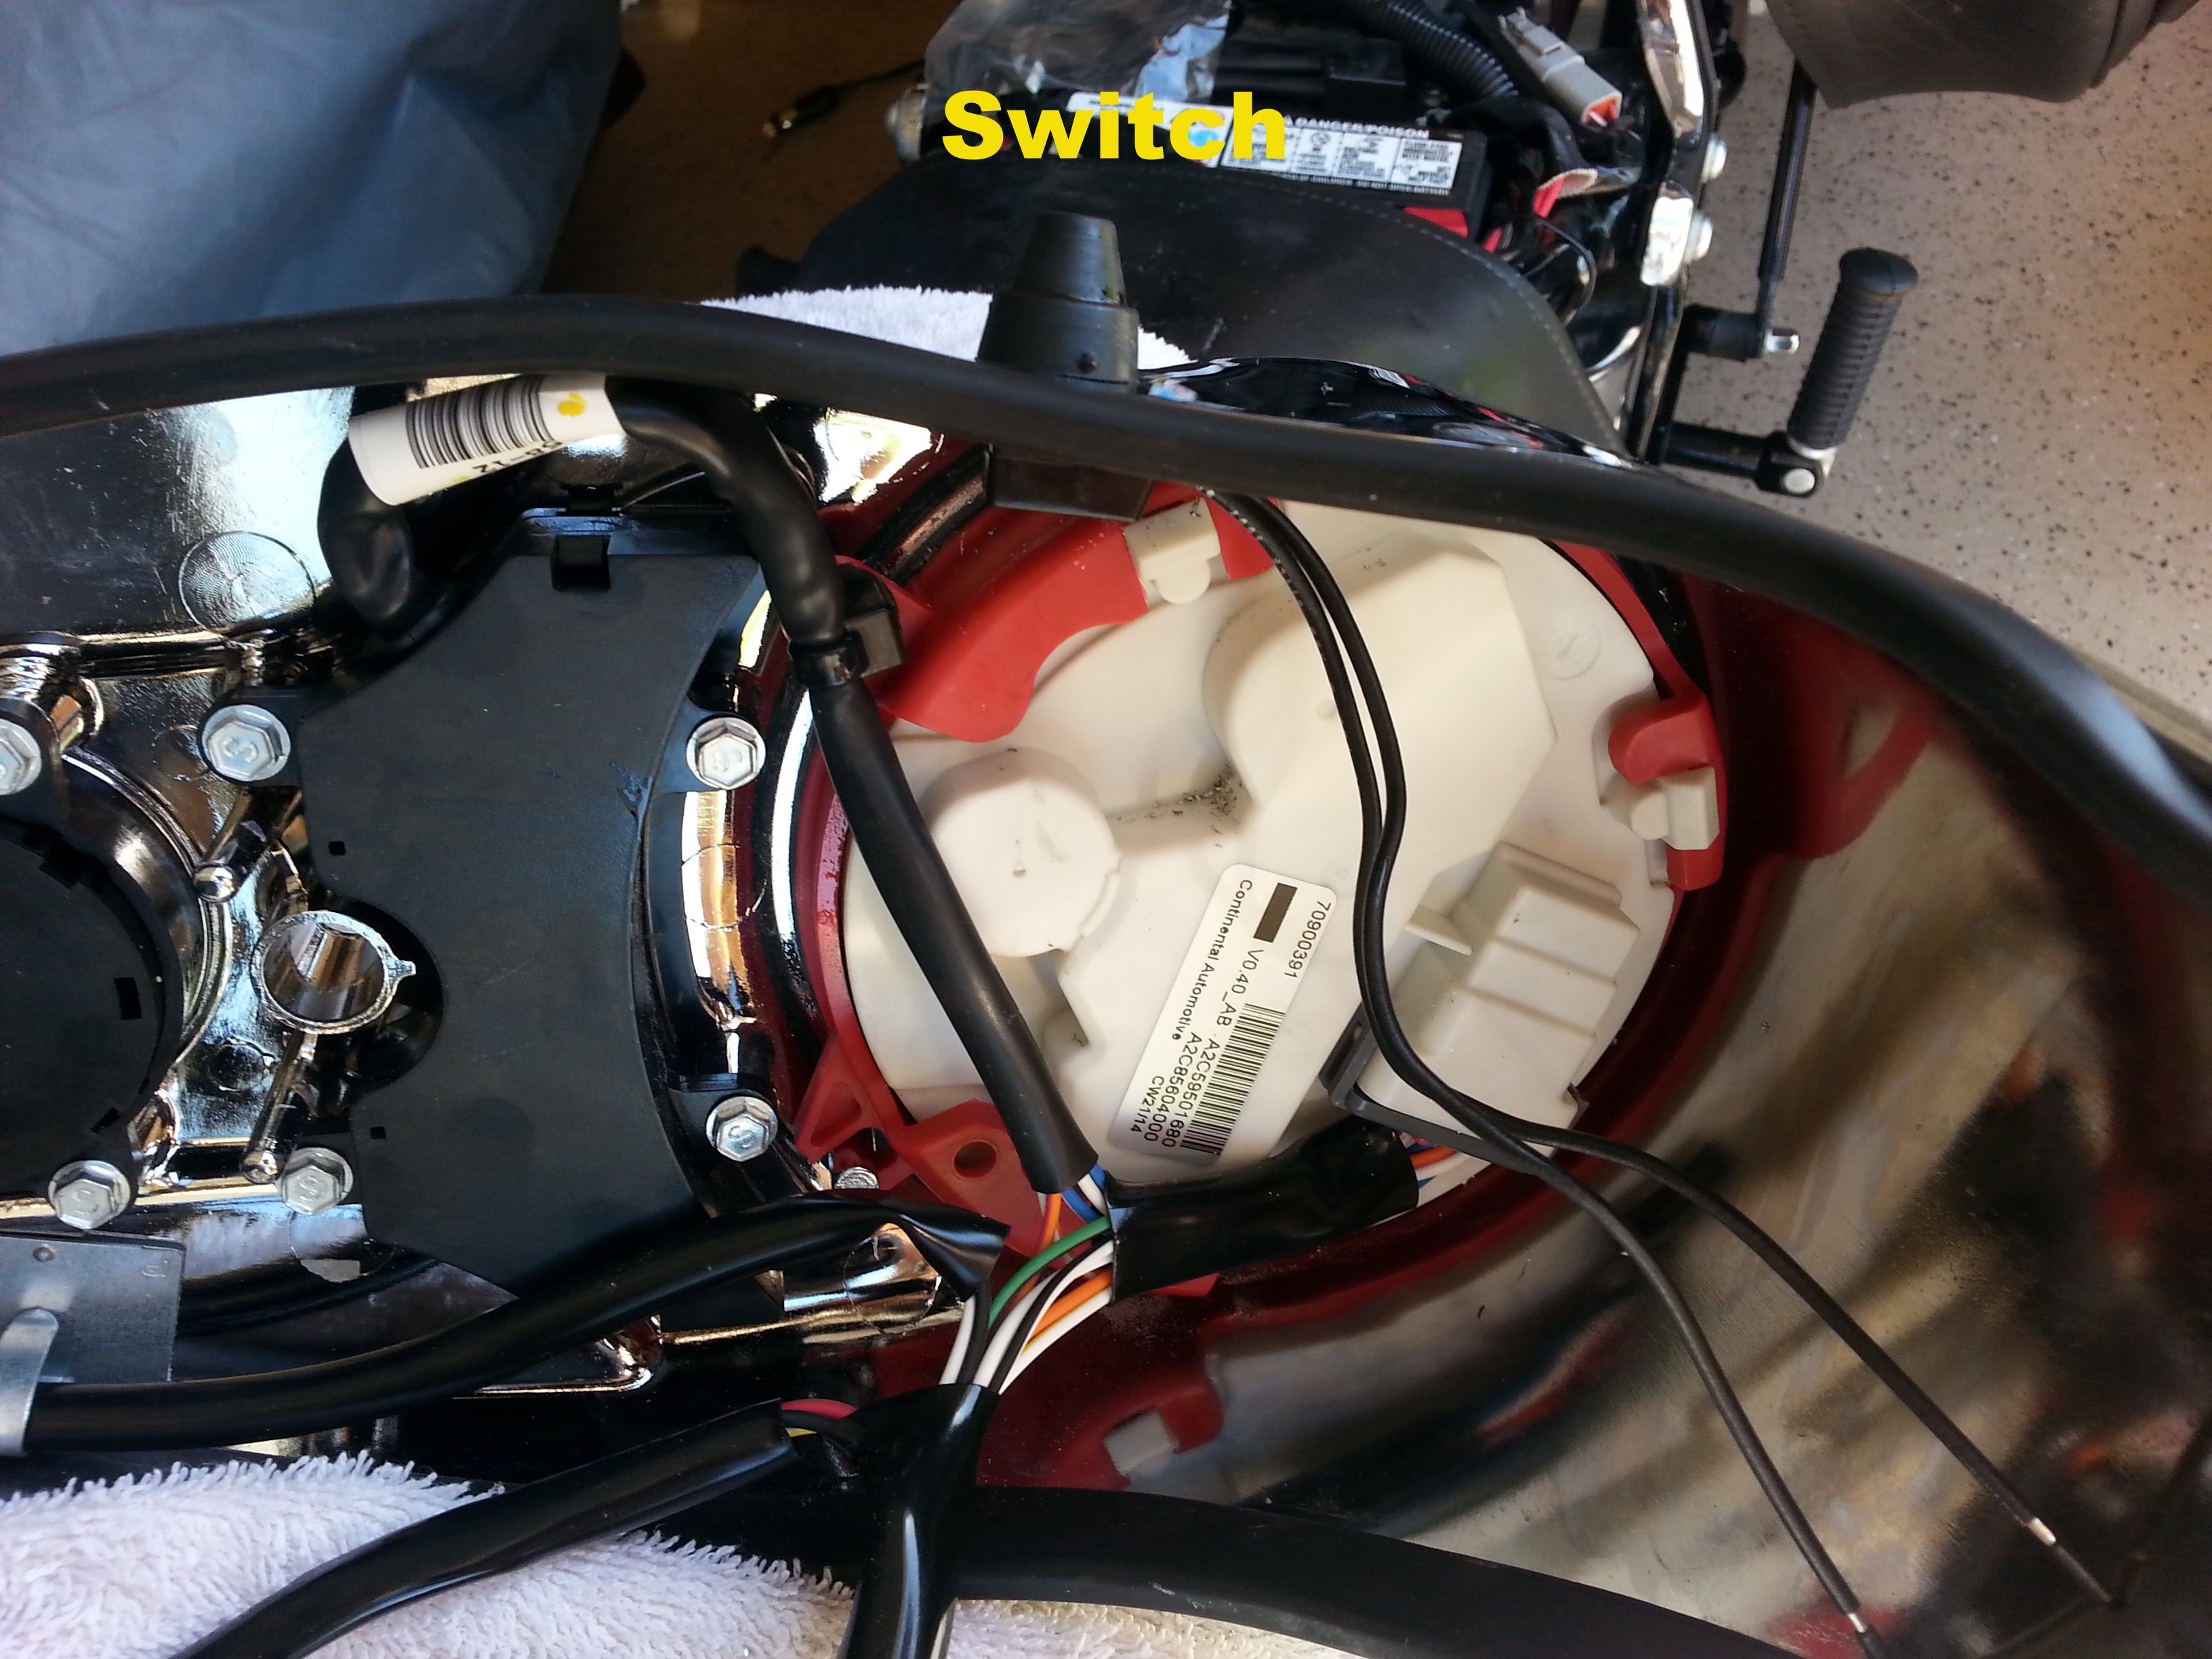
DONE
Used Part number2106-0151 from NAMZ Custom cycle Products
This is the water proof momentary switch used on Road Kings for OD switching
Pre wired keychain garage door opener with tails
Drilled hole in Console near gas tank
Attached momentary switch used caps to twist wires together (to make battery changes easier)
Used Mastic tape to attach opener case to front of inside f console


DONE

#926
07-17-2014, 04:36 PM
I did something very similar but the last time I changed the batteries I decided to fish it down to the battery case under the seat. I don't have to remove the dash to change batteries anymore. Nice work!
#927
07-17-2014, 09:58 PM
Very nice and clean job
quote=TenMidgets;12978578]Another garage door opener Mod
Used Part number2106-0151 from NAMZ Custom cycle Products
This is the water proof momentary switch used on Road Kings for OD switching
Pre wired keychain garage door opener with tails
Drilled hole in Console near gas tank
Attached momentary switch used caps to twist wires together (to make battery changes easier)
Used Mastic tape to attach opener case to front of inside f console


DONE
 [/quote]
quote=TenMidgets;12978578]Another garage door opener Mod
Used Part number2106-0151 from NAMZ Custom cycle Products
This is the water proof momentary switch used on Road Kings for OD switching
Pre wired keychain garage door opener with tails
Drilled hole in Console near gas tank
Attached momentary switch used caps to twist wires together (to make battery changes easier)
Used Mastic tape to attach opener case to front of inside f console
DONE
[/quote]
#928
07-22-2014, 04:57 PM

Hope this counts. I got the idea to store a helmet on the brake mirror and lock the buckle to the brake lever from this forum, but couldn't find a convenient way to store the lock. Took a small lock from lowes and put shrink wrap on the shackle (scratch proof) and the cut the end off of an old auto valve stem, split it on one side and placed it over the metal part that sticks out of one of the throttle cables and zip tied for it to stay in place. Placed the lock over the cable as in the first pick and that keeps it from sliding down the cable. Its right where it needs to be when I leave the helmet in the parking lot. Locks light enough not to affect the cables operation and does not hit the tank when bars are locked in that direction. Second pic shows where I hung my gremlin bell. YES.
#929
08-18-2014, 08:10 PM
Motorcycles and even small cars sometimes find themselves stuck at traffic lights that won't change because the mass of the vehicle isn't enough to trigger the in-ground sensing loops that detect when vehicles are waiting.
Pick up some neodymium magnets and fasten them to the bottom of your frame.
Available at Lowe's, Home Depot and also online...
Pick up some neodymium magnets and fasten them to the bottom of your frame.
Available at Lowe's, Home Depot and also online...
Last edited by jam436; 03-09-2017 at 07:55 PM.
The following users liked this post:
Proline1969 (12-11-2016)
#930
12-06-2014, 05:50 PM

Stage II
Join Date: Sep 2014
Location: united states
Posts: 2
Likes: 0
Received 0 Likes
on
0 Posts
Just got this 06 standard and wanted to make it mine, a buddy suggested getting a black primary cover....all I could find had wrinkle or matte paint. To make it the same finish as the tanks, I had it sanded smooth and painted the same vivid black. Should look good when polished up in the spring (and when I get a new camera)
