Calling all FatBoy Lo Owners
#6891
 05-08-2012, 08:24 PM


#6892
05-08-2012, 08:54 PM
haha how could I have forgot the guy that made hard bags look sik on a lo!
Jose,
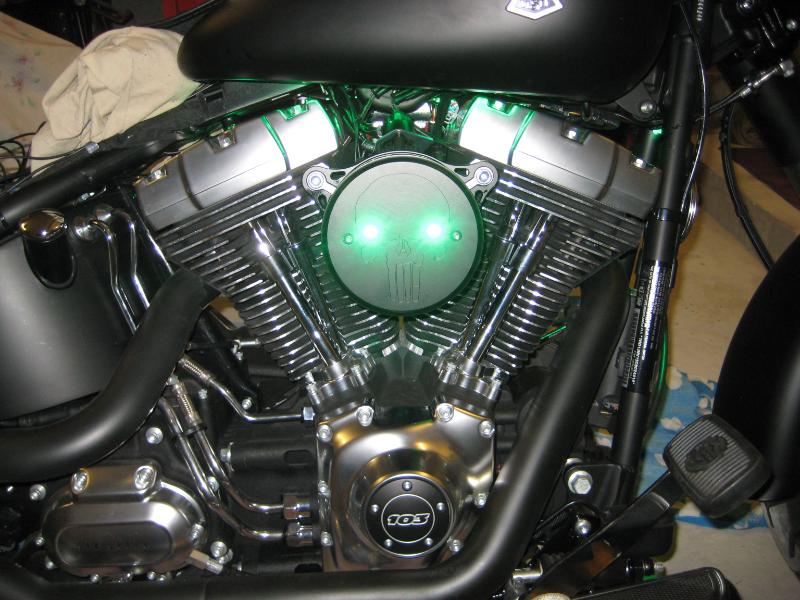
I still have the blue/purple FLHT, but my sig pic is my current project and that's the only pic that I'll show for now and I couldn't get away from the denim black. Not that my softail friends care ha, but I'll post some more pics later and I'll probably ask you to make me a poster of it and I'll toss you a couple coins for it Jose.
You guys really make me miss my lo! later
Jose,
I still have the blue/purple FLHT, but my sig pic is my current project and that's the only pic that I'll show for now and I couldn't get away from the denim black. Not that my softail friends care ha, but I'll post some more pics later and I'll probably ask you to make me a poster of it and I'll toss you a couple coins for it Jose.
You guys really make me miss my lo! later
Last edited by JIMSFBL; 05-08-2012 at 10:05 PM.
#6893
05-08-2012, 11:29 PM

Road Master
I finally got the brake lever blacked out. Looks pretty good for a rattle can job and matches the powder coat on the engine pretty good. I'm trying to decide right now which mod to go for for Father's Day. I'm leaning towards the aux light bar setup but I'm also thinking about getting a set of HD's adjustable footpeg setup for the engine guard so I can stretch out a bit. I guess the aux bar helps me be seen and gets me closer to the look I want but the footpeg setup I think would help me be quite a bit more comfortable on my 25 mile each way commute. Hmm Here's some pics of the brake lever.
#6894
05-09-2012, 06:29 AM
Jose,
I still have the blue/purple FLHT, but my sig pic is my current project and that's the only pic that I'll show for now and I couldn't get away from the denim black. Not that my softail friends care ha, but I'll post some more pics later and I'll probably ask you to make me a poster of it and I'll toss you a couple coins for it Jose.
#6895
05-09-2012, 10:12 AM
Road Master
I finally got the brake lever blacked out. Looks pretty good for a rattle can job and matches the powder coat on the engine pretty good. I'm trying to decide right now which mod to go for for Father's Day. I'm leaning towards the aux light bar setup but I'm also thinking about getting a set of HD's adjustable footpeg setup for the engine guard so I can stretch out a bit. I guess the aux bar helps me be seen and gets me closer to the look I want but the footpeg setup I think would help me be quite a bit more comfortable on my 25 mile each way commute. Hmm Here's some pics of the brake lever.
#6896
05-09-2012, 11:37 AM
Tourer
I finally got the brake lever blacked out. Looks pretty good for a rattle can job and matches the powder coat on the engine pretty good. I'm trying to decide right now which mod to go for for Father's Day. I'm leaning towards the aux light bar setup but I'm also thinking about getting a set of HD's adjustable footpeg setup for the engine guard so I can stretch out a bit. I guess the aux bar helps me be seen and gets me closer to the look I want but the footpeg setup I think would help me be quite a bit more comfortable on my 25 mile each way commute. Hmm Here's some pics of the brake lever.
#6897
05-09-2012, 09:28 PM
Road Master
I used the Rustoleum bed liner. I did about three coats and baked it in the over for 15 min at 200 degrees in between coats. The hardest part was finding a way to keep it upright and off of the baking pan I set it on. I ended up using a pair of vise grips clamped onto the area where the brake pad bolts on which worked pretty good. As far as which mod to do next, aux lights or highway pegs, I think I'm leaning towards getting the highway pegs. I think I would probably use them more. Unfortunately the next mod after Father's Day won't come till probably Christmas.
#6898
05-09-2012, 10:08 PM

6th Gear
Join Date: Nov 2011
Location: Australia
Posts: 10
Likes: 0
Received 0 Likes
on
0 Posts
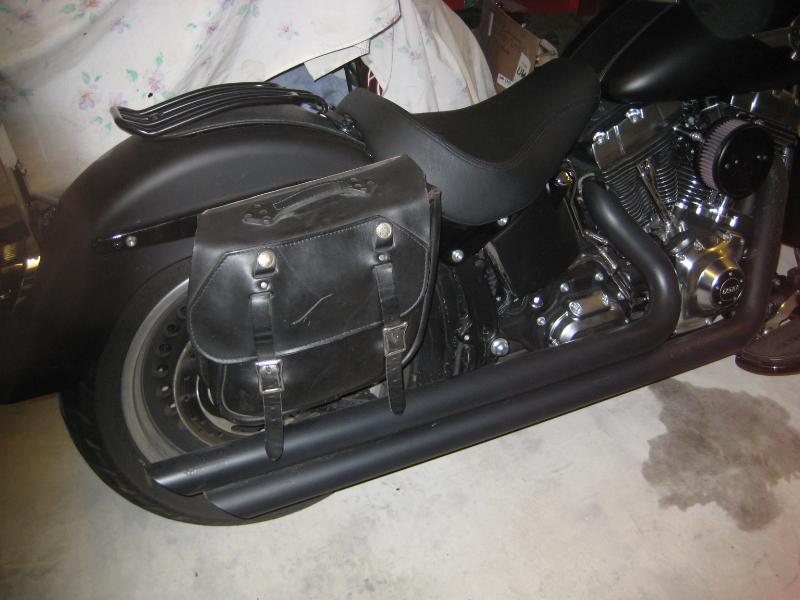
Just got my custom leather set made for me by Artist Pat Nash from Sundog Leather. Totally blown away by the crafmanship, and attention to detail. Can't recommend him enough for any leather creation you can dream up. He even built in a Iphone holder in my tool roll to my surprise!
It was a bit "spendy" but worth every penny, truly unique
It was a bit "spendy" but worth every penny, truly unique
That looks amazing mate well done wish we had guys that skilled down here in Aus.
Can I ask
what brand swing arm bag, is that your rockin?
stanggt
#6899
05-10-2012, 02:59 PM
Tourer
Join Date: Dec 2011
Location: England, Feltwell area
Posts: 300
Likes: 0
Received 0 Likes
on
0 Posts
#6900
05-10-2012, 04:52 PM
Elite HDF Member
Posted the on the main softail thread as well. But thought I would put it her as well.
This is my first write up so please be kind. I hope it can help others who want to do the same. Much credit goes to forum member Fat11LO for providing some great info.
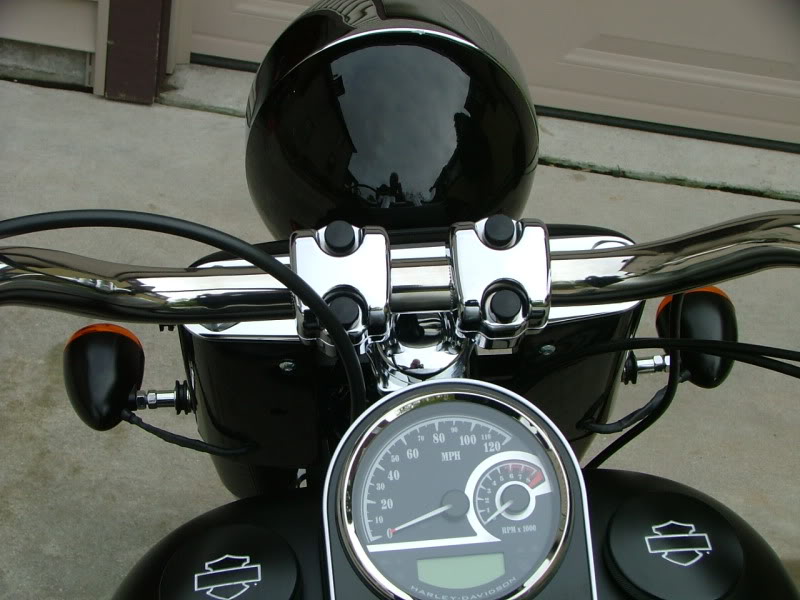
Parts needed
1. Tyco 070 Multilock 6 pin connector/6X black Amp/Tyco
Multi-lock connector set + terminals
(Harley Part # 73156-96BK)
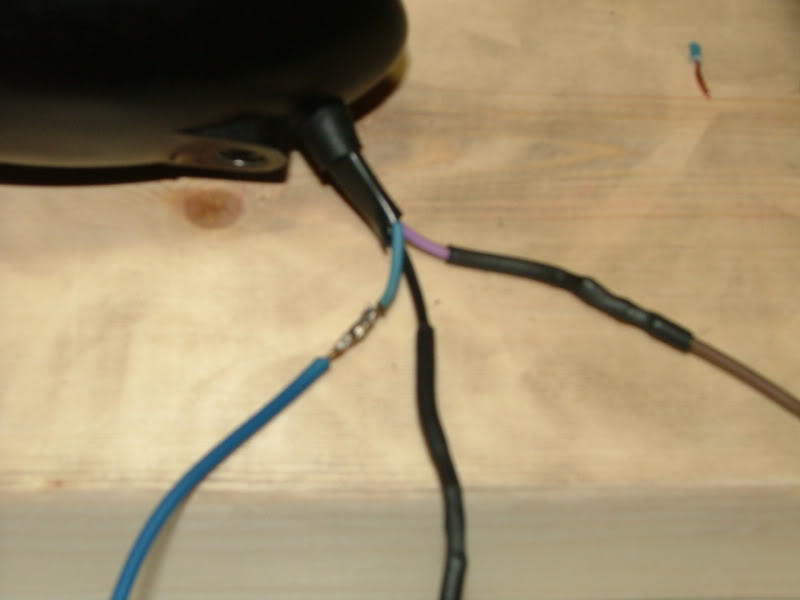
2. 18" each Pink,Brown, GXL 18 gauge wire
3. 36" each Blue, Black GXL 18 gauge wire
4. 1/8" and 1/4" shrink wrap
5. solder
Start by removing the turn signals. You can cut them off at the hand controls but leave enough wire so you can heat shrink each individual wire. Then you can tuck the the the ends back into the controls through the slot where the wires exit after removing the small gromet.
I did it a bit different as I took apart the hand controls and and cut the wires from inside. Either way will work.
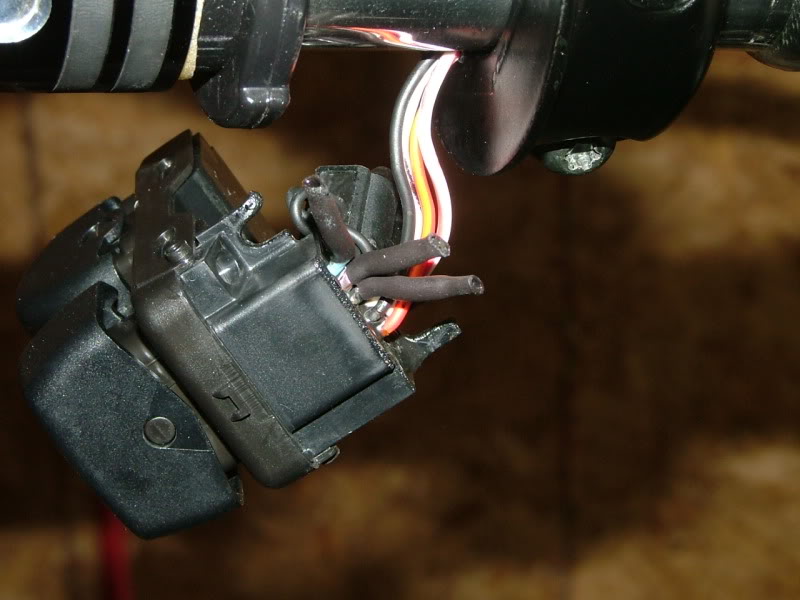
Now that you have the signals removed you can now build your wireing harness. Start by extending the signal wires.
I cut the signal wires and different lengths so I could stager my splices. (keeps the harness from having a big buldge in one spot)
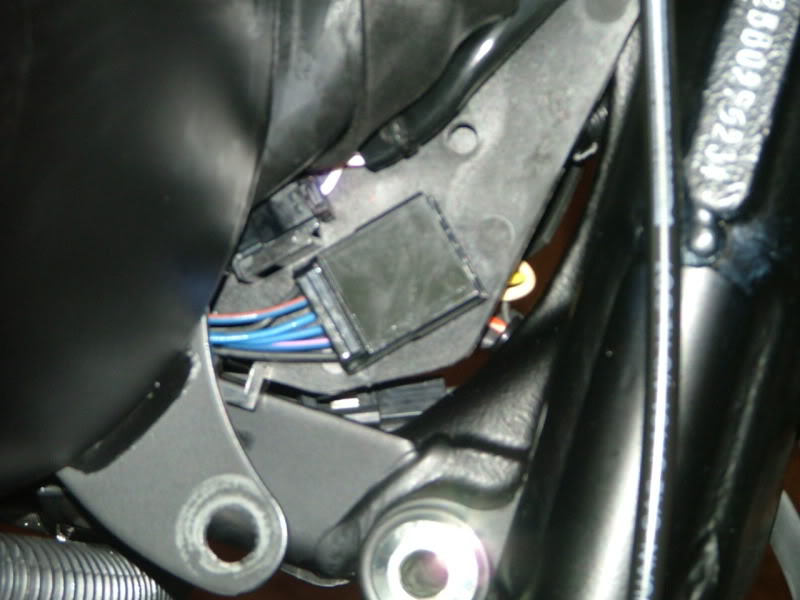
Remove the front and rear bolts holding you gas tank on and you can slide the tank back enough to expose the signal plug on the right hand side.
Now you can mount you signals to you choice of relocation type. I went the easy route and bought a kit from Ebay. http://stores.ebay.com/STEEL-EAGLE-CYCLES
Or you can follow these instructions in the DIY thread.
https://www.hdforums.com/forum/softa...p-mods-30.html
Once you mount the signals you can route your wires and cut to proper length. I routed my wires through the cow bells by drilling a hole in the back side of each and ran the wires through some groumets. Next I heat shrinked the entire harnes with 1/4" Heat shrink. Once you have your wires run you can install the termanals and male receptical.
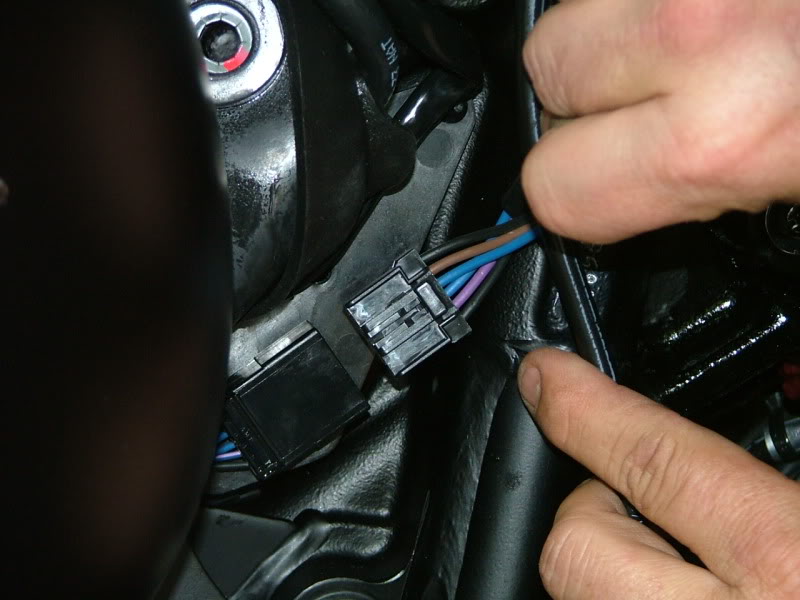
Plug it in and fasten up you gas tank and your done.
This is my first write up so please be kind. I hope it can help others who want to do the same. Much credit goes to forum member Fat11LO for providing some great info.
Parts needed
1. Tyco 070 Multilock 6 pin connector/6X black Amp/Tyco
Multi-lock connector set + terminals
(Harley Part # 73156-96BK)
2. 18" each Pink,Brown, GXL 18 gauge wire
3. 36" each Blue, Black GXL 18 gauge wire
4. 1/8" and 1/4" shrink wrap
5. solder
Start by removing the turn signals. You can cut them off at the hand controls but leave enough wire so you can heat shrink each individual wire. Then you can tuck the the the ends back into the controls through the slot where the wires exit after removing the small gromet.
I did it a bit different as I took apart the hand controls and and cut the wires from inside. Either way will work.
Now that you have the signals removed you can now build your wireing harness. Start by extending the signal wires.
I cut the signal wires and different lengths so I could stager my splices. (keeps the harness from having a big buldge in one spot)
Remove the front and rear bolts holding you gas tank on and you can slide the tank back enough to expose the signal plug on the right hand side.
Now you can mount you signals to you choice of relocation type. I went the easy route and bought a kit from Ebay. http://stores.ebay.com/STEEL-EAGLE-CYCLES
Or you can follow these instructions in the DIY thread.
https://www.hdforums.com/forum/softa...p-mods-30.html
Once you mount the signals you can route your wires and cut to proper length. I routed my wires through the cow bells by drilling a hole in the back side of each and ran the wires through some groumets. Next I heat shrinked the entire harnes with 1/4" Heat shrink. Once you have your wires run you can install the termanals and male receptical.
Plug it in and fasten up you gas tank and your done.