
NRHS Kit Installed!!!
#1
 12-22-2014, 07:23 AM


So how many of you guys can get by buying parts for your wife for her christmas present & then they actually love them?! I surprised mine with a redo of her sporty. Figured I'd toss up a little info and pics and info on how it went.
First off, she's been a trooping over the last few seasons riding her stock 2003 883 Custom while learning how to get it down pat. She asked me about how to make it faster being she was starting to want to keep up a little more with all of us while we ride. So I decided that it was time for a big bore kit. I searched this forum & decided to get the 1250 kit from Dan over at NRHS. First off, heck of a nice guy & great parts. Everything was included with the kit (gaskets, pistons, clips, jugs etc) I opted to have NRHS install the pistons to save time/effort on my part for the install.
First things first, I cannot stress enough the most important tool I found when starting this job was the Harley Service Manual. I've wrenched on quite a few vehicles in the past & felt confident on this job, but found myself going back to the manual quite a few times throughout the job. So if your contemplating a kit for your sporty, make that your second purchase after the kit before you start.
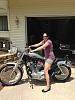
Ok , here's the stock sporty before I started
Sorry for multiple threads on this, for some reason it only lets me load one pic at a time in one thread. The rest wont show up
First off, she's been a trooping over the last few seasons riding her stock 2003 883 Custom while learning how to get it down pat. She asked me about how to make it faster being she was starting to want to keep up a little more with all of us while we ride. So I decided that it was time for a big bore kit. I searched this forum & decided to get the 1250 kit from Dan over at NRHS. First off, heck of a nice guy & great parts. Everything was included with the kit (gaskets, pistons, clips, jugs etc) I opted to have NRHS install the pistons to save time/effort on my part for the install.
First things first, I cannot stress enough the most important tool I found when starting this job was the Harley Service Manual. I've wrenched on quite a few vehicles in the past & felt confident on this job, but found myself going back to the manual quite a few times throughout the job. So if your contemplating a kit for your sporty, make that your second purchase after the kit before you start.
Ok , here's the stock sporty before I started

Sorry for multiple threads on this, for some reason it only lets me load one pic at a time in one thread. The rest wont show up
#2
12-22-2014, 07:27 AM

#3
12-22-2014, 07:45 AM
Now onto top end removal. Battery was taken out & Front cylinder was first. After removing intake port between heads with a modified Allen wrench that I cut short & a 3/8 open end wrench it was on to getting Top cover off, then to rocker box bolts. At this point i slide the jack under it and lifted up bike & removed spark plug. Took a piece of wire and stuck it down into the spark plug hole, put tranny in 5th gear & rolled the rear tire until I found top dead center (piston head all the way up in the cylinder) by watching the wire move up until it started to drop down then rolled back the other way. Once that was found, I started to remove the bolts on the rocker box all in equal turns to each one after another so not to put stress on just one individual bolt by removing them one after another.
With those bolts off, now cam push rod covers & removed push rods.
Forgot to mention I took cardboard & made drawing templates of each part taken off and pushed each bolt in the spot it went back into the cardboard. Figured that would be the easiest way to remember which bolt went where.
With rocker out, head bolts were next with a breaker bar & star socket (them baby's were on there!!!)
Head bolts out, a couple smacks with the palm of my hand, & lifted front cylinder off the case exposing stock rod & piston.
Pretty straight forward deal, just took my time. About 1 1/2 hours on front cylinder. Rear cylinder was the same, just everything was tighter due to the frame.
This took a little less time being I had already knew what to expect after from cylinder. Even though everything was a tighter working area on the rea due to frame clearance, took about 40 mins this time
Here what I ended up looking at after all was off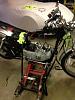

#4
12-22-2014, 07:50 AM
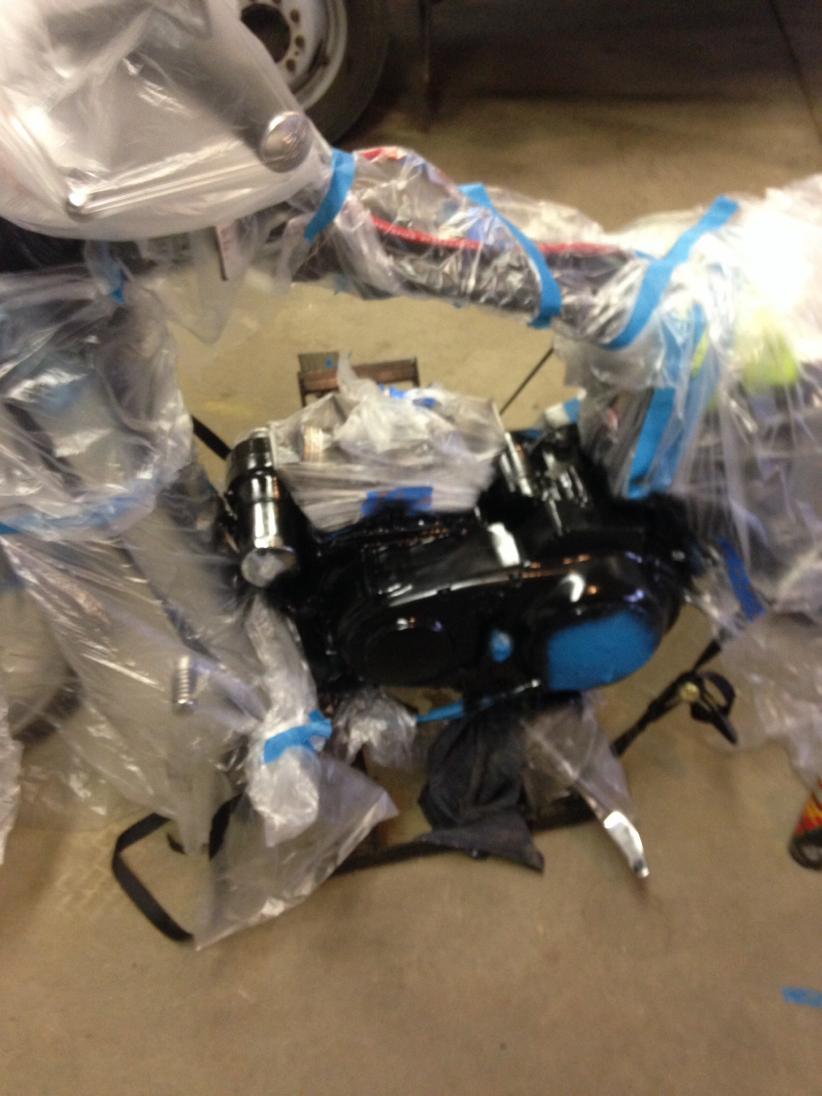
Next step before installing the kit was a deep cleaning of everything being it was a 2003 and now was the time to get into every little nook that I can't get to with the top end and all the other parts on it. Covering up the opening around the stock rods & pistons, I went to work on a good degreasing & deep clean. After an hour and half it was spotless. So decided to go one step further by scuffing the entire lower case and masking everything off & spraying some high temp wrinkle black on it. Attachment 410864
#6
12-22-2014, 08:03 AM
Now onto the new kit, removing the old pistons were a breeze. Awl in the indent below the pin & pop goes the old retain ring across the shop like a billet!! Other side clip and was able to slide pin out with a small wooden handle of a file I had, piston off. Same on the other one.
Took the new cylinders and slide the piston inside the jug that NRHS had already installed in there, down just enough to install the new clips and pins on the rods. Little trick I figured out was to install the new clip on the exhaust side on the piston while jug was on the bench. This point another set of hands is much needed. My father held the jug in place on the studs so I could slide the new pin in and the other clip to hold it in place. Clips are really easy to snap in by using your fingers. Push the two ends of the clip together and press them into grove inside end of piston the pop the bottom of the clip into the hole. I took a very small flat head screwdriver and snapped it into the grove. Double check here at this point with a bright light & MAKE SURE new wrist pin clips are fully seated into the groove. Would be a very bad deal if they flew out because they were not seated!!!
New gasket already setting on, I slide cylinder down onto case and moved to rear. Same procedure
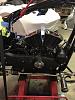
Both new jugs on and looking wrinkled black!!!
Took the new cylinders and slide the piston inside the jug that NRHS had already installed in there, down just enough to install the new clips and pins on the rods. Little trick I figured out was to install the new clip on the exhaust side on the piston while jug was on the bench. This point another set of hands is much needed. My father held the jug in place on the studs so I could slide the new pin in and the other clip to hold it in place. Clips are really easy to snap in by using your fingers. Push the two ends of the clip together and press them into grove inside end of piston the pop the bottom of the clip into the hole. I took a very small flat head screwdriver and snapped it into the grove. Double check here at this point with a bright light & MAKE SURE new wrist pin clips are fully seated into the groove. Would be a very bad deal if they flew out because they were not seated!!!
New gasket already setting on, I slide cylinder down onto case and moved to rear. Same procedure
Both new jugs on and looking wrinkled black!!!

#7
12-22-2014, 08:05 AM

Trending Topics
#9
12-22-2014, 08:14 AM
Now back to replacing the stock rockers & covers. Here's again where the manual & instruction from NRHS come in handy. Make sure to follow all torque procedures with all bolts.
I went as far & bought a second torque wrench to to make damn sure they were right. Took my time and replaced every gasket/seal on everything! Head bolts are important. I would of hated snapping one off!!Once rockers were on, push rod tubes were mounted (by the way, these slide right in with rockers already bolted on. Trick was put new seals in and lube up tiubes, slide mounts down enough to fit top of tube into rocker and position bottom in place, then slide bottom mount down onto pin and install bolt. Worked out great for me. Tipping rocker push rod ends back i slide the push rods into place (make sure one with 3 stripes is on exhaust side, and bingo--all done.
New gaskets on all the covers & covers on!

