
Wire tuck under tank with no tank lift - My take
#1
 03-03-2011, 11:15 AM

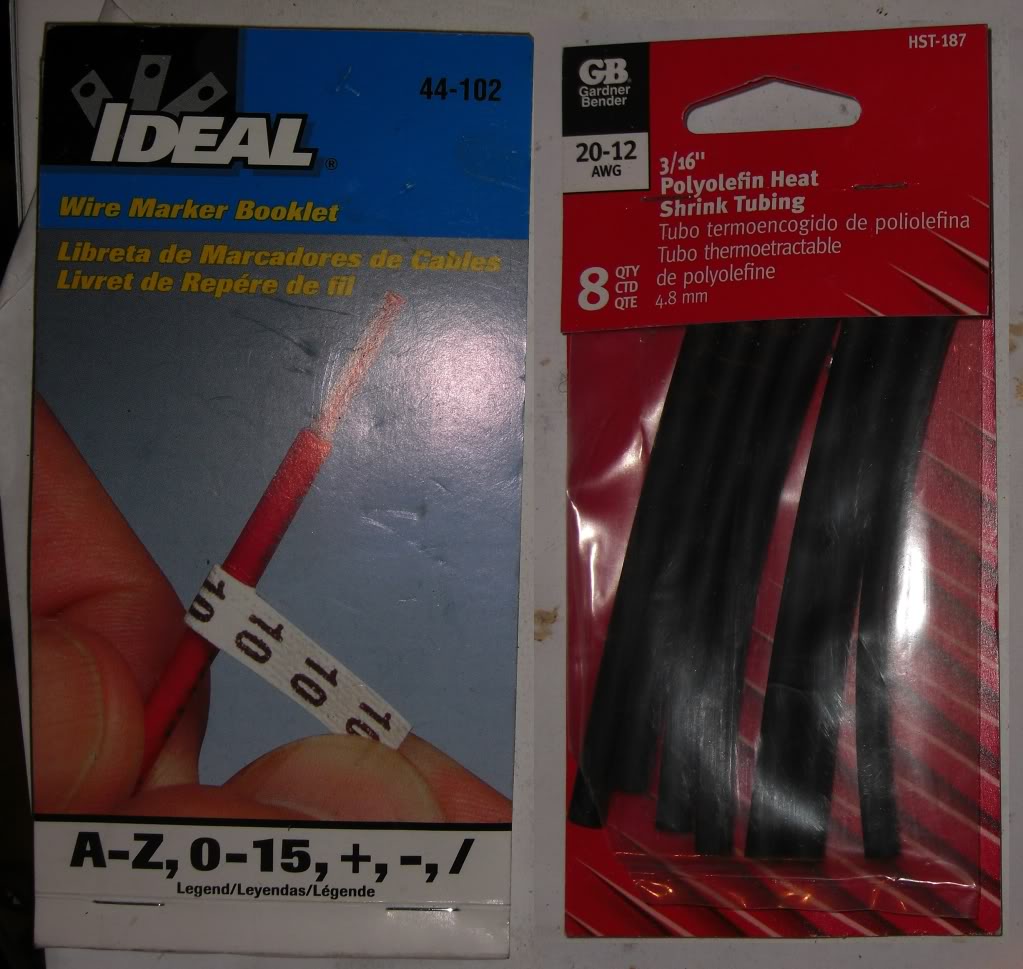
so you want to remove the plastic harness and hide the wires but do not like how the tank lift looks.. the only way is to remove the connectors... my idea is to simply disassemble the connectors, reconnect each correspondent pin, wrap it in heat shrink tubing then label each side of the cable so you now how to reconnect them in case you have to disconnect the cables... this is what I bought at Home Depot: one wire marking booklet and 3 or 4 heat shrink tubing packages (get the 20-12 AWG.. perfect size) .. BTW... try to get this "Ideal 44-102" wire marking booklet... it is not some cheap-o plastic sticker... it is made with some heavy cloth, very sticky... I am certain it can withstand the rigors of being under the tank (heat, rain)... also... each letter / number can be cut in the middle with a knife... much better this way... you save labels and when you wrap it around the cable it doesn't get too bulky.. avoid touching the glue with your hands so it doesn't loose adherence.. use a small flat screwdriver to remove it from the booklet and apply it to the cable...
VERY IMPORTANT!!!: before you even touch a cable.. DISCONNECT THE 30AMP Main Fuse... or the battery... OR BOTH!!.. please do not forget this step.. once you disassemble a connector the pins are going to be touching each other... and that will most certainly fry / short circuit things if you don't disconnect the main 30amp fuse or the battery...
The most tedious part of is remove the pins from the connectors... each connector is different, here is a link to the page that relate to the different connectors (dis assembly, etc)
http://s1218.photobucket.com/albums/...ectors%20Iron/
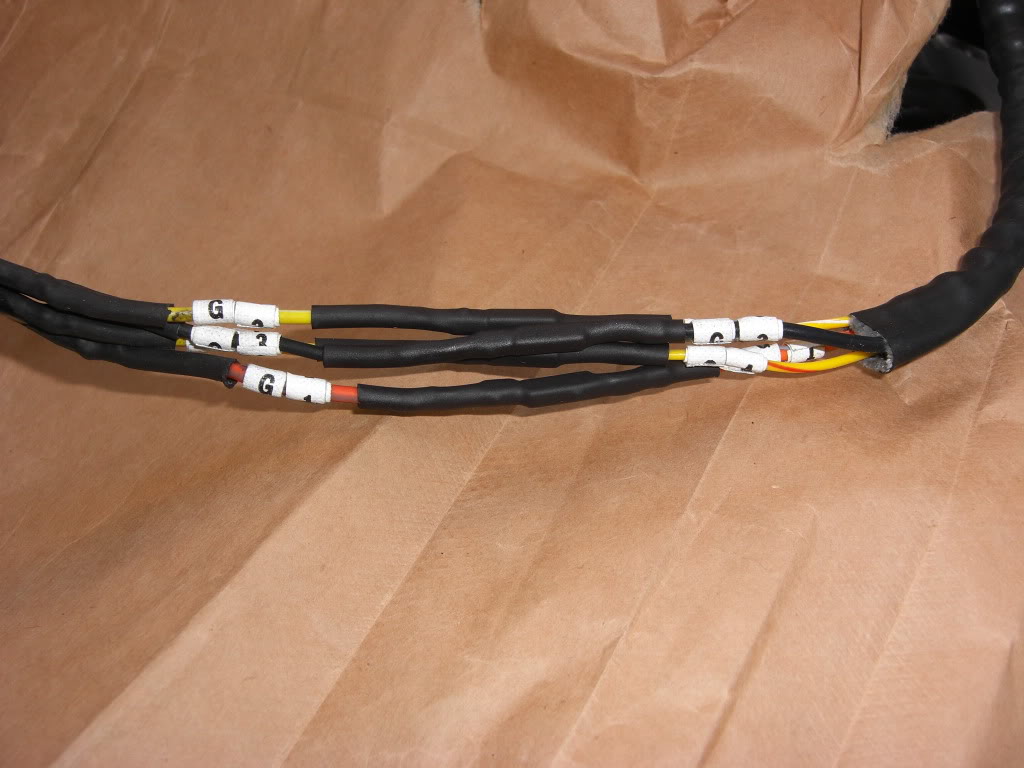
Remove each correspondent pin (one pair at a time so you don't get confused)... take a heat shrink tubing, cut it in half so you don't have to buy that many... use it to cover the connection... don't overdo the heating process.. just heat it enough so the tubing wraps nicely around it.. if you heat it too much you will weaken the rubber, and the pins will pierce the rubber once you start tightly wrapping up all the cables together (imagine the electrical nightmare that would cause)... now label each side of the connection with the same ID... I tried to use meaningful IDs.. things like S1, S2, S3... for the speedo.. T1,T2.... for turning signals... etc... here is the fuel pump cable (BTW, I decided to cut and re-solder this cable since it is strangely long) :
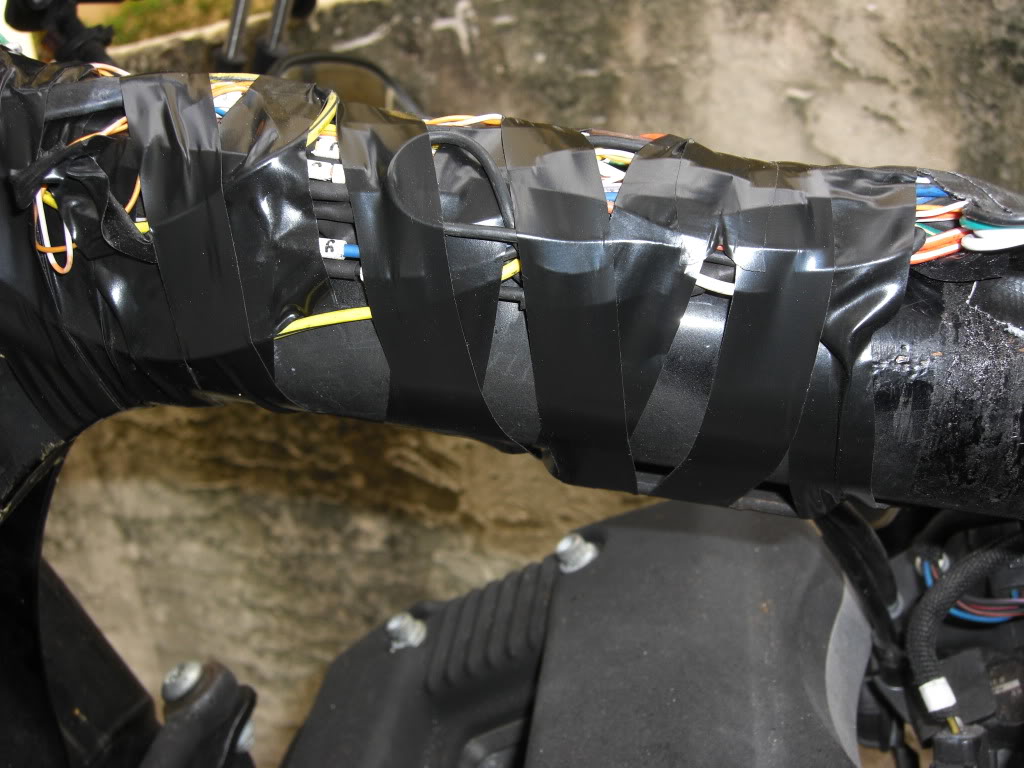
once you are done distribute the cables on top of the frame and secure it with tape or wrap it tightly with dental floss, then cover it with something strong and durable (Gorilla Tape, hockey stick tape).. it should be a tight fit but you should be able to secure the tank in the original position... I did this with no issues so far)
Happy riding!
VERY IMPORTANT!!!: before you even touch a cable.. DISCONNECT THE 30AMP Main Fuse... or the battery... OR BOTH!!.. please do not forget this step.. once you disassemble a connector the pins are going to be touching each other... and that will most certainly fry / short circuit things if you don't disconnect the main 30amp fuse or the battery...
The most tedious part of is remove the pins from the connectors... each connector is different, here is a link to the page that relate to the different connectors (dis assembly, etc)
http://s1218.photobucket.com/albums/...ectors%20Iron/
Remove each correspondent pin (one pair at a time so you don't get confused)... take a heat shrink tubing, cut it in half so you don't have to buy that many... use it to cover the connection... don't overdo the heating process.. just heat it enough so the tubing wraps nicely around it.. if you heat it too much you will weaken the rubber, and the pins will pierce the rubber once you start tightly wrapping up all the cables together (imagine the electrical nightmare that would cause)... now label each side of the connection with the same ID... I tried to use meaningful IDs.. things like S1, S2, S3... for the speedo.. T1,T2.... for turning signals... etc... here is the fuel pump cable (BTW, I decided to cut and re-solder this cable since it is strangely long) :
once you are done distribute the cables on top of the frame and secure it with tape or wrap it tightly with dental floss, then cover it with something strong and durable (Gorilla Tape, hockey stick tape).. it should be a tight fit but you should be able to secure the tank in the original position... I did this with no issues so far)
Happy riding!
Last edited by joebotics; 03-10-2011 at 11:06 PM.
#2
03-03-2011, 11:45 AM

I am trying to do this without the pins and just solder them together, the only problem is some of the wires go into the connector and don't come out, or end up a different color on the other side, or turn into 2 or more cables. The way they did the wiring is a real PITA, I might just end up doing it with the pins to avoid more problems...
#3
03-03-2011, 11:54 AM
#5
03-03-2011, 04:27 PM

#6
03-03-2011, 04:41 PM
Here is the cure... do just one connector and see how it goes.. let's say.. do the turn signals cable first... put the bike together.. ride it... make sure the bike runs ok... then tackle a bigger connector..
#7
03-03-2011, 05:08 PM
Good idea...may apply a liberal amount of beer to myself this weekend and give it a shot. Will let you know if I decide not to puss out.
Trending Topics
#8
03-03-2011, 05:27 PM
thanks for the write-up, JB.
i was toying with the idea of trying this the other day...... but still might wait till after my rockerbox gaskets are done (again) so's i don't give the dealer the impression that i have hacked the bike up.
looks like you need to update your sig pic with the newly improved lowered tank.
i was toying with the idea of trying this the other day...... but still might wait till after my rockerbox gaskets are done (again) so's i don't give the dealer the impression that i have hacked the bike up.
looks like you need to update your sig pic with the newly improved lowered tank.
#9
03-03-2011, 07:59 PM
#10
03-03-2011, 10:54 PM
