
Step by step front brake line swap and riser exensions
#1
 09-10-2011, 08:58 PM

Here is a thread that will show you step by step, how to swap out a stock brake line for a +4" Magnum line so that you can drop in some riser extensions on a 2012 Iron 883. I believe this should apply to pretty much all recent XL883 variants.
You have do to this, because the factory front brake line literally will only give you enough to move the risers up about 0.5"....so if you want to drop in a 1.5" riser extension kit like I am doing....you are SOL unless you change that front brake line.
First, you will need to order an extended brake line. HD is back ordered right now, and I was told "mid to late October", so I decided to contact Magnum and have them send me a line in a custom length. I got the Magnum Black Pearl +4" front brake line, here is the part number: 46646
Details:
1 x 46" Chromite II DOT Custom Brake (46646) = $67.95
Color Black Pearl
I chose a +4" line because I figured I may want to raise the bars up even higher later on, and I didn't want to have to replace the brake line more than once. If your brake line is longer than necessary, its really not a big deal until you get into a line that has like 6" of extra length, and then the line can get cramped and stick out too far on the side of the bike.
Ok with that done, you will need a riser kit. I got one off of ebay, its made from aircraft grade aluminum and then powdercoated. Here is a picture of the kits this guy offers:

What I received was two black powdercoated risers, with two heavy grade steel bolts in a longer length.
Lastly, you will need the following tools:
Metric and SAE socket sets.
A torque wrench that goes from 25 to 40ft*lbs (or better)
Blue locktite (or red, but I prefer the blue)
A bleeder hose/bag/jar
DOT 4 brake fluid (I prefer synthetic, but its up to you)
A bunch of paper towels
Shop towels
Rubber tubing (more on this later)
I originally was going to take this chance to also install a set of Speed Bleeders, but for the first time in many installations, I was let down by this set of Speed Bleeders, and I backed out, choosing to retain the factory bleed screws.
Speed Bleeder will tell you on their website that you need the SB8125L for the new model sportsters, but as I'll show you, this is NOT the correct part number.
Ok, so lets get started with the pictures:
First, cover the front fender, master cylinder, and tank:
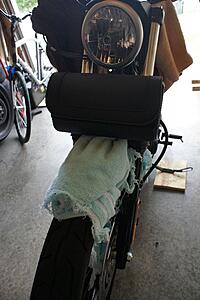
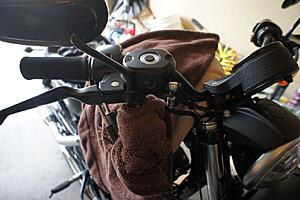
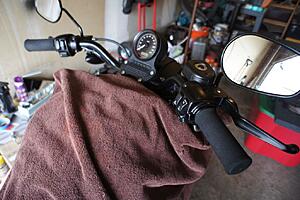
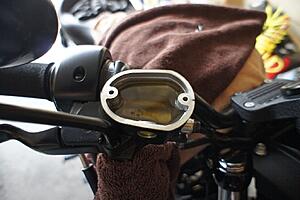
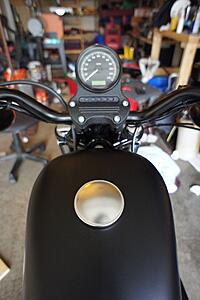
Make sure the bike is upright (I put a board under the jiffy stand) and the master cylinder is level, then pull off the top cover:
Connect the bleeder hose/bag/jar to the bleed screw, and open the bleed screw about 1/2 - 3/4 of a turn. Gravity will pull all of the brake fluid from the master cylinder down and out of the caliper at the bleed screw. This takes a few minutes, there is no reason to pump the lever to get this done.

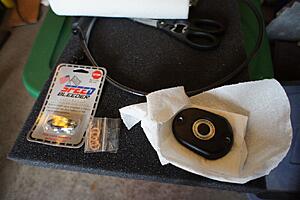
Now, at this point I was going to install the SB8125L speed bleder, but as you can see, its not the correct size on either length, or the flange where you apply the wrench. Speed bleeder on left, HD bleed screw on the right:
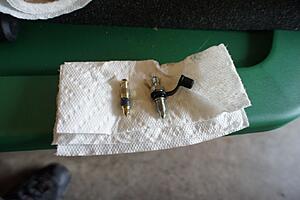
I went ahead and installed the speed bleeder anyway, but as you can see, it doesn't fit properly. You can screw it in so far, that you will lose the ability to get a wrench on the flats:
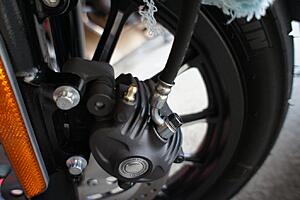
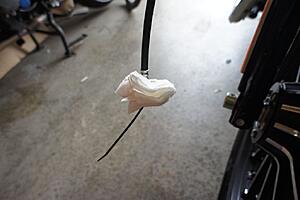
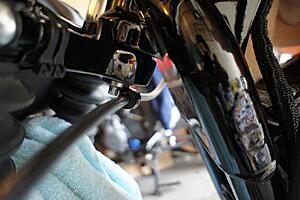
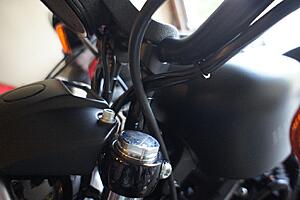
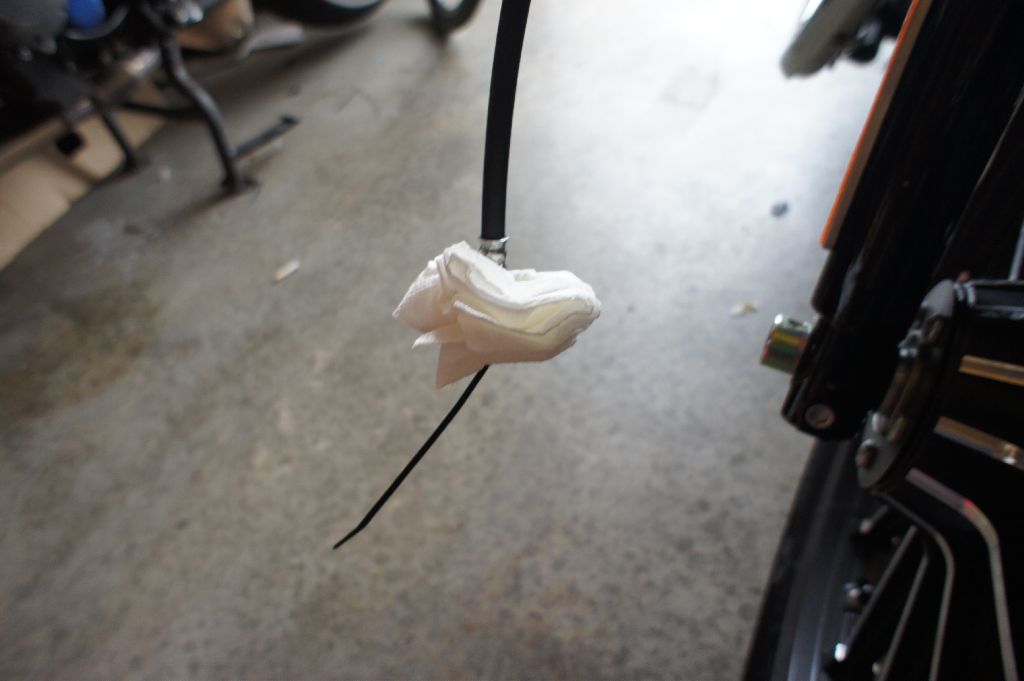
So, I put the factory bleed screw back on. Then I removed the brake line retainer clamp at the very bottom of the lower triple, and unbolted the banjo bolt from the caliper. I wrapped the line in a paper towel and zip tied it to prevent dripping:
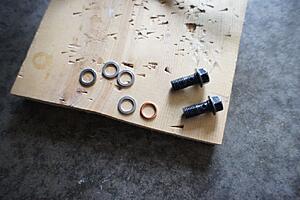
Then I removed the upper brake line retainer clamp on the top triple, and unbolted the top banjo bolt. Here are the two banjo bolts laid out, as well as the factory banjo washers, and one of the copper washers that came with the Magnum line. Due to the smaller size of the copper washers, and the fact that the factory washers were not deformed or worn at all, I chose to clean and re-use the factory washers (the service manual tells you to replace them, but I feel its ok to reuse them if they are perfectly clean and not deformed):
Next, bolt the new brake line to the master cylinder at the top, reusing two of the washers. Torque the banjo bolt to 25ft*lbs as per the service manual.
I wanted to install the lower clamp next, just to hold the line in place while I bolted it to the caliper, but the magnum line is thinner than the flange on the junction between the hard and soft line sections on the factory line, so I cut some hose I had lying around to make a soft spacer:

With the new line torqued down at both ends (same torque rating for both banjo bolts), begin to fill the master cylinder. You will need to begin the standard bleed procedure (unlock screw, pull lever and hold, lock screw, release lever) to get fluid into the line, but then gravity will pull fluid through the line.
Once the line is feeding via gravity, wiggle the line to get air bubbles out, and tap on the caliper with the plastic handle of a screwdriver to knock stuck air bubbles loose.
Continue to refill the master cylinder until you no longer can produce air bubbles in the line through agitating the caliper and line:

At this point, you begin the task of bleeding ALL of the air from the brakes and trying to get the system to build pressure until the lever feel is firm.
I'm not going lie: Every time I do this, I feel like I don't know how to do it. At first I can't get the line to build pressure, and so I just keep repeating the bleeding and the tapping on everything, and I watch as I pump the lever and I see tiny microscopic air bubbles appear up in the master cylinder.
I usually start swearing that I'll never do my own brakes again at this point, so I zip tie the lever in the fully pulled back position and go do something else, hoping air will work its way up to the master cylinder.
If there is some magic way to get a freshly bled system (that was full of air) to pressurize on the first try, I'd love to know what it is. I've used speed bleeders, a mighty vac, and all of the old tricks I've collected over the years...and it always seems like it takes forever.
What I notice, is that if you leave the bleed screw closed, with the master cylinder cover off, you can slowly but surely build pressure by pumping the lever. Watch for a tiny stream of fluid to break the surface of the fluid in the master cylinder reservoir, as this is an indication that the master cylinder is working properly (according to the service manual).
Eventually, you will get a good lever feel and enough pressure in the line and you can top off and close up the master cylinder, and now you are done with the brake bleeding. If the lever is still not as stiff as you want it (but is stiff enough to ride safely), you can ride it around for a few days and then bleed it again, sometimes this makes all the difference.
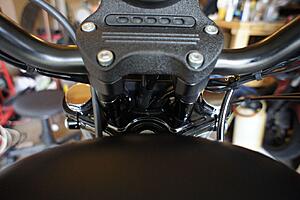
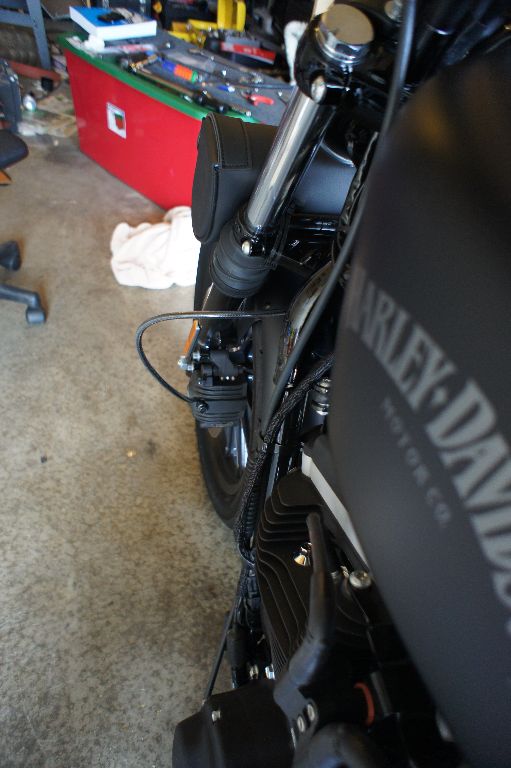
Anyway, now that the longer line is in place, you can install the riser inserts:
The install is really simple:
Remove existing riser bolts
Carefully rest the riser on something (I like to hang a rope from the ceiling and suspend it from that, to avoid setting it on the tank).
Pop in the new riser bolts with a fresh coat of loctite.
Screw everything down tight. I torqued the riser bolts to 40ft*lbs.
Continued in next post....
You have do to this, because the factory front brake line literally will only give you enough to move the risers up about 0.5"....so if you want to drop in a 1.5" riser extension kit like I am doing....you are SOL unless you change that front brake line.
First, you will need to order an extended brake line. HD is back ordered right now, and I was told "mid to late October", so I decided to contact Magnum and have them send me a line in a custom length. I got the Magnum Black Pearl +4" front brake line, here is the part number: 46646
Details:
1 x 46" Chromite II DOT Custom Brake (46646) = $67.95
Color Black Pearl
I chose a +4" line because I figured I may want to raise the bars up even higher later on, and I didn't want to have to replace the brake line more than once. If your brake line is longer than necessary, its really not a big deal until you get into a line that has like 6" of extra length, and then the line can get cramped and stick out too far on the side of the bike.
Ok with that done, you will need a riser kit. I got one off of ebay, its made from aircraft grade aluminum and then powdercoated. Here is a picture of the kits this guy offers:
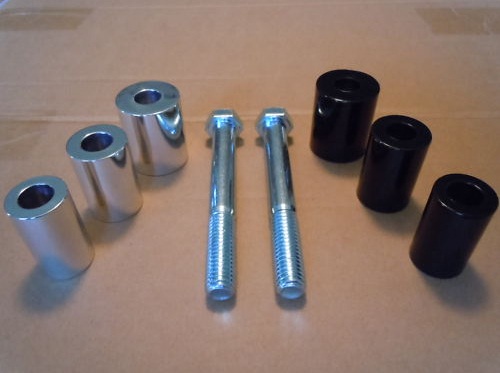
What I received was two black powdercoated risers, with two heavy grade steel bolts in a longer length.
Lastly, you will need the following tools:
Metric and SAE socket sets.
A torque wrench that goes from 25 to 40ft*lbs (or better)
Blue locktite (or red, but I prefer the blue)
A bleeder hose/bag/jar
DOT 4 brake fluid (I prefer synthetic, but its up to you)
A bunch of paper towels
Shop towels
Rubber tubing (more on this later)
I originally was going to take this chance to also install a set of Speed Bleeders, but for the first time in many installations, I was let down by this set of Speed Bleeders, and I backed out, choosing to retain the factory bleed screws.
Speed Bleeder will tell you on their website that you need the SB8125L for the new model sportsters, but as I'll show you, this is NOT the correct part number.
Ok, so lets get started with the pictures:
First, cover the front fender, master cylinder, and tank:


Make sure the bike is upright (I put a board under the jiffy stand) and the master cylinder is level, then pull off the top cover:


Connect the bleeder hose/bag/jar to the bleed screw, and open the bleed screw about 1/2 - 3/4 of a turn. Gravity will pull all of the brake fluid from the master cylinder down and out of the caliper at the bleed screw. This takes a few minutes, there is no reason to pump the lever to get this done.

Now, at this point I was going to install the SB8125L speed bleder, but as you can see, its not the correct size on either length, or the flange where you apply the wrench. Speed bleeder on left, HD bleed screw on the right:

I went ahead and installed the speed bleeder anyway, but as you can see, it doesn't fit properly. You can screw it in so far, that you will lose the ability to get a wrench on the flats:

So, I put the factory bleed screw back on. Then I removed the brake line retainer clamp at the very bottom of the lower triple, and unbolted the banjo bolt from the caliper. I wrapped the line in a paper towel and zip tied it to prevent dripping:
Then I removed the upper brake line retainer clamp on the top triple, and unbolted the top banjo bolt. Here are the two banjo bolts laid out, as well as the factory banjo washers, and one of the copper washers that came with the Magnum line. Due to the smaller size of the copper washers, and the fact that the factory washers were not deformed or worn at all, I chose to clean and re-use the factory washers (the service manual tells you to replace them, but I feel its ok to reuse them if they are perfectly clean and not deformed):

Next, bolt the new brake line to the master cylinder at the top, reusing two of the washers. Torque the banjo bolt to 25ft*lbs as per the service manual.
I wanted to install the lower clamp next, just to hold the line in place while I bolted it to the caliper, but the magnum line is thinner than the flange on the junction between the hard and soft line sections on the factory line, so I cut some hose I had lying around to make a soft spacer:


With the new line torqued down at both ends (same torque rating for both banjo bolts), begin to fill the master cylinder. You will need to begin the standard bleed procedure (unlock screw, pull lever and hold, lock screw, release lever) to get fluid into the line, but then gravity will pull fluid through the line.
Once the line is feeding via gravity, wiggle the line to get air bubbles out, and tap on the caliper with the plastic handle of a screwdriver to knock stuck air bubbles loose.
Continue to refill the master cylinder until you no longer can produce air bubbles in the line through agitating the caliper and line:

At this point, you begin the task of bleeding ALL of the air from the brakes and trying to get the system to build pressure until the lever feel is firm.
I'm not going lie: Every time I do this, I feel like I don't know how to do it. At first I can't get the line to build pressure, and so I just keep repeating the bleeding and the tapping on everything, and I watch as I pump the lever and I see tiny microscopic air bubbles appear up in the master cylinder.
I usually start swearing that I'll never do my own brakes again at this point, so I zip tie the lever in the fully pulled back position and go do something else, hoping air will work its way up to the master cylinder.
If there is some magic way to get a freshly bled system (that was full of air) to pressurize on the first try, I'd love to know what it is. I've used speed bleeders, a mighty vac, and all of the old tricks I've collected over the years...and it always seems like it takes forever.
What I notice, is that if you leave the bleed screw closed, with the master cylinder cover off, you can slowly but surely build pressure by pumping the lever. Watch for a tiny stream of fluid to break the surface of the fluid in the master cylinder reservoir, as this is an indication that the master cylinder is working properly (according to the service manual).
Eventually, you will get a good lever feel and enough pressure in the line and you can top off and close up the master cylinder, and now you are done with the brake bleeding. If the lever is still not as stiff as you want it (but is stiff enough to ride safely), you can ride it around for a few days and then bleed it again, sometimes this makes all the difference.
Anyway, now that the longer line is in place, you can install the riser inserts:

The install is really simple:
Remove existing riser bolts
Carefully rest the riser on something (I like to hang a rope from the ceiling and suspend it from that, to avoid setting it on the tank).
Pop in the new riser bolts with a fresh coat of loctite.
Screw everything down tight. I torqued the riser bolts to 40ft*lbs.


Continued in next post....
Last edited by parabellum_9x19; 09-11-2011 at 10:10 AM.
The following users liked this post:
oilly1 (08-07-2016)
#2
09-10-2011, 08:59 PM


#6
09-11-2011, 09:58 AM
131 tman, maybe that is possible on your model, but it was absolutely impossible on mine, I wish I could have done the rise without changing the cable! :-)
What model do you have?
Jeffkill: Thanks, I stood around staring at it for about a minute before I remembered to go check my box of old lines, and sure enough I had one that was about perfect. Nice to keep old stuff from previous jobs, you never know when something may come in handy.
What model do you have?
Jeffkill: Thanks, I stood around staring at it for about a minute before I remembered to go check my box of old lines, and sure enough I had one that was about perfect. Nice to keep old stuff from previous jobs, you never know when something may come in handy.
#7
09-11-2011, 10:02 AM


Trending Topics

#9
09-11-2011, 10:09 AM
131, yeah, they must have changed something, because the line on my IRON 883 was stretched almost too tight in the factory configuration...there was ZERO slack in that thing, which is why I had to replace the line.
Heck, the new line looks and feels better anyway, so I'm happy with it, but the job would have been $65 cheaper if I could have continued to use the factory line.
Heck, the new line looks and feels better anyway, so I'm happy with it, but the job would have been $65 cheaper if I could have continued to use the factory line.
#10
09-11-2011, 09:34 PM
Advanced
Join Date: Jul 2010
Location: Port Clinton, Ohio
Posts: 76
Likes: 0
Received 0 Likes
on
0 Posts
Thanks for the instructions and the pics. Going to put some risers on my 2012 Iron and now have a guide to work with.
Have you thought about switching your mirrors to under the bars? I found a thread on here with instructions and pics (even though its pretty simple) and switched mine the other day.
1. It makes it a lot easier to see what is behind you, gives a better field of view
2. I think is looks great. Really streamlines the Iron down.
I found it with a seach on here. Great post and thanks again for the tips.