
Changing grips on a Sportster the right way (How To)
#1
 09-24-2011, 04:13 AM

Sorry if this is in the wrong place... I thought I would do a writeup and help out somebody that is interested in doing this swap. Pretty cut and forward, I have done it several times but the amateur can expect to spend a half an hour to an hour on the process. The procedures are the same for Big Twins, but easier. Where Sportsters and older bikes have cables to worry about, the newer V-Twins do not. I will address this in the article. I will also address how to install the clutch side grip without it coming off.
Tools needed.
T-25 Torx driver or socket
180g sandpaper
Acetone
Paper towel
Razor knife
Adjustable wrenches X2
3-2-1 oil or comparable oil such as air tool oil
Powder graphite
Supplied Super Glue gel
Air compressor with blower chuck or WD-40 (optional)
Vasoline
First of all, there is no need to destroy the old grip on the left hand side. If you wish to save the grip, you will need a shop compressor or can of WD-40.
THROTTLE SIDE GRIP REMOVAL
I prefer to do the throttle side first- a reason I will address later in the writeup.
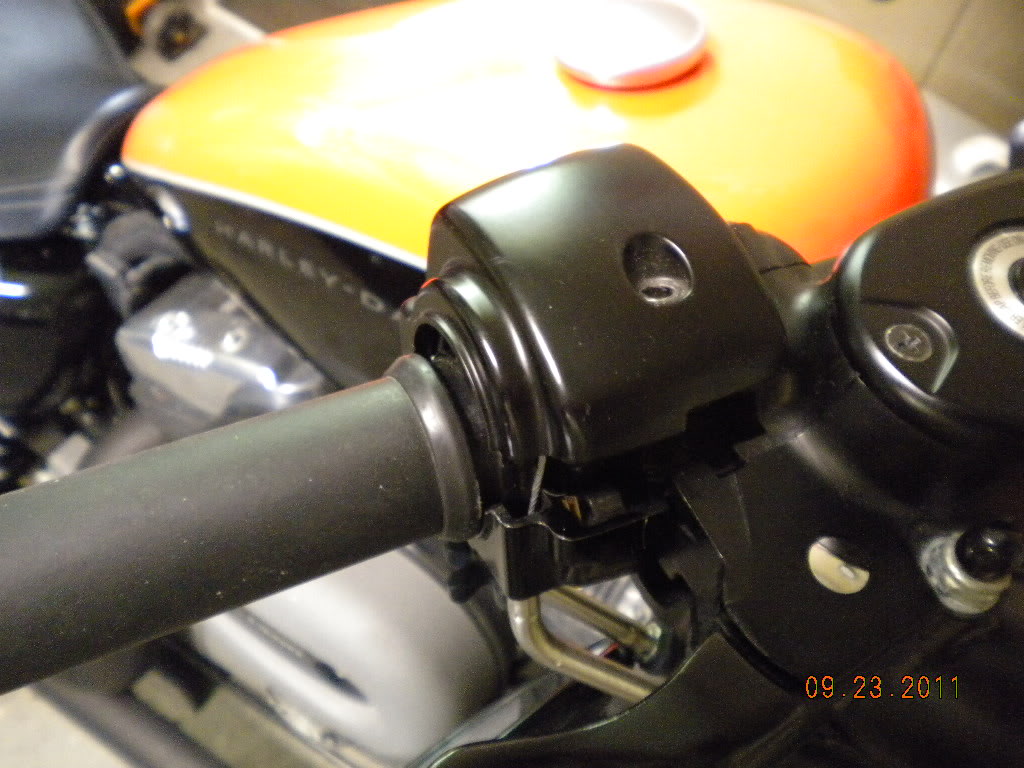
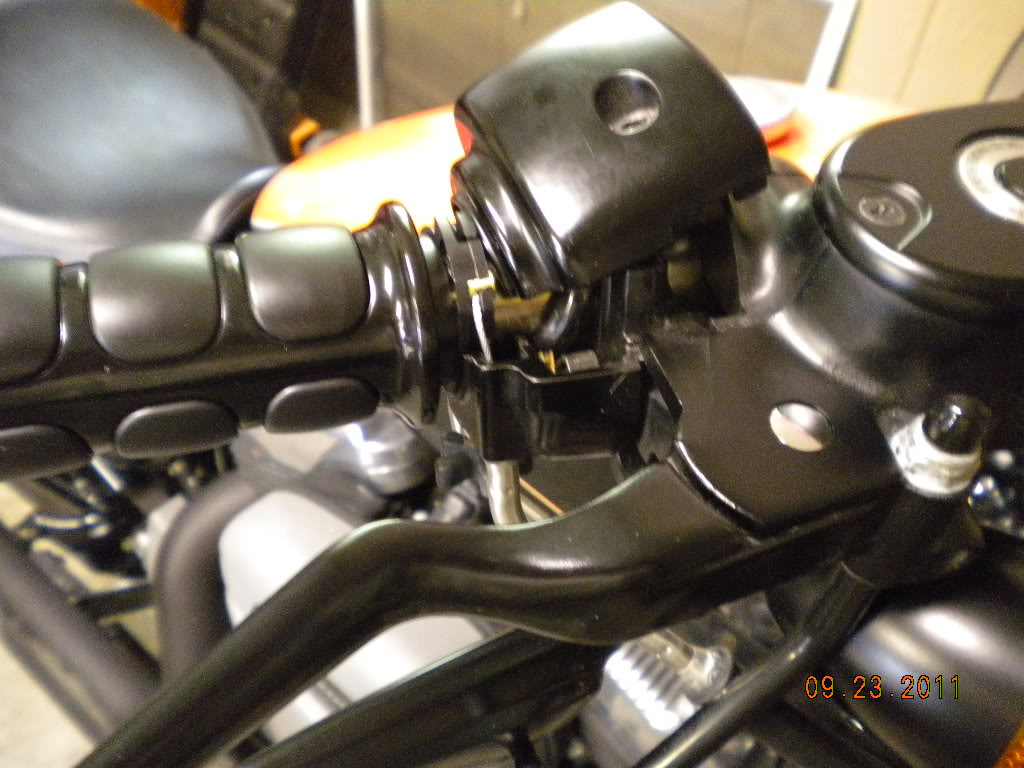
I began by removing the two T-25 screws located at the top rear and bottom front of the switch housing. This will allow the upper switch housing to pop off. Let it hang by the wires, it is not heavy, so there is no need to brace it to prevent damage to the wiring.
NOTE TO FLY-BY-WIRE TWIN CAM OWNERS: The instructions for the cable removal does not apply to you, as your bike does not have a throttle cable per-say. Simply follow the instructions to remove the upper switch housing, slide the old grip off, and slide on the new one. Then move on to the left side, as explained later.
NOTE TO CARBURETOR OWNERS: Shut off the fuel petcock before working with the throttle cable(s).
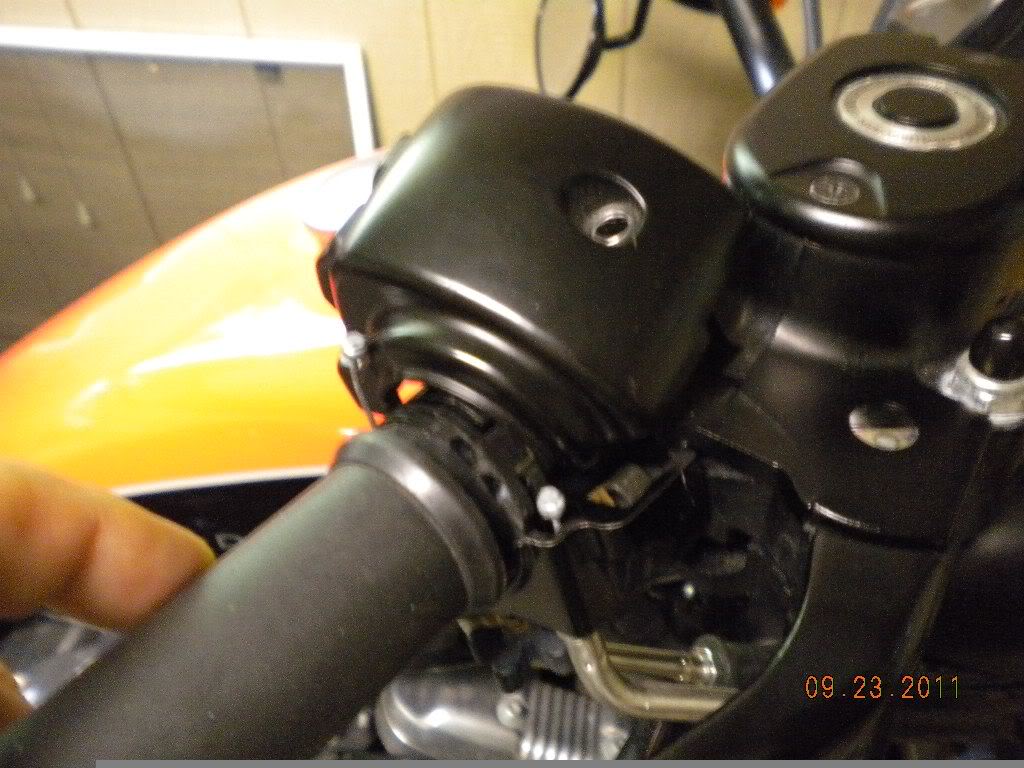
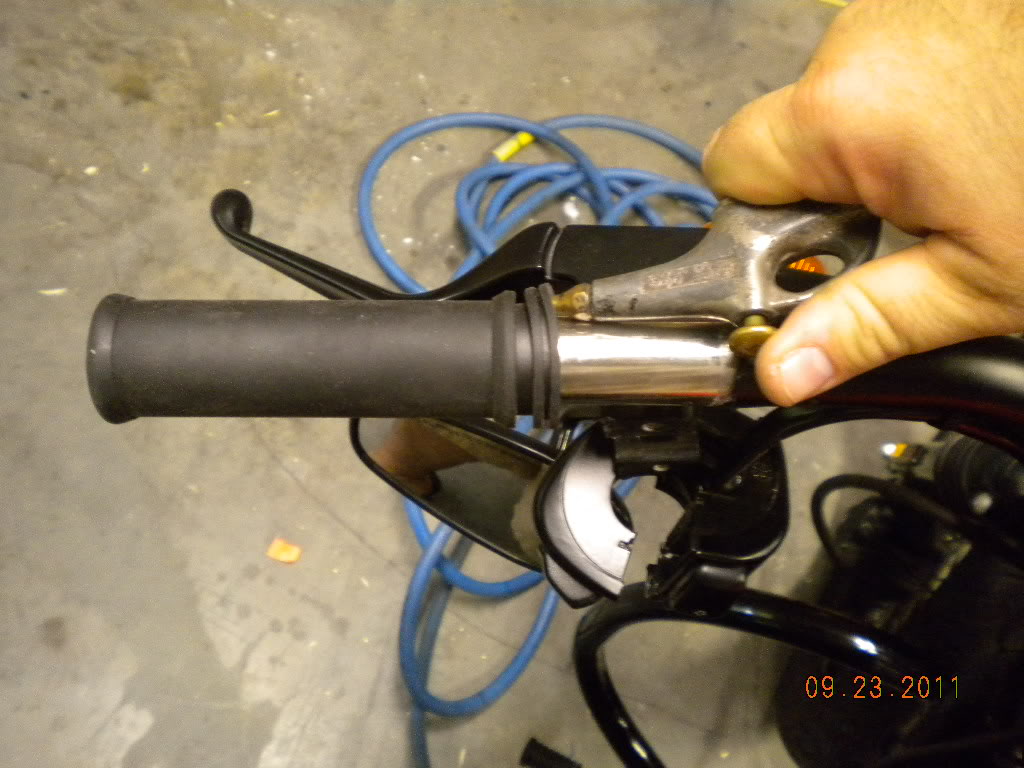
Once inside, you will see two cables that are held to the throttle tube with a brass ferrule. Take care not to lose these ferrules, as they are to be reused on installation. Start with the forward most cable, and using a small flathead screwdriver, lift the cable off the cable channel so that it is aligned with the slit in the grip, then push the cable and ferrule toward the left to disconnect the cable from the throttle tube. There should be enough travel in the cable to allow disconnection, however,if there is not, or your hands are too big to disconnect the cable, peel back the rubber protector on the cable to expose the adjuster. Using the two adjustable wrenches, loosen the jamb nut and retract the tension nut to generate slack in the cable. Once the cable is free, remove the ferrule and put it in a safe place- again, it will be reused. Repeat the procedure with the rearward cable. While pressing downward on the lower switch housing, pull the right grip off the bar, throttle tube and all. It should slide off very easily.
THROTTLE SIDE GRIP INSTALLATION
Apply a VERY LIGHT coat of oil to the bar to lubricate the throttle action.
Test fit the ferrules into the new grip to make sure that they fit properly.
Now slide the new grip onto the bar and guide the channel of the grip into the ridge of the switch housing. Use this opportunity to apply a small amount of graphite to the inside of the two cables to lubricate them internally. Apply a very small dab of Vasoline to the inside of one of the brass ferrules and install it onto the end ***** of the rearward cable. The Vasoline helps to heep the ferrule and the cable ball together. Route the cable through the cable valley and slide the ferrule into the rear hole of the grip, sliding the cable through the slit in the grip housing. Repeat this to the other cable. Note: A small flathead screwdriver helps get under the cable to install it. Apply a small amount of graphite to the cable channels, and check the throttle action.
Make sure that the grip valley is properly installed with the switch housing ridge, and that the cables are properly aligned into their channels, but not rubbing against the sides of the channels. Now place the upper switch housing onto the lower housing, apply a small dab of blue threadlocker to the two bolts, and install them into the housing until the upper housing seats and snugs down. Then tighten each bolt to proper specs. Unscrew the jamb nut located on the underside of the switch housing (if equipped) and check the throttle action of the new grip. It should cycle smooth, without excessive play in the grip. If play exists, or the throttle does not close completely, adjust the cables accordingly. Make sure to tighten the cable jamb nuts and slide the rubber protectors over the adjuster nuts.
CLUTCH SIDE GRIP REMOVAL
Many will probably tell you to use a razor knife to cut off the old grip, but there is no real need to do so. All you will need is a shop compressor and an air blower. If not available, you can use a can of WD-40.
Remove the two T-25 bolts located at the top front and bottom rear of the switch housing, as well as the two T-25's that hold the clutch lever housing end cap. Set the end cap aside, and remove the clutch lever housing assembly from the handlebars. Remove the switch housing from the passenger side bars as well.
SIMPLE GRIP REMOVAL WITHOUT DESTRUCTION!
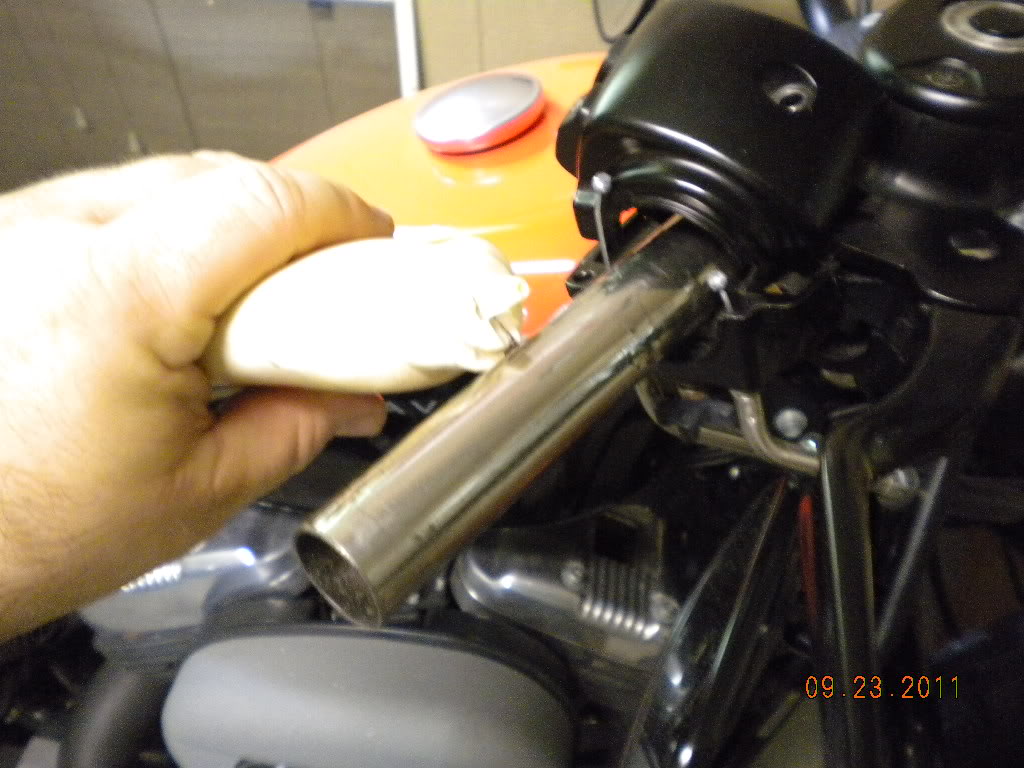
Peel back a small portion of the rubber grip and insert the air blower. Give it a blast of air for a couple of seconds. if the grip does not break loose, rotate it back and forth, then repeat the process. Usually takes only one or two shots before the grip comes right off. If you do not have access to shop air, you can insert the red plastic tube to a WD-40 can and spray a small amount into the bars. Rotate the grip around back and forth to spread the penetrating lube, and the grip adhesive will break free.
Slide the grip off.
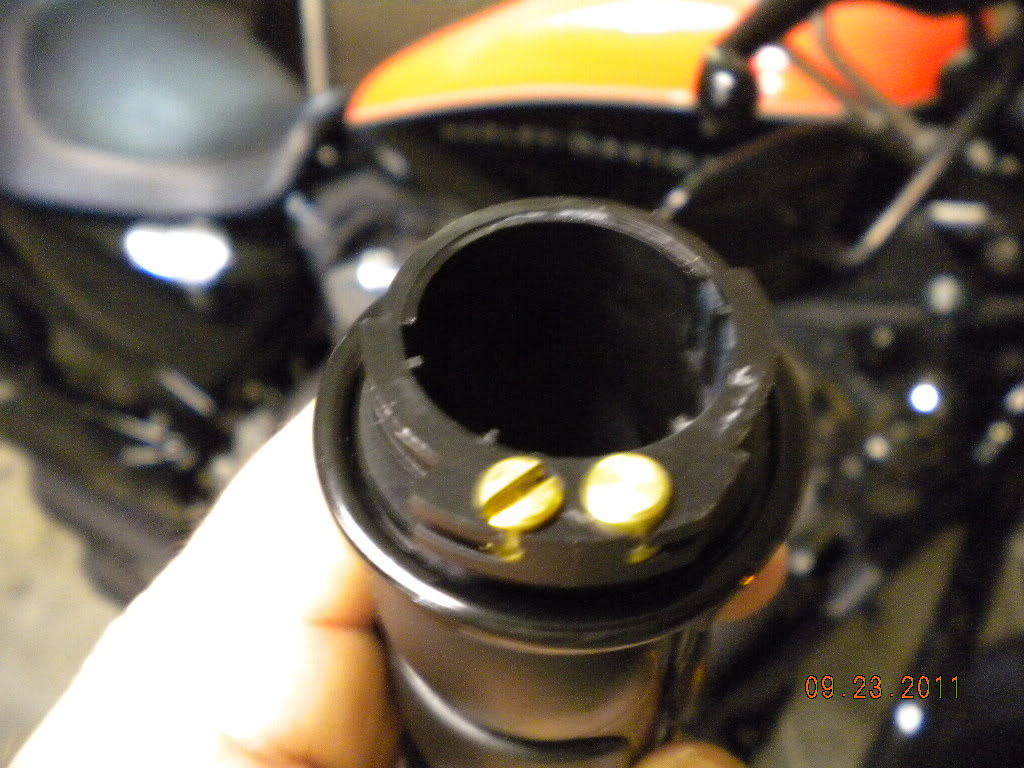
Take your razor blade and clean up the old glue off the bars.
Here is where a lot of people screw up and the grip comes off later down the road, but following my instructions you should never have this problem at all! Now take a piece of 180 grit sandpaper and sand off the rest of the glue. You can sand in any direction that is comfortable to remove the glue, but your final sanding should rotate the bars' diameter, not go laterally. This is to give the adhesive a cross bite, making it all the more difficult for the glue to break free. Clean up the bars with a paper towel soaked in acetone. Then stuff an acetone soaked paper towel
into the grip, rotating it as you go. This will remove any oils from the rubber or the manufacturing process. This will also soften the inner rubber making the adhesive to stick a lot better, getting more of a chemical bond instead of relying solely on the mechanical bond of the glue.
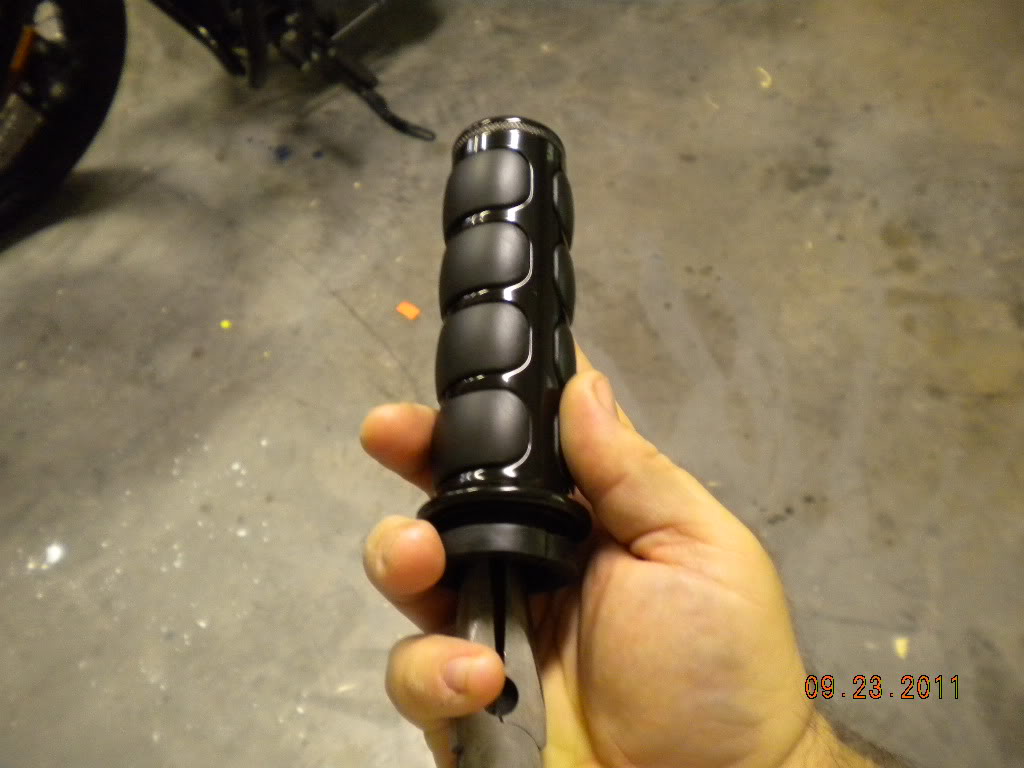
Now to address the reason for doing the throttle side first. You will have little, if any, decision on indexing the throttle grip. If installing a grip such as Iso Grips, you will want them to be indexed properly with each other, for a nice uniform look. Take notation of the orientation of the throttle grip, and install the clutch side grip in the same position.
After allowing proper dry time for the acetone (a good minute or so), test mock the grip onto the bar. It should slide on freely, but not have excessive play in it when fully installed onto the bar. Apply the entire tube of the included gel glue (Super Glue) to the inner sides of the grip. Favor the front of the grip, as it will slide toward the end of the grip upon installation.
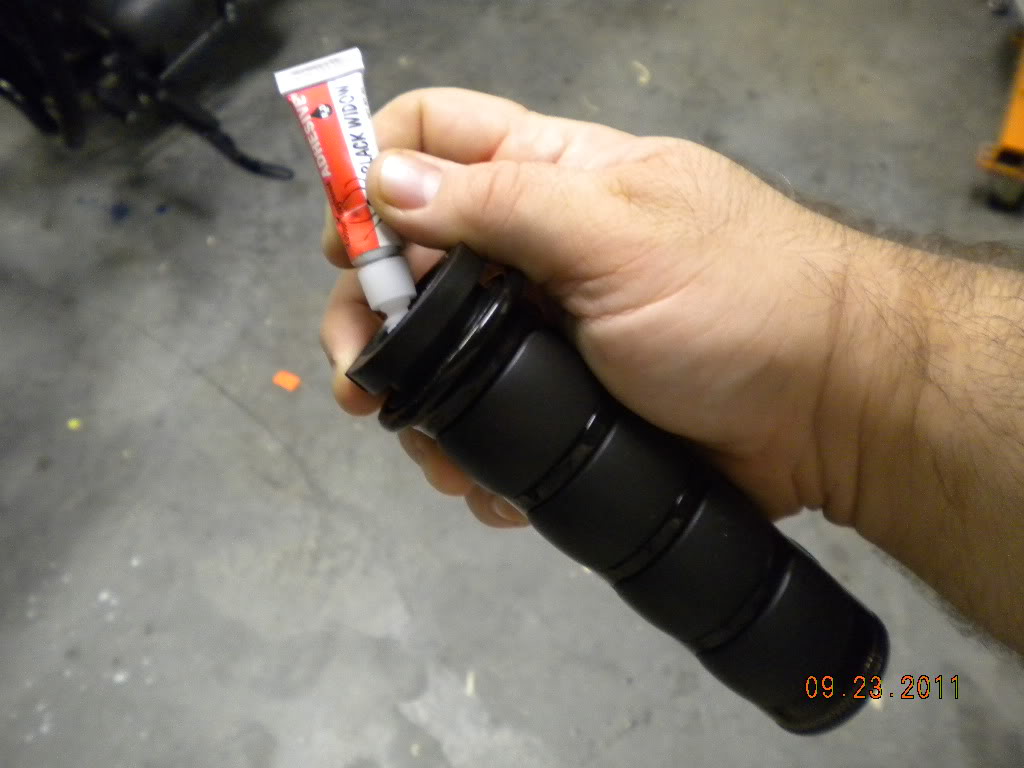
Slide the grip onto the bar, rotating it at least 1/4 turn back and forth as you slide it on. Do not stop rotating it, or else the glue will start to set up as soon as you do. This rotating motion will properly distribute the glue all around the bar and inside the grip. Once the bar is fully inserted into the grip, rotate the grip until it matches the throttle grip's position. When you are satisfied with the location of the grip, stop rotating it but continue to squeeze the grip for fifteen to thirty seconds to apply pressure for the grip to bond to the bar.
Reinstall the left side switch housing, making sure that the housing's ridge goes into the grip's channel. Install the upper switch housing and tighten the T-25's as described above, also using blue threadlocker.
Install the clutch lever housing onto the bar and switch housing making sure that the tab of the clutch housing mates to the slot in the switch housing. This is important, as the lever is designed to make contact with the momentary safety switch that is located in the switch housing. Route the switch wires through the bottom of the lever housing, hugging the bars. It will look like there is no room for the wires, but trust me, there is. Install the lever housing end caps onto the bar and install the T-25's, making sure that the wires do not pinch. Allow the clutch side grip to set up for at least a half an hour before riding, the longer it sets however, the better.
Now turn the key on and do a systems check. Check all functions of the buttons to make sure that the horn, signals, run, etc. properly function. Lastly, fire the engine up, pulling the clutch and engaging first gear, with the brake pressed. The bike should engage first properly. Let off the clutch just enough to let the engine take hold to verify the clutch operation.
TROUBLESHOOTING
Throttle side
Grip does not move freely, or does not move at all Is the jamb nut engaged? Verify that the jamb nut on the throttle tube is not tightened. If no...
Check the friction where the grip mates the switch housing by removing the upper switch housing and checking the play of the throttle tube. If the grip operates freely, the problem is too much tension in the grip to switch housing. Contact the grip manufacturer, as the grip channel may be too large.
If no, disconnect the cables from the throttle tube. Does the grip spin freely on the bars without the cables and removed from the switch housing? If no, contact the grip manufacturer, as the inner diameter is likely too small for the bars.
If yes, manually pull the forward cable and release. It should snap tight when released. If not, check the cable routing for binding, lubricate the cables, check the throttle spring, or replace if necessary.
If the cables do snap properly, it is likely the grip is installed too far inward. loosen the two T-25s that hold the master cylinder/brake lever housing end caps to the bars and slide the entire assembly closer to the end of the bar. A good 1/4" should do it. Retighten the bolts and verify throttle action. If it still binds, contact the grip manufacturer for possible manufacturing defect or further troubleshooting.
Grip has too much wobble Verify that the switch housing bolts are tight. If yes, verify that the correct grips are shipped for your motorcycle.
Grip has too much rotational play Adjust the tension in the cables until tight.
Throttle idles high. Adjust the cables until the throttle closes completely when the grip is at rest.
CLUTCH SIDE
Grip falls off Verify that the switch housing bolts are tight. If yes, repeat the steps for installation, making sure that the steps are followed properly.
Tools needed.
T-25 Torx driver or socket
180g sandpaper
Acetone
Paper towel
Razor knife
Adjustable wrenches X2
3-2-1 oil or comparable oil such as air tool oil
Powder graphite
Supplied Super Glue gel
Air compressor with blower chuck or WD-40 (optional)
Vasoline
First of all, there is no need to destroy the old grip on the left hand side. If you wish to save the grip, you will need a shop compressor or can of WD-40.
THROTTLE SIDE GRIP REMOVAL
I prefer to do the throttle side first- a reason I will address later in the writeup.
I began by removing the two T-25 screws located at the top rear and bottom front of the switch housing. This will allow the upper switch housing to pop off. Let it hang by the wires, it is not heavy, so there is no need to brace it to prevent damage to the wiring.
NOTE TO FLY-BY-WIRE TWIN CAM OWNERS: The instructions for the cable removal does not apply to you, as your bike does not have a throttle cable per-say. Simply follow the instructions to remove the upper switch housing, slide the old grip off, and slide on the new one. Then move on to the left side, as explained later.
NOTE TO CARBURETOR OWNERS: Shut off the fuel petcock before working with the throttle cable(s).
Once inside, you will see two cables that are held to the throttle tube with a brass ferrule. Take care not to lose these ferrules, as they are to be reused on installation. Start with the forward most cable, and using a small flathead screwdriver, lift the cable off the cable channel so that it is aligned with the slit in the grip, then push the cable and ferrule toward the left to disconnect the cable from the throttle tube. There should be enough travel in the cable to allow disconnection, however,if there is not, or your hands are too big to disconnect the cable, peel back the rubber protector on the cable to expose the adjuster. Using the two adjustable wrenches, loosen the jamb nut and retract the tension nut to generate slack in the cable. Once the cable is free, remove the ferrule and put it in a safe place- again, it will be reused. Repeat the procedure with the rearward cable. While pressing downward on the lower switch housing, pull the right grip off the bar, throttle tube and all. It should slide off very easily.
THROTTLE SIDE GRIP INSTALLATION
Apply a VERY LIGHT coat of oil to the bar to lubricate the throttle action.
Test fit the ferrules into the new grip to make sure that they fit properly.
Now slide the new grip onto the bar and guide the channel of the grip into the ridge of the switch housing. Use this opportunity to apply a small amount of graphite to the inside of the two cables to lubricate them internally. Apply a very small dab of Vasoline to the inside of one of the brass ferrules and install it onto the end ***** of the rearward cable. The Vasoline helps to heep the ferrule and the cable ball together. Route the cable through the cable valley and slide the ferrule into the rear hole of the grip, sliding the cable through the slit in the grip housing. Repeat this to the other cable. Note: A small flathead screwdriver helps get under the cable to install it. Apply a small amount of graphite to the cable channels, and check the throttle action.
Make sure that the grip valley is properly installed with the switch housing ridge, and that the cables are properly aligned into their channels, but not rubbing against the sides of the channels. Now place the upper switch housing onto the lower housing, apply a small dab of blue threadlocker to the two bolts, and install them into the housing until the upper housing seats and snugs down. Then tighten each bolt to proper specs. Unscrew the jamb nut located on the underside of the switch housing (if equipped) and check the throttle action of the new grip. It should cycle smooth, without excessive play in the grip. If play exists, or the throttle does not close completely, adjust the cables accordingly. Make sure to tighten the cable jamb nuts and slide the rubber protectors over the adjuster nuts.
CLUTCH SIDE GRIP REMOVAL
Many will probably tell you to use a razor knife to cut off the old grip, but there is no real need to do so. All you will need is a shop compressor and an air blower. If not available, you can use a can of WD-40.
Remove the two T-25 bolts located at the top front and bottom rear of the switch housing, as well as the two T-25's that hold the clutch lever housing end cap. Set the end cap aside, and remove the clutch lever housing assembly from the handlebars. Remove the switch housing from the passenger side bars as well.
SIMPLE GRIP REMOVAL WITHOUT DESTRUCTION!
Peel back a small portion of the rubber grip and insert the air blower. Give it a blast of air for a couple of seconds. if the grip does not break loose, rotate it back and forth, then repeat the process. Usually takes only one or two shots before the grip comes right off. If you do not have access to shop air, you can insert the red plastic tube to a WD-40 can and spray a small amount into the bars. Rotate the grip around back and forth to spread the penetrating lube, and the grip adhesive will break free.
Slide the grip off.
Take your razor blade and clean up the old glue off the bars.
Here is where a lot of people screw up and the grip comes off later down the road, but following my instructions you should never have this problem at all! Now take a piece of 180 grit sandpaper and sand off the rest of the glue. You can sand in any direction that is comfortable to remove the glue, but your final sanding should rotate the bars' diameter, not go laterally. This is to give the adhesive a cross bite, making it all the more difficult for the glue to break free. Clean up the bars with a paper towel soaked in acetone. Then stuff an acetone soaked paper towel
into the grip, rotating it as you go. This will remove any oils from the rubber or the manufacturing process. This will also soften the inner rubber making the adhesive to stick a lot better, getting more of a chemical bond instead of relying solely on the mechanical bond of the glue.
Now to address the reason for doing the throttle side first. You will have little, if any, decision on indexing the throttle grip. If installing a grip such as Iso Grips, you will want them to be indexed properly with each other, for a nice uniform look. Take notation of the orientation of the throttle grip, and install the clutch side grip in the same position.
After allowing proper dry time for the acetone (a good minute or so), test mock the grip onto the bar. It should slide on freely, but not have excessive play in it when fully installed onto the bar. Apply the entire tube of the included gel glue (Super Glue) to the inner sides of the grip. Favor the front of the grip, as it will slide toward the end of the grip upon installation.
Slide the grip onto the bar, rotating it at least 1/4 turn back and forth as you slide it on. Do not stop rotating it, or else the glue will start to set up as soon as you do. This rotating motion will properly distribute the glue all around the bar and inside the grip. Once the bar is fully inserted into the grip, rotate the grip until it matches the throttle grip's position. When you are satisfied with the location of the grip, stop rotating it but continue to squeeze the grip for fifteen to thirty seconds to apply pressure for the grip to bond to the bar.
Reinstall the left side switch housing, making sure that the housing's ridge goes into the grip's channel. Install the upper switch housing and tighten the T-25's as described above, also using blue threadlocker.
Install the clutch lever housing onto the bar and switch housing making sure that the tab of the clutch housing mates to the slot in the switch housing. This is important, as the lever is designed to make contact with the momentary safety switch that is located in the switch housing. Route the switch wires through the bottom of the lever housing, hugging the bars. It will look like there is no room for the wires, but trust me, there is. Install the lever housing end caps onto the bar and install the T-25's, making sure that the wires do not pinch. Allow the clutch side grip to set up for at least a half an hour before riding, the longer it sets however, the better.
Now turn the key on and do a systems check. Check all functions of the buttons to make sure that the horn, signals, run, etc. properly function. Lastly, fire the engine up, pulling the clutch and engaging first gear, with the brake pressed. The bike should engage first properly. Let off the clutch just enough to let the engine take hold to verify the clutch operation.
TROUBLESHOOTING
Throttle side
Grip does not move freely, or does not move at all Is the jamb nut engaged? Verify that the jamb nut on the throttle tube is not tightened. If no...
Check the friction where the grip mates the switch housing by removing the upper switch housing and checking the play of the throttle tube. If the grip operates freely, the problem is too much tension in the grip to switch housing. Contact the grip manufacturer, as the grip channel may be too large.
If no, disconnect the cables from the throttle tube. Does the grip spin freely on the bars without the cables and removed from the switch housing? If no, contact the grip manufacturer, as the inner diameter is likely too small for the bars.
If yes, manually pull the forward cable and release. It should snap tight when released. If not, check the cable routing for binding, lubricate the cables, check the throttle spring, or replace if necessary.
If the cables do snap properly, it is likely the grip is installed too far inward. loosen the two T-25s that hold the master cylinder/brake lever housing end caps to the bars and slide the entire assembly closer to the end of the bar. A good 1/4" should do it. Retighten the bolts and verify throttle action. If it still binds, contact the grip manufacturer for possible manufacturing defect or further troubleshooting.
Grip has too much wobble Verify that the switch housing bolts are tight. If yes, verify that the correct grips are shipped for your motorcycle.
Grip has too much rotational play Adjust the tension in the cables until tight.
Throttle idles high. Adjust the cables until the throttle closes completely when the grip is at rest.
CLUTCH SIDE
Grip falls off Verify that the switch housing bolts are tight. If yes, repeat the steps for installation, making sure that the steps are followed properly.
Last edited by TennesseeMustangPerf; 09-24-2011 at 02:11 PM.
The following 2 users liked this post by TennesseeMustangPerf:
HHooligan88 (01-31-2022),
Mikes08Sportster (03-16-2022)
#2
09-24-2011, 04:15 AM

#4
09-24-2011, 11:55 AM

Road Captain
Join Date: Oct 2010
Location: New Jersey
Posts: 726
Likes: 0
Received 0 Likes
on
0 Posts
#5
09-24-2011, 12:14 PM
#6
09-24-2011, 02:08 PM
cHarley: yup, sorry, I meant V-Twin. That is what I get for doing this at 5am. Noted and edited, thanks for letting me know.
Last edited by TennesseeMustangPerf; 09-24-2011 at 02:11 PM.
#7
09-24-2011, 02:57 PM

Trending Topics

#9
09-24-2011, 08:53 PM
Cruiser
Join Date: Aug 2011
Location: Gilbert, AZ
Posts: 102
Likes: 0
Received 0 Likes
on
0 Posts
#10
09-24-2011, 08:55 PM
Any time, guys! Glad to help out. I figured, since I am doing it, might as well take some photos and possibly help out a fellow rider. Good luck with the install!