
Sportster Winter Makeover

#12
 12-20-2012, 11:15 PM
Join Date: Nov 2010
Location: Red Banks, Mississippi
Posts: 17,466
Received 3,941 Likes
on
2,296 Posts
i see your gonna put a "STOP" light on the new build..how about this one instead ? I have one knocking about in my bruvs house in Virginia., top quality piece of kit http://vintagechop.bigcartel.com/pro...eer-tail-light

#13
12-22-2012, 10:38 PM

Cruiser
#14
12-23-2012, 12:49 AM
Join Date: Nov 2010
Location: Red Banks, Mississippi
Posts: 17,466
Received 3,941 Likes
on
2,296 Posts
Getting a softail Heritage, and gonna do a little bit of cosmetic work to it to make it a cross between a Heritage and a Deluxe.
Wife never has been too comfortable on the Sporty for more than a couple hour ride, and even then was a bit cramped for her. She will be good for all day on the softy.
Sporty will be back to my daily rider when it's back together, unless I have to carry more stuff than I can strap on to the pillion/shorter sissy bar.
#15
12-30-2012, 01:00 AM
Join Date: Nov 2010
Location: Red Banks, Mississippi
Posts: 17,466
Received 3,941 Likes
on
2,296 Posts

#17
12-31-2012, 12:57 AM
Join Date: Nov 2010
Location: Red Banks, Mississippi
Posts: 17,466
Received 3,941 Likes
on
2,296 Posts
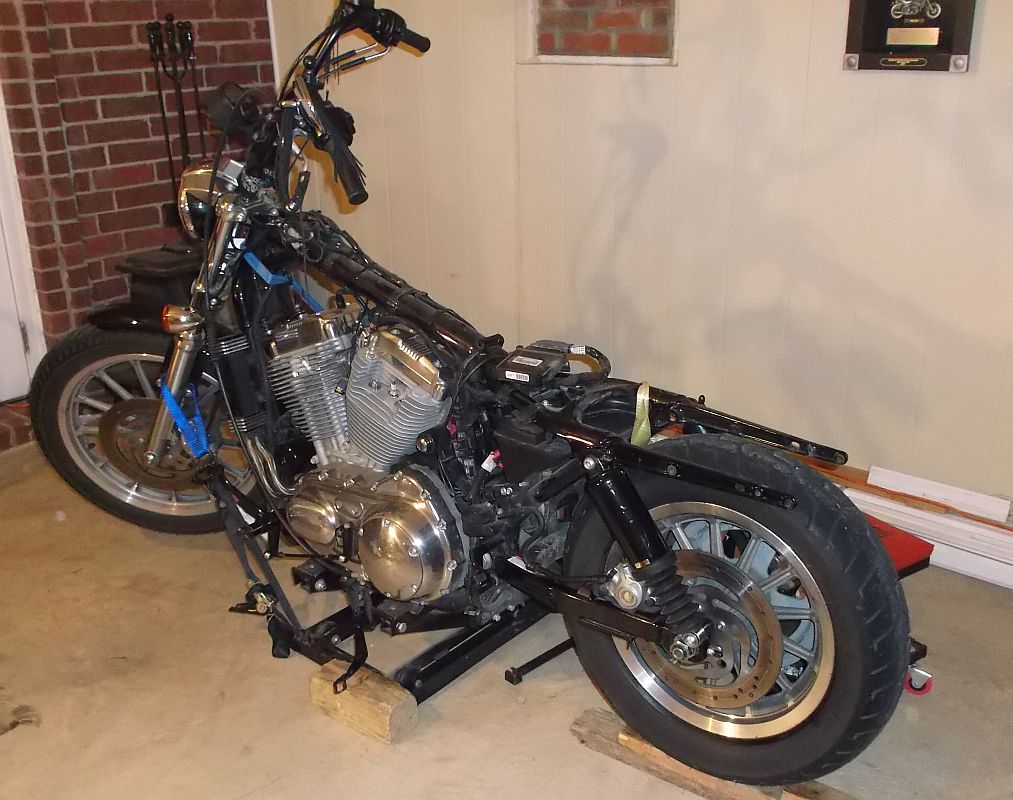
I had about an hour today, so it begins.
Last pic before getting into it-
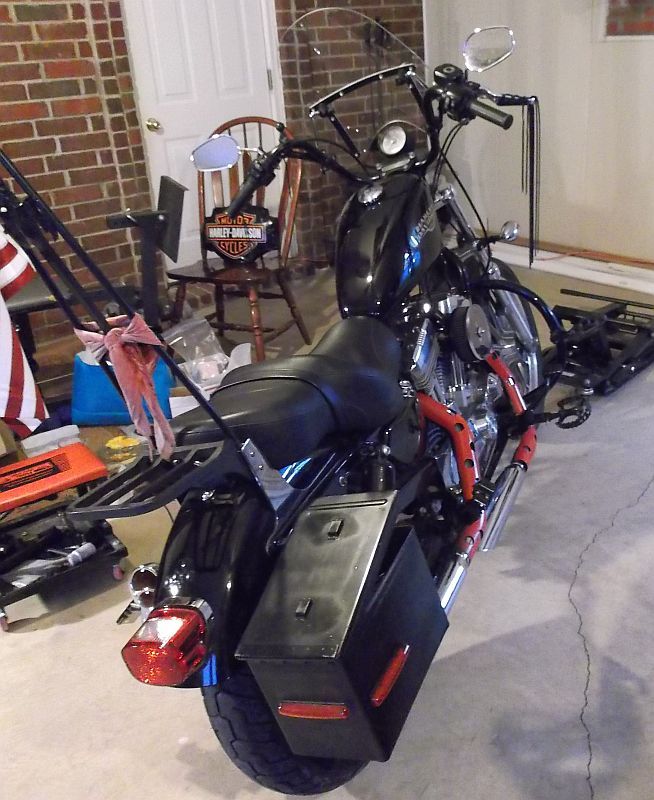
Before putting it on the lift
Removed left side ammo can
Removed Engine Guard
Removed all pegs
Removed heat shields
Removed Cycle Shack slip-ons
Removed rear header
Removed pulley cover
Removed exhaust crossover
Of the above, the only thing going back on are the pegs
Here it is in it's new home for the next few months-
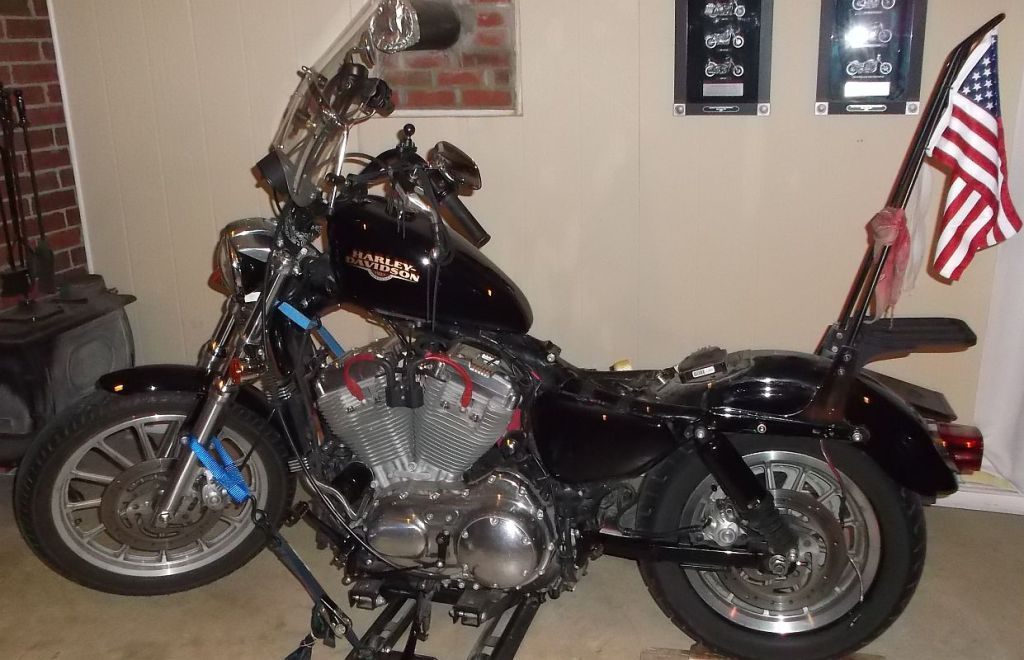
Over the next couple of days I should have some time to pull a bunch more off.
Last pic before getting into it-
Before putting it on the lift
Removed left side ammo can
Removed Engine Guard
Removed all pegs
Removed heat shields
Removed Cycle Shack slip-ons
Removed rear header
Removed pulley cover
Removed exhaust crossover
Of the above, the only thing going back on are the pegs
Here it is in it's new home for the next few months-
Over the next couple of days I should have some time to pull a bunch more off.
#18
12-31-2012, 11:04 PM
Join Date: Nov 2010
Location: Red Banks, Mississippi
Posts: 17,466
Received 3,941 Likes
on
2,296 Posts
Had a bit more time today. (hope I get more tomorrow!)
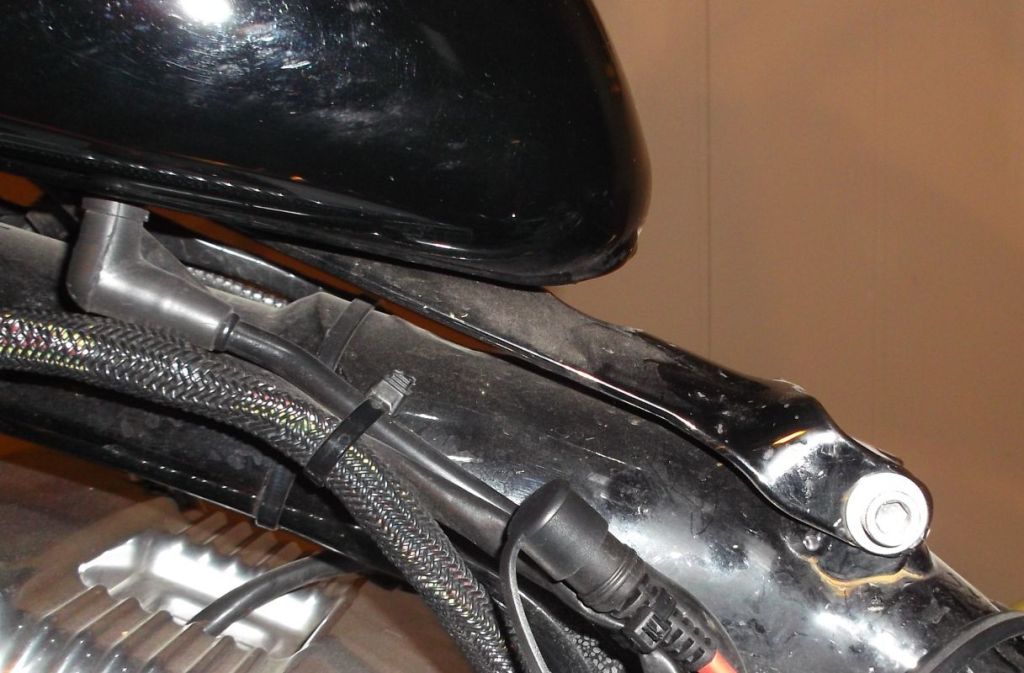
First thing I did was look at the rear tank mount again.
I don't like how high it sits off the frame. I looked at this briefly a year or so ago and did not see any easy fix to get it lower.
Here is how it sits stock- I don't like the space between the top of the backbone and the bottom of the tank.
I would like to get it lower, more like this-much better, no more open space!
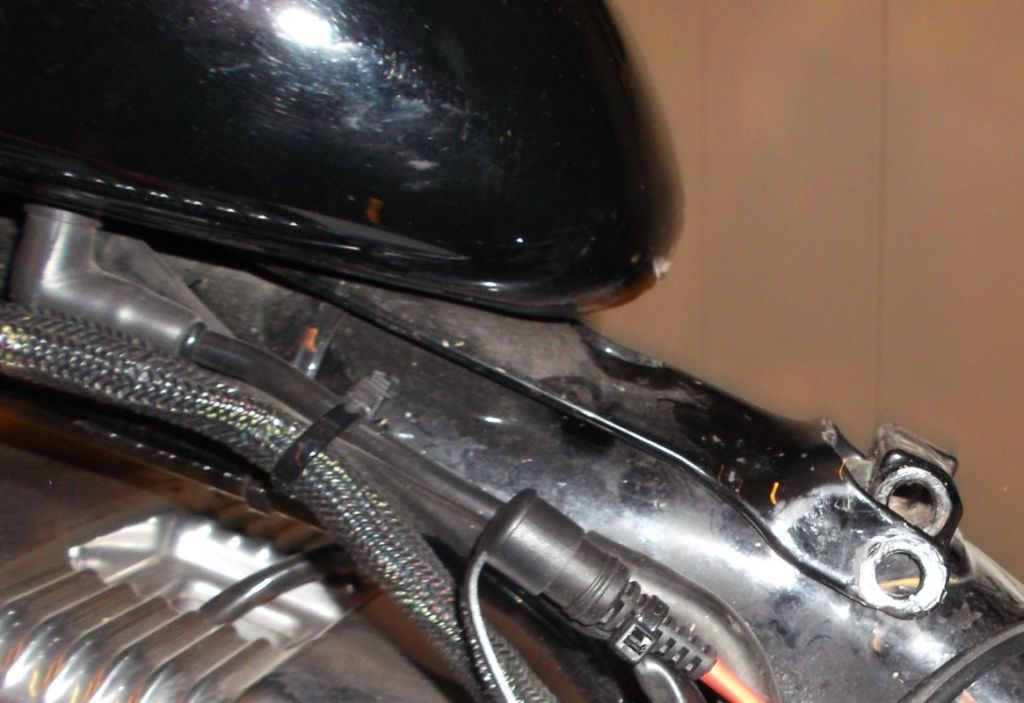
The only thing I can think to do is to rework the tank tabs a bit.
btw, this area will be visible with the Solo Seat that I will be installing.
If anyone has done this before, or has any ideas, I'm all ears!
First thing I did was look at the rear tank mount again.
I don't like how high it sits off the frame. I looked at this briefly a year or so ago and did not see any easy fix to get it lower.
Here is how it sits stock- I don't like the space between the top of the backbone and the bottom of the tank.
I would like to get it lower, more like this-much better, no more open space!
The only thing I can think to do is to rework the tank tabs a bit.
btw, this area will be visible with the Solo Seat that I will be installing.
If anyone has done this before, or has any ideas, I'm all ears!
#19
12-31-2012, 11:26 PM
Join Date: Nov 2010
Location: Red Banks, Mississippi
Posts: 17,466
Received 3,941 Likes
on
2,296 Posts
Other stuff I got done today.
Removed windshield
Removed right side ammo can
Removed tank
Removed coil
Removed battery and battery cover
Removed side plate, sissy bar and rack
Removed rear fender
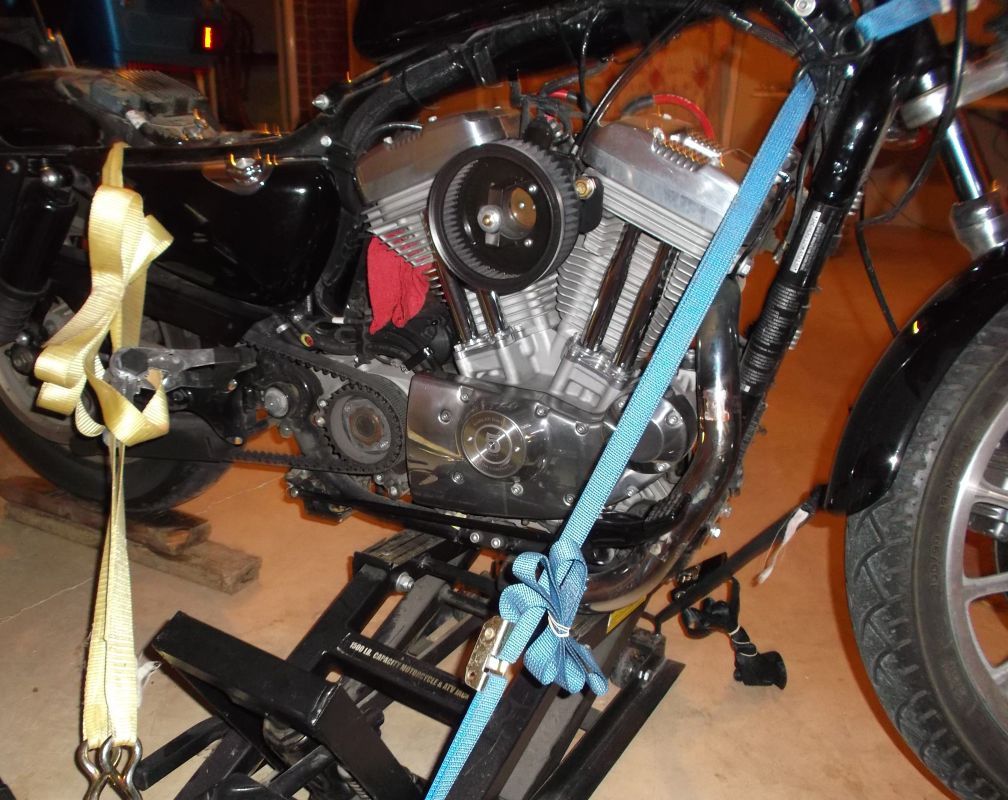
As it sits today-
Next thing I need to do before removing the wheels is lower the front fender. Should be able to get that done tomorrow.
Then the biggie, and any advice, references, help is appreciated-
I need to get the rear fender right down on the tire, and chop it to end right past the rear axle.
Easy enough to slide the fender forward, but how to attach it to the front of the swingarm? Drill the swingarm and bolt, weld tabs on the swingarm to bolt to, fab a square clamp with tabs on it and bolt to that?
The back of the fender will have some fender struts going from the fender down to the swingarm.
Removed windshield
Removed right side ammo can
Removed tank
Removed coil
Removed battery and battery cover
Removed side plate, sissy bar and rack
Removed rear fender
As it sits today-
Next thing I need to do before removing the wheels is lower the front fender. Should be able to get that done tomorrow.
Then the biggie, and any advice, references, help is appreciated-
I need to get the rear fender right down on the tire, and chop it to end right past the rear axle.
Easy enough to slide the fender forward, but how to attach it to the front of the swingarm? Drill the swingarm and bolt, weld tabs on the swingarm to bolt to, fab a square clamp with tabs on it and bolt to that?
The back of the fender will have some fender struts going from the fender down to the swingarm.
Last edited by DK Custom; 12-31-2012 at 11:33 PM.
#20
01-01-2013, 05:03 AM
1st Gear
Join Date: May 2010
Location: Ft. Lee, VA
Posts: 5
Likes: 0
Received 0 Likes
on
0 Posts