
2003 XL1200CXNRDB Build
#1
 07-10-2013, 07:16 PM

Mouthful, right? Check it out. Bike belongs to a friend, and my buddy has been rebuilding it for him with a little help from me when I can get the time....
Oh, and as a side note, all the powder work we did ourselves in the garage. Shout out to Joe for some great advice!
Oh, and as a side note, all the powder work we did ourselves in the garage. Shout out to Joe for some great advice!
Originally Posted by piper1978
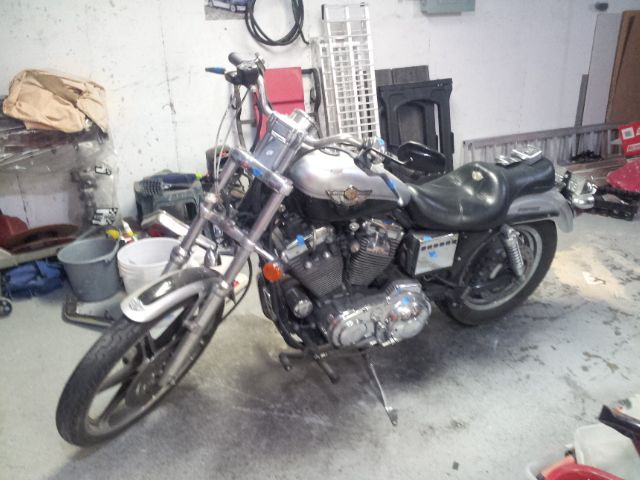
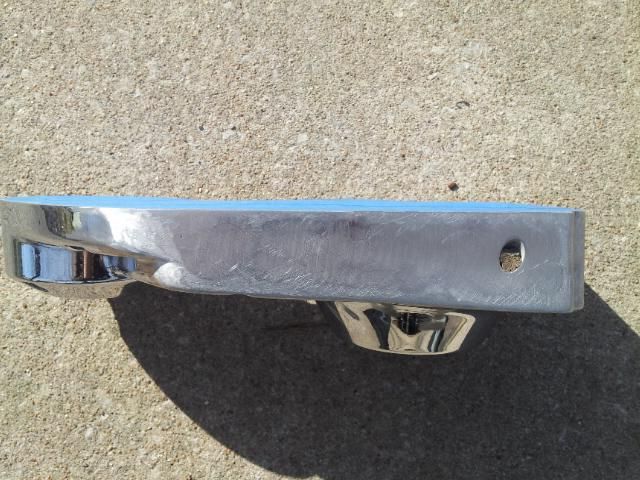
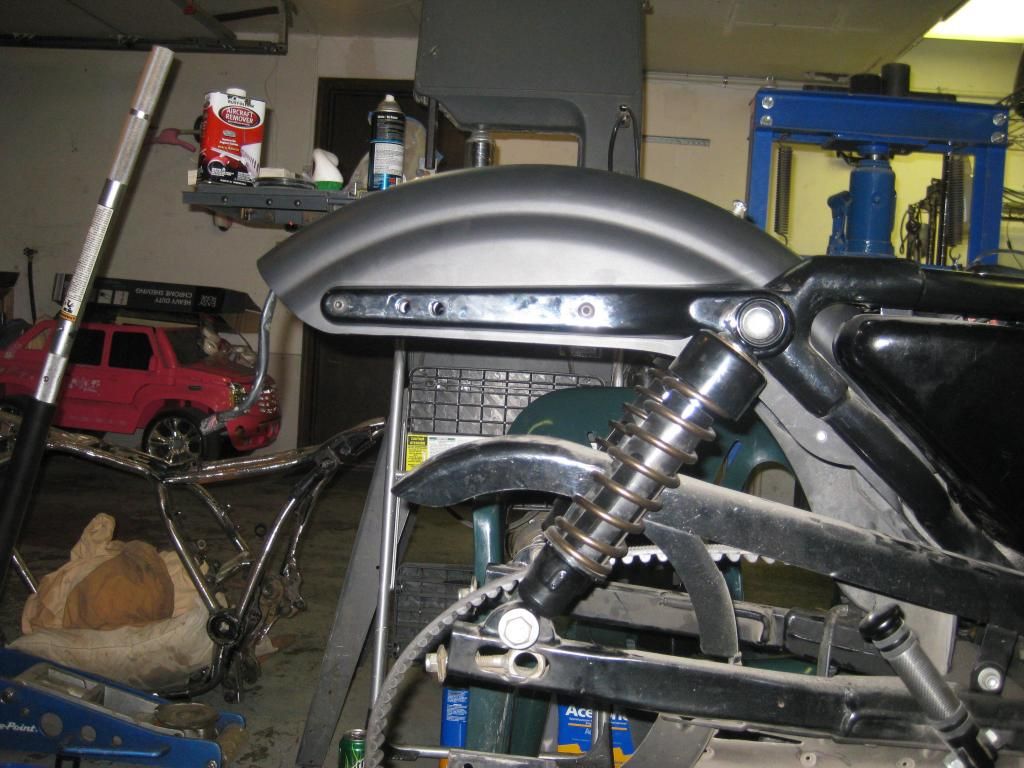
Ok so almost a year ago my buddy laid down his 03 xlc 1200. I was looking for a winter project so I offered to refresh his bike for him. Here is what I started with.
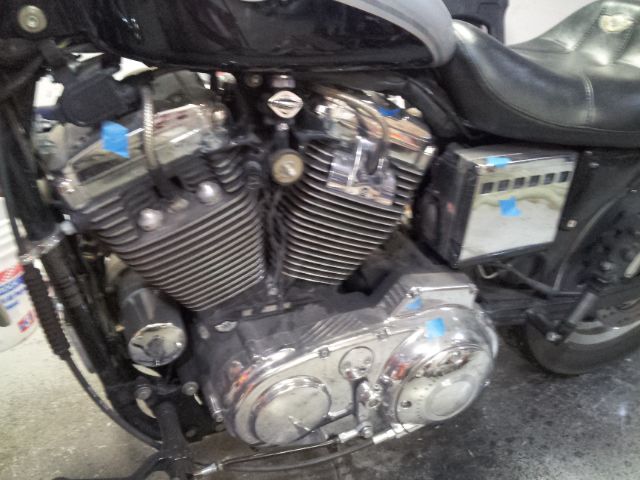
Since most of the right side chrome was done we decided to go the black route. Other mods included cutting the cam cover, cutting the rear fender above the tail lamp and stop/tail/turns in the rear.
After tearing her down I started with the cam cover chop. Some info from the forum made it a simple task.
Here it is after the rough cuts with the grinder....
More trimming and sanding...
And starting to destroy the first pieces of chrome..
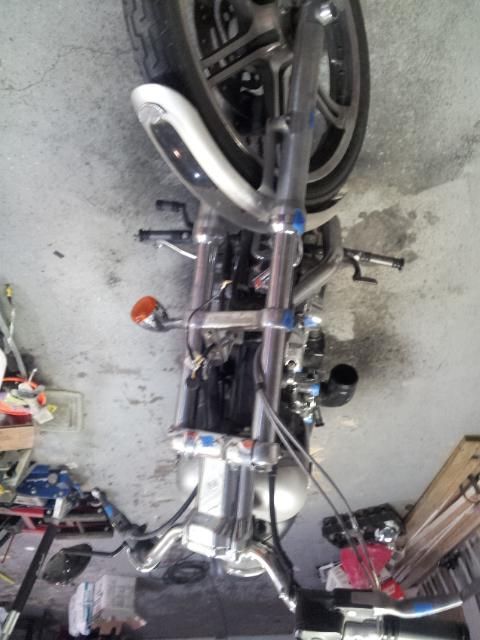
I removed the entire front end and other misc items and started powder coating. Here is most of the front end after PC ready to reinstall.

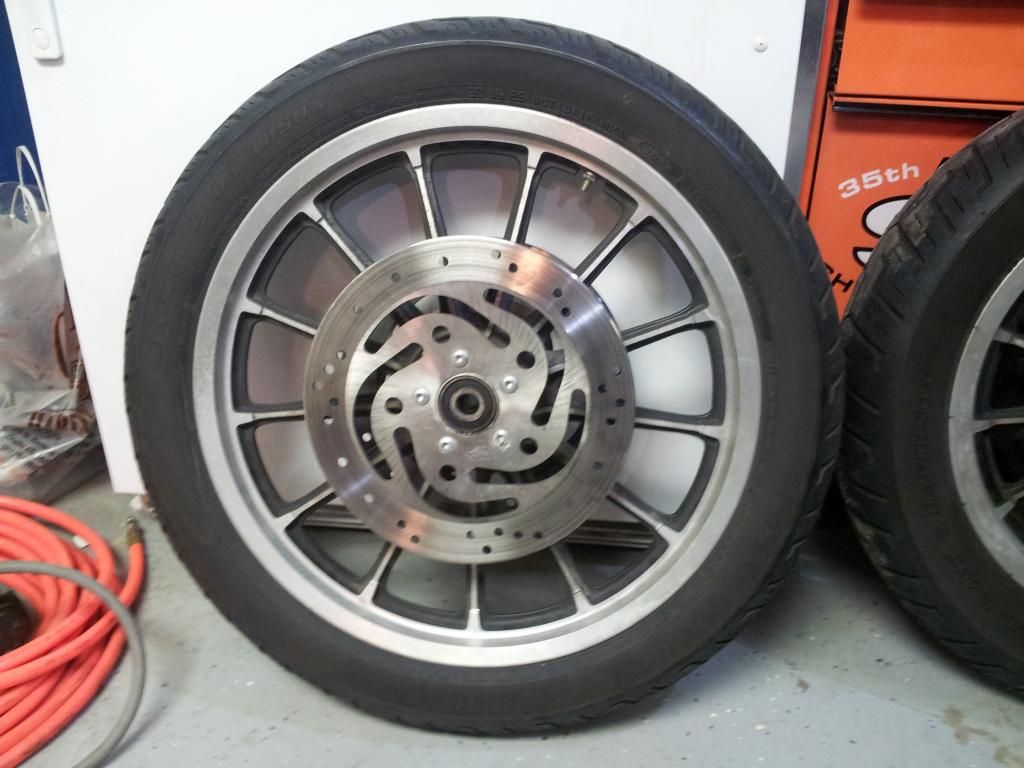
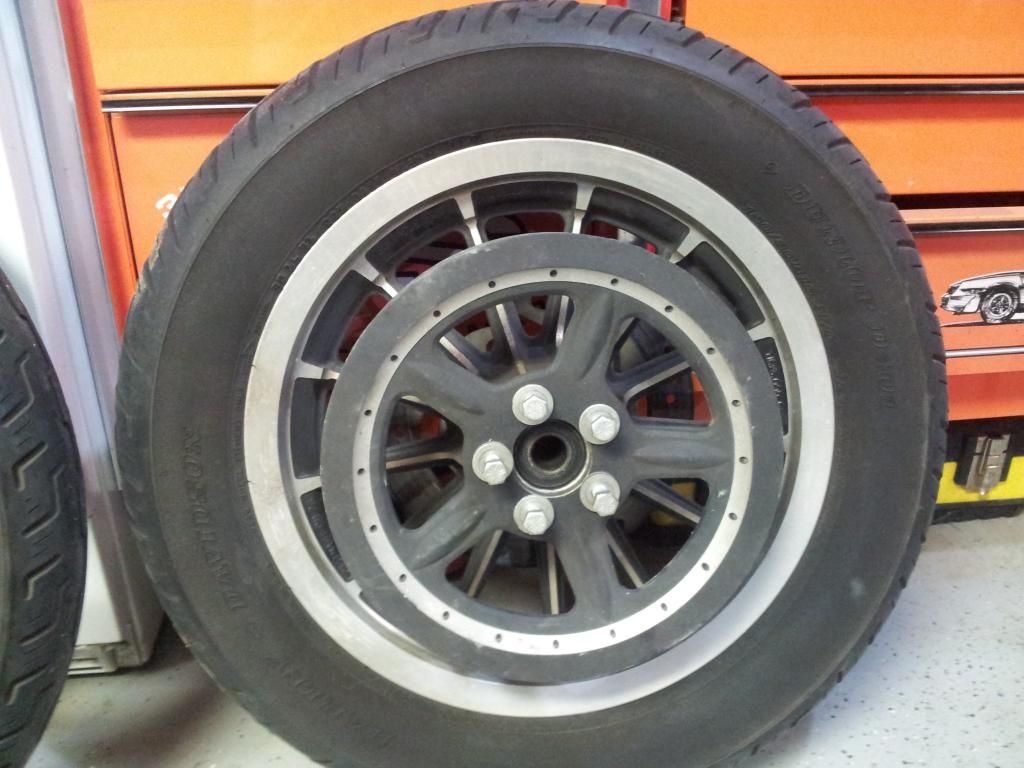
After a mishap trying to reinstall the fork stem into the lower triple clamp (As I was pressing it in I forgot about the built in rake angle and blew out the back side of the lower clamp rendering it useless), I acquired an entire front end off Craigslist from an 08 XL Roadster. Which was nice since it would now upgrade me to dual disk rakes up front and matching wheels front and back
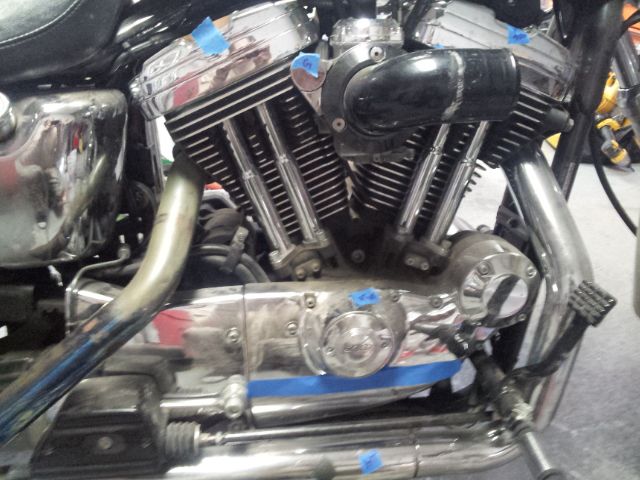
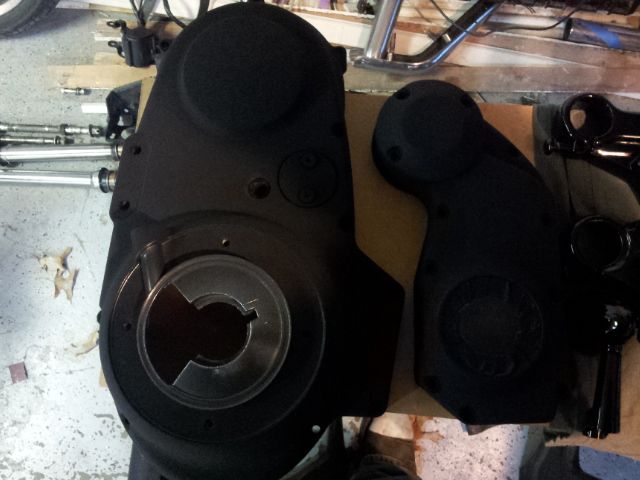
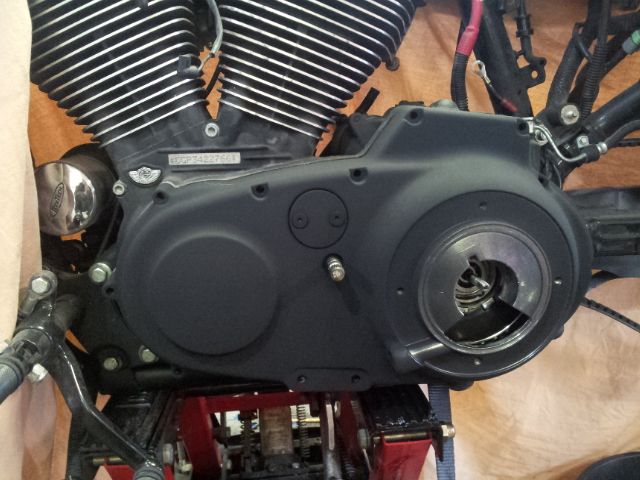
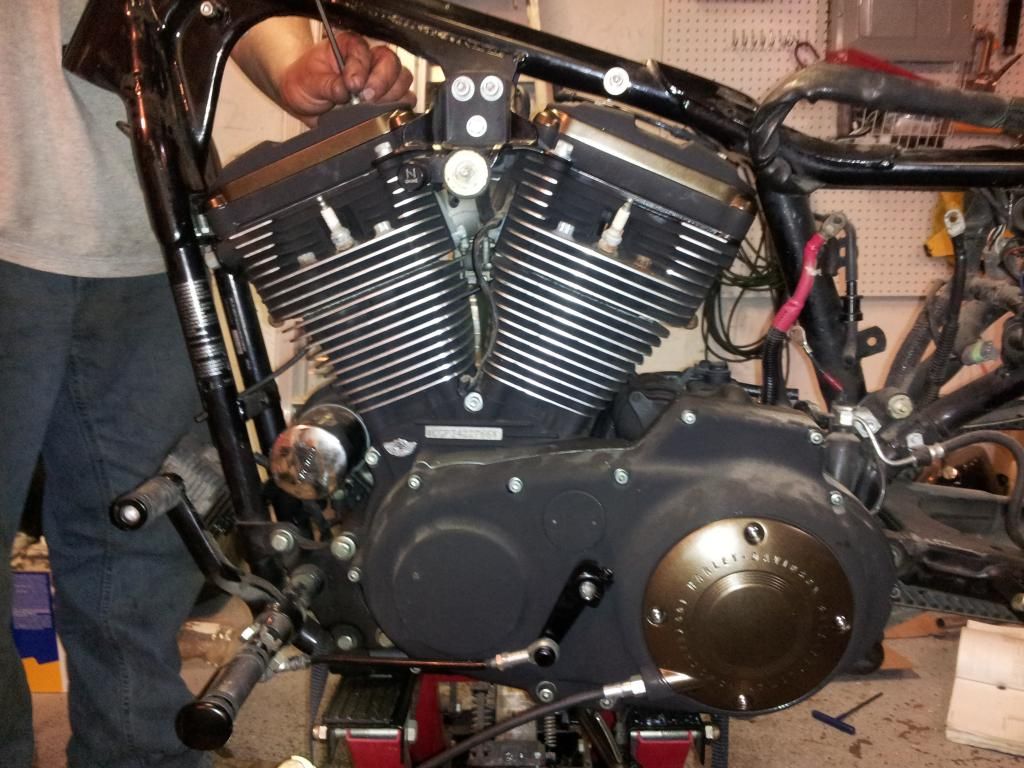
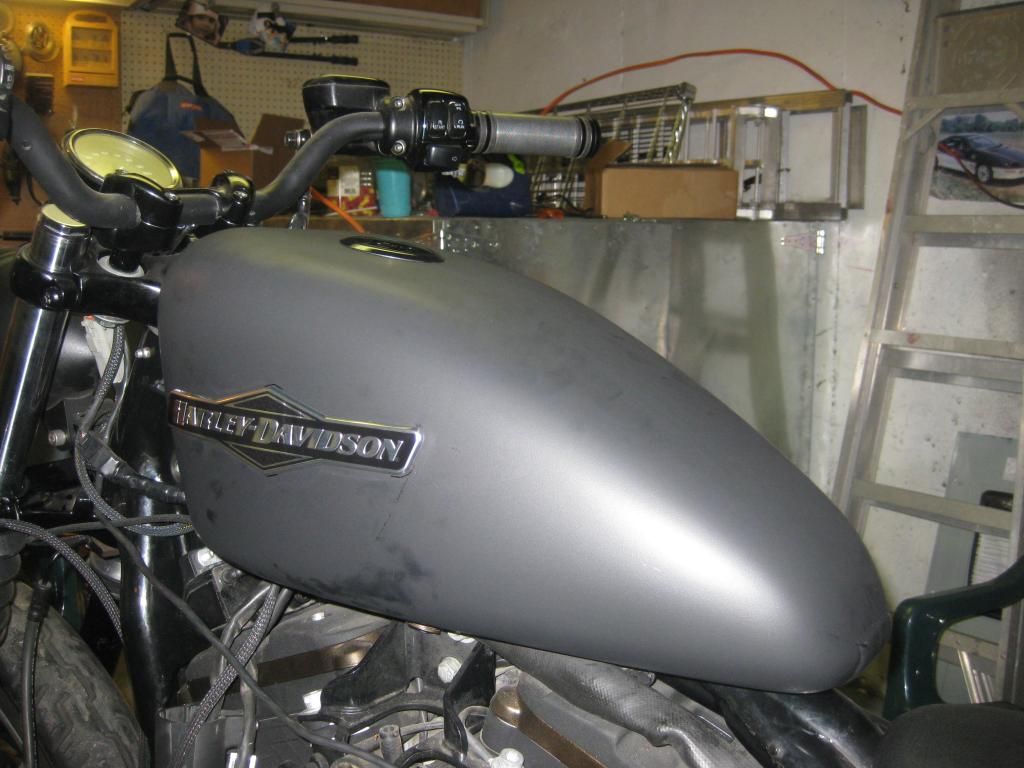
Finally got most of the engine covers powdercoated and installed.
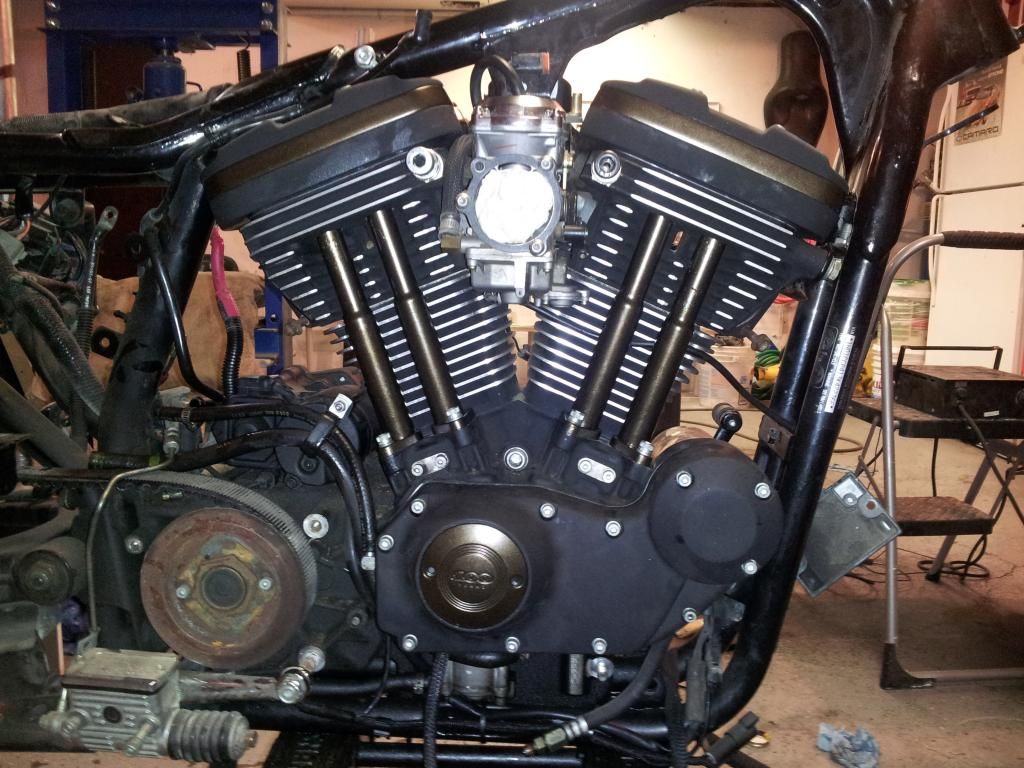
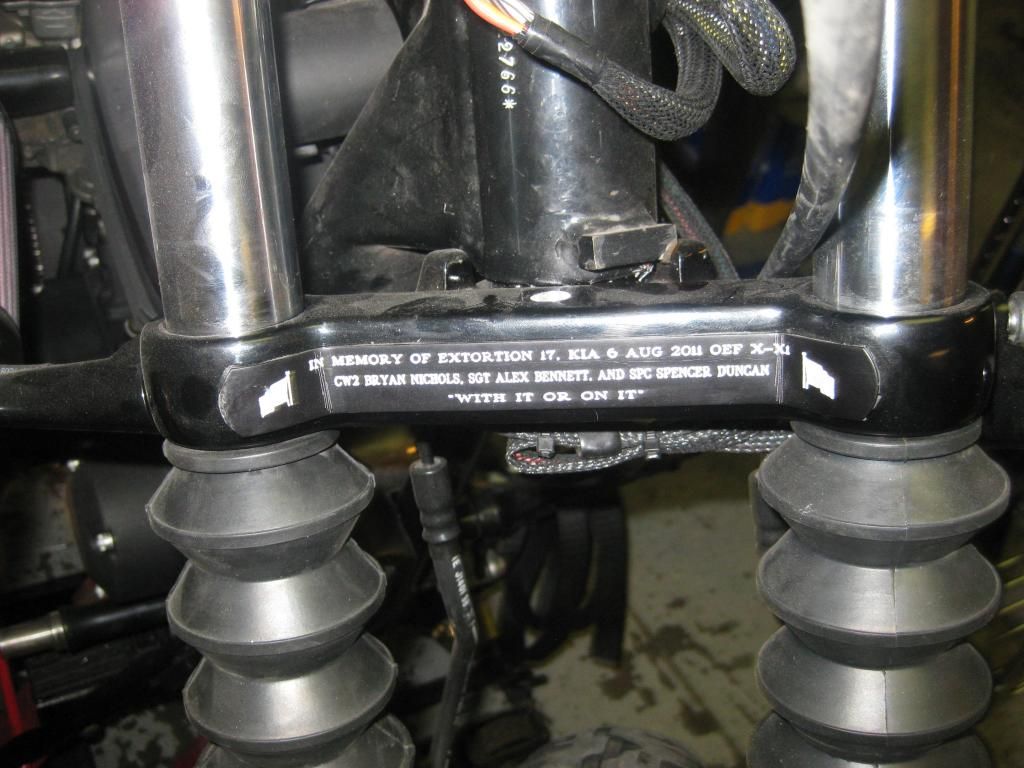
When we were at Sturgis, he kept looking at some of the tribute bikes around on display and mentioned he wanted to make his into a tribute bike for an aircrew our unit lost on our last deployment. Our Chinook unit is known as the Spartans and 203Cree suggested the bronze engine trim as it is a close match to the Spartan's shield color.
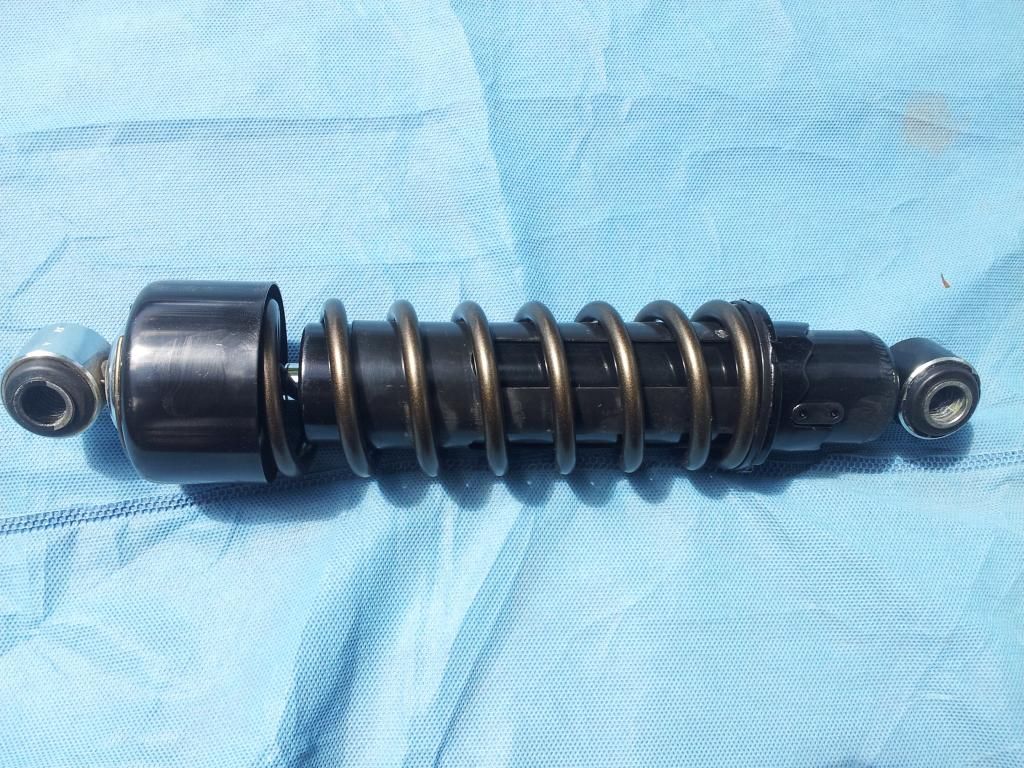
Figured out how to dissasemble and reassemble shocks so I powdercoated them black with a bronze spring. Stock Nightster take off's.
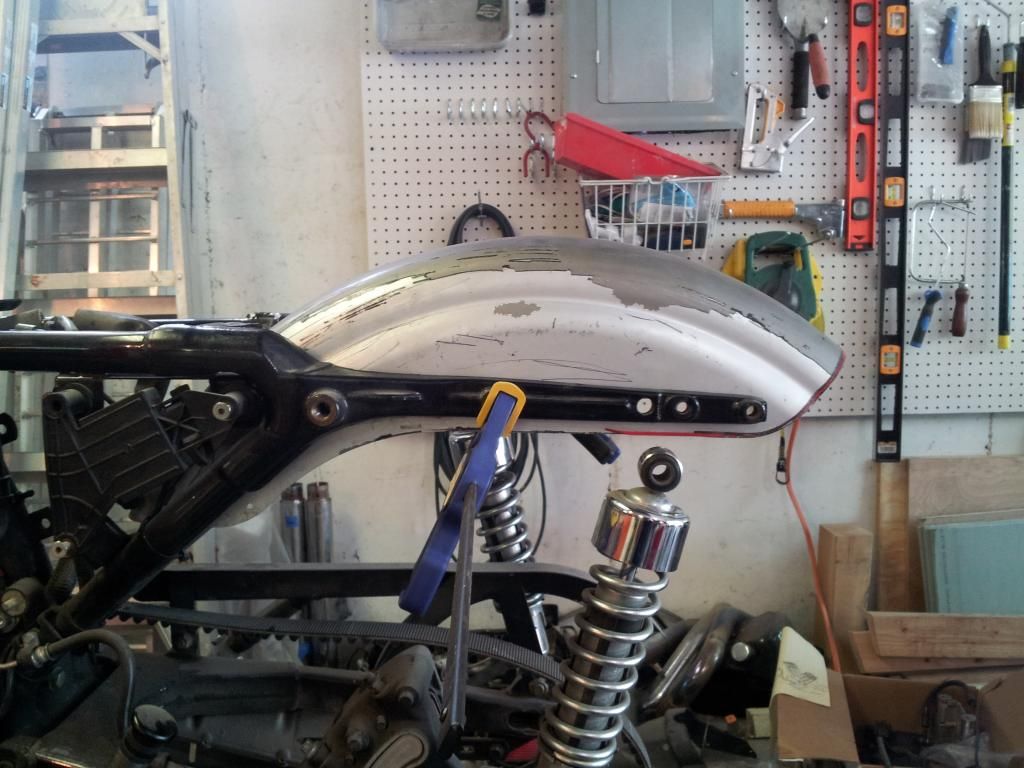
Next we moved to cutting the rear fender. Again couple good reads on this forum helped make this a simpler task!


Since most of the right side chrome was done we decided to go the black route. Other mods included cutting the cam cover, cutting the rear fender above the tail lamp and stop/tail/turns in the rear.
After tearing her down I started with the cam cover chop. Some info from the forum made it a simple task.
Here it is after the rough cuts with the grinder....

More trimming and sanding...


And starting to destroy the first pieces of chrome..


I removed the entire front end and other misc items and started powder coating. Here is most of the front end after PC ready to reinstall.

After a mishap trying to reinstall the fork stem into the lower triple clamp (As I was pressing it in I forgot about the built in rake angle and blew out the back side of the lower clamp rendering it useless), I acquired an entire front end off Craigslist from an 08 XL Roadster. Which was nice since it would now upgrade me to dual disk rakes up front and matching wheels front and back


Finally got most of the engine covers powdercoated and installed.


When we were at Sturgis, he kept looking at some of the tribute bikes around on display and mentioned he wanted to make his into a tribute bike for an aircrew our unit lost on our last deployment. Our Chinook unit is known as the Spartans and 203Cree suggested the bronze engine trim as it is a close match to the Spartan's shield color.
Figured out how to dissasemble and reassemble shocks so I powdercoated them black with a bronze spring. Stock Nightster take off's.

Next we moved to cutting the rear fender. Again couple good reads on this forum helped make this a simpler task!


Last edited by 203Cree; 07-14-2013 at 12:14 AM.
#2
07-10-2013, 07:16 PM
Continuing on....
Originally Posted by piper1978
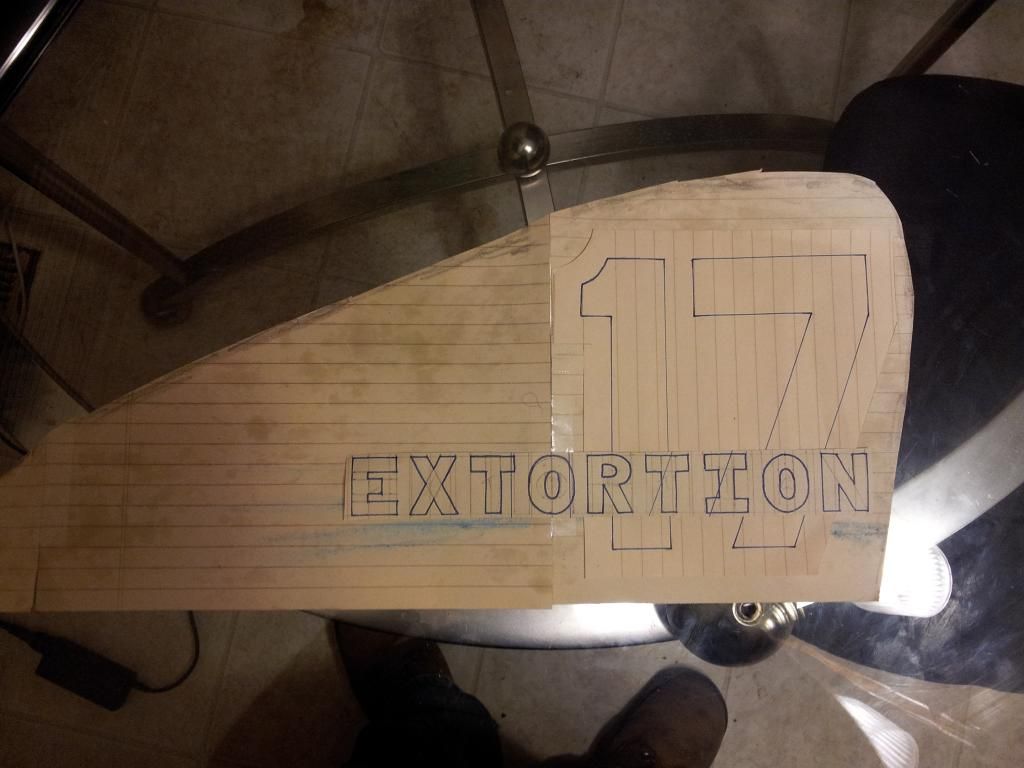
The call sign of the Chinook our unit lost on August 6th 2011 was Extortion 17. Staying with the tribute theme, I wanted to do something that would stand out but also be simplistic. This is the tank design I came up with.
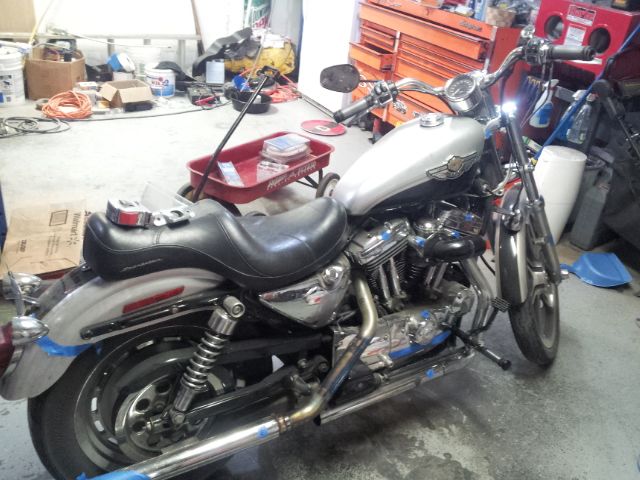
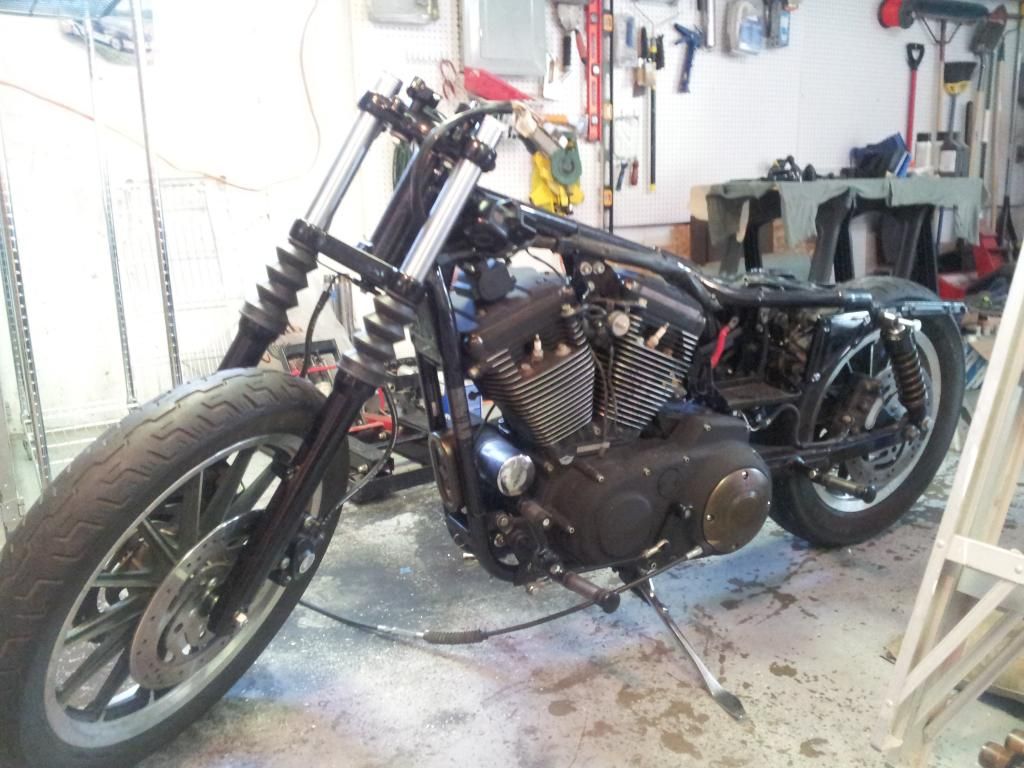
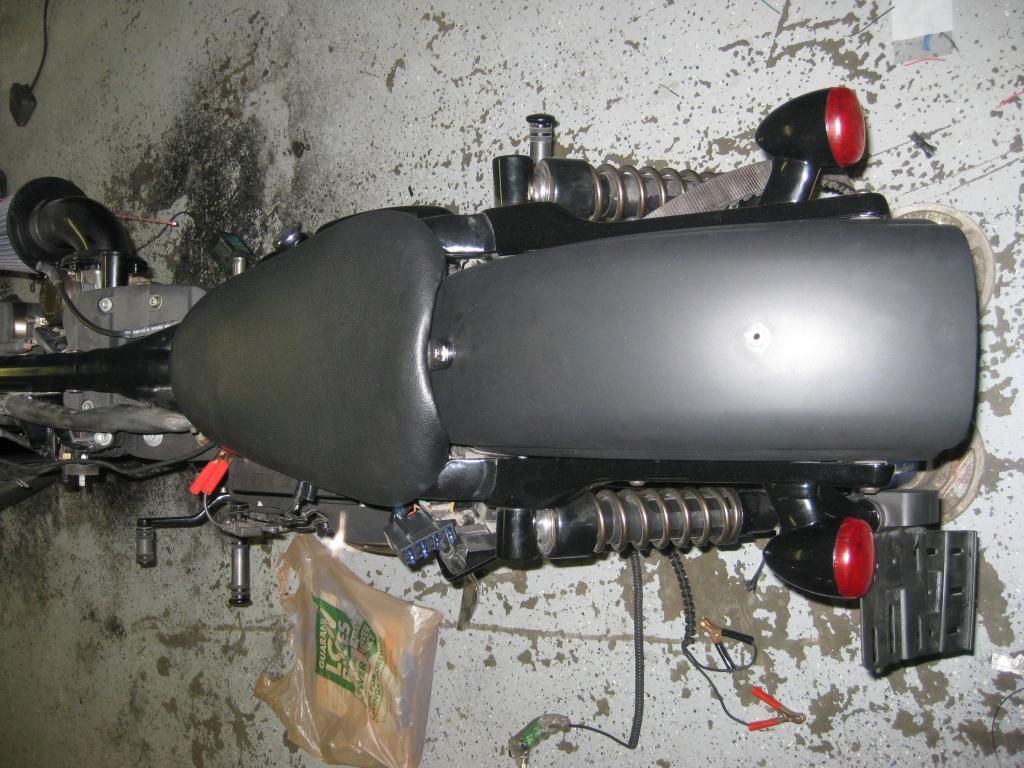
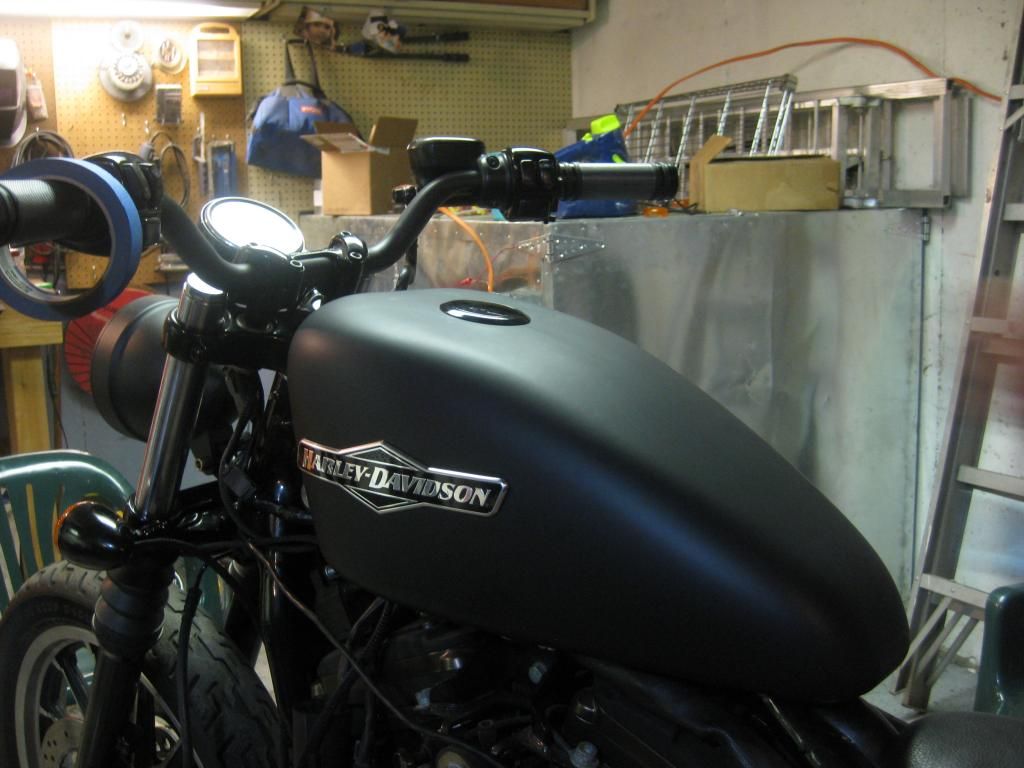
Here is a more current pic of the bike assembled (well most of it) and on the ground. We also removed the stock Custom risers and installed a 48 handle bar clamp with some worked over 1 inch risers.
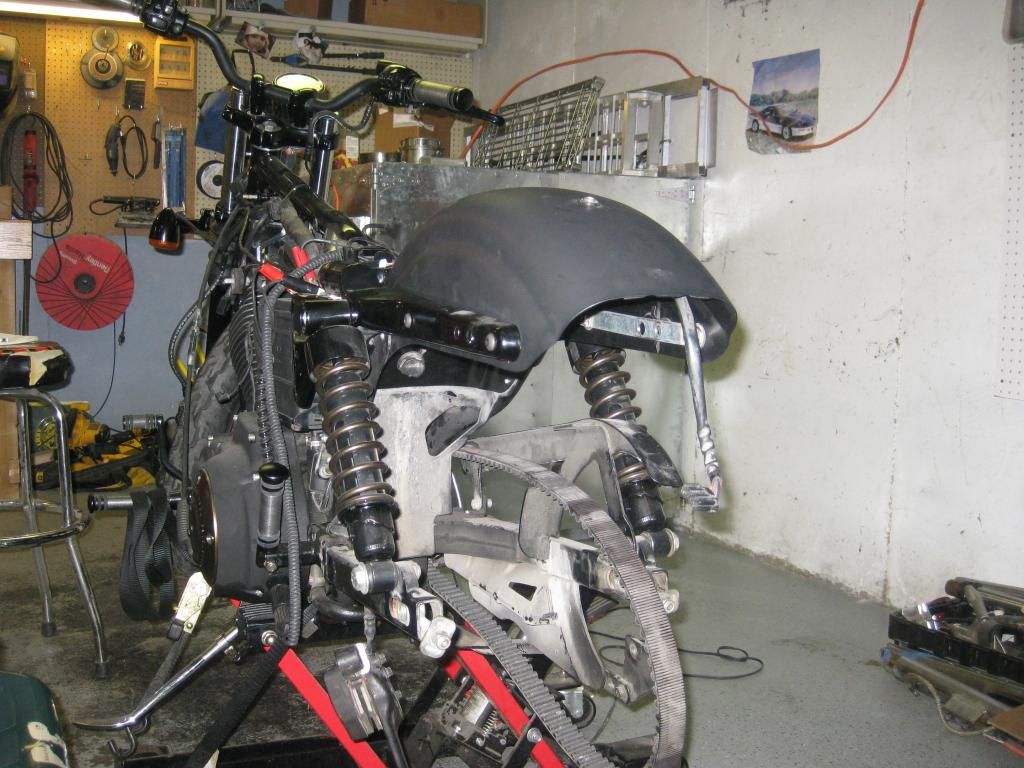
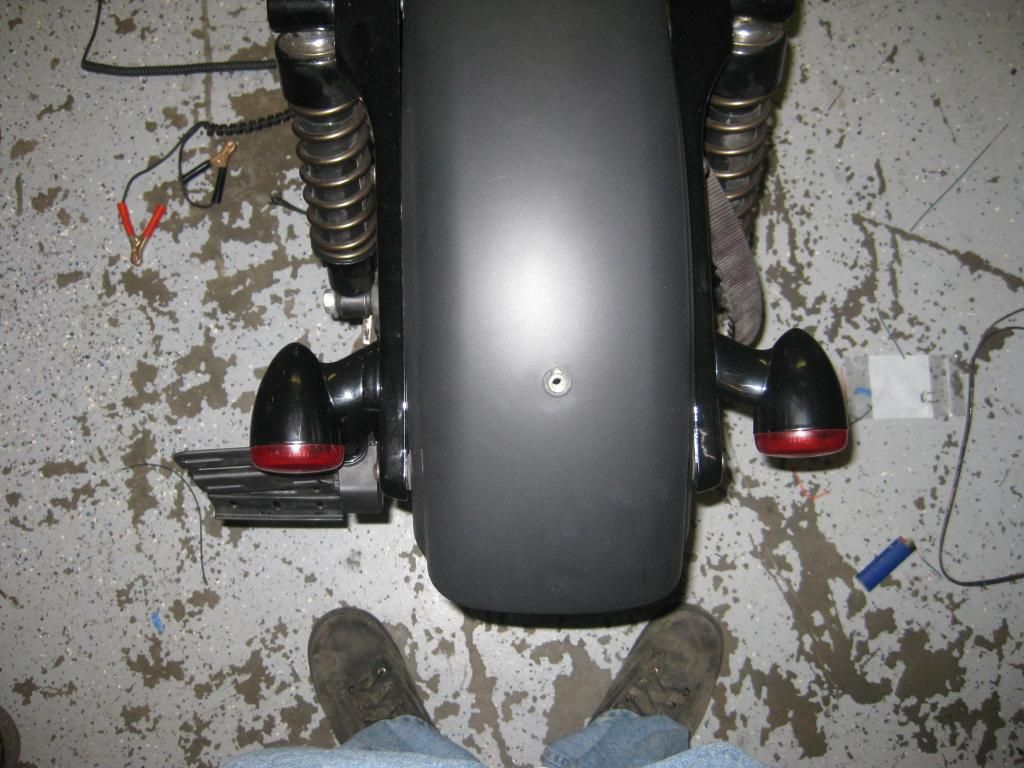
I got the rear tins Powdercoated finally. I like the Solar black flat powder.

I had a flat memorial bracelet laying around that I was going to use on my Streetglide but couldnt find a good place to use it on mine. One late night I decided to mount it on the lower triple clamp.
Here is the front end with the headlamp installed
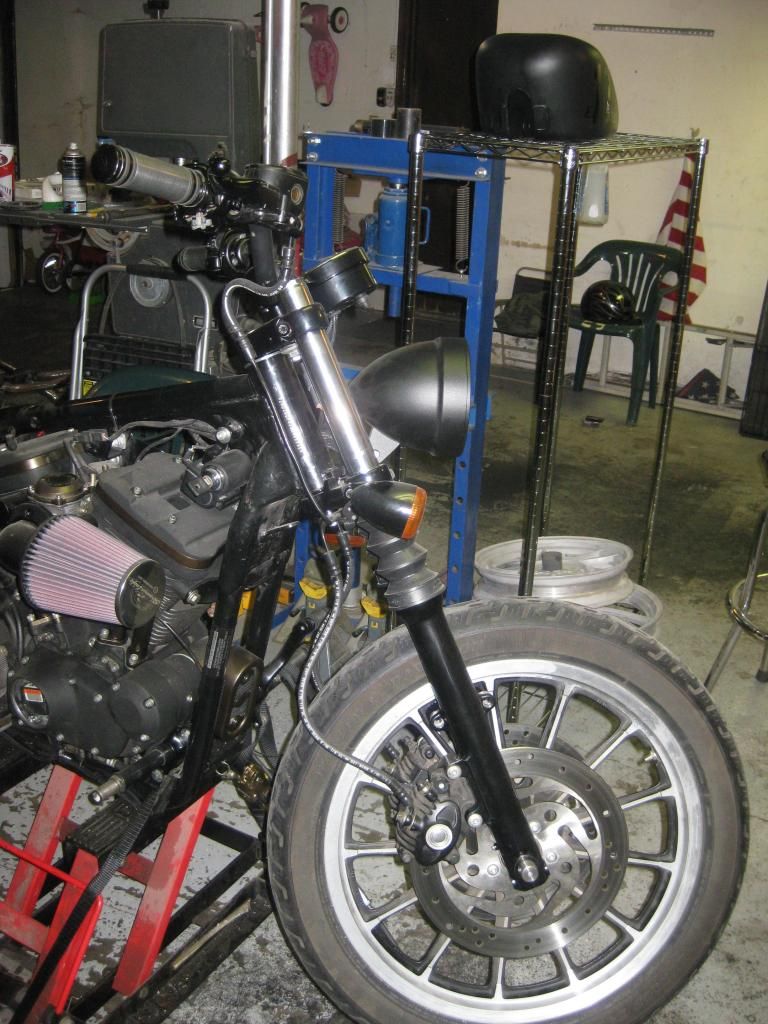

Here is a more current pic of the bike assembled (well most of it) and on the ground. We also removed the stock Custom risers and installed a 48 handle bar clamp with some worked over 1 inch risers.

I got the rear tins Powdercoated finally. I like the Solar black flat powder.


I had a flat memorial bracelet laying around that I was going to use on my Streetglide but couldnt find a good place to use it on mine. One late night I decided to mount it on the lower triple clamp.

Here is the front end with the headlamp installed


Last edited by 203Cree; 07-10-2013 at 07:22 PM.
#4
07-10-2013, 10:12 PM
Well, the seat we just got in my as well have come off of a 72. It looks to be about as substantial! 
Originally Posted by piper1978
After getting the fender mounted we took care of some wiring. I had to change out some pin connectors to make a stop/turn/tail module for an 04 and newer Sporty work. Got the wiring completed and went to mount turn signals and the side mount license plate and ran into some issues. I cut the studs I put on the signals too small and once the fender was mounted they didn't extend far enough to get a nut on them.
Also I bought a side mount license plate from the HD Dealer. Its for a newer sporty and figured it would fit. Turns out I was wrong. The spacing for the mounting holes didn't change so it mounted fine to the fender struts. Once I got the fender on i found out the older fenders hang down farther on the strut and was in the way of mounting the bracket.
Here is a link to the part I am talking about
http://www.harley-davidson.com/store...097210--1#tabs
Harley says it fits 04 and later Sporty's. Fitment details from the site:
Fits '04-later XL models. Will not fit models equipped with saddlebags, rigid mount sissy bars, and Turn Signal Relocation Kit P/N 68732-02A and 68733-02A
Here is some pics of the actual part
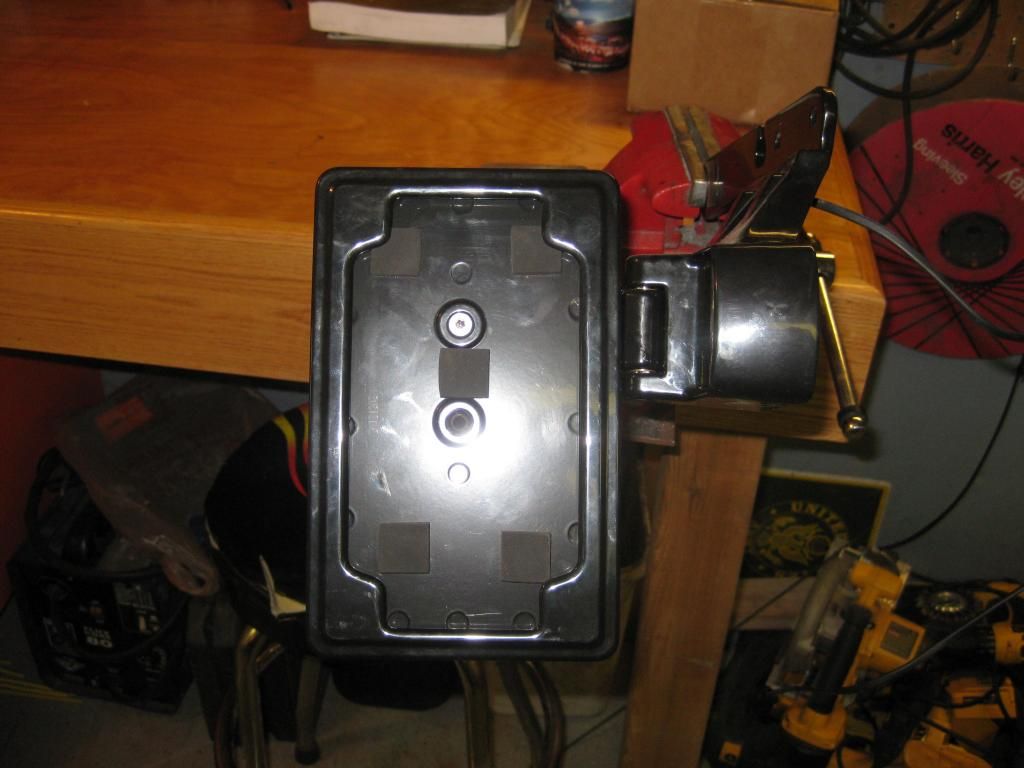
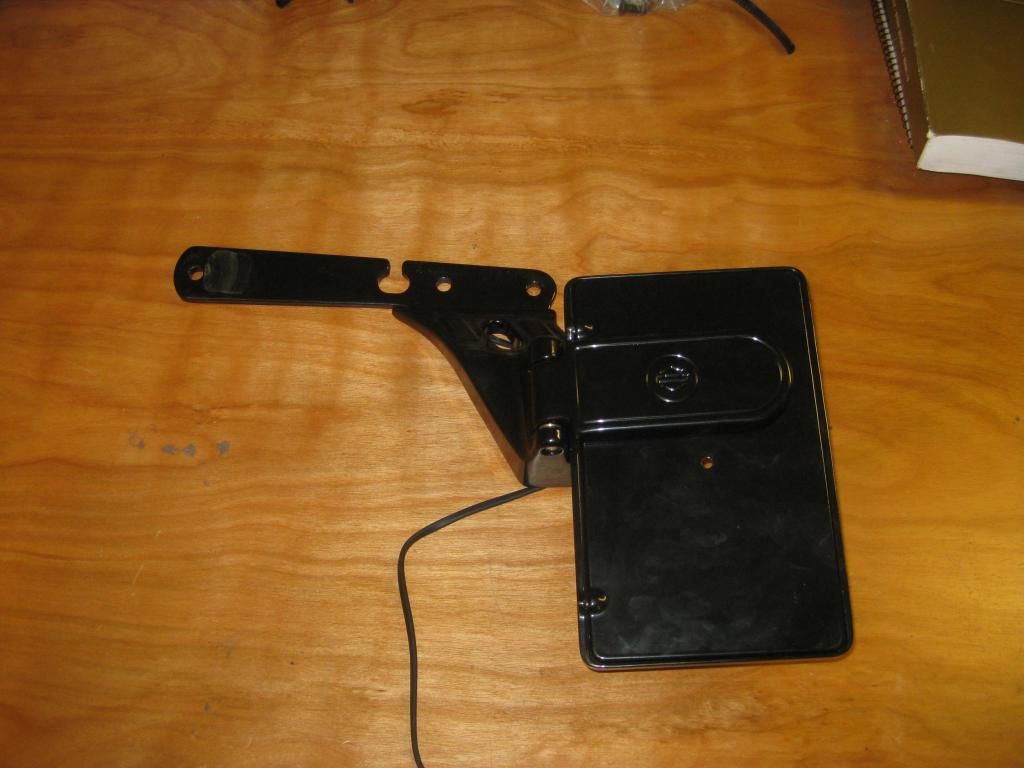
It actually works out because Rob (203Cree) was changing up the rear end on his 2013 Street Bob and had no need for his stock standoffs, and more importantly, his stock side mount plate setup. It worked out great. With the plate kit mentioned above I could not run the plate vertically without modifying the kit. With the 13 Dyna mount I can run the plate vertical and not hit the turn signals. Also the 13 Dyna standoffs are about half as long as stock Sporty pieces and make the turn signals hug the fender struts a little better.
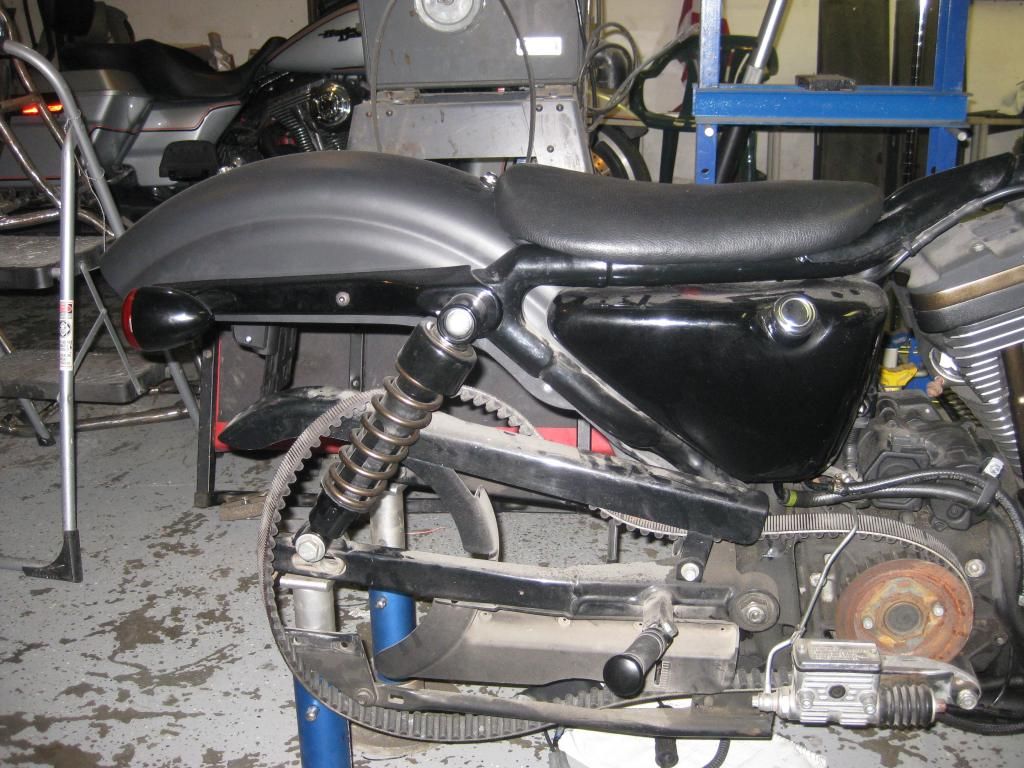
My seat from Hellpatrol came in and was able to throw it on and get some pics of the taillights and license plate bracket. Enjoy!
Turn signals with 2013 Dyna Streetbob standoffs and license plate bracket.
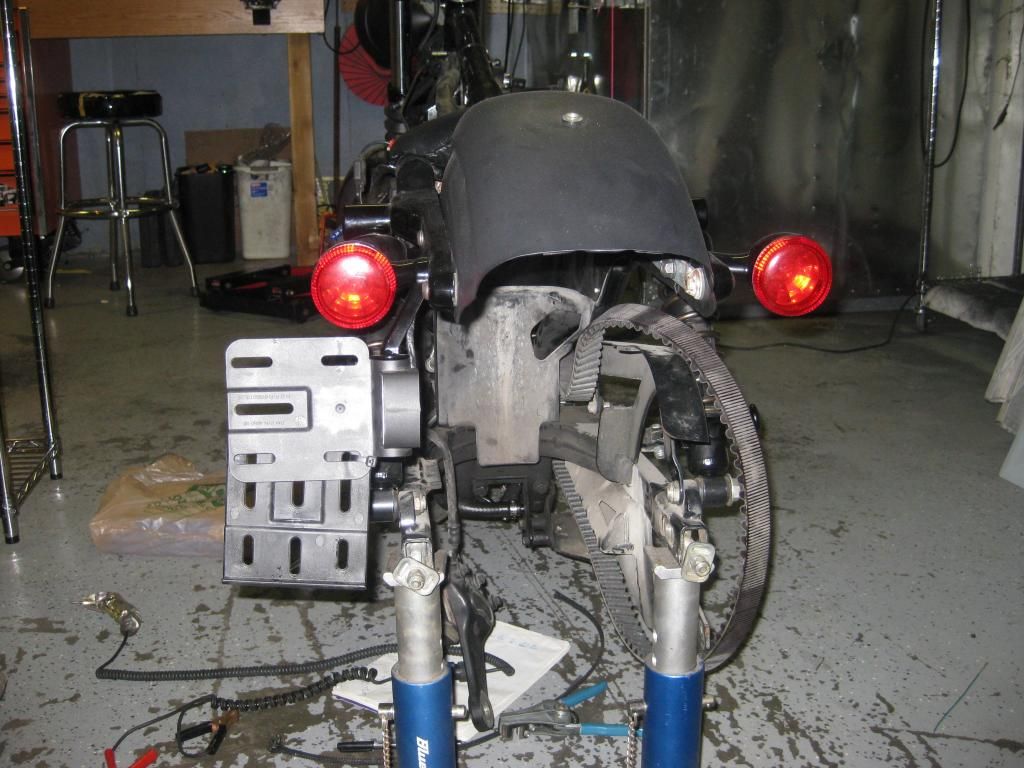
Glad we got him talked into this solo seat, I think its gonna fit nicely with the look of the bike
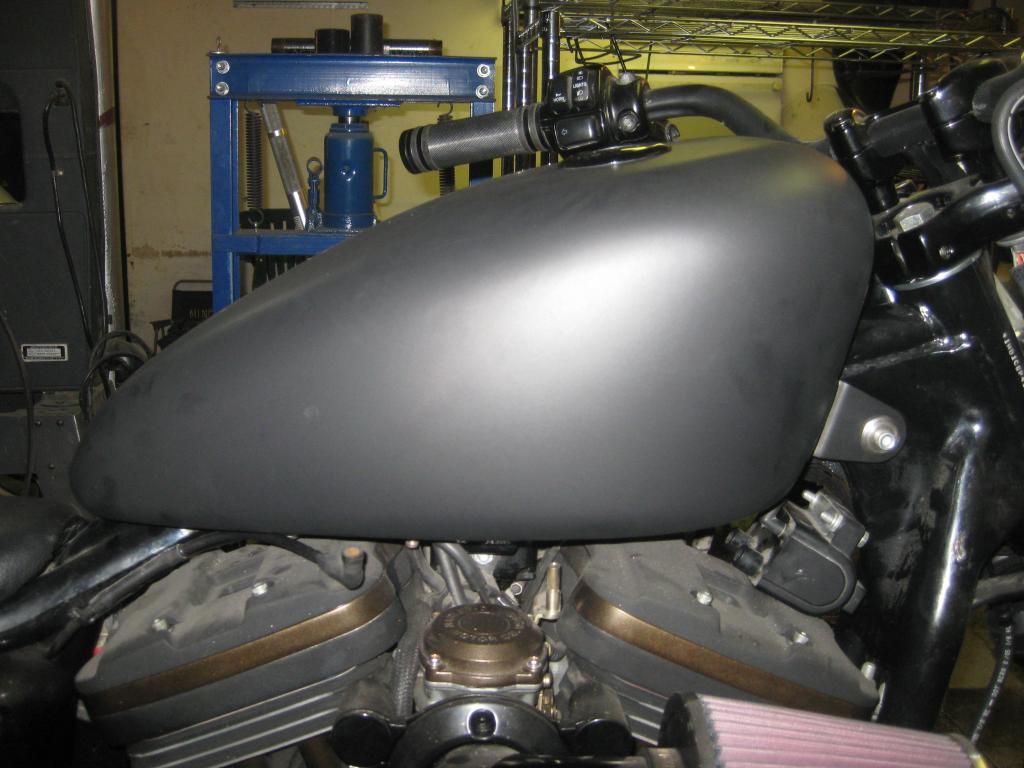
Got to re powder coat the tank, my first attempt at a two tone powder didn't come out so well. Will try to have that done tomorrow and hopefully will have it mounted also.
Also I bought a side mount license plate from the HD Dealer. Its for a newer sporty and figured it would fit. Turns out I was wrong. The spacing for the mounting holes didn't change so it mounted fine to the fender struts. Once I got the fender on i found out the older fenders hang down farther on the strut and was in the way of mounting the bracket.
Here is a link to the part I am talking about
http://www.harley-davidson.com/store...097210--1#tabs
Harley says it fits 04 and later Sporty's. Fitment details from the site:
Fits '04-later XL models. Will not fit models equipped with saddlebags, rigid mount sissy bars, and Turn Signal Relocation Kit P/N 68732-02A and 68733-02A
Here is some pics of the actual part


It actually works out because Rob (203Cree) was changing up the rear end on his 2013 Street Bob and had no need for his stock standoffs, and more importantly, his stock side mount plate setup. It worked out great. With the plate kit mentioned above I could not run the plate vertically without modifying the kit. With the 13 Dyna mount I can run the plate vertical and not hit the turn signals. Also the 13 Dyna standoffs are about half as long as stock Sporty pieces and make the turn signals hug the fender struts a little better.
My seat from Hellpatrol came in and was able to throw it on and get some pics of the taillights and license plate bracket. Enjoy!
Turn signals with 2013 Dyna Streetbob standoffs and license plate bracket.


Glad we got him talked into this solo seat, I think its gonna fit nicely with the look of the bike


Got to re powder coat the tank, my first attempt at a two tone powder didn't come out so well. Will try to have that done tomorrow and hopefully will have it mounted also.
#5
07-14-2013, 12:00 AM
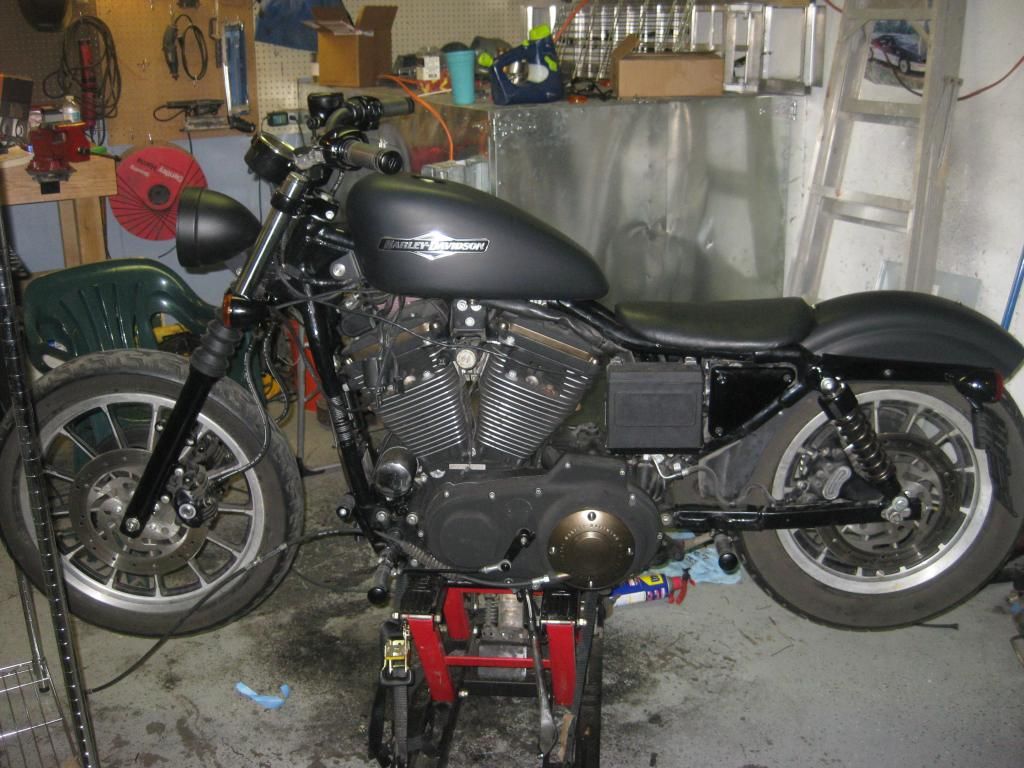
Put in a few days worth of work on this project this weekend. Check out the progress below. I suppose it really isn't all that impressive to most of you, but keep in mind this whole thing has been done on about an 800 dollar budget. Tons of powder work and just some good old fashioned shade tree ingenuity.
Originally Posted by piper1978
When I cut the cam cover, I searched for a solution to the master cylinder mounting and found a few results that fit my situation. This is a budget build so I couldn't just order a part and had to use what I had laying around. This is what I came up with.
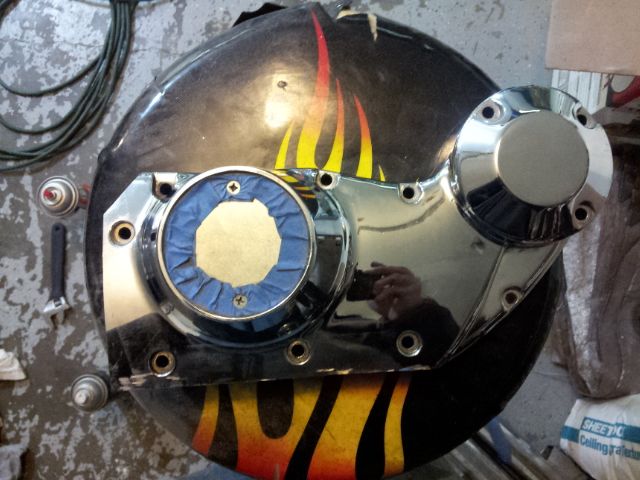
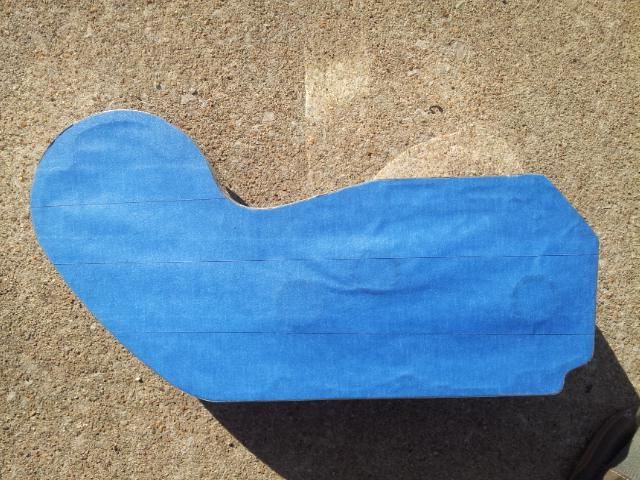
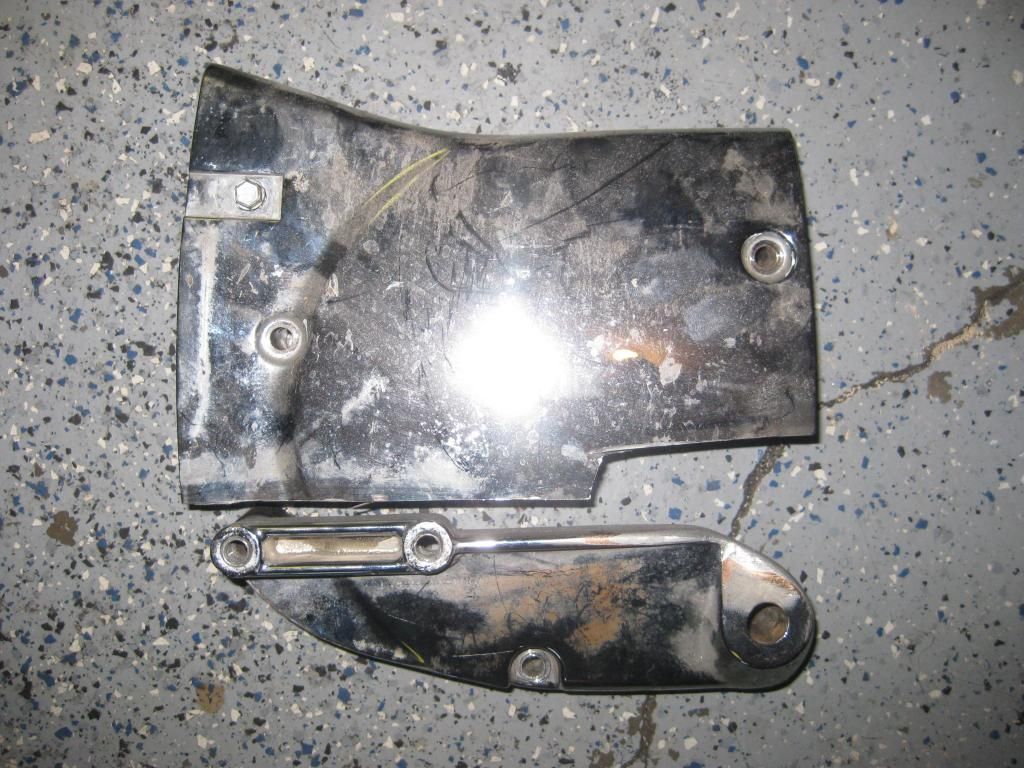
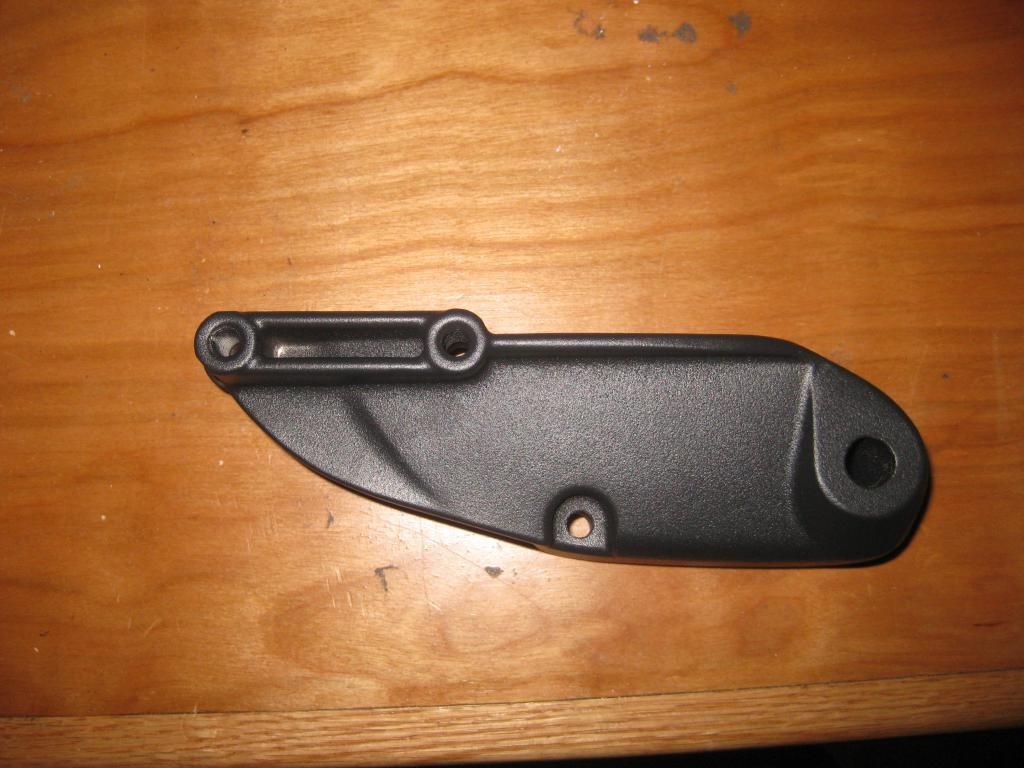
I took the original sprocket cover and made rough cuts with the grinder then blended out the edges. Here is a pic of the section I cut out
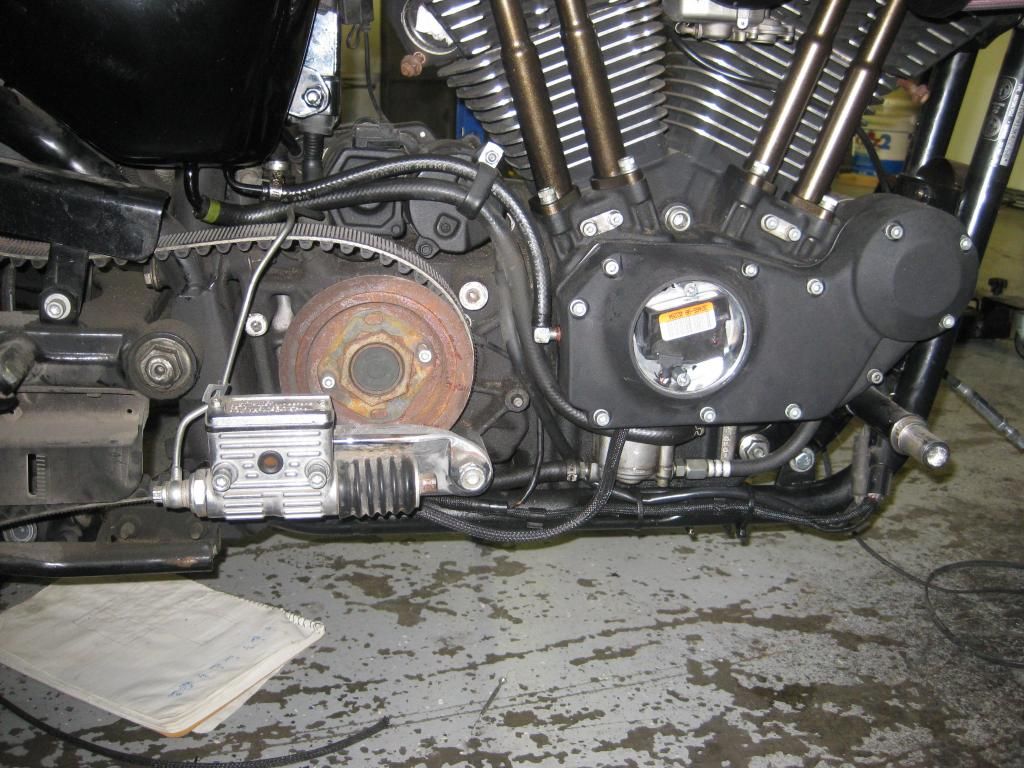
After blending and trimming this is how it looks mounted on the bike
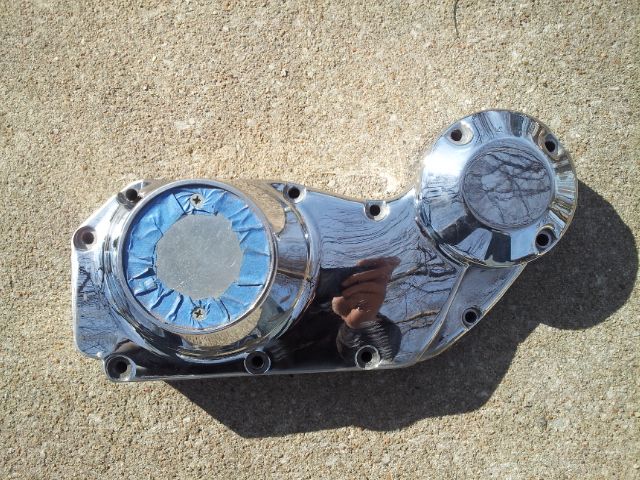
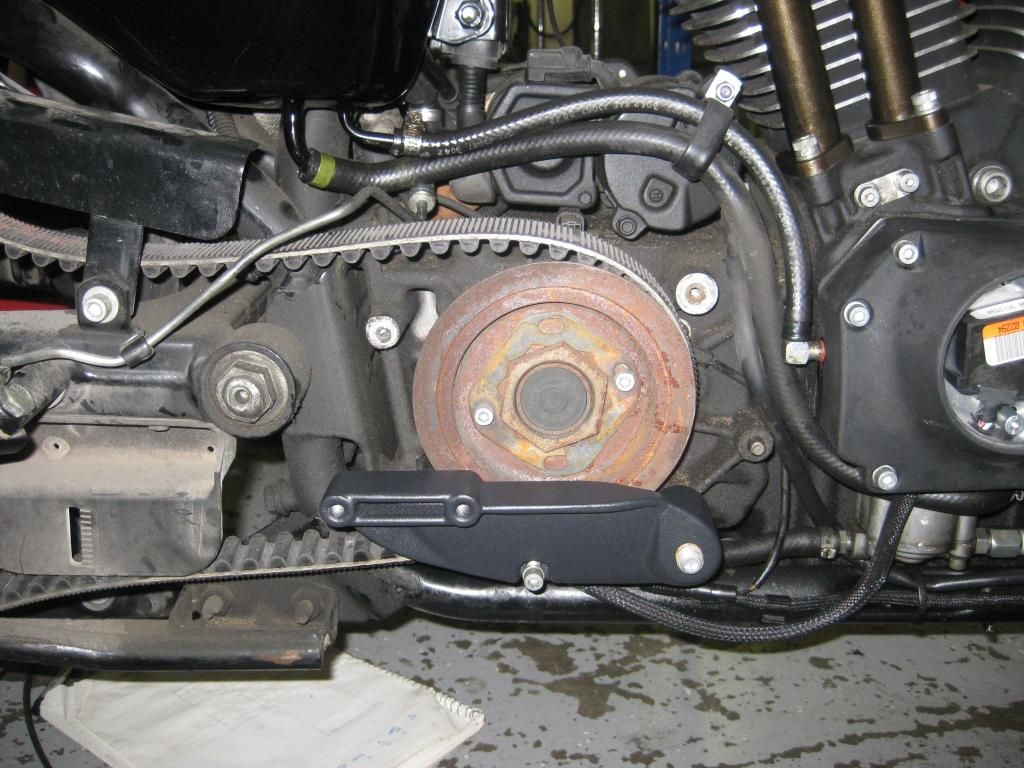
Since I am finally happy with the part I powder coated and remounted it
Wasn't ready to rebuild the master cylinder so I just cleaned it up and spray canned it. Waiting on it to dry for final reinstallation on the bike.
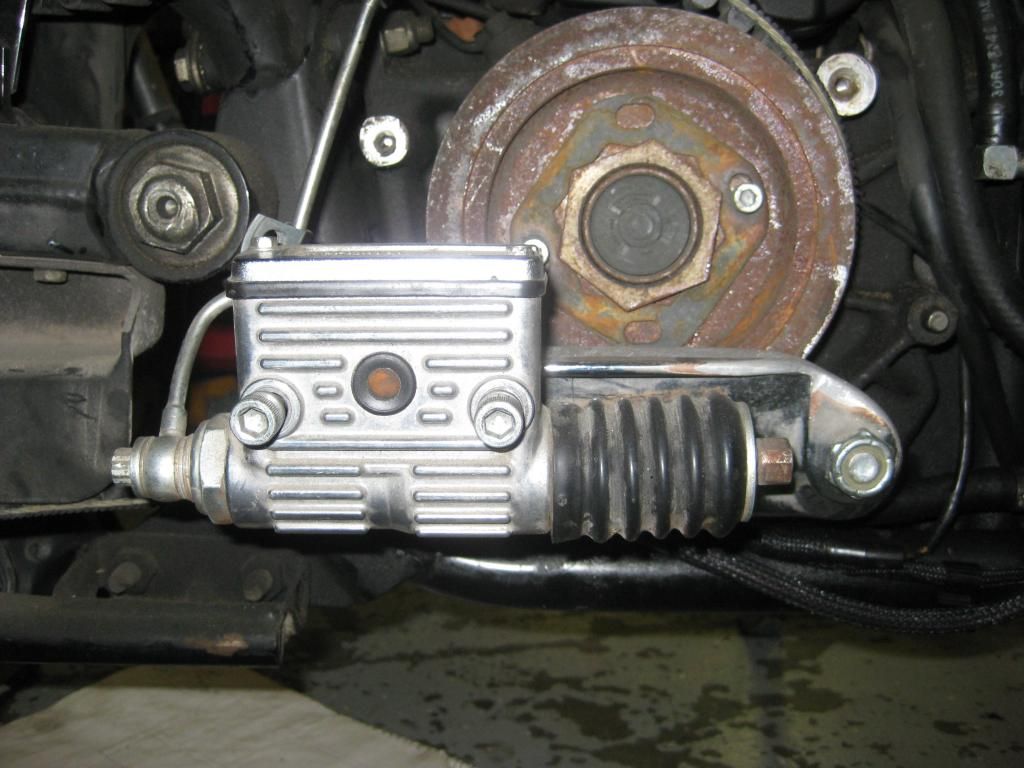
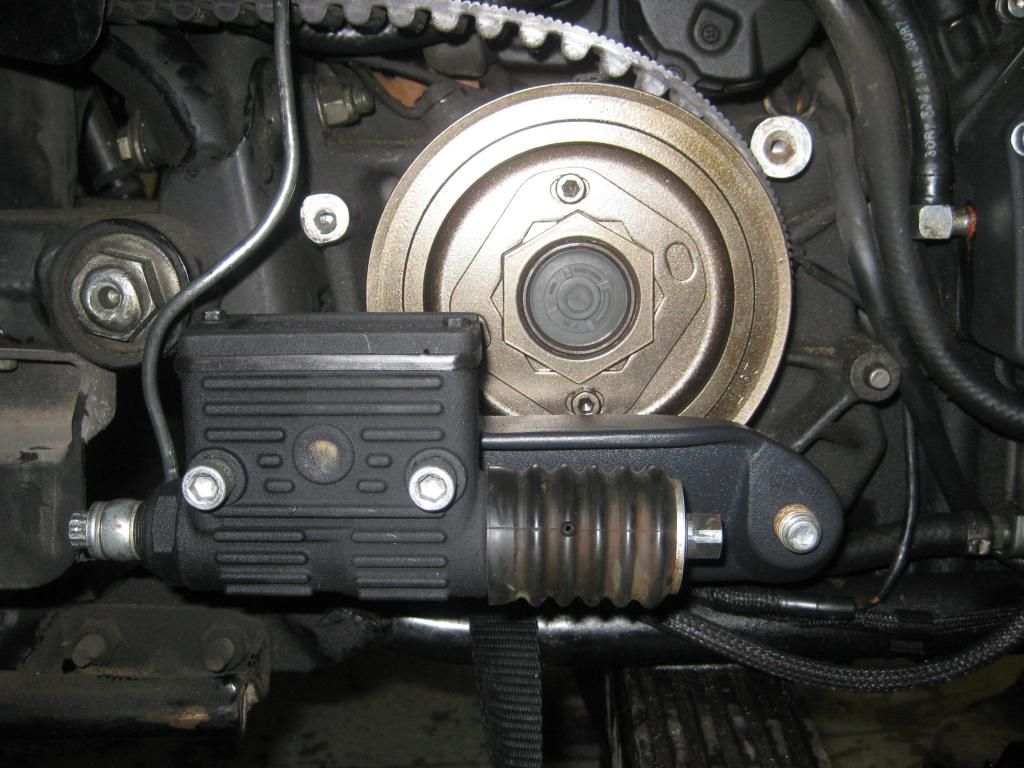
I got the master cylinder done and re mounted it. The rusty nasty looking drive pulley was bothering me so I powder coated it Bronze.
Was finally ready to put the rear wheel on for hopefully the last time but wanted to get a pic of the rear lighting wiring harness I built
The two tone Powder coat tank was not working (need more practice on the technique!) 203cree Had some Night Train tank badges he wasn't going to use so they got donated to the cause.
Here is the tank with just the base Solar Flat Black powder
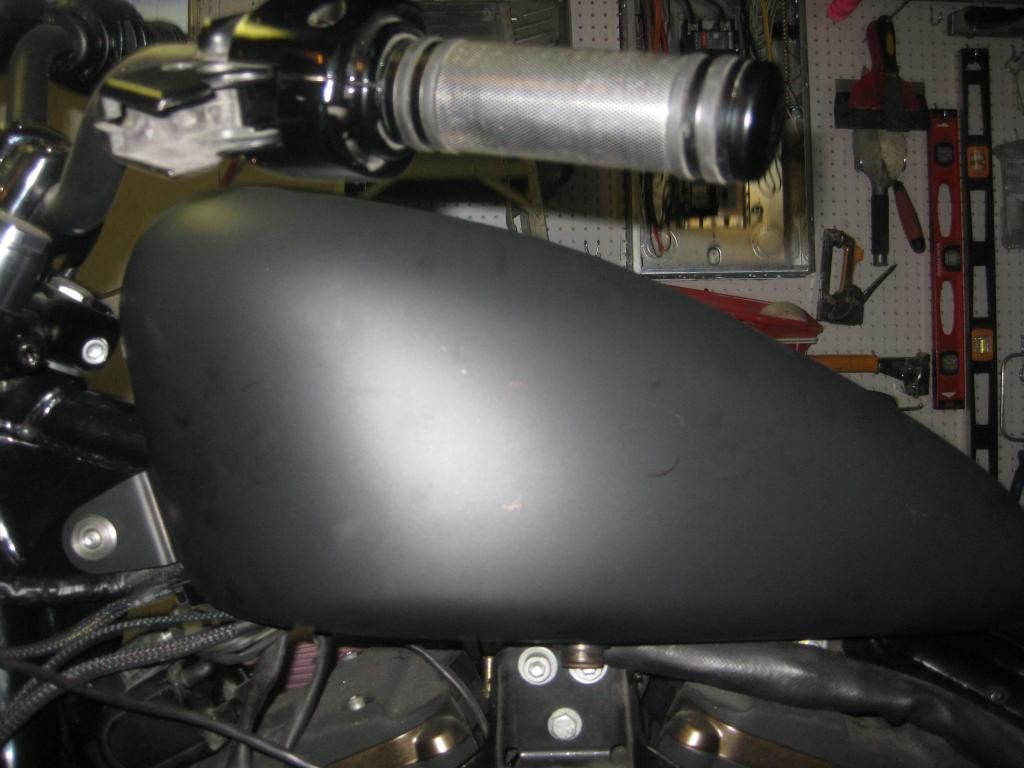
Got the emblems in place
Tank is just temporaryily in place (gonna have to run throttle cables still.)
Also picked up a flush mount gas cap

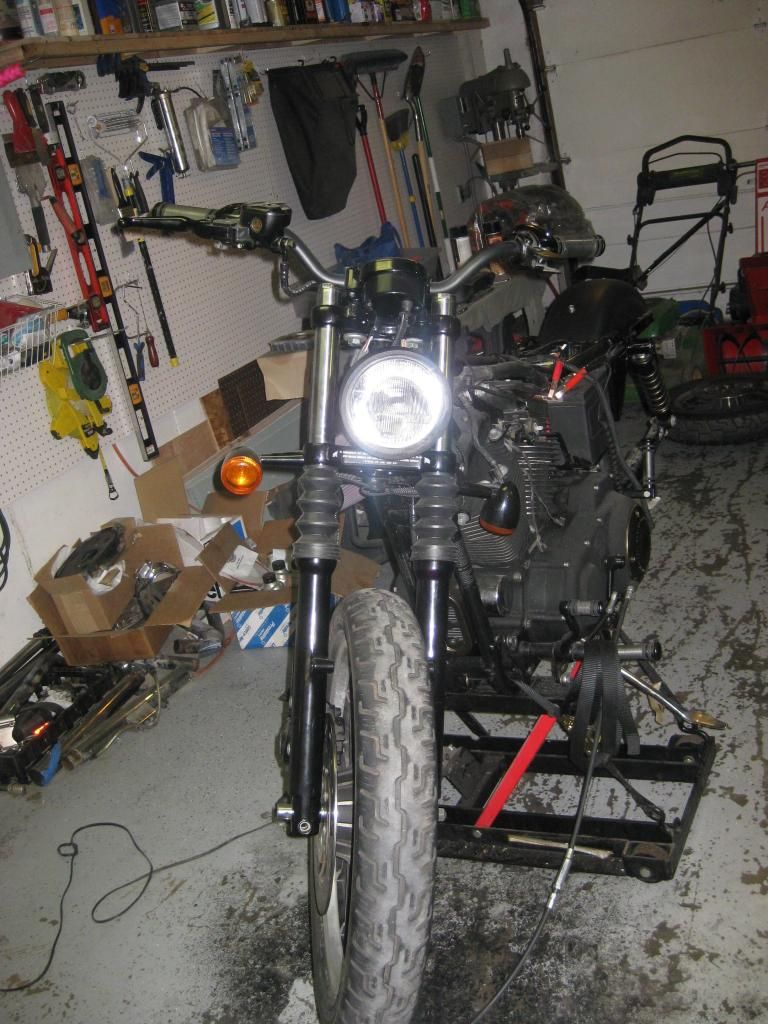
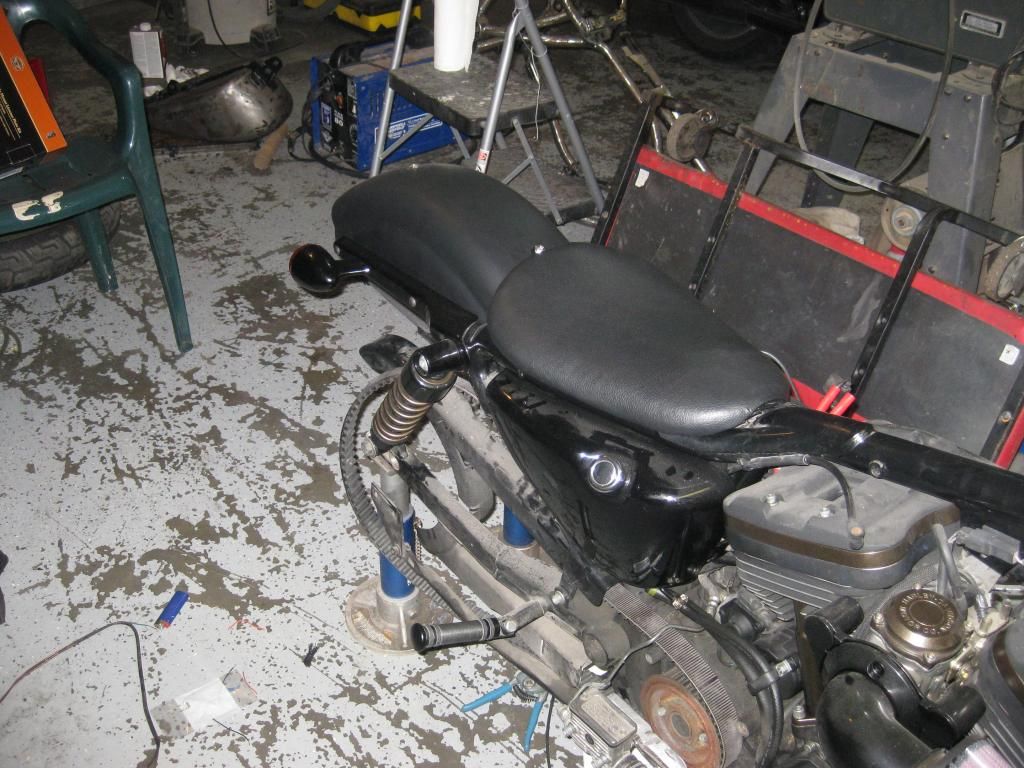
Here is a pic of the bike so far. Very happy with how its coming along. Hope my buddy is just as excited!
I took the original sprocket cover and made rough cuts with the grinder then blended out the edges. Here is a pic of the section I cut out

After blending and trimming this is how it looks mounted on the bike


Since I am finally happy with the part I powder coated and remounted it


Wasn't ready to rebuild the master cylinder so I just cleaned it up and spray canned it. Waiting on it to dry for final reinstallation on the bike.
I got the master cylinder done and re mounted it. The rusty nasty looking drive pulley was bothering me so I powder coated it Bronze.

Was finally ready to put the rear wheel on for hopefully the last time but wanted to get a pic of the rear lighting wiring harness I built

The two tone Powder coat tank was not working (need more practice on the technique!) 203cree Had some Night Train tank badges he wasn't going to use so they got donated to the cause.
Here is the tank with just the base Solar Flat Black powder


Got the emblems in place

Tank is just temporaryily in place (gonna have to run throttle cables still.)

Also picked up a flush mount gas cap

Here is a pic of the bike so far. Very happy with how its coming along. Hope my buddy is just as excited!


#7
07-14-2013, 12:26 PM

Trending Topics
#8
07-14-2013, 03:22 PM
How to do it isn't very hard, what you need is special equipment. Unless you're going to do a LOT, it's cheaper to send it to someone such as The Powder Pro.
#9
07-14-2013, 08:10 PM
#10
07-14-2013, 08:29 PM