
Sportster project

#12
 04-24-2014, 01:02 PM

Can you tell me more of this process. It wouldn't at least hurt to try this on mine. Yours look like they really shined up too.
For your lower legs, consider polishing the aluminum instead of chrome. When a rock hits the chrome, it'll crack. Once it's cracked, it'll blister and short of re-chroming, you're screwed. With polished lowers, you simply keep them polished. Once you get them to shine, maintenance is easy.
Strip off the clear-coat and polish away. All it takes is time and a little elbow grease. Polish the triple clamps while you're at it.

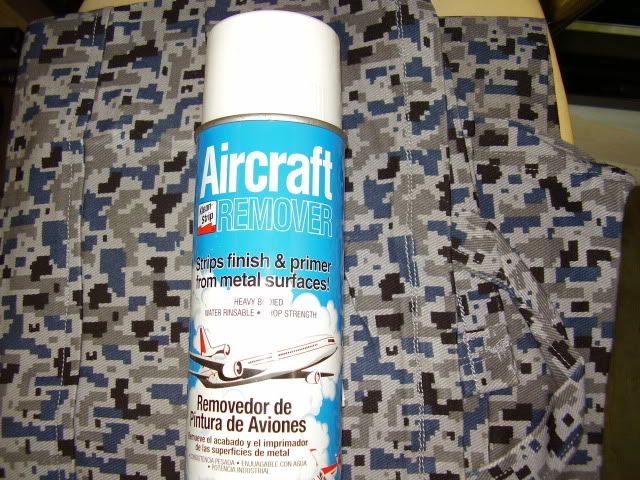
A can of stripper makes it a lot easier to remove the clear-coat on the lower legs:
Strip off the clear-coat and polish away. All it takes is time and a little elbow grease. Polish the triple clamps while you're at it.

A can of stripper makes it a lot easier to remove the clear-coat on the lower legs:

#13
04-24-2014, 08:27 PM

Elite HDF Member
I took mine off the triple clamps. In theory, you could tape and cover everything and do 'em in the triple clamps, but the Airplane stripper WILL ef up anything it contacts.
I skipped the Airplane stripper and went straight to some 220 grit on a regular, electric, 1/4 sheet palm sander commonly found in a wood shop. I took off the casting marks and shaped them slightly near the axle area. In retrospect, I should have taken the clear off with the stripper, first. I think it's easier to use the stripper than it is to sand through the clear. I coulda stepped down to 100 grit, but I didn't want to be too aggressive.
Keep sanding, working your way up to maybe 600-800 grit. Some would suggest going to 1000 or 1200 grit. You'll be doing a bit of it by hand. The more scratches you make, the more you gotta sand, but that's what makes it work. If the legs are a little road-worn, you can sand down small rock blemishes, but be careful not to make divets or depressions. Longer strokes help avoid divets. Too many long strokes, and you then have a depression. Just go easy 'till you get a feel for it. You will not ef it up in the first 10 seconds. Just don't stay in one spot too long. You'll see what's going on and how long it takes to take how much off.
Pictured above is 1/2" drill with a buffing wheel arbor stacked with two, 6" buffing wheels from Home Depot. Clamped in a vise it works pretty good, but a drill isn't designed for the axial loads, so it's going to get messed up, eventually. I've clamped the buffing drill to the tongue of my trailer with Quick-grip clamps, too. Whatever you gotta do. Outside is best. Little bits of fuzz and polishing compound go everywhere. Every now and then, I break up the buffing wheel by putting the tines of an old dinner table fork into it, like a rake.
Brown polishing compound is the course. Do that first, then, using a new set of buffing wheels, go to white compound. The white is fine. Don't be afraid to apply compound. A large percentage of the time spent polishing, is applying the compound to the wheel. I bet you could find some buffing tips on Youtube. Long strokes are best. Wear gloves because the aluminum will get HOT. If it doesn't get hot, you're doin' it wrong. I like to wear glasses, a dust mask and an old, long sleeve shirt, too. If you accidentally hit your arm with a freshly polished part of the leg, it will burn. You'll know it right away, because it will hurt a lot.
Once they're looking like a mirror, it doesn't take much to keep them that way. Don't let it go too long between polishing touch-ups, or it gets to be a total drag. Maintenance is easier than repair. After all the effort to get them that way and how nice they look when they shine, motivation to stay on top of it comes quick.
Don't get anything on your fork seals. I taped mine off, but I also dis-assembled the legs and used different fork tubes, completely re-building the front end. In my case, it was easier to handle the lowers while they were still attached to the tubes because I had something to clamp to. If you have 10,000 miles on the bike, it wouldn't hurt to swap the seals, anyway. Get new bushings, too, but that's another forum thread.
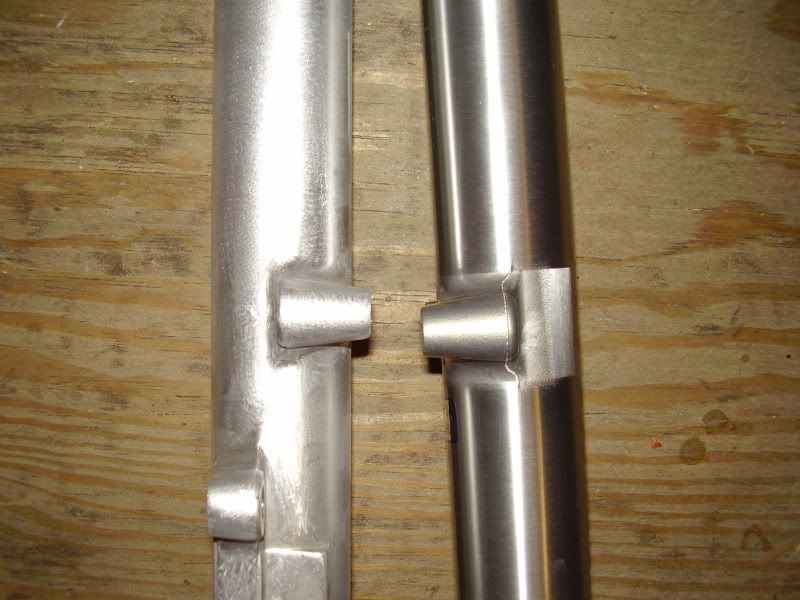
The one on the right is factory, before the 220 grit. On the left is after a little sanding.
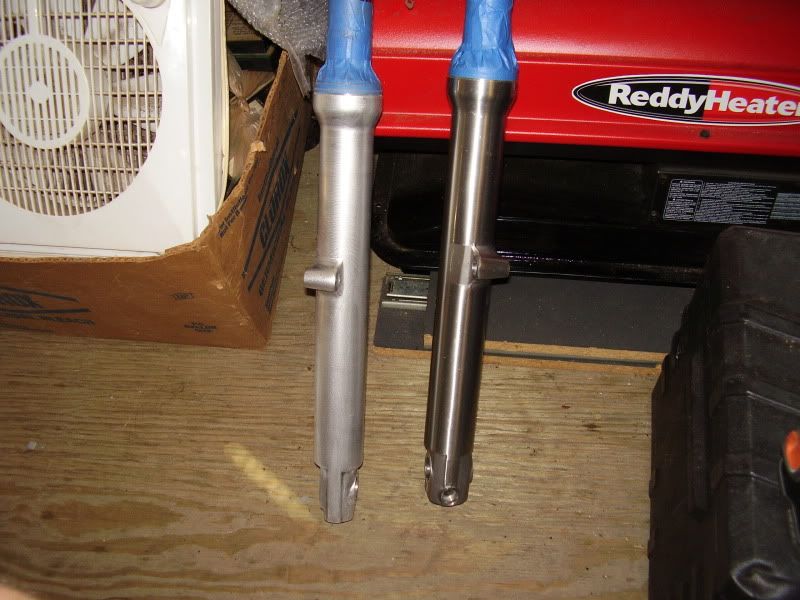
Casting marks, gone:
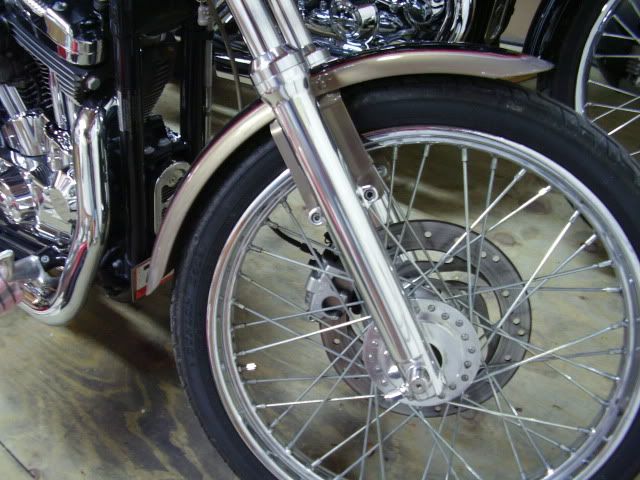
Installed. The dust shield at the top of the lower leg is chrome (brand new from Harley). If you know what you're looking at, you can see the difference. The Average Joe can't tell, and no worries about chipped, cracked or blistered chrome.
It will take some effort. I hit the wheel hub real quick, too (rims are chrome, the hub is aluminum).
I skipped the Airplane stripper and went straight to some 220 grit on a regular, electric, 1/4 sheet palm sander commonly found in a wood shop. I took off the casting marks and shaped them slightly near the axle area. In retrospect, I should have taken the clear off with the stripper, first. I think it's easier to use the stripper than it is to sand through the clear. I coulda stepped down to 100 grit, but I didn't want to be too aggressive.
Keep sanding, working your way up to maybe 600-800 grit. Some would suggest going to 1000 or 1200 grit. You'll be doing a bit of it by hand. The more scratches you make, the more you gotta sand, but that's what makes it work. If the legs are a little road-worn, you can sand down small rock blemishes, but be careful not to make divets or depressions. Longer strokes help avoid divets. Too many long strokes, and you then have a depression. Just go easy 'till you get a feel for it. You will not ef it up in the first 10 seconds. Just don't stay in one spot too long. You'll see what's going on and how long it takes to take how much off.
Pictured above is 1/2" drill with a buffing wheel arbor stacked with two, 6" buffing wheels from Home Depot. Clamped in a vise it works pretty good, but a drill isn't designed for the axial loads, so it's going to get messed up, eventually. I've clamped the buffing drill to the tongue of my trailer with Quick-grip clamps, too. Whatever you gotta do. Outside is best. Little bits of fuzz and polishing compound go everywhere. Every now and then, I break up the buffing wheel by putting the tines of an old dinner table fork into it, like a rake.
Brown polishing compound is the course. Do that first, then, using a new set of buffing wheels, go to white compound. The white is fine. Don't be afraid to apply compound. A large percentage of the time spent polishing, is applying the compound to the wheel. I bet you could find some buffing tips on Youtube. Long strokes are best. Wear gloves because the aluminum will get HOT. If it doesn't get hot, you're doin' it wrong. I like to wear glasses, a dust mask and an old, long sleeve shirt, too. If you accidentally hit your arm with a freshly polished part of the leg, it will burn. You'll know it right away, because it will hurt a lot.
Once they're looking like a mirror, it doesn't take much to keep them that way. Don't let it go too long between polishing touch-ups, or it gets to be a total drag. Maintenance is easier than repair. After all the effort to get them that way and how nice they look when they shine, motivation to stay on top of it comes quick.
Don't get anything on your fork seals. I taped mine off, but I also dis-assembled the legs and used different fork tubes, completely re-building the front end. In my case, it was easier to handle the lowers while they were still attached to the tubes because I had something to clamp to. If you have 10,000 miles on the bike, it wouldn't hurt to swap the seals, anyway. Get new bushings, too, but that's another forum thread.
The one on the right is factory, before the 220 grit. On the left is after a little sanding.

Casting marks, gone:

Installed. The dust shield at the top of the lower leg is chrome (brand new from Harley). If you know what you're looking at, you can see the difference. The Average Joe can't tell, and no worries about chipped, cracked or blistered chrome.
It will take some effort. I hit the wheel hub real quick, too (rims are chrome, the hub is aluminum).

Last edited by HarleyScuba; 04-24-2014 at 10:20 PM. Reason: nunya
#14
05-06-2014, 09:44 PM
What are my options with me getting short risers and moving my speedo out in front of the bars instead of on tank side of bars? Probably going to go with black bars but can't decide on black or chrome risers. Don't really want to do the speedo relocation beside tank. I like the look of the lows speedo and location.
#15
05-12-2014, 03:04 PM
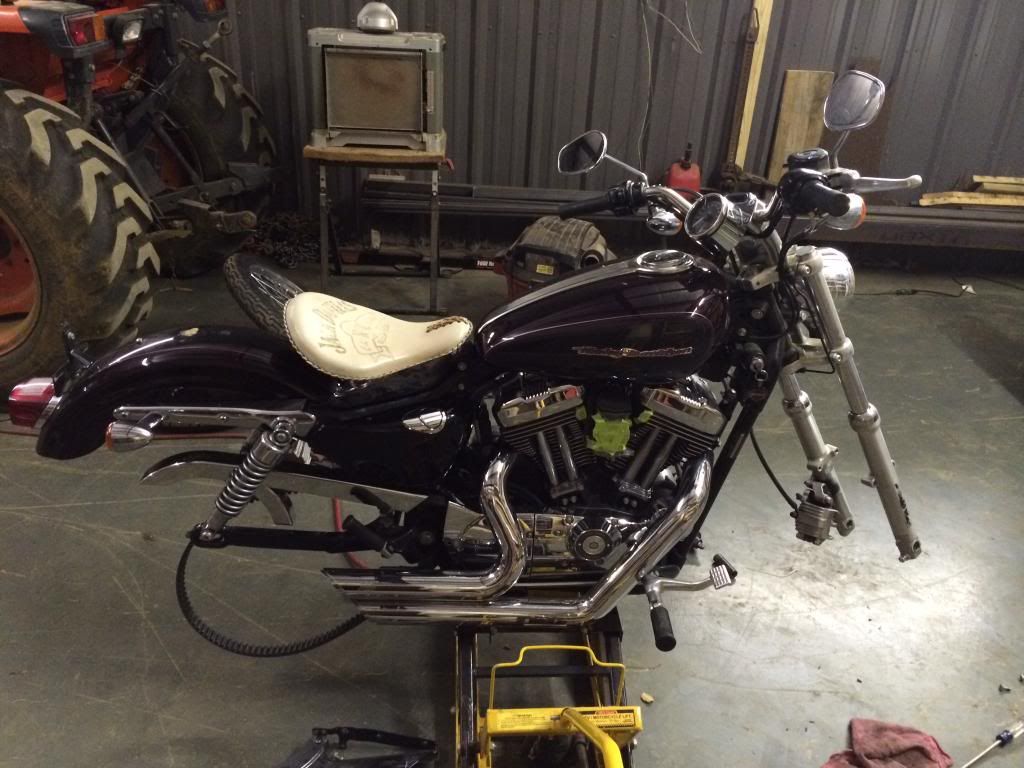
This is how it looks right now. Took the seat off and installed a LaRosa spring seat. Having my new white walls mounted on my front stock laced spoke wheel and a new rear laced spoke wheel along with the new rotors, front chrome caliper and chrome pulley cover.
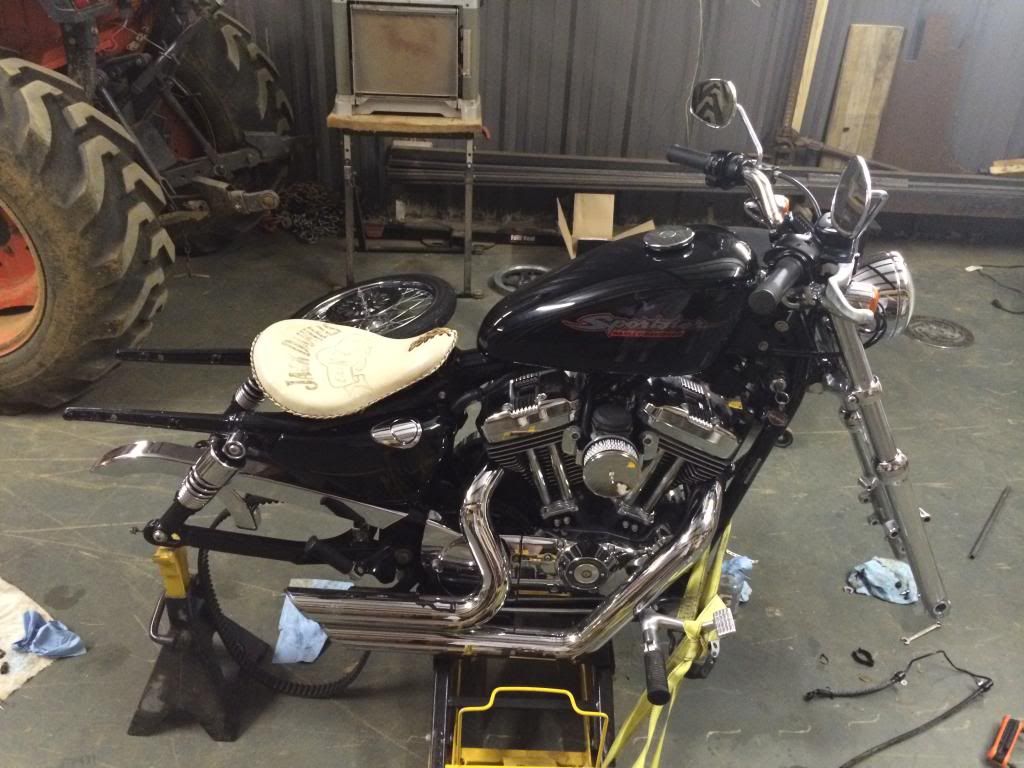
Probably going to ride some more before I take back apart for the paint and apes. I ended up going with the short stock black risers and smooth top clamp. Then DK indicator relocation to the top clamp. I am getting a new speedo wire harness since no one makes a bracket for the Custom indicator lights. Then I am doing the speedo relocation below the tank.

Probably going to ride some more before I take back apart for the paint and apes. I ended up going with the short stock black risers and smooth top clamp. Then DK indicator relocation to the top clamp. I am getting a new speedo wire harness since no one makes a bracket for the Custom indicator lights. Then I am doing the speedo relocation below the tank.
#16
05-28-2014, 08:13 AM
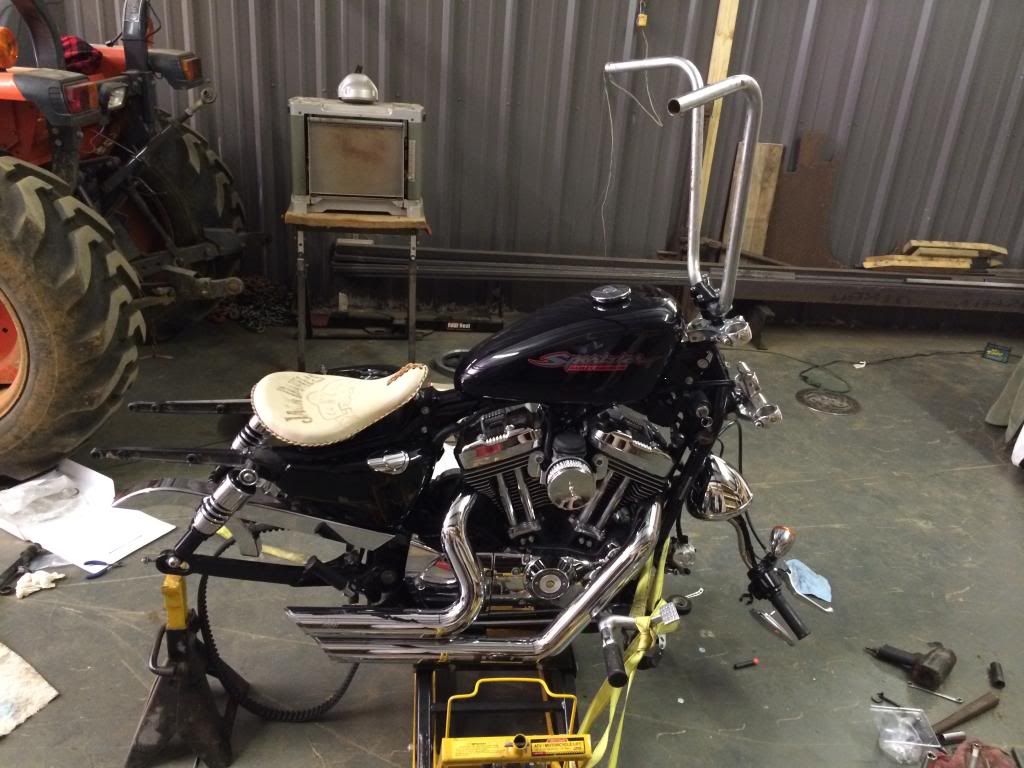
I have got a good bit of work done. I got my air cleaner installed, removed custom risers/speedo mount and went with a speedometer relocation and new risers and top clamp, new rear shocks, lowered the seat down (I will be using rubber bumpers for rear), polished the lowers (thanks to HarleyScuba), got a 3.3 gal tank and threw some 18" apes on I had laying around.
You can see the factory finish on the post above
these are after being polished

4.5 gal tank
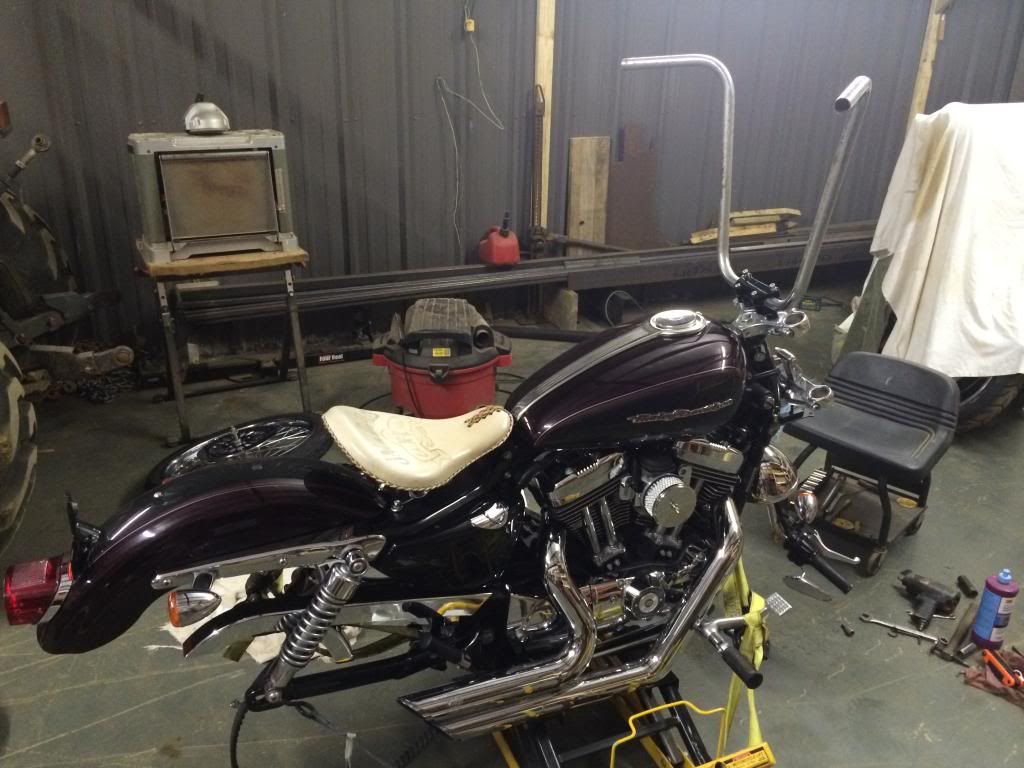
3.3 gal tank
You can see the factory finish on the post above
these are after being polished


4.5 gal tank

3.3 gal tank

Last edited by DoubleTake; 05-28-2014 at 08:15 AM.
#17
05-28-2014, 03:13 PM
Elite HDF Member
#18
05-28-2014, 03:37 PM
Yeah, the pictures makes those apes look even bigger. They were a touch over shoulder height on that seat with springs. I dropped the seat though. I think the 16" will be just right. I'm 6'3'.
#19
05-28-2014, 08:26 PM
Elite HDF Member
I use a soft rag with Mother's Mag & Aluminum Polish, Eagle One's "Nevr-Dull" Wadding Polish, or the drill with the buffing wheel after taping off the fender and brake disc. I've tried Aluminum Wax & Sealant, from Busch, but it doesn't seem to protect them very long so I stopped using it. I gave 'em a good lick-and-a-promise at least once a month, but my goal was for a quick 2 minutes once a week during riding season. That was probably over-kill, but they stayed shiney. We've since sold that bike (last January) and I haven't laid into the set on the OL's new bike, so I haven't polished a lower in a while (my bikes have gloss black lowers).
You've probably noticed that wiping/buffing with a clean rag, removing any black residue after a buffing procedure, cleans 'em up nice.
You've probably noticed that wiping/buffing with a clean rag, removing any black residue after a buffing procedure, cleans 'em up nice.
