
Basic cam swap instructions w/ pictures late model Twin Cam
#1
 01-18-2010, 11:04 PM

Here is some basic cam install information for those questioning what is involved on a cam swap on a late model twin cam. This was taken from the cam page on our website www.fuelmotousa.com/cams.htm
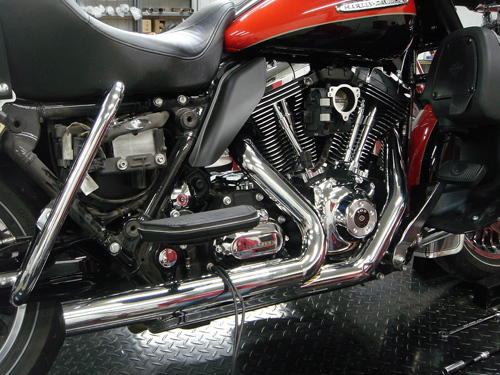
Performing a cam swap in a late model Twin Cam motor is very straight forward. Here is some basic information and pictures from a cam swap on a 2010 Harley Davidson Ultra Limited. Please refer to your service manual for specific instructions for each model
The base circle on these cams are the same as stock which makes install and setup very straight forward. You can use the stock pushrods, or for quicker installation you can use adjustable "quick install" style pushrods which will save time because you will not need to remove the rocker boxes or fuel tank
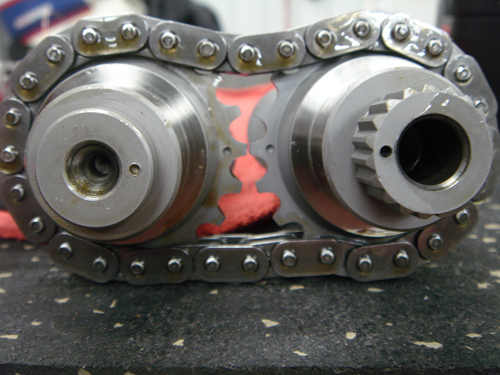
You will start by removing the exhaust system and RH floorboard. Remove cam cover , put the bike on stand, remove the spark plugs, put the bike in 5th gear and rotate the rear wheel until the timing marks on the sprockets line up

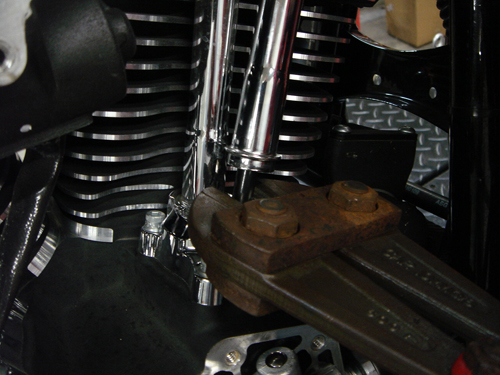
If using "Quick Install" style pushrods, carefully remove stock pushrods with bolt cutters
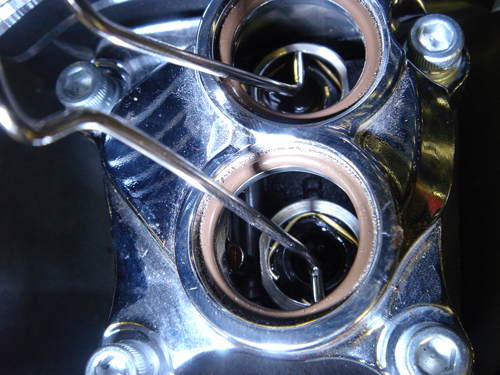
We use clips to hold the lifters in place which will prevent them from dropping in the motor once the cam plate is removed
Remove the cam chain tension shoe, crankshaft sprocket bolt and rear cam sprocket retaining bolt, You can now unbolt the cam support and remove from motor
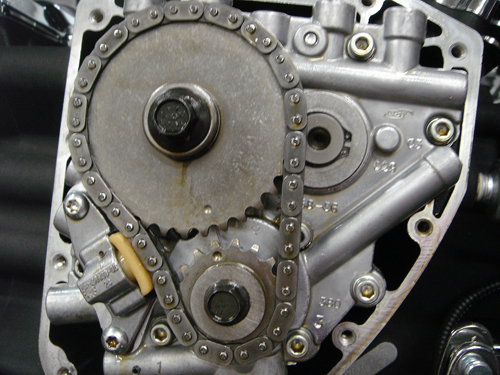

With the cam support plate now removed from the engine you can now remove the inner cam chain tensioner assembly and swap the old cams with your replacements. Make sure to align the timing marks on the cams
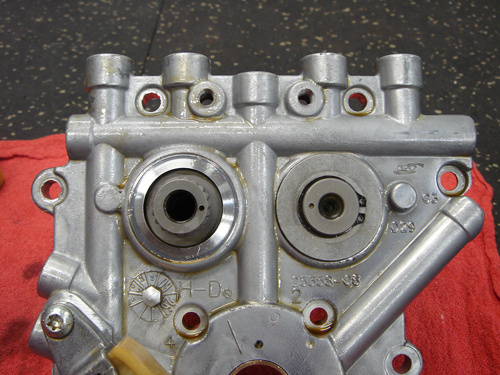
Replace inner cam bearings (if required) and install the cam plate into the engine and align crankshaft and cam sprocket timing marks and torque retaining bolts
Reinstall outer cam cover and torque in the correct sequence as listed in manual
Install push rods adjust to the shortest length rocker arm end first. Rotate motor so pushrod is on the base circle and adjust pushrod to zero lash. Adjust pushrod per manufacturers specs and tighten jam nut (generally 2.5-4 turns depending on thread pitch). Wait for lifter to bleed down and repeat for each pushrod. Install pushrod tube covers
Install exhaust system and floorboard
Performing a cam swap in a late model Twin Cam motor is very straight forward. Here is some basic information and pictures from a cam swap on a 2010 Harley Davidson Ultra Limited. Please refer to your service manual for specific instructions for each model
The base circle on these cams are the same as stock which makes install and setup very straight forward. You can use the stock pushrods, or for quicker installation you can use adjustable "quick install" style pushrods which will save time because you will not need to remove the rocker boxes or fuel tank
You will start by removing the exhaust system and RH floorboard. Remove cam cover , put the bike on stand, remove the spark plugs, put the bike in 5th gear and rotate the rear wheel until the timing marks on the sprockets line up
If using "Quick Install" style pushrods, carefully remove stock pushrods with bolt cutters
We use clips to hold the lifters in place which will prevent them from dropping in the motor once the cam plate is removed
Remove the cam chain tension shoe, crankshaft sprocket bolt and rear cam sprocket retaining bolt, You can now unbolt the cam support and remove from motor
With the cam support plate now removed from the engine you can now remove the inner cam chain tensioner assembly and swap the old cams with your replacements. Make sure to align the timing marks on the cams
Replace inner cam bearings (if required) and install the cam plate into the engine and align crankshaft and cam sprocket timing marks and torque retaining bolts
Reinstall outer cam cover and torque in the correct sequence as listed in manual
Install push rods adjust to the shortest length rocker arm end first. Rotate motor so pushrod is on the base circle and adjust pushrod to zero lash. Adjust pushrod per manufacturers specs and tighten jam nut (generally 2.5-4 turns depending on thread pitch). Wait for lifter to bleed down and repeat for each pushrod. Install pushrod tube covers
Install exhaust system and floorboard
__________________

Jamie Long / Fuel Moto USA
The USA's Leader V-Twin EFI & Performance www.fuelmotousa.com
Contact 920-423-3309
Email jamie@fuelmotousa.com
Jamie Long / Fuel Moto USA
The USA's Leader V-Twin EFI & Performance www.fuelmotousa.com
Contact 920-423-3309
Email jamie@fuelmotousa.com


#7
03-29-2010, 01:14 PM
Road Master
Trending Topics
#8
03-29-2010, 01:47 PM

Road Master

