
Installed w/ Pictures--Tour-Pak Turn Signal Conversion Kit
#1
 09-04-2010, 05:33 PM

HD's new "Tour-Pak Brake Light/Running Light/Turn Signal Conversion Kit" (now that's a mouthful), p/n 6920042, is a nice, easy DIY installation. Basically, the kit retains the run/brake light functions of the corner lights in an Ultra light bar, and adds a turn signal function (but not an Emergency Flasher function which would have been nice) to those lights.
To get started, you remove the tour pak liner and your seat. With the seat off, you access the rear lighting connector and separate them to install a Y-harness. Here's a picture of the Y-harness installed:
http://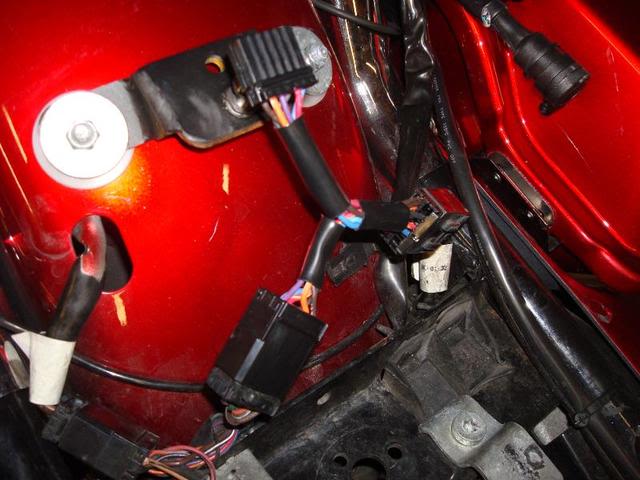
Incidentally, I already had the HD module that converts the turn signals into a run/brake function in addition to turn signal function, and simply installed the tour pak turn signal conversion Y-harness in front of the turn signal module. Said another way, the tour pak turn signal conversion Y-harness downstream connector is upstream connector of the turn signal module.
In the first picture, you see the unused connector of the Y-harness. In this next picture, that connector is now connected to the "auxiliary brake/run/turn signal conversion harness" (another mouthful we'll now call the "auxiliary harness")--this "auxiliary harness" is what runs inside the four pak:
http://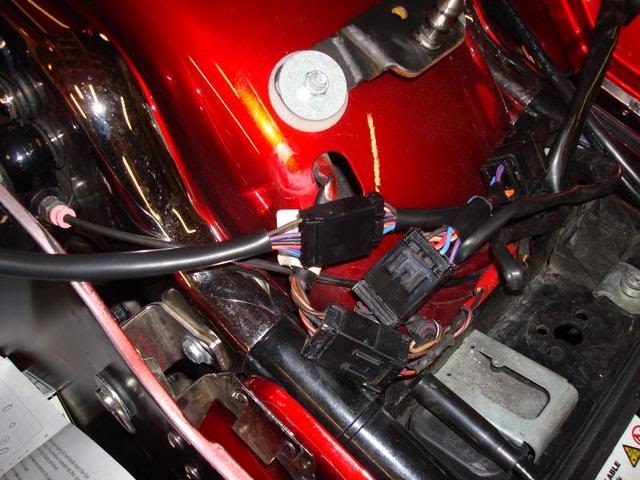
The "auxiliary harness" connector in the picture is assembled AFTER it has been routed through the tour pak. It uses five wires that go into numbered chambers in the connector. The numbers are molded into the connector and quite small. As you hold the connector in your hand with the secondary lock (that's the part that sticks up and you later push down to lock the wires in place) on top, the chambers are numbered 1-6 left to right. The wires have pins on the end with small tangs. Have the tangs on the bottom, and the secondary lock up, and push the wires into their assigned chambers until you feel a click--that's the tang locking inside the connector.
Inside the tour pak, you disconnect the tour pak wiring harness connector that runs from the bike to inside the tour pak--you are replacing the run/brake/ground circuits from that harness with the run/brake/turn signal/ground circuits provided by the "auxiliary harness." Here's a picture of the tour pak wire harness disconnected (it's the unused connector), and the "auxiliary harness" connected to the wire harness inside the tour pak:
http://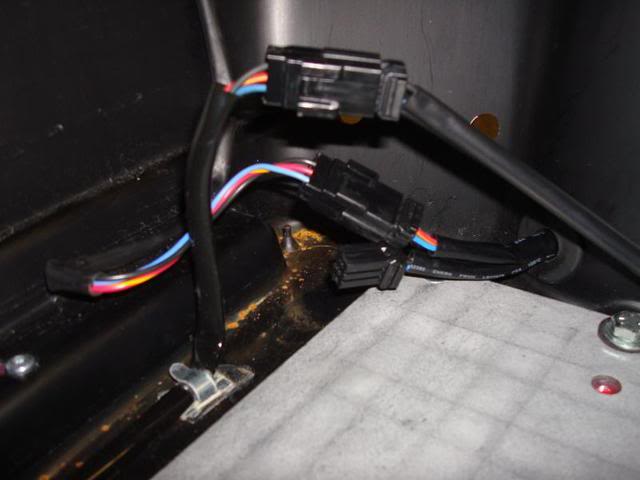
In the picture above, the "auxiliary harness" to the light bar harness connection is the one on top. (The other connection is to the tour pak spoiler LED. I used a Y-harness (not the one in this kit, but one from the Air Wing luggage rack LED kit that a tech gave me) to split the tour pak harness circuits into to two duplicate circuits. If you have a normal tour pak, you can disregard that second connection I have for the tour pak spoiler LED.)
The "auxiliary harness" includes a relay that is located in the right rear of the tour pak below the right side light housing. To provide the turn signal circuit to the lights, the bulb housings are removed and disassembled. The instructions say to "Snap open the bulb housings and remove the red/yellow wires with terminals."
"Snap open" basically means to use your fingers to widen the light plastic half of the housing to free the gray plastic tabs. Here's a picture showing the gray plastic tabs freed and the bulb housing ready to separate:
http://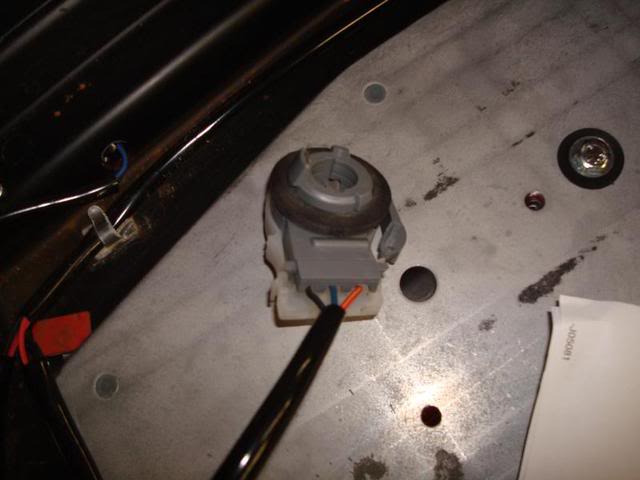
The "terminals" are actually long, light metal contacts that are held in place by a small plastic tab in the housing. The terminals are easy to remove (only remove the red/yellow wire in each housing), and are replaced with wires/terminals from the relay. Here's a picture of the reassembled left side bulb housing--the removed wire/terminal will later be wrapped in electrical tape and secured to the harness:
http://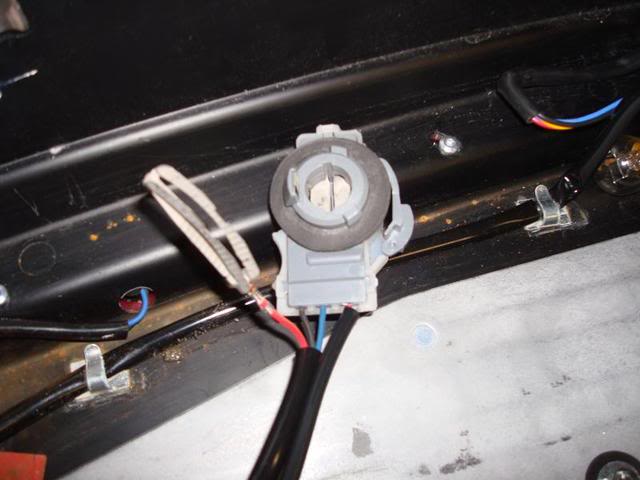
Reinstall the bulb housings, test the light functions, then remove the double-sided tape to secure the relay below the right rear housing, double-check that wiring is well located inside the tour pak, install the tour pak liner and enjoy your new turn signals.
I'll try to post some brief video of the turn signals and tour pak lights' in turn signal mode. All in all, a very easy project; no special tools required, and by HD standards, a reasonably priced accessory.
The only tricky part of the project was figuring out how to "snap open" the bulb housings--turns out it is quite simple--just spread the light gray plastic around the darker gray tabs to open the bulb housing.
Also, use of this Ultra tour pak turn signal conversion kit didn't have any effect on the run/brake/turn signal module I'd installed previously; the turn signals still function as run/brake/turn signals.
Probably took about 45 minutes to do the project; much longer time to write this up.
Here are a couple of very short video clips of the kit installed and operating:
http://www.youtube.com/watch?v=9PkL8DrS66E
http://www.youtube.com/watch?v=XTwJGHw6Zy4
Carl
PS: I also noticed that I had some fine metal shavings after drilling the holes to mount the tour pak some time ago, and I've obviously got to do a better job of sealing the holes for the tour pak speaker pods to avoid getting rust inside the tour pak--great; now I'll need to buy pods, speakers, and an amp!
Last edited by Harleypingman; 01-02-2011 at 09:29 PM.
The following users liked this post:
the wild hog (03-08-2016)
#2
09-04-2010, 06:39 PM
#4
09-04-2010, 07:31 PM
#5
09-04-2010, 07:49 PM

Tourer
I just did mine last week. For me, the hardest part was installing the grommet.
I also have a Backoff XP unit that I use for my eGlideGoodies LL-1 Tail/Brake light spoiler. I connected it to the new circuit so now my tour-pak corner lights (and spoiler) continually flash when I employ the brakes.
I also have a Backoff XP unit that I use for my eGlideGoodies LL-1 Tail/Brake light spoiler. I connected it to the new circuit so now my tour-pak corner lights (and spoiler) continually flash when I employ the brakes.
#6
09-05-2010, 07:31 AM
I had the HD module that converts the turn signals into a run/brake function but took it off when I installed the tour pak kit, wasn't sure if they would work together and hadn't had a chance to talk to the dealer about running them together. I missed the turn signals functioning as running lights so it's good to know both will work.
It really was easy to install, thanks for the great pictures.
It really was easy to install, thanks for the great pictures.
#7
09-05-2010, 07:40 AM
