
HOW TO: Street Glide rear fascia install
#1
 11-18-2010, 04:15 PM

EDIT - 1/21/11- IMPORTANT. I want to thank some of the members who have posted their experiences later in this thread. For instance, a tri-bar light is available that does not require cutting the loom like I did. BE SURE TO READ THIS ENTIRE THREAD BEFORE YOU BUY PARTS OR DO YOUR OWN INSTALL.
Another important note: THIS THREAD APPLIES TO THE NEW ROAD GLIDE ULTRA. If your bike is not an FLRTU, your install will vary. For instance, the plug inside your taillight may not be available. Please check carefully before you start or order parts.
EDIT - This thread applies to the newer bikes with the updated frame. If you have a 08 or older bike, the facsia part number will be different. The tri-light and related parts are the same.
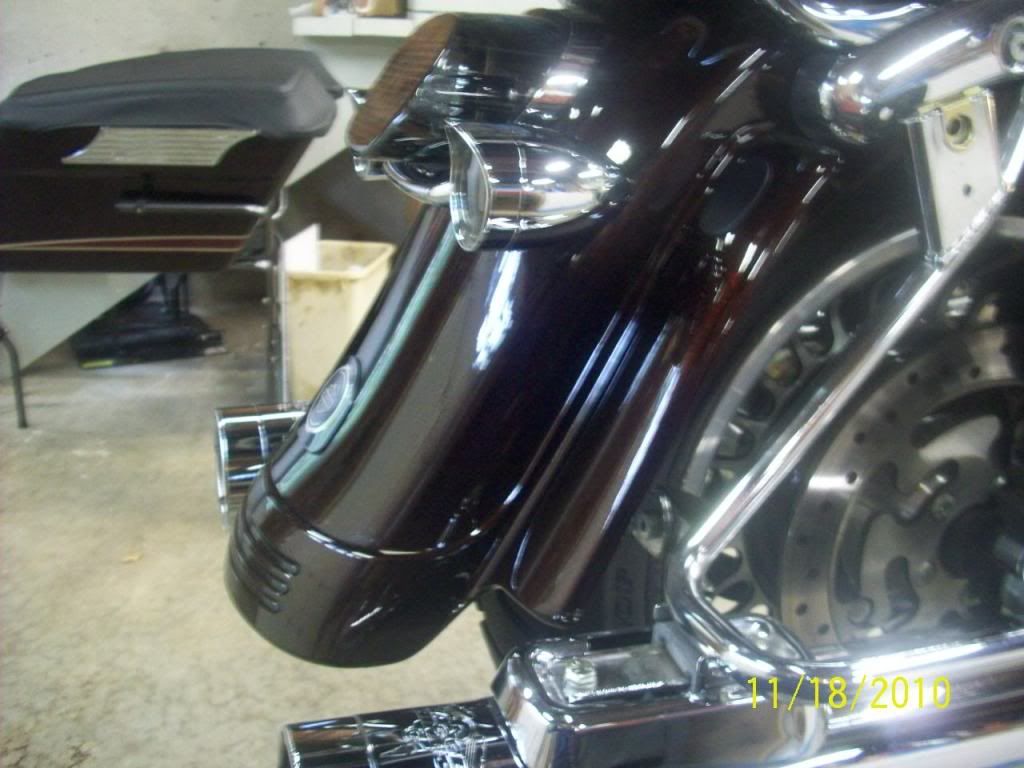
I just completed the install on my 2011 FLTRU. The rear fascia is available in the same color as my bike due to the fact that HD makes a Merlot Sunglo Street Glide. I wanted to give everyone here a complete HOW TO with pictures and video to help you if you decide to do this upgrade to your bike.
I think of the rear fascia is one of the best upgrades a person can do both for looks and for added lights for safety.
PM ME IF YOU HAVE ANY QUESTIONS.
DISCLAIMER - If I screwed up and listed a part incorrectly, I'm sorry. Use this HOW TO at your own risk. If I made a mistake in the directions, please let me know so I can edit this post. I am human and I do make mistakes (sometimes daily) LOL
Here is a compete parts list:
EDIT - added Lakeshore prices.LAKESHORE
(1) 59739-10DCE (DCE=Merlot Sunglo) - Rear Fascia - $78.36
EDIT 1/21/11 - (Thanks for Haleypingman for this one.) There is a tri-bar light available that will plug right into the socket behind the taillight it is part # 68074-07. Using this light, you will not have to cut and modify the loom on the light. You will not need to buy the plug of the connectors when using this light.
(1) 68358-07A - Tri-bar light assembly with run/brake function - $78.36
Do not buy the newer light because it is made for the bikes that do not have a center rear taillight. That light requires a separate wiring loom. I made the mistake and bought that light and could not figure out how to make it work. BTW, the old style and new style lights are exactly the same size. You will be wiring the tri-bar light into the taillight as you will see later.
(2) 59818-09 - Stud Plates
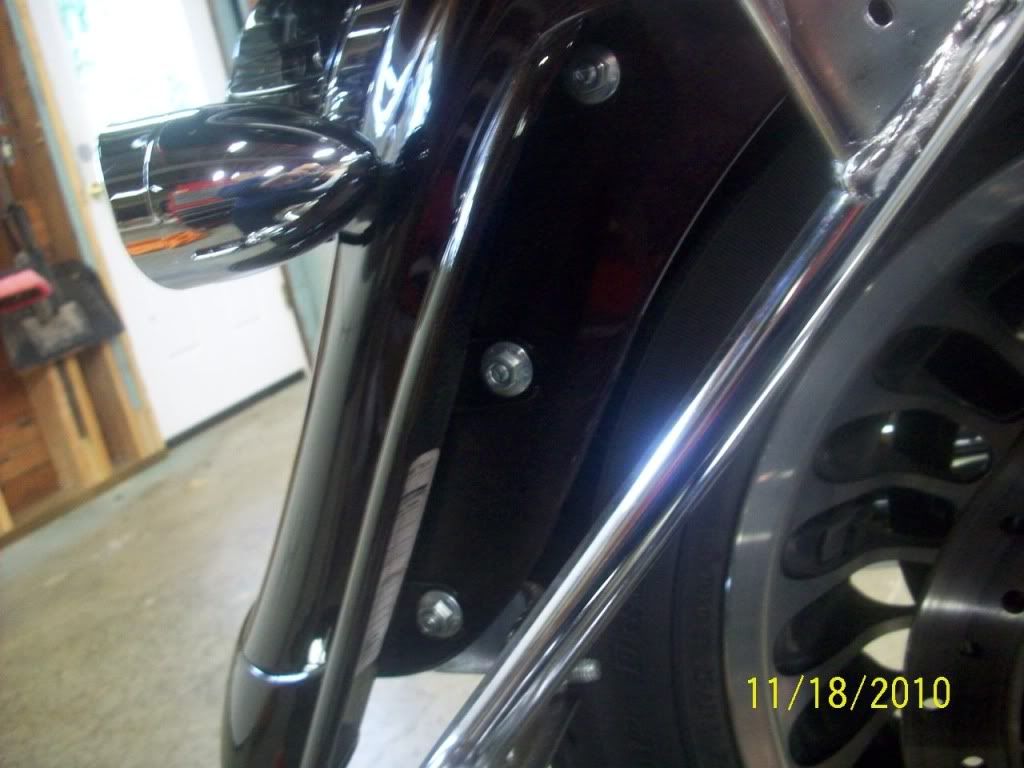
I chose to drill my fender and bolt the fascia on. On my last bike, I used 3M tape and it worked fine.
(6) 7499 - Nut
For stud plates
(2) 59749-06 - Plug
To plug the oval holes in the fascia
(1) 73153-96bk - Pin housing - 3 place
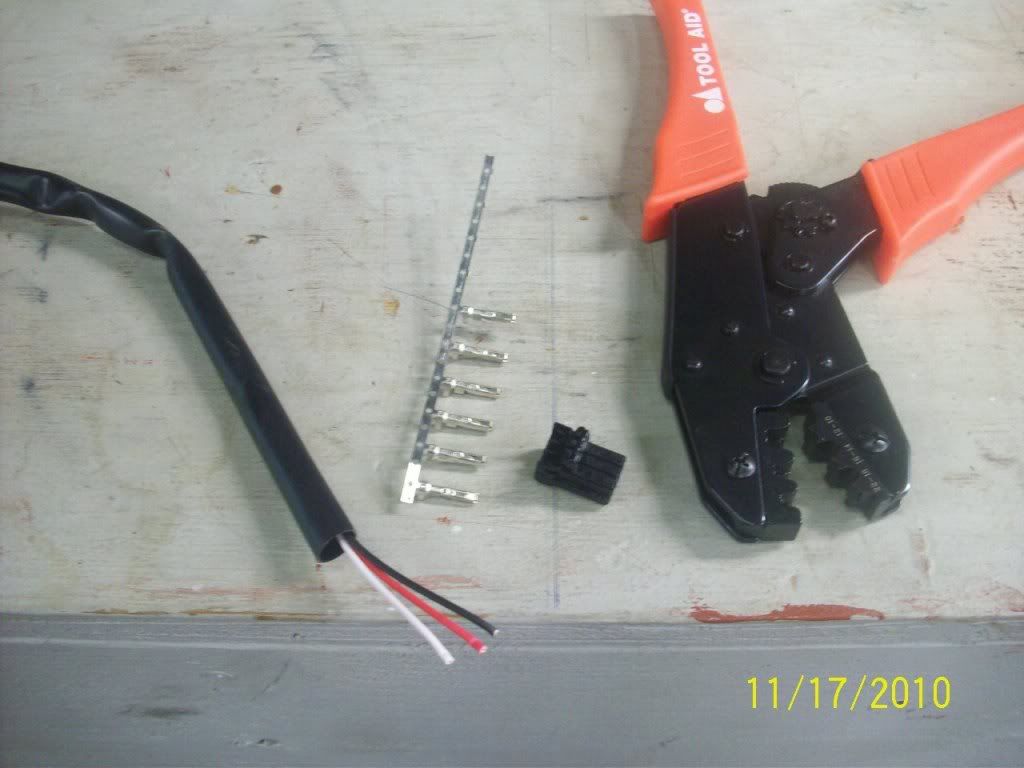
(3) 73191-96 - Terminal - socket
Buy extra in case you screw one up. I crimp mine and then solder them for a better connection.
(2) 2995 - screw to mount tri-bar light.
HOW TO -
1. Remove both saddlebags.
2. Remove the saddlebag to fender support bracket. It is the U-shaped piece that goes behind the fender.
3. Cover the sides of the fender with blue tape. Position the fascia on the fender and mark the location of the 6 holes you will drill in the fender. Take your time and use a felt pen.
4. Hold the stud plate up to the marks to make sure you have the holes marked in the correct locations.
5. Center punch the holes to insure the bit doesn't skate.
6. Drill the holes. I drilled mine slightly larger than 1/4 so I could easily install the stud plates.
7. I applied some Rustolium paint to the raw metal edges of the holes with a Q-tip. This might help stop any future rusting.
8. Install both stud plates through the fender.
9. Install the Fascia and loosely snug all 6 nuts. Once it's positioned correctly, snug all 6 nuts - careful - it's plastic.
10. Replace the fender support bracket.
Sorry, I don't have pictures of every step.
The light . . .
1. Remove the taillight
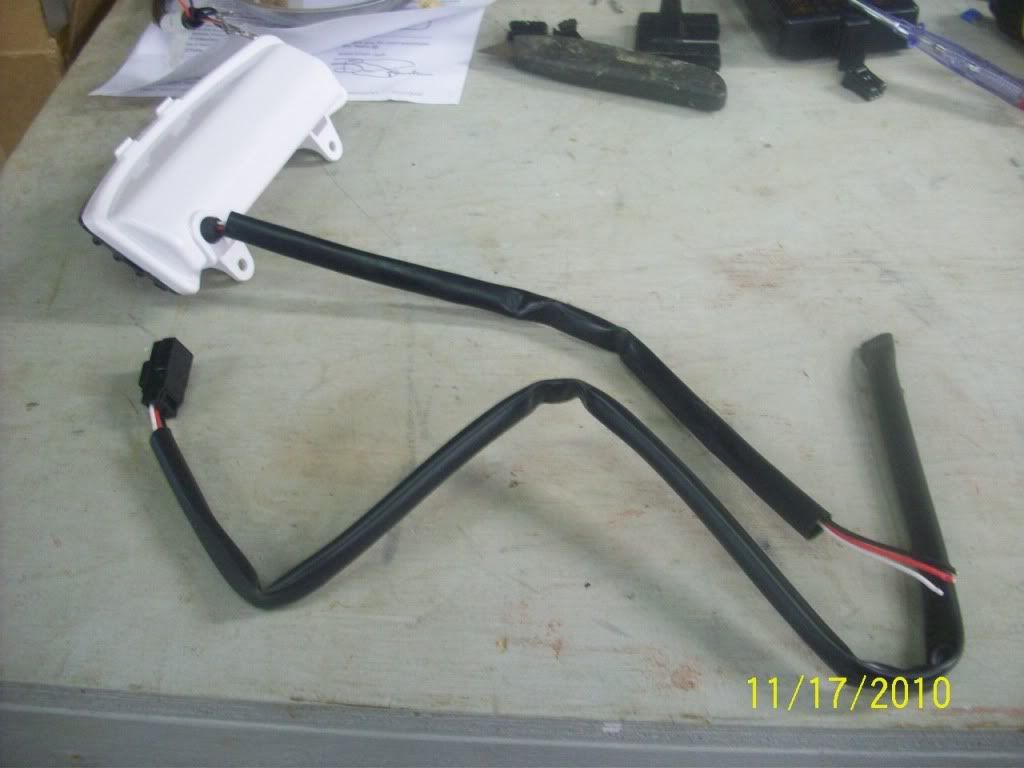
2. Temporarily fit the light to determine how much of the wiring to cut off. Feed the wire up the inside of the fender and out the hole in the fender behind the taillight.
4. Mark the loom for length and remove the light.
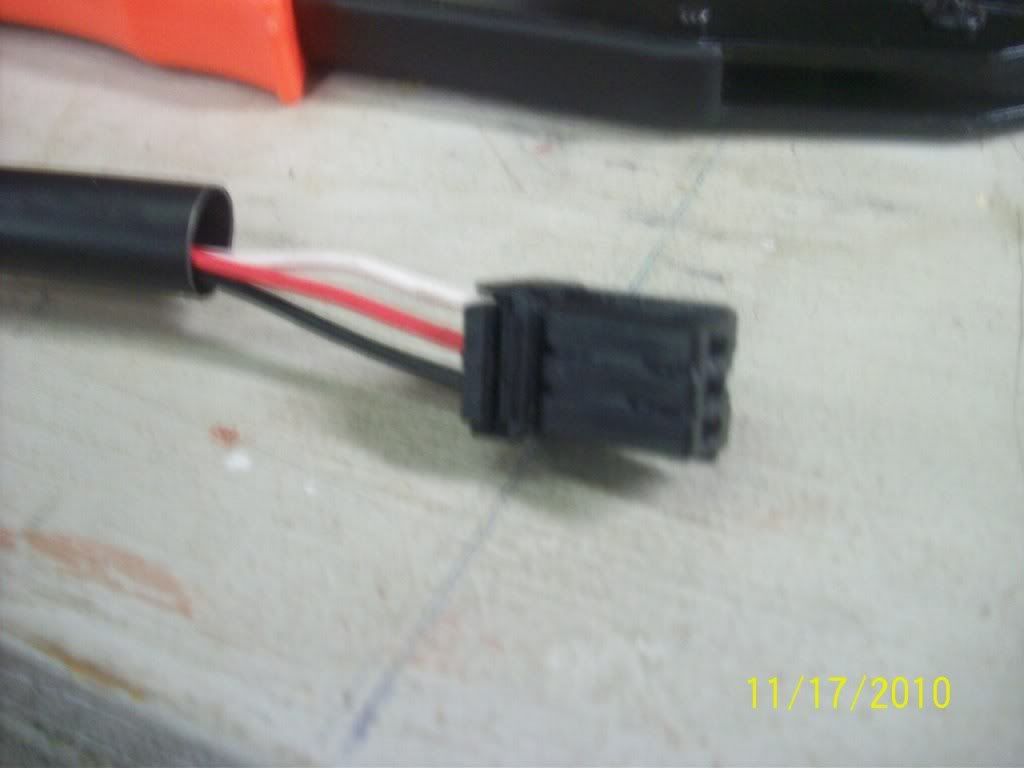
3. Cut the wires and install the 3 female terminals. Install the terminals into the 3 place connector. Note the location of the wires. Black on the left, Red at center, and white on the right.
4. Install the light with the 2 screws.
5. Install a P clamp on the loom and secure it to the 1/4 stud at the bottom of the fender.
6. Route the wire up through the fender and secure with the stock wire clamp on the inside of the fender.
7.Plug in the wires and test.
8. Replace the taillight and you are good to go!
EDIT - You may want to mount the light before you mount the fascia because there is not a lot of room between the back of the light and the tire.
Note how much I cut off the loom.
Parts and crimping tool - I also soldered the connectors.
Finished plug
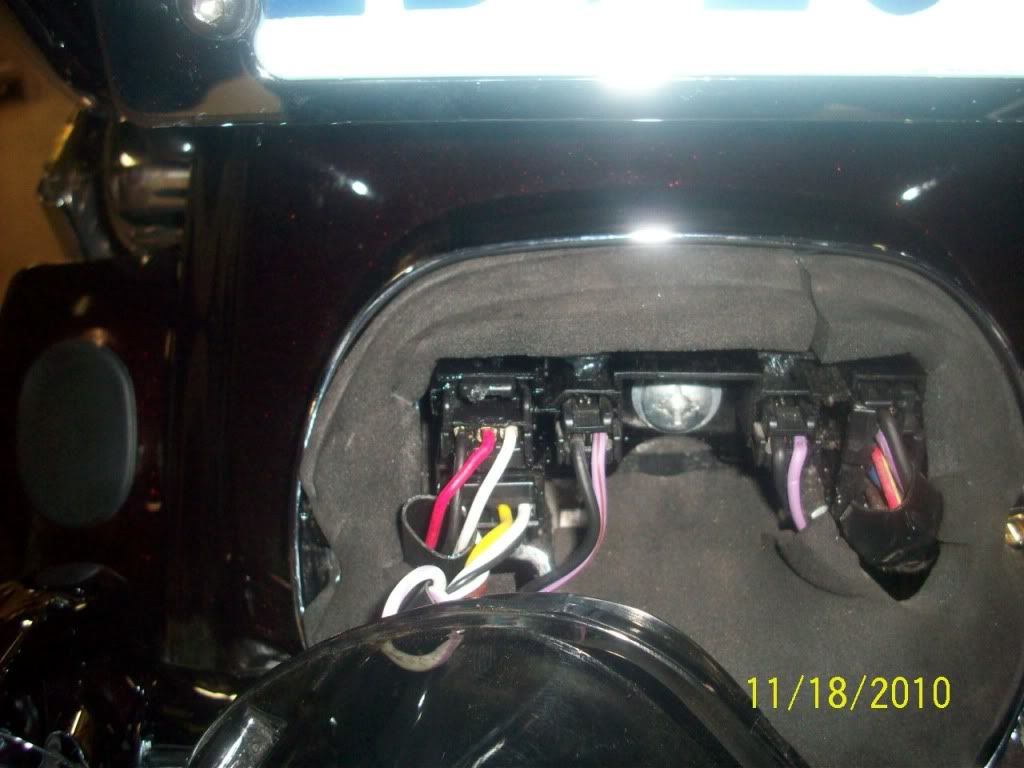
Location of the plug-in. Top left 3 wire plug.
Finished job - Run mode
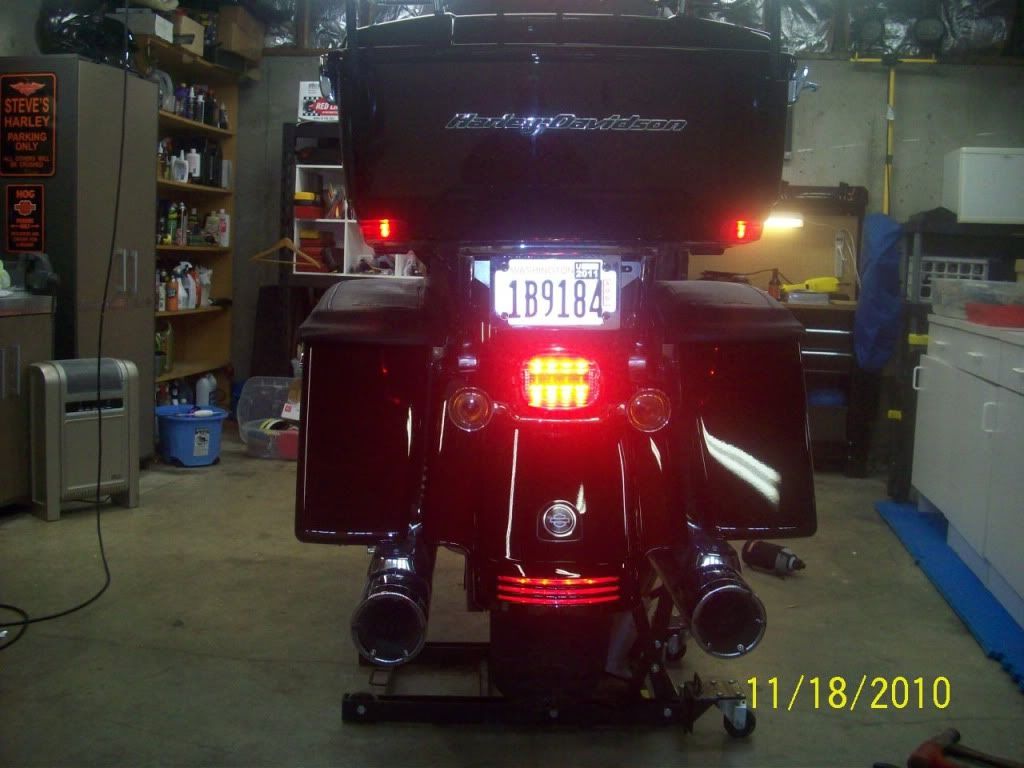
Brake mode

Video of the Fascia light

Video of all the lights on the rear

Another important note: THIS THREAD APPLIES TO THE NEW ROAD GLIDE ULTRA. If your bike is not an FLRTU, your install will vary. For instance, the plug inside your taillight may not be available. Please check carefully before you start or order parts.
EDIT - This thread applies to the newer bikes with the updated frame. If you have a 08 or older bike, the facsia part number will be different. The tri-light and related parts are the same.
I just completed the install on my 2011 FLTRU. The rear fascia is available in the same color as my bike due to the fact that HD makes a Merlot Sunglo Street Glide. I wanted to give everyone here a complete HOW TO with pictures and video to help you if you decide to do this upgrade to your bike.
I think of the rear fascia is one of the best upgrades a person can do both for looks and for added lights for safety.
PM ME IF YOU HAVE ANY QUESTIONS.
DISCLAIMER - If I screwed up and listed a part incorrectly, I'm sorry. Use this HOW TO at your own risk. If I made a mistake in the directions, please let me know so I can edit this post. I am human and I do make mistakes (sometimes daily) LOL
Here is a compete parts list:
EDIT - added Lakeshore prices.LAKESHORE
(1) 59739-10DCE (DCE=Merlot Sunglo) - Rear Fascia - $78.36
EDIT 1/21/11 - (Thanks for Haleypingman for this one.) There is a tri-bar light available that will plug right into the socket behind the taillight it is part # 68074-07. Using this light, you will not have to cut and modify the loom on the light. You will not need to buy the plug of the connectors when using this light.
(1) 68358-07A - Tri-bar light assembly with run/brake function - $78.36
Do not buy the newer light because it is made for the bikes that do not have a center rear taillight. That light requires a separate wiring loom. I made the mistake and bought that light and could not figure out how to make it work. BTW, the old style and new style lights are exactly the same size. You will be wiring the tri-bar light into the taillight as you will see later.
(2) 59818-09 - Stud Plates
I chose to drill my fender and bolt the fascia on. On my last bike, I used 3M tape and it worked fine.
(6) 7499 - Nut
For stud plates
(2) 59749-06 - Plug
To plug the oval holes in the fascia
(1) 73153-96bk - Pin housing - 3 place
(3) 73191-96 - Terminal - socket
Buy extra in case you screw one up. I crimp mine and then solder them for a better connection.
(2) 2995 - screw to mount tri-bar light.
HOW TO -
1. Remove both saddlebags.
2. Remove the saddlebag to fender support bracket. It is the U-shaped piece that goes behind the fender.
3. Cover the sides of the fender with blue tape. Position the fascia on the fender and mark the location of the 6 holes you will drill in the fender. Take your time and use a felt pen.
4. Hold the stud plate up to the marks to make sure you have the holes marked in the correct locations.
5. Center punch the holes to insure the bit doesn't skate.
6. Drill the holes. I drilled mine slightly larger than 1/4 so I could easily install the stud plates.
7. I applied some Rustolium paint to the raw metal edges of the holes with a Q-tip. This might help stop any future rusting.
8. Install both stud plates through the fender.
9. Install the Fascia and loosely snug all 6 nuts. Once it's positioned correctly, snug all 6 nuts - careful - it's plastic.
10. Replace the fender support bracket.
Sorry, I don't have pictures of every step.
The light . . .
1. Remove the taillight
2. Temporarily fit the light to determine how much of the wiring to cut off. Feed the wire up the inside of the fender and out the hole in the fender behind the taillight.
4. Mark the loom for length and remove the light.
3. Cut the wires and install the 3 female terminals. Install the terminals into the 3 place connector. Note the location of the wires. Black on the left, Red at center, and white on the right.
4. Install the light with the 2 screws.
5. Install a P clamp on the loom and secure it to the 1/4 stud at the bottom of the fender.
6. Route the wire up through the fender and secure with the stock wire clamp on the inside of the fender.
7.Plug in the wires and test.
8. Replace the taillight and you are good to go!
EDIT - You may want to mount the light before you mount the fascia because there is not a lot of room between the back of the light and the tire.
Note how much I cut off the loom.
Parts and crimping tool - I also soldered the connectors.
Finished plug
Location of the plug-in. Top left 3 wire plug.
Finished job - Run mode
Brake mode
Video of the Fascia light
Video of all the lights on the rear
Last edited by sifularson; 01-22-2011 at 11:13 AM.
The following users liked this post:
Gent (12-13-2018)
#4
11-18-2010, 05:41 PM
#5
11-18-2010, 07:01 PM
Cruiser
Join Date: Jun 2008
Location: Madison, Ms
Posts: 131
Likes: 0
Received 0 Likes
on
0 Posts
#6
11-18-2010, 07:10 PM
I just did mine tonight. I used 3M double side. I ran it right down the side of the fascia and on the tabs. Just trimmed it nicely with the razor blade and then cleaned the fender with alcohol.
I'm not drilling holes in my fender if not absolutely necessary. The fascia is extremely solid on there.
I have to get my rubber plugs and tri-bar light.
I'm not drilling holes in my fender if not absolutely necessary. The fascia is extremely solid on there.
I have to get my rubber plugs and tri-bar light.
#7
11-18-2010, 07:11 PM
Extreme HDF Member
Outstanding write-up (including pictures, part nos., prices, etc.) and a great, cost-effective cosmetic and safety mod to an already great looking bike.
In anticipation of others asking about doing the same thing to '08 and older bikes, check out this thread and the threads referenced in it:
https://www.hdforums.com/forum/touri...with-tips.html
Carl
PS: This dealer has provided a website with drawings of parts and part nos. (just select parts and go to check-out to get HD part nos.) which may be useful:
http://www.shopronniesharleydavidson...idsonparts.htm
Trending Topics
#9
11-18-2010, 07:23 PM
Advanced
Join Date: Oct 2007
Location: Lake Stevens, WA.
Posts: 61
Likes: 0
Received 0 Likes
on
0 Posts

#10
11-18-2010, 08:33 PM
If I had a detachable TP, I'd need to move the plate and it would probably end up down low like yours.
Thanks for the kudos.
Steve