
Radio Shack - Alarm Siren Install - 2011 RGC
#1
 03-19-2011, 11:00 PM

I will contribute this thread for those doing it on a 2011 RGC
Just want to contribute a few photos. Nothing that has not been said or done... just my way to help someone else that might have questions.
Process is for a 2011 Road Glide Custom
Useful documents:
Install Instructions
User/Owners Manual (Page 77-78)
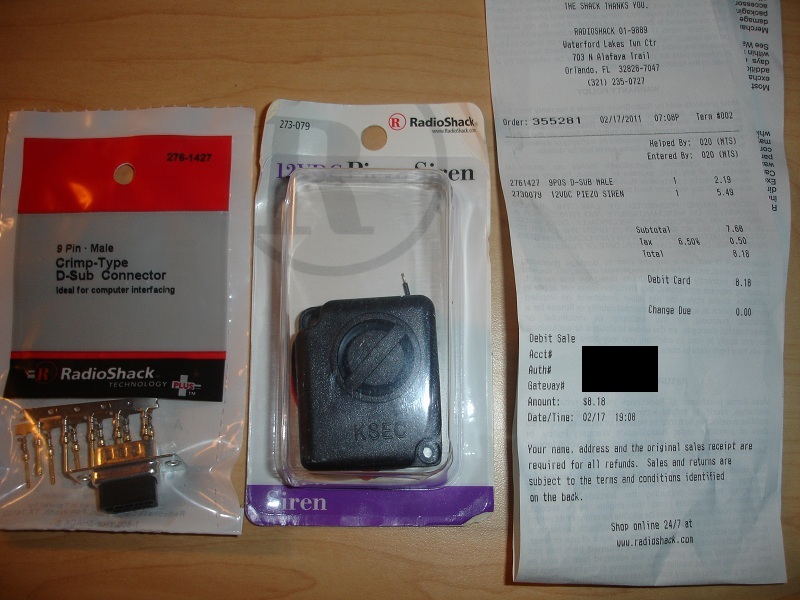
Parts needed from Radio Shack:
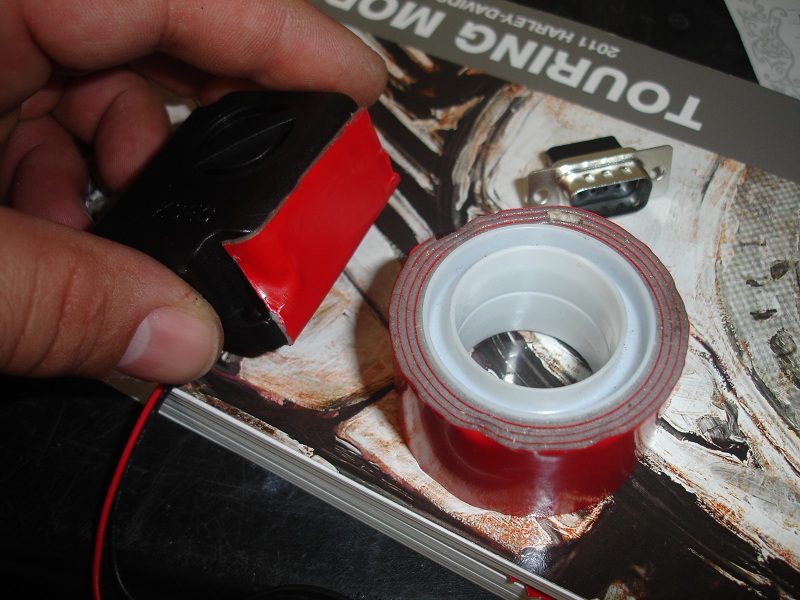
273-079 - 12VDC Piezo Siren (US$5.49)
276-1427 - 9 Pin Male Crimp-Type D-Sub Connector (US$2.19)
Procedure:
1. Follow the instructions in the owner's manual (page 77-78) to remove the left side saddlebag.
2. Gently pull the side cover from the frame downtubes.
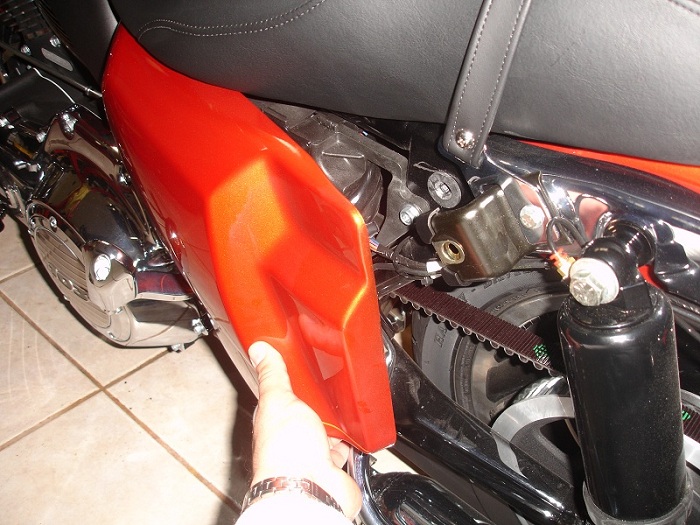
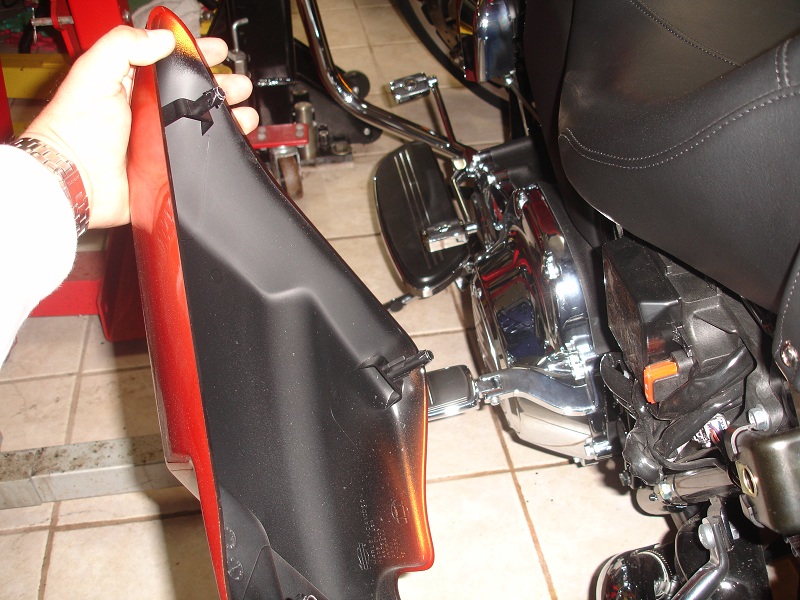
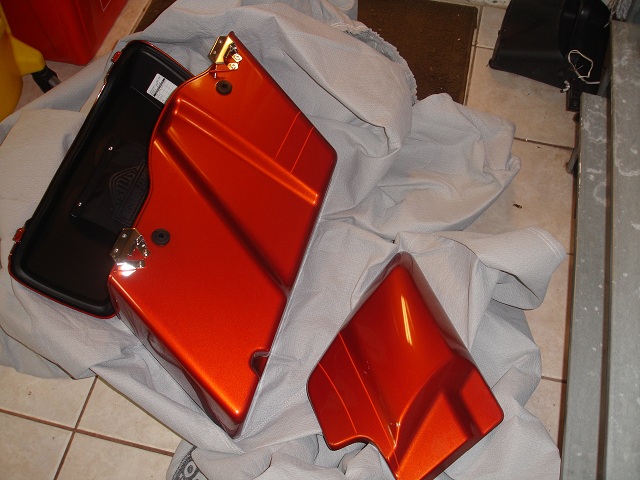
3. Put them aside carefully so they do not get scratched.
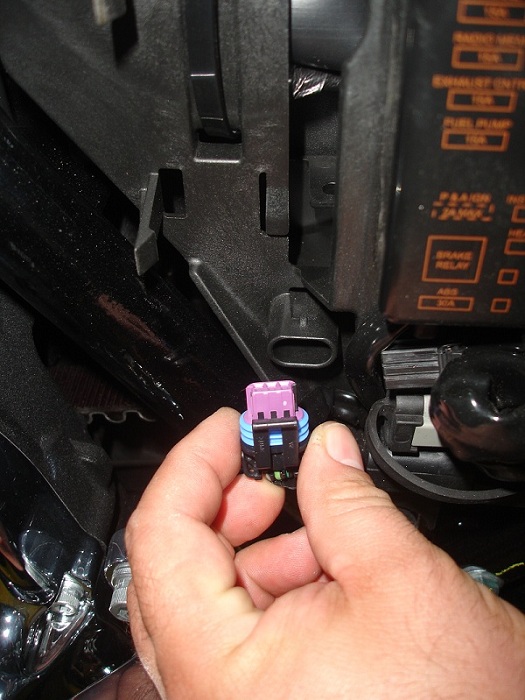
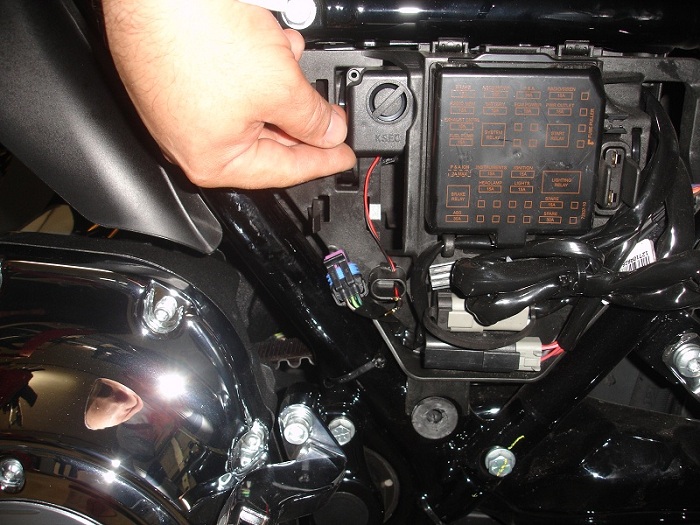
4. Pull the main fuse (40amp orange fuse... can't miss it!)

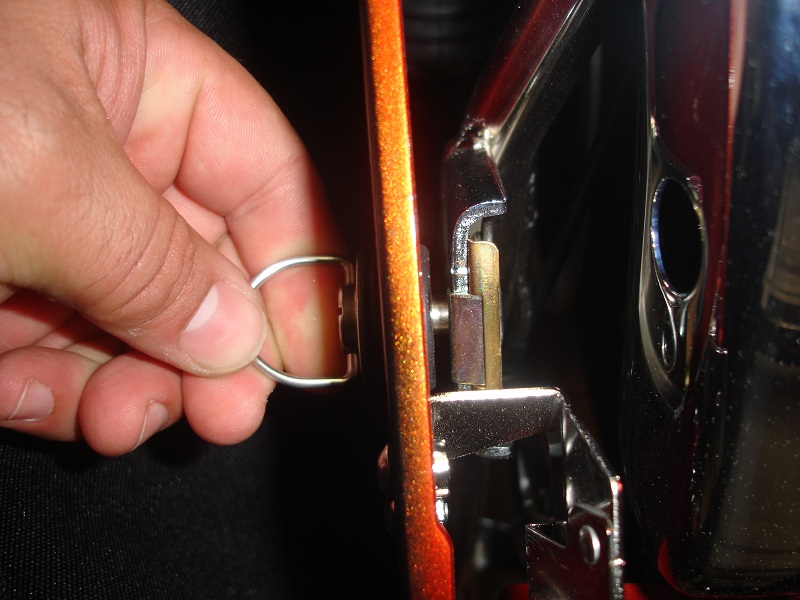
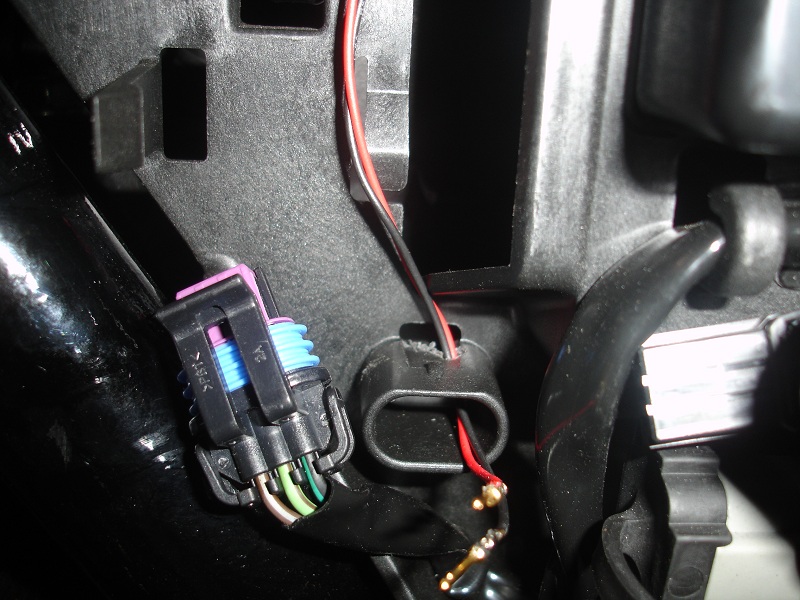
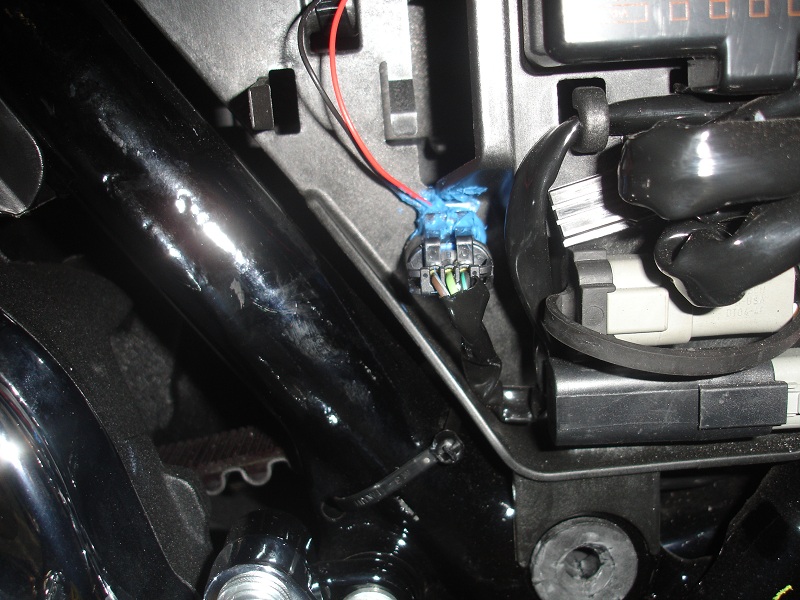
5. Pull Plug with three wires.

6. Decide how you will install the wires from the alarm to the plug. In my case I used the pins. Peel about 1/2" of the wire, slide it in the pin. If done right, the wire should go inside the pin. I soldered just a small part to the crimping area before bending the tabs.
As someone, I drilled a hole on the base where the plug was stored, to pass the wires and then connected to the plug.
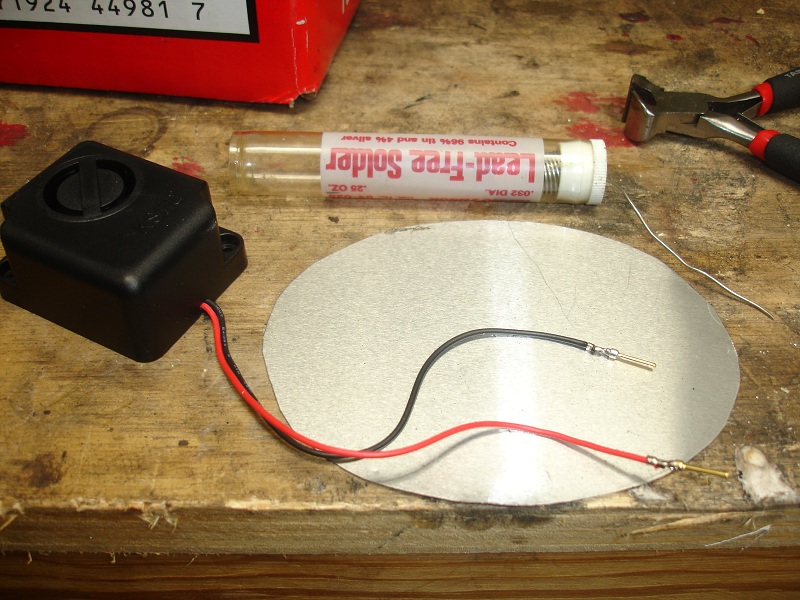
7. Red wire from siren goes to Brown wire from plug.
8. Black wire from siren goes to Green wire from plug.
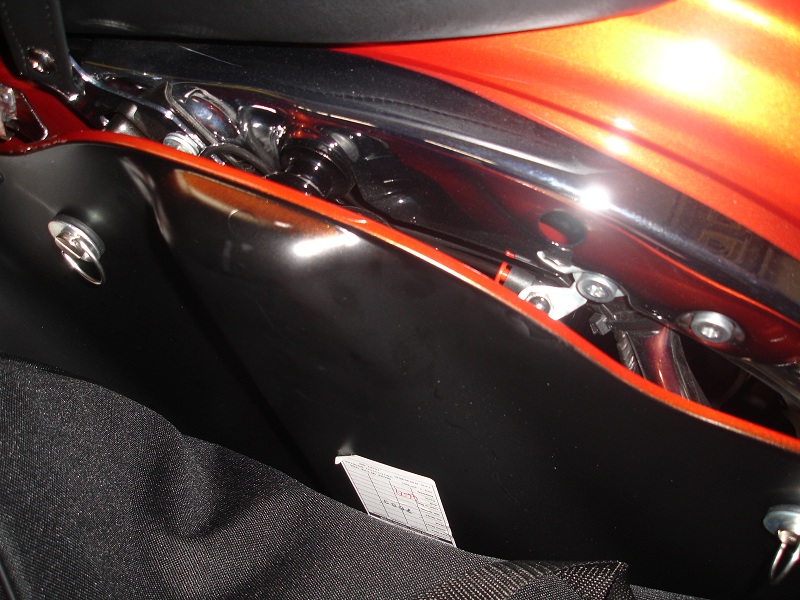
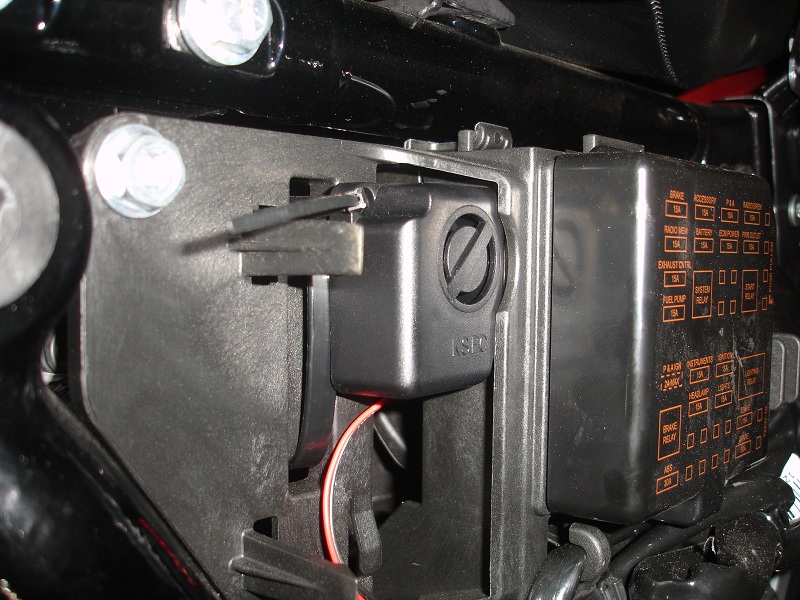
9. Secure the siren with double face tape (I used the strong stuff from 3M) and put a tie wrap just in case.
There is a nice cut out in the place where the HD Siren/Pager module goes. Just looked like the perfect place for it. imho of course.
10. If, like in my case, you drilled a small hose to pass the cables into the storage for the plug, just know that the pins with the plug is longer that the space to put the plug back in. If you try to push the plug with the pins in place back into the plastic storage you will bend the pins... so don't try it!!. I drilled a small hole aligned with where the pins would touch the bottom of the housing to allow the plug to go in all the way. Put some silicone to seal it off. Also put some silicone in the hole where the wires come out to the siren. In my case, I ran out of black silicone and ended up using some blue silicone I had. I need to go back and replace that with black silicone... yes yes, nobody is going to see it, but I know and it will drive me crazy!
11. Install the 40amp fuse.
12. Validate everything works before you install back the covers.
13. Admire your work... drink your favorite installation fluid.
14. Install cover.
15. Install saddlebag.
16. Admire your work... drink your favorite installation fluid.
17. If the bike is not in flames the next day, you did everything fine.
Admire your work... drink your favorite installation fluid.
Please know that testing at 11:30pm might not be a good idea... specially if the door from the garage to the house is open. Just trust me on this one.
You will get a "chirp" when the alarm arms... a "chirp" when someone moves the bike to warn them... and then it goes full blast.
Turns off when you come back from the house with the fob and your wife is screaming at you for doing all this crap when the children are sleeping...
Just want to contribute a few photos. Nothing that has not been said or done... just my way to help someone else that might have questions.
Process is for a 2011 Road Glide Custom
Useful documents:
Install Instructions
User/Owners Manual (Page 77-78)
Parts needed from Radio Shack:
273-079 - 12VDC Piezo Siren (US$5.49)
276-1427 - 9 Pin Male Crimp-Type D-Sub Connector (US$2.19)
Procedure:
1. Follow the instructions in the owner's manual (page 77-78) to remove the left side saddlebag.
2. Gently pull the side cover from the frame downtubes.
3. Put them aside carefully so they do not get scratched.
4. Pull the main fuse (40amp orange fuse... can't miss it!)
5. Pull Plug with three wires.
6. Decide how you will install the wires from the alarm to the plug. In my case I used the pins. Peel about 1/2" of the wire, slide it in the pin. If done right, the wire should go inside the pin. I soldered just a small part to the crimping area before bending the tabs.
As someone, I drilled a hole on the base where the plug was stored, to pass the wires and then connected to the plug.
7. Red wire from siren goes to Brown wire from plug.
8. Black wire from siren goes to Green wire from plug.
9. Secure the siren with double face tape (I used the strong stuff from 3M) and put a tie wrap just in case.
There is a nice cut out in the place where the HD Siren/Pager module goes. Just looked like the perfect place for it. imho of course.
10. If, like in my case, you drilled a small hose to pass the cables into the storage for the plug, just know that the pins with the plug is longer that the space to put the plug back in. If you try to push the plug with the pins in place back into the plastic storage you will bend the pins... so don't try it!!. I drilled a small hole aligned with where the pins would touch the bottom of the housing to allow the plug to go in all the way. Put some silicone to seal it off. Also put some silicone in the hole where the wires come out to the siren. In my case, I ran out of black silicone and ended up using some blue silicone I had. I need to go back and replace that with black silicone... yes yes, nobody is going to see it, but I know and it will drive me crazy!
11. Install the 40amp fuse.
12. Validate everything works before you install back the covers.
13. Admire your work... drink your favorite installation fluid.
14. Install cover.
15. Install saddlebag.
16. Admire your work... drink your favorite installation fluid.
17. If the bike is not in flames the next day, you did everything fine.
Admire your work... drink your favorite installation fluid.
Please know that testing at 11:30pm might not be a good idea... specially if the door from the garage to the house is open. Just trust me on this one.
You will get a "chirp" when the alarm arms... a "chirp" when someone moves the bike to warn them... and then it goes full blast.
Turns off when you come back from the house with the fob and your wife is screaming at you for doing all this crap when the children are sleeping...
Last edited by wachuko; 03-19-2011 at 11:03 PM.
The following 6 users liked this post by wachuko:
benningtonr (11-29-2016),
Circa58 (01-01-2019),
gomabxi (04-30-2023),
Lighteye (08-12-2016),
pearsom (05-18-2016),
and 1 others liked this post.
#2
03-20-2011, 09:43 AM
Seasoned HDF Member
#4
03-20-2011, 10:06 AM
Here is the link to the 3 place metri-pack connector needed that I posted on the other thread in the other forum if you want to make it look factory without having to splice and run it through the dummy connector. Have to buy pack of 10 but I'm sure you could split them/sell them with others doing this mod.
I need to order it to make this install look properly finished!!
Last edited by wachuko; 03-20-2011 at 10:09 AM.
#6
04-03-2011, 12:57 PM
Cruiser
Great post. The only thing I would add is a remote weather proof hidden toggle switch spliced between the hot lead to the siren. A "valet" switch so you can turn it off when sent to the shop or if you are planning a ride to an event that you wish not to "announce your presence" or if you are parking somewhere you have people you trust that may need to move your ride.
#7
04-03-2011, 02:38 PM

Trending Topics
#8
04-04-2011, 03:17 PM
Extreme HDF Member
Great post. The only thing I would add is a remote weather proof hidden toggle switch spliced between the hot lead to the siren. A "valet" switch so you can turn it off when sent to the shop or if you are planning a ride to an event that you wish not to "announce your presence" or if you are parking somewhere you have people you trust that may need to move your ride.


#10
04-04-2011, 06:05 PM
Extreme HDF Member
So when you park it in your garage, the alarm is on? Mine is an '06, so I need to push a button on the fob to arm it. I did arm it in the garage once, didn't ride it for 2-3 weeks, the battery went dead.