
Saddlebag Lid Spoilers Install - 2011 RGC
#1
 05-03-2011, 01:06 PM

Parts needed:
Color-Matched Saddlebag Lid Spoiler Kit 58606-11DGX
Tools needed:
Drill
1/16", 9/32", 3/8" drill bits
Phillips screwdriver
4mm allen wrench (I know, I know... but that was the one I got from the toolbox, you can get the equivalent non-metric allen wrench)
Remove the front fairing... kidding, kidding!!! I have removed the front fairing so many times that I could not resist
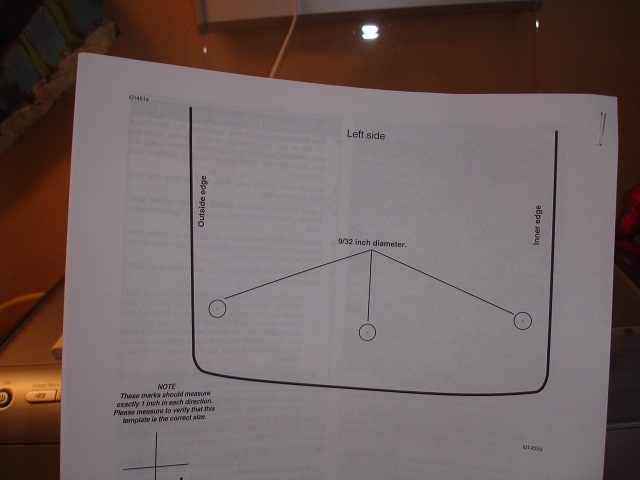
You will need to cut out the templates from the instructions. I made a copy of the instructions before cutting since these are double sided and I would have lost a page of instructions... Harley, next time leave the templates in their own page...
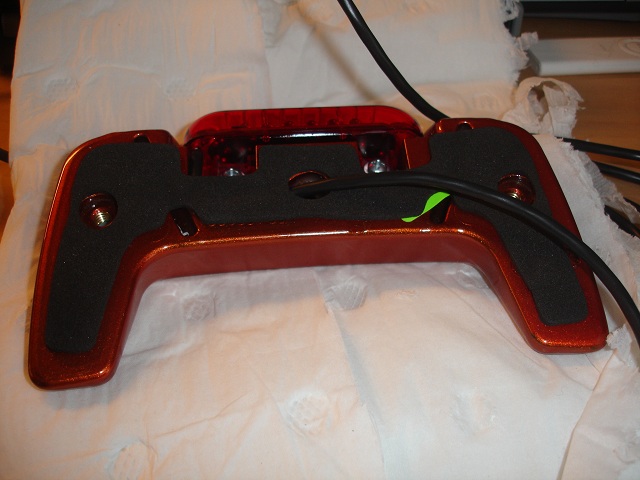
This is what is included in the box with the spoilers:


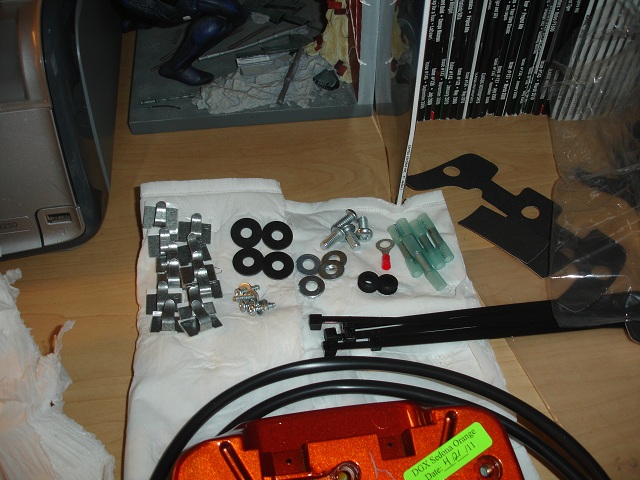
Everythings comes disassembled... so start by installing the LED lights to the spoiler.
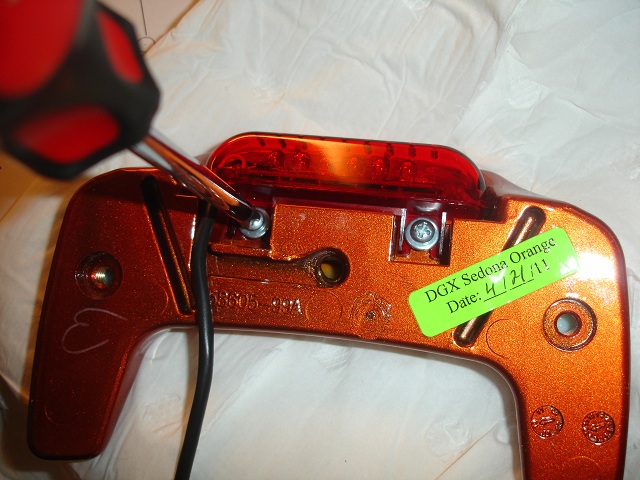
Now... and I dare you to note curse while installing the rubber gasket... Insert the gasket in place (wire goes in middle hole of gasket). Once you have it in place, remove the paper covering the adhesive and align it with the holes... sounds easy, but it is a pita to do since the gasket will touch and adhere to the spoiler immediately, making it a bit difficult to align it... Anyway... best of luck on this...
As Marion mentioned this is the critical part... cut the templates and using painters tape put them on the saddlebag lids. Use a point of reference to measure from. You really want them both installed on the same spot.
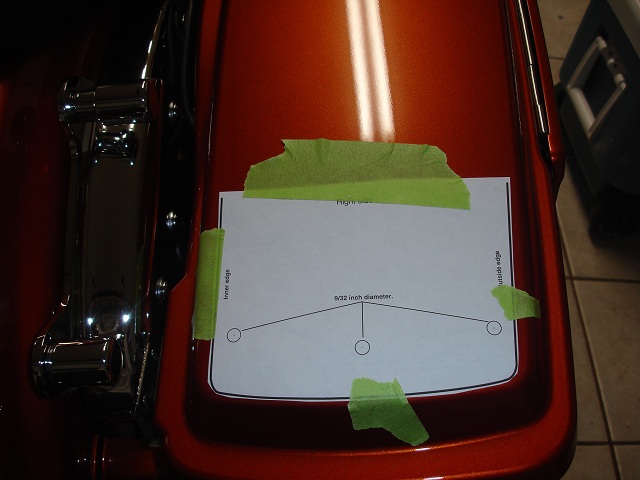
Once I was satisfied that the templates were set, I put some more tape to make sure those were not going anywhere...

Color-Matched Saddlebag Lid Spoiler Kit 58606-11DGX
Tools needed:
Drill
1/16", 9/32", 3/8" drill bits
Phillips screwdriver
4mm allen wrench (I know, I know... but that was the one I got from the toolbox, you can get the equivalent non-metric allen wrench)
Remove the front fairing... kidding, kidding!!! I have removed the front fairing so many times that I could not resist
You will need to cut out the templates from the instructions. I made a copy of the instructions before cutting since these are double sided and I would have lost a page of instructions... Harley, next time leave the templates in their own page...
This is what is included in the box with the spoilers:
Everythings comes disassembled... so start by installing the LED lights to the spoiler.
Now... and I dare you to note curse while installing the rubber gasket... Insert the gasket in place (wire goes in middle hole of gasket). Once you have it in place, remove the paper covering the adhesive and align it with the holes... sounds easy, but it is a pita to do since the gasket will touch and adhere to the spoiler immediately, making it a bit difficult to align it... Anyway... best of luck on this...
As Marion mentioned this is the critical part... cut the templates and using painters tape put them on the saddlebag lids. Use a point of reference to measure from. You really want them both installed on the same spot.
Once I was satisfied that the templates were set, I put some more tape to make sure those were not going anywhere...
#2
05-03-2011, 01:07 PM
Start with a small drill bit... instructions mentions a 1/16" drill bit... I went with a 1/8" - Then drill with a 9/32"
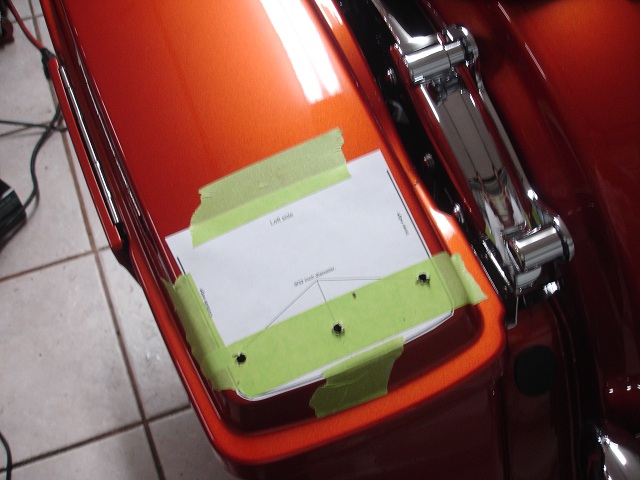
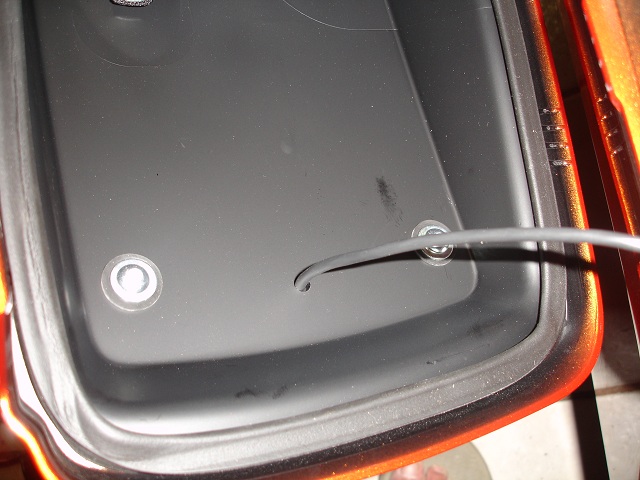
Repeat on the other side and then remove the templates and insert the wires in the middle hole... you will need to insert each wire (two at the most) at a time as all three pins will not go in at once...
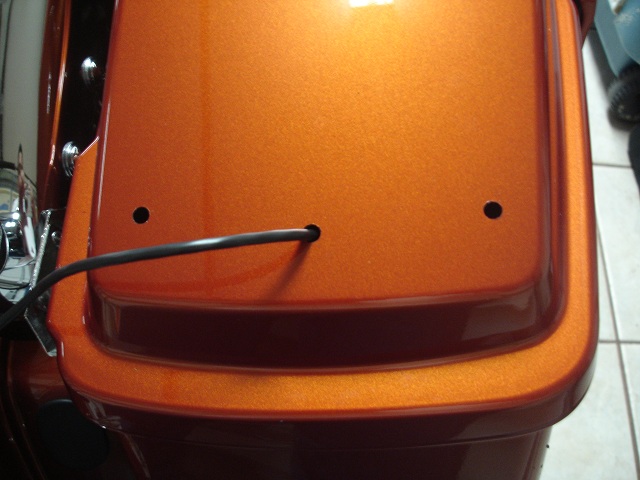
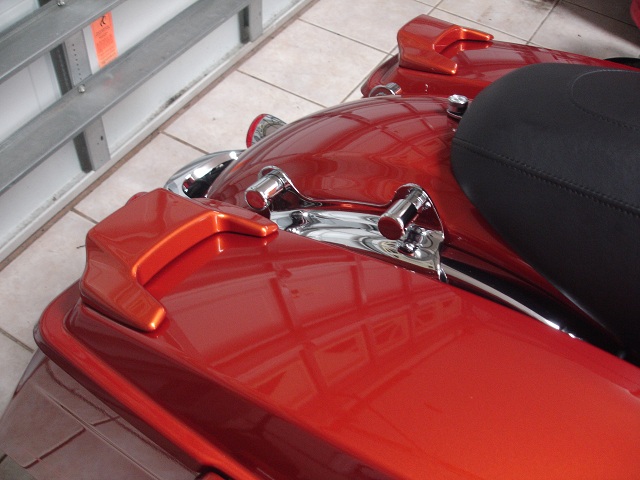
Use the rubber washer and metal washer with the 3/16" bolt and fix the spoiler in place. You will have to press a little to get the rubber gasket to compress.
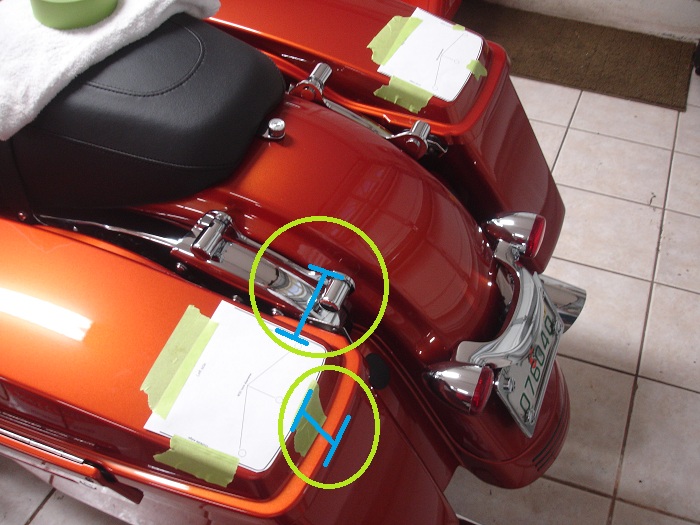
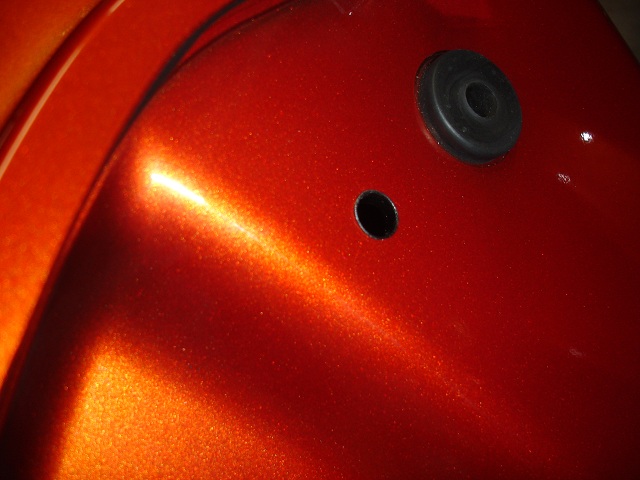
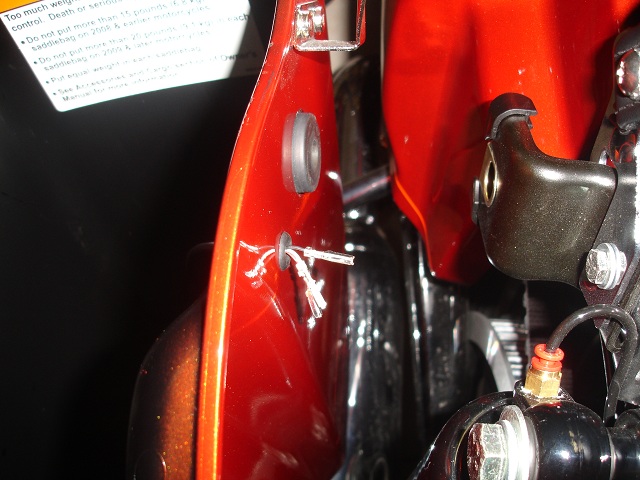
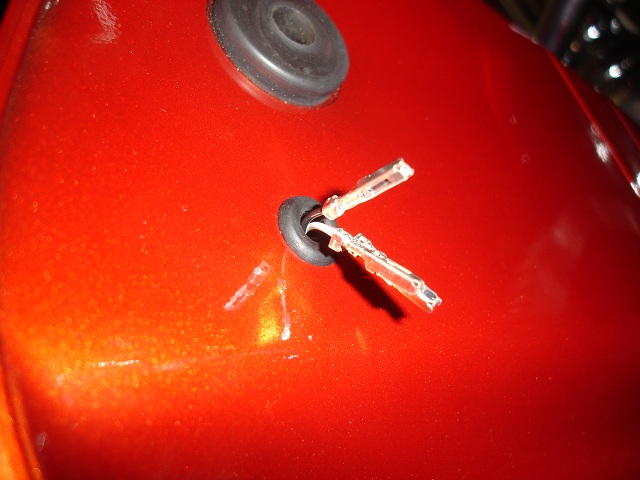
Drill the hole on the saddlebag. Instructions asks that you drill a 3/8" hole in front of the shock absorber area, 2" from the lip of the saddlebag.
Once you have drilled the hole on both sides, insert the rubber grommet in the hole.
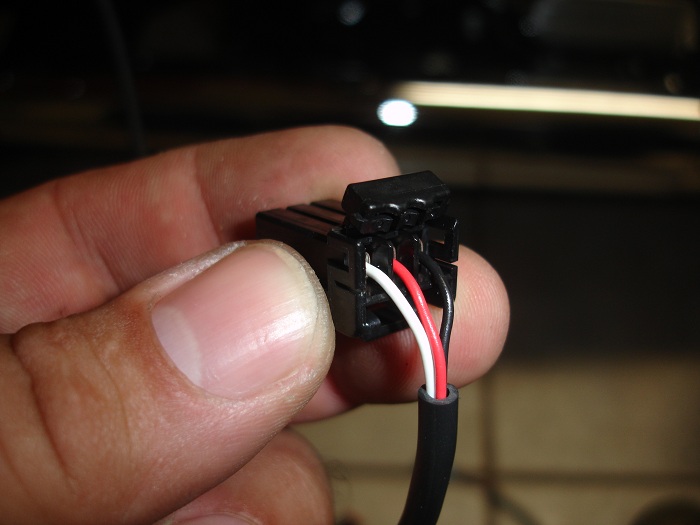
same drill... insert the wires, not all pins will go in at once, so do it one at a time...
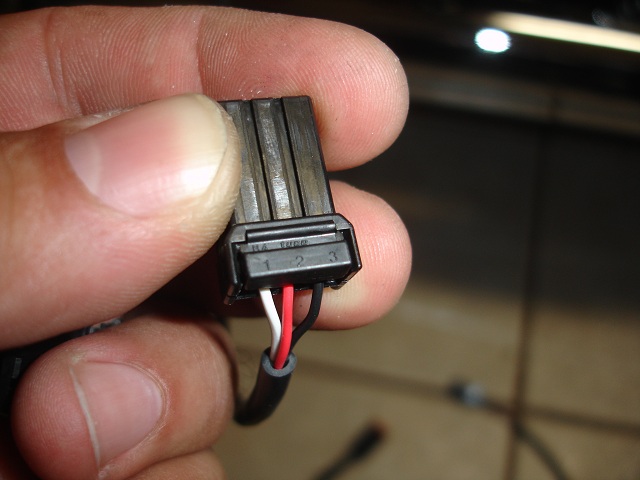
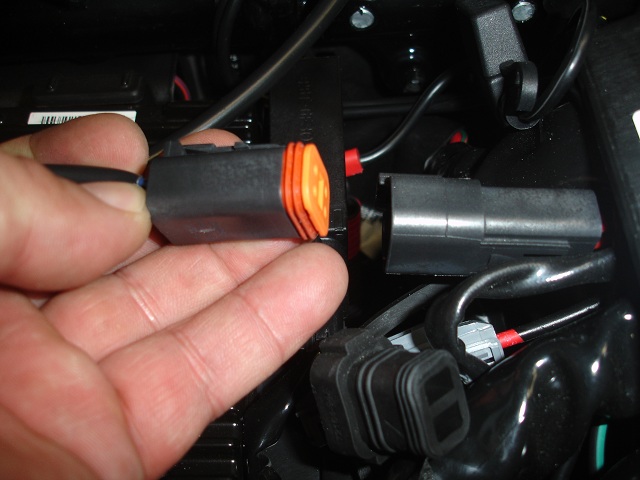
Insert the pins in the plug... White in 1, Red in 2, Black in 3
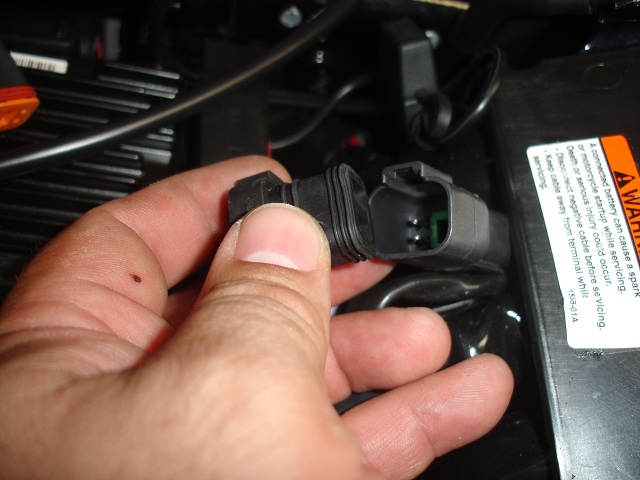
Remove the seat... search for the connector. Mine was in the middle of the bike but a little towards the left side. It was plugged with a rubber cap. Remove the rubber cap, insert the female end from the splitter. Then insert each of the plugs from the lights of the spoilers into the splitter cable. Use the provided tie wraps to organize and hold the wires in place. I forgot to take photos of this... will take the seat out, snap a few and update the thread.
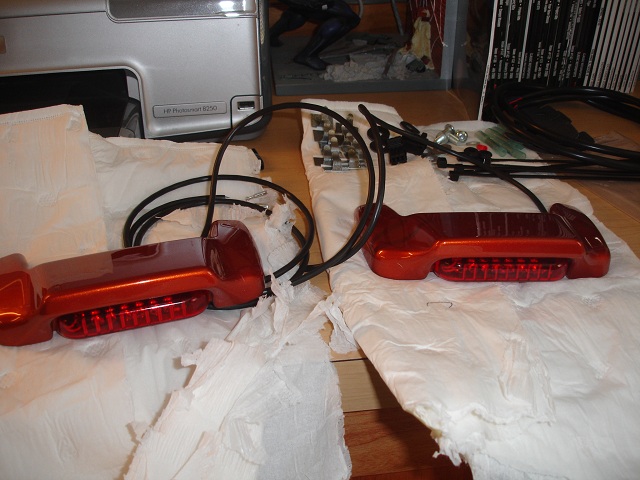
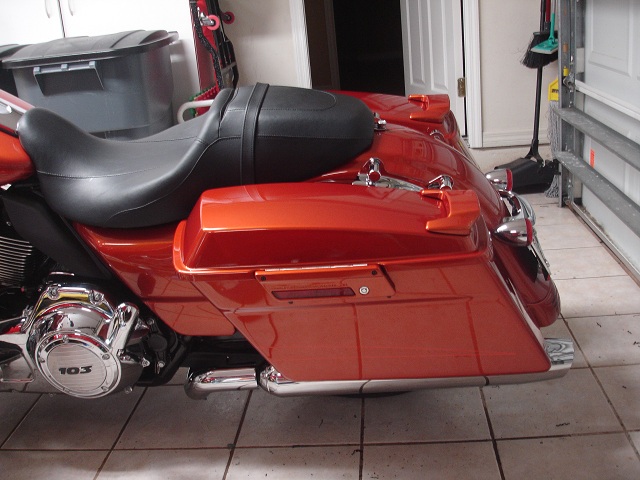
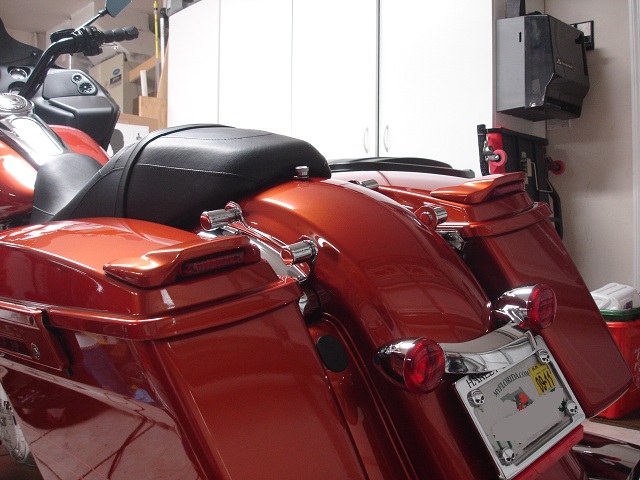
Test that everything works... install the seat back. Sit back with your favorite install drink and admire your work.
Repeat on the other side and then remove the templates and insert the wires in the middle hole... you will need to insert each wire (two at the most) at a time as all three pins will not go in at once...
Use the rubber washer and metal washer with the 3/16" bolt and fix the spoiler in place. You will have to press a little to get the rubber gasket to compress.
Drill the hole on the saddlebag. Instructions asks that you drill a 3/8" hole in front of the shock absorber area, 2" from the lip of the saddlebag.
Once you have drilled the hole on both sides, insert the rubber grommet in the hole.
same drill... insert the wires, not all pins will go in at once, so do it one at a time...
Insert the pins in the plug... White in 1, Red in 2, Black in 3
Remove the seat... search for the connector. Mine was in the middle of the bike but a little towards the left side. It was plugged with a rubber cap. Remove the rubber cap, insert the female end from the splitter. Then insert each of the plugs from the lights of the spoilers into the splitter cable. Use the provided tie wraps to organize and hold the wires in place. I forgot to take photos of this... will take the seat out, snap a few and update the thread.
Test that everything works... install the seat back. Sit back with your favorite install drink and admire your work.
#3
05-03-2011, 01:08 PM
Wachuko great step by step they look great I installed a pair a couple of months ago.
I have a question for you did you leave the connectors under the seat or did you move them to a more accessible location so you do not have to remove the seat each time you want to remove the saddlebags?
I have a question for you did you leave the connectors under the seat or did you move them to a more accessible location so you do not have to remove the seat each time you want to remove the saddlebags?
One thing I forgot to mentioned. I don't think I will be using the provided cable holders... I am going to stop by Radio Shack and get some of those plastic bases for tie-wraps and go that route instead.
The clips provided with the kit are metal and I am concern of those causing damage to anything I put in the bags.
#5
05-03-2011, 01:15 PM
#7
05-03-2011, 01:22 PM
Stellar HDF Member
Trending Topics
#8
05-03-2011, 01:29 PM

Great writeup. I'm picking up a sedona orange RG custom Friday...excited of course. I'm not mechanically inclined..would you say it was a fairly easy install?
Second- it looks like you kept the stock pipes- are you happy with them?
Third- are the handlebars easy to adjust on the RG custom?
Sorry for so many questions.
Second- it looks like you kept the stock pipes- are you happy with them?
Third- are the handlebars easy to adjust on the RG custom?
Sorry for so many questions.
#9
05-03-2011, 01:46 PM
Great writeup. I'm picking up a sedona orange RG custom Friday...excited of course. I'm not mechanically inclined..would you say it was a fairly easy install?
Second- it looks like you kept the stock pipes- are you happy with them?
Third- are the handlebars easy to adjust on the RG custom?
Sorry for so many questions.
Second- it looks like you kept the stock pipes- are you happy with them?
Third- are the handlebars easy to adjust on the RG custom?
Sorry for so many questions.
On the spoilers. It is a fairly easy install. The scary part is drilling that first hole in the beautiful saddlebag lids... reason why the most critical part of the whole install is making sure that the templates are correctly set, that you measure them from a several reference points, etc... after the holes are done, everything else is easy.
On the pipes. I like the looks of the stock pipes and plan to keep them (famous last words). I do plan to change the headpipes because of the heat issue that the cat converter creates. Reading from those that have done it, this will increase slightly the noise and deep sound of the exhaust, so looking forward to that change. Lowering the temp alone is enough for me doing the headpipe change, even if the sound stays the same... going with the Fuelmoto ceramic coated headpipes.
On the handle bars. The two top bolts are easy to get to. But not sure if loosen only those two will allow you to move the handle bar. I wanted a bit more pullback so I went with Heritage styled bars. Very inexpensive swap, keeps the stock wires, and it helped a lot with riding position. If you decide to change them for Heritage styled bars... here is write up I did: Heritage Style Handlebar Install - 2011 RGC