
Step-By-Step 96" Oil Cooler Install - With Pics
#1
 10-17-2011, 04:03 PM

An addition to some of my other step-by-step's. This is for the archives in hopes to help someone else who'd like to tackle this themselves.
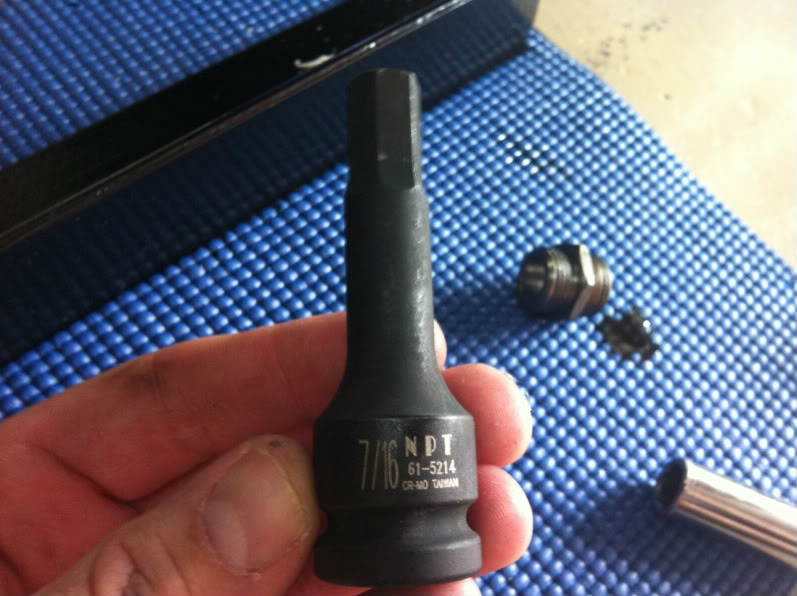
***Special Tools***
I did need to purchase this 7/16" Allen Key from NAPA. Just under $7. They didn't sell this part separately but opened a kit and removed just this socket for me. They said they'll order the one off piece and have a full kit again. Needless to say, the folks at NAPA were very helpful
Begin
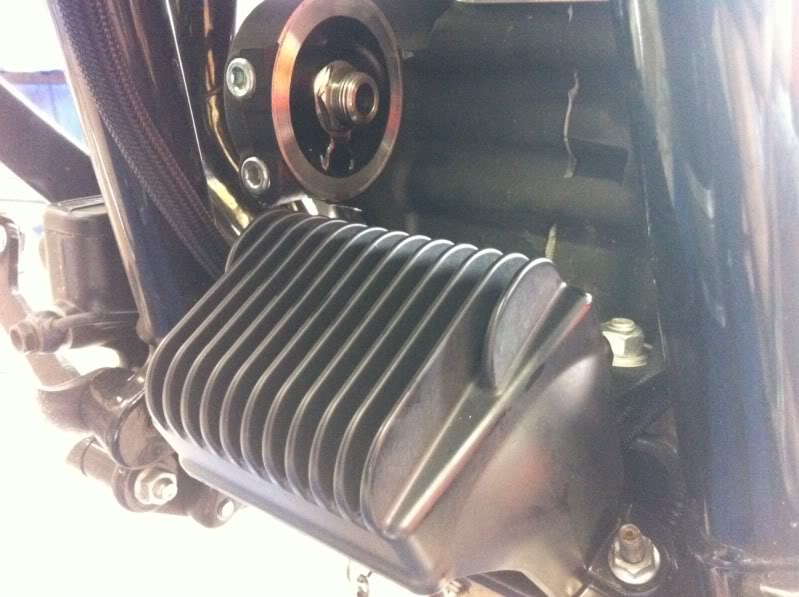
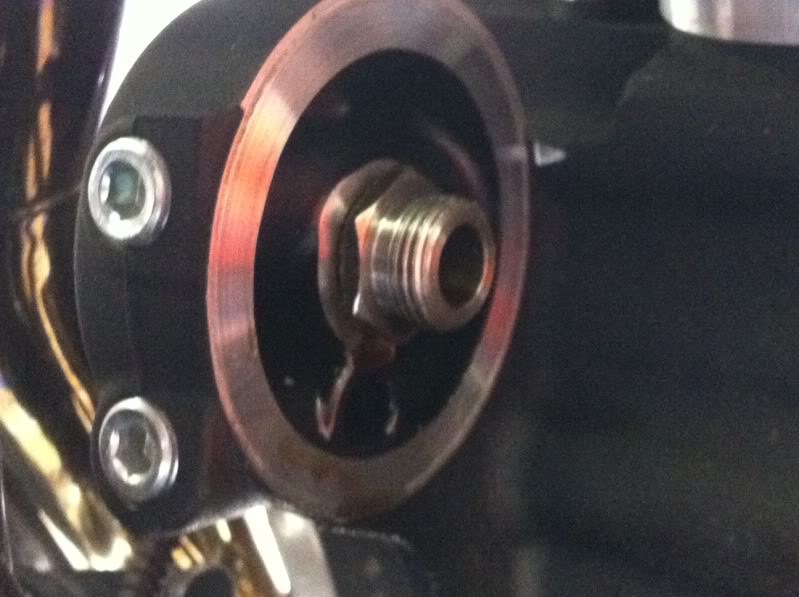
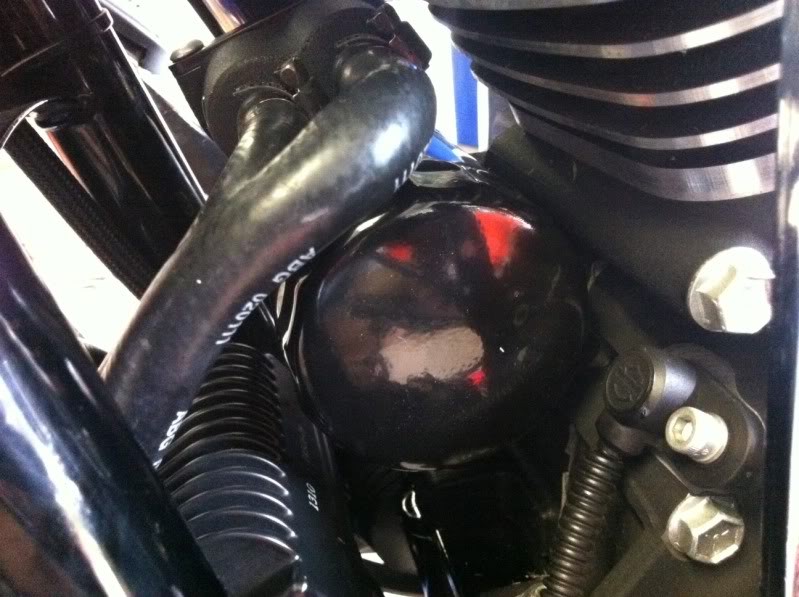
After removing the oil and oli filter you are here!
Remove the Voltage Regulator
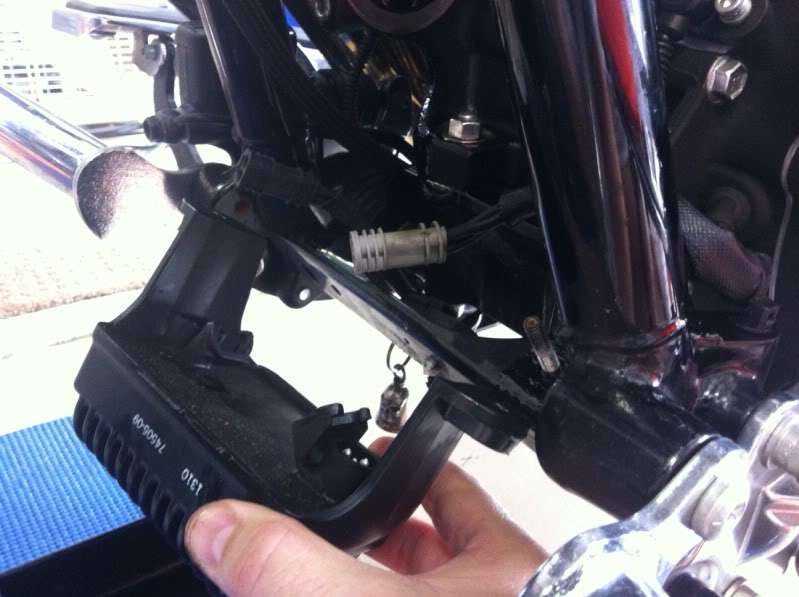
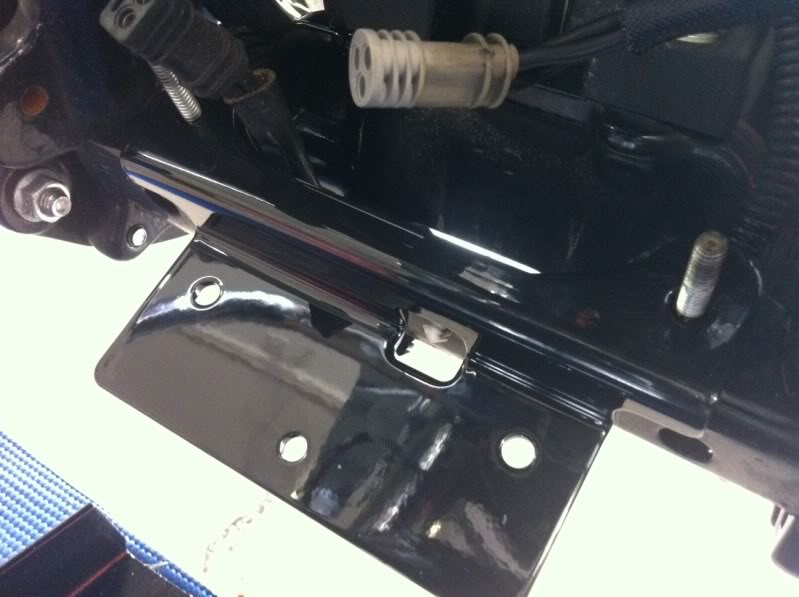
Place Oil Cool Support Bracket on to Voltage Regulator mounts
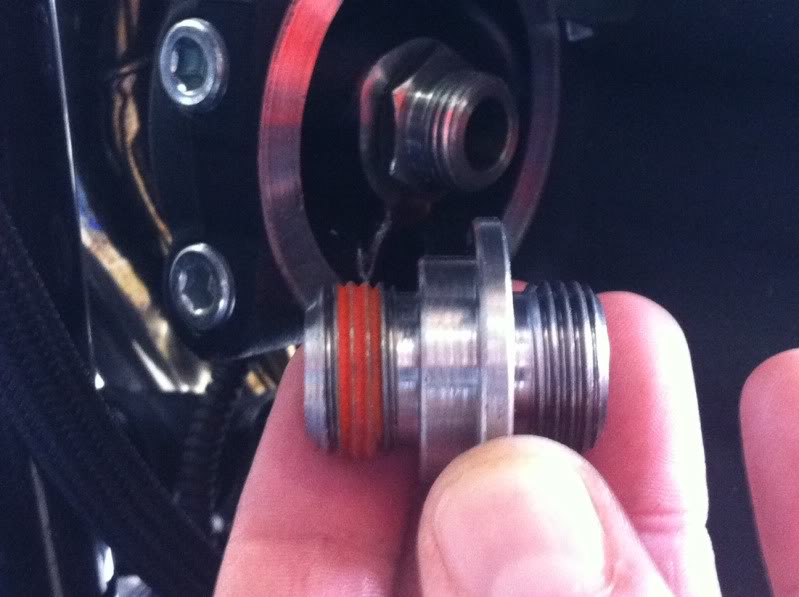
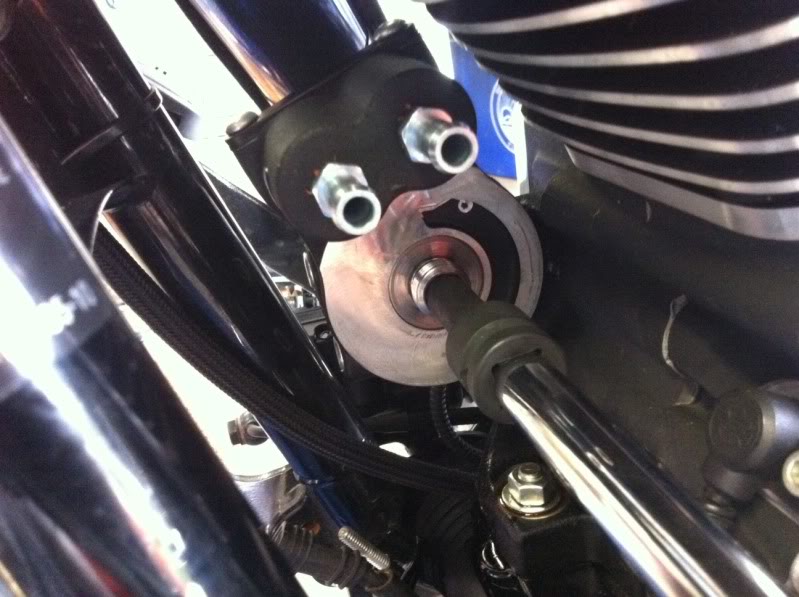
Remove Oil Filter threaded bolt. You'll be replacing this in a later step
Replacement piece shown
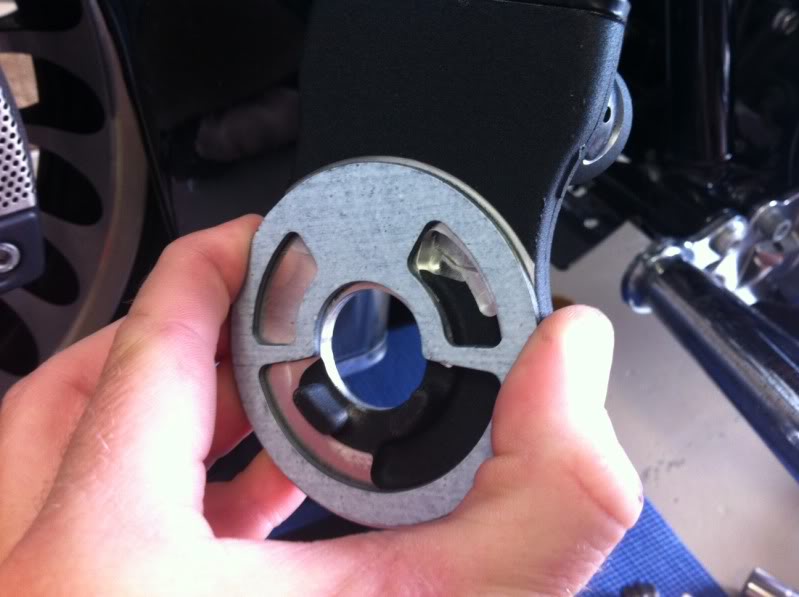
Place supplied gasket onto back of Oil Cooler Adapter
Place Oil Cooler bracket onto engine. It will only fit into place one way. Thread new Oil Filter threaded bolt into place. Allen key opening outwards

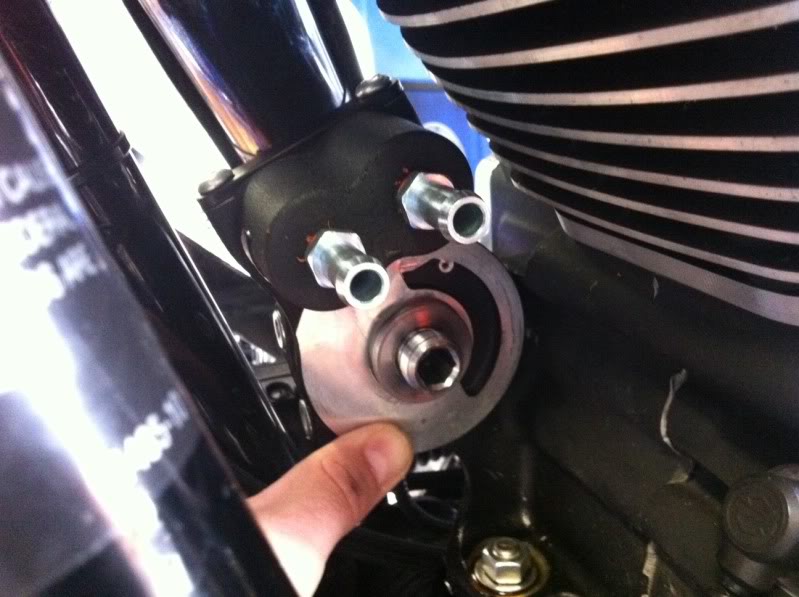
Use the 7/16" Allen key to tighten bolt
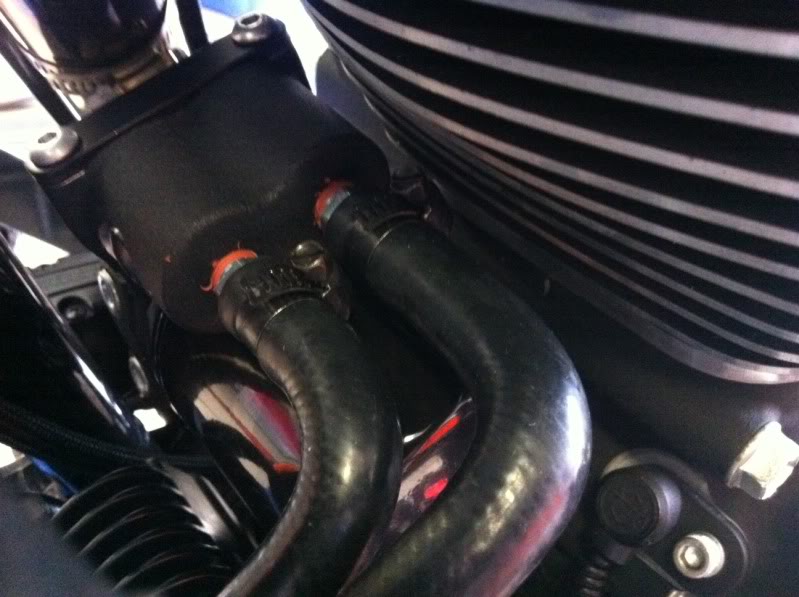
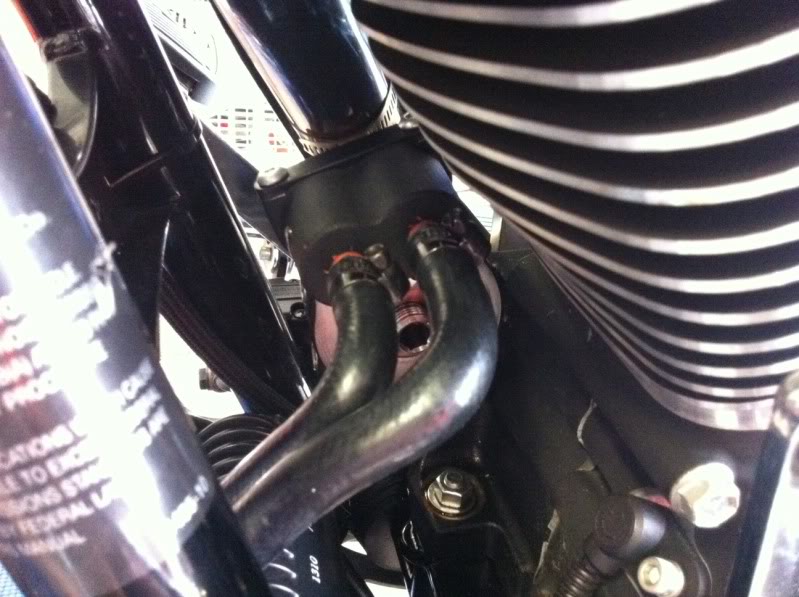
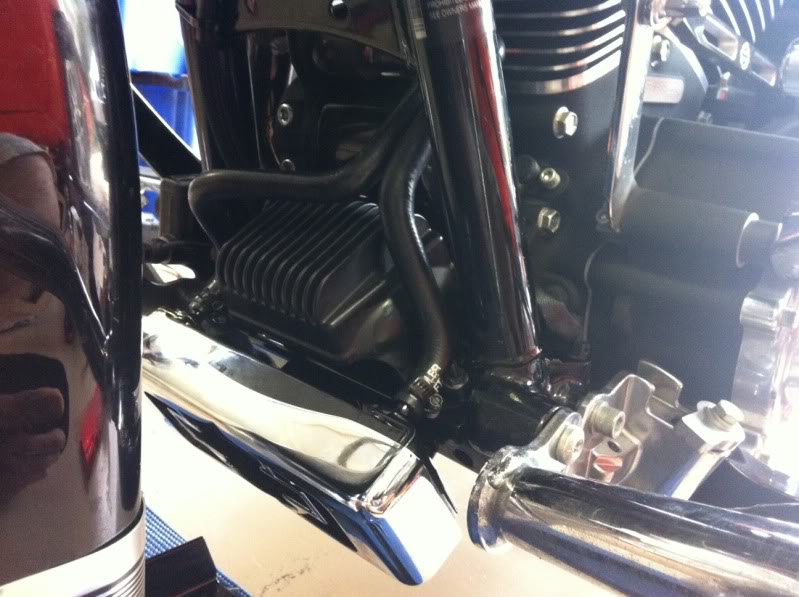
Place Oil Cooler Lines onto Oil Cooler and the Oil Cooler onto the support Bracket. DO NOT secure Oil Cooler at this time.

Reinstall the Voltage Regulator. A good time to add some Dielectric Grease to the plugs
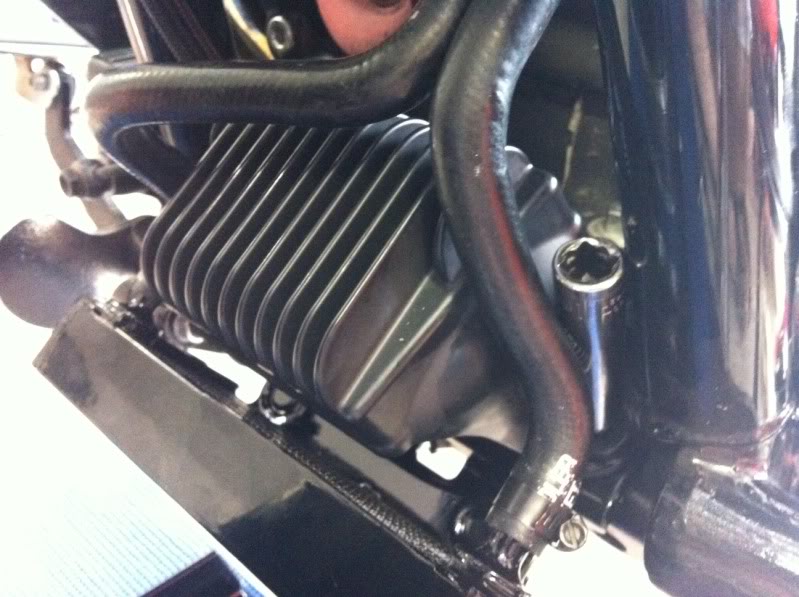
Run Oil Cooler Supply lines to the Oil Cooler Adapter. Once the Oil Cooler lines have been run, tighten hose clamps.
Don't forget to install your oil filter
Slide your Chrome Cover (if you choose to use it) over the Oil Coole and now secure the Oil Cooler to the bracket with the 3 supplied washer and nuts below.
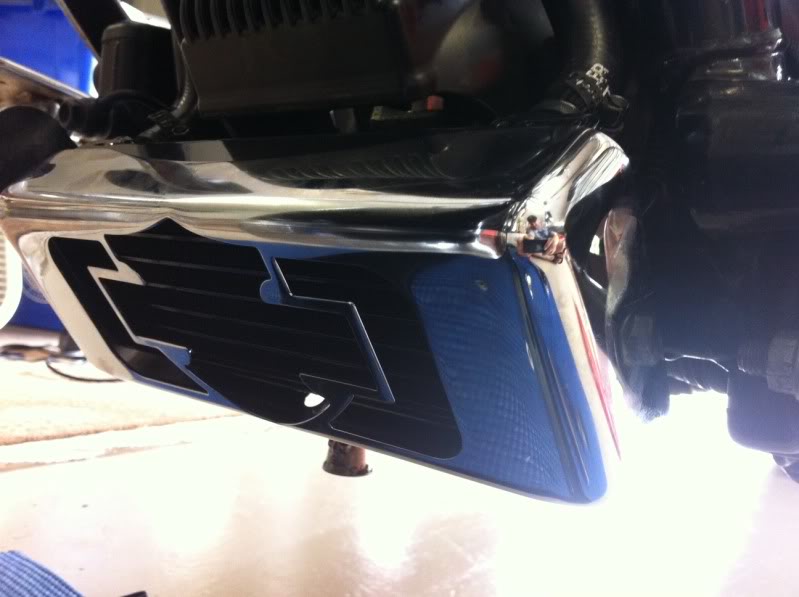
Secure any loose ends and you're complete
***Special Tools***
I did need to purchase this 7/16" Allen Key from NAPA. Just under $7. They didn't sell this part separately but opened a kit and removed just this socket for me. They said they'll order the one off piece and have a full kit again. Needless to say, the folks at NAPA were very helpful
Begin
After removing the oil and oli filter you are here!
Remove the Voltage Regulator
Place Oil Cool Support Bracket on to Voltage Regulator mounts
Remove Oil Filter threaded bolt. You'll be replacing this in a later step
Replacement piece shown
Place supplied gasket onto back of Oil Cooler Adapter
Place Oil Cooler bracket onto engine. It will only fit into place one way. Thread new Oil Filter threaded bolt into place. Allen key opening outwards
Use the 7/16" Allen key to tighten bolt
Place Oil Cooler Lines onto Oil Cooler and the Oil Cooler onto the support Bracket. DO NOT secure Oil Cooler at this time.
Reinstall the Voltage Regulator. A good time to add some Dielectric Grease to the plugs
Run Oil Cooler Supply lines to the Oil Cooler Adapter. Once the Oil Cooler lines have been run, tighten hose clamps.
Don't forget to install your oil filter
Slide your Chrome Cover (if you choose to use it) over the Oil Coole and now secure the Oil Cooler to the bracket with the 3 supplied washer and nuts below.
Secure any loose ends and you're complete
The following users liked this post:
_LostSoul_ (03-03-2016)
#2
10-17-2011, 04:23 PM
Stellar HDF Member
#3
10-17-2011, 04:34 PM
Road Master
#4
10-17-2011, 04:59 PM
Ultimate HDF Member
Hey I have a question. With the oil cooler that close
to the road and the front tire, do you supose that the
front tire could or would chunk rocks or gravel into the
cooler and screw it up, or fill it full of mud and render it
useless if one lives, oh say two or three miles down a
dirt road? I need one and I want a harley oil cooler,
but I don't want to buy more than one.
#5
10-17-2011, 05:04 PM

Just ordered one today, thanks for the heads up on the 7/16" allen key. I'll get one and have it ready for the install. It looks like a strait forward installation but it still nice to see pics to get a better idea of what wil be needed to get it done correctly. Any hiccups at all, anything that might help.
#6
10-17-2011, 05:54 PM
#7
10-17-2011, 06:40 PM
Extreme HDF Member
One thing that I didn't see. The new gasket that goes behind the new adapter has a paper over the sticky back side of the gasket that one removes to stick the gasket in place.
I have installed one on my 07 FXSTC five years ago. Never had to even clean the unit yet. Same for the 10 Ultra with 18K on the clock. I think that if riding through muddy areas then It may need attention. But it is not that vulnerable.
I have installed one on my 07 FXSTC five years ago. Never had to even clean the unit yet. Same for the 10 Ultra with 18K on the clock. I think that if riding through muddy areas then It may need attention. But it is not that vulnerable.
Trending Topics
#8
10-17-2011, 06:56 PM
Hey I have a question. With the oil cooler that close
to the road and the front tire, do you supose that the
front tire could or would chunk rocks or gravel into the
cooler and screw it up, or fill it full of mud and render it
useless if one lives, oh say two or three miles down a
dirt road? I need one and I want a harley oil cooler,
but I don't want to buy more than one.
to the road and the front tire, do you supose that the
front tire could or would chunk rocks or gravel into the
cooler and screw it up, or fill it full of mud and render it
useless if one lives, oh say two or three miles down a
dirt road? I need one and I want a harley oil cooler,
but I don't want to buy more than one.
#9
10-17-2011, 08:36 PM
Now that you posted this I was so paranoid that the gasket was going to leak I just went out to the garage and tore the whole damn thing down. Drained all the new oil, removed the filter then removed the adapter to find a gasket with no removal paper. It's not a soft rubber like a derby cover gaskey, but more like a hard rubber you would find on the oil filter.
Anyways, now that every thing is covered in oil, again, I'll put it all back together tomorrow. At least I'll feel better that I didn't miss a step. Maybe its a new type gasket they're using, but I wasn't able to peel anything off....