
Garage Door Opener Mod. Done - with pics.
#1
 03-21-2012, 08:46 PM

Yeah, I know - Another garage door opener mod thread... 
I really like this mod and had it on the Dyna. It just works for me and it is was inexpensive and fun. I know several put their openers in the windshield pockets and carry them around on their key chains, but I just wanted this.
As mentioned, I did it on the Dyna shortly after getting it and researching.
See those pictures here if you want -
Here is a single post out of a larger thread for my installation -
https://www.hdforums.com/forum/8055186-post102.html
Here is the larger thread -
https://www.hdforums.com/forum/touri...itch-pics.html
2007 Street Glide.
This is new to me. I've had it about four weeks now.
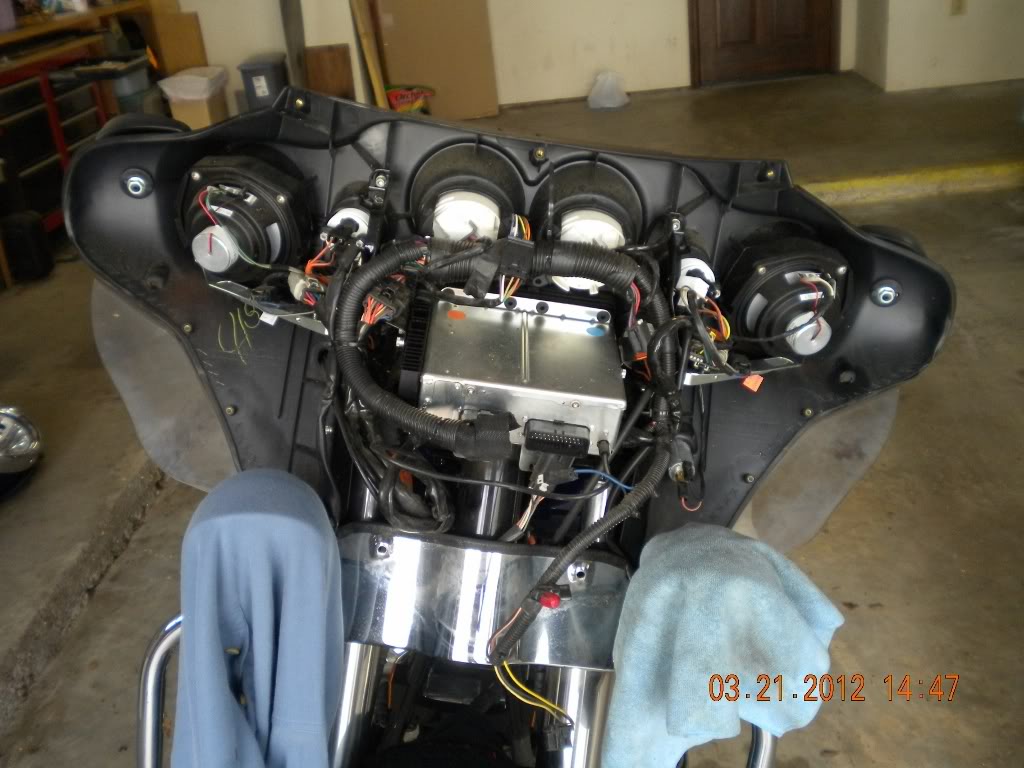
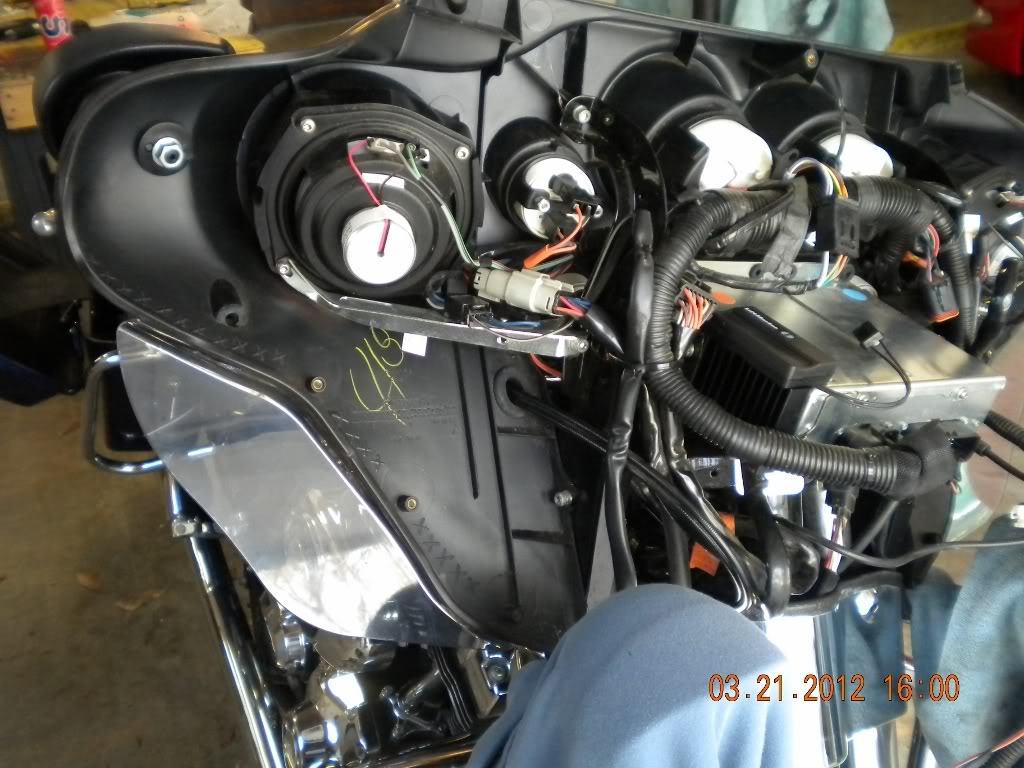
Front Fairing removed -
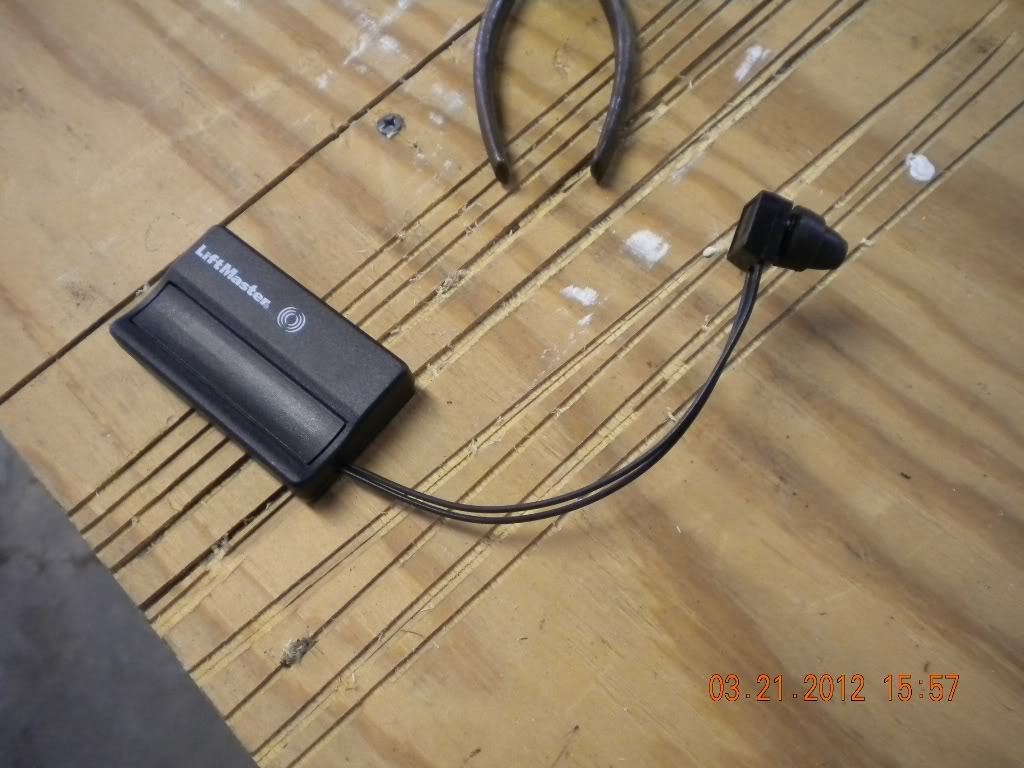
Liftmaster opener -

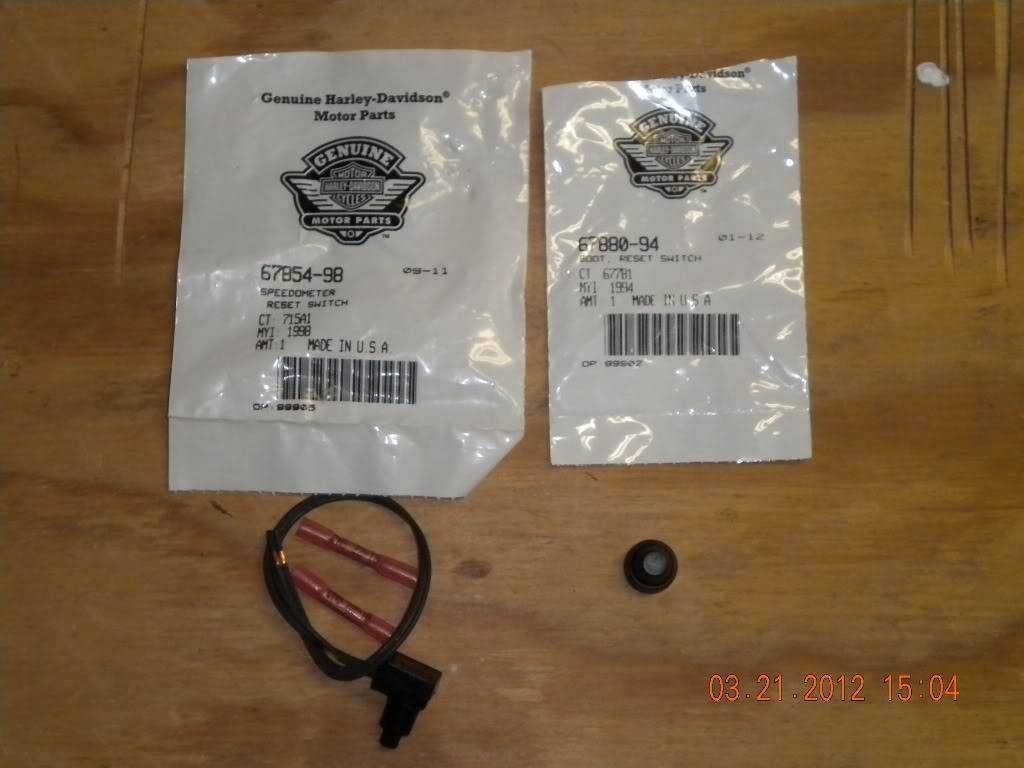
Harley Odometer switch and rubber boot -
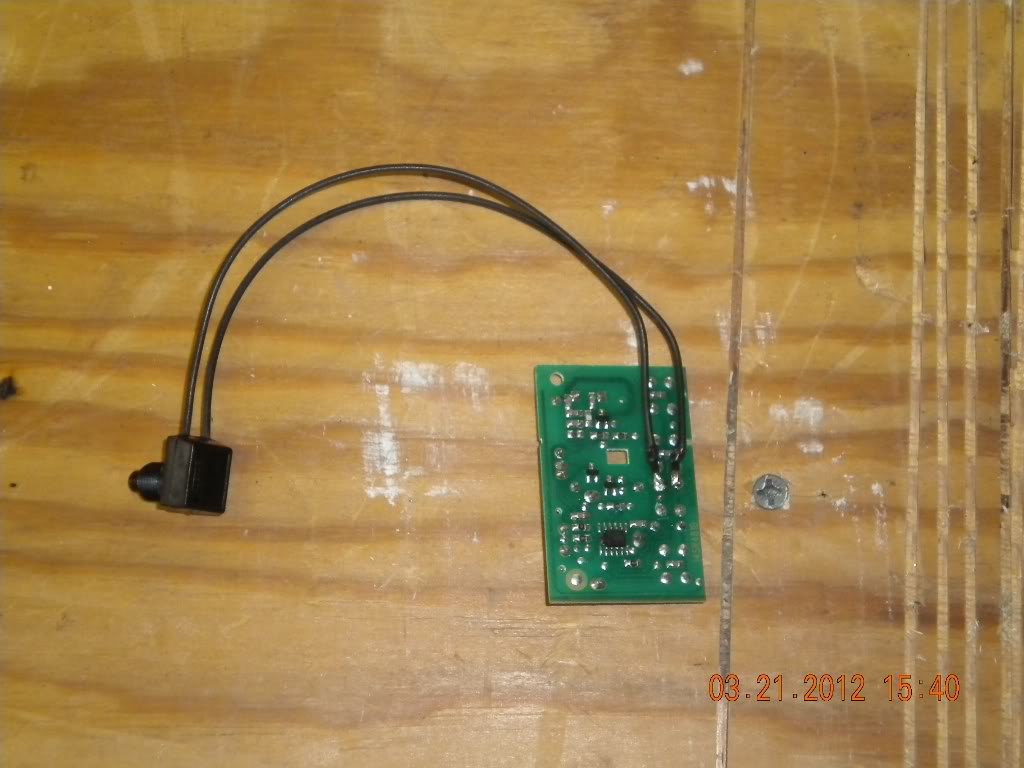
Identify the operational legs on the circuit board on the back side of the switch.
Solder one wire of the odometer switch to each leg of the switch.
Check for proper operation.
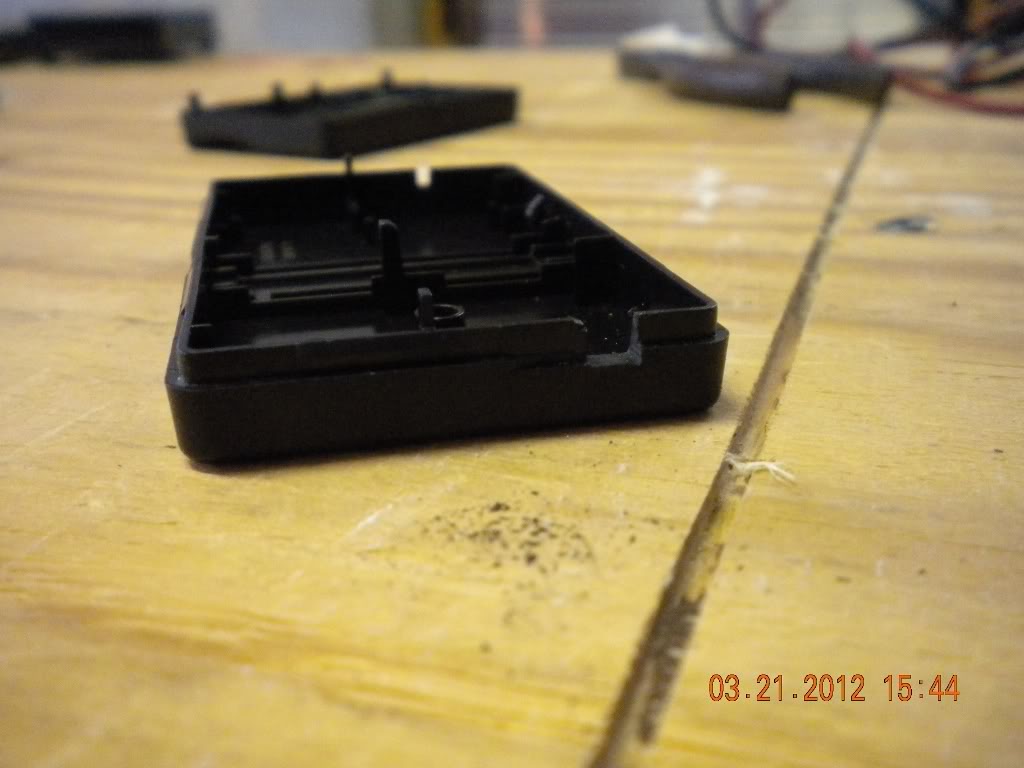
I filed-out a bit of the opener housing for the wires to pass through.
The opener reassembled and tested - numerous times.
This particular opener was tricker than the last one I did which was a Sears Craftsman model.
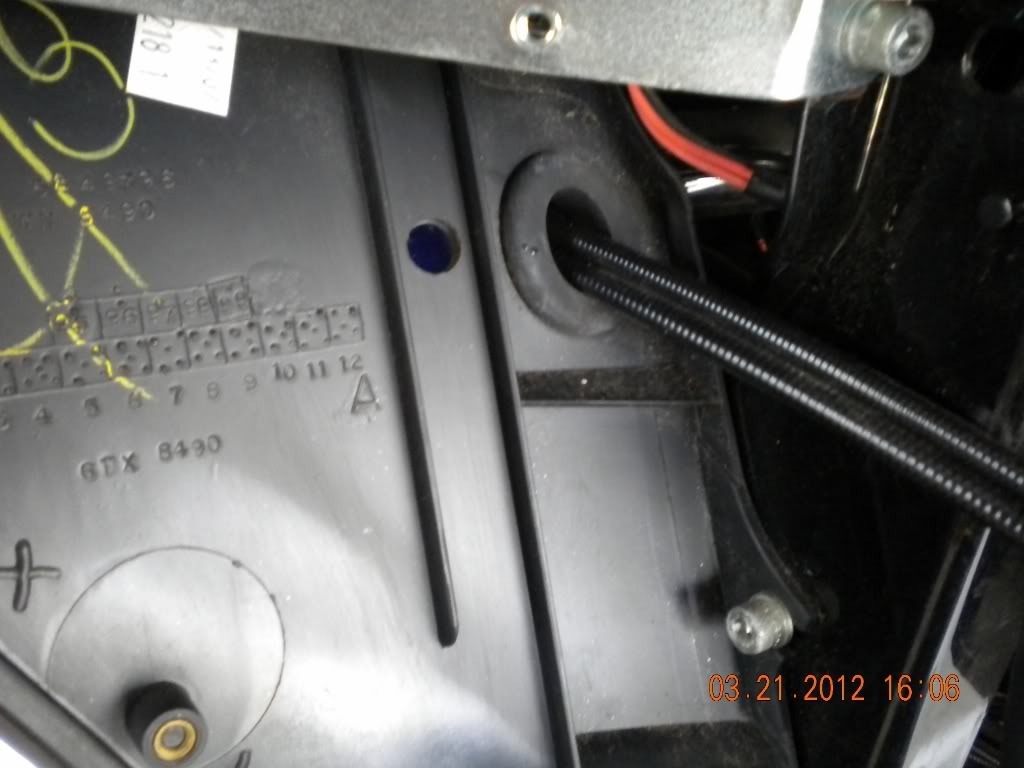
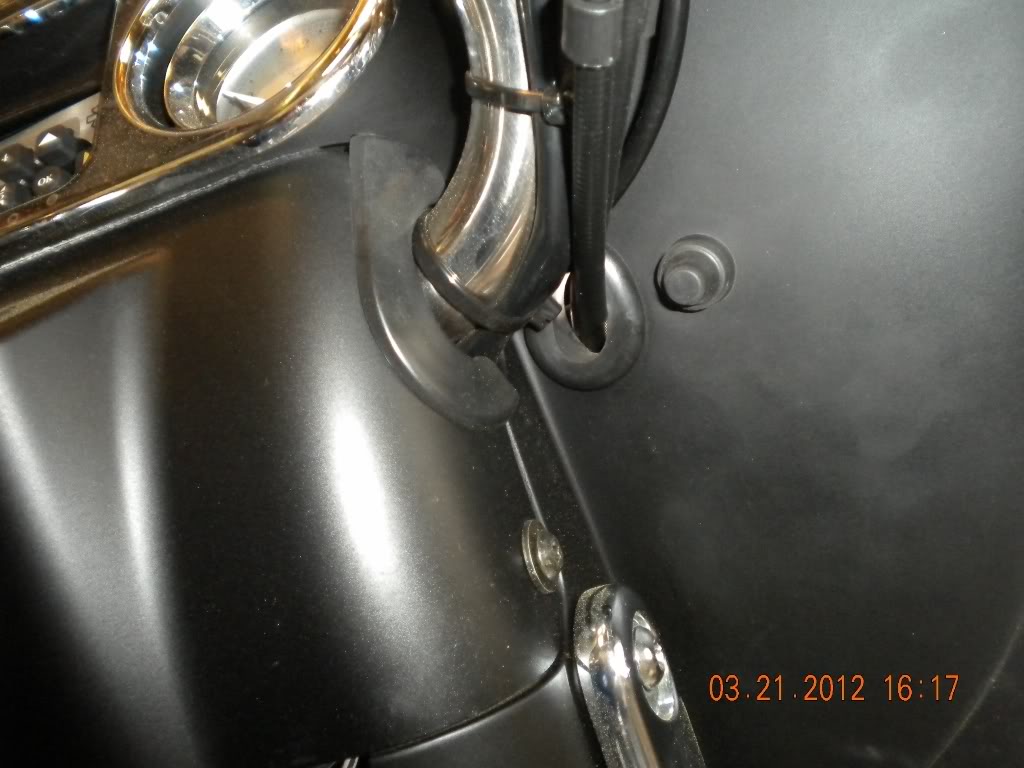
I drilled a hole in the fairing between the two stiffeners adjacent to the hole where the throttle cables pass through.
The switch is installed and the opener is stuck with double-sidded sticky tape.
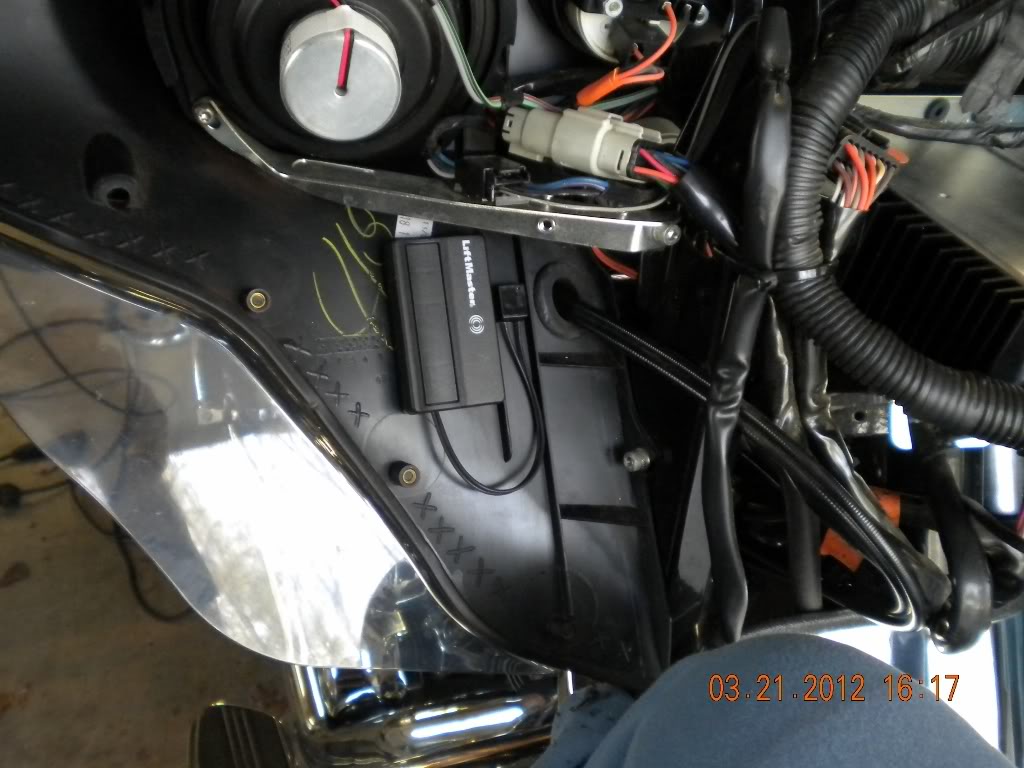
The switch is not really visable, but easy enough to reach with my right hand.
I opted for this location as my second choice.
Initially I wanted it to mirror the odometer reset switch on the front of the dash.
The special relief that the odometer switch is mounted in, would in my opinion, make the added switch stand out and not appear balanced.
So, I went with hiding it a bit.
I really like this mod and had it on the Dyna. It just works for me and it is was inexpensive and fun. I know several put their openers in the windshield pockets and carry them around on their key chains, but I just wanted this.
As mentioned, I did it on the Dyna shortly after getting it and researching.
See those pictures here if you want -
Here is a single post out of a larger thread for my installation -
https://www.hdforums.com/forum/8055186-post102.html
Here is the larger thread -
https://www.hdforums.com/forum/touri...itch-pics.html
2007 Street Glide.
This is new to me. I've had it about four weeks now.
Front Fairing removed -
Liftmaster opener -
Harley Odometer switch and rubber boot -
Identify the operational legs on the circuit board on the back side of the switch.
Solder one wire of the odometer switch to each leg of the switch.
Check for proper operation.
I filed-out a bit of the opener housing for the wires to pass through.
The opener reassembled and tested - numerous times.
This particular opener was tricker than the last one I did which was a Sears Craftsman model.
I drilled a hole in the fairing between the two stiffeners adjacent to the hole where the throttle cables pass through.
The switch is installed and the opener is stuck with double-sidded sticky tape.
The switch is not really visable, but easy enough to reach with my right hand.
I opted for this location as my second choice.
Initially I wanted it to mirror the odometer reset switch on the front of the dash.
The special relief that the odometer switch is mounted in, would in my opinion, make the added switch stand out and not appear balanced.
So, I went with hiding it a bit.
Last edited by Stickman81; 03-27-2012 at 03:38 PM.
The following 2 users liked this post by Stickman81:
Michael P. Rizzo (08-03-2016),
Sparkybob477 (04-15-2019)
#3
03-22-2012, 08:15 AM
Nice. I'm working on the same setup except I'm going to switch the power and solder a jumper across the switch to make it normally closed. I'm worried the constant power from the bike will burn up the opener. this way it only receives power to operate for a second and then it's off. Let us know how it works out.
#4
03-22-2012, 08:47 AM
Ultimate HDF Member


#5
03-22-2012, 08:31 PM
#6
03-22-2012, 08:34 PM
I can barely solder, never seem to have too much luck.
I tinned the copper wires from the switch and heated that before touching it to the circuit board. Perhaps something to hold the switch wires while you are soldering to prevent burning your fingers.
#7
03-22-2012, 08:40 PM

Ultimate HDF Member
Trending Topics

#9
03-23-2012, 06:32 AM


