
Auxiliary Passing Lamp control mod for road king custom/classic
#1
 01-21-2013, 11:23 AM

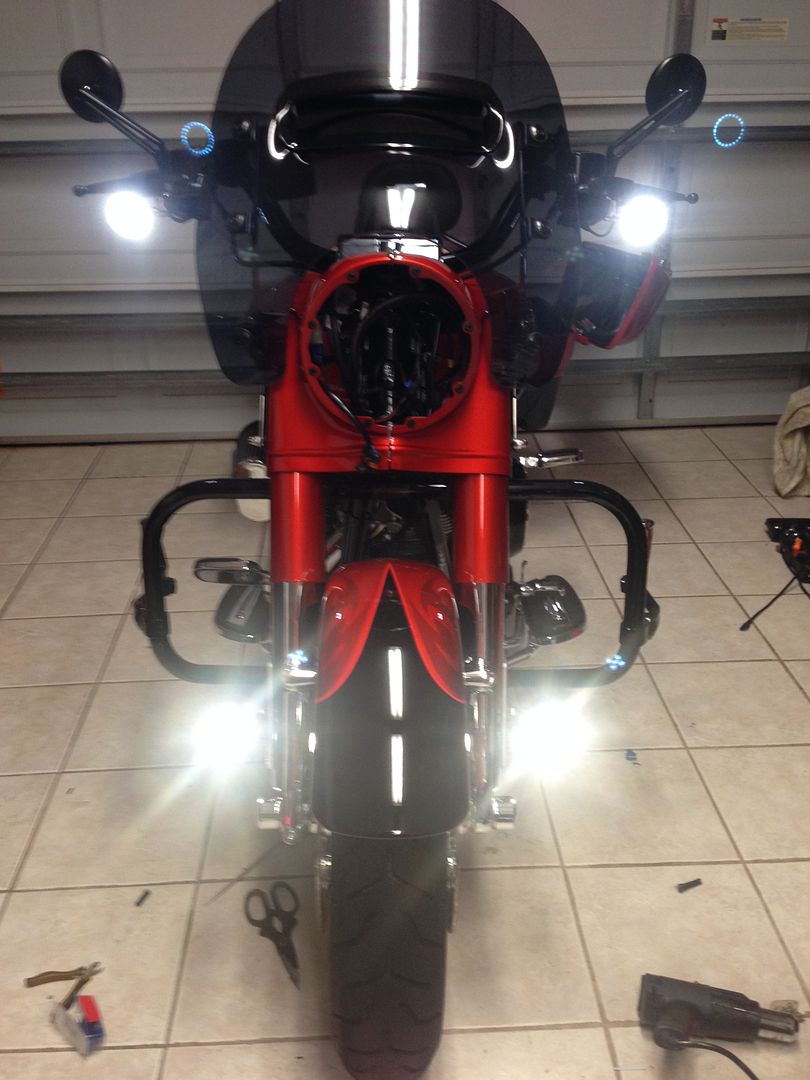
So I did a lot of research on doing this auxiliary passing lamp mod and all of the information I could find on this board was for touring bikes with fairings. Everyone talks about taking the acc switch out...etc, etc, etc.
Well, as we all know the road king classic and custom don't have that fairing or the acc switch panel. So I decided to post this for anyone who wants to do this mod and is a little confused looking at all the diagrams for fairing bikes....
Step 1 :
Disconnect battery and pull maxi-fuse. Remove headlight and headlight mounting bracket. Headlight should be held in with 3 small phillips screws, and the mounting bracket should have 7 or 8 phillips holding it in (mine had 7).
Step 2:
Unplug headlight and remove everything to a save location. You will notice 3 wires going to the back of the headlight. Yellow, black and white. From what I found, the yellow is the low beams, white is high, and black is ground.

Step 3:
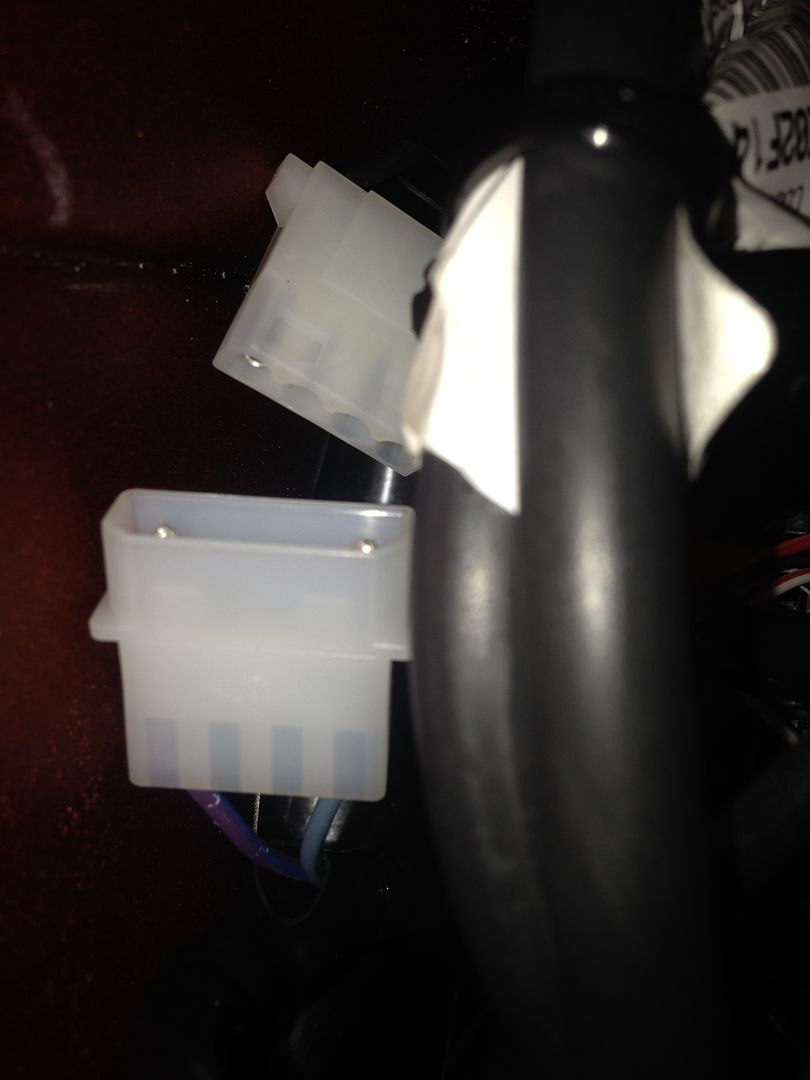
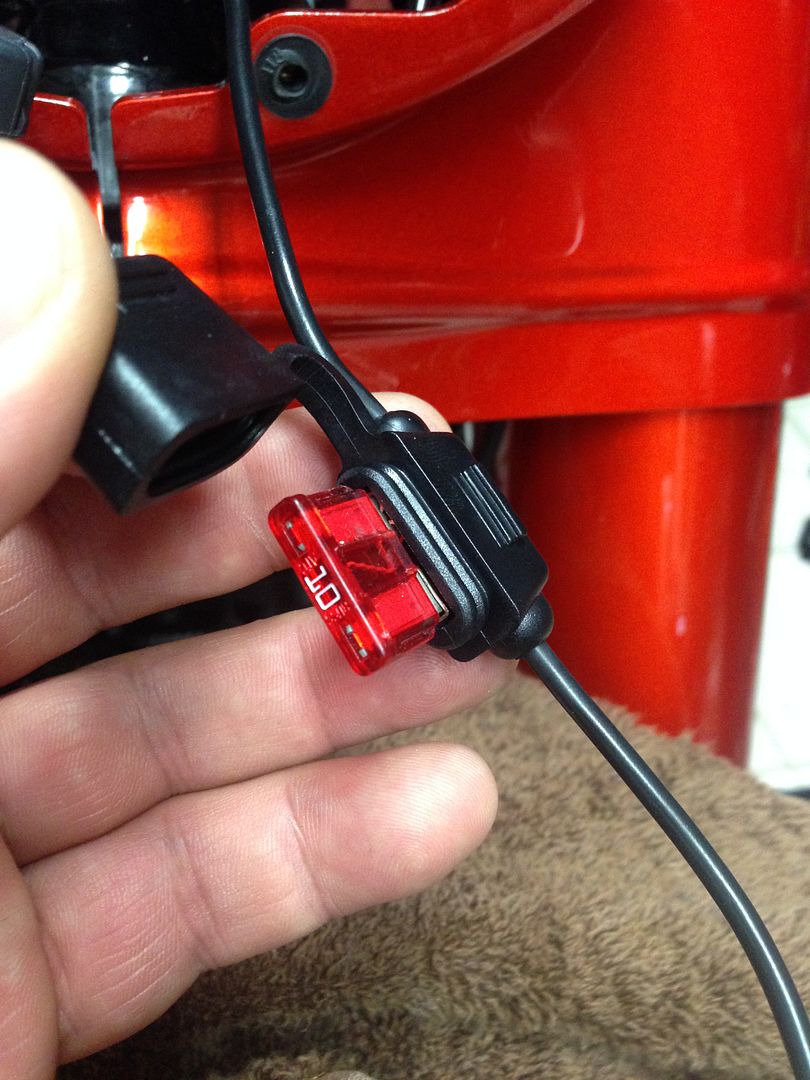
Follow the wires coming out of the headlight socket down into the wire harness, you will find two wires with 90� connectors of them taped to the harness. One is black, and one is orange / white. On my custom, the orange / white connector had a red cap on it. Go ahead and free these wires up from the harness. Should just be held on by a small piece of tape.
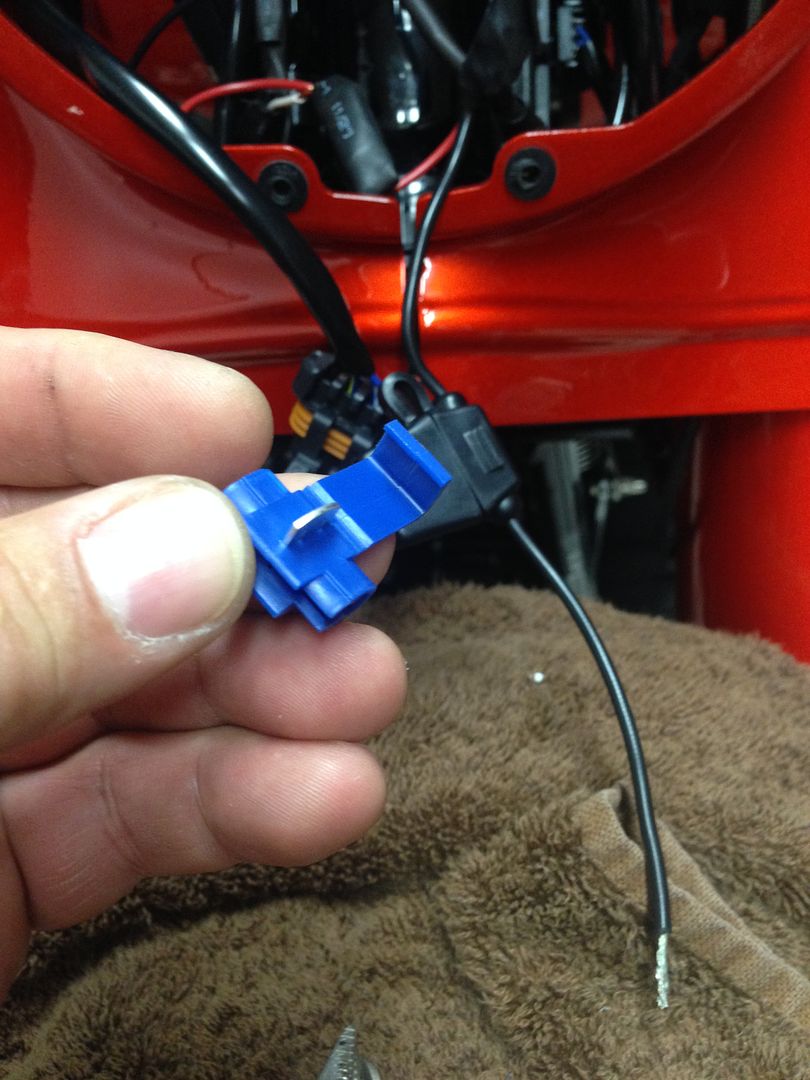
(The pic below is only showing the black wire, I had already connected the orange / white wire to the yellow)

Step 4:
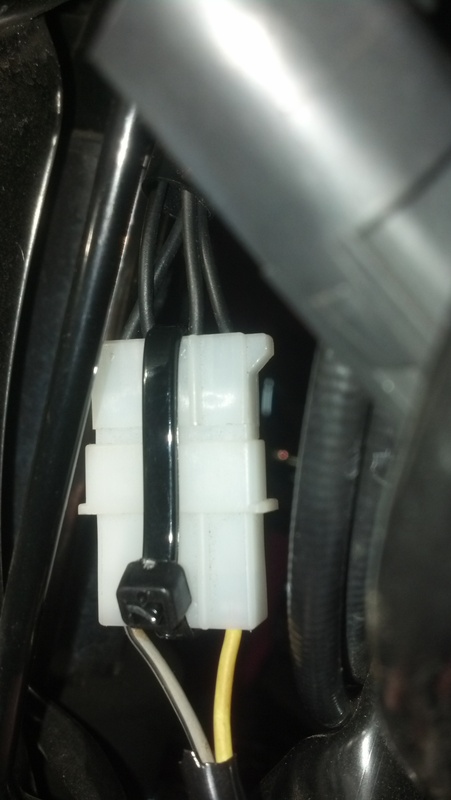
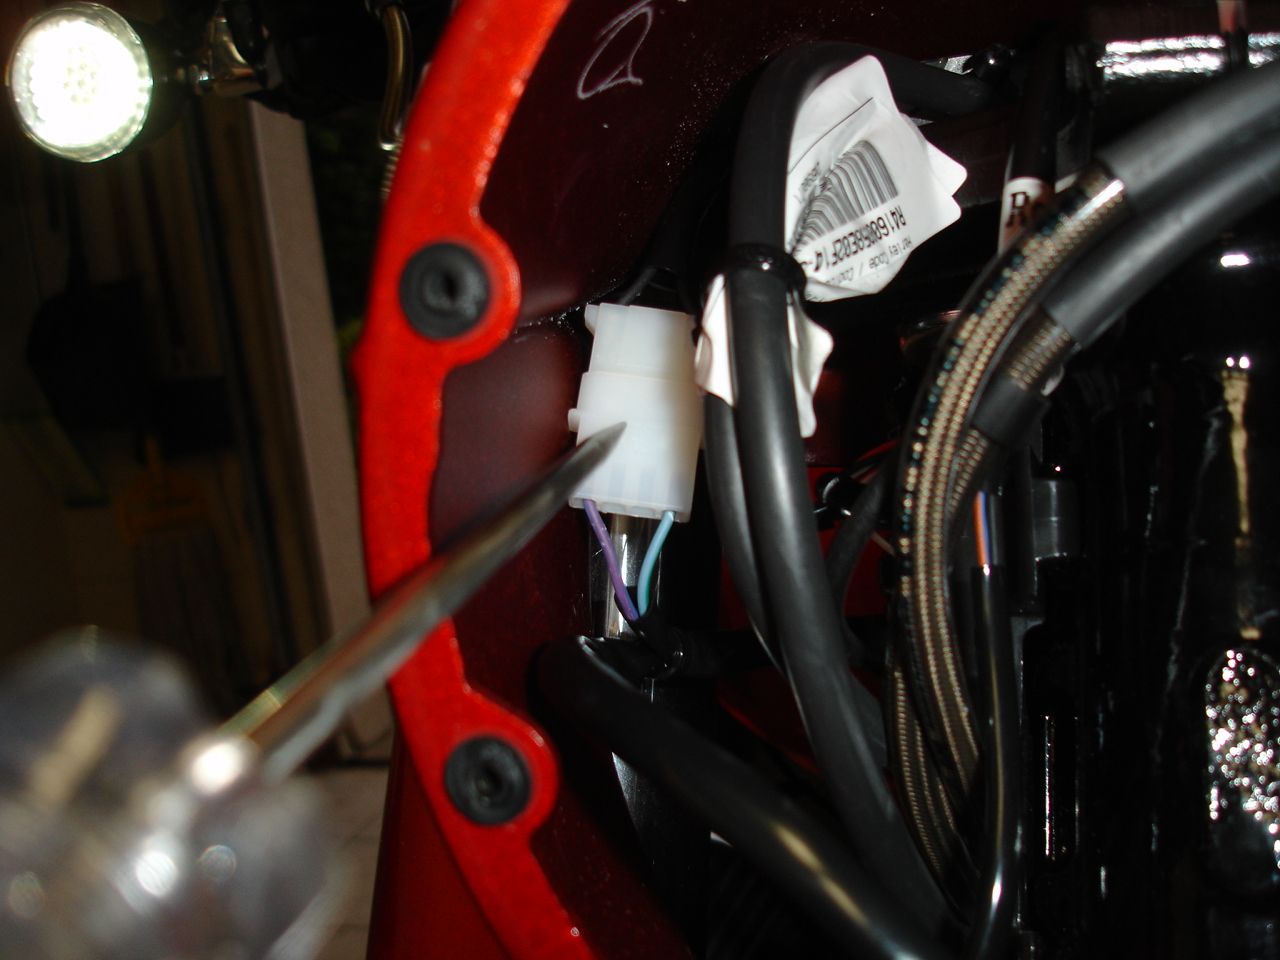
Locate the white connector for your auxiliary lights. The aux. light feed is a grey / black wire. Find the connector that has a grey/black wire going into it, and you'll see a yellow wire going into that same connector. Their should only be 2 wires going into this connector (see pic)

Step 5:
Unplug the white connector and remove the pins from the socket. Use a paper clip to unclip them. Be SURE you take notice of what position each wire is in. It may vary from bike to bike, so just take a quick picture before you disassemble anything. Then remove the black wire conduit from these two wires.
Step 6:
Trace the yellow wire back to the harness that you just disconnected from the white connector. Find a suitable area and cut the wire, go ahead and cap the part that is going back to the harness, you won't be using that anymore. So what you should be left with is a piece of yellow wire, with a male connection on one side (the one you removed from the white connector), and the cut end.
Step 7:
Crimp, or solder a male flat spade connector to the end of this yellow wire. You will be connecting this yellow wire to the orange / white wire that was taped to the harness that you set free a few steps ago. Go ahead and crimp that sucker on, then connect the yellow wire to the 90� female connector that is already on the orange / white wire.

Step 8:
Re-install the grey/black wire and yellow wire into the white connector, and plug that connector back in. Mine had a zip tie holding them together, I replaced it with another zip tie.
A little explanation of what you've doing with this mod:
Federal regulations prohibit the use of passing lamps in conjuction with hi-beam lights, even on a motorcycle. So MoCo wires the passing lamps in series with the low beam circuit. Therefore the passing lamps only get power when the low beam has juice.
Now, almost all touring bikes are wired with the same wiring harness as the next, but they don't use all the connections. The orange/white and black wires you found on the harness that weren't being used are normally for the fender running light. That light is supposed to be on at all times. So what you've done is instead of the low-beam feeding your passing lamps, it is now the feed that is supposed to go to the fender running light.
Just a disclaimer: You ARE cutting into your wiring with this mod!!! Serious physical injury or death may occur if this is not performed correctly. Perform this modification at your own risk.
Well, as we all know the road king classic and custom don't have that fairing or the acc switch panel. So I decided to post this for anyone who wants to do this mod and is a little confused looking at all the diagrams for fairing bikes....
Step 1 :
Disconnect battery and pull maxi-fuse. Remove headlight and headlight mounting bracket. Headlight should be held in with 3 small phillips screws, and the mounting bracket should have 7 or 8 phillips holding it in (mine had 7).
Step 2:
Unplug headlight and remove everything to a save location. You will notice 3 wires going to the back of the headlight. Yellow, black and white. From what I found, the yellow is the low beams, white is high, and black is ground.
Step 3:
Follow the wires coming out of the headlight socket down into the wire harness, you will find two wires with 90� connectors of them taped to the harness. One is black, and one is orange / white. On my custom, the orange / white connector had a red cap on it. Go ahead and free these wires up from the harness. Should just be held on by a small piece of tape.
(The pic below is only showing the black wire, I had already connected the orange / white wire to the yellow)
Step 4:
Locate the white connector for your auxiliary lights. The aux. light feed is a grey / black wire. Find the connector that has a grey/black wire going into it, and you'll see a yellow wire going into that same connector. Their should only be 2 wires going into this connector (see pic)
Step 5:
Unplug the white connector and remove the pins from the socket. Use a paper clip to unclip them. Be SURE you take notice of what position each wire is in. It may vary from bike to bike, so just take a quick picture before you disassemble anything. Then remove the black wire conduit from these two wires.
Step 6:
Trace the yellow wire back to the harness that you just disconnected from the white connector. Find a suitable area and cut the wire, go ahead and cap the part that is going back to the harness, you won't be using that anymore. So what you should be left with is a piece of yellow wire, with a male connection on one side (the one you removed from the white connector), and the cut end.
Step 7:
Crimp, or solder a male flat spade connector to the end of this yellow wire. You will be connecting this yellow wire to the orange / white wire that was taped to the harness that you set free a few steps ago. Go ahead and crimp that sucker on, then connect the yellow wire to the 90� female connector that is already on the orange / white wire.
Step 8:
Re-install the grey/black wire and yellow wire into the white connector, and plug that connector back in. Mine had a zip tie holding them together, I replaced it with another zip tie.
A little explanation of what you've doing with this mod:
Federal regulations prohibit the use of passing lamps in conjuction with hi-beam lights, even on a motorcycle. So MoCo wires the passing lamps in series with the low beam circuit. Therefore the passing lamps only get power when the low beam has juice.
Now, almost all touring bikes are wired with the same wiring harness as the next, but they don't use all the connections. The orange/white and black wires you found on the harness that weren't being used are normally for the fender running light. That light is supposed to be on at all times. So what you've done is instead of the low-beam feeding your passing lamps, it is now the feed that is supposed to go to the fender running light.
Just a disclaimer: You ARE cutting into your wiring with this mod!!! Serious physical injury or death may occur if this is not performed correctly. Perform this modification at your own risk.
#2
09-06-2014, 04:15 PM
Outstanding HDF Member
2014 Road King CVO
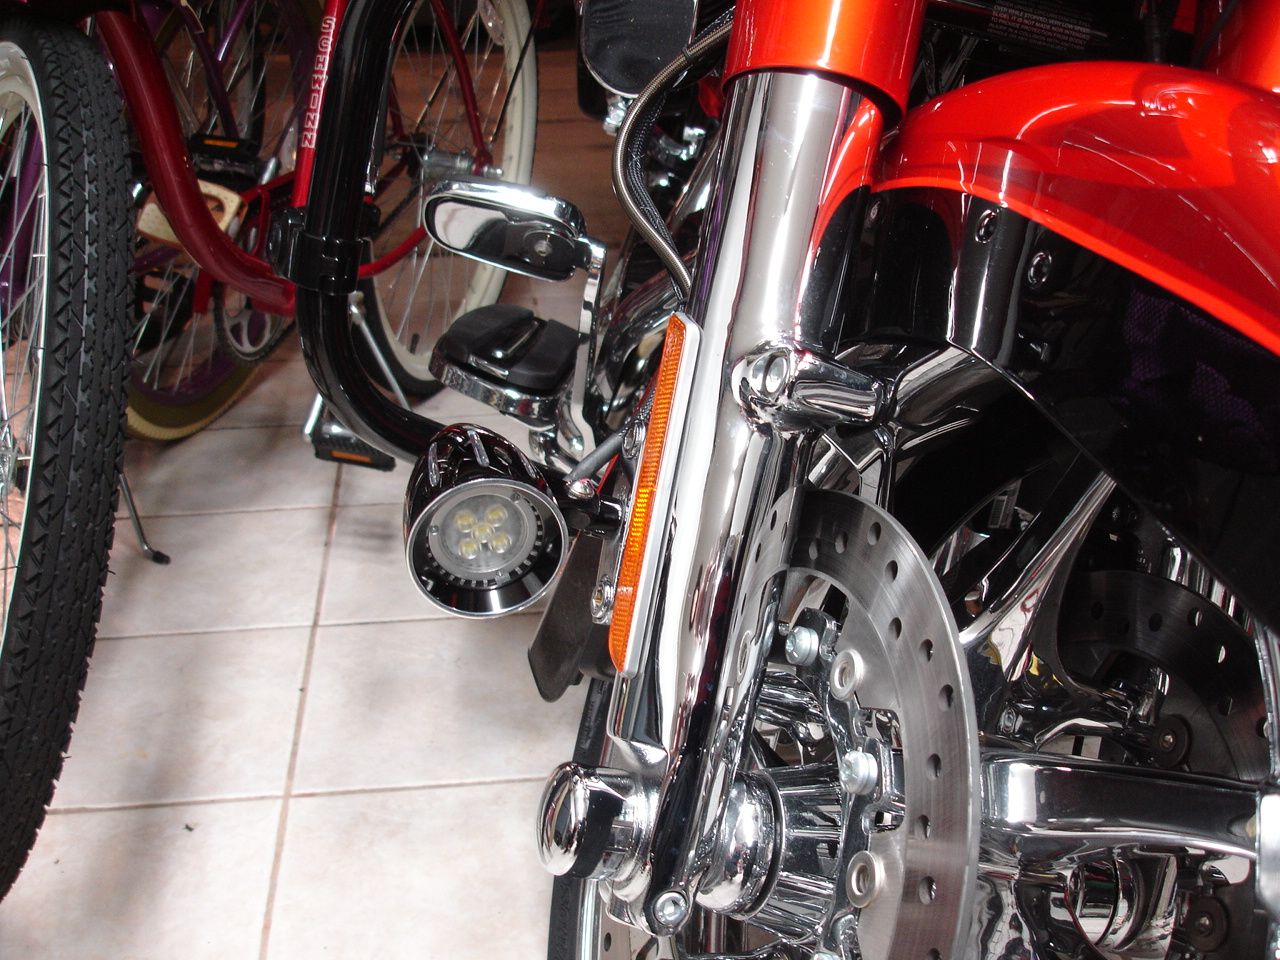
Installed caliper mounted fog/aux LED lights. Trying to connect them to the right aux light switch. The switch is wired but where is the connector for me to hook up the wires from the lights???
I can see where the switch wires go into a plug...but can't seem to be able to follow that plug to find the end of it....
I removed the headlight to make it easier... ...and I can't find threads on this either... Help!
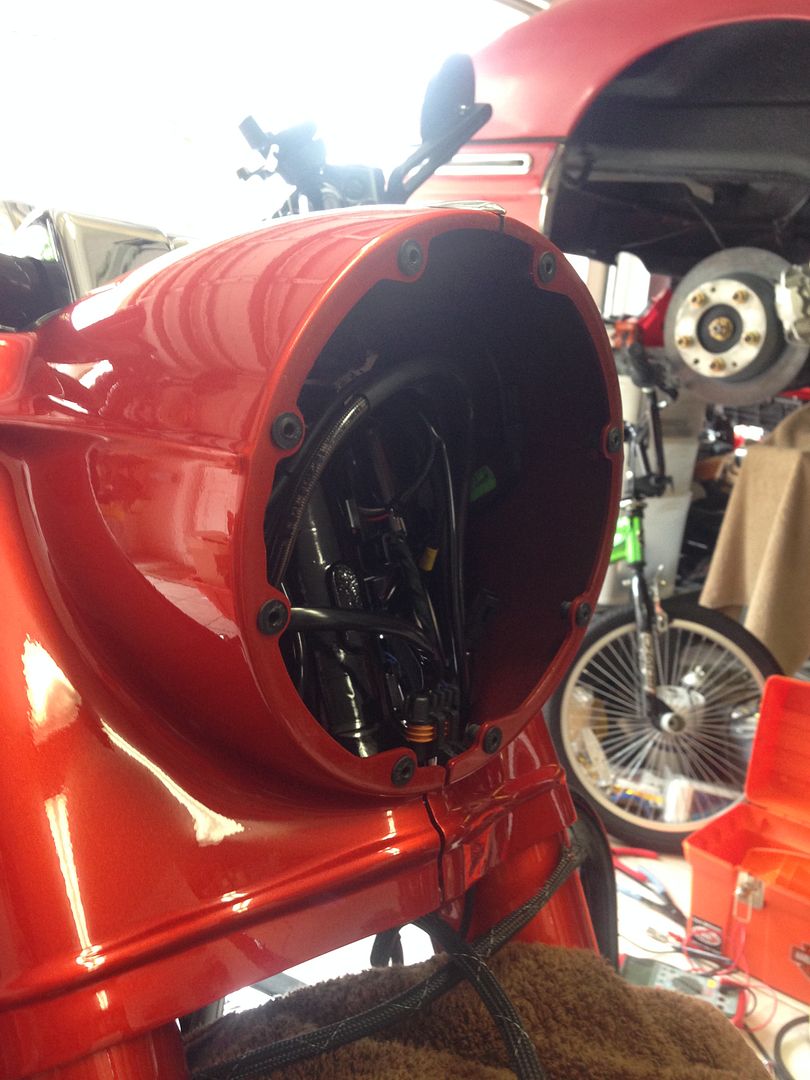
Here is the plug to the switch... I disconnected the bottom portion... I thought that I would find two empty connectors inside the headlight bucket to connect the lights to...but no such luck...
Before I tear down more of the bike...looking for help from someone that has done this in a newer RK. In the RGC those where clearly visible when you removed the fairing...
Just in case, yes, Workshop Manual ordered when I bought the bike...Still waiting for it to arrive.
Installed caliper mounted fog/aux LED lights. Trying to connect them to the right aux light switch. The switch is wired but where is the connector for me to hook up the wires from the lights???
I can see where the switch wires go into a plug...but can't seem to be able to follow that plug to find the end of it....
I removed the headlight to make it easier... ...and I can't find threads on this either... Help!
Here is the plug to the switch... I disconnected the bottom portion... I thought that I would find two empty connectors inside the headlight bucket to connect the lights to...but no such luck...
Before I tear down more of the bike...looking for help from someone that has done this in a newer RK. In the RGC those where clearly visible when you removed the fairing...
Just in case, yes, Workshop Manual ordered when I bought the bike...Still waiting for it to arrive.
#3
09-06-2014, 04:29 PM

What the OP is doing here is moving the spot light power source from the lighting circuit to the accessory circuit, which already has alot of stuff running on it.
2 x 35w lamps will draw about 6 amps of power on that circuit.
if you pop the fuse you may loose ( depending on model) brake lights and marker lights.
so the owner should take the time to go through the wiring diagram and see what might be affected
2.) soldered joints do not hold up well on motorcycles due to vibration- that is why OEM uses crimps.
Soldered joints may last weeks, months or even years but...
Wachuko, I suggest you look into using a relay for your added lights- the $20 pepboys type fog light kits come with wire, fuse, a relay , switch and rudimentary instructions.
You can use your existing switch to trigger the relay.
This keeps the added load of the new lights separate from the stock wiring harness.
pull power from the battery ( use a fuse) , run your wire under the tank into the nacelle and it should be pretty slick- and easy and safe
mike
Last edited by mkguitar; 09-06-2014 at 04:34 PM.
#4
09-06-2014, 04:34 PM
Outstanding HDF Member
What the OP is doing here is moving the spot light power source from the lighting circuit to the accessory circuit, which already has alot of stuff running on it.
2 x 35w lamps will draw about 6 amps of power on that circuit.
if you pop the fuse you may loose ( depending on model) brake lights and marker lights.
so the owner should take the time to go through the wiring diagram and see what might be affected
2.) soldered joints do not hold up well on motorcycles due to vibration- that is why OEM uses crimps.
Soldered joints may last weeks, months or even years but...
mike
My question was: where is the factory accessory plug for the RK passing/driving lamps?? I thought that I would find it right inside the headlight bucket....
And I will be running LEDs..very small load on the wiring...like 7watts in total.
Last edited by wachuko; 09-06-2014 at 04:36 PM.
#5
09-06-2014, 04:53 PM
well you piggy backed on an old thread, and I was responding first to the OP in case someone wants to use that mod for themsleves
if you want to wire to the aux plug:
most models up to 2013 the aux plug is under the seat... I think it is under the left side cover for the 2014.
for the 2013 and earlier the plug often has 4 wires:
ground, run, brake light and aux.
black, orange/red, red/yel, orange are the likely colors used
so you'll have to figure out which pin is hot with your switch and use that...other wise you lights will come on with the brake...
I think on your model they do not include the spot light wiring if that is deleted from the model.
mike
Last edited by mkguitar; 09-06-2014 at 05:06 PM.
#6
09-06-2014, 05:05 PM
Outstanding HDF Member
well you piggy backed on an old thread, and I was responding first to the OP in case someone wants to use that mod for themsleves
if you want to wire to the aux plug:
most models up to 2013 the aux plug is under the seat... I think it is under the left side cover for the 2014.
for the 2013 and earlier the plug often has 4 wires:
ground, run light, brake light and aux.
so you'll have to figure out which pin is hot with your switch and use that...other wise you lights will come on with the brake...
I think on your model they do not include the spot light wiring if that is deleted from the model.
mike
Thank you. I was hoping those connectors were in the headlight bucket. But you are correct, acc plug is under side panel, below fuse box. Wires are easy to identify (purple and green). Arggghhhh, looks like no way to get away with wiring to a factory plug without running wires from front to side panel....
#7
09-06-2014, 05:26 PM
right.
many do use a relay kit.- that saves the aux plug for heated clothes or a led kit up kit or a phone charger or...
for your 7watt load you could try partially adapting the OP's wiring scheme..
but in reality it takes just minutes to pull the tank off and run the wiring the way you'd like.
whatever you do, document it in case you have weird electrical concerns- or for the next owner.
mike
The following users liked this post:
streetglidedean (03-03-2017)
Trending Topics
#8
09-06-2014, 06:00 PM
Outstanding HDF Member
right.
many do use a relay kit.- that saves the aux plug for heated clothes or a led kit up kit or a phone charger or...
for your 7watt load you could try partially adapting the OP's wiring scheme..
but in reality it takes just minutes to pull the tank off and run the wiring the way you'd like.
whatever you do, document it in case you have weird electrical concerns- or for the next owner.
mike
many do use a relay kit.- that saves the aux plug for heated clothes or a led kit up kit or a phone charger or...
for your 7watt load you could try partially adapting the OP's wiring scheme..
but in reality it takes just minutes to pull the tank off and run the wiring the way you'd like.
whatever you do, document it in case you have weird electrical concerns- or for the next owner.
mike
If I look at the solution from Harley... they just provide a wire harness that plugs into the acc plug and gives the wires to tap into... here: Touring Electrical Connection Update Kit-69200722 which is just a plug to the acc outlet... seems redundant when I can just tap into the plug in the photo at the bucket end and accomplish the same...
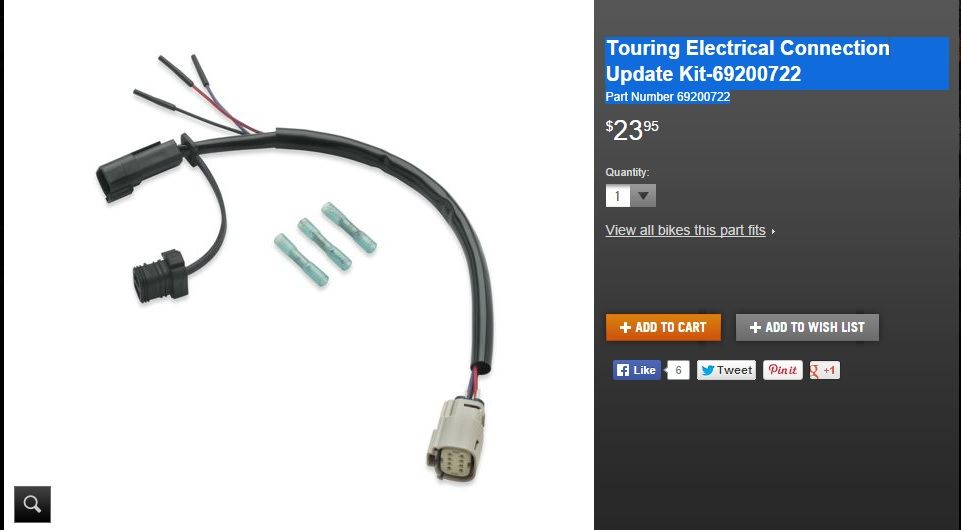
Which is just a plug to the acc outlet... seems redundant when I can just tap into the plug in the photo at the bucket end (same wire that goes to that acc plug on the side panel) and accomplish the same...

#9
09-06-2014, 09:51 PM
Outstanding HDF Member
#10
09-06-2014, 10:12 PM
Ultimate HDF Member
I bought the dang "kit" from Harley. Probably a total waste of money after seeing how easy you guys did the same thing for basically....... free. That being said, I think from a safety standpoint this single mod (and my run/turn/brake mod) is probably the best money I have ever spent on a motorcycle. Thanks for taking the time to post this up!