
Street Glide Ape Install.
#1
 06-23-2014, 12:49 PM


Finally getting around to posting my write up of my ape install. I got a lot of info from Murph's write up (https://www.hdforums.com/forum/touri...-tutorial.html), but it never hurts to add another for members to read through. I tried to get as many pics as I could but forgot to get some and was to frustrated at times to worry about it. All in all this job really wasn't that bad as long as you slow down and take your time.
Parts List:
WO576 14" chubbies.
Magnum +8 Upper brake line, and new lower brake line assembly. (Would go with +10 if I was going to do it again.)
Magnum +10 Clutch Cable.
Guerrilla wire extensions for left and right controls, and also TBW. (more on this later)
Harley DOT 4 brake fluid
Spectra speed 6 tranny fluid.
Tranny cover gasket.
Arlen Ness riser bushings.
Tools:
Torque Wrench ( in-lbs and ft-lbs)
Basic sockets and torque bits.
Allen wrenches.
Soldering Iron.
Wire Strippers.
Large flat blade screw driver.
Towels and blankets.
Zip Ties.
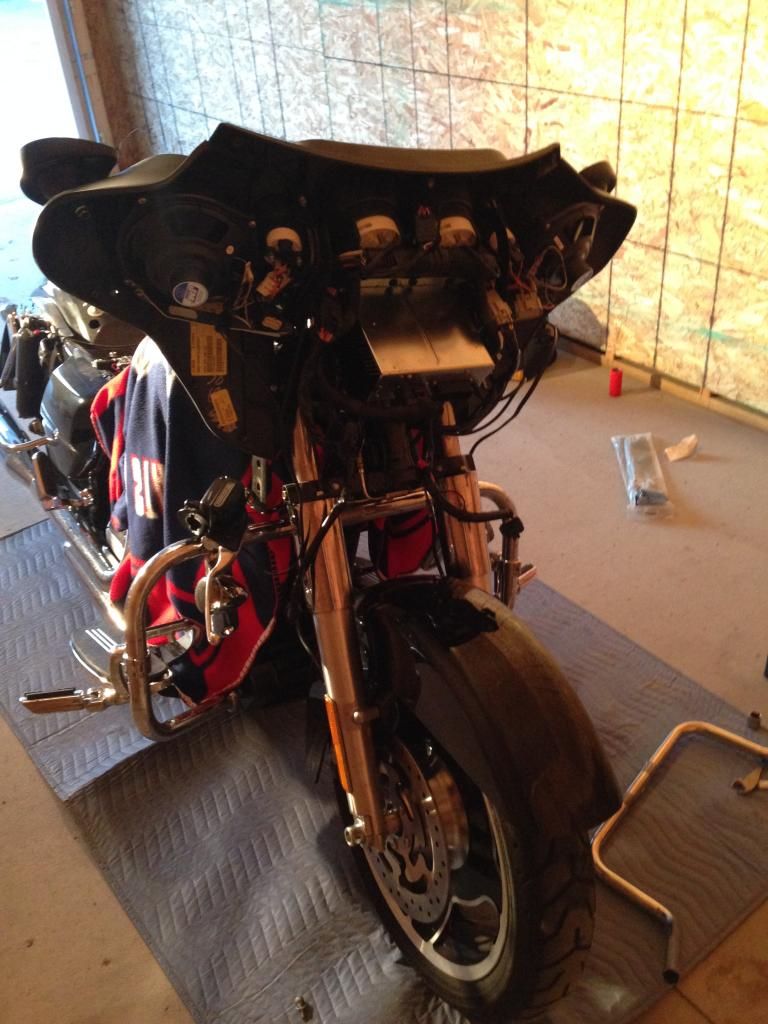
Here is the bike with the bags off (reduce chance of scratching something), seat off with battery disconnected, and a blanket of the tank to prevent scratches.
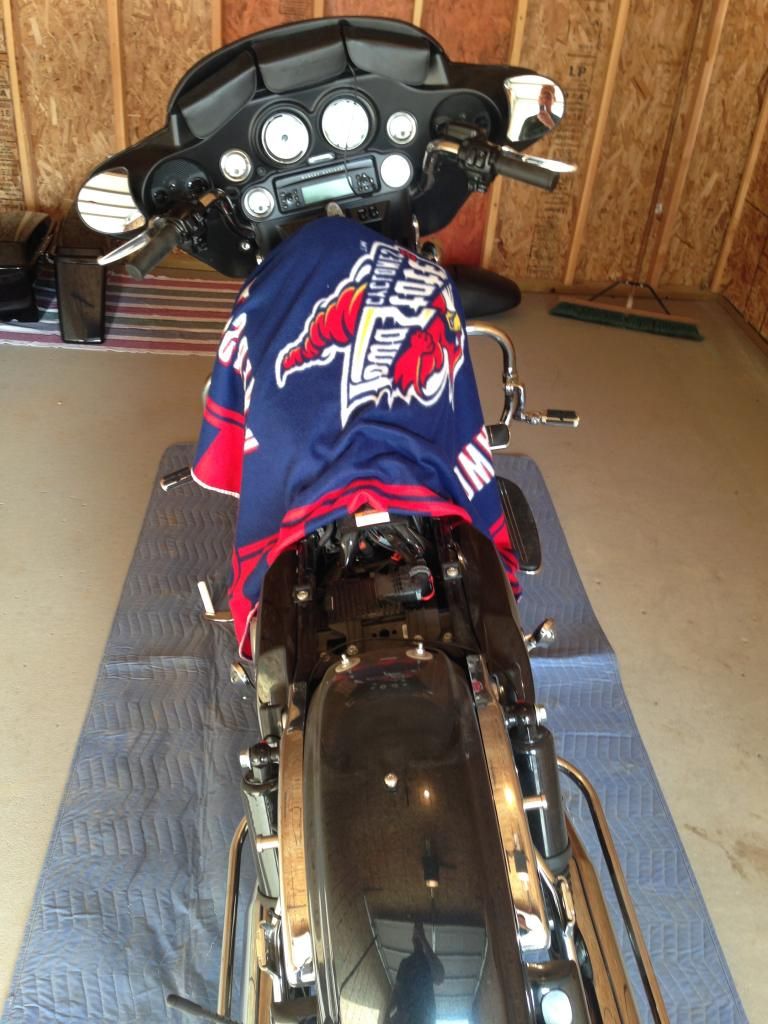
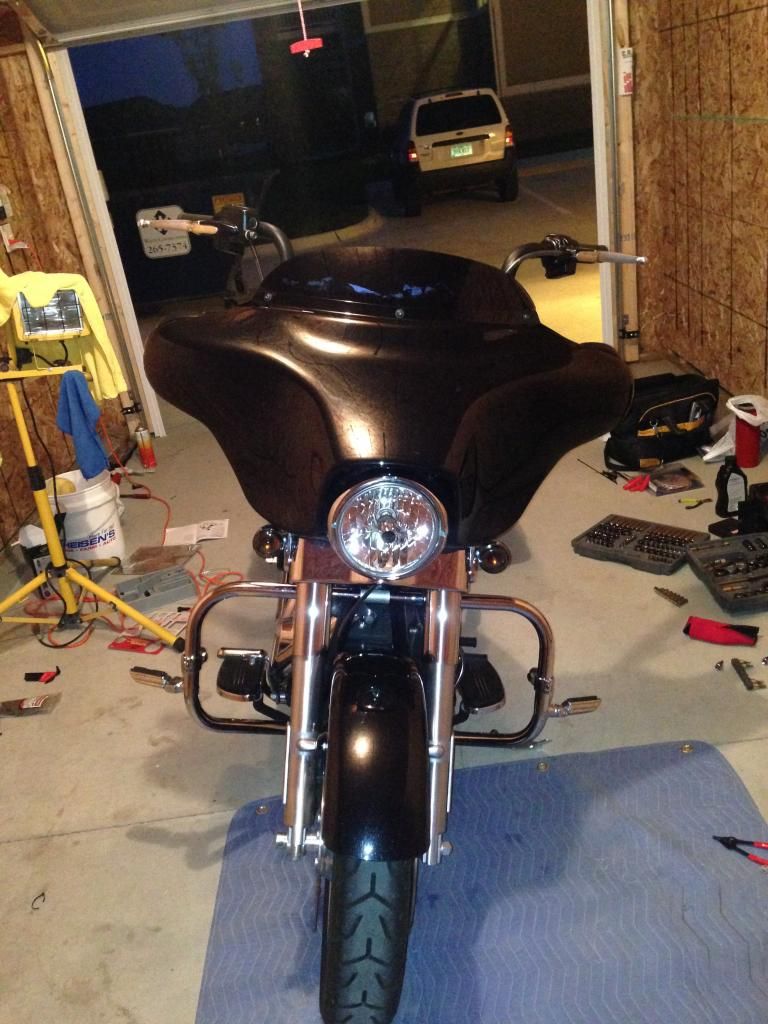
Front fairing removed and pointing out one of the molex connectors.

Ignition removed. I used a flat blade screw driver to lock and unlock the ignition as needed. Lots of good videos on you tube about this. The biggest key I found is to make sure you turn all the tumblers every time you turn on of them so that they all stay in sync.

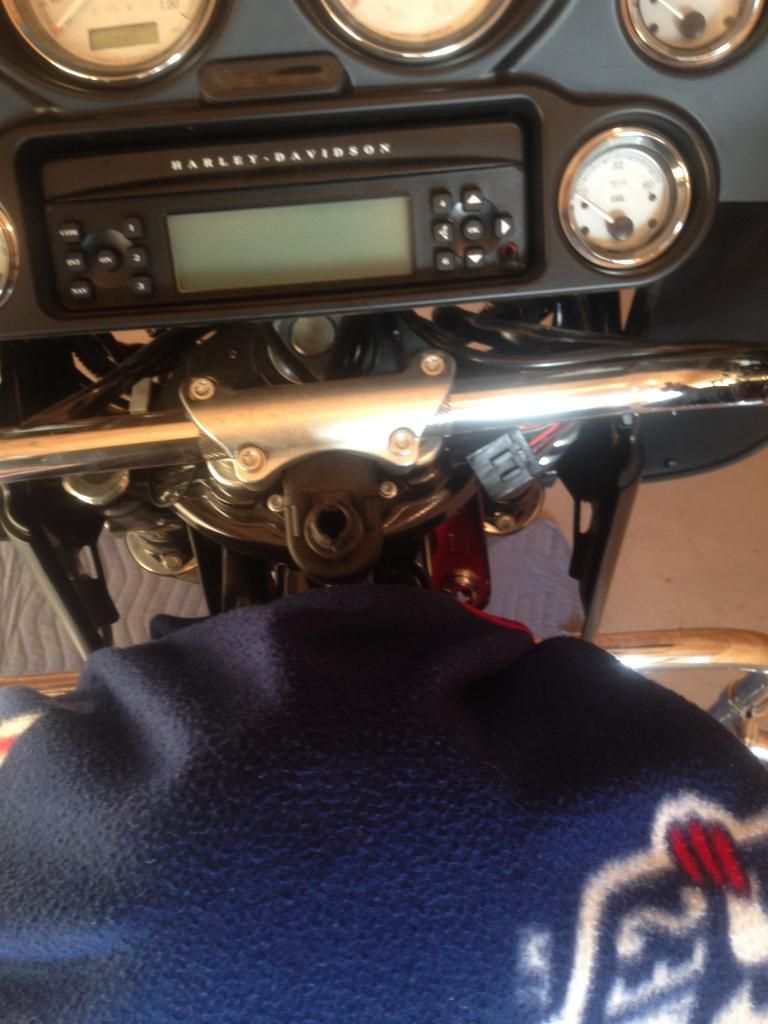
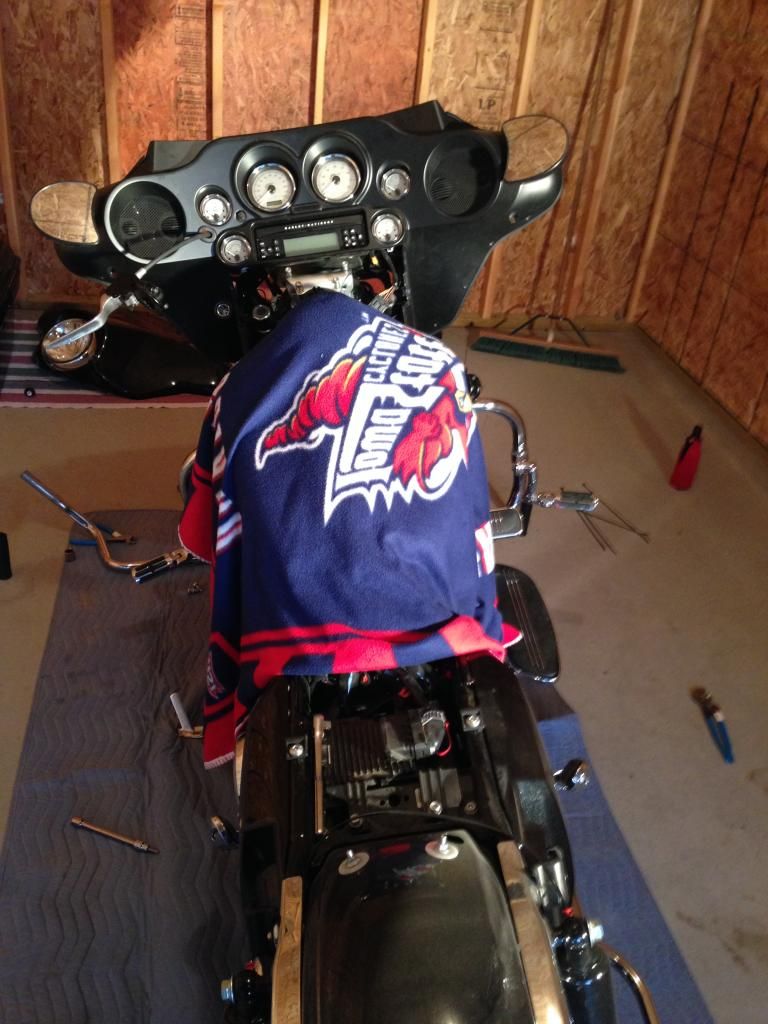
Just another picture of the nacelle removed.
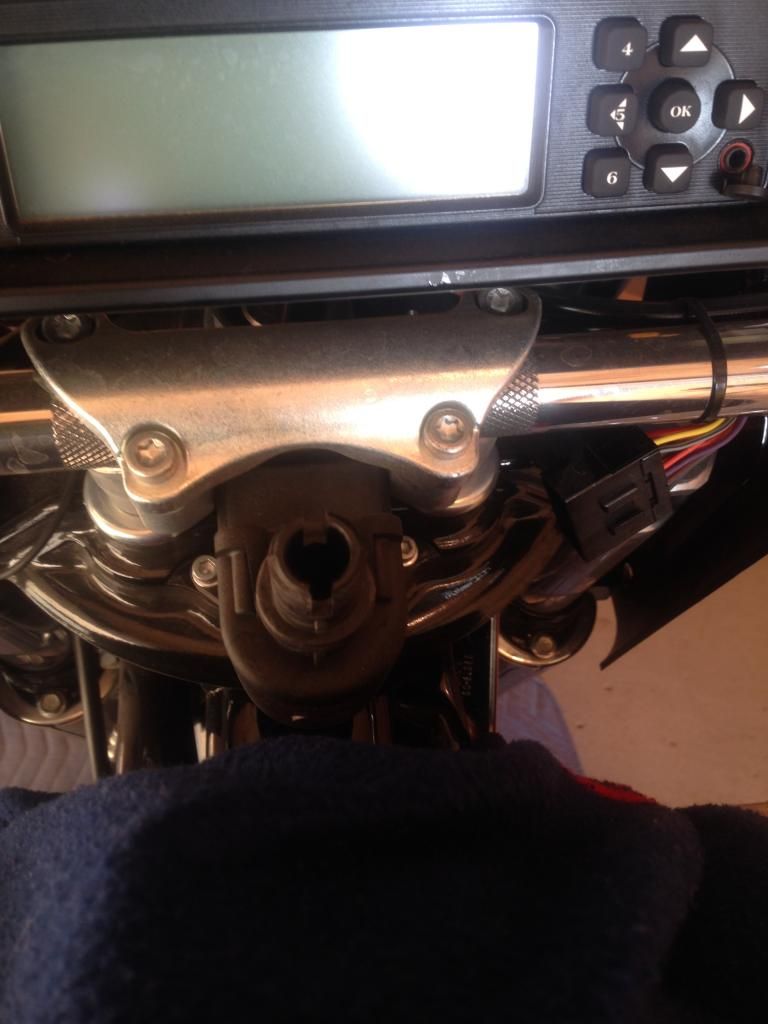
This is with the 4 fairing bolts removed and the fairing tilted forward. I removed the 4 bolts, lifted the fairing enough to clear lower mounts, put the top 2 bolts back in, tilted the fairing forward, and tightend the bolts where I wanted them.
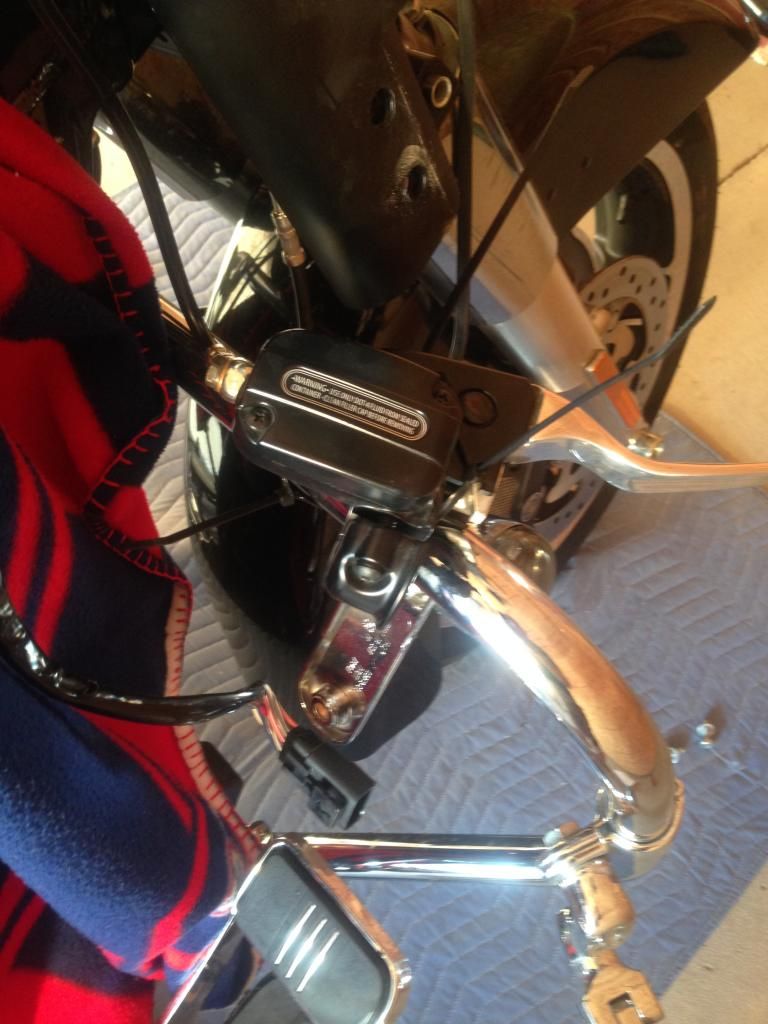
After removing the master cylinder from the bars I zip tied it to the crash bar to keep it up right and from leaking any fluid. I also zip tied the turn signal brackets to each side of the crash bar.
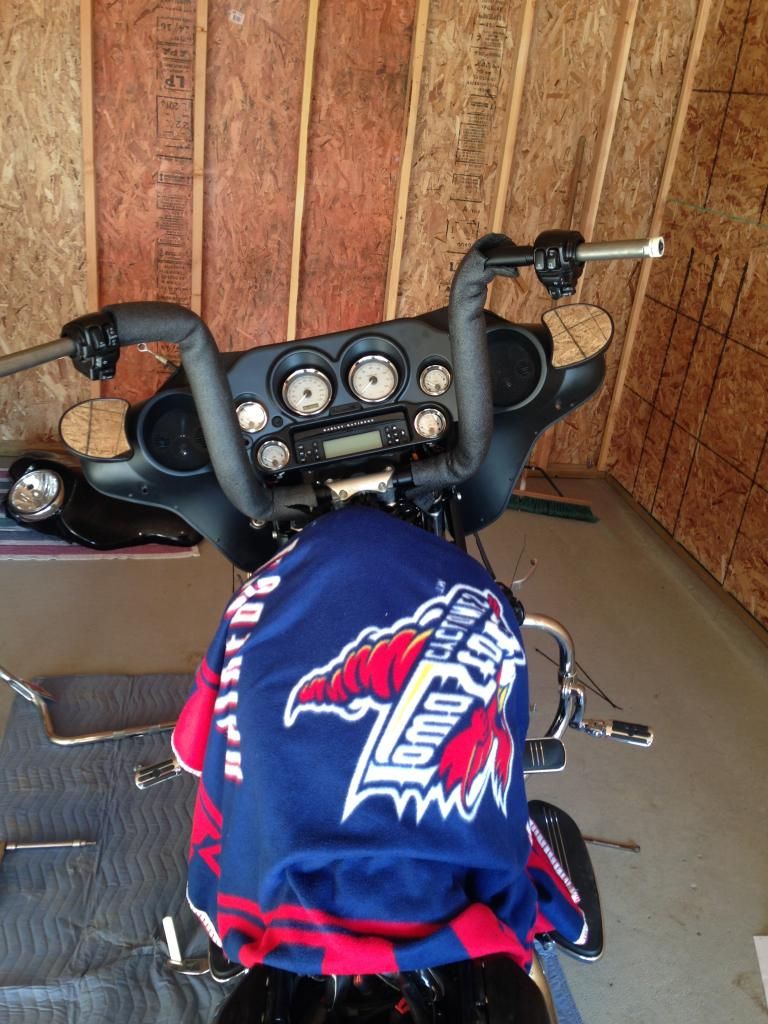
Old bars are off.
 .
.
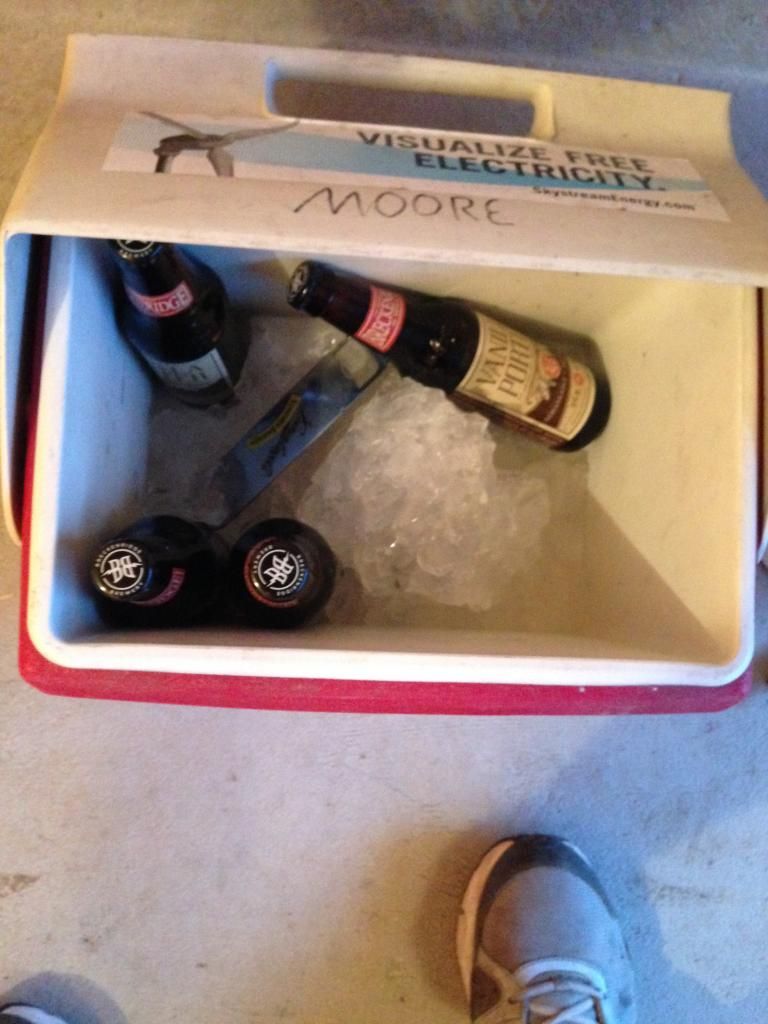
At this point I had to grab another beer. Beer of choice was Breckenridge Vanilla Porter.
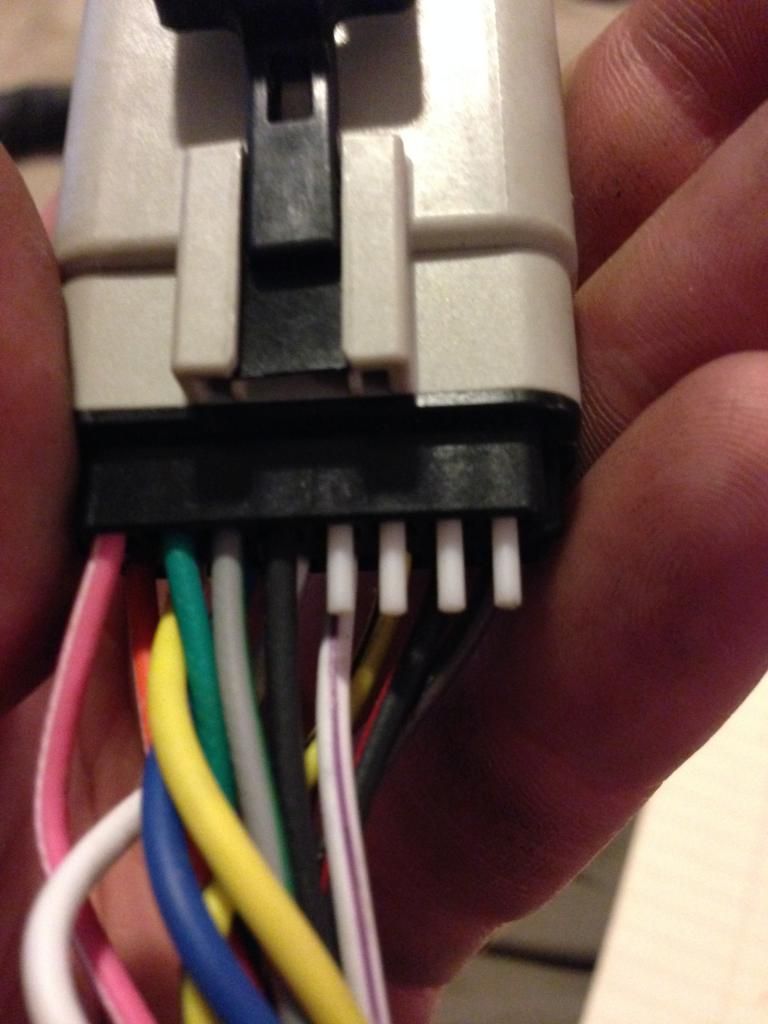
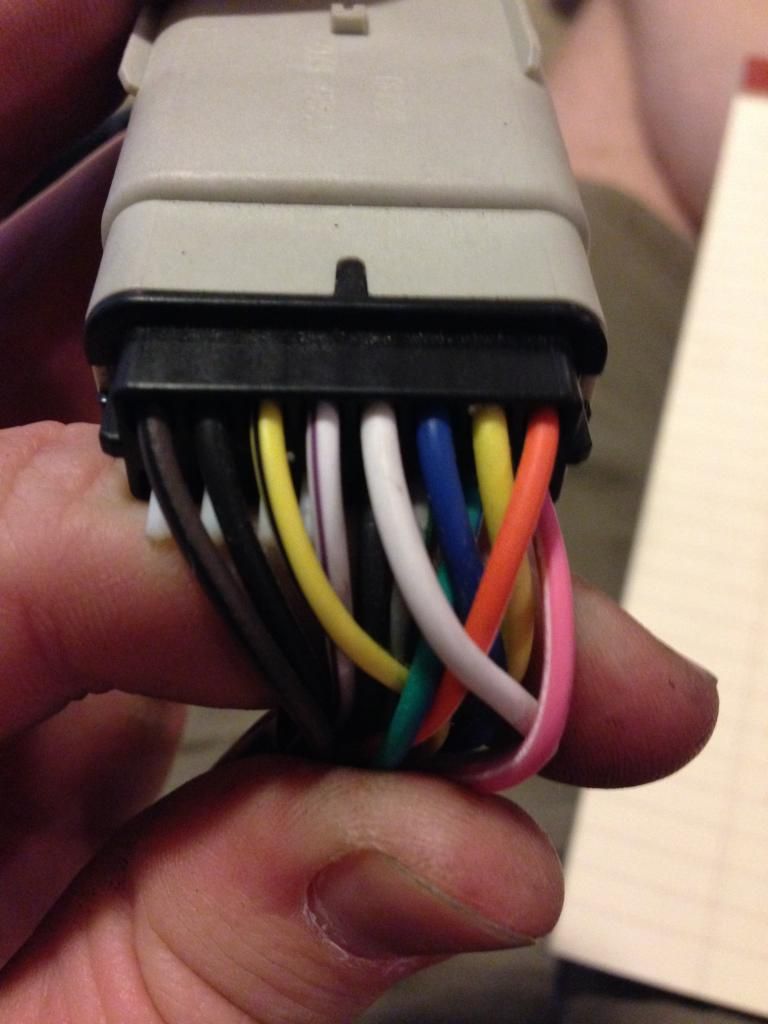
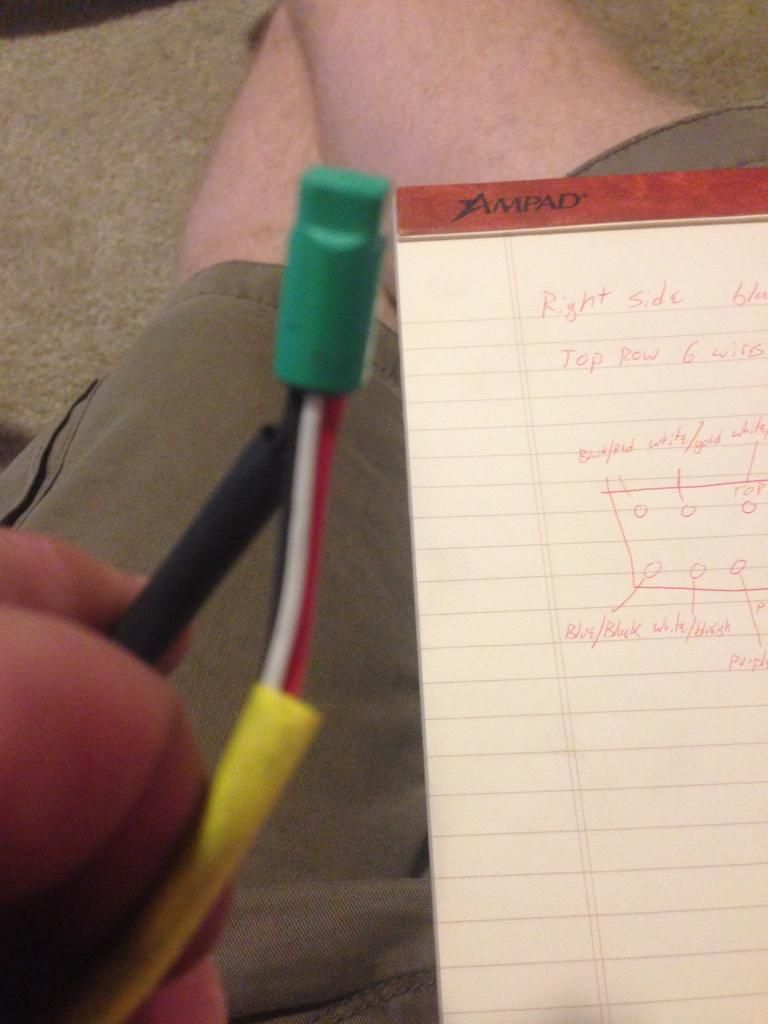
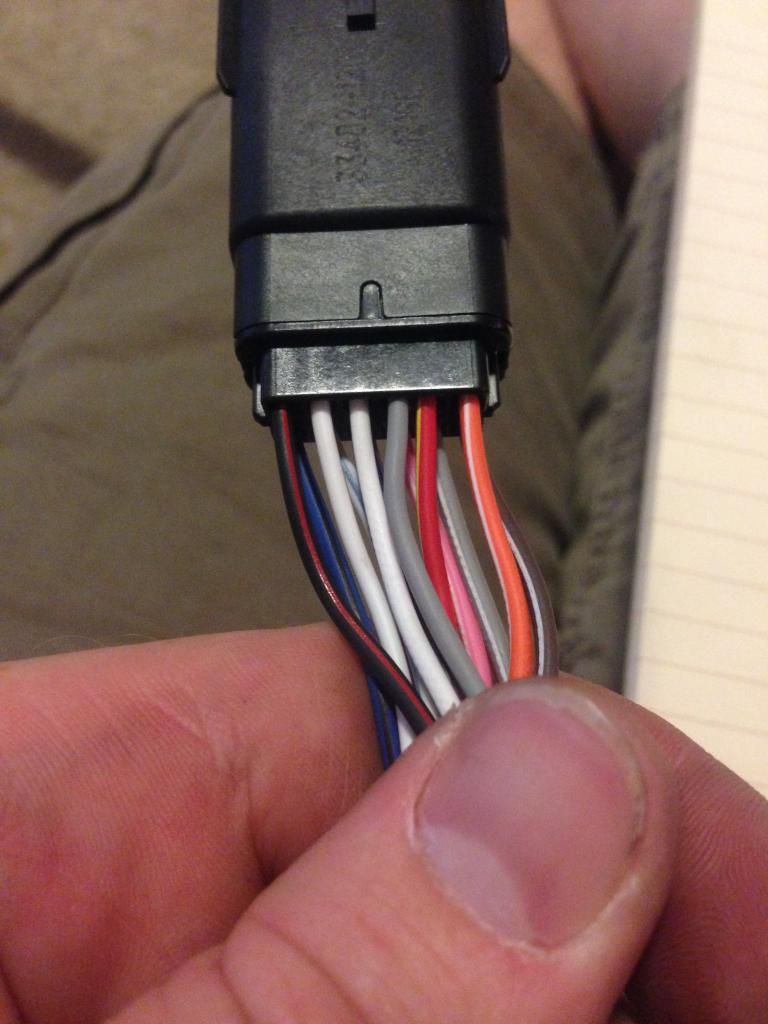
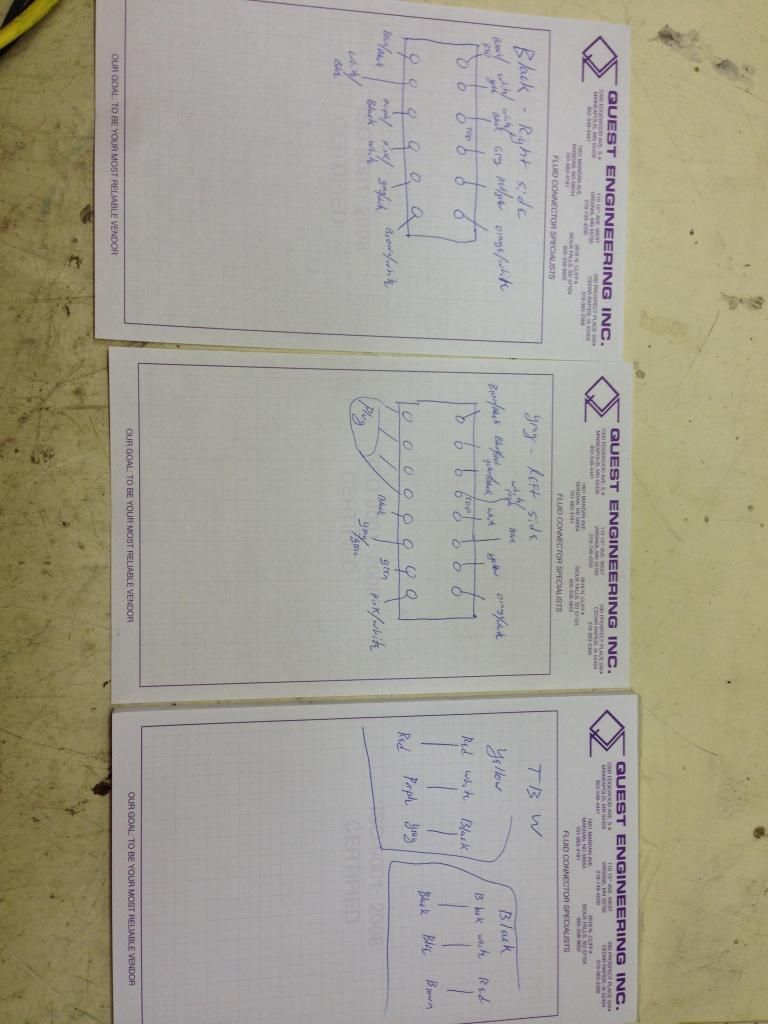
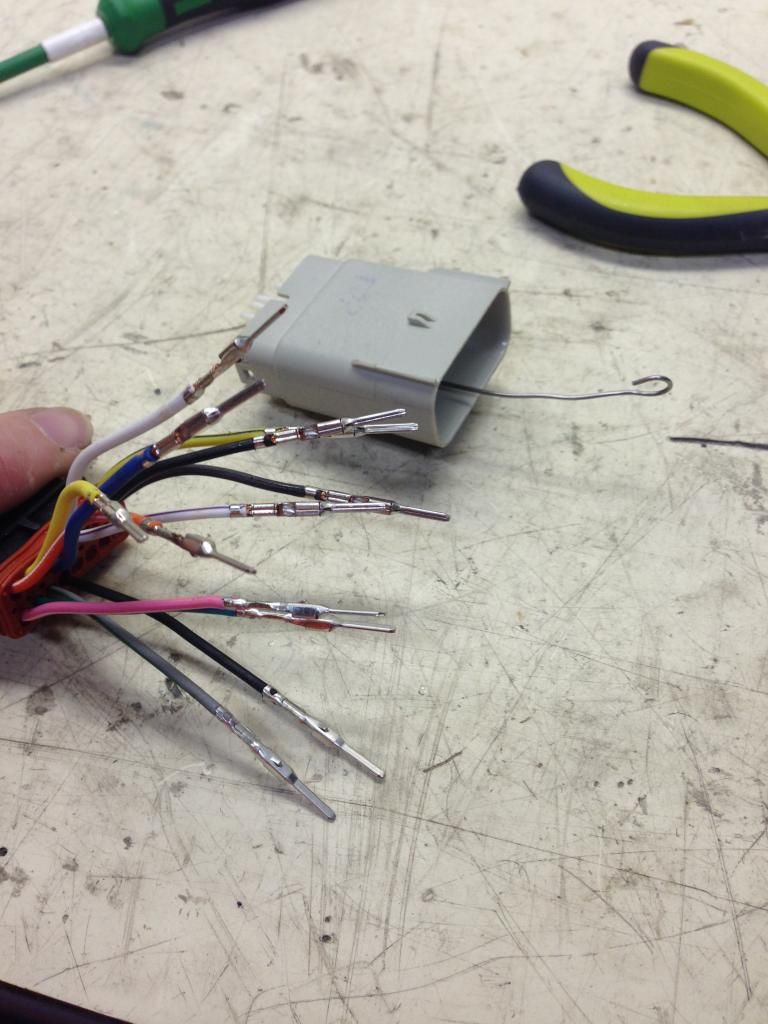
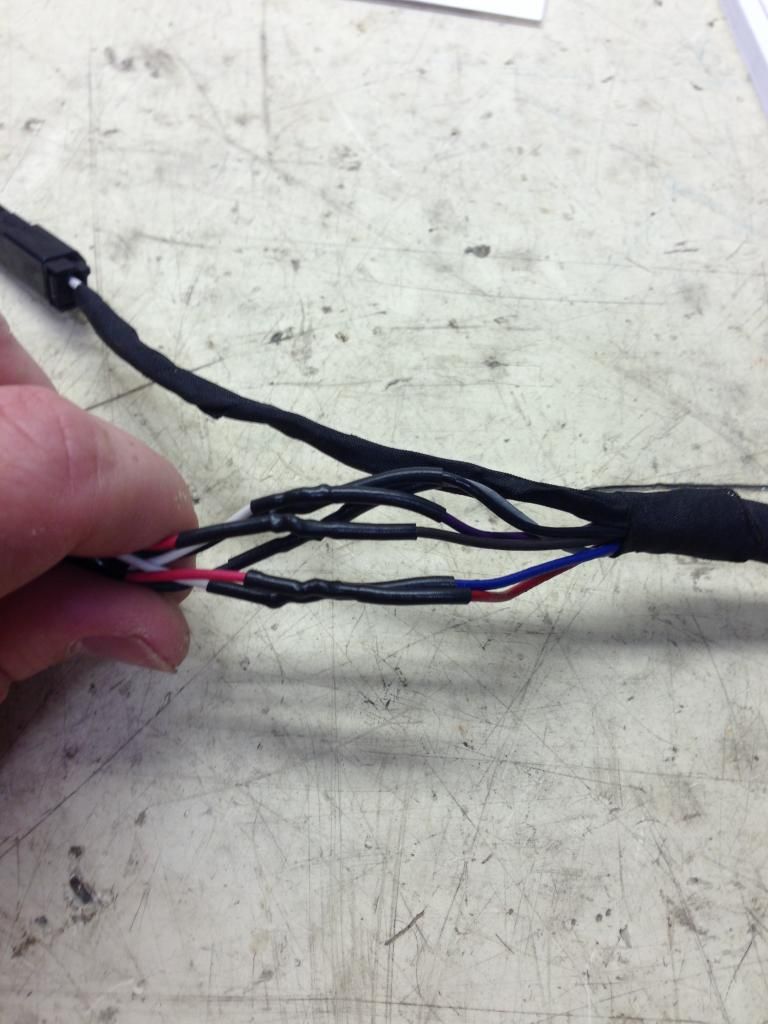
The next handful of pictures is of the connectors and my associated drawings and sketches. This is the most important part of the job by far.


It was getting late and I had beer to drink so I had to postpone the wiring portion of the job until Saturday afternoon.
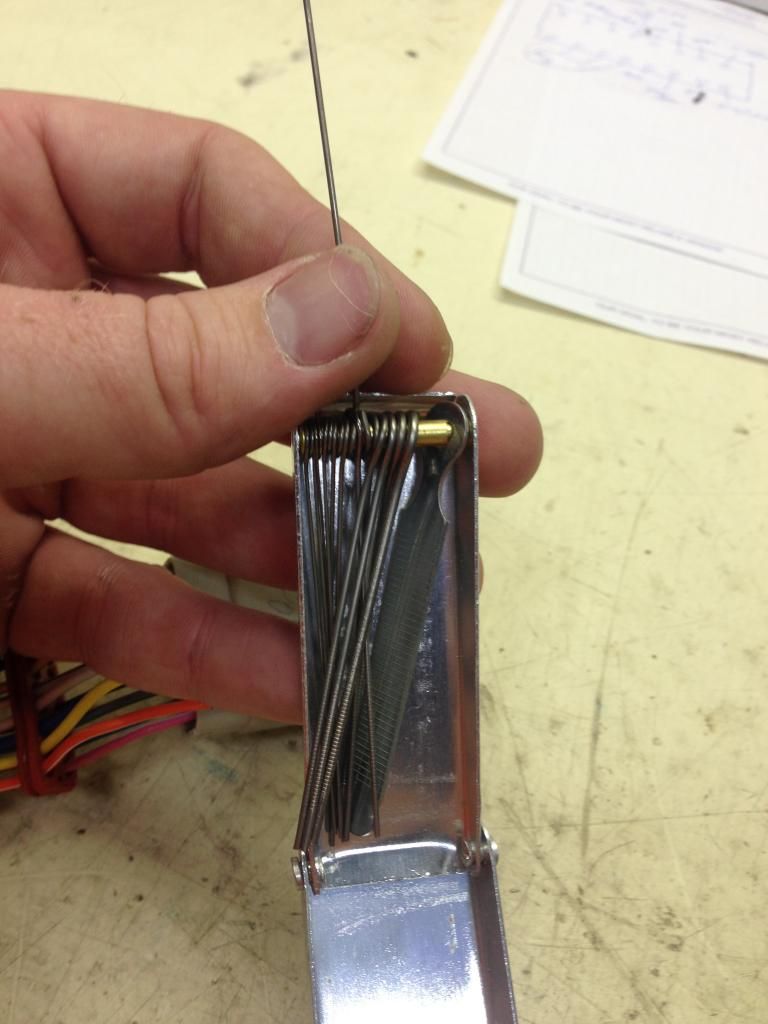
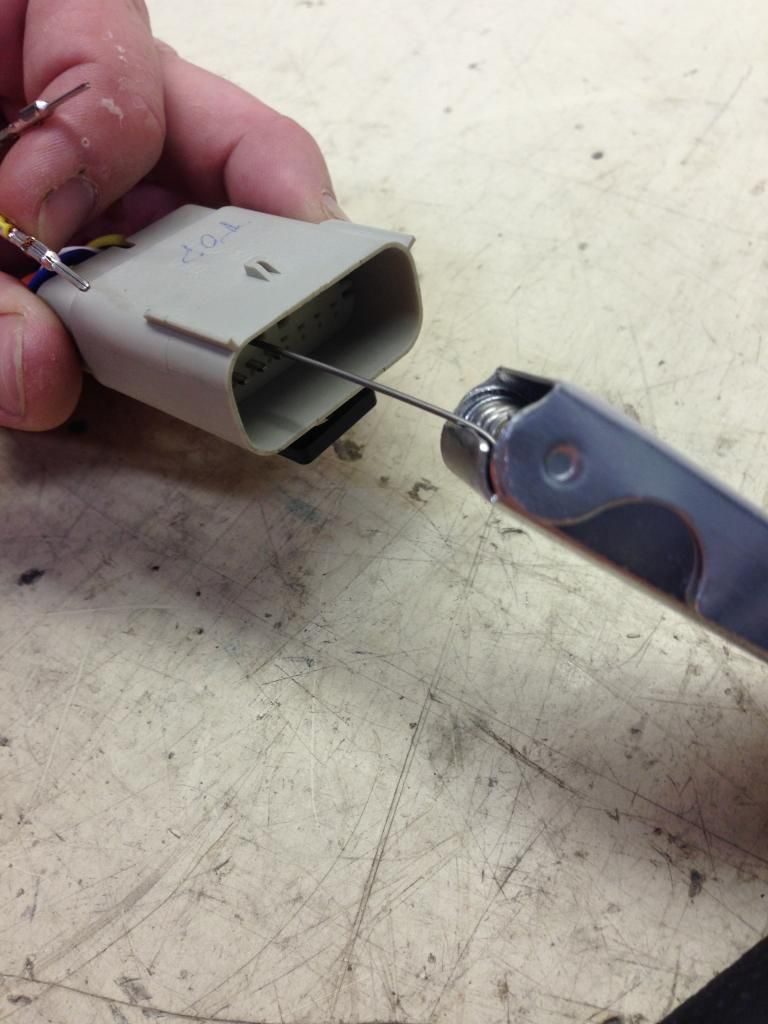
This is where I started pulling connectors apart. I actually used a wire out of my nozzle cleaner kit for the molex connectors. More rigid then a paper clip and cheaper than the actual tool. These are used mainly for torch nozzles but I use them for sprayer nozzles.
Parts List:
WO576 14" chubbies.
Magnum +8 Upper brake line, and new lower brake line assembly. (Would go with +10 if I was going to do it again.)
Magnum +10 Clutch Cable.
Guerrilla wire extensions for left and right controls, and also TBW. (more on this later)
Harley DOT 4 brake fluid
Spectra speed 6 tranny fluid.
Tranny cover gasket.
Arlen Ness riser bushings.
Tools:
Torque Wrench ( in-lbs and ft-lbs)
Basic sockets and torque bits.
Allen wrenches.
Soldering Iron.
Wire Strippers.
Large flat blade screw driver.
Towels and blankets.
Zip Ties.
Here is the bike with the bags off (reduce chance of scratching something), seat off with battery disconnected, and a blanket of the tank to prevent scratches.

Front fairing removed and pointing out one of the molex connectors.

Ignition removed. I used a flat blade screw driver to lock and unlock the ignition as needed. Lots of good videos on you tube about this. The biggest key I found is to make sure you turn all the tumblers every time you turn on of them so that they all stay in sync.

Just another picture of the nacelle removed.

This is with the 4 fairing bolts removed and the fairing tilted forward. I removed the 4 bolts, lifted the fairing enough to clear lower mounts, put the top 2 bolts back in, tilted the fairing forward, and tightend the bolts where I wanted them.

After removing the master cylinder from the bars I zip tied it to the crash bar to keep it up right and from leaking any fluid. I also zip tied the turn signal brackets to each side of the crash bar.

Old bars are off.

 .
.At this point I had to grab another beer. Beer of choice was Breckenridge Vanilla Porter.

The next handful of pictures is of the connectors and my associated drawings and sketches. This is the most important part of the job by far.


It was getting late and I had beer to drink so I had to postpone the wiring portion of the job until Saturday afternoon.
This is where I started pulling connectors apart. I actually used a wire out of my nozzle cleaner kit for the molex connectors. More rigid then a paper clip and cheaper than the actual tool. These are used mainly for torch nozzles but I use them for sprayer nozzles.

#2
06-23-2014, 12:50 PM
Pulling the pins apart is frustrating at first but you get the hang of how to manipulate the clip into the hole pretty quick. It took me maybe 15 min to get all the connectors apart.
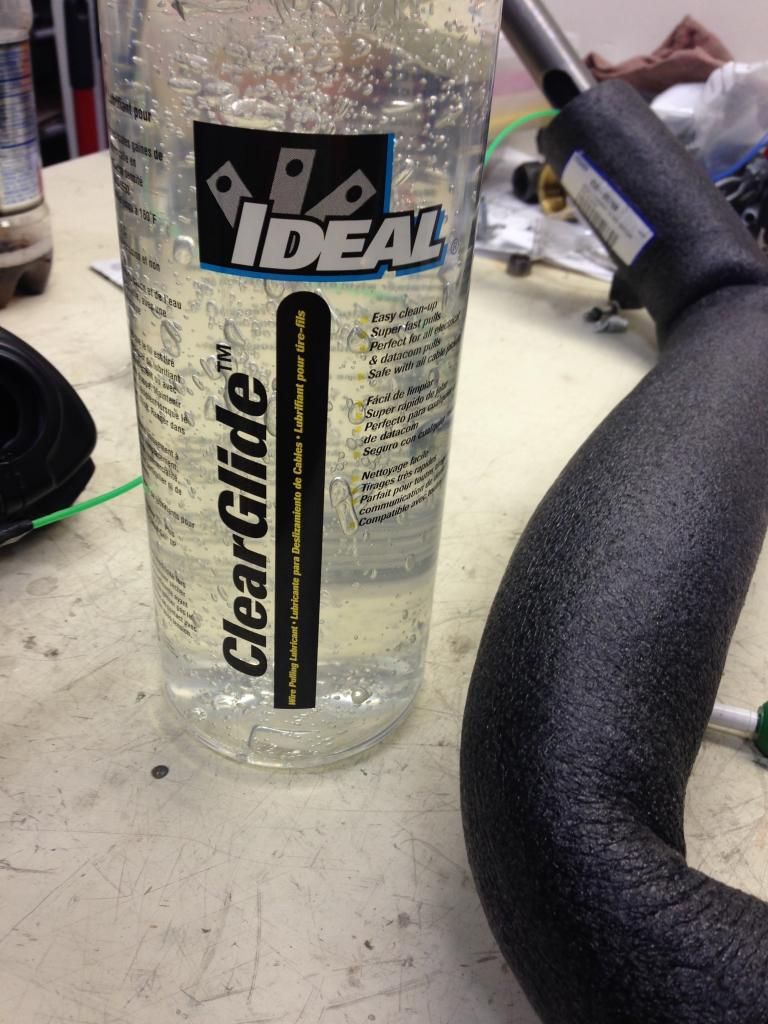
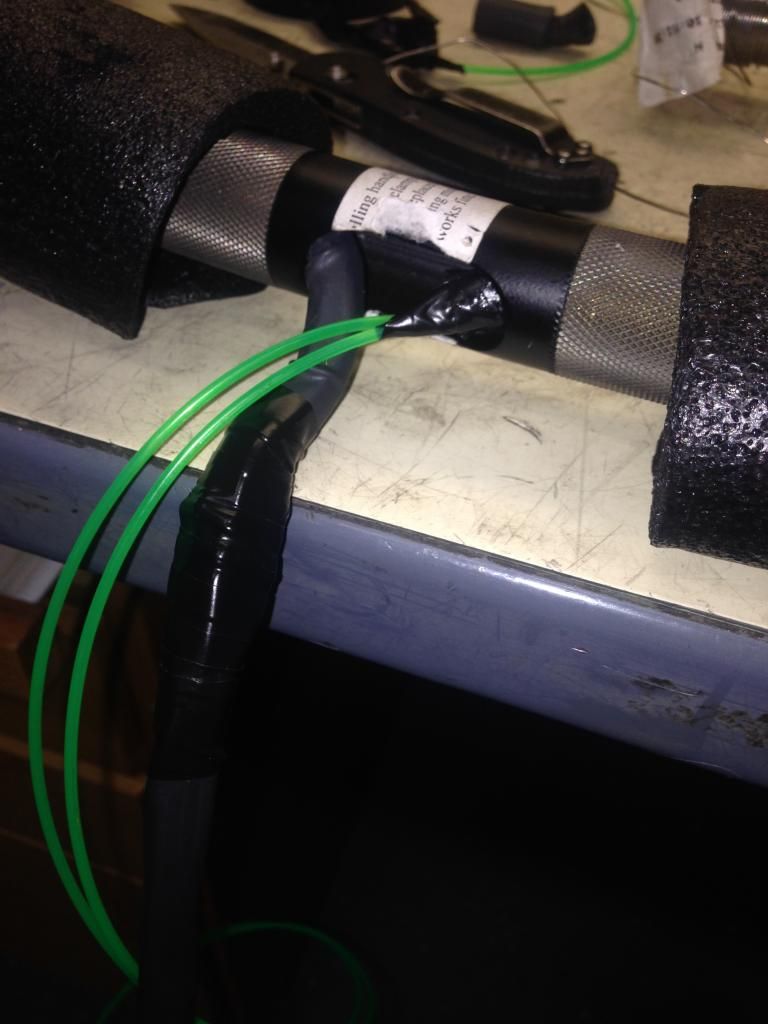
Now for actually pulling the wires through the bars. I did this by my self and would have gone much smoother if I had had some help. I used weedeater string as a fish line, and wire lube from Lowes.
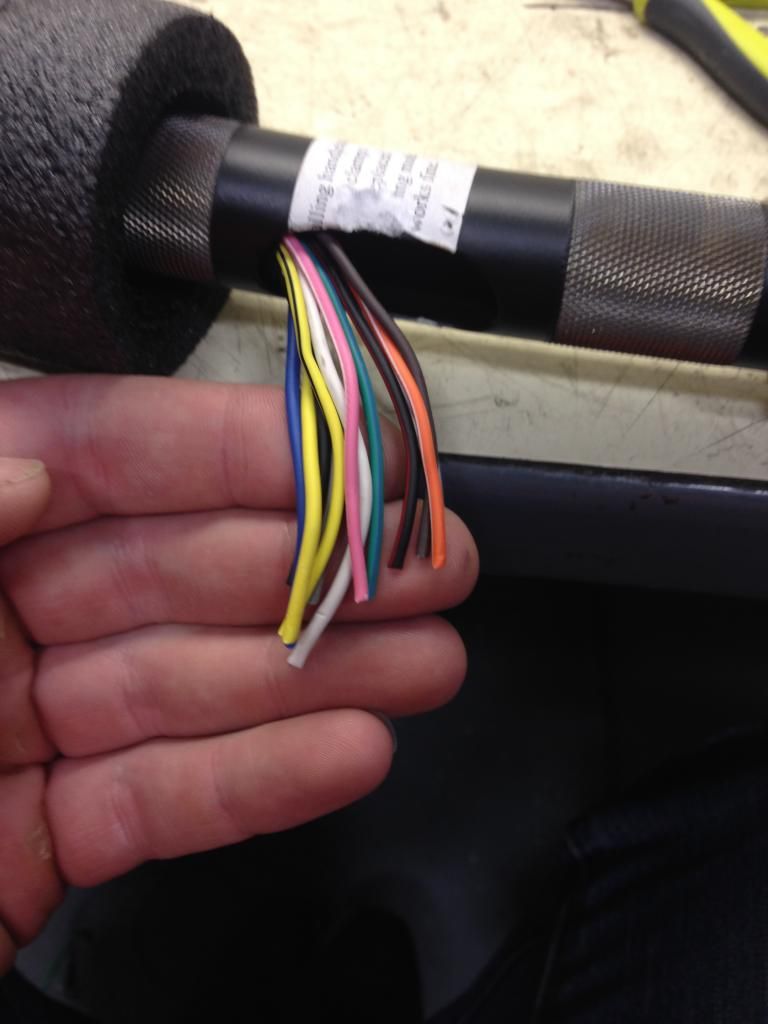
The left side went through no problem and the stock wires were just long enough to make it through the bars without the extensions on it.

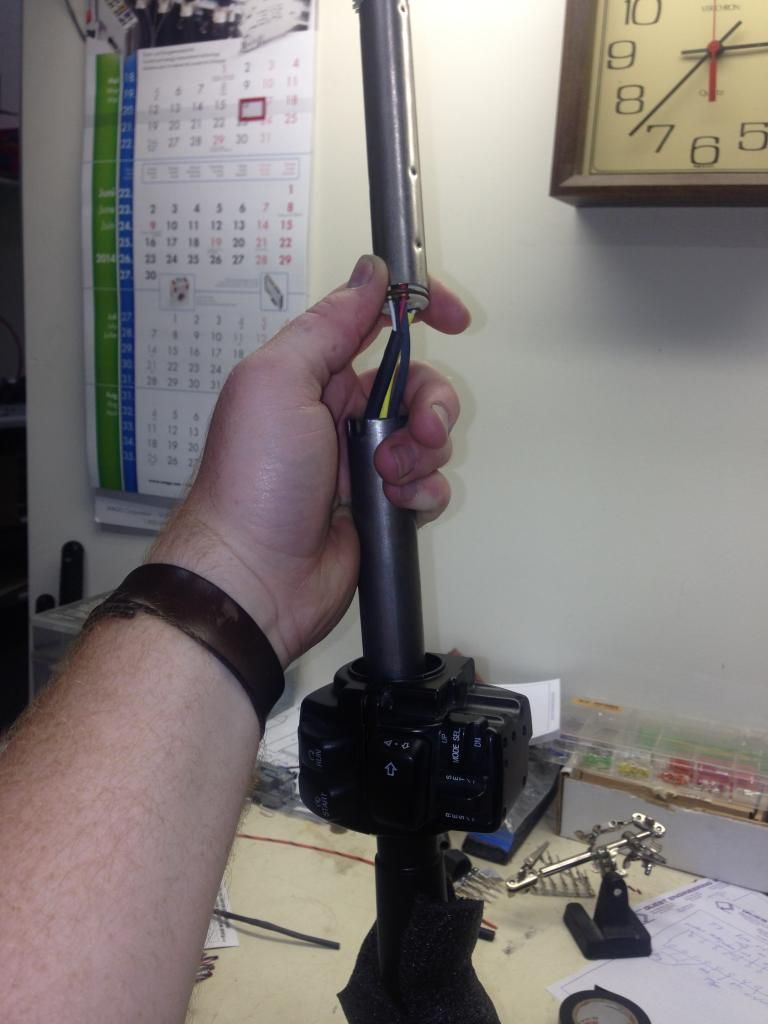
I then soldered my left side extensions on and put heat shrink on each individual wire.

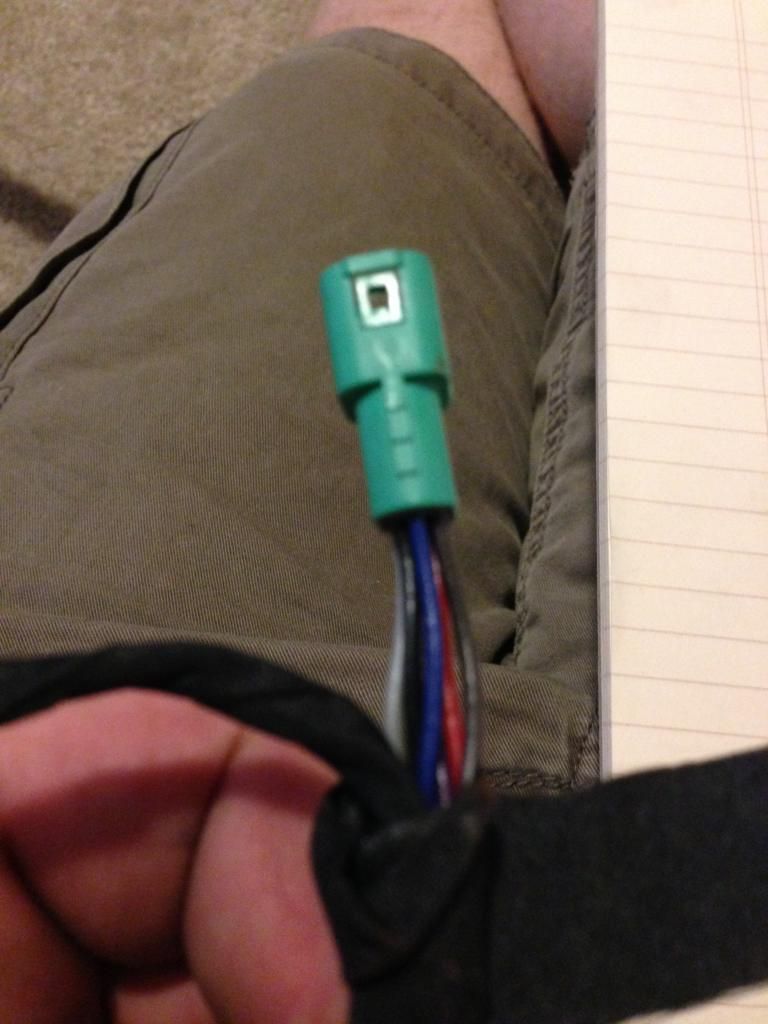
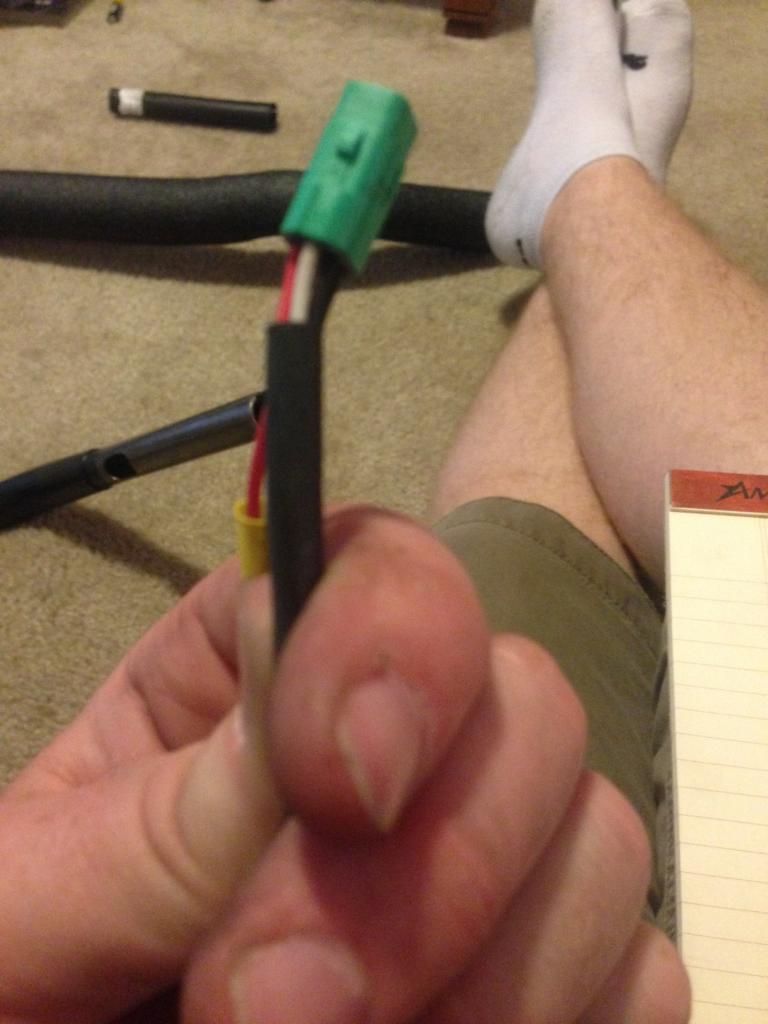
I cut the green connector out of the TBW and soldered the wires together, then soldered on my extensions before pulling the wires through.
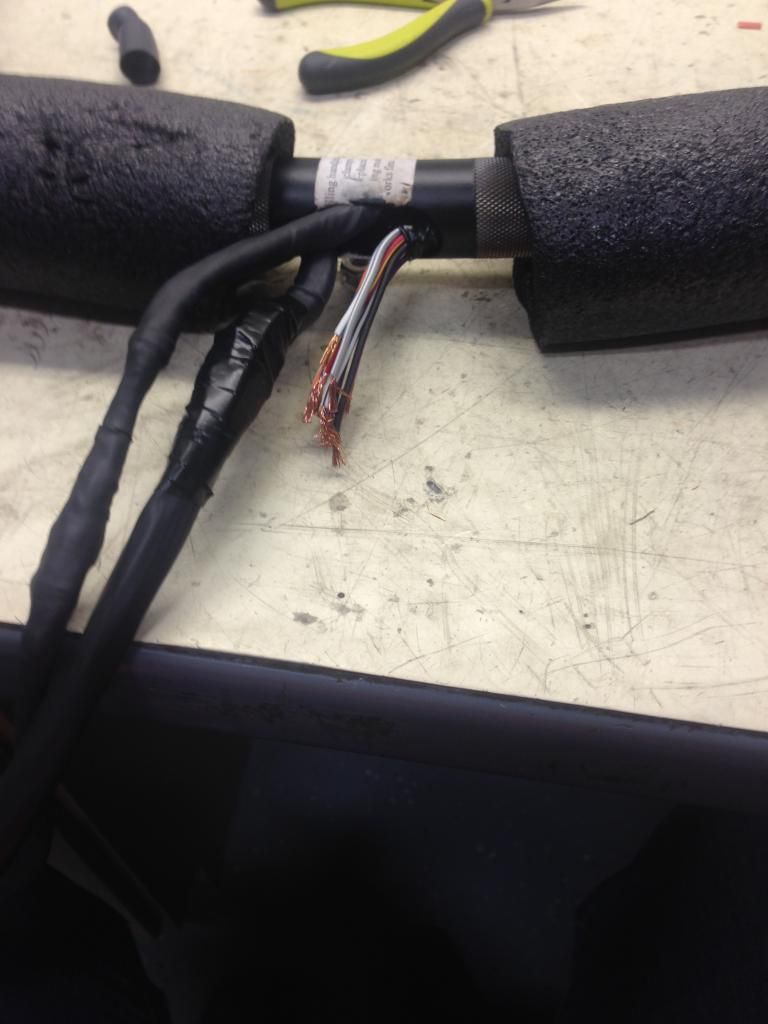
Pulling the right side of the controls was the worst. I first tried pulling the control wires trough, then the TBW and it was a no go. Then I tried pulling the TBW then the control wires, still no go. Then I pulled both at the same time and about an hour later, many 4 letter words, and some sweat they came almost all the way through and got stuck.
Frustration has set in as I finally got my right side through, but the TBW still had 12 inches to go.
Finally got everything through and ready to solder the right side together.
This brought me to about 9 P.M. saturday night and I had a going away party to get to.
The following Sunday was putting everything back together. This is where I kind of slacked off on pictures because I was quickly getting frustrated.
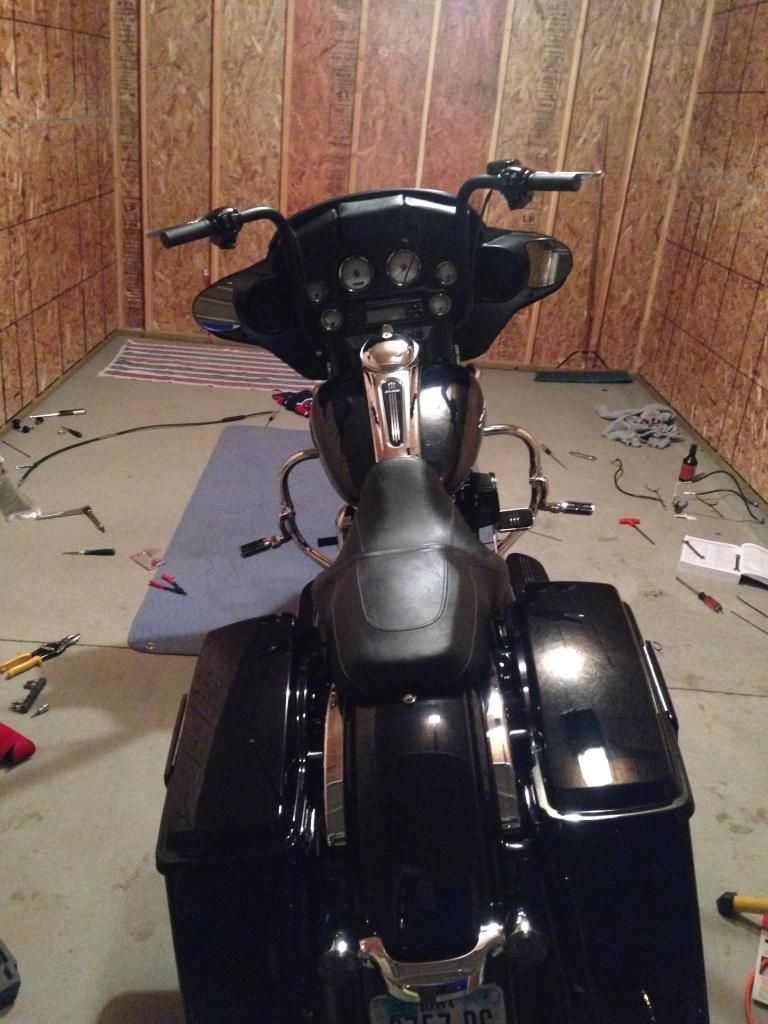
Bars are mounted.
Remounted master cylinder and new brake line it on.

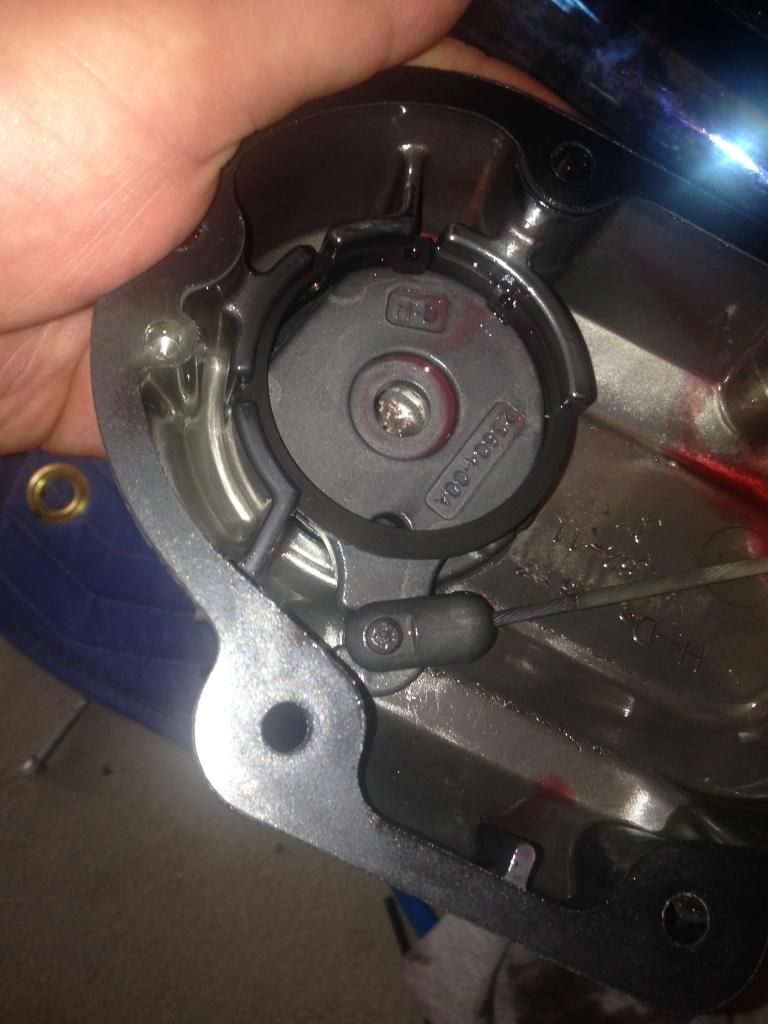
Clutch cable replacement. Make sure you take a lot of pictures of how the stock cable is routed. Also make sure you have small and large snap ring pliers. When you pull the large snap ring from inside the cover then rotate the piece the cable connects to 180* and pull it apart. Then unscrew the cable form the cover. Make sure the ***** stay in the correct position and don't fall out or anything. I screwed the clutch cable into the cover, then connect it to the part it attaches to (I have no clue what it's called). I then put a new gasket on, and reattached and torqued the cover. I have V&H Dresser duals and was able to just loosen the rear cylinder head pipe and that gave me enough clearance to get the cover off.
I didn't get any pictures of the brake bleeding but I used a mighty vac and had the brakes bled in 10 min. I'm sure I missed a few things, but it really wasn't the bad of a job.
All finished.

I still need to put different grips on and also new black brake and clutch levers I just haven't got around to it yet.
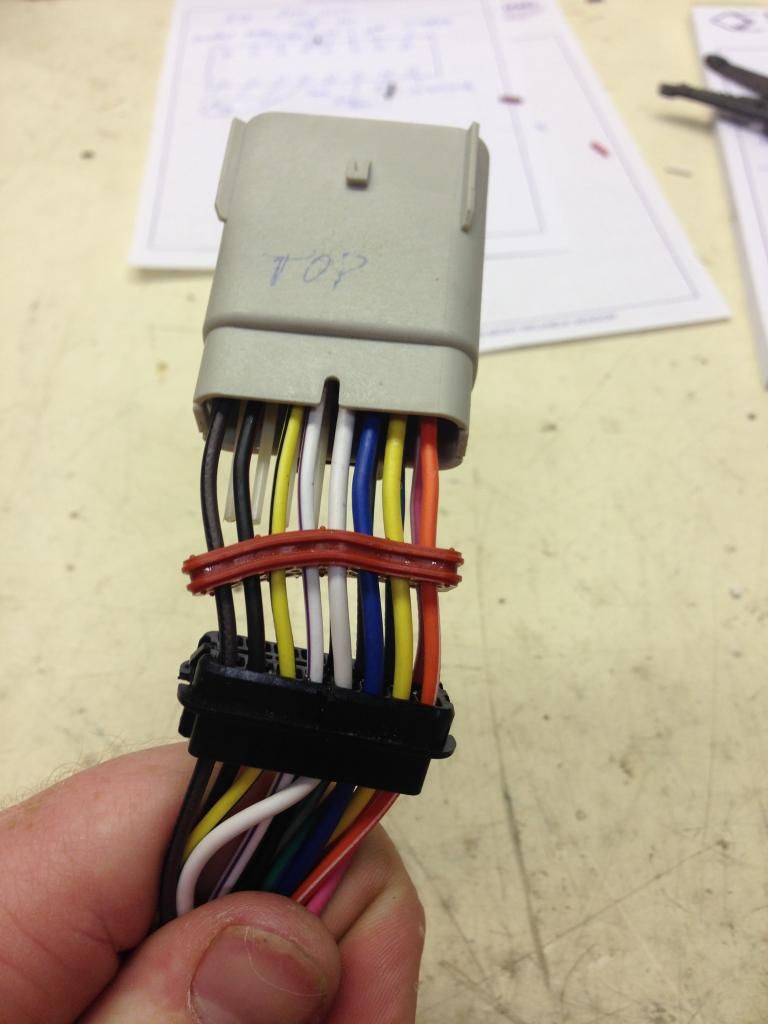
As for the Guerrilla wire extensions, I was unaware you needed a special crimp tool to put the new molex connector pins on the wires. I ended up using a small set of pliers, to fold and crush the pin crimpers over the wire and insulation. I then soldered each connector to the wire to make sure nothing would come undone. This probably added a solid 1.5-2 hours of time to the total job.
I bought the Arlen Ness riser bushings and they seemed to be a bit to tall. After pulling the fairing as far up as it would go and retightening the bolts all seems to fit well now.
All in all I had about 11-12 hours in this job. It was the first time I have undertaken bars or wiring, so I was learning as I go. I hate wiring. It's far to tedious for my liking. But this was definitely better then paying the dealer $700 to do it. I think all said and done I had about $550 in parts.
If anyone has any questions on any part of this feel free to ask or shoot me a PM and I'll try to help out.


Now for actually pulling the wires through the bars. I did this by my self and would have gone much smoother if I had had some help. I used weedeater string as a fish line, and wire lube from Lowes.

The left side went through no problem and the stock wires were just long enough to make it through the bars without the extensions on it.


I then soldered my left side extensions on and put heat shrink on each individual wire.

I cut the green connector out of the TBW and soldered the wires together, then soldered on my extensions before pulling the wires through.

Pulling the right side of the controls was the worst. I first tried pulling the control wires trough, then the TBW and it was a no go. Then I tried pulling the TBW then the control wires, still no go. Then I pulled both at the same time and about an hour later, many 4 letter words, and some sweat they came almost all the way through and got stuck.

Frustration has set in as I finally got my right side through, but the TBW still had 12 inches to go.

Finally got everything through and ready to solder the right side together.

This brought me to about 9 P.M. saturday night and I had a going away party to get to.
The following Sunday was putting everything back together. This is where I kind of slacked off on pictures because I was quickly getting frustrated.
Bars are mounted.

Remounted master cylinder and new brake line it on.

Clutch cable replacement. Make sure you take a lot of pictures of how the stock cable is routed. Also make sure you have small and large snap ring pliers. When you pull the large snap ring from inside the cover then rotate the piece the cable connects to 180* and pull it apart. Then unscrew the cable form the cover. Make sure the ***** stay in the correct position and don't fall out or anything. I screwed the clutch cable into the cover, then connect it to the part it attaches to (I have no clue what it's called). I then put a new gasket on, and reattached and torqued the cover. I have V&H Dresser duals and was able to just loosen the rear cylinder head pipe and that gave me enough clearance to get the cover off.

I didn't get any pictures of the brake bleeding but I used a mighty vac and had the brakes bled in 10 min. I'm sure I missed a few things, but it really wasn't the bad of a job.
All finished.


I still need to put different grips on and also new black brake and clutch levers I just haven't got around to it yet.
As for the Guerrilla wire extensions, I was unaware you needed a special crimp tool to put the new molex connector pins on the wires. I ended up using a small set of pliers, to fold and crush the pin crimpers over the wire and insulation. I then soldered each connector to the wire to make sure nothing would come undone. This probably added a solid 1.5-2 hours of time to the total job.
I bought the Arlen Ness riser bushings and they seemed to be a bit to tall. After pulling the fairing as far up as it would go and retightening the bolts all seems to fit well now.
All in all I had about 11-12 hours in this job. It was the first time I have undertaken bars or wiring, so I was learning as I go. I hate wiring. It's far to tedious for my liking. But this was definitely better then paying the dealer $700 to do it. I think all said and done I had about $550 in parts.
If anyone has any questions on any part of this feel free to ask or shoot me a PM and I'll try to help out.
#3
06-23-2014, 01:12 PM
Also forgot to mention that the gasket for the master cylinder went bad even with keeping the MC upright at all times. Just a bit of fluid would leak out when I was at highway speed. It looked like fluid was trapped in the area between the MC and cover and the wind was pushing it out but I tried tightening and retightening and it didn't help. I went to the dealer to buy a new gasket and was informed that you have to buy the cover and gasket together, but they had seen this happen before so they replaced the cover under warranty for me and no problems since.

#5
06-23-2014, 01:56 PM
I feel your pain on the wiring. I don't have the TBW but puling the wires through was still a pain, as was getting the Molex back together. I pulled out the white piece in the center as I didn't look hard enough for a pin to use (bought the tool in case I ever have to go back in there) to remove the wires. The connectors were the most frustrating part for me, but I really didn't know what I was doing on the first one. Once I got the left side done the right went real quick. The rest was just a lot of things to remove and replace. I took off a lot more than I needed since I didn't want to damage things.

Thread
Thread Starter
Forum
Replies
Last Post
MontyCop05
2014-2023 Touring Models
13
10-11-2014 06:30 AM