Barnett +1 Clutch and Hayden Chain Adjuster
#1
 02-05-2016, 09:54 AM

Installing a new Barnett +1 Clutch and Hayden Chain Adjuster
OK guys and gals. I did this on another site but it's always a pleasure to do a write up and once again show how easy it is to do your own Harley modifications. Before attempting this please read this thoroughly through to the end. Read first, work second. Manufacturer sheets are uploaded for your convenience.
Now for the disclaimer... Maybe you would like to learn, maybe you just want to see how it's done. It's all good. But, here it comes... This site, me or anyone else is not responsible if you mess up. It's your dollar.
Today we are going to remove the stock Harley clutch pack. We are also going to replace the stock ratchet type (P.O.S.) Harley primary chain adjuster. So, tighten your seat belts, pull your hat down tight as we are headed in wind.
If you want to enlarge a picture, just click on it and it will enlarge. You can also save it to your computer and zoom in.
First we will need to gather all the parts before starting. Out of pocket costs for this job will average about $300 or less. Time value will run between 2 to 4 hours depending on your skill. It actually took me longer to write this than do the work.
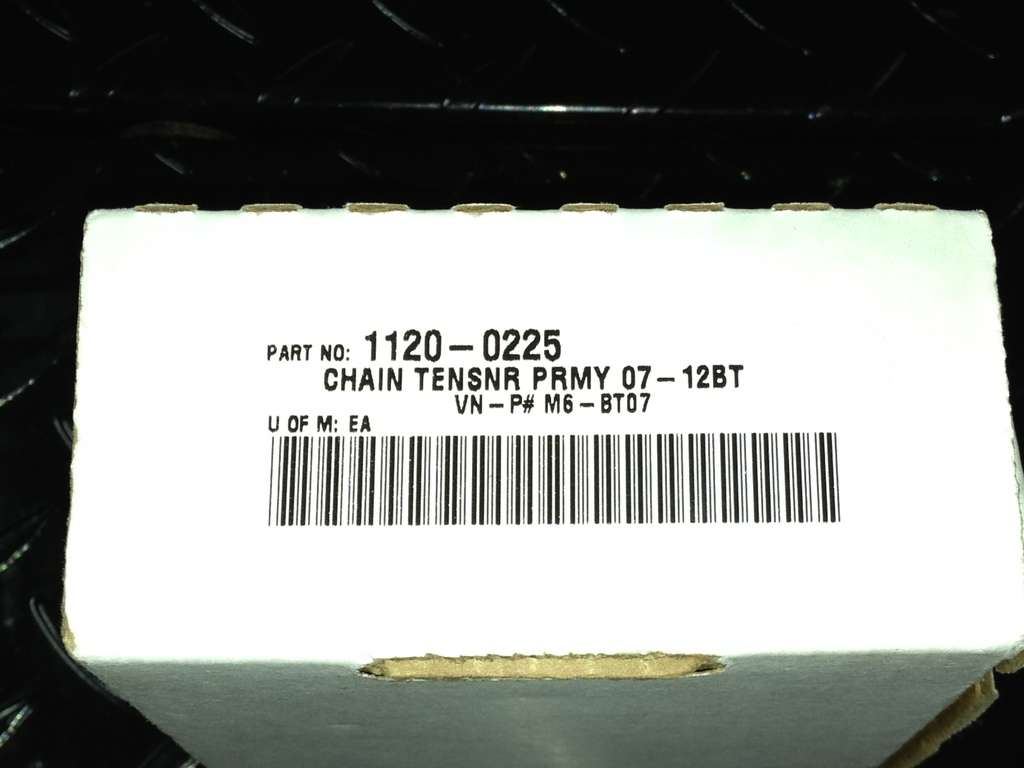
For this exercise we purchased the Barnett +1 clutch pack and the Hayden M6-BT07 primary chain adjuster. I also purchased the TGlideStuff.com 480 clutch spring and will reinstall my ClutchWIZ. You will also need some primary lubricant and I'll get into that later in this thread. If doing this on a two wheel bike then you should level the bike before starting.
Here are the part numbers from the box.
Tools needed for this job will vary but the most widely used would be a set of long ball end Allen wrenches, 3/8 or 1/4 socket set, box end ratchet wrenches in 5/8, 9/16, 1/2 and 7/16. A 11/16 box angled end will be needed to adjust the clutch. You may need a wide flat blade long handle screwdriver and a set of Torx wrenches. You will need plenty of rags, an oil bucket that will fit under the bike, a little Teflon tape, drain plug o-ring and a 10" or longer zip tie.
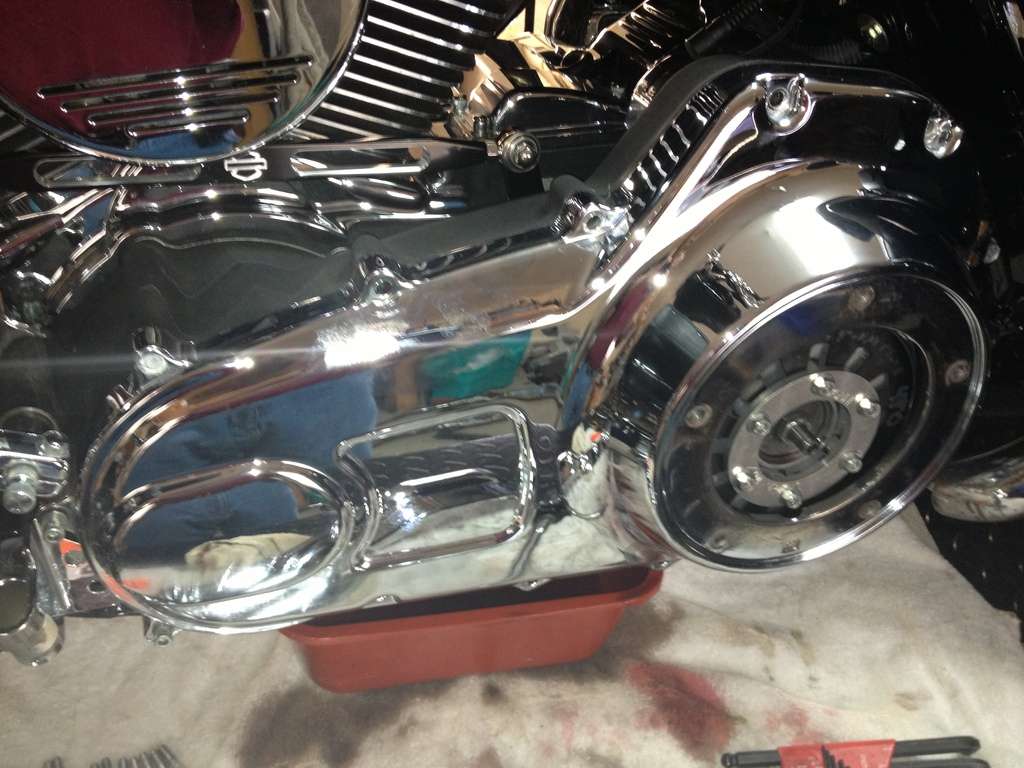
Here it is... the "not so daunting task" of removing the outer primary cover.
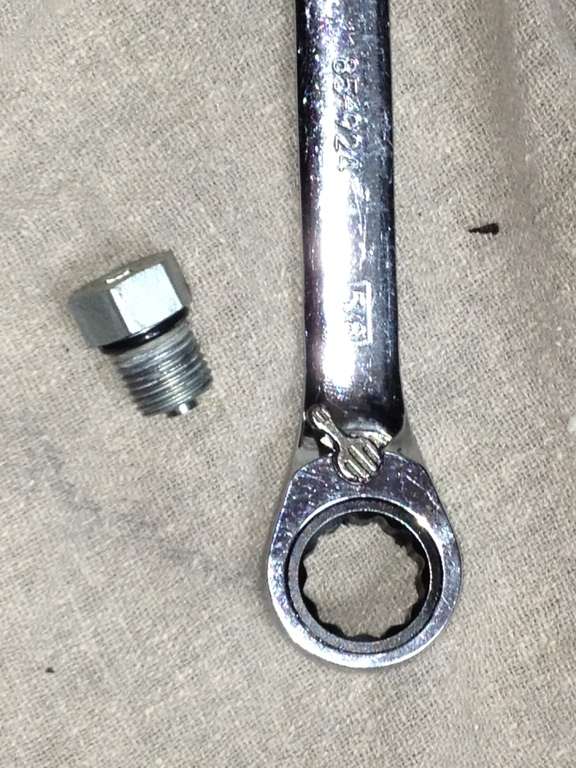
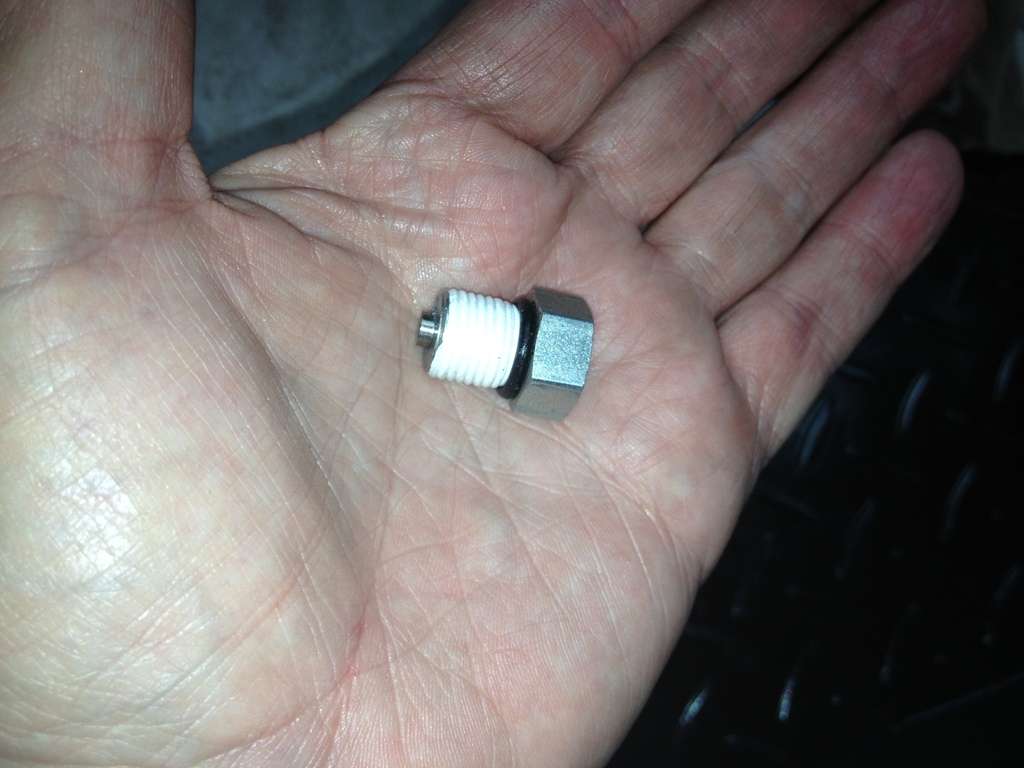
Let's drain the primary fluid. Grab a 5/8 and pull the plug. Get your drain pan ready.
You will find a magnet on the end of the drain plug. It should have some metal shavings on it. Not to worry as long as all the shavings are tiny. Use a rag to clean off the magnet and the threads. Replace the o-ring and use Teflon tape on the threads.
Let's pull the derby cover and the passenger board off at this time. Remember to keep all the screws and fasteners with the removed parts. Move them away from your work area to a safe place.

Next would be the left floorboard and the heal shifter.
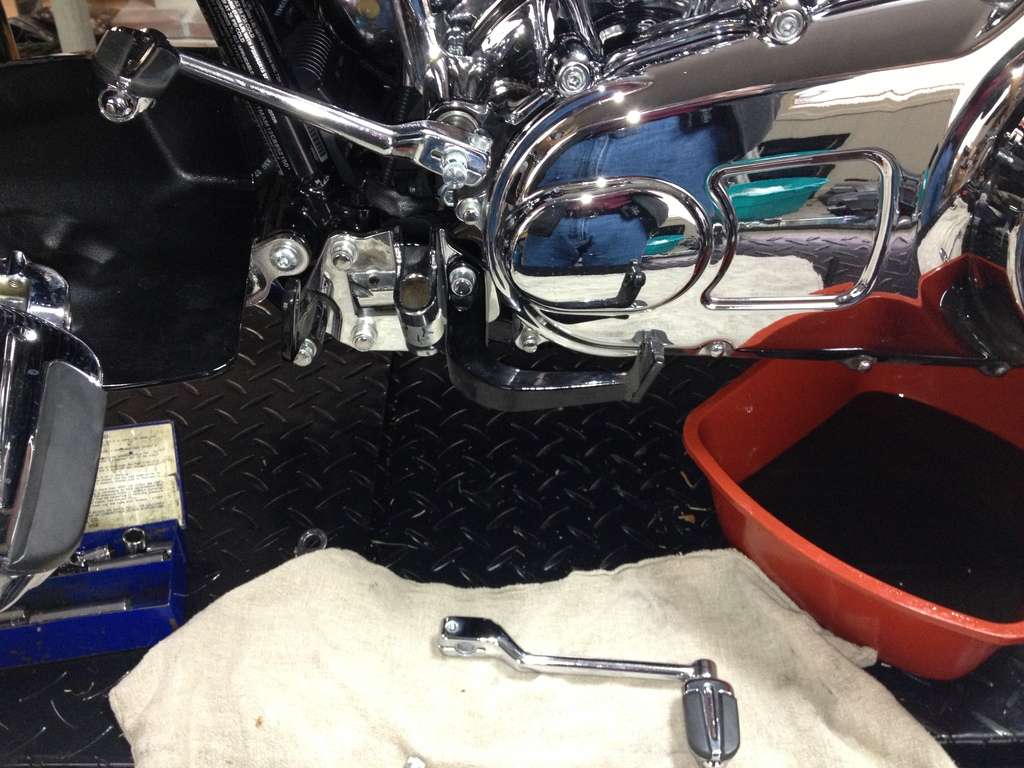
Time to remove the rear floorboard bracket.
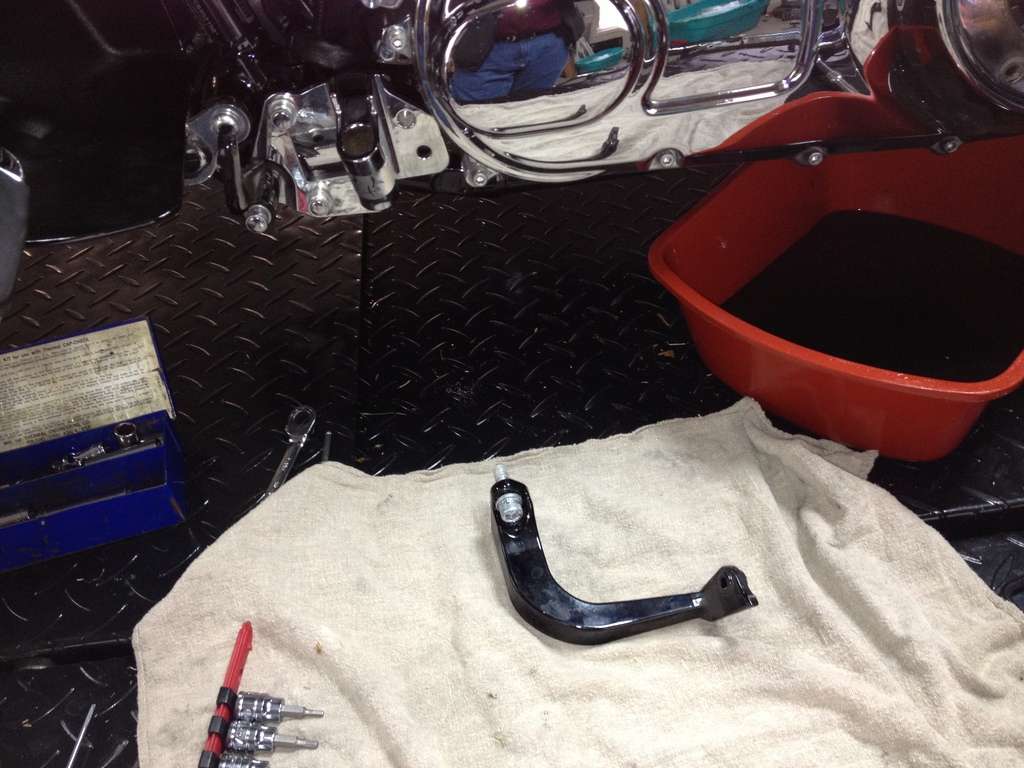
Now for the fun part. Take several rags, cardboard or an old bath towel that can be covered in oil and place it directly under the outer primary cover. Loosen and remove all the primary bolts. Keep them close and accounted for. There are only two lengths of bolts so don't worry about mixing them up. NOTE: If the outer cover sticks then reinstall one bolt at the top center loosely. Use your rubber mallet to tap or even smack the outer primary cover to break it free. Don't worry, you won't break it. Leaving one bolt in but loose will keep the cover from flying across the room.
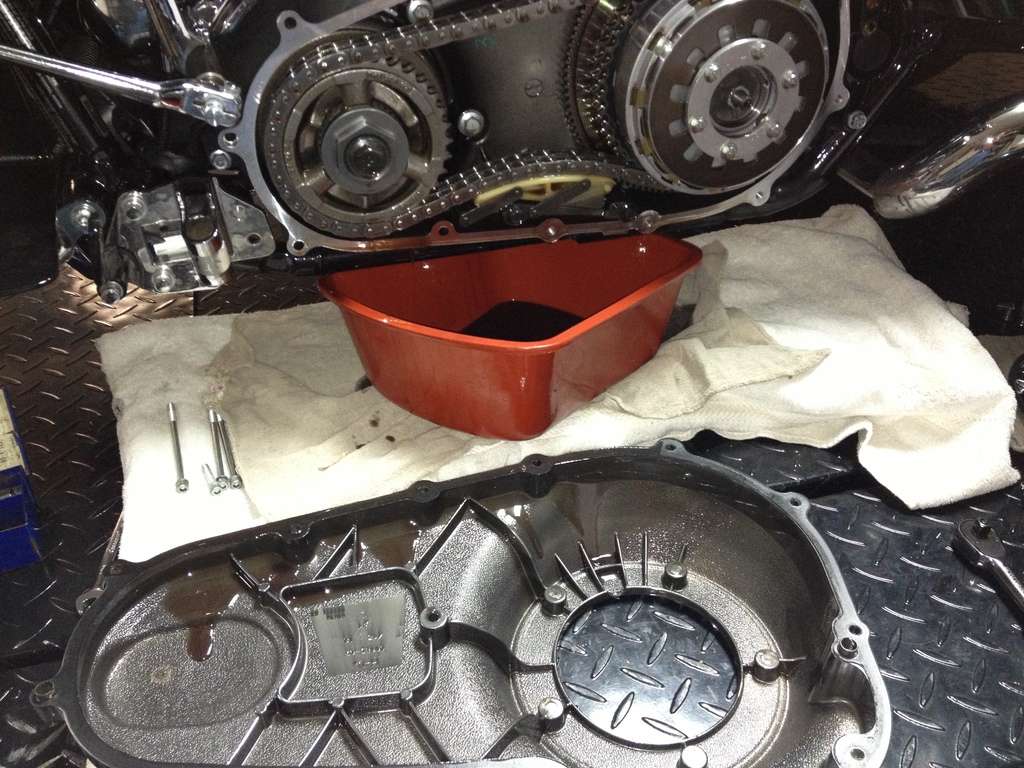
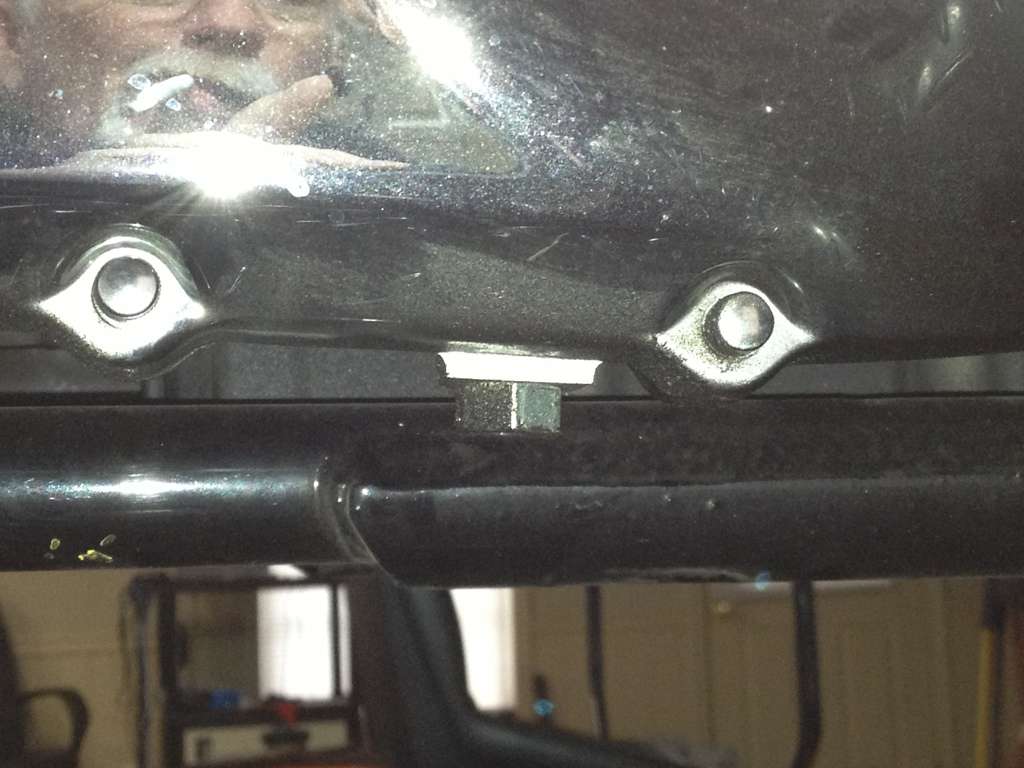
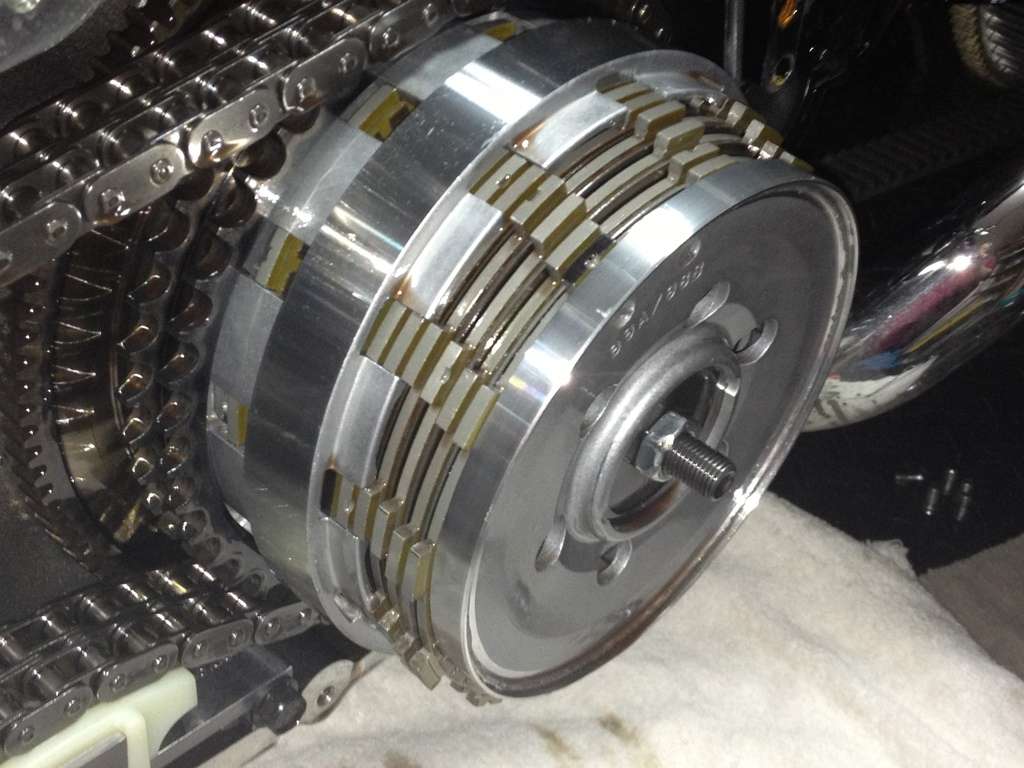
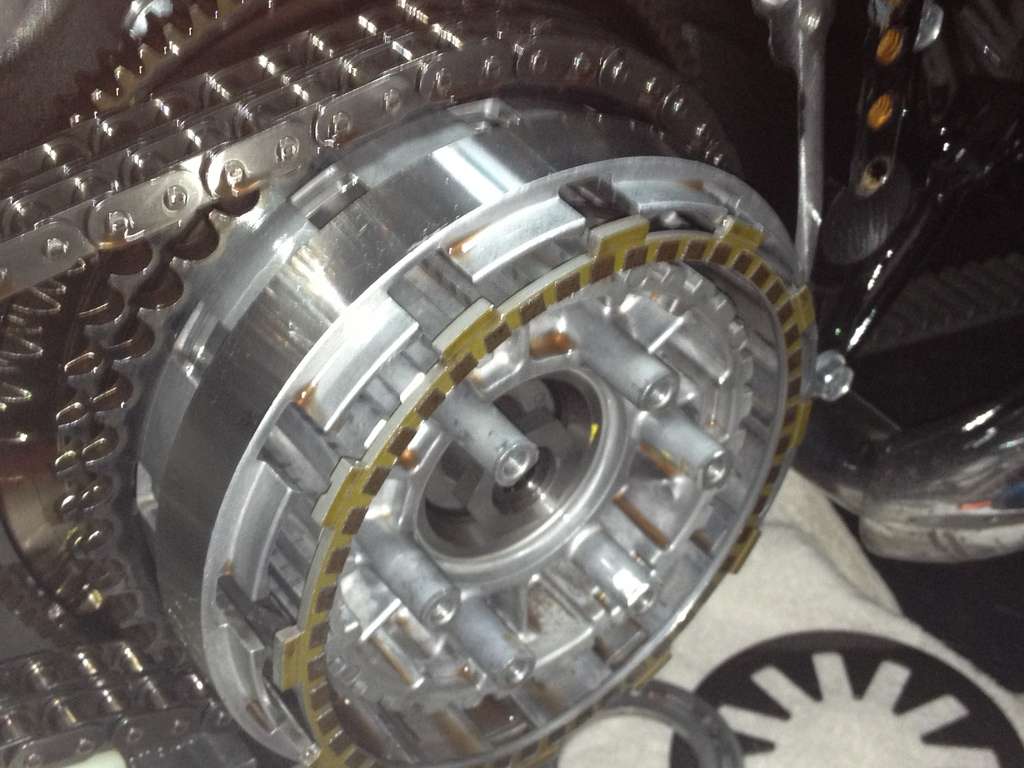
To the left is the Harley SE Compensator. Center bottom is the POS ratchet type primary chain adjuster and to the far right is the clutch basket. We want to remove the chain adjuster first.
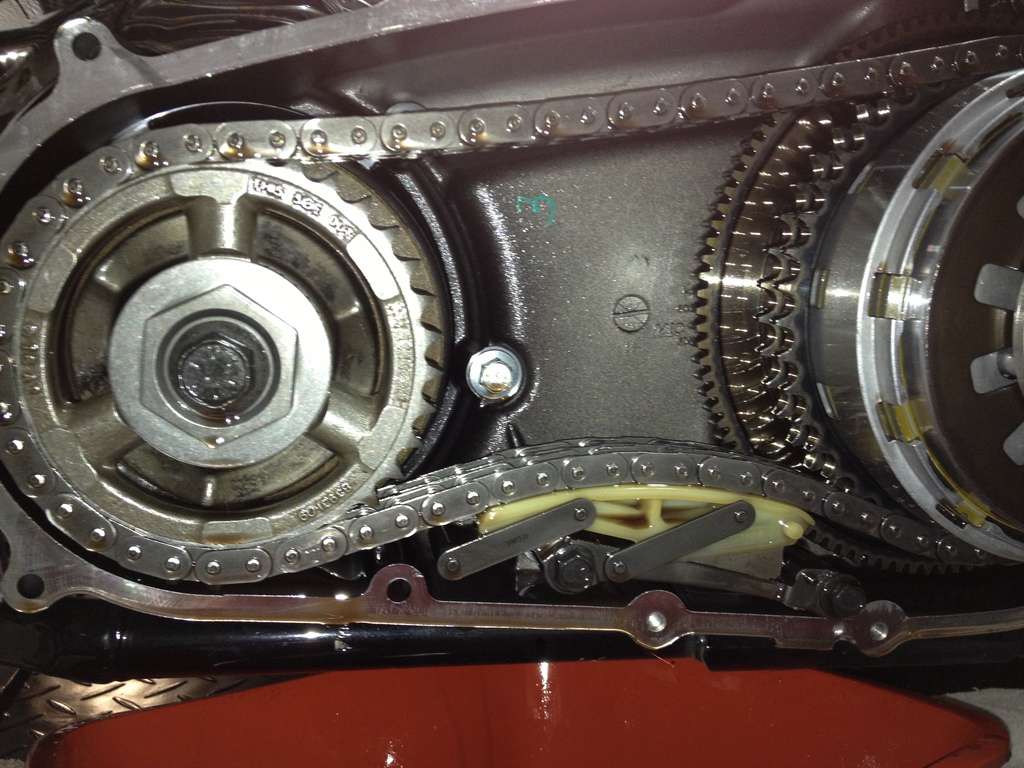
Pull off the two bolts that hold in the chain adjuster. Keep the bolts and reuse them later.

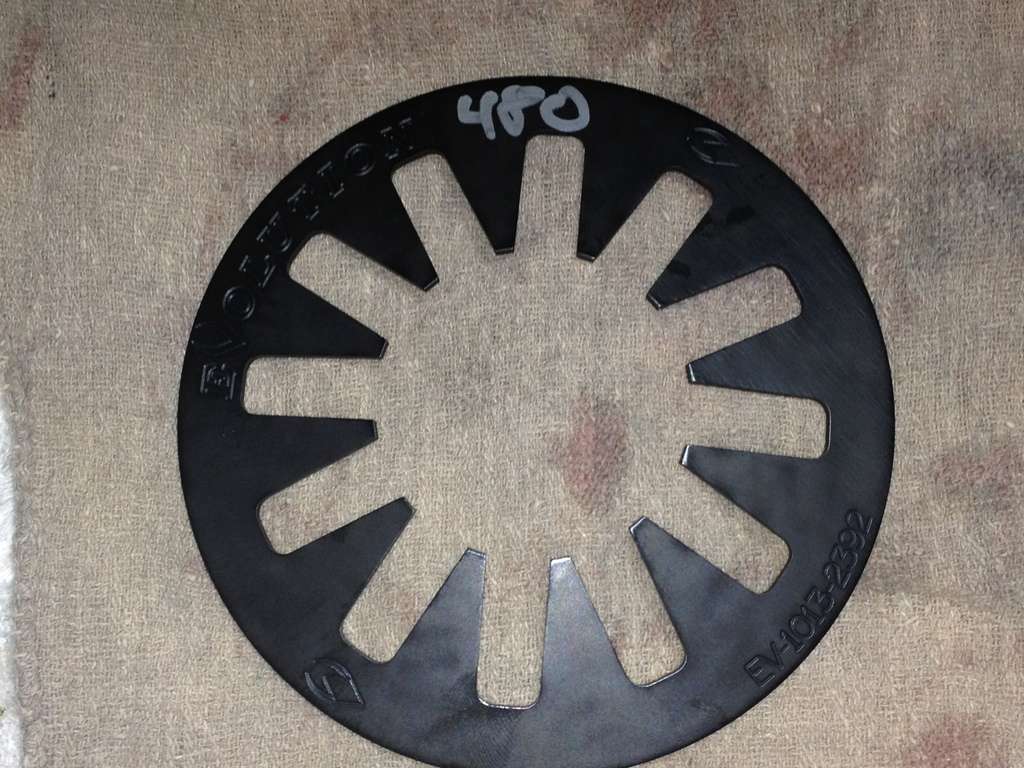
Remove the Hayden parts from the box and lay them out. There will be two shim plates. Hayden says to have a 3/8" adjustment. To get this I didn't have to use a shim. You may have to install the Hayden to see if you need a shim. Others I've talked to like less than 3/8, they want 1/4". If that is what you want then use the thin shim.
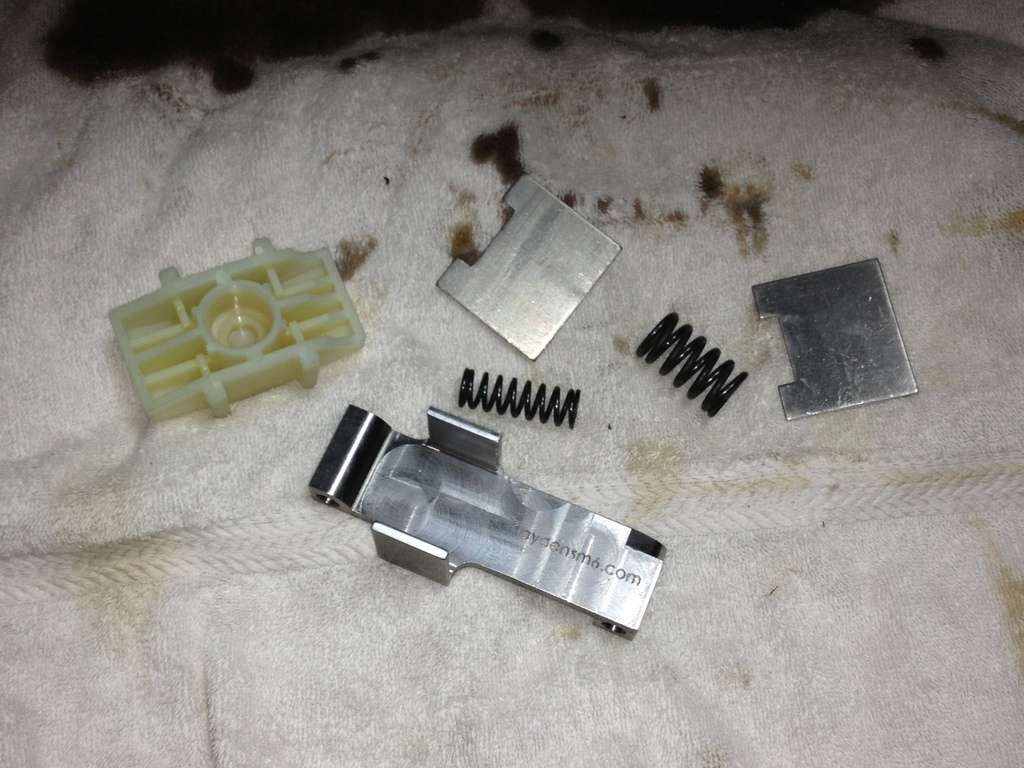
Insert the small spring inside the larger spring. Put both springs in the round slot in the Hayden primary shoe. If you want to use a shim, install it now. The shoe will slide over the bracket. It's difficult to put it together wrong. Just be sure to mount the shoe cut out points to the front of the bike.
Take your 10" zip tie and wrap it around the Hayden assembly to hold it together. Place it on a sturdy table and press down on the shoe. Compress the spring and pull the zip tie tight. You will need to compress the Hayden height to get it under the primary spring. This is also where the wide blade screwdriver comes in handy. You can use it to help move the chain a little .

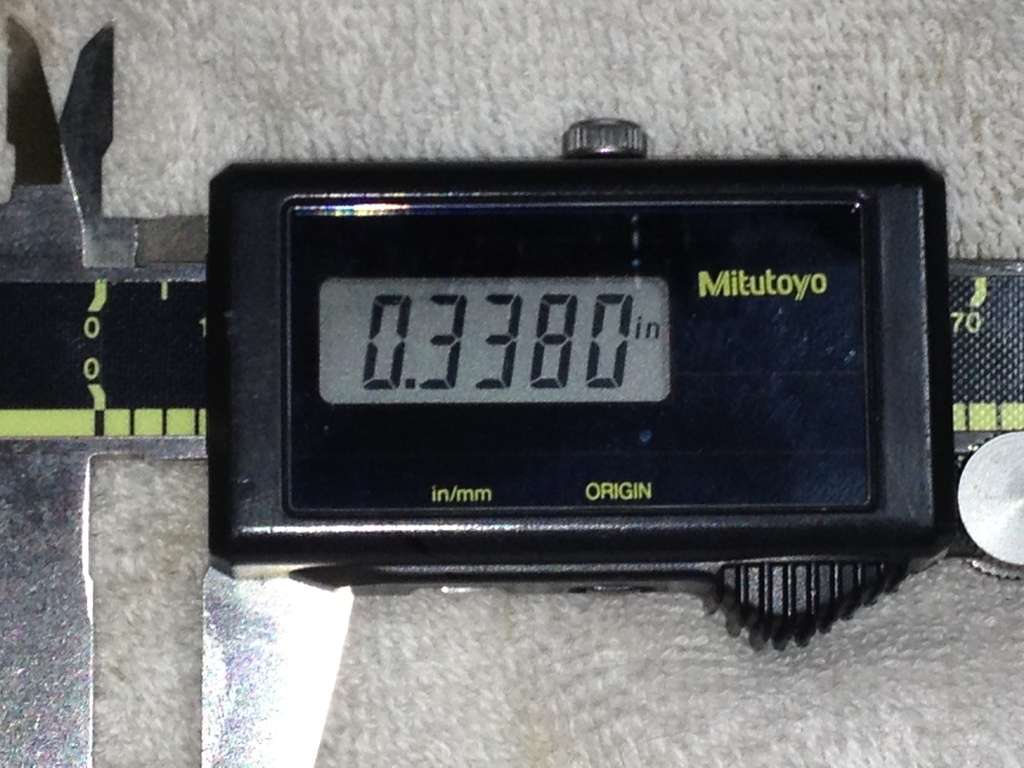
Tap on the Hayden to line up the right hand bolt. Use your old adjuster bolts. Use the flat blade screwdriver to gently pry under the Hayden to start the right hand bolt. Don't tighten it, just get it started a few turns. Use the pry bar to gently move the left hand bolt hole in place. Get it started and then give it a few turns. Cut the zip tie and remove it. Measure the Hayden adjustment before you tighten the two bolts.
Now, if the adjustment is to your taste, tighten the two bolts to specs (specs are in the paperwork) and you're done. If the Hayden adjustment isn't to your liking then pull the two bolts and start over by adding or removing a shim if you installed one. Rinse and repeat. Hope you have another zip tie laying around.
Here is what my measurement was digitally. It's just shy of 3/8 without a shim.
You're done. Now... let's get the clutch pack replaced.
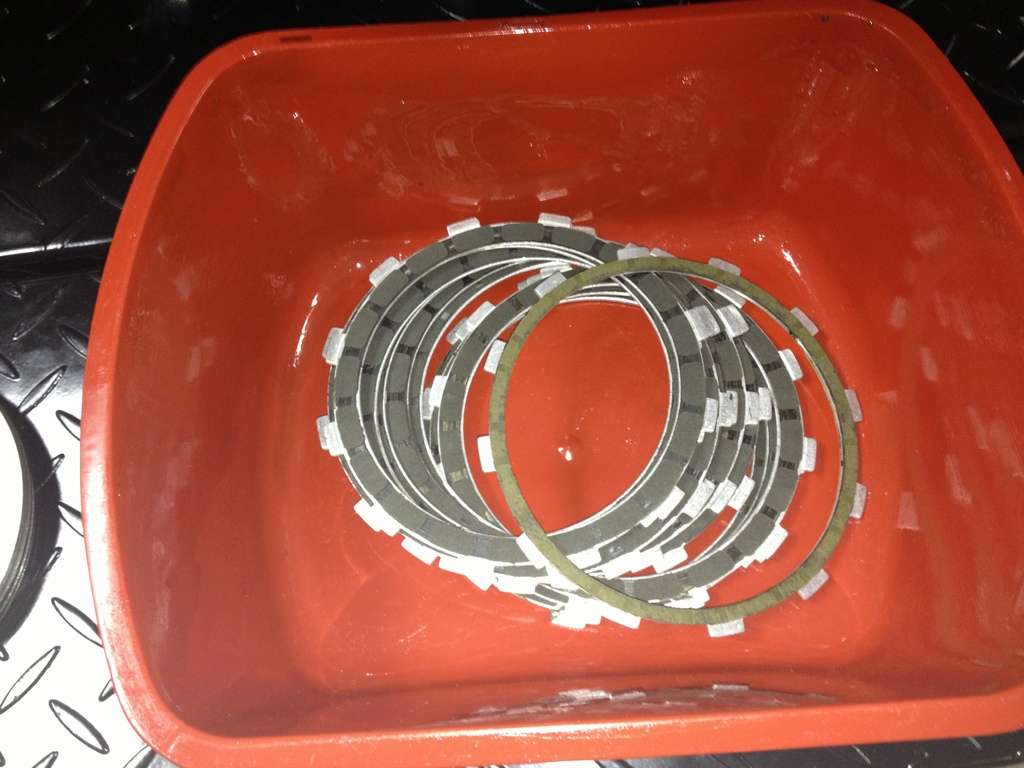
Open the Barnett box and remove the clutch bands and new steels. Clean your oil bucket and scatter the new clutch bands across the bottom. See the top band? See it is smaller than the others??
Remember this new and smaller band.
Take your primary lubricant and soak your new bands. Factory directions say 3 minutes but they are going to live in an oil bath. So, as long as they are wet before you install them it's fine.
While your bands are soaking... let's pull off the ClutchWIZ and the clutch spring.

Gently pull on the clutch pack. It will slide out very easily.
DON'T LET IT ALL COME OUT AND FALL APART.
If working on a two wheel bike and the bike is at an angle then the clutch bands will slide out and fall everywhere. You will want to carefully slide out the bands and old steels a little at a time and keep them together. This way you have a map of how they go back in.
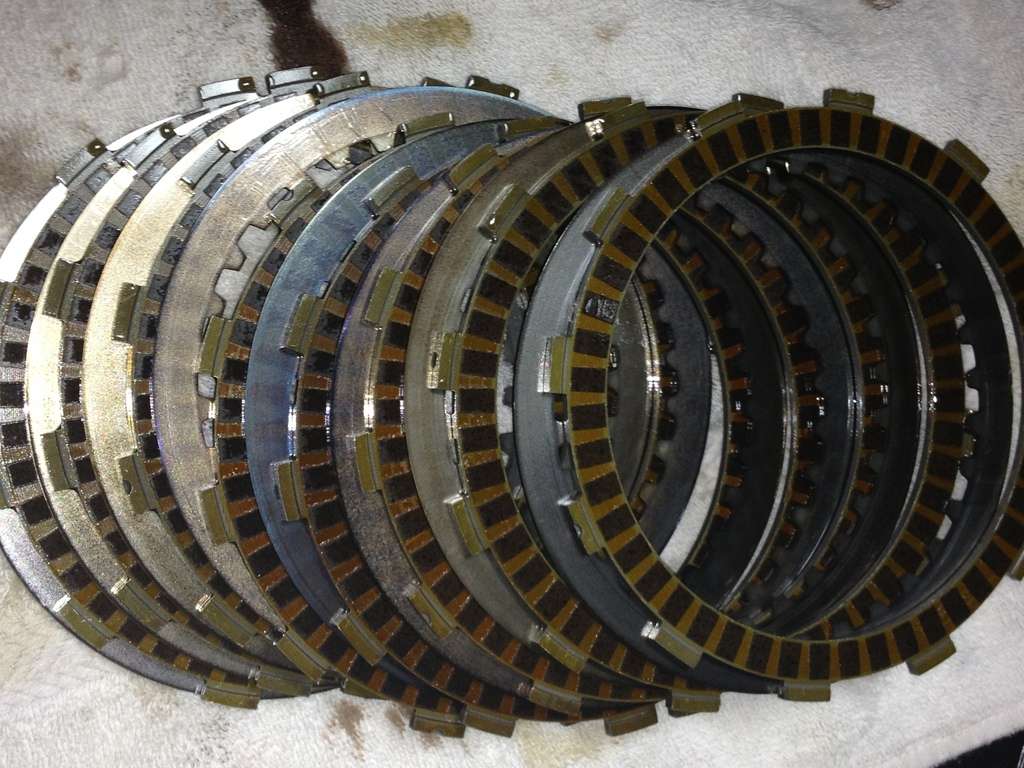
Here are my wonderful old stock Harley clutch bands and steels. Notice how the steels in the center are dark? This is the reason why some Tri Glides have had warranty issues. Weak stock clutches, heavy trikes and clutch slippage when using the friction zone from a stop.
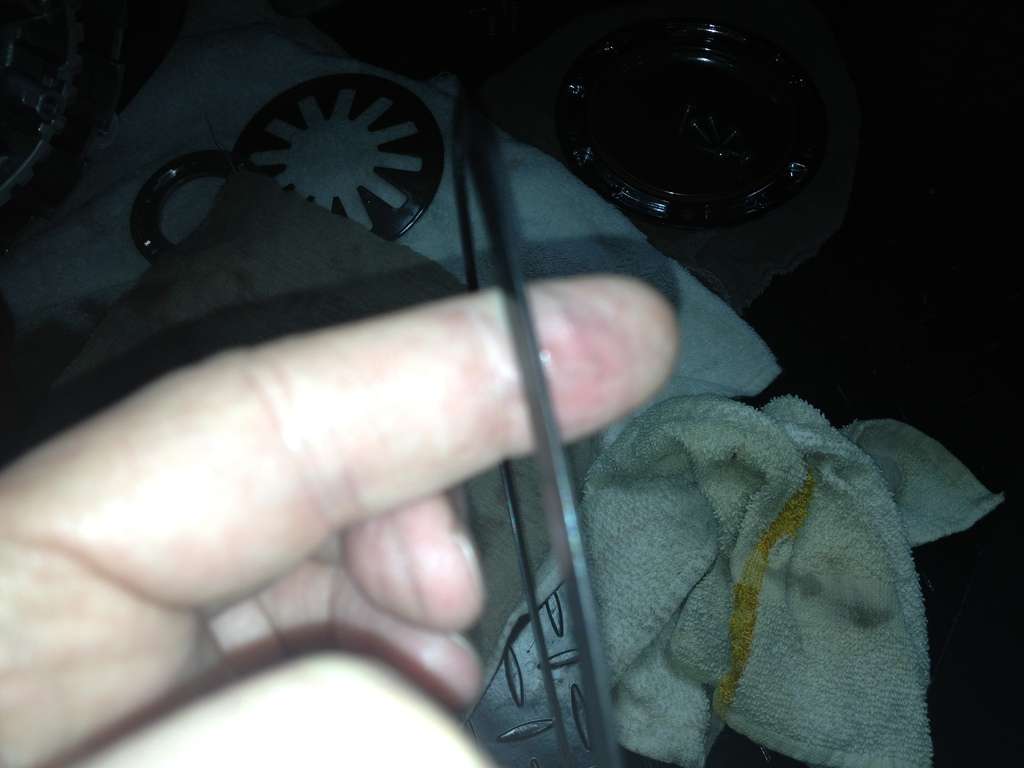
Alright... we are ready to install the new clutch bands and steels, yes? ARE WE? Did you count the ones that you removed?? There are only 8 in the picture above. There's one more in there. Better look for it and get it out of there. You may need a small screwdriver to help you find it.
OK, there it is... old number 9. Remember the smaller band soaking in the oil bath? There it is. Go ahead and pull it out and place it with the others.
When removing the small band from the picture above you will need to be careful you don't pull the dished ring and small flat ring from the clutch pack. *** IF YOU WANT TO KEEP THE DISHED RING. It is called the Damper Spring.*** If they do stick together then the small flat ring goes back in first then the dished ring second. See the pic below to see the dished ring. I know it's hard to see but if you lay it down you can see that this ring is cupped a little. The cup faces away from the motor when you reinstall it.
***Some installations of a +1 clutch assy will create an issue finding neutral. I sometimes leave this Damper Spring out. This will relieve a little surface tension on the new clutch pack and help in finding neutral. THIS IS TOTALLY UP TO YOU AND YOUR CALL. The damper spring is still in my trike and works fine.
What's next? Yep, the new clutch bands and steels. Remove the soaking bands from your oil and use a clean cloth to dry them off but not totally dry. Leave some oil on them. Remember our old buddy... Mr. Small clutch band? He's first. Go ahead and install him. Then install a new steel then a new band then a new steel. Do this carefully and slow. Take your time to make sure you get the order correct. Insert all the bands and steels until they are all in.

Time for the new spring and ClutchWIZ install. Easy as pie. Once installed go ahead and adjust the clutch now. It's much easier to get to the shoulder nut now than with the primary cover on.
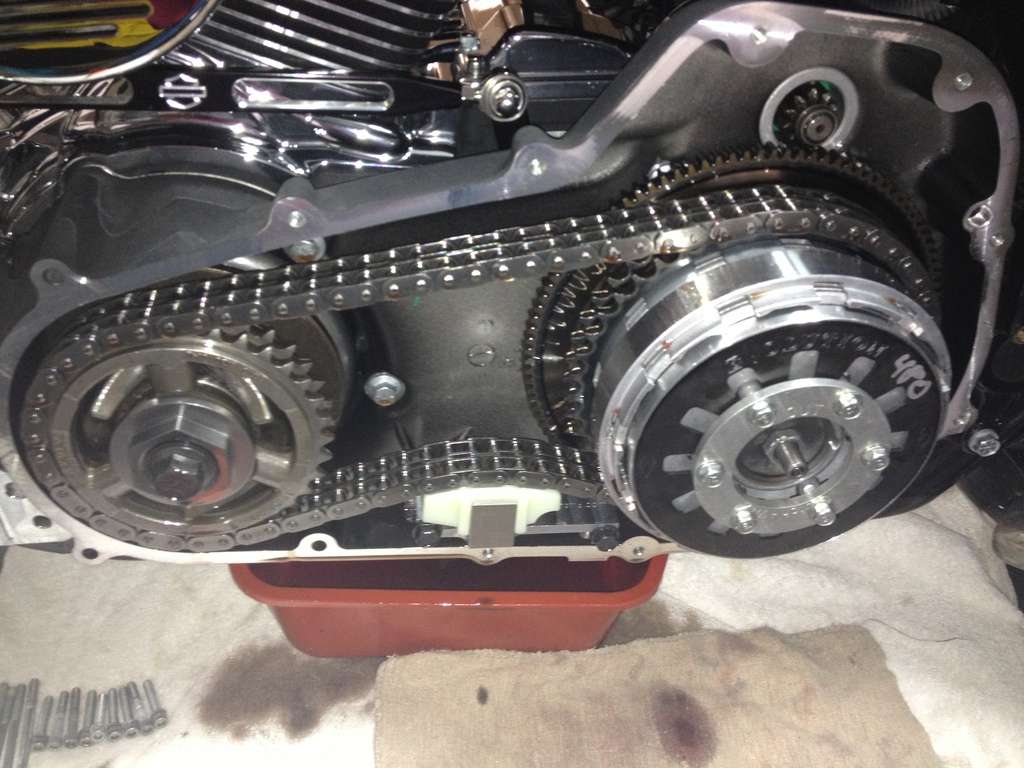
Great.. we are on the home stretch. Time for the primary cover, passenger floorboard, toe shifter and riders floorboard. Go ahead and install them now but leave the derby cover off. We still need to add primary fluid.
Good... it's time to fill the primary with our fluid, right?
WRONG STOP RIGHT THERE
Did you put the drain plug back in? It's out of sight and out of mind so grab your 5/8 wrench and snug her up.
Now we are ready to fill but check this out...
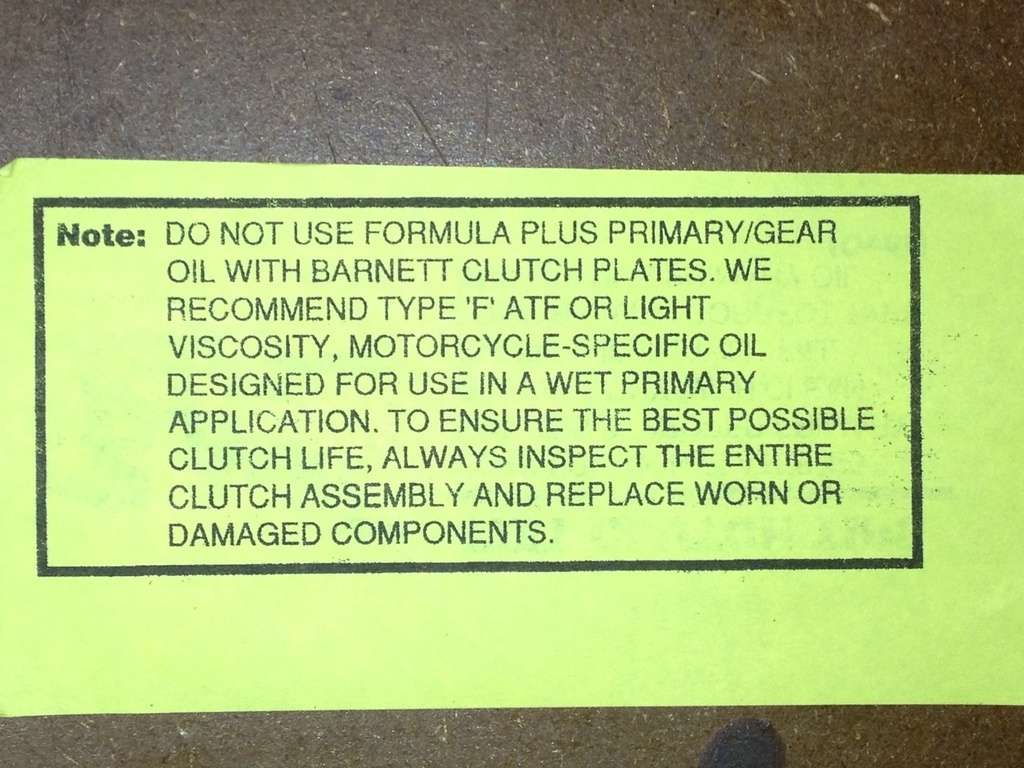
I didn't understand why they would say such a thing so... I called tech support at Barnett for an explanation. I don't want to use just ATF, it's too thin and may leak through the internal primary seals or the outer case seal. Here's the word....
In cold climates the Formula Plus will thicken up and cause the clutch bands to somewhat stick together until the oil warms up. This will cause the bike to creap if cold and in first gear. If you live in a warmer climate you can use it with no issues. Syn3, he said, was fine too. (Ugh... I don't like Syn3) His favorite was B&M TrickShift but mine is a mix of Formula Plus and ATF.
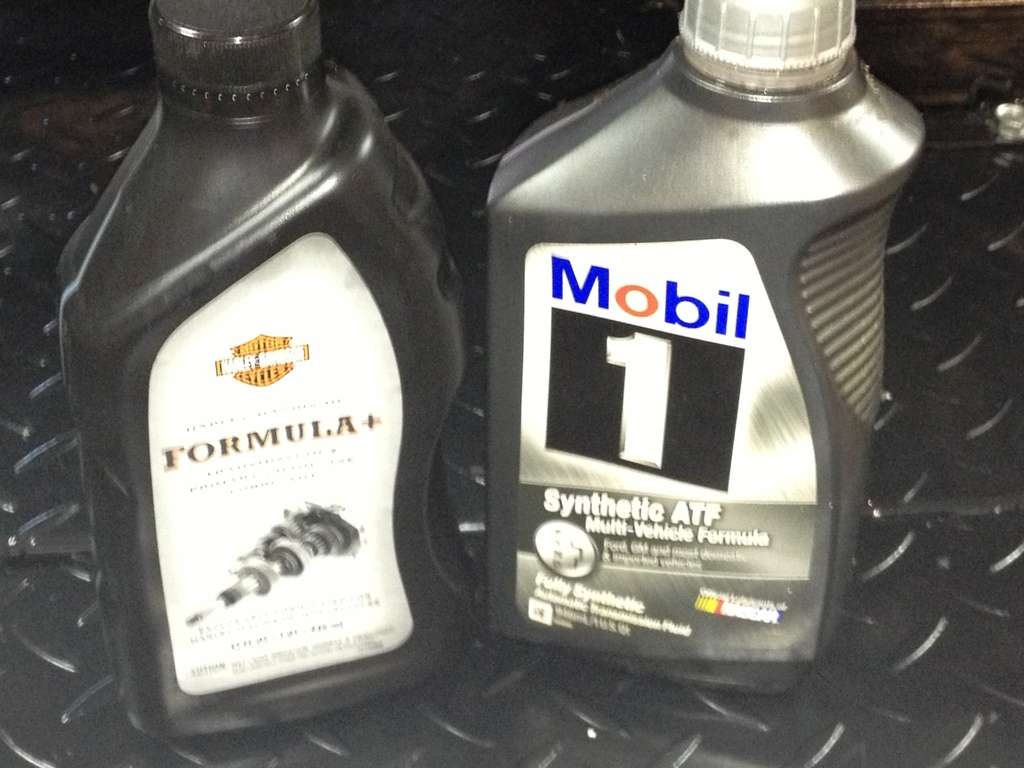
The thinner your primary oil the cooler your clutch will run. Low viscosity oil dissipates heat faster than thicker oil I use 30 oz of Formula Plus and 15 oz of Mobil One Syn ATF. I got the high sign, no warranty or leaking issues.
Since you now have a dry primary, we need 45 ounces to fill the Tri Glide. Check your manual for the details on your bike.
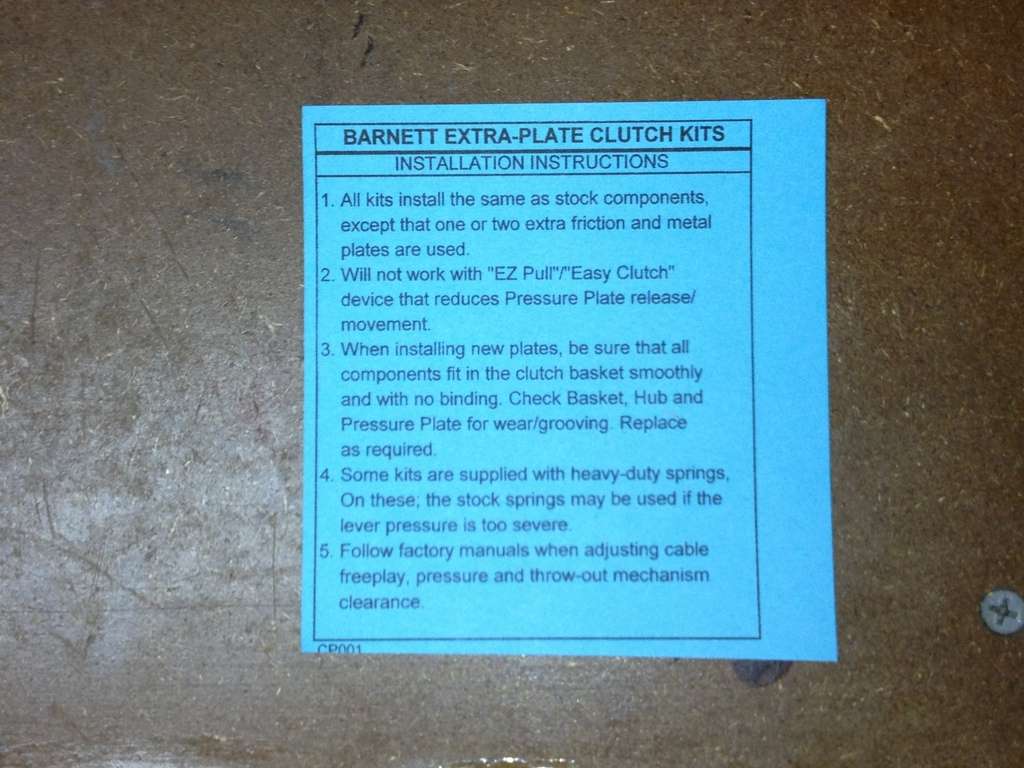
One more thing to discuss. There is a sheet that comes with the Barnett, pictured below. It says not to use a EZ Clutch/EZ Pull when using a Barnett clutch. These are right side ramp devices that install under the tranny cover on the right side of the bike. These "Ramps" actually reduce the friction zone which, with a +1 (extra band), could reduce pressure plate release movement. This doesn't happen when using the ClutchWIZ.
So... there ya go. All cleaned up and ready to enjoy your new clutch mods. The ClutchWIZ will reduce the lever pull on mine to 11 pounds now with the TGlidestuff.com 480 spring. The +1 clutch pack will put the torque to the rear wheel much better than the weak HD clutch and the Hayden will reduce the primary chain slap you get when either changing gears or rolling on or off the throttle. Shifting will be smoother and your ride more enjoyable. You now have a clutch that should last you a very, very long time and slow down or may stop the fretting on the SE Compensator.
Well done!
Ride Report.
Took my first jaunt on the above modifications. WOW.. huge difference in the way the clutch engaged and put the torque to the rear wheel. The Hayden tension adjuster is da bomb. Remember the first gear SLAP when cold.. nope, it's down to a clink. Shifting between gears you can't feel a thing just hear a clink, let out the clutch and there's the power. Clutch lever pull = 11 pounds with the TGlidestuff.com 480 spring. Not bad, not bad at all.
This mod gets (*****) five stars from me
I hope you enjoyed reading this and hopefully will show you just how easy it is to mod your baby and increase your riding experience.
EDIT:
For those who ask me for the Barnett +1 part number is it 307-30-20013 pr 10013. I get mine from Amazon. One is Kevlar and the other is Carbon Fiber. Either will work just fine.
-Wiz
The following users liked this post:
RADLINE (01-04-2021)
#4
02-05-2016, 04:26 PM

#5
02-05-2016, 04:45 PM
Seasoned HDF Member
#6
02-05-2016, 06:59 PM
Not sure if I will repost cam install or not. Had to get special permission to increase the text count just to post this one here. Boss said I could stick it when ready. Thought I would leave it here for a bit. I see the "Cam thread" is a sticky now. I did not do that but it has tons of great info for you guys to compare cams and sheets.
Remember when looking at the above article that the spring and CW will NOT work on the newer Slip-n-Assit clutch systems. If it is new and hydraulic chances are it is SNA clutch
Now... I'll say this. The above buildup of my clutch is still holding strong. I'm hoping for a bullet-proof clutch that will last the life of the bike. The stock clutch lasted 4000 miles.
#7
02-05-2016, 07:52 PM
Cruiser
What timing!! If you had posted this 2 days ago I would have gone with the Hayden chain adjuster...Oh well, another project, another day.
I just installed the Recluse clutch in my Tri Glide due to a pinched nerve and no strength in my left hand to squeeze the clutch lever. Works great so far. Just have to learn how to shift it now!
Great write up as usual.....
Jim
I just installed the Recluse clutch in my Tri Glide due to a pinched nerve and no strength in my left hand to squeeze the clutch lever. Works great so far. Just have to learn how to shift it now!
Great write up as usual.....
Jim
Trending Topics
#8
02-06-2016, 08:08 AM
My original HD clutch pack was slipping within 100 miles of picking the Tri up new.I took the bike to two different dealers who each tried to adjust it( they both said it was okay), I even tried, but, no luck. Soooo, at a few thousand miles, I installed the Barnett+1 clutch pack. What a tremendous difference it made. The original HD clutch pack bands were significantly burned and the primary fluid had a burnt smell to it. I called Barnett like you did, Wiz. I had the same concerns you did about what fluid to use. I decided to use 1 qt Mobil1 ATF to 2qts HD Formula Plus. I've been running this setup for almost 3 years now and I am completely satisfied. Although I think I would like to install a Clutch Wiz this year.
#9
02-06-2016, 11:32 AM
My original HD clutch pack was slipping within 100 miles of picking the Tri up new.I took the bike to two different dealers who each tried to adjust it( they both said it was okay), I even tried, but, no luck. Soooo, at a few thousand miles, I installed the Barnett+1 clutch pack. What a tremendous difference it made. The original HD clutch pack bands were significantly burned and the primary fluid had a burnt smell to it. I called Barnett like you did, Wiz. I had the same concerns you did about what fluid to use. I decided to use 1 qt Mobil1 ATF to 2qts HD Formula Plus. I've been running this setup for almost 3 years now and I am completely satisfied. Although I think I would like to install a Clutch Wiz this year.