TG Modifications – The ABC’s of Removing Rider Heat A + B = C
#1
 08-13-2010, 10:40 PM

TG Modifications – The ABC’s of Removing Rider Heat
A + B = C
A = Motor Heat, B = Exhaust Heat, C = Rider Heat
A + B = C
A = Motor Heat, B = Exhaust Heat, C = Rider Heat
Simple and easy right, well in this case it seems to be the best way for understanding how best to reduce the heat the rider and passenger feels when riding a Harley Tri Glide. The enclosed information is certainly not the only way but it may be the most thought out and popular way of modifying a TG to save money and increase standard operating performance.
Let’s start with why the heat is transmitted to the riders of a Harley Touring Trike more so than a two wheeled bike. This simply involves aerodynamics or how the wind moves around the riders. When air moves in a straight line it is moving at a single velocity. If the same wind has to move around an object the velocity will increase. So, when air moves around an object such as a front fairing it speeds up and as the same air hits the fenders of a trike it again speeds up. So now, you start with straight line air... then deflected/faster moving air surrounding the riders... thus putting them in slower moving air which creates a bubble effect. No, this does not mean you are in a void but in slower air which is surrounded by faster moving air. This is also know an an aerodynamic bubble.
Some say it’s actually a vacuum. Although that is not possible but the properties of being in the bubble of air can and will result in similar oddities such as… When rain drops come across your windshield they will hover for a split second before dropping to earth. If you take a feather and release it near the rider it too will be stagnate, if you can find the sweet spot of the bubble, before it blows away. So how does this bubble effect have to do with heat?
Heat rises and enters the bubble then has nowhere to go. Side wind has an effect on the riders bubble. It’s the wind you must try to take advantage of especially from the waist down on a rider. From the waist up you can simply open the “bat wings” on the fairing to break the air bubble. The faster you go with the bat wings open the more you deflect air to the riders mid section thus cooling using an evaporative effect. Now we all know why riding a Harley Trike can be hotter than riding a Harley two wheel bike.
**Note**, stopping at red lights and stop signs are going to be uncomfortable. It’s an air cooled motor and a Harley. It is just what it is, hot. It will be hot until you move once again to get air across the motor and your body.
Another way is to take advantage of reducing C is to reduce A and B. So, how do we do that using the best and most economical way? We use the same techniques as a two wheeler uses to convert his beloved Harley into what sounds and runs like a Harley.
For this experiment the owner of the 2010 Harley Tri Glide was given advice and did research for making his personal choice. I did not make the choices for him nor do I sell these parts. I did, however, interject my opinion for the tuning device. I will also list these parts with the manufacturer’s name simply because it is being used for his modifications. Your choice is a very personal one and should be yours alone. Do the research, weigh the pros and cons and decide for yourself which direction you intend to go.
For this TG modification we will be using the list of parts below. Pricing will not be included as pricing may vary.
RJ’s Originals Mid Frame Deflectors RJ's Originals
Fullsac 2009-2010 Tri Glide 103” Stage1-Performance Kit Fullsac
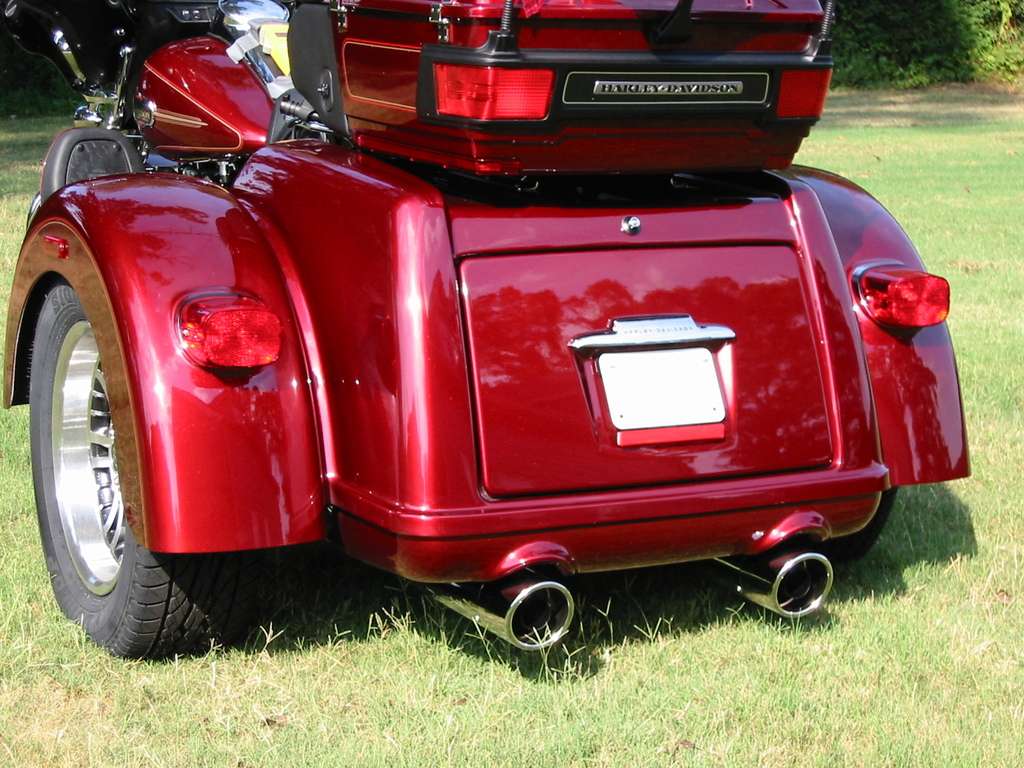
1.Fullsac Ceramic Coated X-Pipe
2.Arlen Ness Big Sucker Air Breather
3.Fullsac Mufflers with 1.75 Baffles and Reversible Slash Down End Caps.
4.TTS Mastertune ECM Tuner
Step 1 (Installation of RJ’s Originals Mid Frame Deflectors)
The Harley TG comes with HD deflectors. Temperatures were taken at the following locations during a 20 minute ride. The main sensor (#1) was installed 1” away from the frame wall under the seating area, just behind the rear cylinder and in the center of the mid frame deflectors with a separate fast acting temperature sensor (#2) fastened under my right thigh just above and to the outside of the knee. The ambient temperature was 91*, speed varied between stopping for street signs up to 50 MPH. The average speed cruising was 45 MPH @ 2500 RPM’s.

The average temps on sensor #1 during the average 45 MPH ride was 145* with a high reading of 178*. While sitting at a 30 second red light the temp rose to 297* before starting the ride again. Sensor #2 on my right thigh averaged 127* with a high reading of 139*. While at the 30 second stop light the high temp crept up to 151*. The average temperature fluxes were corresponding to MPH and RPM’s, the lower the RPM’s the lower the temp as expected.
After removing the HD Mid Frame Deflectors and installing the RJ Originals I ran the test again. Same ambient temperature, same route and the same red light.
The average temps on sensor #1 during the average 45 MPH ride was 122* with a high reading of 159*. While sitting at a 30 second red light the temp rose to 295* before starting the ride again. Sensor #2 on my right thigh averaged 111* with a high reading of 126*. While at the 30 second stop light the high temp crept up to 150*. Again, the average temperature fluxes were corresponding to MPH and RPM’s, the lower the RPM’s the lower the temp as expected
Sensor #1 average reduction was -23* at cruise and a high reading reduction of -19*.
Sensor #2 average reduction was -15* at cruise and a high reading reduction of -13*.
Conclusion, the RJ Originals reduced rider heat and the temperature under the open frame and seat by using the available wind more efficiently and whisking away the rear cylinder and exhaust heat from the rider.
Step #2 (Installation of the Fullsac Stage 1 Tri Glide Kit)
I started to write up a detail on the removal and installation of the TG head pipe but was simply too long for this post. So, remove your old pipes and install the new ones and the mufflers. This is a fairly straight forward event with the exception of your 02 sensors and the TG extension pipe. After the installation be sure to check for leaks, heat the motor up or go for a short ride then re-torque all fasteners especially your four exhaust port bolts as they will loosen up with heat.
Remove your air cleaner and install the stage 1 air cleaner. Simply follow the directions that come with it and make sure you have all the parts before removing your stock air cleaner.
Now for installing the TTS, making a copy of your factory map and saving it on your computer. Flash the TTS map that comes with the kit and VTune. Note, Vtune isn’t necessary but no bike is totally alike. You will find some VE tables that will be off just a little. This is totally up to the individual owner. There are threads dedicated to the VTune procedure and manuals/guides to follow that will make this job easy and dependable.
Once complete again I used the same sensors to take the A and B readings. I also added more areas to record operating temperatures to verify we are actually reducing temperatures from stock and just how much. The following are my recordings.
Sensor #1 is still located as the above.
Sensor #2 is still located as the above.
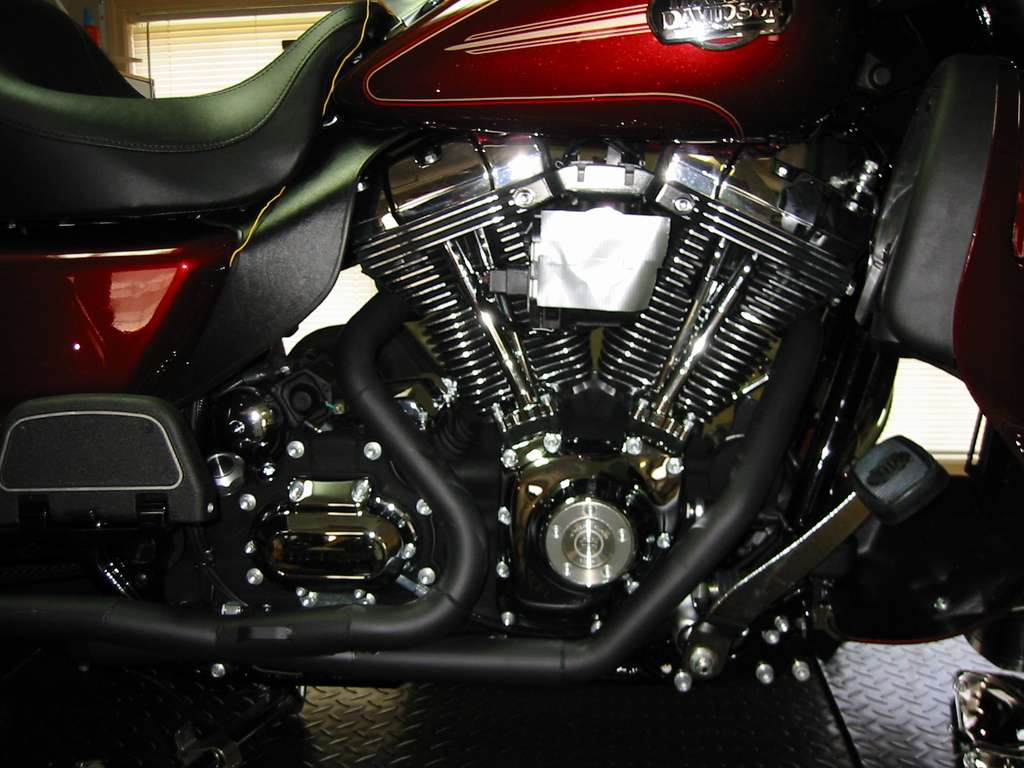
Temp reading #3 through #10 is shown in the pictures below. They are on the center of the back heat shield, center of the front heat shield and the center of the shield covering the cat device. The other locations are to the right and left of the spark plug on each head and a sensor was placed in the oil to take accurate readings of the circulated oil after riding.


There were readings were taken while the trike was in the stock factory condition as a base calibration. They were taken again after the installation of the Mid Frame Deflectors then again after the installation of the Fullsac Stage 1 Kit and TTS mapping. Below are my findings and temperature recordings.
Stock temperature readings on #3 though #10. Ambient temps were ranging from 91 to 95*, RPM’s from 2000 to 3500 and MPH average 45 to 50.
#1, center under seat behind the rear cylinder = 145* with a high reading of 178*.
#2, right leg located on the thigh just above the knee = averaged 127* with a high reading of 139*.
#3, center of rear shield = 140*
#4, center of front shield = 141*
#5, center of the cat shield = 154*
#6, left side of spark plug on front cylinder = 335*
#7, right side of spark plug on front cylinder = 284*
#8, right side of spark plug on rear cylinder = 333*
#9, left side of spark plug on rear cylinder = 393*
#10, sensor placed in the oil tank = 307*
Modification temperature readings on #3 though #10. Ambient temps were ranging from 91 to 95*, RPM’s from 2000 to 3500 and MPH average 45 to 50. This includes all above modifications and tuning.
#1, center under seat behind the rear cylinder = 118* with a high reading of 136*.
#2, right leg located on the thigh just above the knee = averaged 97* with a high reading of 103*.
#3, center of rear shield = 127*
#4, center of front shield = 113*
#5, center of the cat shield = 122*
#6, left side of spark plug on front cylinder = 288*
#7, right side of spark plug on front cylinder = 276*
#8, right side of spark plug on rear cylinder = 311*
#9, left side of spark plug on rear cylinder = 365*
#10, sensor placed in the oil tank = 248*
Conclusions to my findings are as follows. The modifications worked in reducing A and B by the following amounts.
#1, center under seat behind the rear cylinder = -4* to -23* (or -27* to 42* for the modification)
#2, right leg located under the right thigh = -15* to 13* (or -30* to -36* for full modification)
#3, center of rear shield = -13* (for full modification)
#4, center of front shield = -28* (for full modification)
#5, center of the cat shield = -32* (for full modification)
#6, left side of spark plug on front cylinder = -47* (for full modification)
#7, right side of spark plug on front cylinder = -8* (for full modification)
#8, left side of spark plug on rear cylinder = -22* (for full modification)
#9, left side of spark plug on rear cylinder = -28* (for full modification)
#10, sensor placed in the oil tank = -59* (for full modification)
Commentary
A + B = C We reduced the motor heat “A” by 42* nearest to the rider and the exhaust heat “B” by 32* at the cat shield. We also reduced the direct heat to the riders right thigh by 36* The reduction of heat made the rider more comfortable and the addition of torque (16.82 ft lbs/15.22 HP per the Fullsac Dyno Sheet) were felt with the extra throttle response and the reduction of the motor heat also made the rider more comfortable. For the dollar amount spent and the reduction over all for C (rider heat) was money well spent. “C” also stands for a “cooler” ride.
This research is certainly not the only way to reduce heat or the only available product line. TG riders have spend countless hours of investigating other aftermarket and OEM products to help remove heat from both the motor and the rider and increase the performance of their rides. I do hope that you enjoyed this write up and that in some small way it may have helped in your decision process.
-wiz
Pictures of the work preformed.


End of report.
Last edited by Mr. Wizard; 04-11-2016 at 02:21 PM.
The following users liked this post:
Bomber1955 (10-03-2018)
#3
08-14-2010, 04:33 AM
Advanced
Join Date: Sep 2008
Location: Washington, North Carolina
Posts: 84
Likes: 0
Received 0 Likes
on
0 Posts
#4
08-14-2010, 07:18 AM

#5
08-14-2010, 07:42 AM
#7
08-14-2010, 11:13 AM
Took a little extra time but as I promised, the next time I did this modification I would post my findings here.
This would be a nice place for all you guys to post what mods you've found were helpful also. All this info can be in one place instead of being spread out in this forum.
This would be a nice place for all you guys to post what mods you've found were helpful also. All this info can be in one place instead of being spread out in this forum.
The following users liked this post:
Ron in Warsaw (06-03-2021)
Trending Topics
#9
08-14-2010, 01:28 PM

Very informative indeed! Even though I made my product for the rider's comfort and to blend with the Harley's appearance from day one. Since HD came out with theirs. I was curious in the comparison from a technical stand point of heat deflection. Very good job there Wizard. Excuse me, Make that Mr. Wizard!
zoood/RJ
zoood/RJ
The following users liked this post:
Ron in Warsaw (06-03-2021)