Harley Davidson Sportster: How to Change Transmission Fluid
The transmission fluid reduces friction and heat inside your transmission. Any wear from metal or clutch material becomes mixed with the fluid and reduces its ability to lubricate. When this occurs, transmission wear will accelerate until shifting problems develop.
This article applies to the Harley Davidson Sportster.
Regularly replacing fluids is one of the most important maintenance tasks to keep your Harley running optimally. This is especially true for the transmission fluid, as it doubles as the primary chain lubricant. Although you don't need to change it as often as engine oil (5,000 miles), replacing the transmission fluid every 10,000 miles is recommended. Shorten the interval if your Sportster is ridden hard because the extra heat will deteriorate the fluid quicker.

Materials Needed
- Oil drain pan
- 3/4" wrench or socket (earlier models)
- Clean rag
- 5/8" wrench or socket (later models)
- Torque wrench
- T27 Torx wrench or socket (later models)
- Allen head wrench or socket set (earlier models)
- Large flat head screwdriver or pry bar (earlier models)
- 1 quart of Harley Davidson Formula+ Transmission and Primary Chaincase Lubricant or equivalent.
Two different Sportster generations will be covered. The earlier model is based off a 1980 XLH-1000. The second is based off a 2007; although, models up to 2015 are the same.
Step 1 – Drain the transmission fluid
Warm the engine to near operating temperature. This will allow the fluid to easily drain from the transmission. Place a drain pan beneath the drain bolt.
Earlier Model
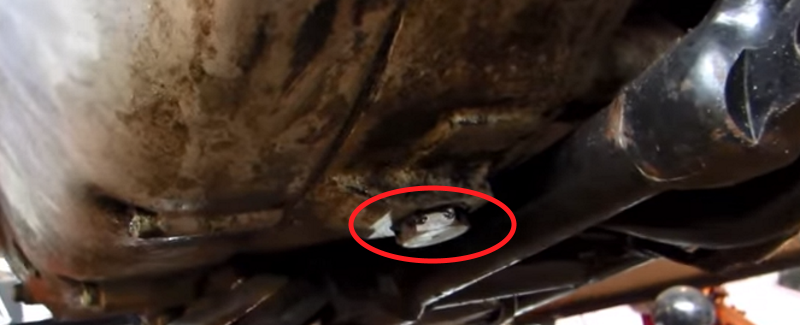
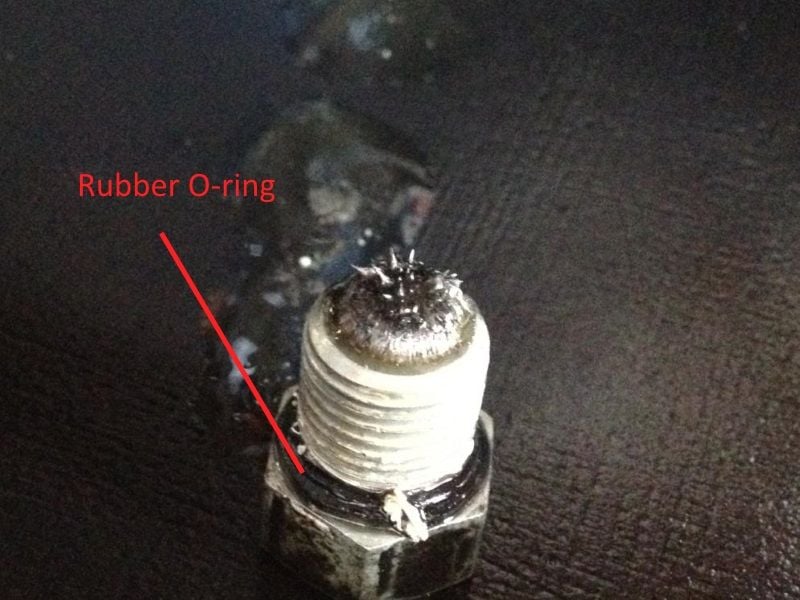
Locate the drain bolt (near the kickstand) and remove it with a 3/4" socket or wrench. Clean any material from the magnetic tip of the drain plug. A small amount of material is normal. Sit on the bike and leave it resting level as the remaining fluid drains. Inspect the rubber O-ring for damage on the drain plug and replace if necessary. Re-install the drain plug and torque it to 18 ft/lbs.
Later Model
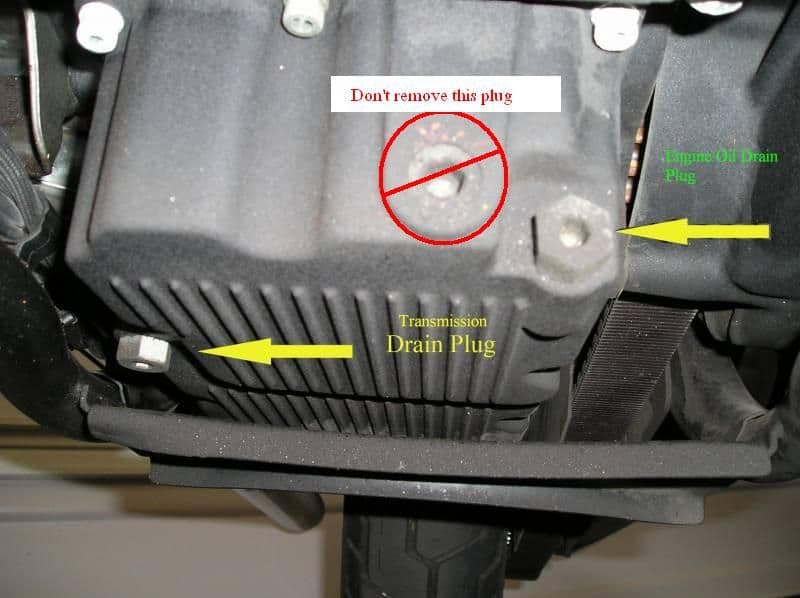
Locate the drain bolt (underneath the clutch on the bottom side of the chaincase) and remove it with a 5/8' socket or wrench. Clean any material from the magnetic tip of the drain plug. A small amount of material is normal. Sit on the bike and leave it resting level as the remaining fluid drains. Inspect the rubber O-ring for damage on the drain plug and replace if necessary. Re-install the drain plug and torque it to 18 ft/lbs.
Take this time to install a magnetic drain plug. The magnet catches debris that would otherwise be left to do damage in the transmission/primary. Magnetic drain plugs are inexpensive maintenance that work from the inside in a way that transmission flushing or other cleaning systems cannot.
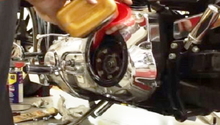
Step 2 – Fill transmission with new fluid
What brand of fluid you use can depend on your preference; although, Harley Davidson recommends using gear lube (75-90W). Harley Davidson makes fluid specifically for the transmission and primary case. This fluid is Formula+ Transmission and Primary Chaincase Lubricant (Part No. 98851-05 quart).
Earlier Model
Open the fill plug with a large flat head screwdriver or pry bar. Remove the transmission fluid level fill plug with a Allen wrench or socket. Level the bike and add fluid through the large fill plug opening until fluid pours out of the fluid level fill plug. Tighten down both fill plugs. Start the engine and check for leaks.
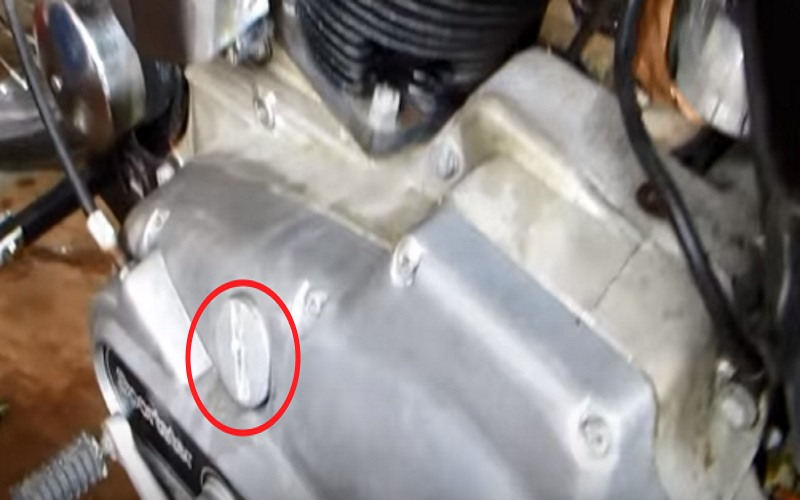
Figure 4. The large fill plug on the earlier models. 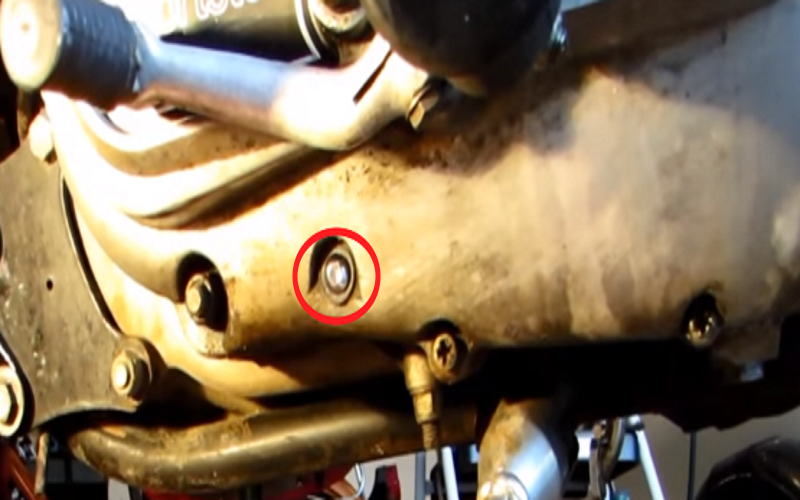
Figure 5. The smaller fluid level fill plug on the early models.
Later Model
Remove the clutch inspection cover. There are five holding it to the primary cover. With your Sportster leveled, add 1 quart of your selected fluid through the cover opening. Inspect the clutch cover quad-ring for damage and replace if necessary. Re-install the clutch inspection cover and torque the screws to 100 in/lbs. Tighten the screws in a star pattern. Start the engine and check for leaks.

Figure 6. The clutch inspection cover on the later models. 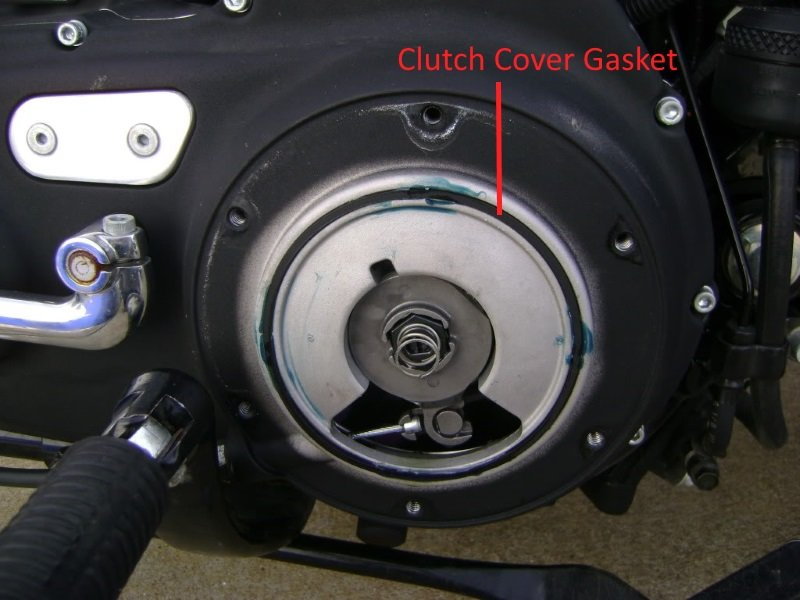
Figure 7. Make sure the inspection cover gasket is not damaged.
Featured Videos: Transmission Fluid Change
-
Sportster Transmission Fluid Change
-
Primary Oil Change on Sportster
Related Discussions
- Primary/Trans Fluid Change Intervals - HDForums.com
- Oil and Transmission Oil Change - HDForums.com