Harley Davidson Touring: How to Change Transmission Fluid
An oft neglected bit of your drivetrain is the transmission. Even those that religiously change their engine oil will offer a blank stare when asked when was the last time they changed the transmission oil. Preventing wear and extending the life of your transmission could not be easier as performing regular lubricant changes, just like for your engine. In this article we'll show you how.
This article applies to the Harley Davidson Touring and other Big Twin models.
Harley Davidson still used the old style setup where the transmission and the motor have their own oil supply, and the primary drive chain uses yet another separate oil bath. The good thing about this is that the transmission and primary chain oil don't get fouled with stuff left over from the combustion chamber, like the engine does. The bad thing is that many people forget to change the oil in there all together. The factory recommends you change the transmission fluid every 20,000 miles, and the primary chain oil every 10,000 miles. We'll only be talking you through the transmission oil, but there are links at the bottom for both.

Materials Needed
- 3/8" Hex (Allen) key
- 1/4" Hex (Allen) key
- 5/8" socket
- Ratchet wrench
- Torque Wrench
- Funnel
- Drain pan
- Brush or spray degreaser
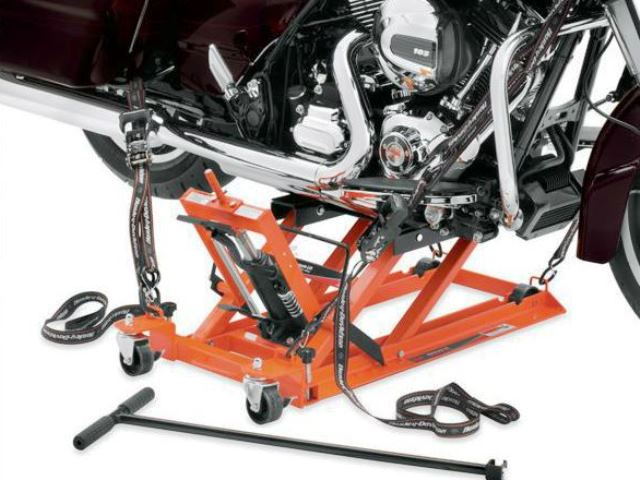
Step 1 – Position bike on a level surface or lift
In order to make sure your transmission drains thoroughly, the bike should be a vertical position rather than leaned over on its side stand. If you don't have a lift, have a helper hold the bike, or use other means to assure complete drainage. We'll talk more about that later.
Pro Tip
It's good practice to warm up the fluid by riding the bike or running the engine until it reaches normal operating temperature. Not only will the fluid drain more quickly and completely when it's warm, but debris as well as contaminants will be better suspended in the oil and drained out with the old oil.
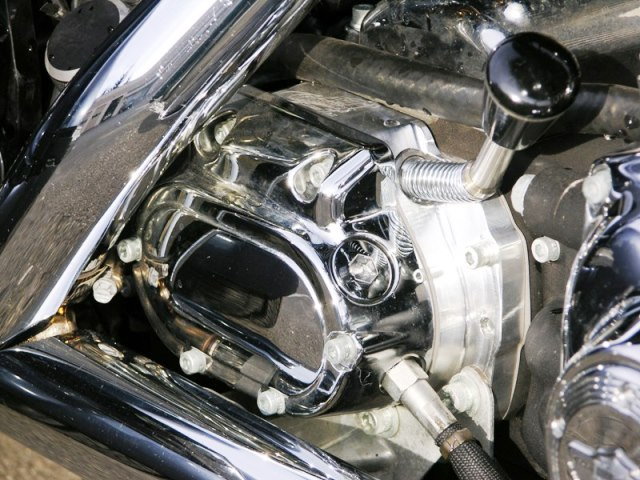
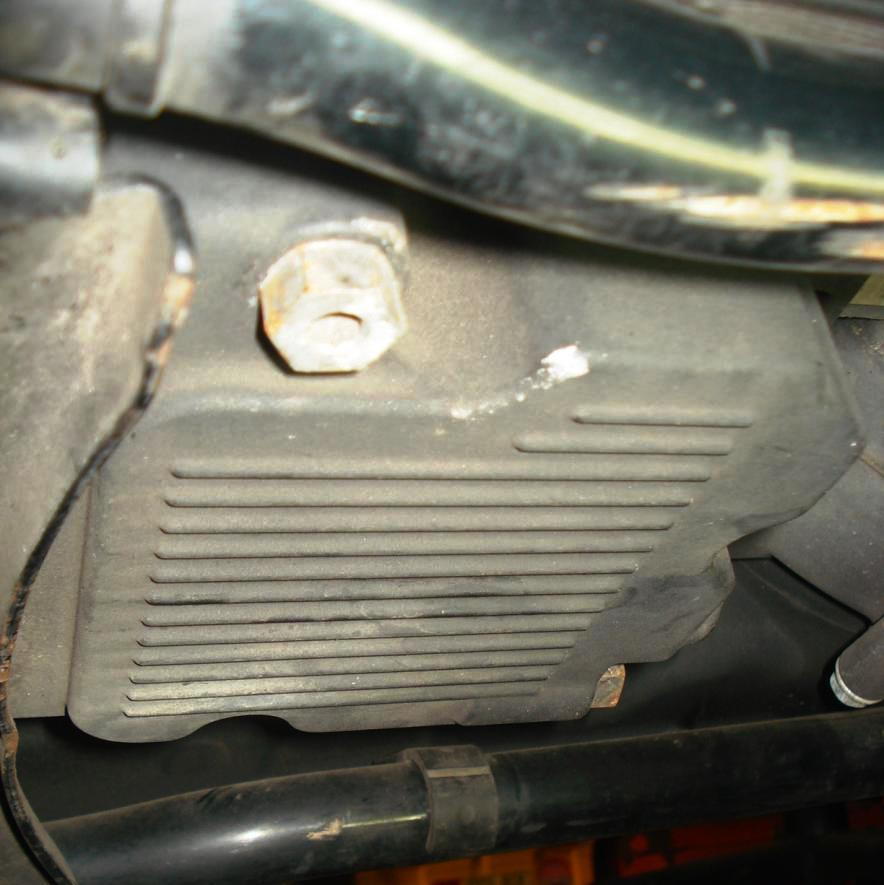
Step 2 – Thoroughly clean area around dipstick and filler port
Using a brush or spray degreaser, clean off the area around the filler cap to avoid dropping dirt and/or contaminants into the transmission when the cap is removed. Also, make sure the socket for the 3/8" Hex key is cleaned out to allow full engagement, and reduce the chance of the tool slipping as well as damaging the socket.
Pro Tip
Always make sure you can remove the filler cap BEFORE removing the drain plug.
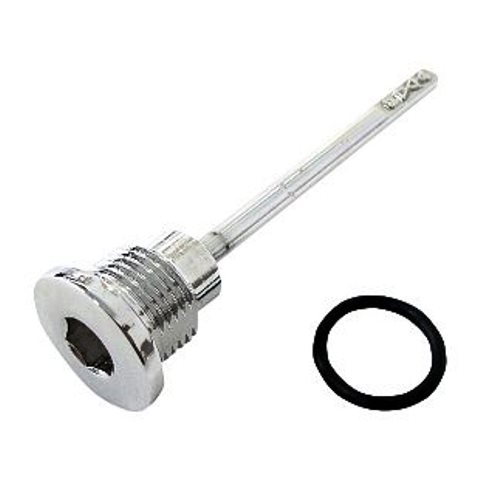
Step 3 – Remove the filler cap
Use the 3/8" Allen key and your ratchet to remove the filler cap. Once you have removed the cap, inspect the condition of the O-ring seal and make sure there are no cracks or abraded areas. If there is any damage, replace the O-ring.
Step 4 – Remove transmission drain plug
Position your drain pan directly beneath the drain plug, then carefully loosen the plug using the 5/8" socket and ratchet. Oil will begin to leak as soon as you begin unscrewing the plug, do your best not to drop the slippery little devil when it's all the way unscrewed. You don't want to damage the threads or have it land in dirty area.
While the transmission oil drains into the pan, examine the condition of the O-ring (replace if any damage is evident) and magnet on the end of the drain plug. Excessive metal debris adhered here is sign or a transmission problem you will want to follow up on with your dealer. This is why it's important not to drop the plug on the floor where the integral magnet may pick debris up off the ground and cause a false alarm about the condition of your transmission. Typically, for a healthy transmission there will only be some fine grey paste like debris there. Wipe this off with a cloth and or some degreaser.
If your bike is not already held vertically on a stand or a wheel chuck, straddle the bike and raise it to vertical until the oil drainage slows to a drip. I like to wait until there's less than one drip per second.
Pro Tip
In many cases, a 1/4" Allen Hex key can be used instead of the 5/8" socket, but we feel the socket will provide better purchase and minimize the possibility of stripping the bolt.
Step 5 – Replace drain plug and refill transmission
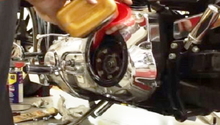
Wipe off the area around the drain opening and then screw the drain plug back in. Torque the plug to 14 to 21 ft/lb. Now clean any oil that spilled over the frame, exhaust etc. Moving to the top, refill the transmission with 20 to 24 ounces of lubricant. Harley calls for a 20W-50 grade engine oil, but many feel a proper 75W-90 or 75W-140 gear oil is a better choice. Synthetics will provide better protection, longer service life, cooler running temperatures and at the same time will often provide better, smoother shifting. We recommend a good brand synthetic gear specific oil be used.
When re-filling, first put only about 20 oz in, and then check the level; if not to full line, add 2 oz at a time until you reach the line or 24 oz.
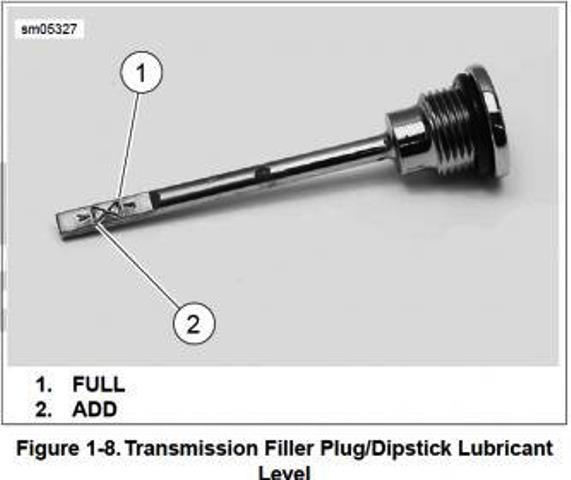
When reading the transmission fluid level, just rest the dipstick into the fill hole without screwing it all the way in. Remember to check the level with the bike in a vertical orientation, not on the side stand.
Pro Tip
Avoid over-filling the transmission, which may cause operational problems or loss of fluid from the vent. Best case, this is messy; worst case, you lube down your rear tire, which can be entirely too exciting and dangerous for our taste.
Step 6 – Replace the filler plug/dipstick
Once you are satisfied with the oil level, replace the filler cap. As a rule of thumb, start the threads and screw the cap in as far as you can by hand before using a wrench. Once the cap is seated, tighten it (carefully) to only about 15 to 20 inch-pounds. Clean up any split lube, then properly dispose of the used oil and you are ready to go ride.
Related Discussions
- Transmission Fluid Change - HDForums.com
- 2010 Tranny Oil Change - HDForums.com
- Changing Transmission Fluid - HDForums.com