Basketcase-Hardtail-Springer-Sportster
#21
 06-27-2009, 01:28 PM

UPDATE:
I was out in the garage goofing off tonight and have a few pictures of what I was doing.
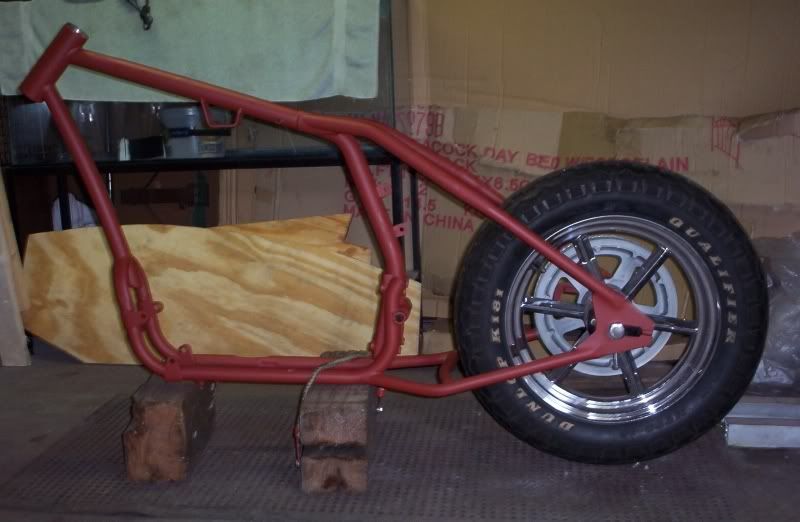
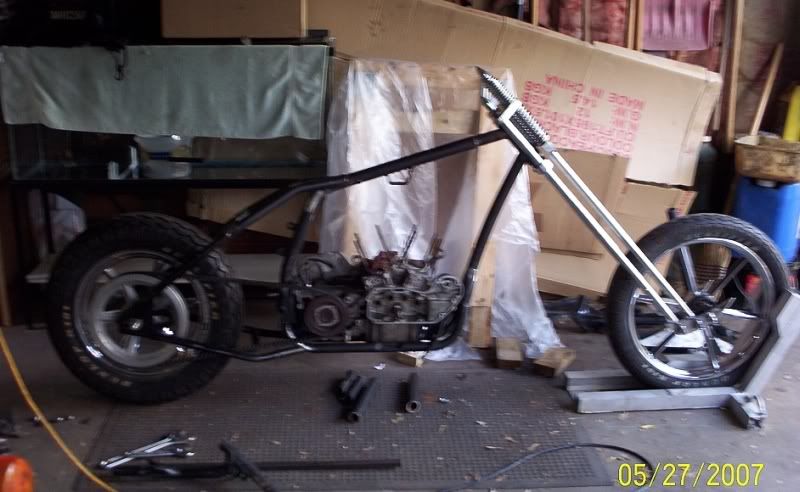
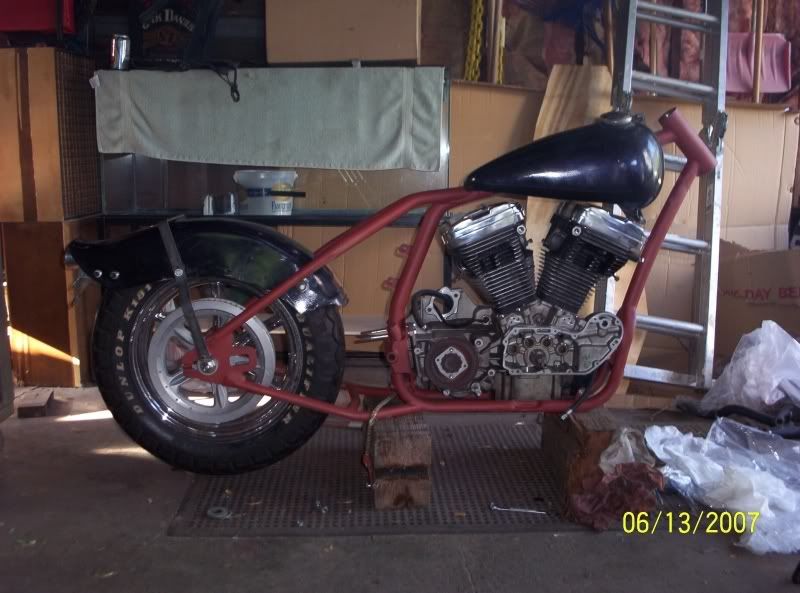
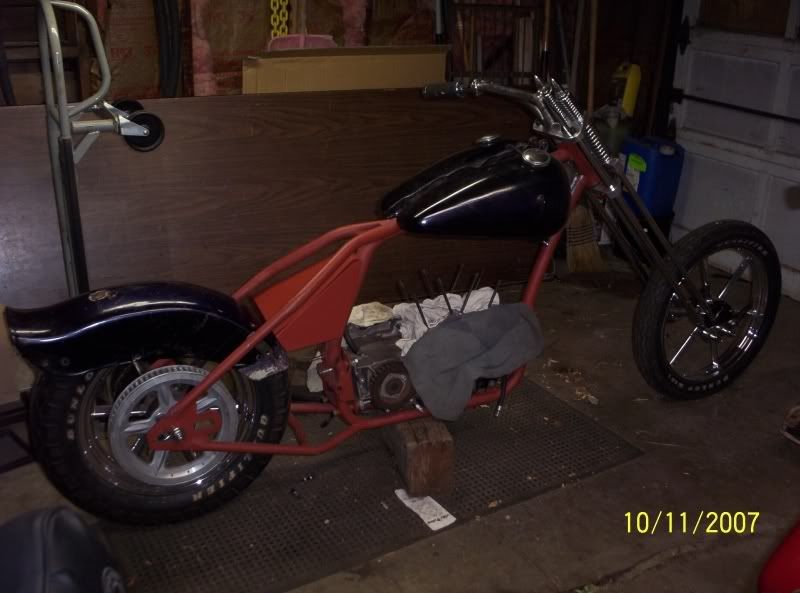
First, Here is a bare bones rear end, no fender:
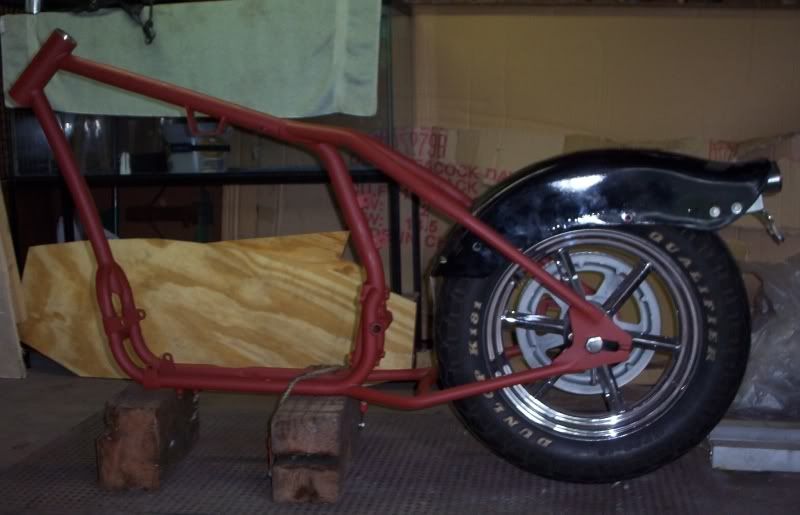
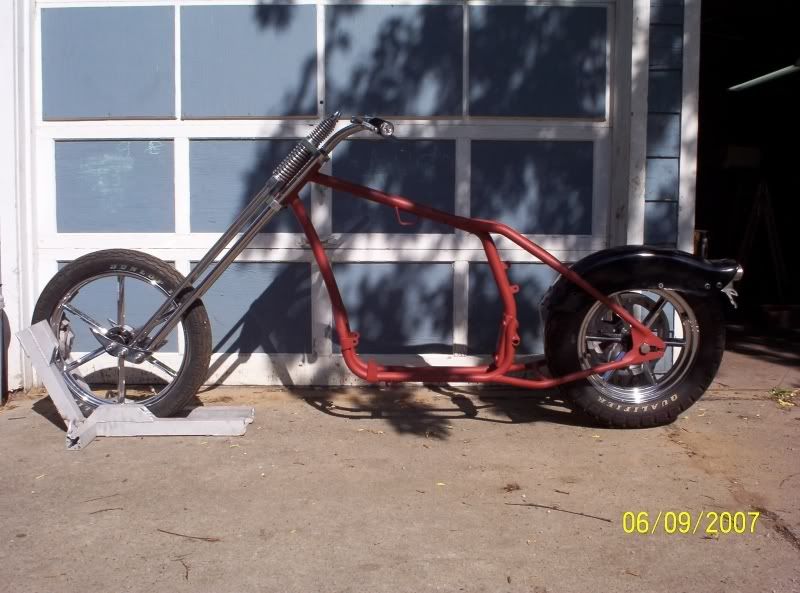
Now I have the rear wheel and fender on the bike with a piece of 2" PVC on the top of the tire and the front edge taped 1" away from the tire:
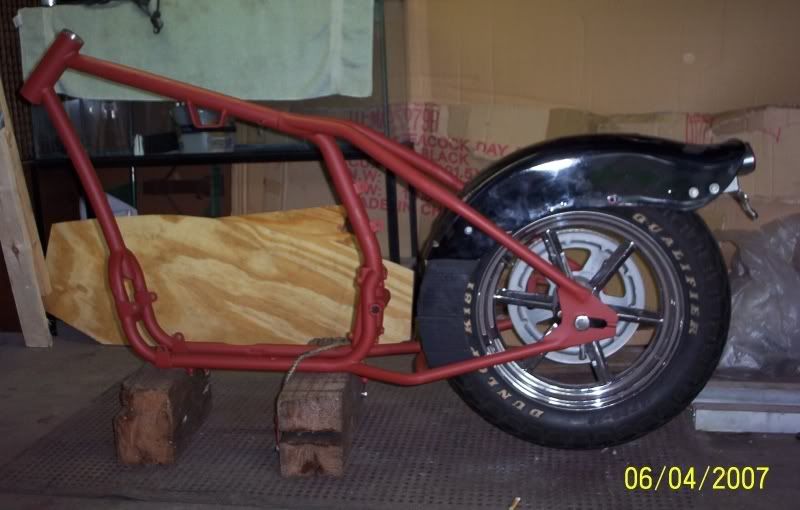
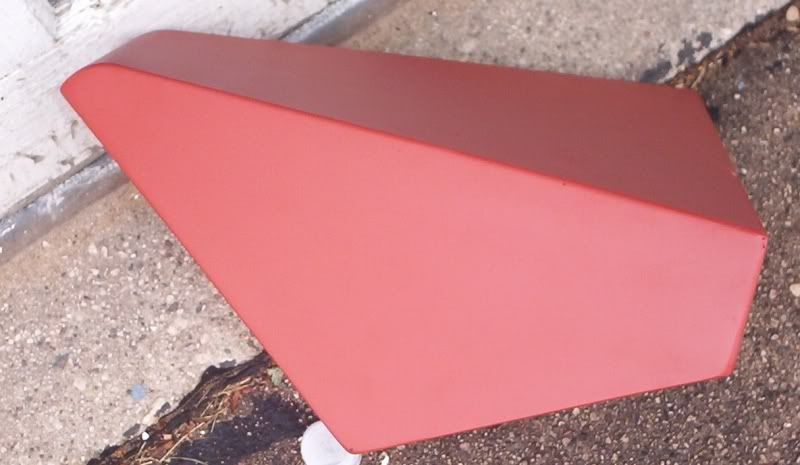
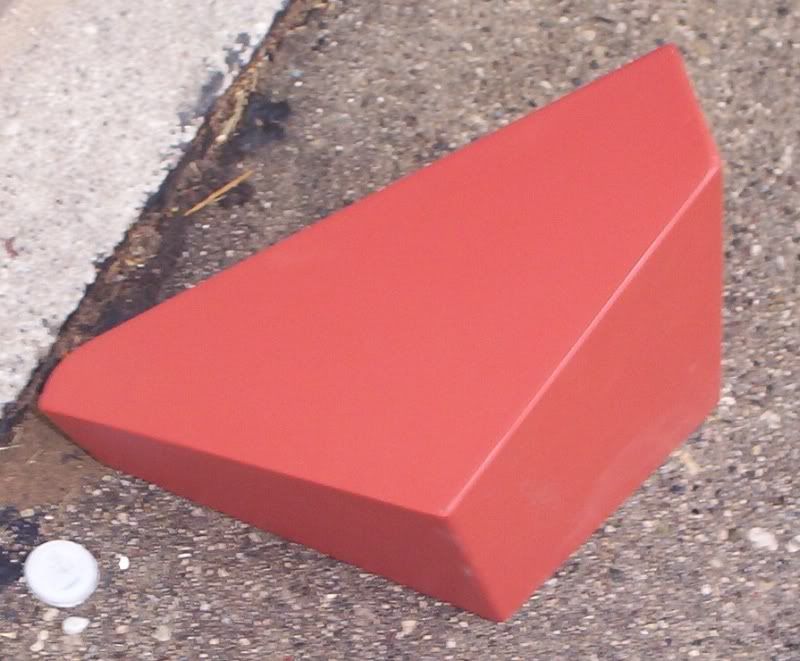
What would it look like if I were to extend the fender down a bit? A piece of cardboard painted black helped me get the look:
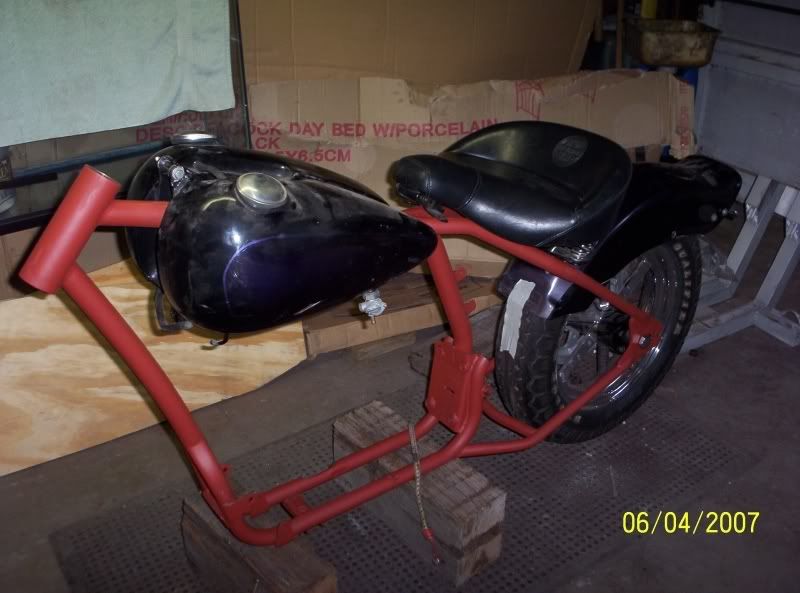
After a bit of looking I remembered I had a seat off my FXRP sitting up on a shelf and decided to toss the tanks on there and the seat just to see what it would look like:

Well that particular seat does not go with the bike very well.
I have my measurements off the tank and I should have it mountable by next weekend if time permits.
End update.
I was out in the garage goofing off tonight and have a few pictures of what I was doing.
First, Here is a bare bones rear end, no fender:
Now I have the rear wheel and fender on the bike with a piece of 2" PVC on the top of the tire and the front edge taped 1" away from the tire:
What would it look like if I were to extend the fender down a bit? A piece of cardboard painted black helped me get the look:
After a bit of looking I remembered I had a seat off my FXRP sitting up on a shelf and decided to toss the tanks on there and the seat just to see what it would look like:
Well that particular seat does not go with the bike very well.
I have my measurements off the tank and I should have it mountable by next weekend if time permits.
End update.
#22
06-27-2009, 01:29 PM
#24
06-27-2009, 01:31 PM
Good job with the Photoshop on the fender Mudpuddle!
I like it dropped back a little more with the taillight evened out however if I drop the top down to 1" clearance at the top it will cover some of the rim and I would like to keep all of the rim visible but have the tire completely covered in the fender areas.
I could chop the fender out after I drop it to 1" and that would get the seat lower? Maybe the frame is going to conflict with lowering the seat though? Hmmm, I will have to get out there this weekend and have a closer look at this.
Thanks for the Photoshop on the fender!
#25
06-27-2009, 01:32 PM
UPDATE:
Great suggestion Mud on the rear fender mounting.
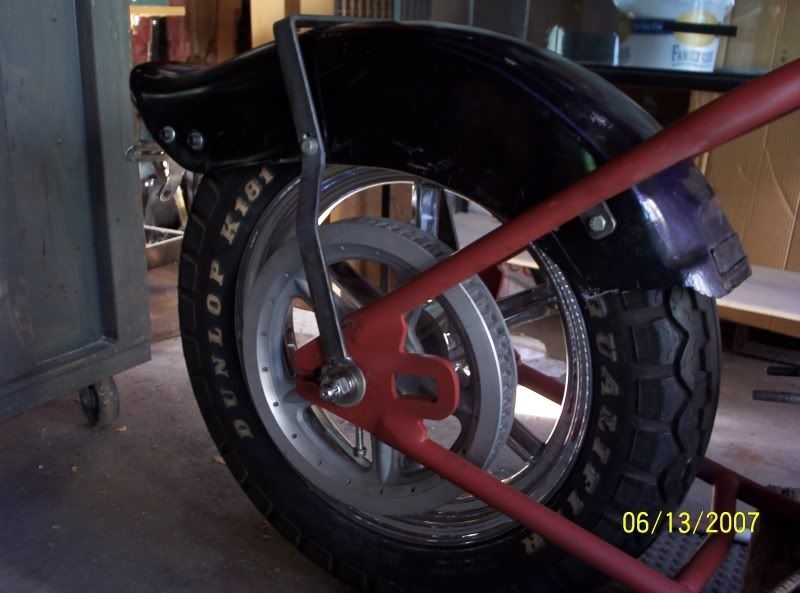
I took the frame, fender, a tank, rear wheel and a 1" hose to space the fender 1" above the tire. In 3 hours I managed to fab up and weld on two tabs and a 1/2 *** sissybar to mount the fender and 5 tabs to mount the tanks. getting things just right took longer than I figured, I had planned on being there for about an hour.
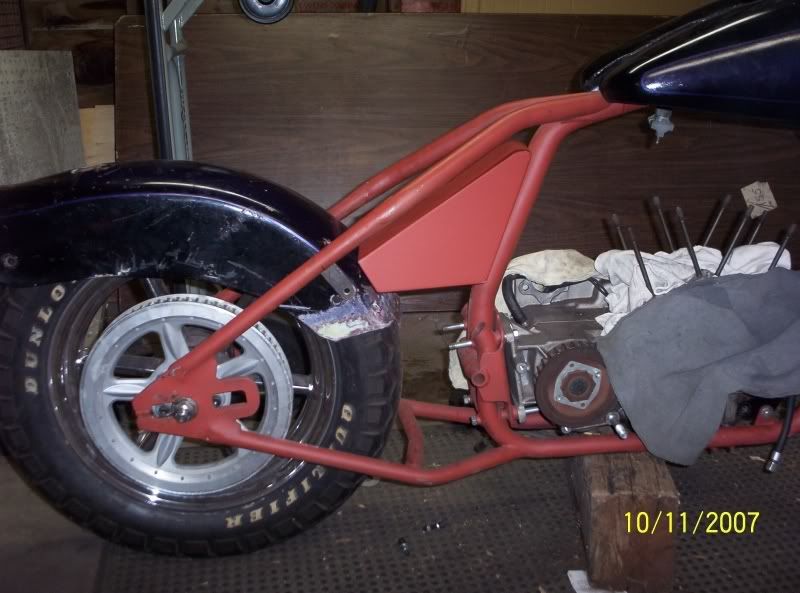
This is how the rear fender will mount. 2 1/4 x 1" tabs for the front and a sissybar will support the rear:
For the tanks there are 2 1/4 x 1" tabs up front and 2 1/4 x 1" tabs out back with a support for the bottom welded to the bottom of the frame:
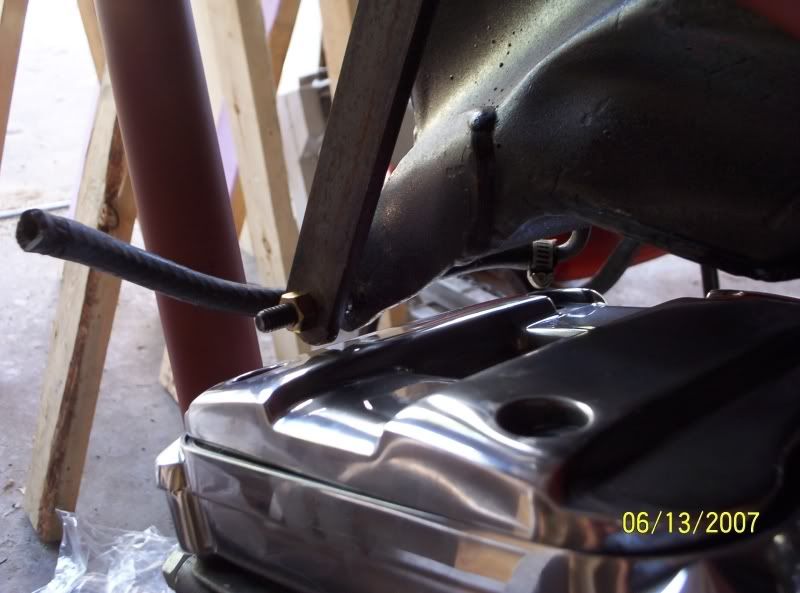
As you can tell from the picture there is a 1/16" space between the engine and tank mount, crossover hose. This will not do, I will needd to grind away some of the mounting tab and some of the tank tab to gain more clearance, correct me if I am wrong but, I am thinking 1/2" will be good. and structurally this tab only keeps the 2 pieces of tank separated and does not support the weight of the tank, I should be able to go pretty thin here.
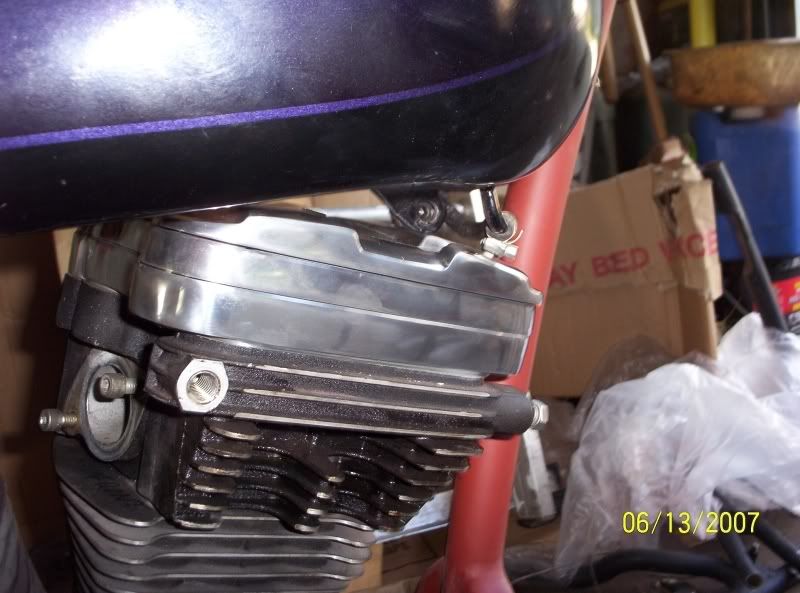
I ended up with plenty of clearance from the tank to the engine where I assembled it with the tank in place.
Here it is assembled minus the front end which needed to be removed for transport in my Saturn trunk (with the rear seats folded down).
This is a picture I took when I was getting my measurements for mounting things:
Great suggestion Mud on the rear fender mounting.
I took the frame, fender, a tank, rear wheel and a 1" hose to space the fender 1" above the tire. In 3 hours I managed to fab up and weld on two tabs and a 1/2 *** sissybar to mount the fender and 5 tabs to mount the tanks. getting things just right took longer than I figured, I had planned on being there for about an hour.
This is how the rear fender will mount. 2 1/4 x 1" tabs for the front and a sissybar will support the rear:
For the tanks there are 2 1/4 x 1" tabs up front and 2 1/4 x 1" tabs out back with a support for the bottom welded to the bottom of the frame:
As you can tell from the picture there is a 1/16" space between the engine and tank mount, crossover hose. This will not do, I will needd to grind away some of the mounting tab and some of the tank tab to gain more clearance, correct me if I am wrong but, I am thinking 1/2" will be good. and structurally this tab only keeps the 2 pieces of tank separated and does not support the weight of the tank, I should be able to go pretty thin here.
I ended up with plenty of clearance from the tank to the engine where I assembled it with the tank in place.
Here it is assembled minus the front end which needed to be removed for transport in my Saturn trunk (with the rear seats folded down).
This is a picture I took when I was getting my measurements for mounting things:
#26
06-27-2009, 01:32 PM
PDATE:
I have been busy at work and home and have not accomplished very much. I managed to get a frame neck gusset water jet cut at work and welded in place and I have some hand controls on the way but that sums up what has been going on out in the garage, besides getting the shop cleaned up.
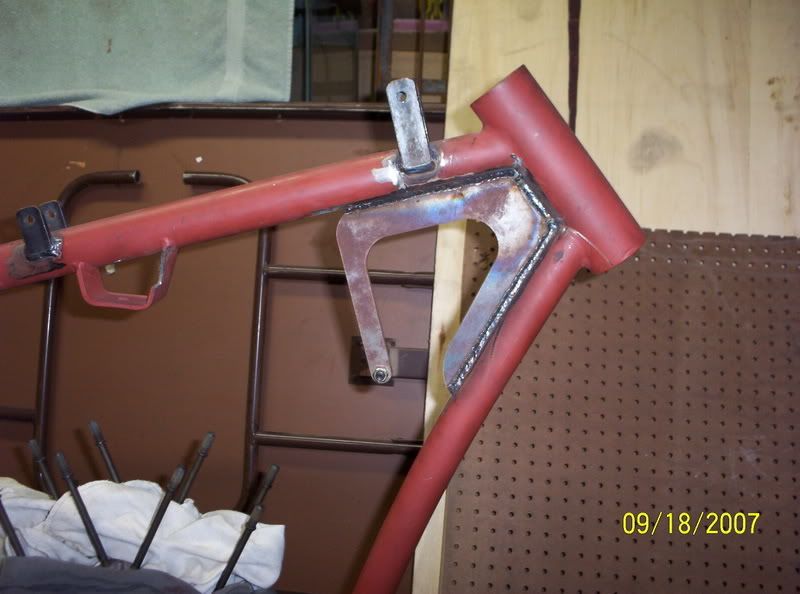
Here is the gusset, in place:
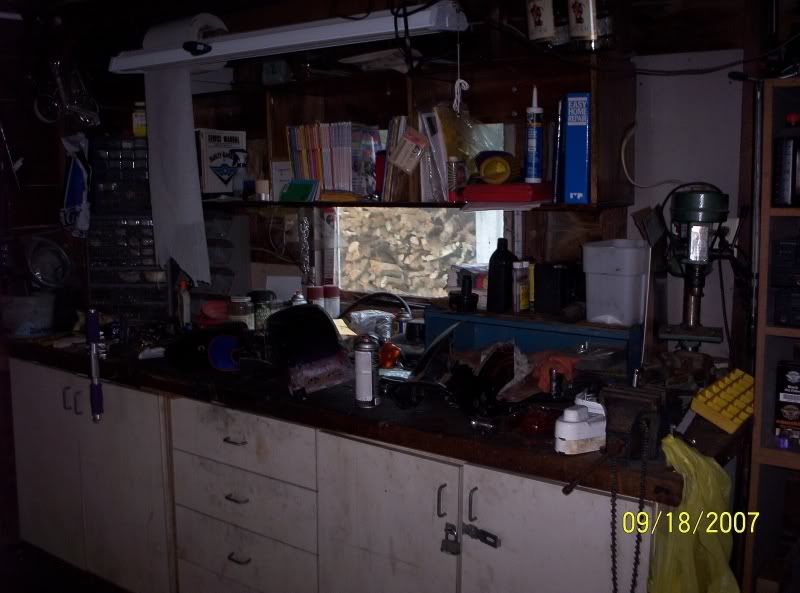
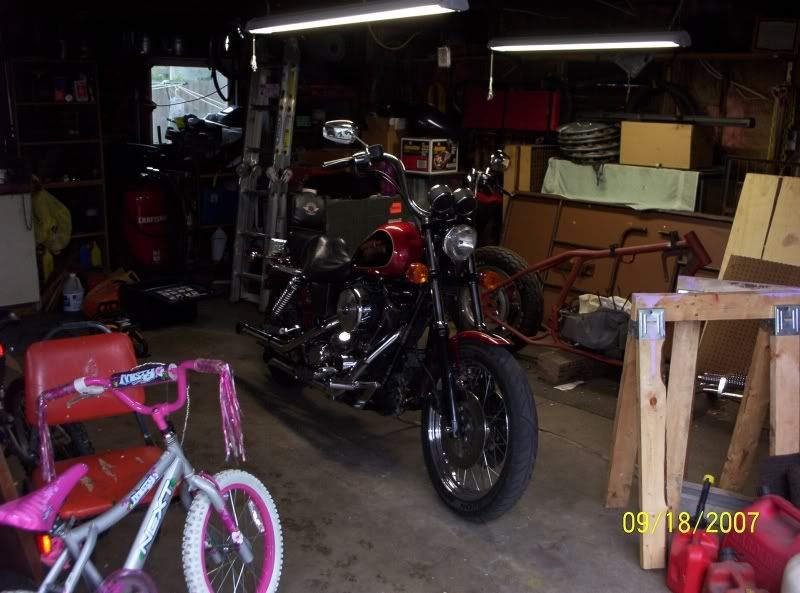
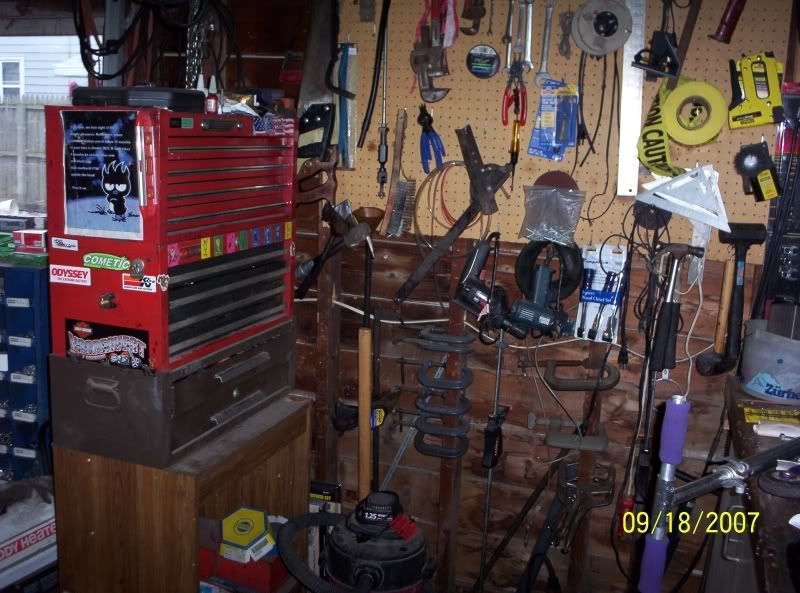
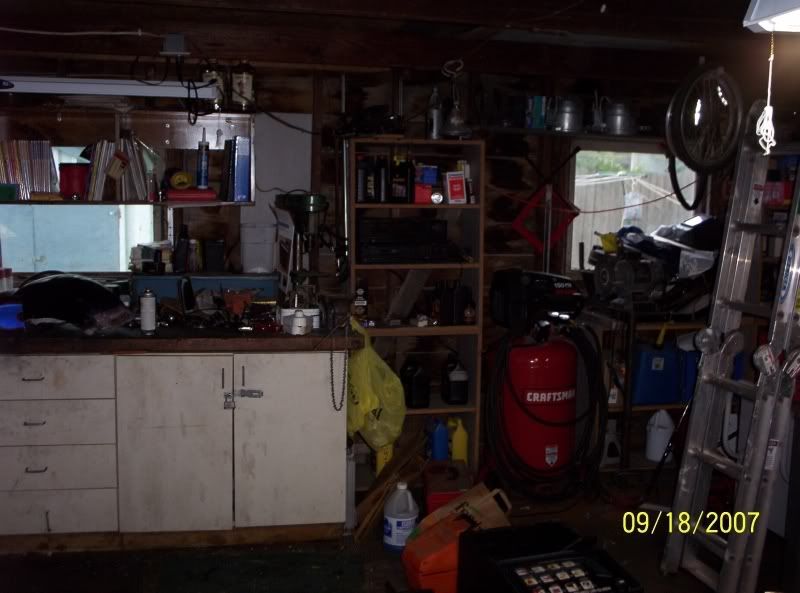
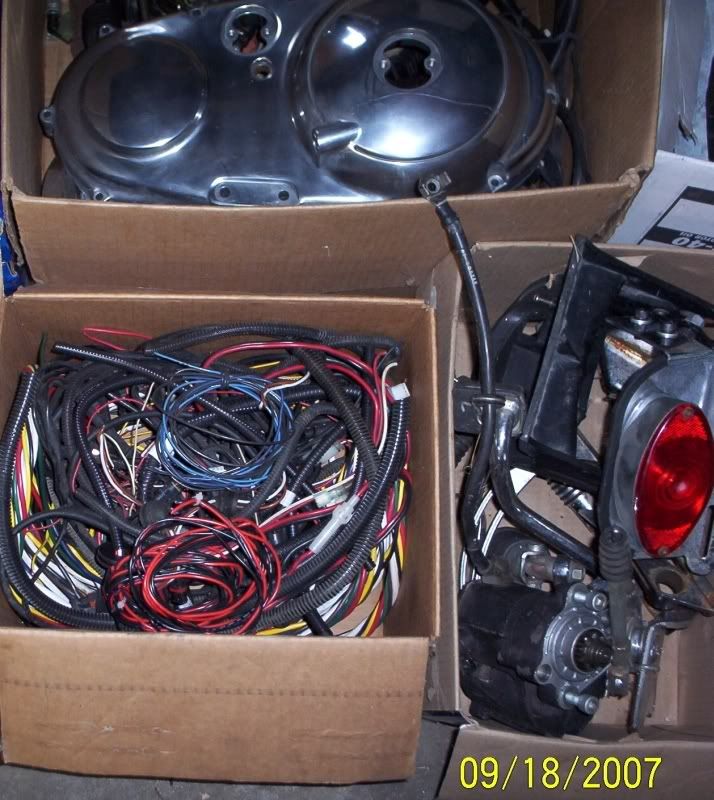
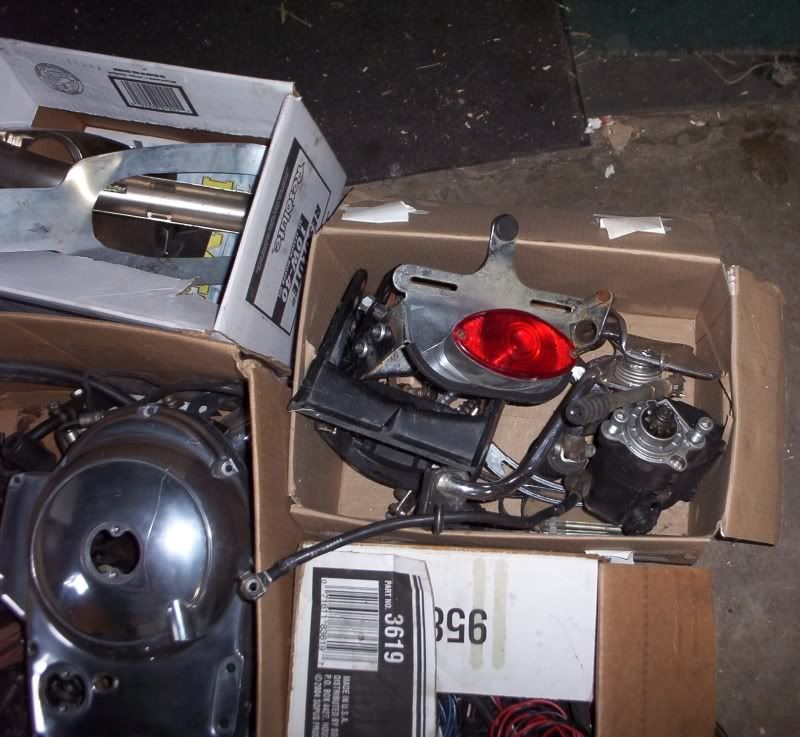
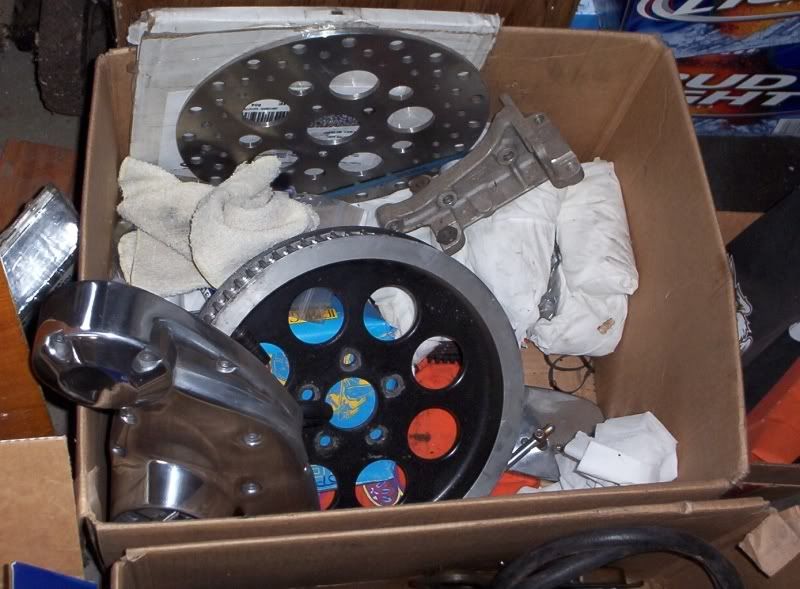
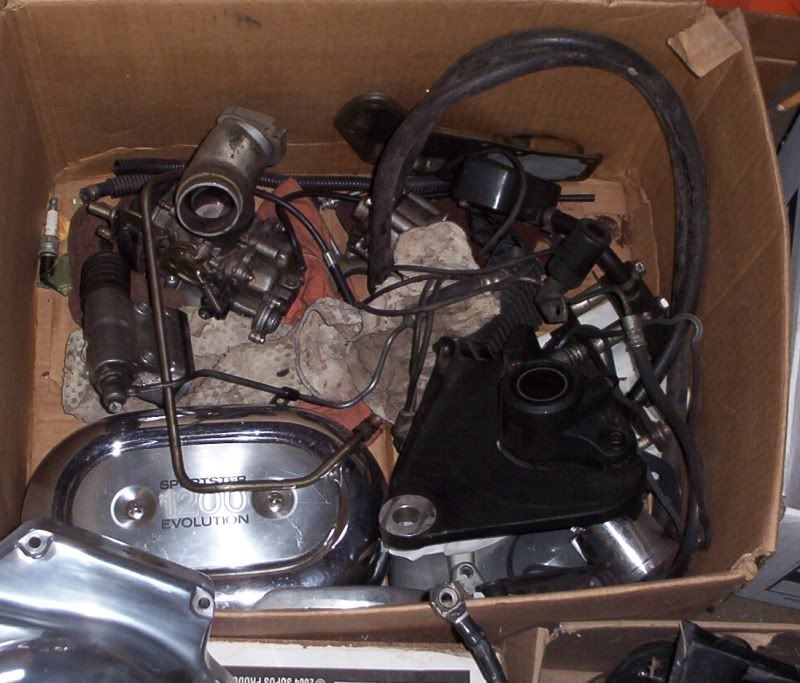
Here are a few pictures of the shop:
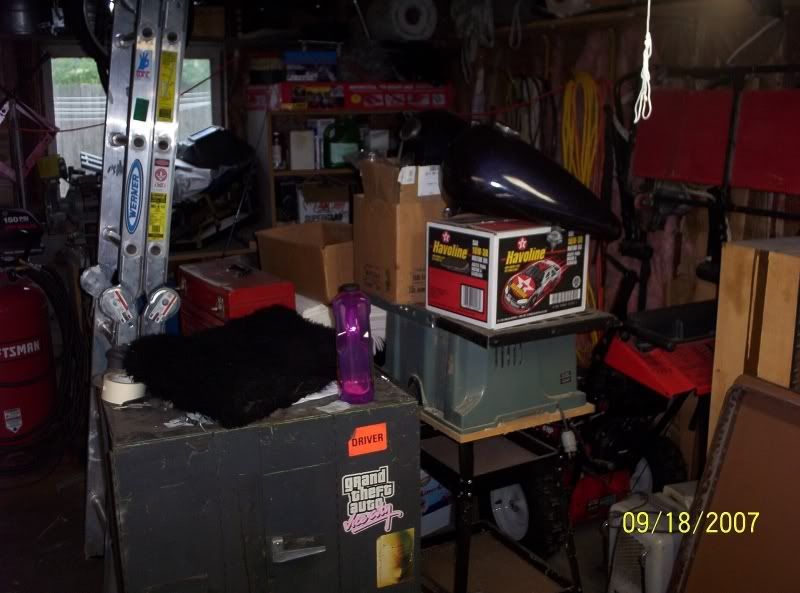
I have a lot of boxes of parts, most will be used but some are strictly for mock-up purposes:
Hopefully I will get back at it soon and at least get the oil bag and battery box finished up. I have a cardboard mock up of both sitting at work awaiting time to build them.
I have been busy at work and home and have not accomplished very much. I managed to get a frame neck gusset water jet cut at work and welded in place and I have some hand controls on the way but that sums up what has been going on out in the garage, besides getting the shop cleaned up.
Here is the gusset, in place:
Here are a few pictures of the shop:
I have a lot of boxes of parts, most will be used but some are strictly for mock-up purposes:
Hopefully I will get back at it soon and at least get the oil bag and battery box finished up. I have a cardboard mock up of both sitting at work awaiting time to build them.
#27
06-27-2009, 01:33 PM
UPDATE:
I managed to get time to get the oilbag made however I still have to find someone who has a spare lying around, preferably collecting dust (hint, hint).
I will be cutting out the oil line fittings and filler neck out of it and using those pieces on mine. The bag was easier to make than I thought it would be, I guess having a cardboard mock-up helped.
Here's the pictures:

This is where it will fit into the bike:
As you can see from the last 2 pictures I haven't gotten squat done on the darn thing. :censored:
Oh well, winter is coming I guess....
I managed to get time to get the oilbag made however I still have to find someone who has a spare lying around, preferably collecting dust (hint, hint).
I will be cutting out the oil line fittings and filler neck out of it and using those pieces on mine. The bag was easier to make than I thought it would be, I guess having a cardboard mock-up helped.
Here's the pictures:
This is where it will fit into the bike:
As you can see from the last 2 pictures I haven't gotten squat done on the darn thing. :censored:
Oh well, winter is coming I guess....
#28
06-27-2009, 01:34 PM
Another UPDATE:
I got a rear fender from Mud a while back, $35.00, and I started cutting it up to get the rear fender to extend further down between the tire and frame to cover up the gap in the hardtail frame area. But I saw a picture in The Horse, page 11, that really looks interesting and different. I may end up going that way instead.
Thanks for the fender Mud.
I also won an Ebay auction where I aquired my turn signals, throttle cables, clutch cable and a few misc. other items for a measley $25.00
Also on another forum I got everything for the handle bars, including wiring, for $100.00.
#29
06-27-2009, 01:35 PM
This is taking longer than I thought it would. I was at least hoping to have more of the components needed to build this thing by now. I wanted to be able to start wiring it up before winter but I still need the engine gaskets, electronic ignition components, more wiring, battery, and a few other components.
Plus some more sanding to do to get things in primer. Also, I really should get out there, take inventory and make a list so nothing is forgotten.
Plus some more sanding to do to get things in primer. Also, I really should get out there, take inventory and make a list so nothing is forgotten.
#30
06-27-2009, 01:36 PM
Update...
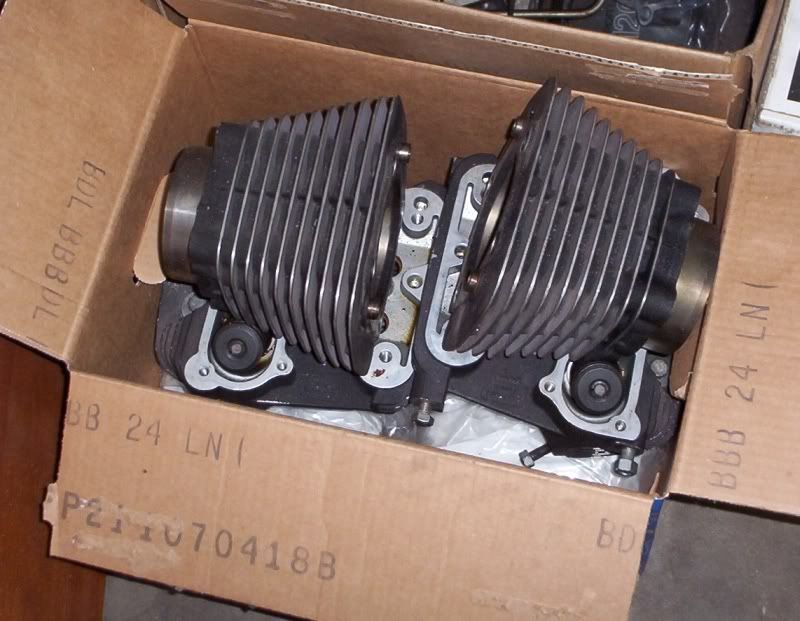
I told another co-worker about the needs of the oil tank and he said he had an extra oil tank from his Sporty that was taking up room in his mothers garage. I went over there and found not only an oil bag but 1/2 of a forward control set that he used when he got into a wreck with his old bike. $20.00 for the whole box of parts including pegs. I'll have pictures, hopefully, tomorrow.
I told another co-worker about the needs of the oil tank and he said he had an extra oil tank from his Sporty that was taking up room in his mothers garage. I went over there and found not only an oil bag but 1/2 of a forward control set that he used when he got into a wreck with his old bike. $20.00 for the whole box of parts including pegs. I'll have pictures, hopefully, tomorrow.