2001 Wide Glide Project Bike - Lots of Pics
#1
 05-19-2016, 11:26 PM

Join Date: Nov 2010
Location: Red Banks, Mississippi
Posts: 17,464
Received 3,940 Likes
on
2,295 Posts
2001 Wide Glide Project Bike
We are fortunate to have Dwayne on the DK Custom Products Team! If you’ve called, texted or emailed our shop, there’s a good chance you’ve talked with him, and you know he knows his bikes.
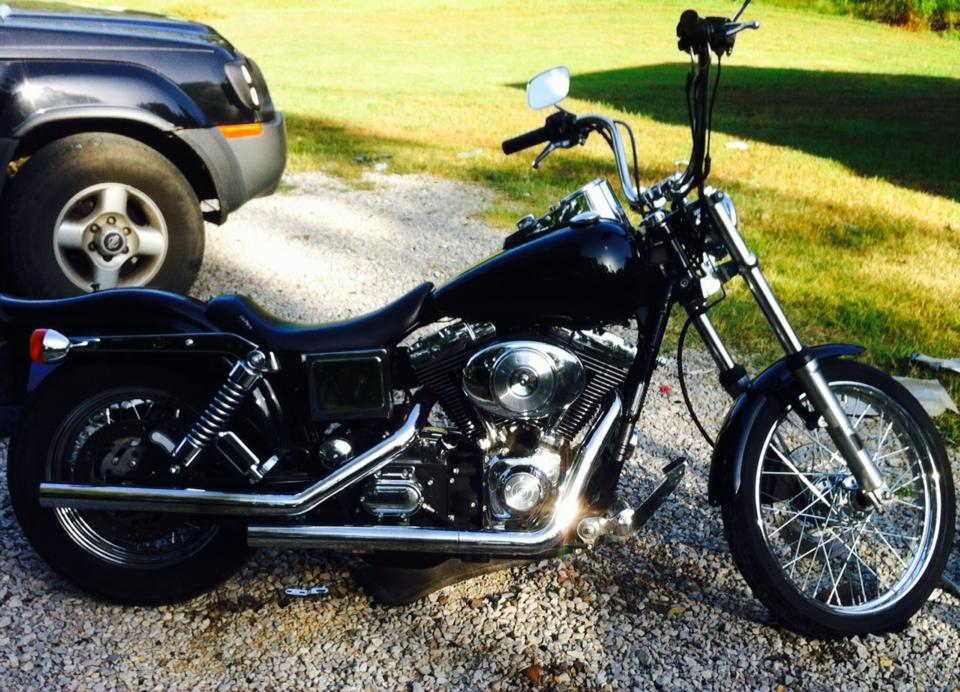
Here is a pic of his 2001 Wide Glide as it looked when he came to work with us less than a year ago-
In Dwayne’s words, here’s how this little project came together-
At a young age I found a love for motorcycles. As time progressed, so did the caliber of bikes I prefered. Minibikes turned to dirt bikes, which eventually became street bikes. I know this reads like a coming of age story so I will fast-forward a few years. I had always seen HD as the pinnacle of motorcycles so I took the plunge and picked up a new to me 2001 Dyna Wide Glide. Keep in mind , this is all prior to my time at DK.
The Bike was bone stock with no add-ons unless you count the tassels on the bars. Needless to say, the tassels were the first thing to go. The bike quickly grew on me and I was on a mission to customize it as my own.
There were a few things that I did initially such as lowering the front and rear using progressive shocks. While continuing my search for parts online, one company came up time and time again. This company is DK Custom Products. In a strange coincidence, the DK office and shop happened to be 10 miles down the road from my home. To makes things even crazier, it turns out they were hiring!
Fast forward again, this time only a few weeks. I’m working at DK and it’s a cool job. Shortly after starting, I am approached by Devin (the D in DK) about adding a few things to my bike over the winter, utilizing DK parts. Also, due to a previous underlying issue with my tank, the bike was in need of a paint job.
Devin and I milled over which parts would look great on the Dyna. Naturally, it got the quintessential DK treatment… Coil relo, tank lift, Hi-Flow air cleaner, license plate relo, and most definitely the Thunder Torque Inserts. Devin suggested going with stealth LED turn signals on the front and the LED run-brake-turn light on the rear. I am really glad he did because the LED lights really clean up the look of the bike as well as look bad *** at night. There were a few small things done like the trap moto pegs and heel rests. Also, a headlight grill that houses a super bright LED headlight. Also , to accent the overall theme of the bike, Devin added blacked out spoke covers and a chin spoiler.
After a few months Spring time was upon us and I was anxious to see what Devin had done to the Wide Glide. I couldn’t believe how different the bike was. Of course the carb was re-jetted to accommodate the the Hi-Flow 636v Air Cleaner. That, coupled with the Thunder Torque Inserts and the bike really grabs you by the seat of the pants and gets moving! The trap moto pegs set up with heel rests are super comfortable and the LEDs are very visible. So far, the bike has been a real head turner and I couldn’t be happier with the way it turned out.
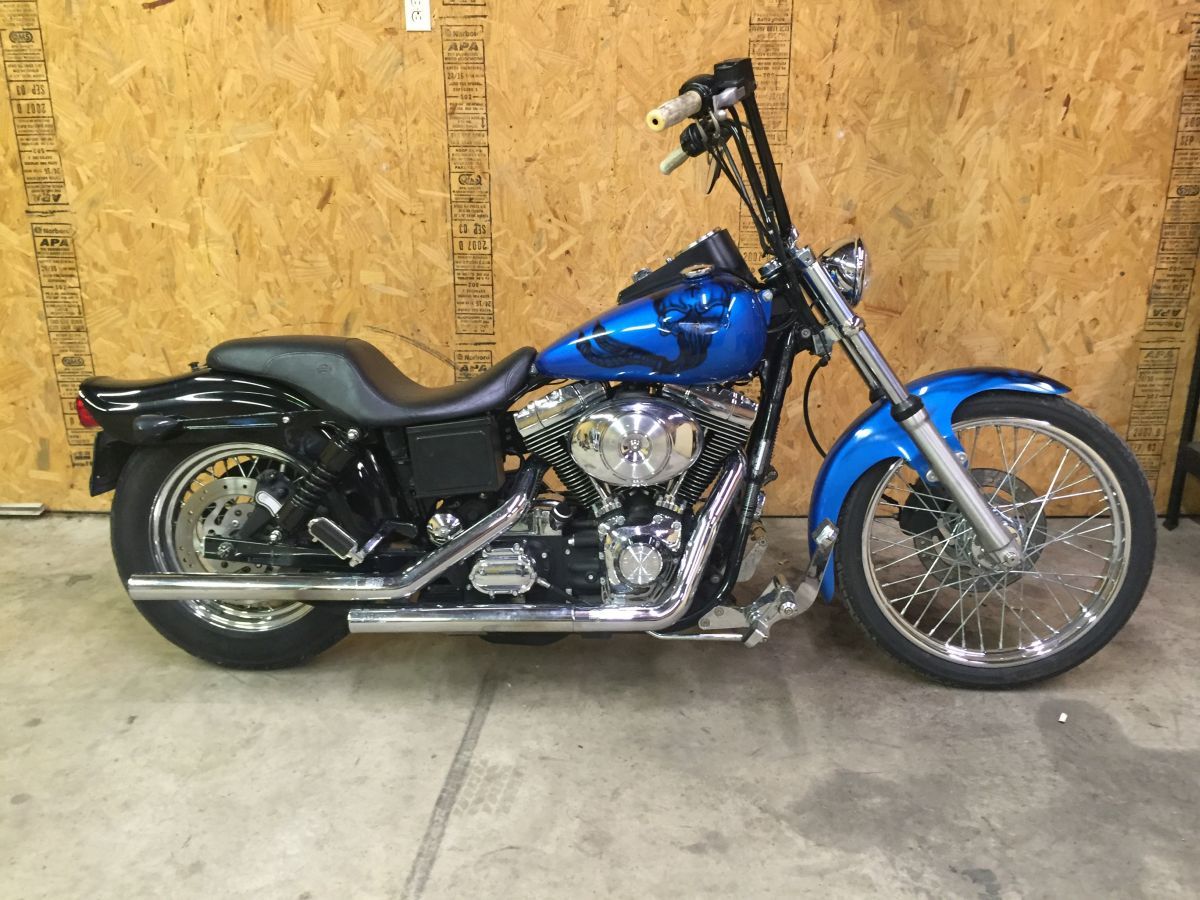
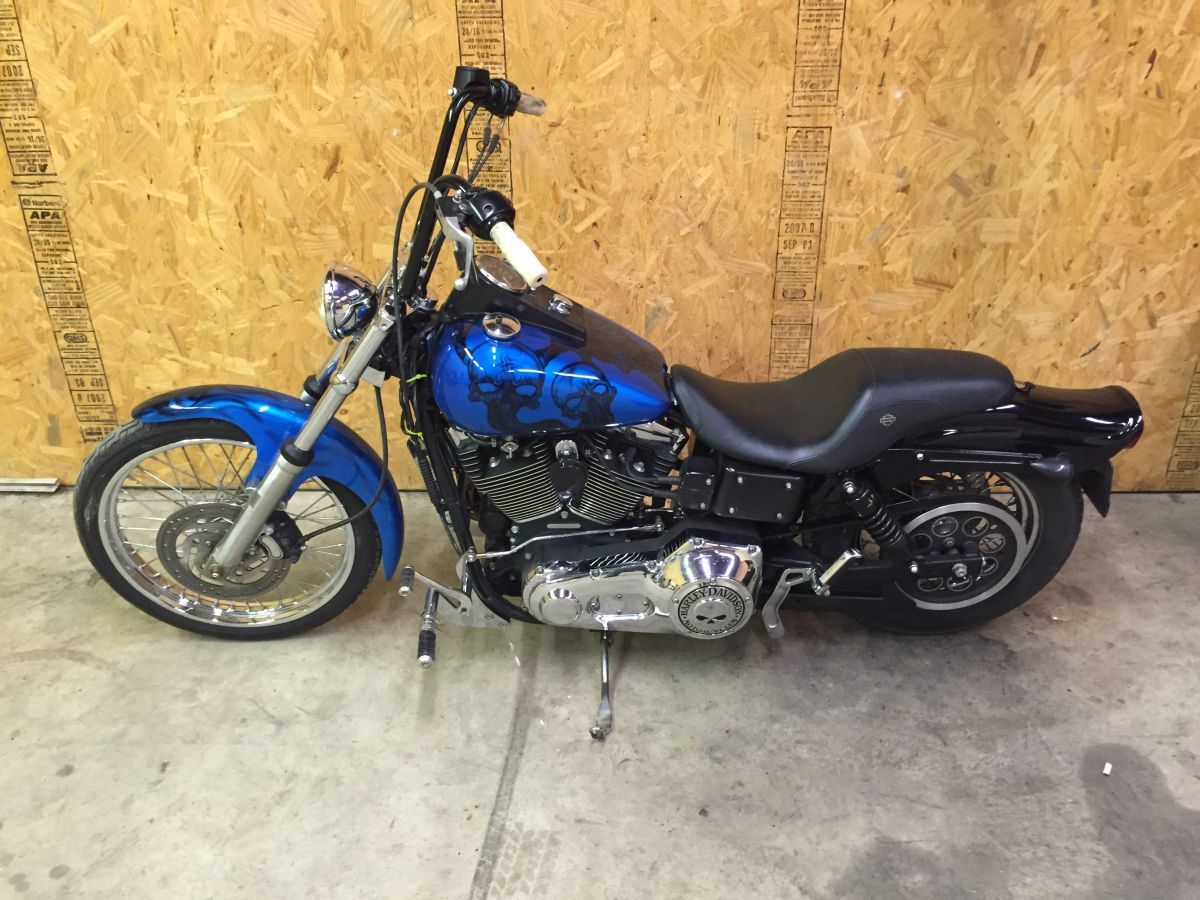
Here are a few pics of how it was the day Devin started on the makeover-
More in the next post.
We are fortunate to have Dwayne on the DK Custom Products Team! If you’ve called, texted or emailed our shop, there’s a good chance you’ve talked with him, and you know he knows his bikes.
Here is a pic of his 2001 Wide Glide as it looked when he came to work with us less than a year ago-
In Dwayne’s words, here’s how this little project came together-
At a young age I found a love for motorcycles. As time progressed, so did the caliber of bikes I prefered. Minibikes turned to dirt bikes, which eventually became street bikes. I know this reads like a coming of age story so I will fast-forward a few years. I had always seen HD as the pinnacle of motorcycles so I took the plunge and picked up a new to me 2001 Dyna Wide Glide. Keep in mind , this is all prior to my time at DK.
The Bike was bone stock with no add-ons unless you count the tassels on the bars. Needless to say, the tassels were the first thing to go. The bike quickly grew on me and I was on a mission to customize it as my own.
There were a few things that I did initially such as lowering the front and rear using progressive shocks. While continuing my search for parts online, one company came up time and time again. This company is DK Custom Products. In a strange coincidence, the DK office and shop happened to be 10 miles down the road from my home. To makes things even crazier, it turns out they were hiring!
Fast forward again, this time only a few weeks. I’m working at DK and it’s a cool job. Shortly after starting, I am approached by Devin (the D in DK) about adding a few things to my bike over the winter, utilizing DK parts. Also, due to a previous underlying issue with my tank, the bike was in need of a paint job.
Devin and I milled over which parts would look great on the Dyna. Naturally, it got the quintessential DK treatment… Coil relo, tank lift, Hi-Flow air cleaner, license plate relo, and most definitely the Thunder Torque Inserts. Devin suggested going with stealth LED turn signals on the front and the LED run-brake-turn light on the rear. I am really glad he did because the LED lights really clean up the look of the bike as well as look bad *** at night. There were a few small things done like the trap moto pegs and heel rests. Also, a headlight grill that houses a super bright LED headlight. Also , to accent the overall theme of the bike, Devin added blacked out spoke covers and a chin spoiler.
After a few months Spring time was upon us and I was anxious to see what Devin had done to the Wide Glide. I couldn’t believe how different the bike was. Of course the carb was re-jetted to accommodate the the Hi-Flow 636v Air Cleaner. That, coupled with the Thunder Torque Inserts and the bike really grabs you by the seat of the pants and gets moving! The trap moto pegs set up with heel rests are super comfortable and the LEDs are very visible. So far, the bike has been a real head turner and I couldn’t be happier with the way it turned out.
Here are a few pics of how it was the day Devin started on the makeover-
More in the next post.

Last edited by DK Custom; 05-20-2016 at 12:00 AM.
#2
05-19-2016, 11:59 PM
Join Date: Nov 2010
Location: Red Banks, Mississippi
Posts: 17,464
Received 3,940 Likes
on
2,295 Posts
Tins were pulled for the painter-
Also the air cleaner, turn signals, horn and coil.
Little did we know that the tins were going to disappear into a black hole with the painter...took over 4 months to get them back. In the meantime we had less than 2 days worth of work getting everything else done.
Pic of the Top Performing, patented 636v System, before install-
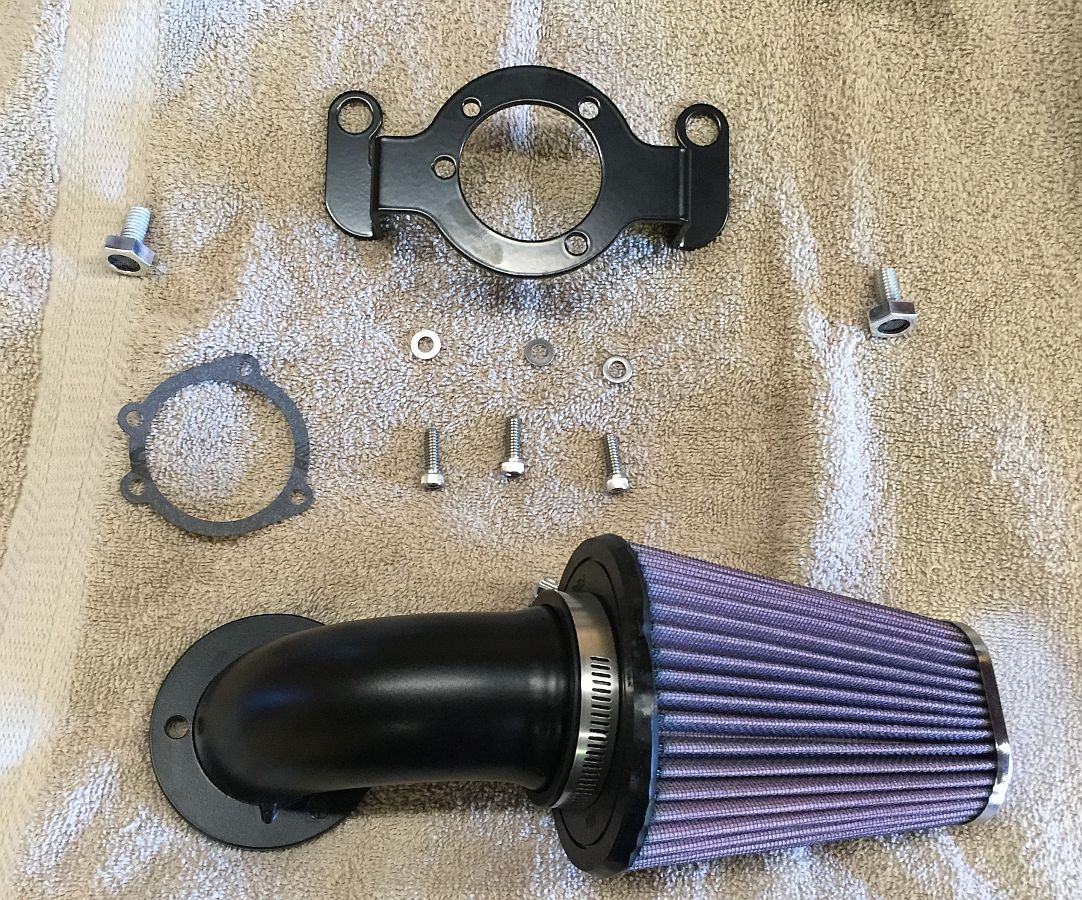
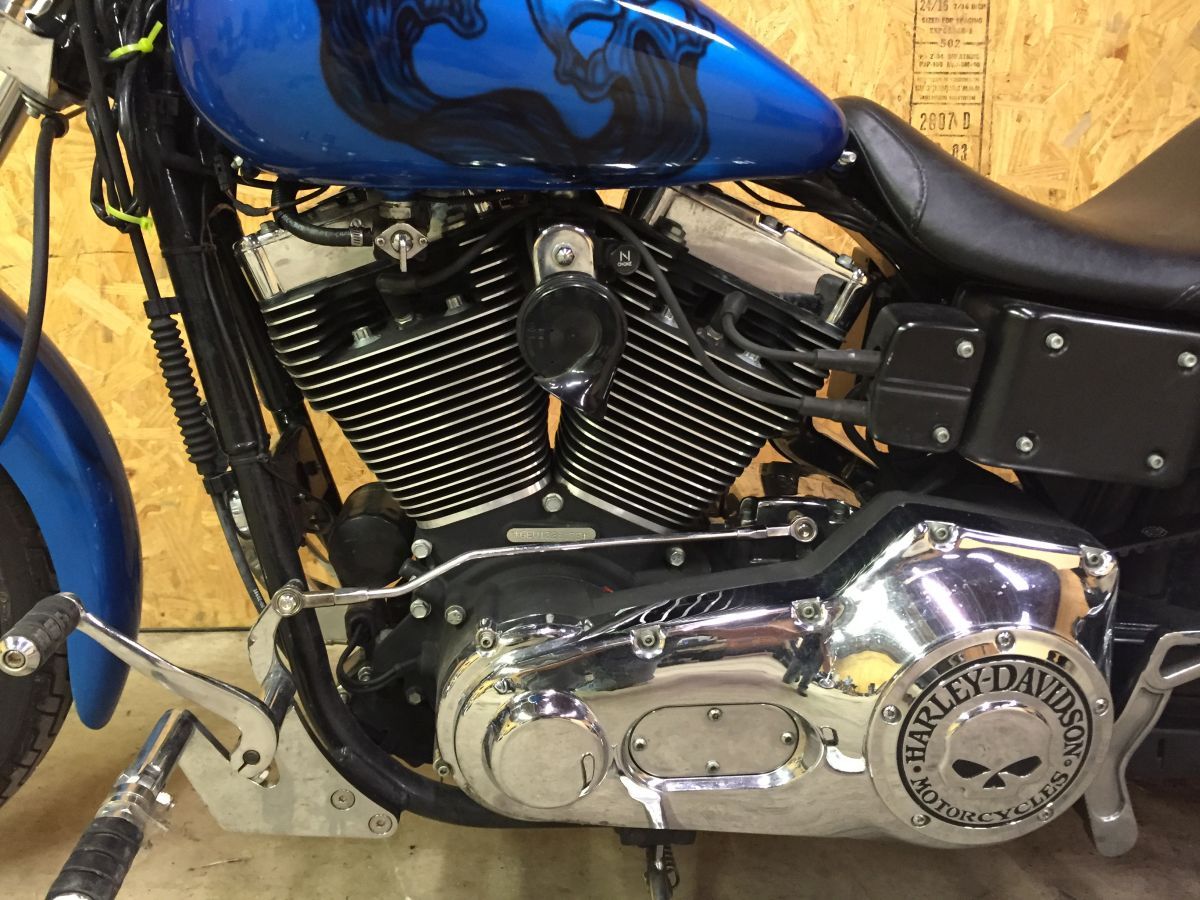
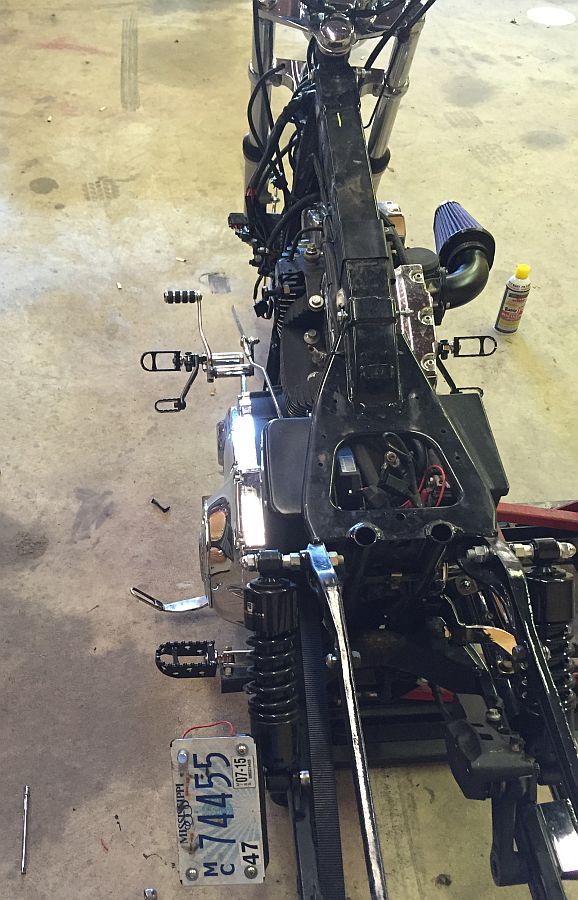
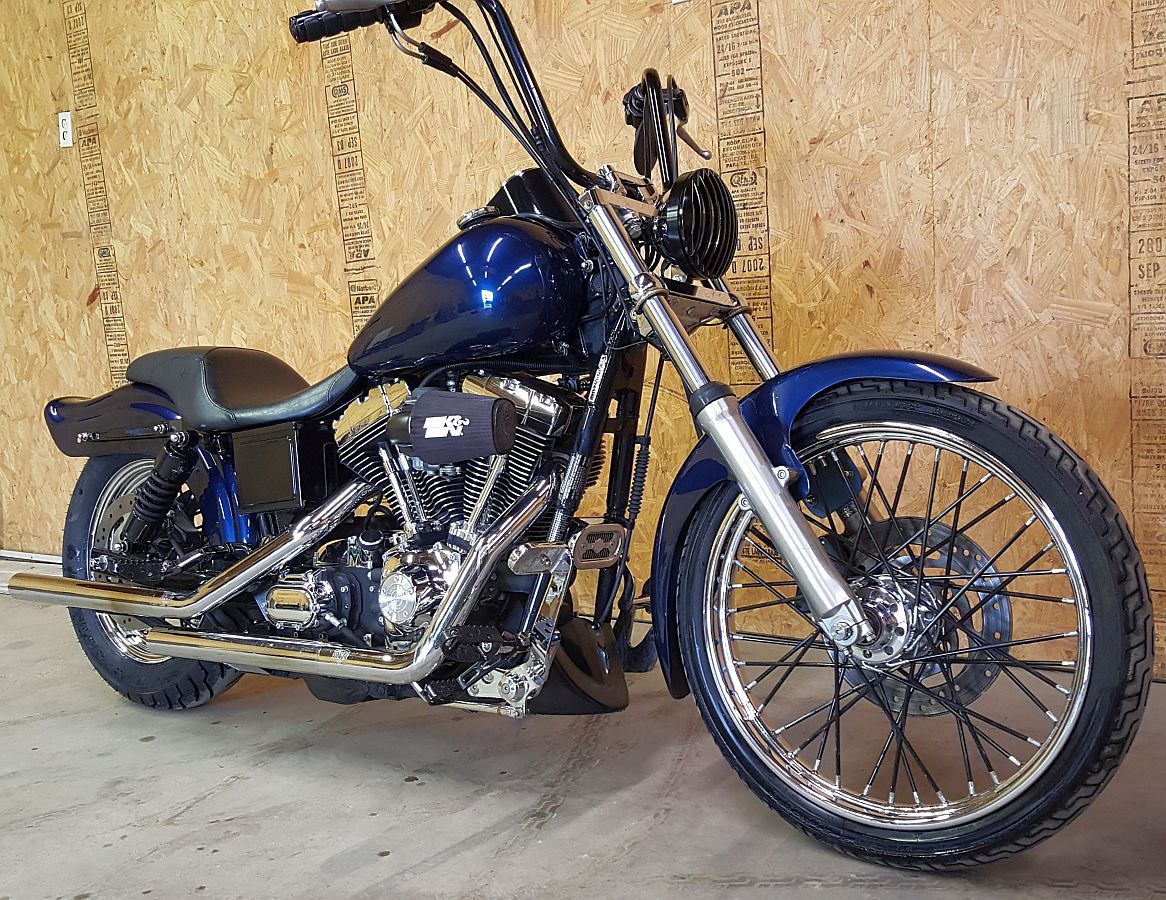
Here you can see the License Plate relo is installed, the Outlaw 636v air cleaner is on, the Trap Moto Rider pegs and passenger pegs, as well as the rider Heel Rests are installed.
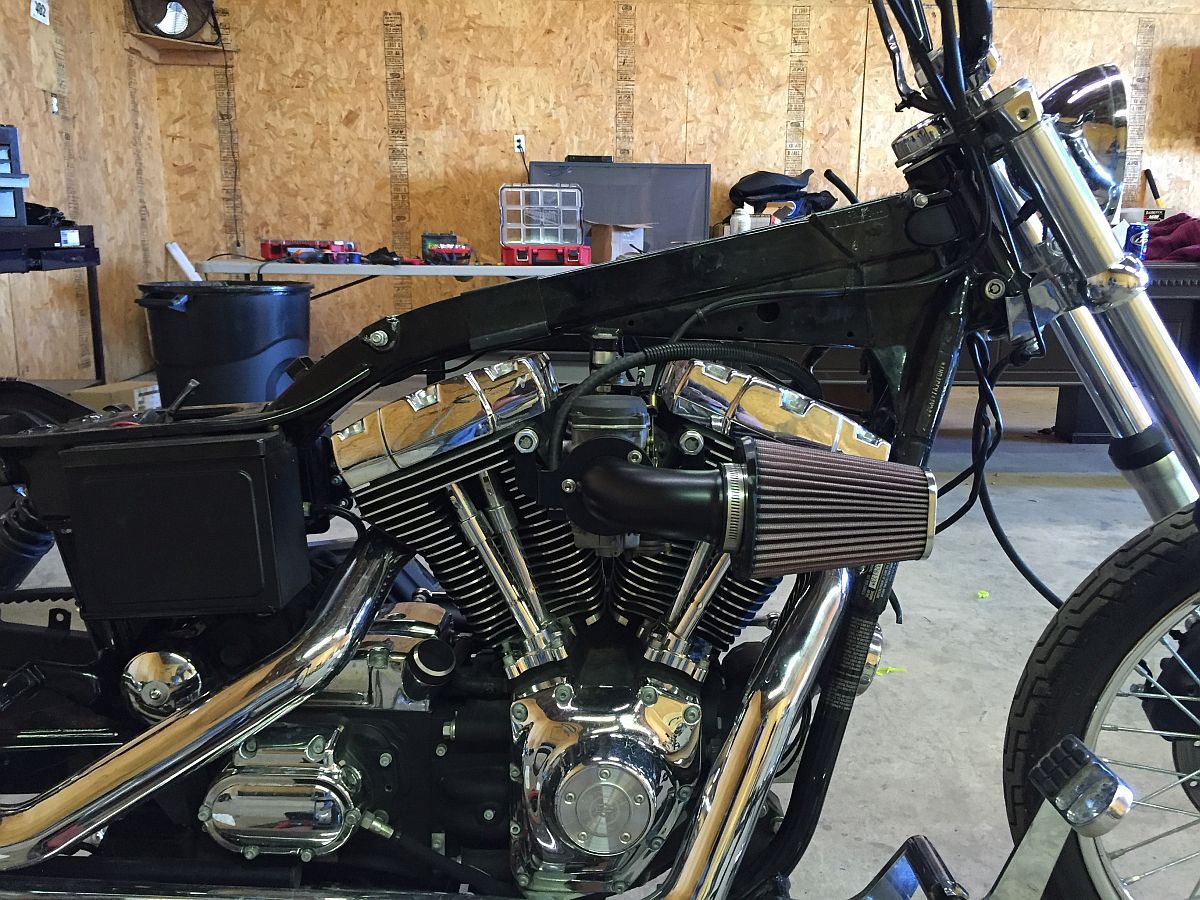
Another shot of the 636v A/C with the Outlaw Breather Bolts.
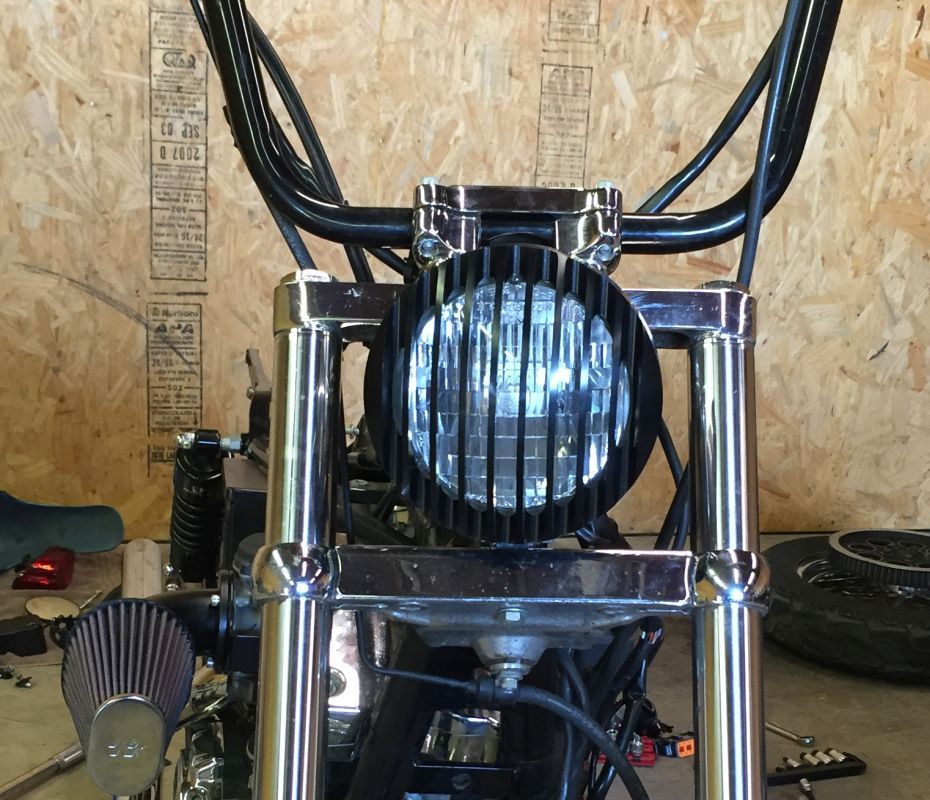
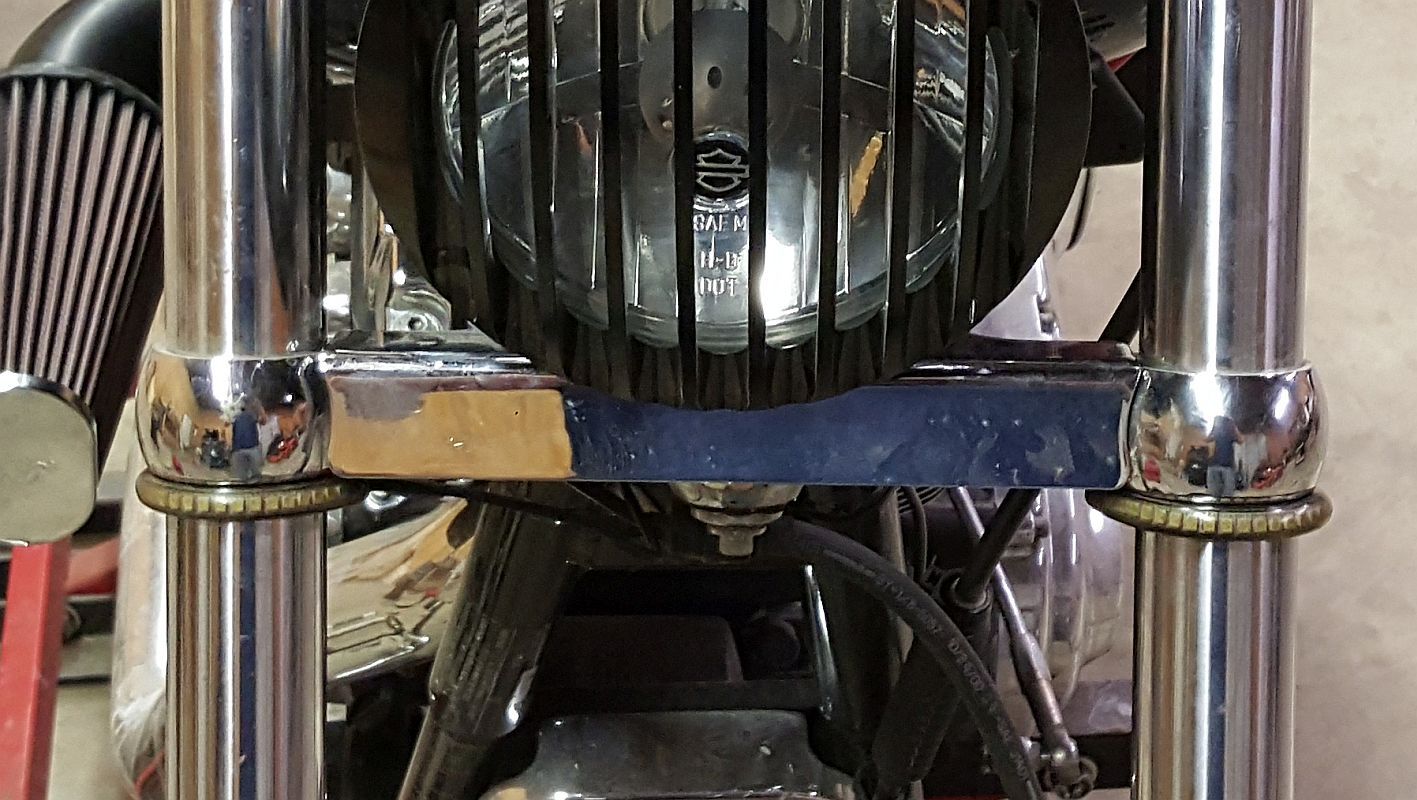
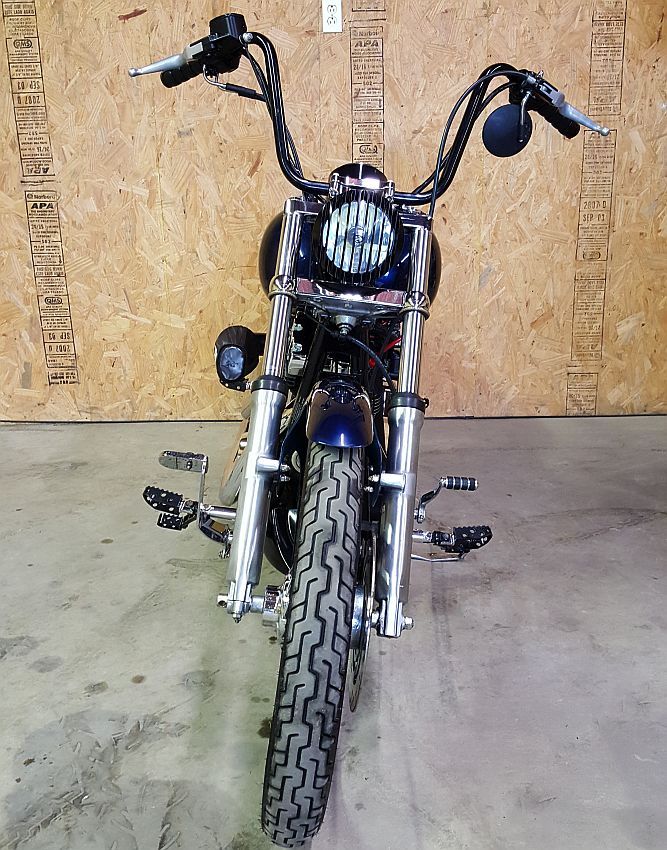
Next was an LED Drop-in bulb to replace the anemic stock headlight bulb...
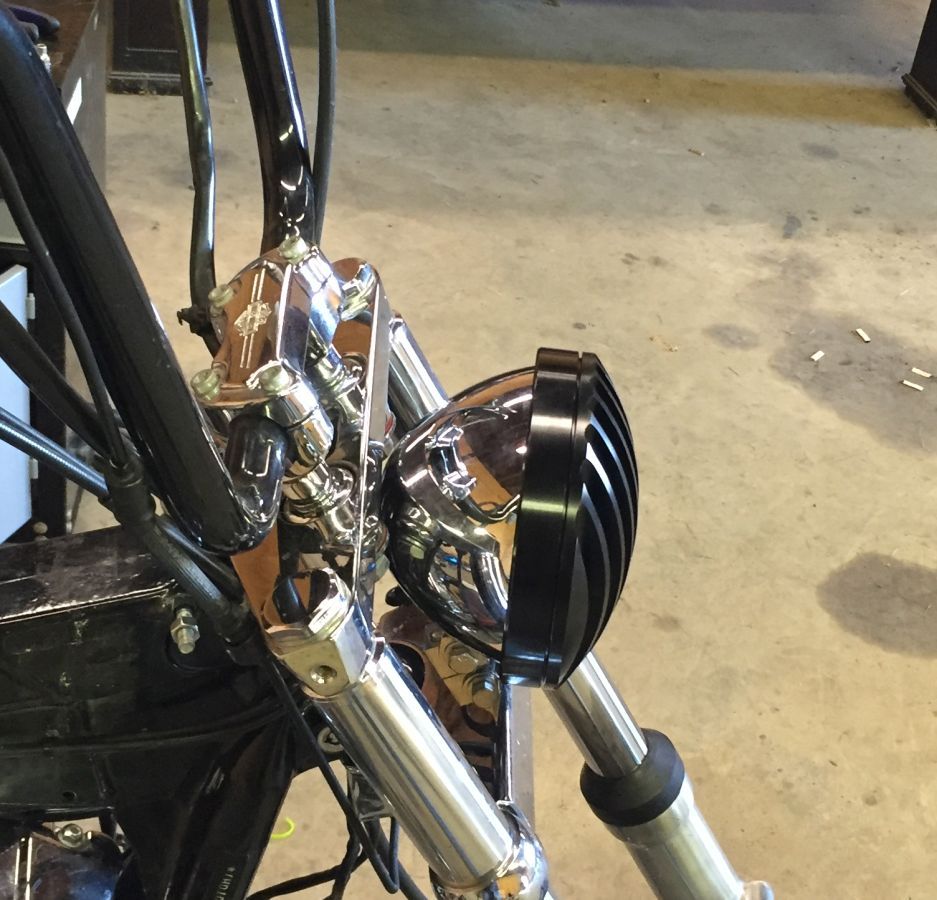
...along with a Headlight Grille.
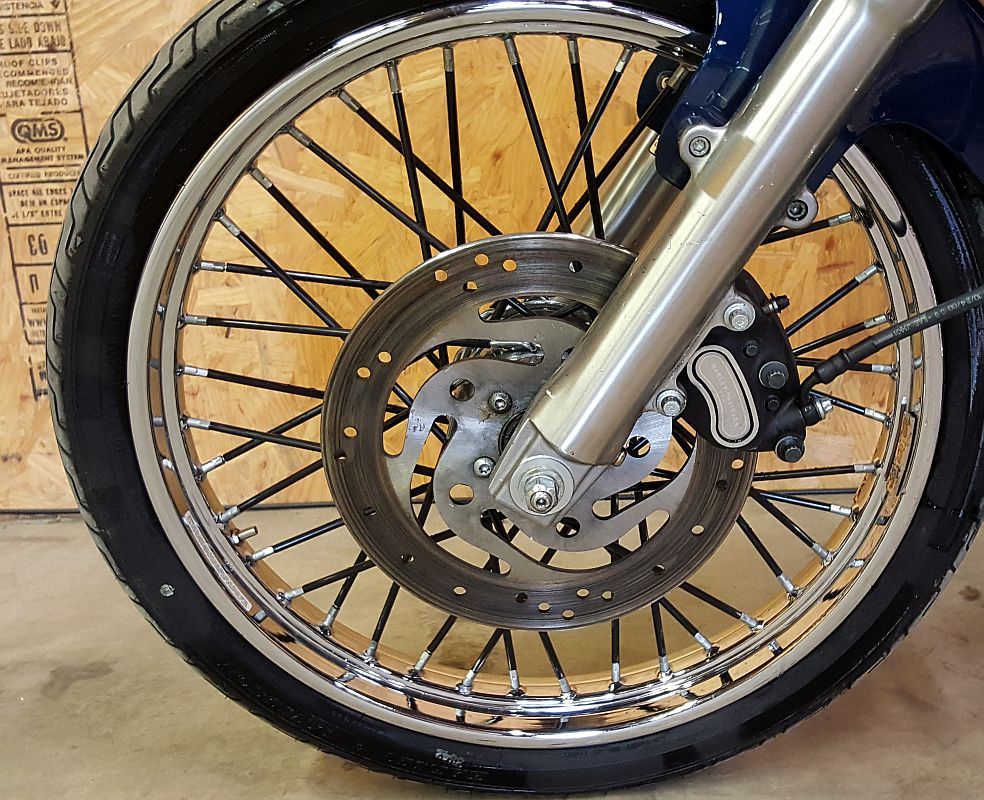
Next was blacking out the spokes with some Spoke Covers. This is an inexpensive way to get some nice contrast on stock wheels....
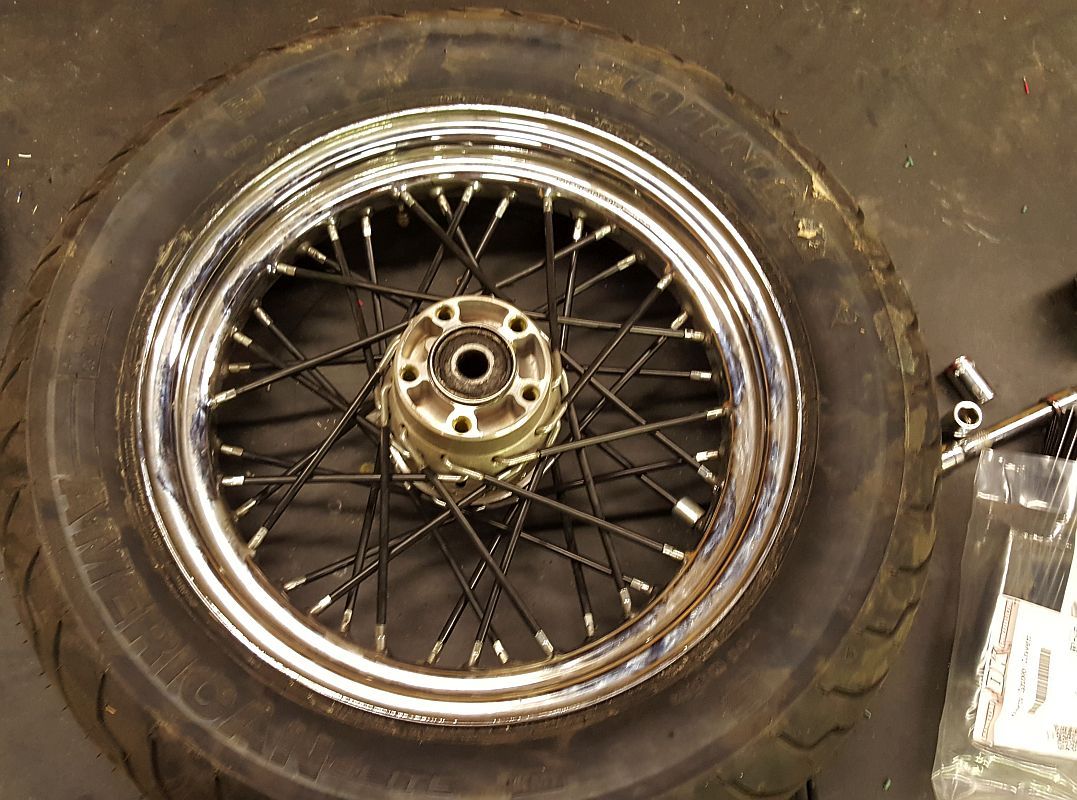
...it makes a nice improvement for low $. But it is hard on the fingers!
More in next post.
Also the air cleaner, turn signals, horn and coil.
Little did we know that the tins were going to disappear into a black hole with the painter...took over 4 months to get them back. In the meantime we had less than 2 days worth of work getting everything else done.
Pic of the Top Performing, patented 636v System, before install-
Here you can see the License Plate relo is installed, the Outlaw 636v air cleaner is on, the Trap Moto Rider pegs and passenger pegs, as well as the rider Heel Rests are installed.
Another shot of the 636v A/C with the Outlaw Breather Bolts.
Next was an LED Drop-in bulb to replace the anemic stock headlight bulb...
...along with a Headlight Grille.
Next was blacking out the spokes with some Spoke Covers. This is an inexpensive way to get some nice contrast on stock wheels....
...it makes a nice improvement for low $. But it is hard on the fingers!
More in next post.
Last edited by DK Custom; 05-21-2016 at 12:39 AM.
#3
05-21-2016, 01:59 AM
Join Date: Nov 2010
Location: Red Banks, Mississippi
Posts: 17,464
Received 3,940 Likes
on
2,295 Posts
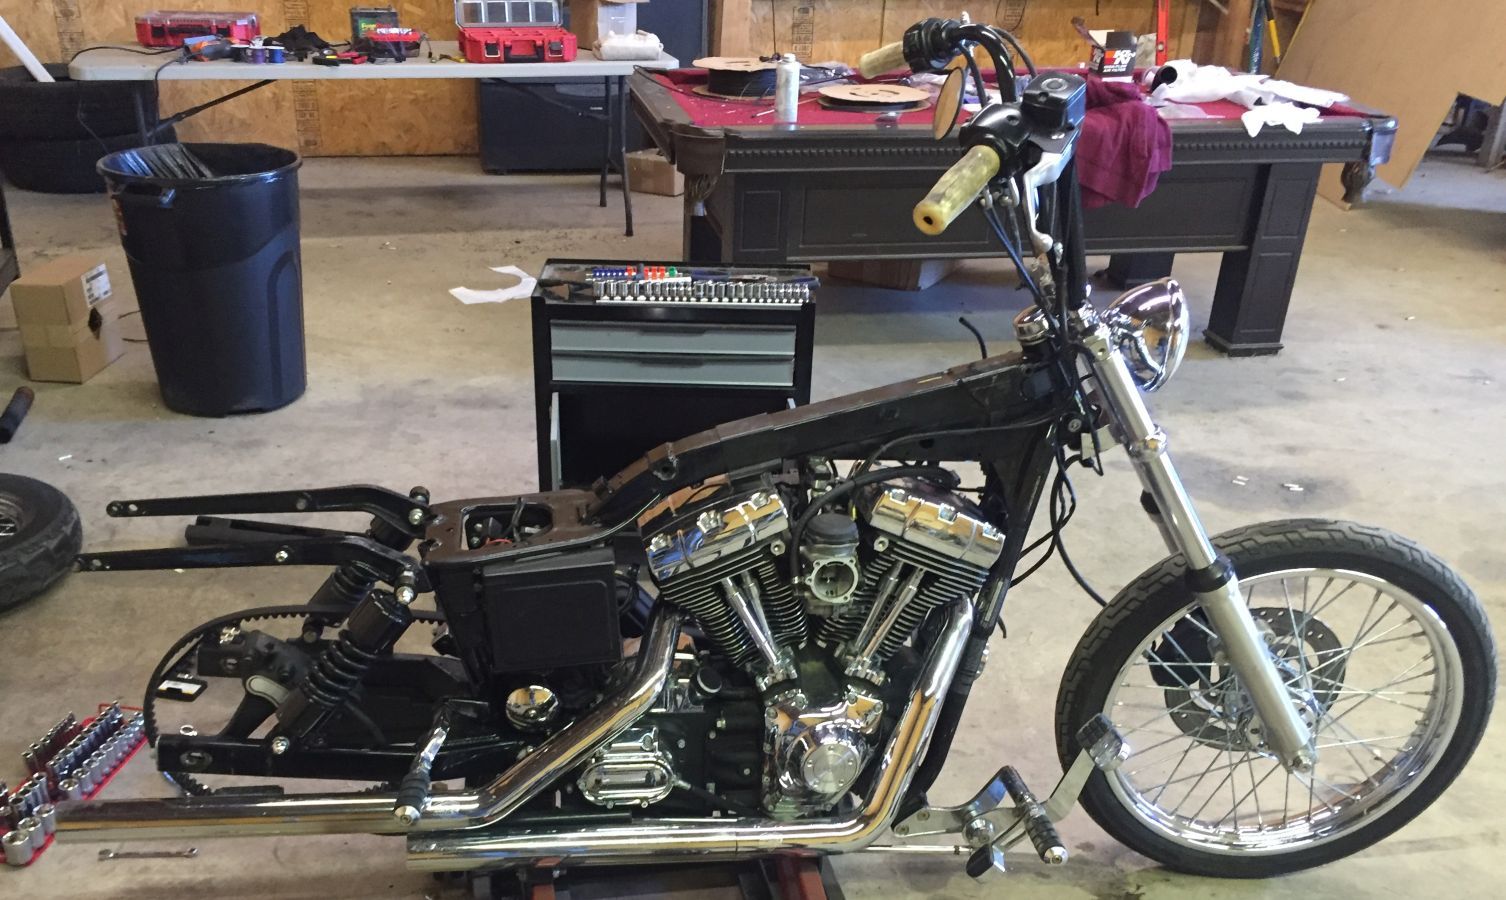
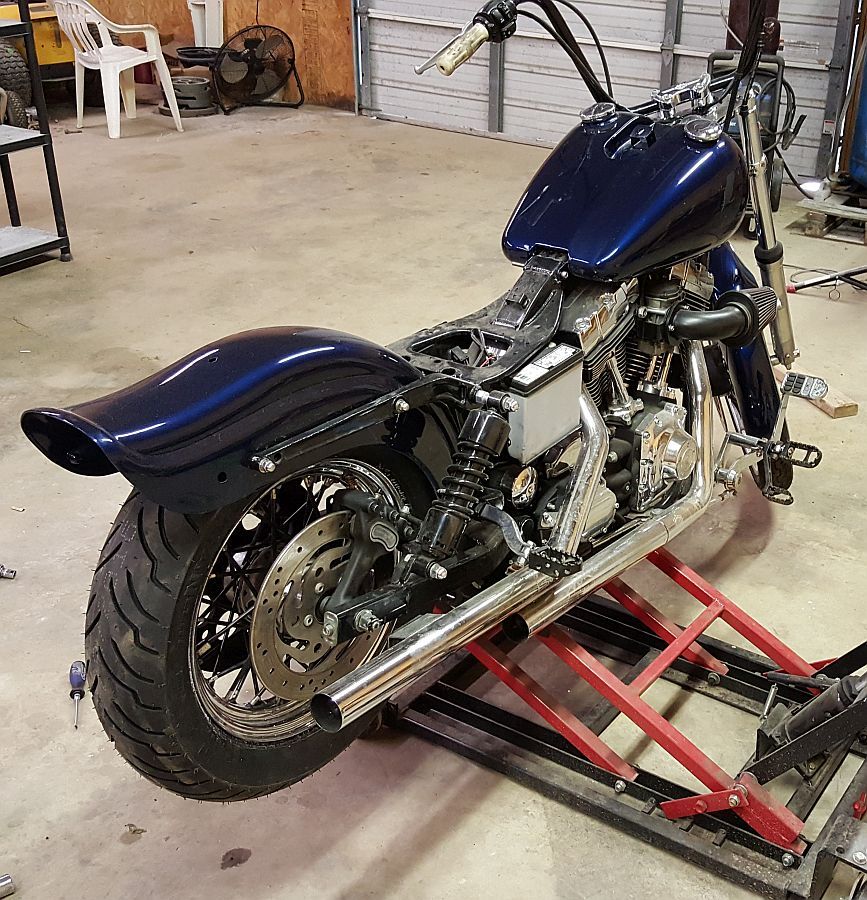
This is how it sat for months...waiting for the tins.
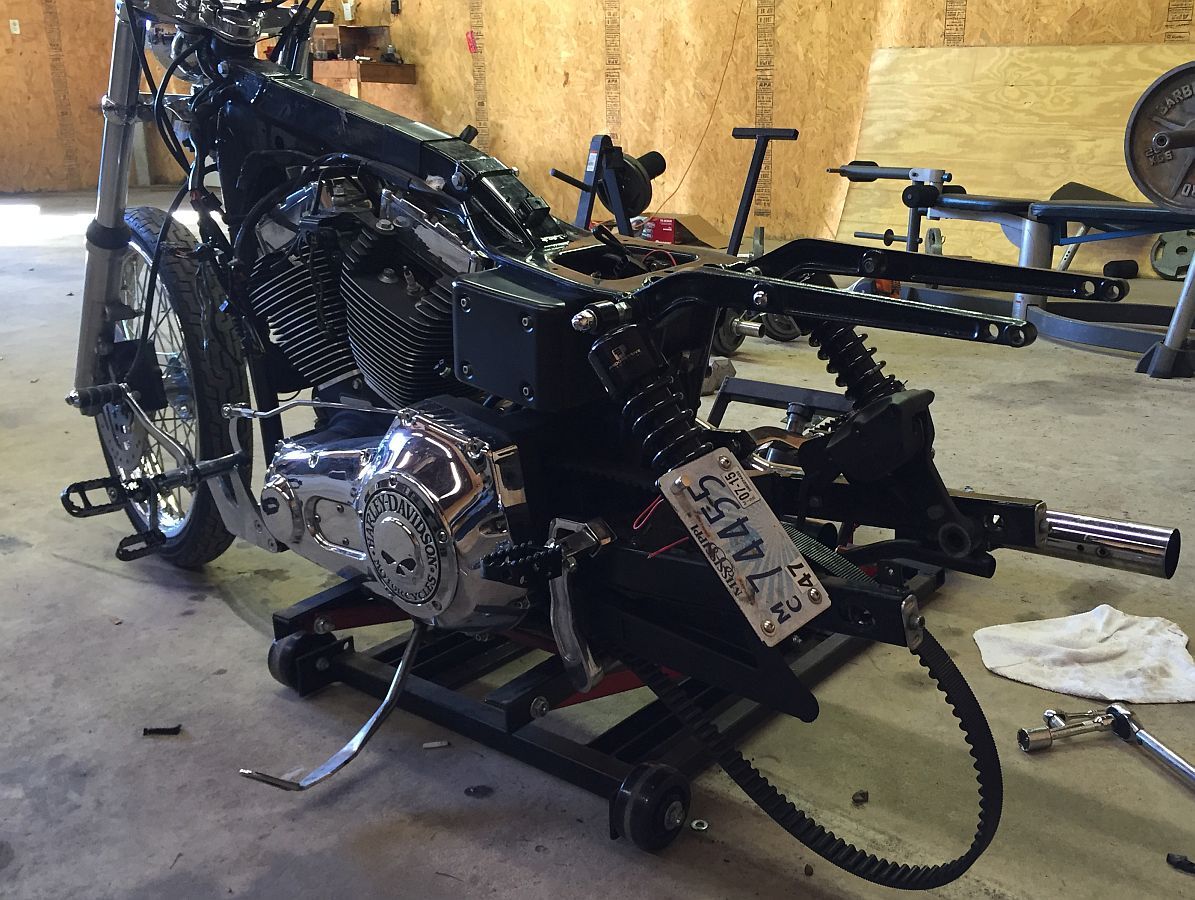
It was the middle of winter...snow, ice, lots of sub-freezing days. But on the warmer days, Dwayne as a Nightster also...so he was able to ride that while we were waiting for the painter.
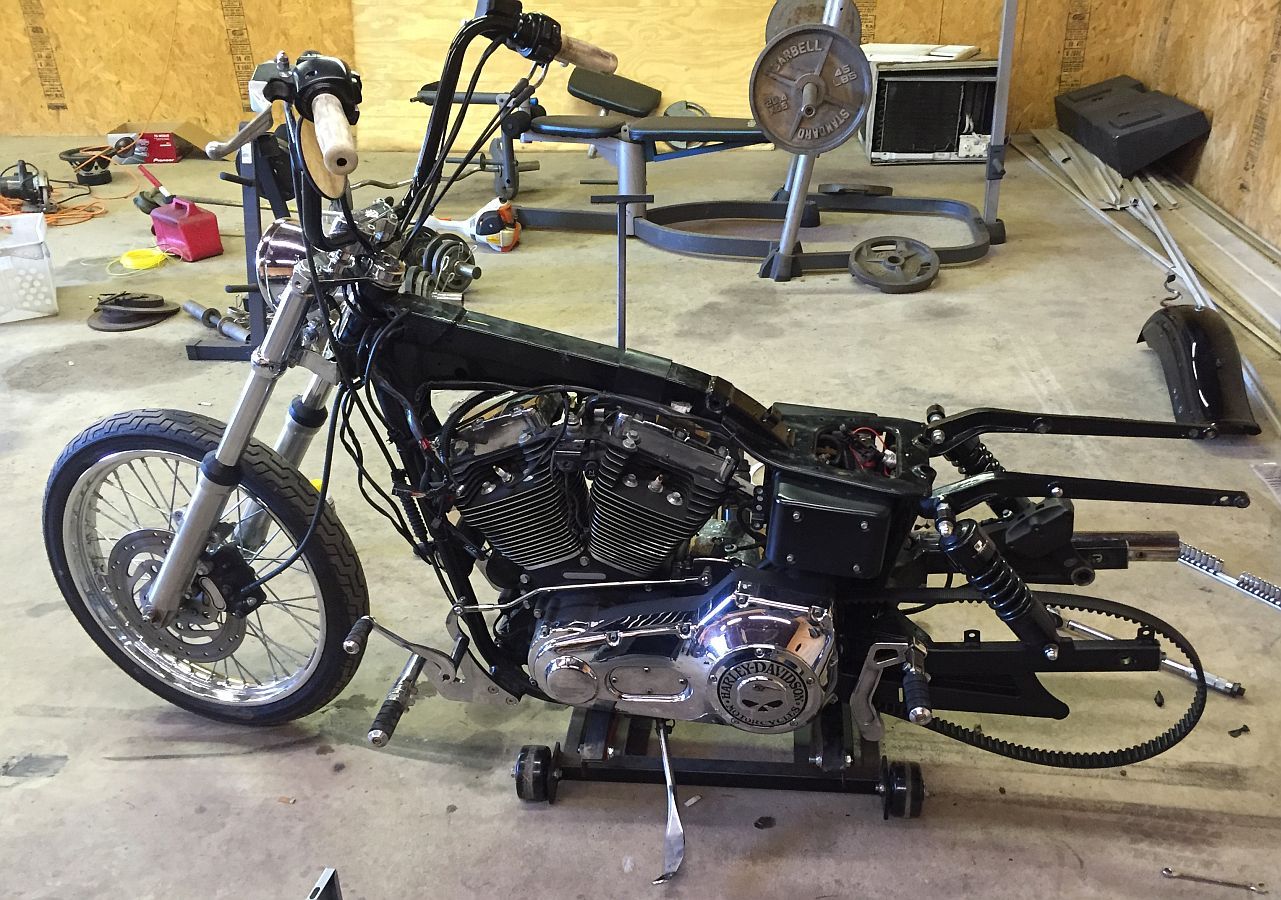
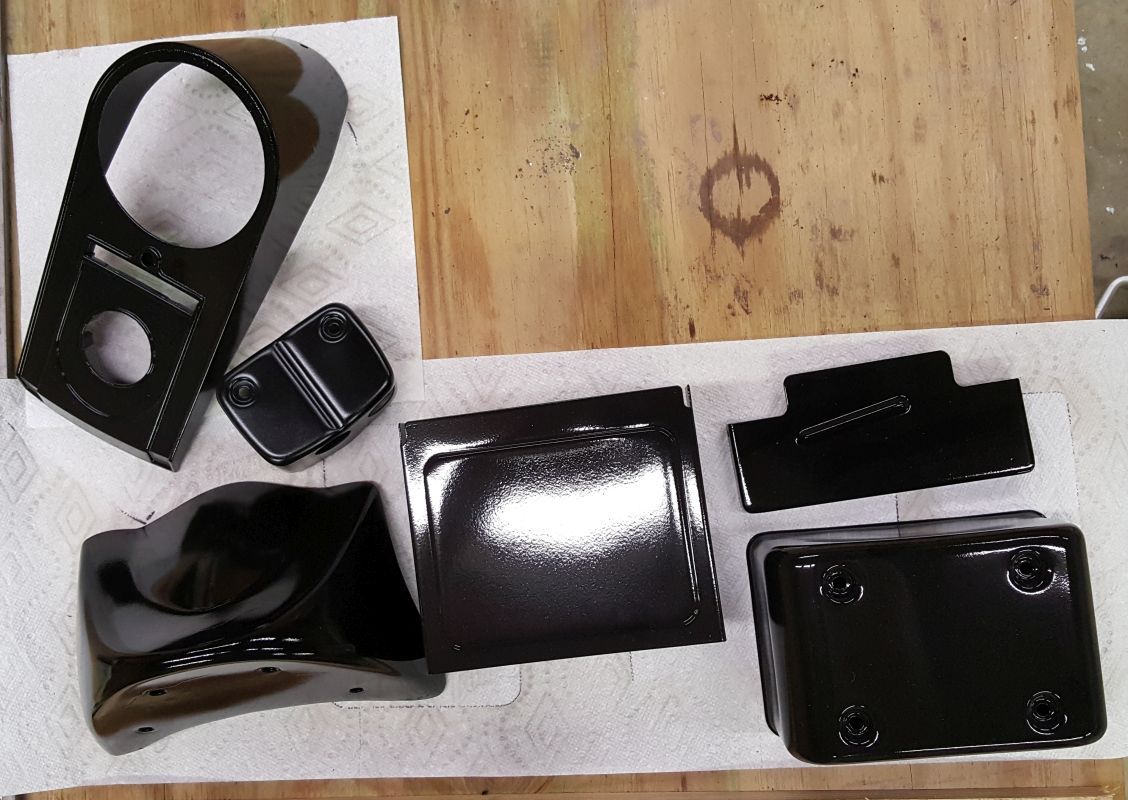
A few things got done...
Has some miscellaneous pieces that got cleaned up and then a few coats of rattle can black, including the Chin Spoiler.
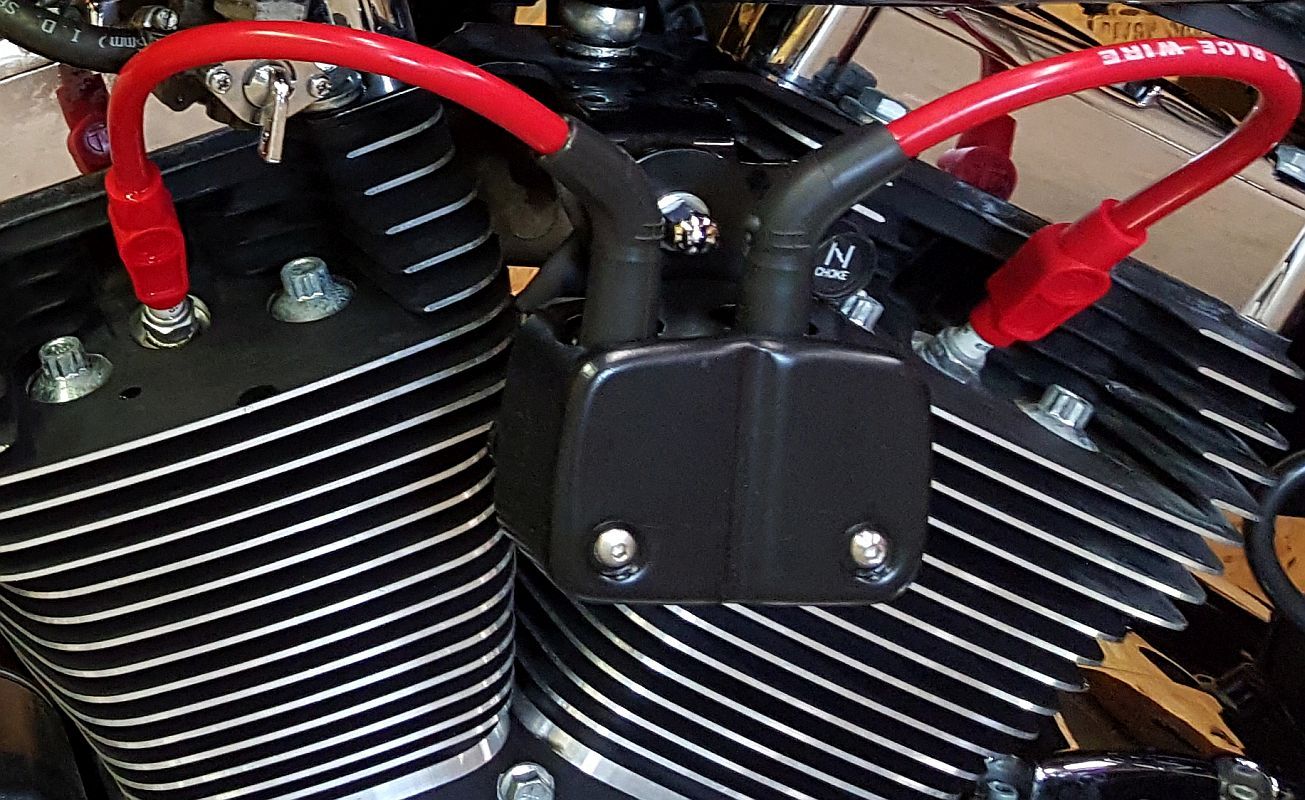
Got the coil relocation done....
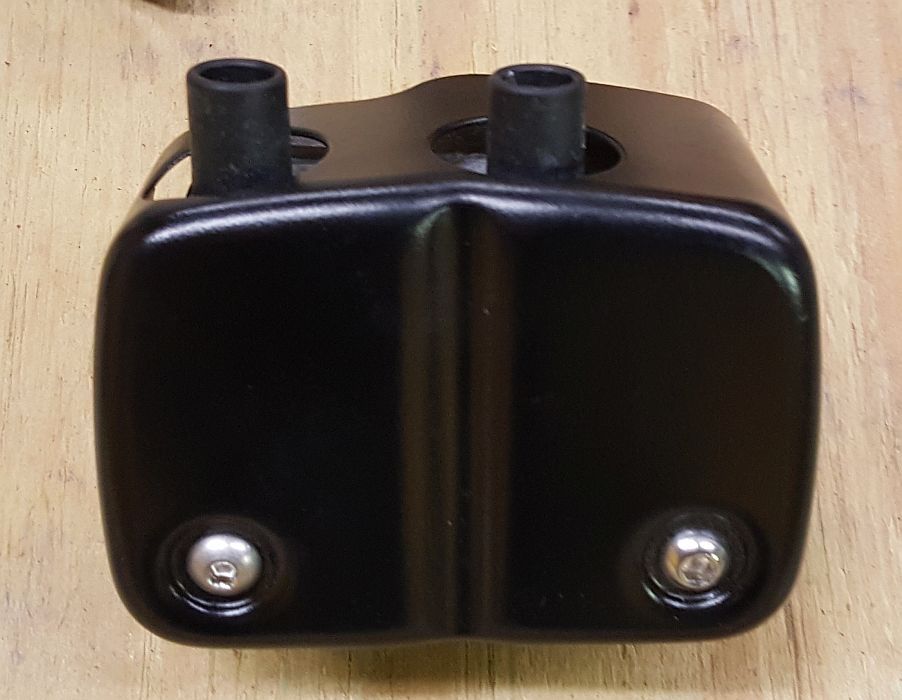
Used the Taylor PRO Race Wires-
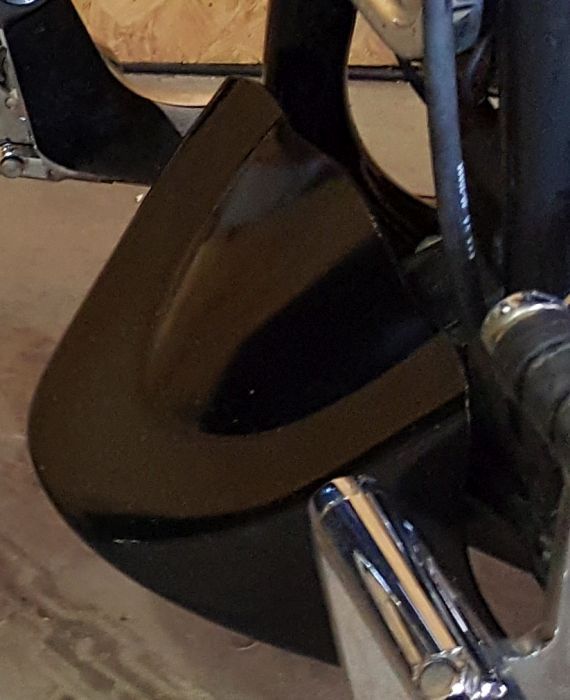
Mounted up the Chin Spoiler-
Got the Stealth LED Running Lights/Turn Signals mounted and wired up-
More coming soon!
It was the middle of winter...snow, ice, lots of sub-freezing days. But on the warmer days, Dwayne as a Nightster also...so he was able to ride that while we were waiting for the painter.
A few things got done...
Has some miscellaneous pieces that got cleaned up and then a few coats of rattle can black, including the Chin Spoiler.
Got the coil relocation done....
Used the Taylor PRO Race Wires-
Mounted up the Chin Spoiler-
Got the Stealth LED Running Lights/Turn Signals mounted and wired up-
More coming soon!
#6
05-24-2016, 12:57 PM
Join Date: Nov 2010
Location: Red Banks, Mississippi
Posts: 17,464
Received 3,940 Likes
on
2,295 Posts
The painted tins finally came in.
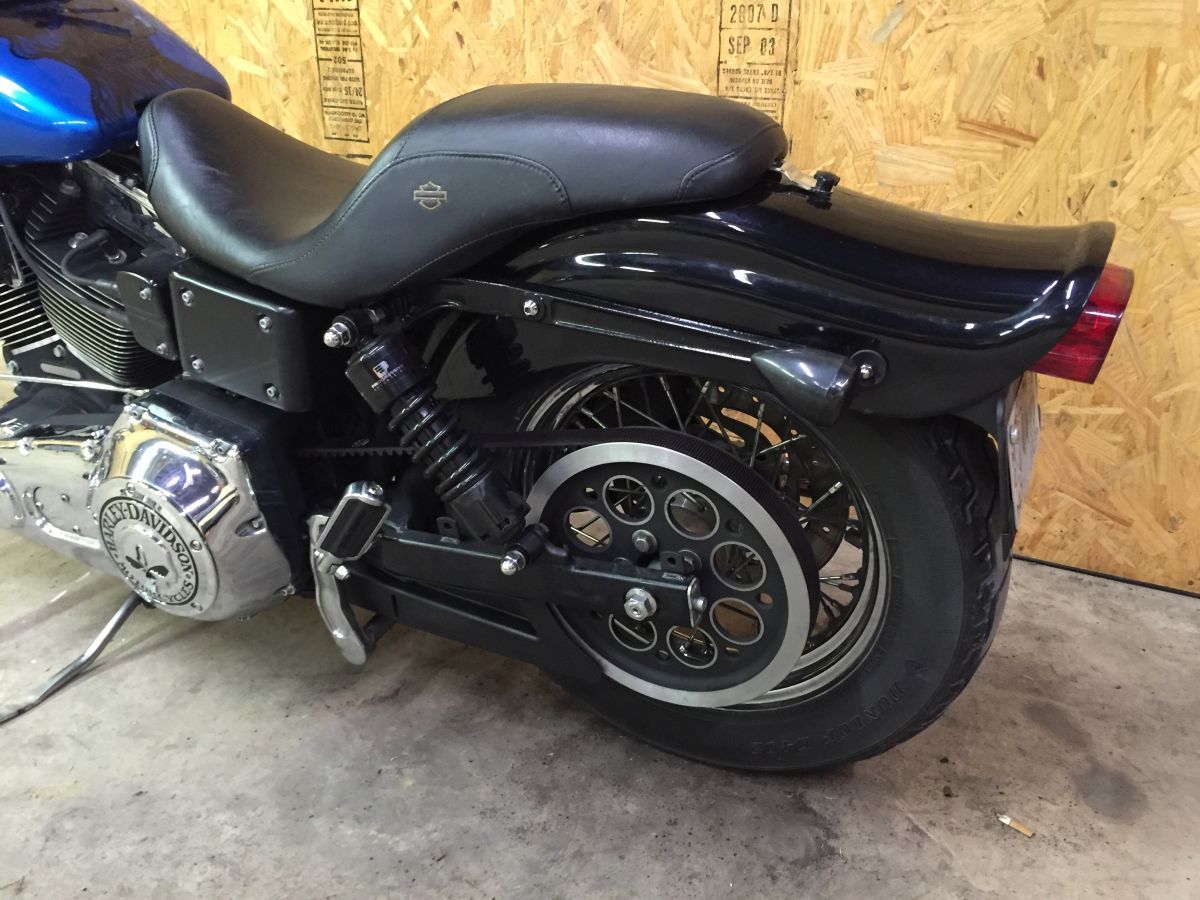
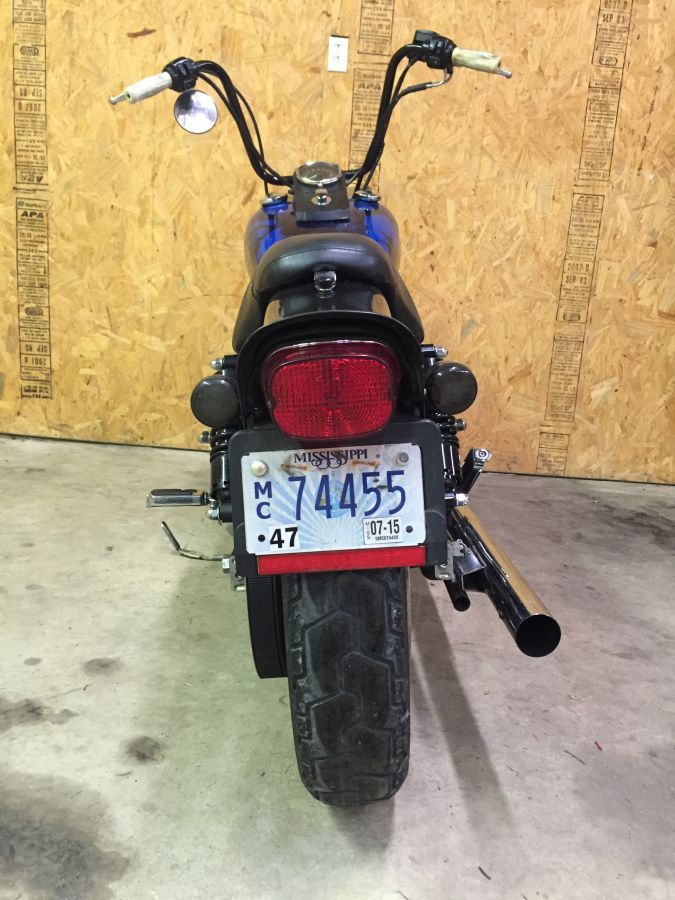
All the garbage that was on the back of the bike is NOT going back on.
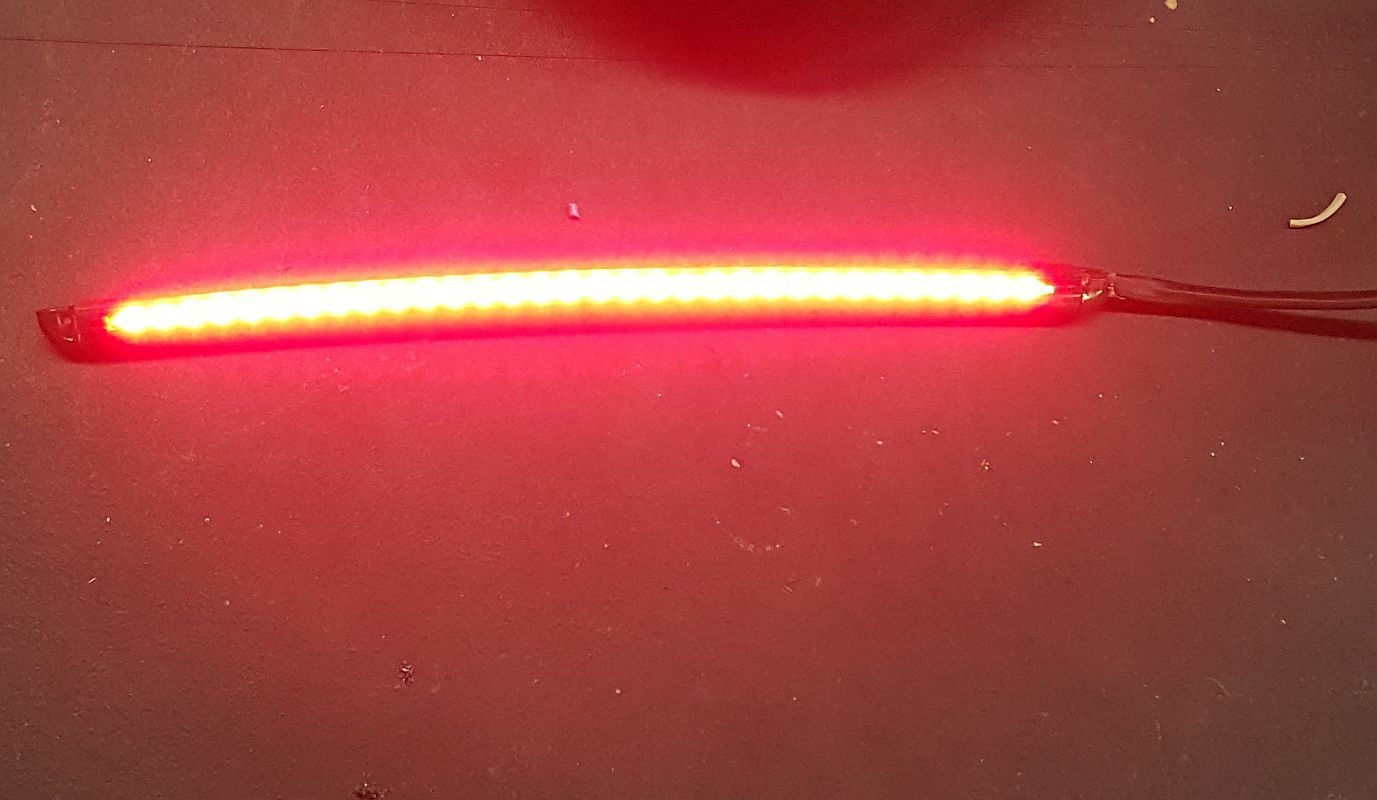
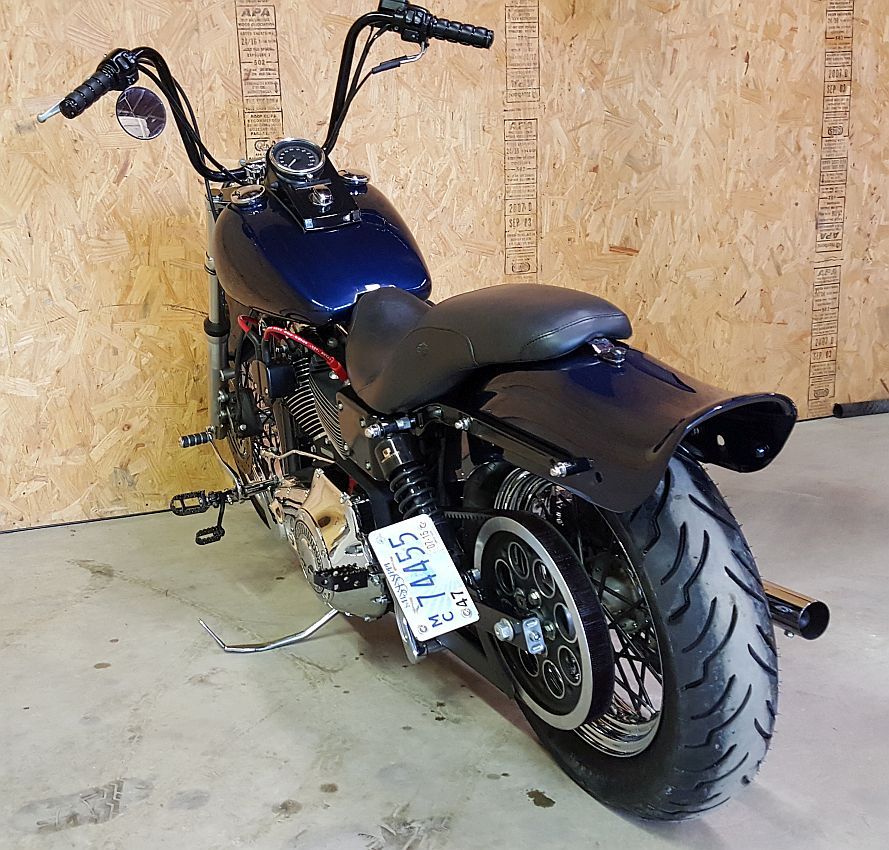
Warming up the Stealth LED RBT before affixing it to the fender-
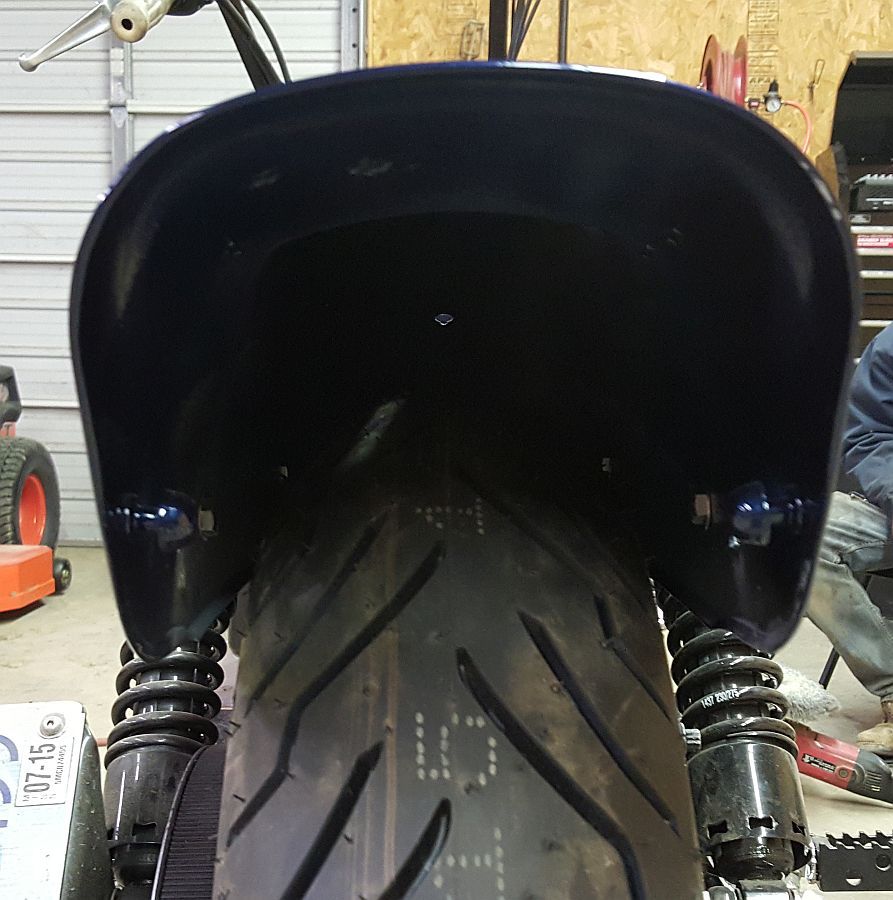
Instead the Stealth Run-Brake-Turn LED unit is added to the bottom lip of the fender-
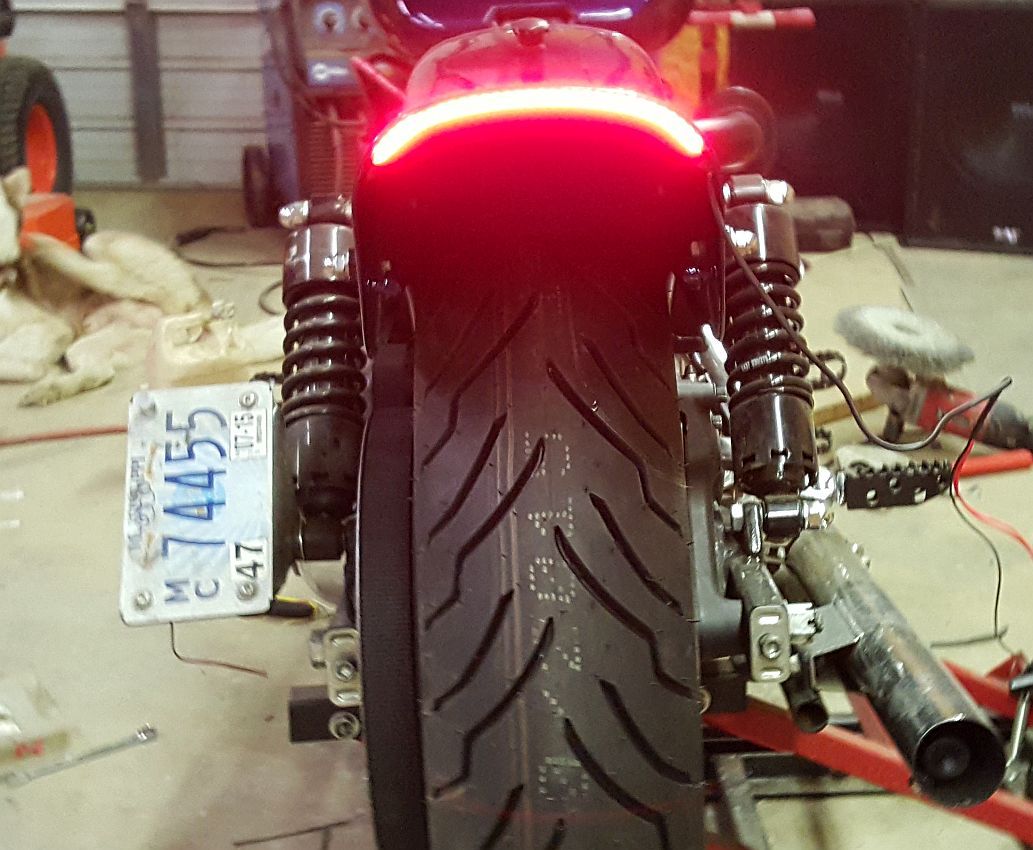
Also above, you can see the new rear rubber and Thunder Torque Inserts.
ISO Grips are installed, more comfortable, and better match for the semi-blacked out look Dwayne is going for-
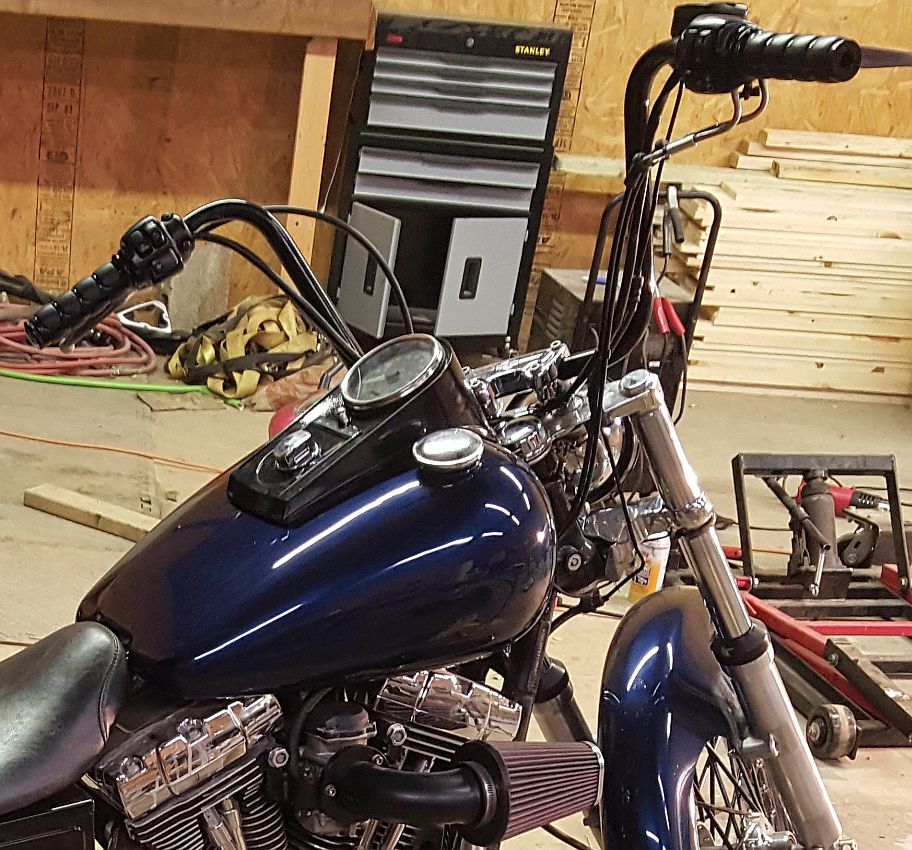
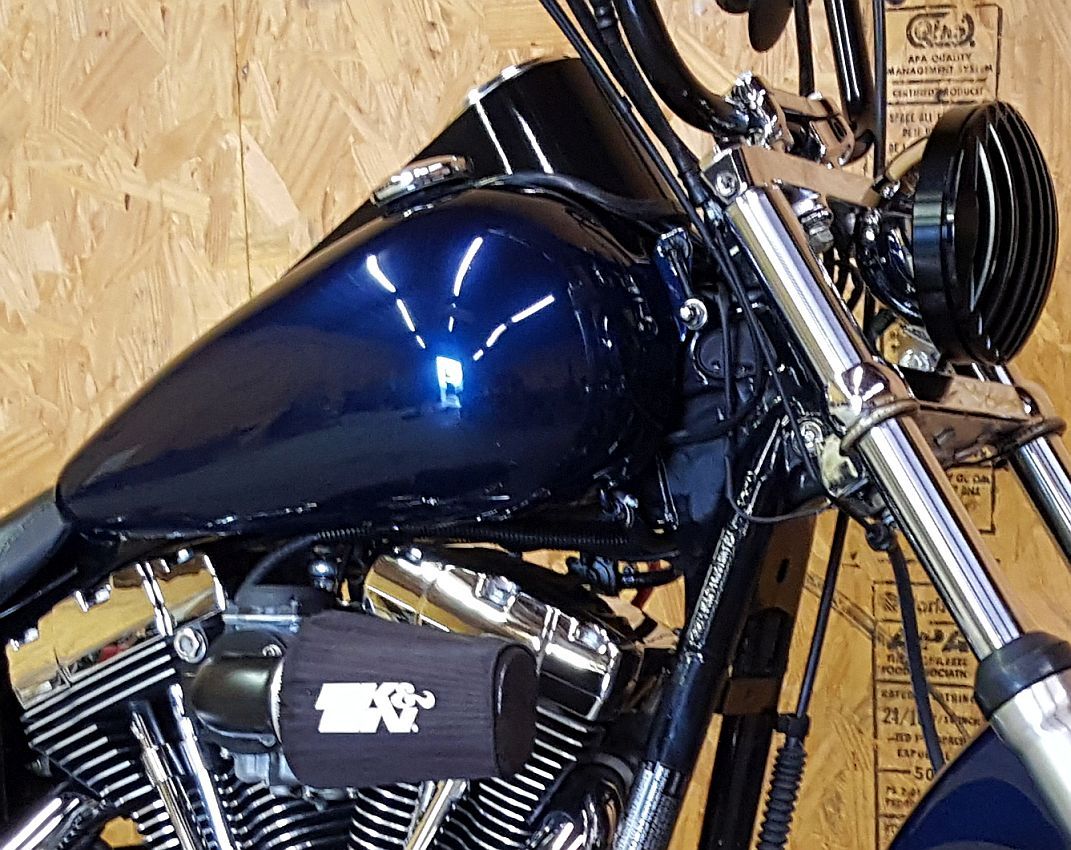
Tank Lift is installed for better cooling, less buffeting and easier cleaning of the Rocker Covers-
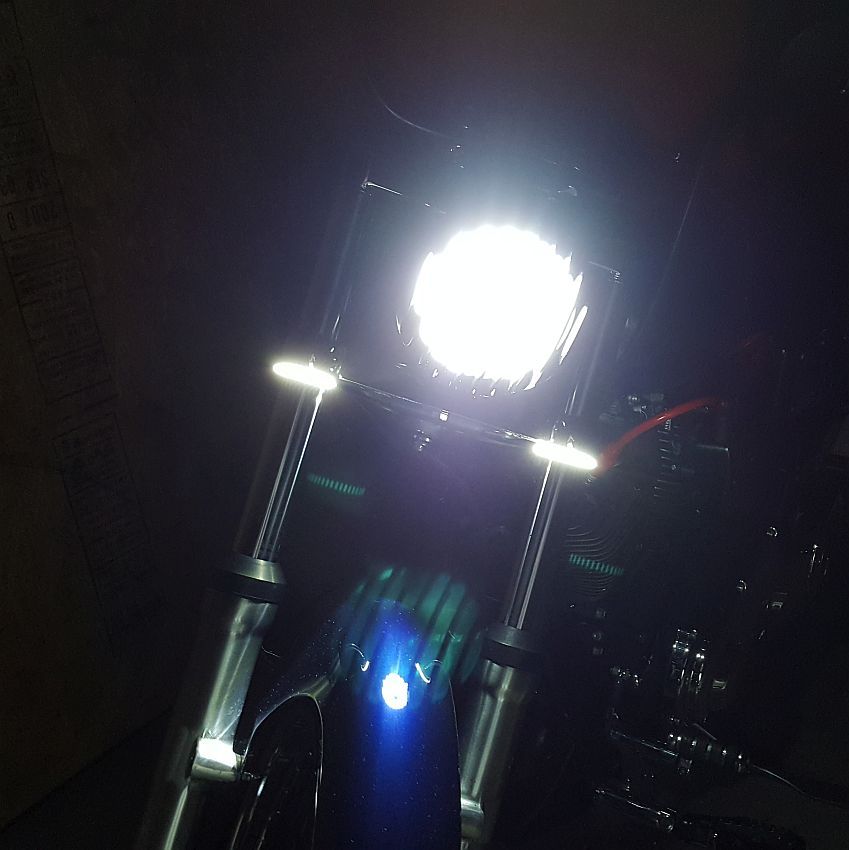
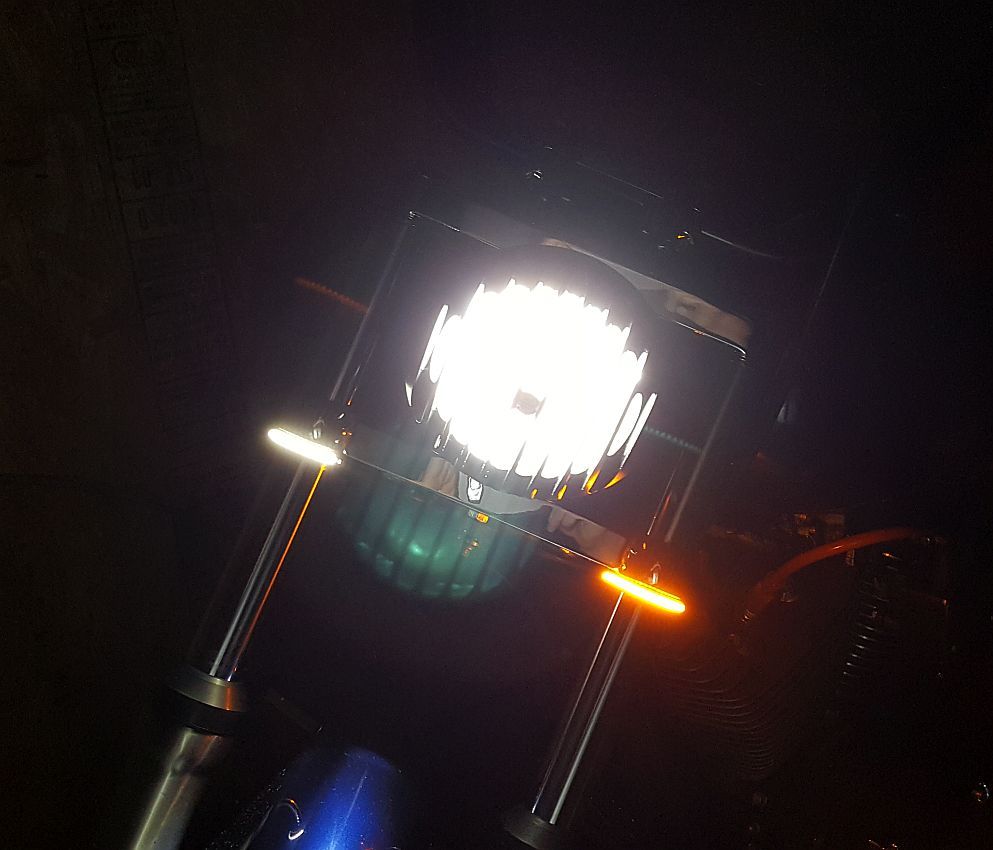
Pic of the Stealth LED RBT, also notice how much light the LED Bolt on the plate relo puts out.
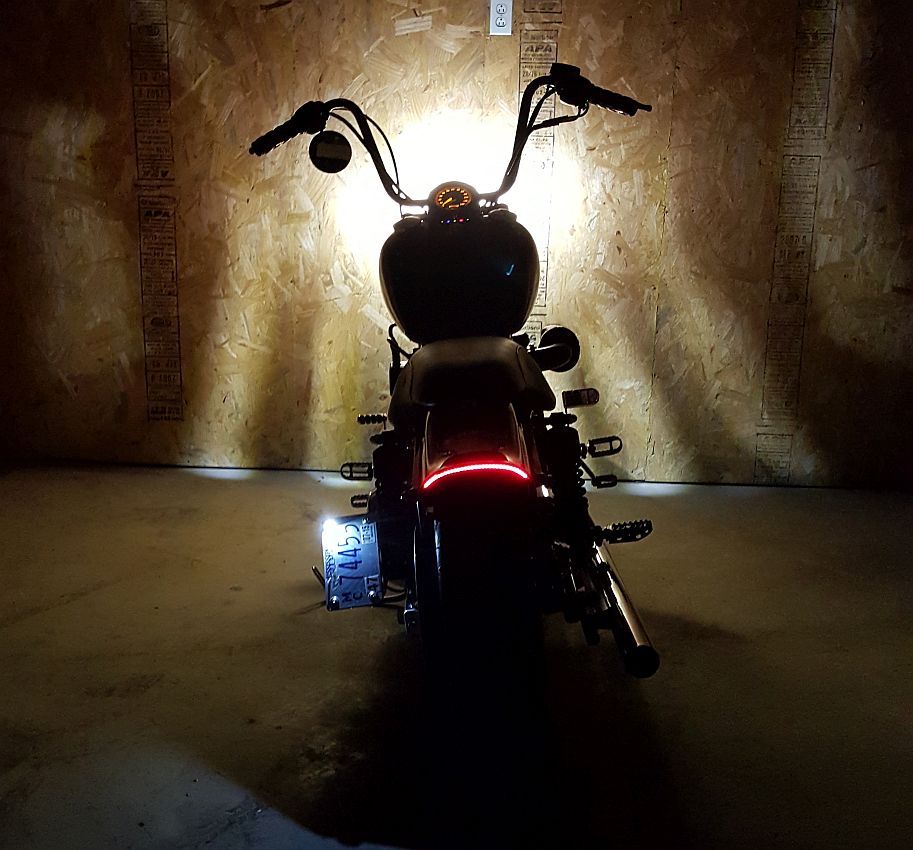
Couple of pics of the LED Drop-in head light bulb, along with the Stealth LED Turn Signals/White Running lights.
More in next post.
All the garbage that was on the back of the bike is NOT going back on.
Warming up the Stealth LED RBT before affixing it to the fender-
Instead the Stealth Run-Brake-Turn LED unit is added to the bottom lip of the fender-
Also above, you can see the new rear rubber and Thunder Torque Inserts.
ISO Grips are installed, more comfortable, and better match for the semi-blacked out look Dwayne is going for-
Tank Lift is installed for better cooling, less buffeting and easier cleaning of the Rocker Covers-
Pic of the Stealth LED RBT, also notice how much light the LED Bolt on the plate relo puts out.
Couple of pics of the LED Drop-in head light bulb, along with the Stealth LED Turn Signals/White Running lights.
More in next post.
Last edited by DK Custom; 05-24-2016 at 01:03 PM.
#7
05-24-2016, 01:32 PM
Join Date: Nov 2010
Location: Red Banks, Mississippi
Posts: 17,464
Received 3,940 Likes
on
2,295 Posts
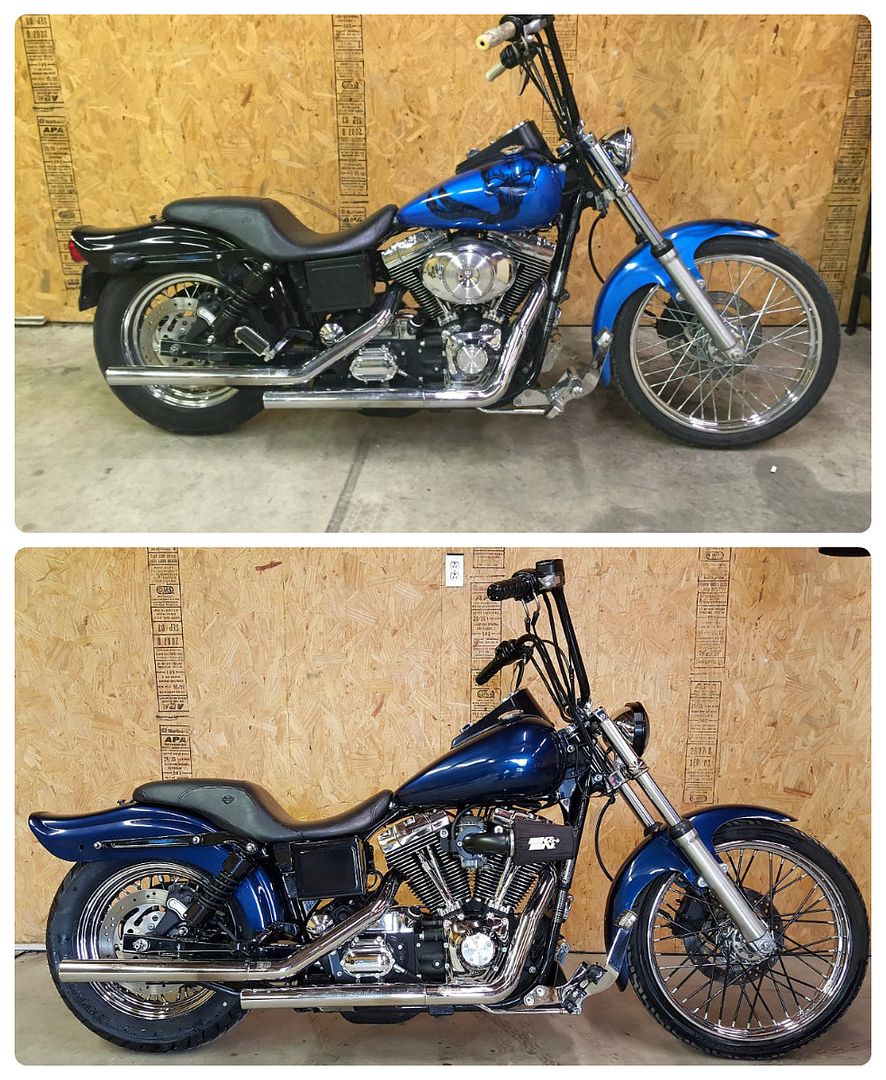
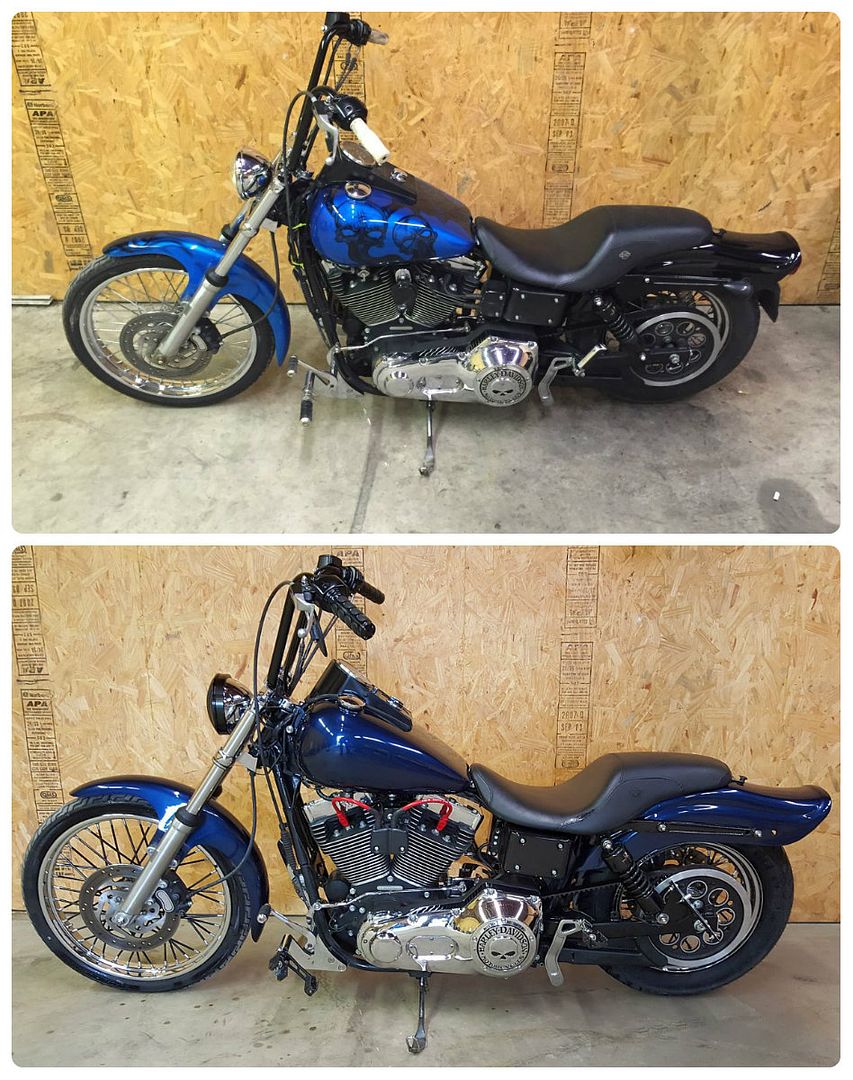
Ready to roll!
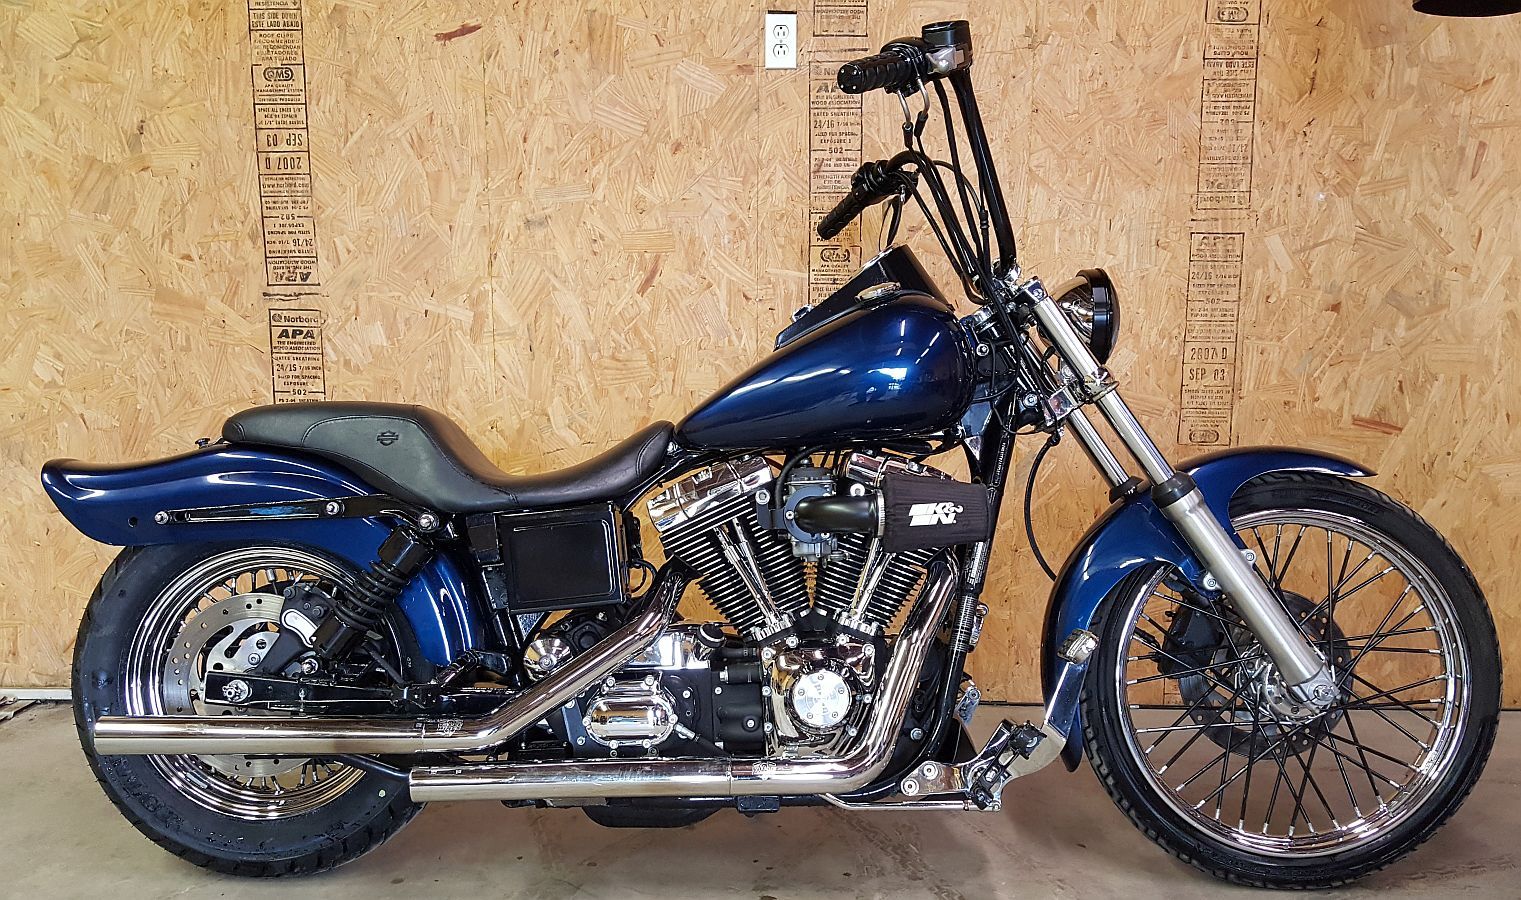
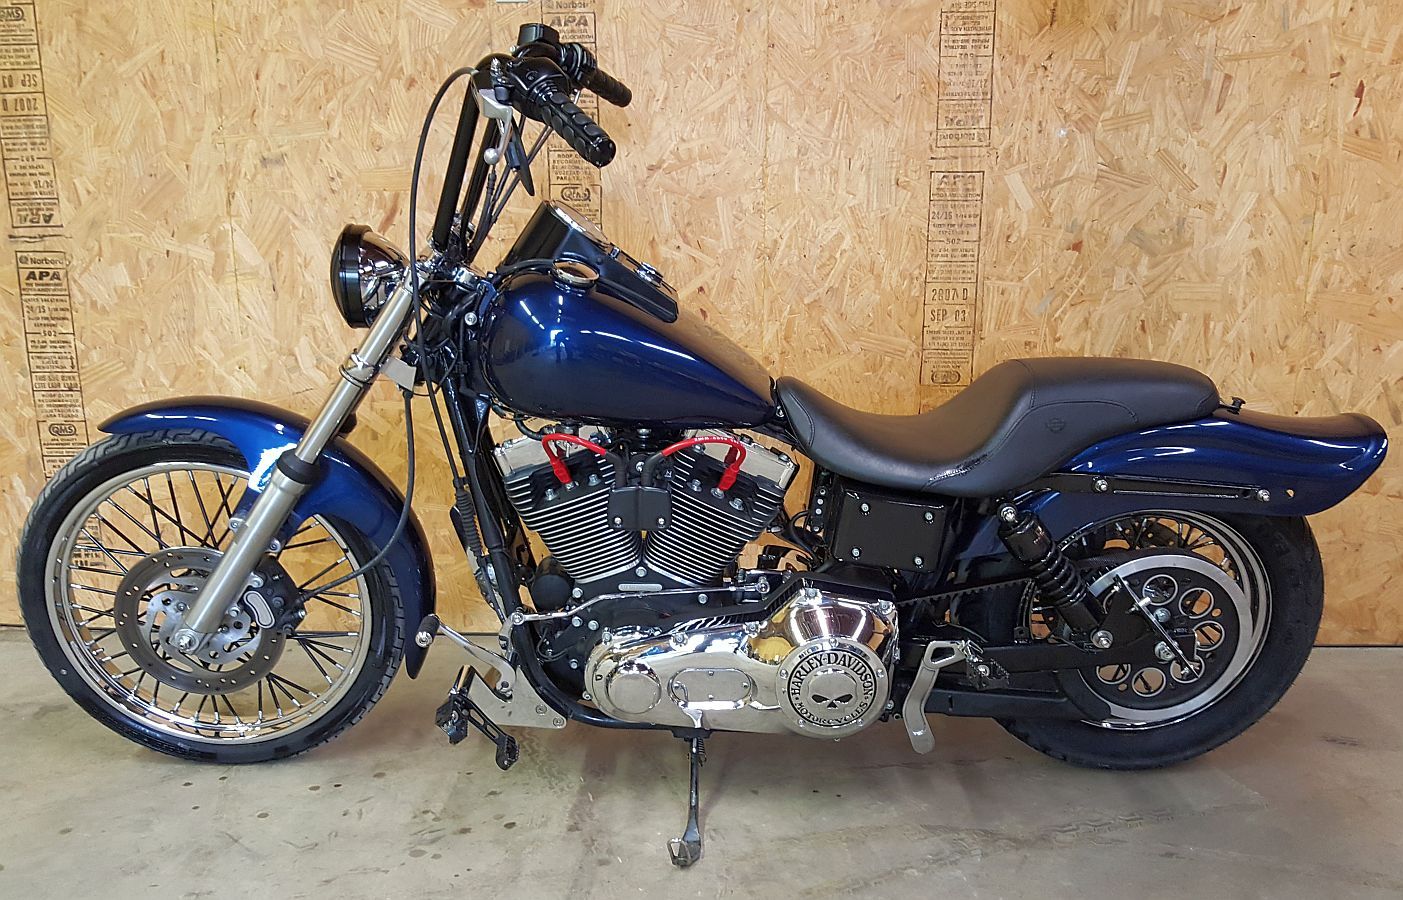
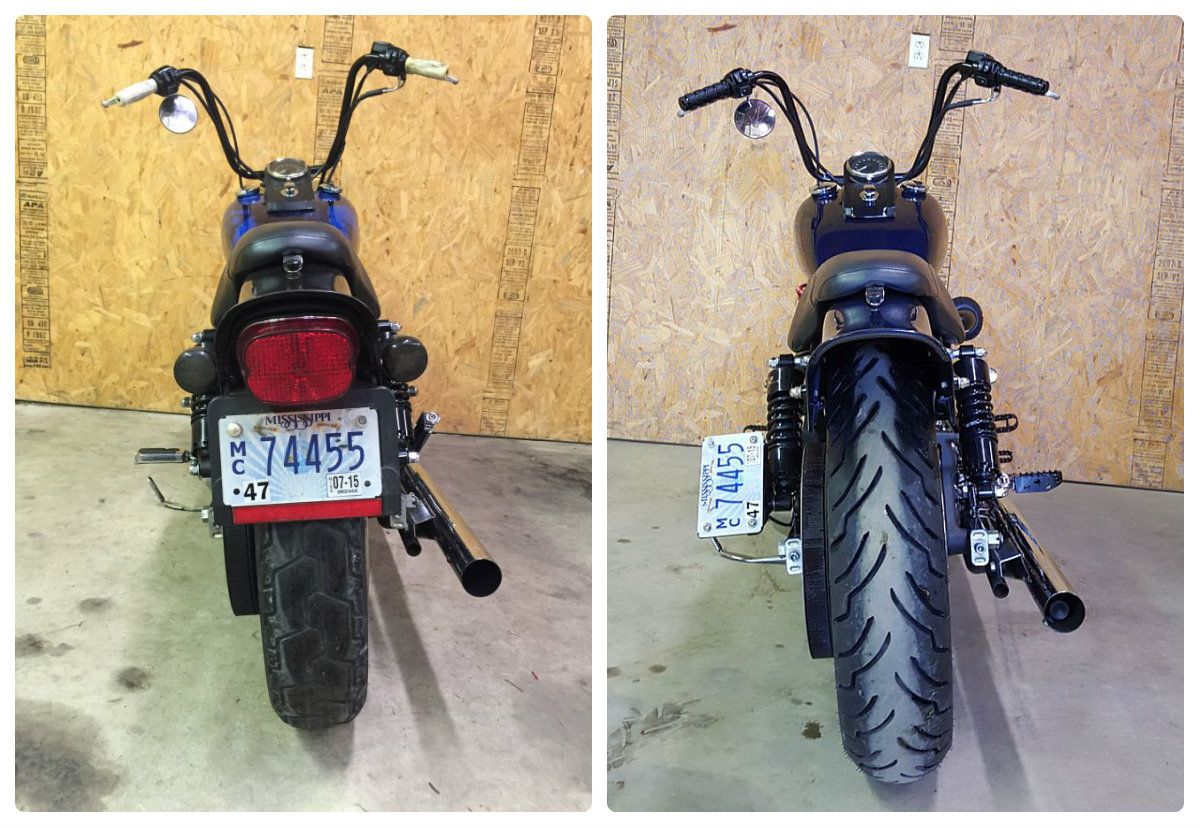
There are no really *BIG* things done, but a lot of little things that make a difference...check out the before and afters-
One of the most startling changes is how well the back end cleaned up!
There are still a few things that need to be done-
Chrome Bolt Covers for engine/trans/primary
Different Shift Peg and Brake Pedal
Caps to fill holes in rear fender and fender strut
Possibly a change in the forward control mounting hardware, & possibly a FL style rear fender.
Will be interesting to see what Dwayne does with this, in the meantime he's just enjoying riding it!
List of Mods:
Blacked-Out Spoke Covers
Headlight Grille
Drop-in LED Headlight Bulb
Stealth LED Front Turn Signals/Running Lights
Blacked-Out ISO Grips
Chin Spoiler
Tank Lift
Trap Moto footpegs, front & rear
Heel Rests with Trap shift pegs
Outlaw 636v HiFlow A/C
Outlaw Breather Bolts
Coil Relocation
License Plate Relocation w/ LED bolt light
Thunder Torque Inserts
Stealth LED Run-Brake-Turn Light
And a 4 month paint job.
Trending Topics
#8
05-24-2016, 03:07 PM
Extreme HDF Member

#10
05-24-2016, 07:28 PM
Stellar HDF Member