* HOW TO * under fifty bux *

#1842
 05-20-2012, 10:11 PM
#1843
06-05-2012, 02:40 PM

6th Gear
Join Date: Mar 2012
Location: Brooklyn
Posts: 12
Likes: 0
Received 0 Likes
on
0 Posts
.

.
I've received several emails over the last two years asking about
extracting wires from the ever so popular AMP connectors.
HD uses these in several locations on their machines.
Here's the last one:
mud,
I picked up the short standoffs at the dealer today and wanted to
install them tonight but am unsure about the process.
Someone on the forum said you cut the wire for each signal and splice into it,
but the directions don't say anything to that effect.
They mention something about undoing the plug from the rear tail light area instead.
I've never done any electrical work on my bike before
so I'm not really sure if these mod is out of my league.
Any chance you might be able to decipher the instructions
and give me some tips on doing the install?
Thanks,
******, yeah nice to hear from you.
I am a strong believer in NOT cutting wires.
Yes, remove the lens, then unplug the fitting.
Really very simple to disassemble the electrical connectors
so you can pull the wires thru the standoffs.
I've heard quite a few folks on the forums
brag on how fast they can cut the wire and then solder.
Sadly, that bit of misinformation is a joke.
I can extract several before you can even get out
the snips, soldering gun, solder, shrink wrap, heat gun, etc.
Patience is a virtue while mastering this technique on the first wire.
After that, they get easier.
I can release them in a matter of seconds now.
Same is true for the other connectors that HD uses -
Deutsch, Packard, Delphi -
NO need to BUY SPECIAL extraction tools for any of these.
Here ya go:
Remove the two screws that hold the taillight to it's housing.
Use a small screwdriver to push the lock tab down a little,
and pull the fitting out.
.
.

.
.
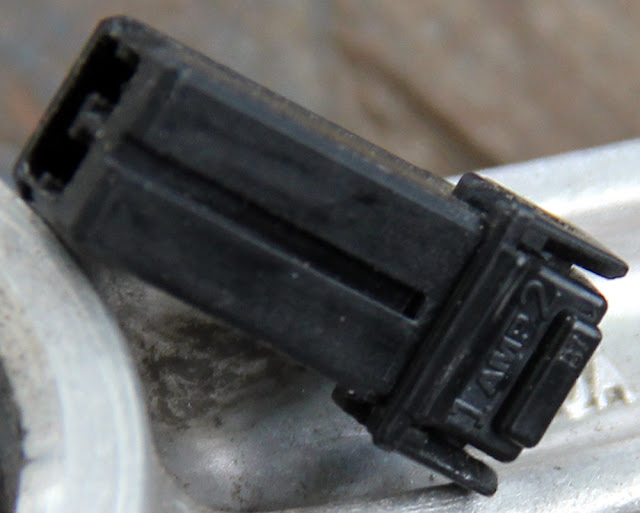
This image below shows the 2 hole AMP and the tip of the 16 gauge wire I use.
Blue arrow shows a slight bend, and the tip is hammered flat.
Red is the first lock to undo. This is what holds the wires in the fitting.
Green is the tab that you released in the first step above,
it locks the fitting to it's receiver.
Green on the right is opened way up for some of the pix farther down.
Don't bend it out or you will ruin the fitting.
They are cheap, fifty cents or so.
.
.

.
.
Blue below, better shot of the 16 ga tip.
.
.

.
.
Next image you see I put an S bend in my release tool so I can control it better.
Also here you see that I have the turn indicator wire pushed fully IN
while raising the lock tang inside.
.
.

.
.
Now, below, once you have the lock tang lifted,
extract the wire.
.
.

.
.
Don't forget to pay attention to which wire comes from which side of the fitting.
There are small numbers on the housing.
In this case. 1 is purple, 2 is black.
.
.
.
.
Next two images illustrate where the tang is, and where the tip of my tool needs to be.
Green is pulled way up here simply for the photo.
.
.

.
.
I suggest buying a couple of new sockets so you can fold this way wide open
for your first try at this. If need be.
Little blue arrow indicates how far the end of the tang lifting wire needs to be.
.
.

.
.
I made two video tutorials.............................
Green below shows a generous dab of dielectric compound on the tip of a little brush.
Red - the fitting is full
.
.

 .
.
.


.
.

.
.
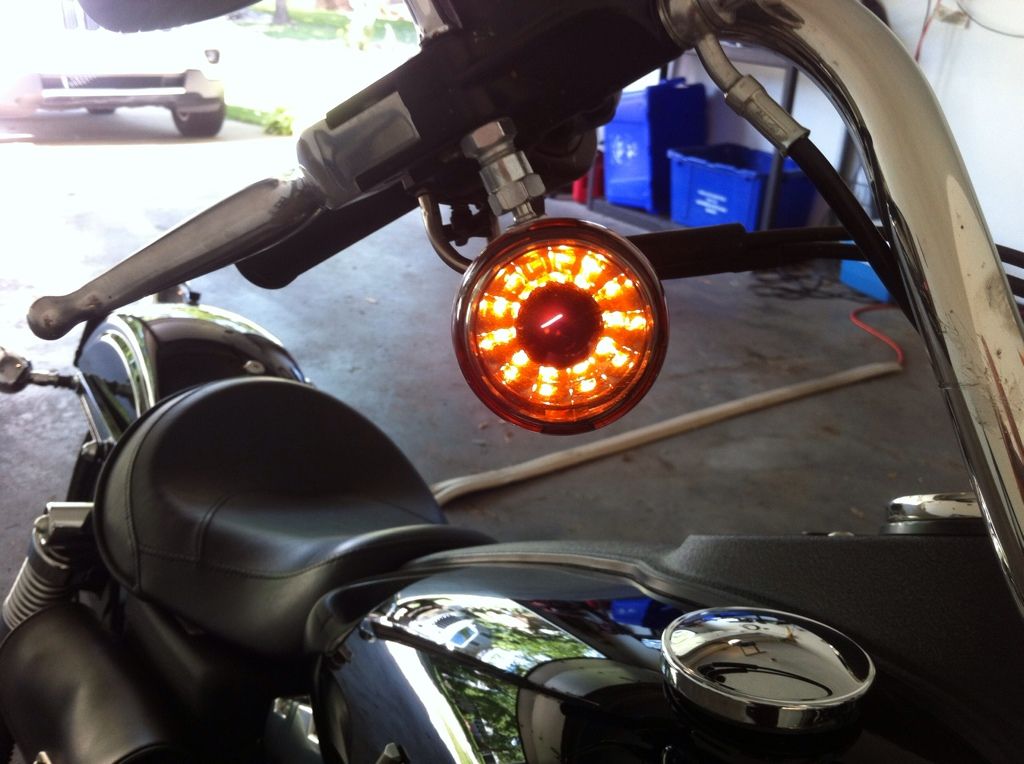
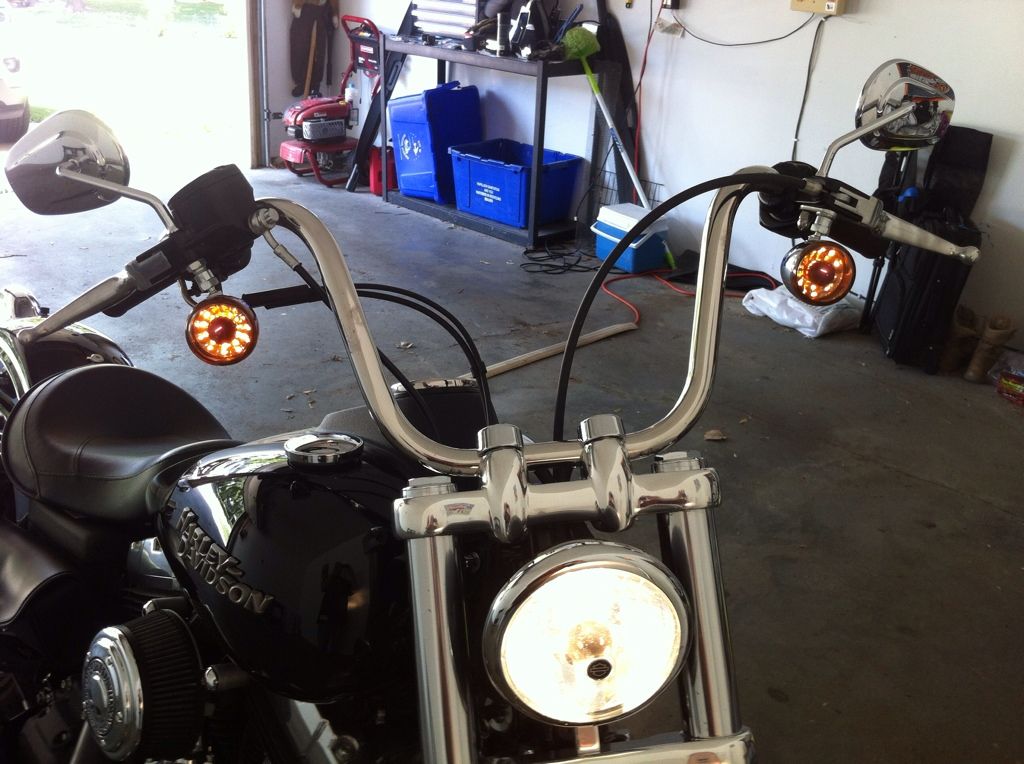
Above - HD rear standoffs.
Below - close standoff on left. Stock on right.
.
.

.
.

.
****AMP fitting release tool****
.
I've received several emails over the last two years asking about
extracting wires from the ever so popular AMP connectors.
HD uses these in several locations on their machines.
Here's the last one:
mud,
I picked up the short standoffs at the dealer today and wanted to
install them tonight but am unsure about the process.
Someone on the forum said you cut the wire for each signal and splice into it,
but the directions don't say anything to that effect.
They mention something about undoing the plug from the rear tail light area instead.
I've never done any electrical work on my bike before
so I'm not really sure if these mod is out of my league.
Any chance you might be able to decipher the instructions
and give me some tips on doing the install?
Thanks,
******, yeah nice to hear from you.
I am a strong believer in NOT cutting wires.
Yes, remove the lens, then unplug the fitting.
Really very simple to disassemble the electrical connectors
so you can pull the wires thru the standoffs.
I've heard quite a few folks on the forums
brag on how fast they can cut the wire and then solder.
Sadly, that bit of misinformation is a joke.
I can extract several before you can even get out
the snips, soldering gun, solder, shrink wrap, heat gun, etc.
Patience is a virtue while mastering this technique on the first wire.
After that, they get easier.
I can release them in a matter of seconds now.
Same is true for the other connectors that HD uses -
Deutsch, Packard, Delphi -
NO need to BUY SPECIAL extraction tools for any of these.
Here ya go:
Remove the two screws that hold the taillight to it's housing.
Use a small screwdriver to push the lock tab down a little,
and pull the fitting out.
.
.
.
.
This image below shows the 2 hole AMP and the tip of the 16 gauge wire I use.
Blue arrow shows a slight bend, and the tip is hammered flat.
Red is the first lock to undo. This is what holds the wires in the fitting.
Green is the tab that you released in the first step above,
it locks the fitting to it's receiver.
Green on the right is opened way up for some of the pix farther down.
Don't bend it out or you will ruin the fitting.
They are cheap, fifty cents or so.
.
.
.
.
Blue below, better shot of the 16 ga tip.
.
.
.
.
Next image you see I put an S bend in my release tool so I can control it better.
Also here you see that I have the turn indicator wire pushed fully IN
while raising the lock tang inside.
.
.
.
.
Now, below, once you have the lock tang lifted,
extract the wire.
.
.
.
.
Don't forget to pay attention to which wire comes from which side of the fitting.
There are small numbers on the housing.
In this case. 1 is purple, 2 is black.
.
.
.
.
Next two images illustrate where the tang is, and where the tip of my tool needs to be.
Green is pulled way up here simply for the photo.
.
.
.
.
I suggest buying a couple of new sockets so you can fold this way wide open
for your first try at this. If need be.
Little blue arrow indicates how far the end of the tang lifting wire needs to be.
.
.
.
.
I made two video tutorials.............................
.
.
part 1 - http://www.youtube.com/embed/myPysAK2bWA
.
.
part 2 - http://www.youtube.com/embed/RNc0M74G4_Q
.
.
These are great fittings, but, they are not watertight..
part 1 - http://www.youtube.com/embed/myPysAK2bWA
.
.
part 2 - http://www.youtube.com/embed/RNc0M74G4_Q
.
.
Green below shows a generous dab of dielectric compound on the tip of a little brush.
Red - the fitting is full
.
.
..
.
.
.
.
Above - HD rear standoffs.
Below - close standoff on left. Stock on right.
.
.
.
.
.
Very impressive details of your work you put together. Thanks....from a DIY-er.
Getting ready to tackle turn signal relocation on my 2007 LOW Rider so's I can install a detachable backrest. Problem is....I can't find where to get the 16 gauge bare wire you created as a fitting release tool. I would have to buy an expensive spool of the wire and that doesn't make sense. Any other ideas on where to get wire or something else I can use? Also, can I get at the original turn signal bolts under the fender without a jack? I hope so. I don't have one. THANKS for any thoughts you can offer.
Featman
Brooklyn NY
#1844
06-05-2012, 03:27 PM

Join Date: Feb 2007
Location: Harmelen (The Netherlands, Europe)
Posts: 8,986
Received 867 Likes
on
576 Posts
Hi Mud,
Very impressive details of your work you put together. Thanks....from a DIY-er.
Getting ready to tackle turn signal relocation on my 2007 LOW Rider so's I can install a detachable backrest. Problem is....I can't find where to get the 16 gauge bare wire you created as a fitting release tool. I would have to buy an expensive spool of the wire and that doesn't make sense. Any other ideas on where to get wire or something else I can use? Also, can I get at the original turn signal bolts under the fender without a jack? I hope so. I don't have one. THANKS for any thoughts you can offer.
Featman
Brooklyn NY
As an addition to mud,s info check out this image on the use of a jewlers screwdriver or a one end flattened paperclip:

To gain access to the bolts inside the fender you could put the bike on some wood blocks and unbolt the bottom schock bolts to lower the rear wheel:
In my experience, one at a time isn't the best way to go. On my shovelhead I would roll the bike on to progressively taller blocks of wood until I could fit a 4x4 under the frame. I would start with a 5/8 piece of fiberboard, then a 2x4, then check for fitment of the 4x4. Basically a poor man's lift. Careful removing the bike.
If that doesn't work, I would often take a piece of 4x4 and place it under one side of the frame. Lean the bike onto the 4x4, and place a 4x4 and shim (5/8 fiberboard again for me) under the opposite frame rail. Then lean the bike onto the 4x4 and shim and place a shim onto the first 4x4. Repeat as needed, increasing the height until your rear wheel is off the ground. Easy!
If you don't feel like experimenting with that, Harbor Freight sells a decent lift for a great price. It's not a Handy that you'll have forever, but I've had mine for about three years and it still works great.
Last edited by FXD2003Rider; 01-25-2020 at 02:04 PM.
#1845
06-05-2012, 11:19 PM
Sorry, not related to Under $50 but i just want to say I just love looking at you bike, man. Never thought I'd like green but there's something special about your bike. It's very clean and fresh looking. small details make it killer. I use it as my screen saver as inspiration for where i want my bike to be some day.
I now return you to the Under $50 buck thread (which I am reading for the second time around.)


I now return you to the Under $50 buck thread (which I am reading for the second time around.)
#1846
06-09-2012, 01:59 AM
Club Member
Join Date: Dec 2010
Location: Anchorage, AK
Posts: 501
Likes: 0
Received 0 Likes
on
0 Posts
Thanks for the idea, though.
#1847
06-13-2012, 02:12 PM
Road Captain
Join Date: Oct 2009
Location: So Cal
Posts: 728
Likes: 0
Received 0 Likes
on
0 Posts
The the wimpy little ball joints on the stock shift linkage are known to fail sooner or later. Here's my home-made linkage. Around $10-$15 in parts. Two heim joints bought off ebay, a short piece of threaded rod covered with black shrink tube, a couple of bolts and nuts from the hardware store. You can go with chrome plated heim joints for more $.
Last edited by soldierbot; 04-02-2021 at 07:46 AM.
#1848
06-15-2012, 09:28 PM
Tourer
Join Date: Mar 2009
Location: I'm on the Central West Coast
Posts: 259
Likes: 0
Received 1 Like
on
1 Post
a couple weeks ago, I ordered on those Battery Tender Jrs.
It came yesterday.
At the same time I ordered an Emgo Handlebar-Mount Cigarette Lighter that came today.
I'm mounting the lighter and I'm gonna use it for a power outlet for Charging things like my phone and GPS.
I've also wired a power cord to one of the adapter plug that came with the battery tender so I can just plug it in at the handle bars when I pull into the garage and park my bike.
I think it will make it less likely that I'll for to unplug it before I try to back my bike out.
#1849
06-16-2012, 06:35 AM
#1850
06-19-2012, 09:28 PM
Warning .... got no pics on this one. (My new year's res is to get some pics of my scoot.)
Turn signal black-out : If you've added smoked lenses to your turn signals and arent thatimpressed cause you can still see the amber bulbs .... this is for you. Hit the parts store for new amber bulbs ( 2 each amber 1156 and 1157) and some black/dark gray paint. I used Krylon Fusion although I think BBQ High Temp Black would be best. Tape off each bulb so that you can paint the back halfthat you see through your smoked lenses. Spray with a couple of coats and let 'em dry. Re-install with the new blacked-out bulbs. Now, you'll have a much darker .... almost totally black turn signals .... but once you flip them on the un-painted portion will still light up amber and reflect off the inner unitas normal. Done deal!!
Later ...
PsTaN