* HOW TO * under fifty bux *
#1001
 10-13-2008, 09:15 PM

Club Member
Join Date: Feb 2008
Location: Passaic County, NJ
Posts: 11,474
Likes: 0
Received 23 Likes
on
18 Posts
Usage:
Remove cap from master cylinder. Attach pump to drain plug on caliper. Open drain. Pull plunger and it will suck all fluid into the syringe. Tighten drain plug before air gets back in. Check fluid level. Refill master cylinder when necessary. repeat process until syringe is full. Remove tubing from drain. Aim in a safe disposal container. Compress plunger. Continue process of pumping down the brake line until fresh clean brake fluid is all you're getting without bubbles. Also, when using the pump, do it easy because too much pressure and you'll probably mess up some of the seals. /end usage
I wanted to get this on video but my digi-cam needed a charge and I had a bug up my butt to get it done. Maybe I'll re-bleed them again and this way y'all can see it in action.
Last edited by SC-Longhair; 10-13-2008 at 10:03 PM.
#1002
10-13-2008, 09:52 PM
.
Remove cap from master cylinder.
Attach pump to drain plug on caliper.
Open drain.
Pull plunger and it will suck all fluid into the syringe.
Tighten drain plug before air gets back in.
Check fluid level.
Refill master cylinder when necessary.
repeat process until syringe is full.
Remove tubing from drain.
Aim in a safe disposal container.
Compress plunger.
Continue process of pumping down the brake line
until fresh clean brake fluid is all you're getting.
Now we're talking.
Slick technique.
mud

#1005
10-14-2008, 07:15 PM
#1007
10-14-2008, 11:26 PM
I was reminded of a cheap mod today. The wife just got a new sporty and wanted her mods done now. So I hid the wires in the bars for starters. I posted about this way back towards the beginning when I did the wires on my Bob, but never did pictures. Since it is all the same, if anyone is interested I can go over the post again, but with pictures. Completely free mod and cleans up the appearance of the bike as well.
#1008
10-15-2008, 12:05 AM
I was reminded of a cheap mod today. The wife just got a new sporty and wanted her mods done now. So I hid the wires in the bars for starters. I posted about this way back towards the beginning when I did the wires on my Bob, but never did pictures. Since it is all the same, if anyone is interested I can go over the post again, but with pictures. Completely free mod and cleans up the appearance of the bike as well.
https://www.hdforums.com/forum/dyna-glide-models/172813-doin-some-bob-mods-w-pics.html
#1009
10-15-2008, 12:26 AM
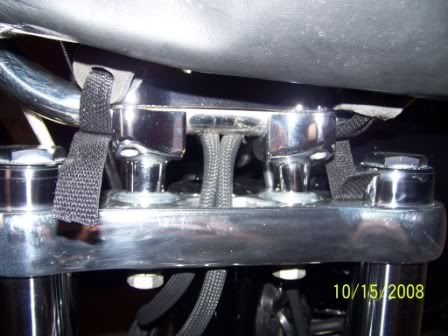
The first part is tear everything apart, get the tank out of the way, and find all your main wiring plugs. You can take the plugs apart and run the wires through the bars, then put the plugs back together. Some of the pics are from doing the wifes sporty today and some are of the Bob finished. When you get the bars off, you will notice some indentions under where the throttle and clutch lever is.
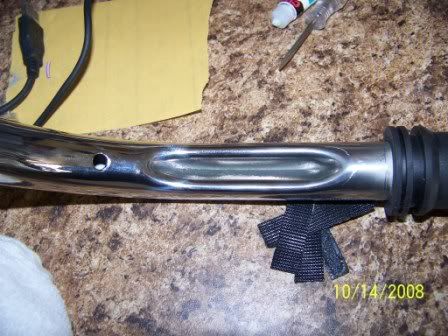
You will cut a notch there on each side to slide the wires in. You will then cut a notch under the center of the bars, in the center of the clamp
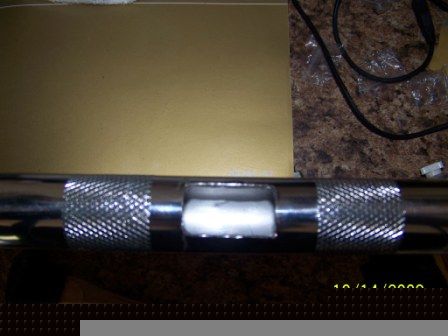
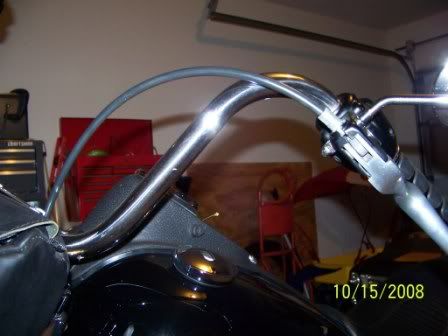
Cleans up the outside of the bars pretty well.
The most time consuming part is the actual wiring. You can break down the 8pin connector, that way you can avoid cutting & splicing/soldering. I will be happy to help with any questions
You will cut a notch there on each side to slide the wires in. You will then cut a notch under the center of the bars, in the center of the clamp
Cleans up the outside of the bars pretty well.
The most time consuming part is the actual wiring. You can break down the 8pin connector, that way you can avoid cutting & splicing/soldering. I will be happy to help with any questions
#1010
10-15-2008, 09:37 PM
Advanced
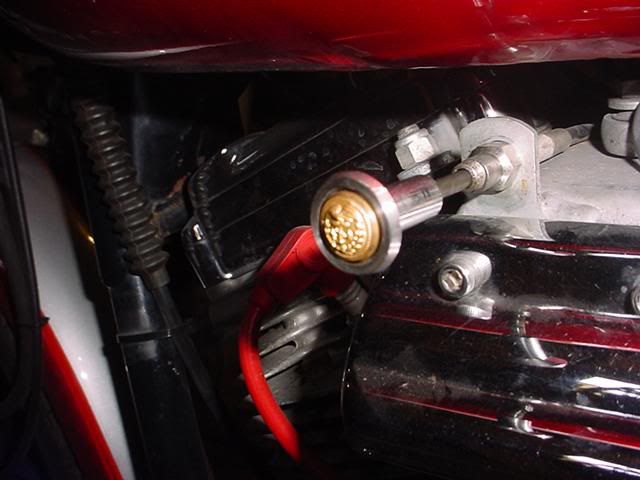
I'm not sure if these qualify cause although the parts were made with some materials I had on hand, it did require a lathe and milling machine to make, but I'll put them here anyway. The first is a new choke **** that I made from stainless steel and incorporated the chin strap screw from my military combination cap (U. S. Coast Guard).
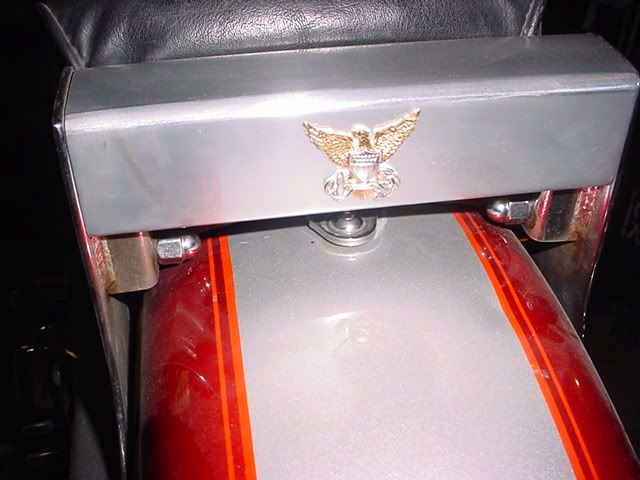
The other is a bracket that I built to replace the sissy bar/back rest when I'm not carrying a passenger, etc. It's made from aluminum and uses the hat device from a USCG garrison cap. I clipped the prongs the clutch fasteners attach to. I used double backed tape to attach it to the bar. I eventually plan to have it chrome plated. I can easily replace the sissy bar should it be needed.
Dave
Last edited by chengdave2003; 03-03-2010 at 08:34 AM. Reason: upload better quality pictures