Darkhorse/S&S/WFO Larry 117" build time.
#11
#13
Originally Posted by multihdrdr
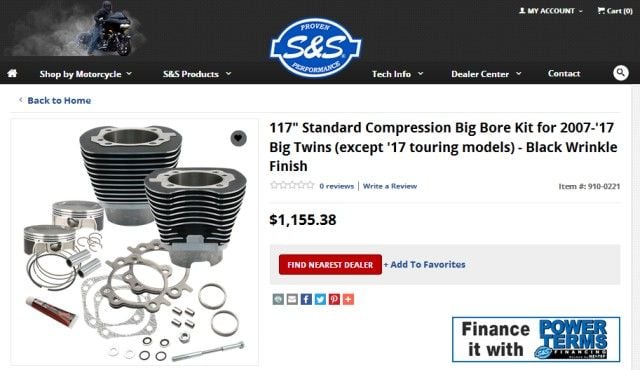
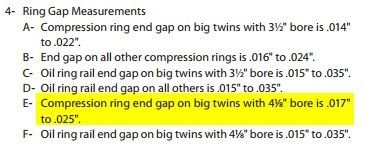
OK, so I found it interesting that a ring gap would be listed down to the TEN-Thousanths...I mean it's a ring end gap measured with a feeler gauge no less. So I pulled up the S&S kit instructions because I had to see this in print.
Well, it shows in Thousandths (what I would expect), but also different specs that you show
Well, it shows in Thousandths (what I would expect), but also different specs that you show
#14
Interesting because both instructions are supplied by S&S and don't "Jive"


http://assetcloud02.roccommerce.net/...s_20131230.pdf

#15
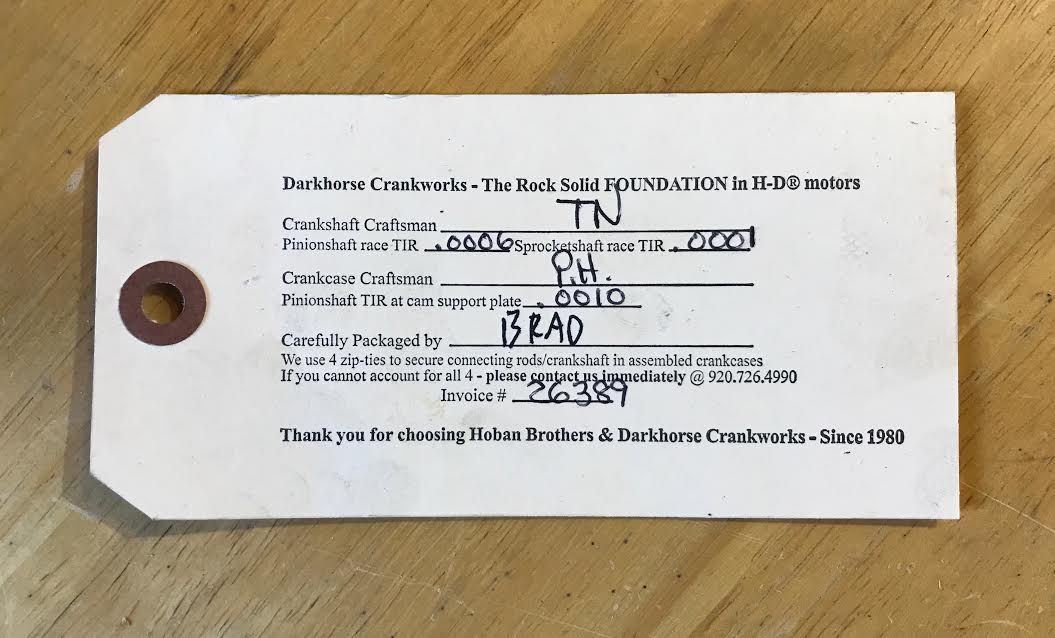
Another question--I thought I remembered reading somewhere that with a Timken bearing you need to set the crankshaft endplay. I'm guessing Darkhorse did that when it was assembled, but for some reason I'm thinking that I read it can't be accurately adjusted until the stator is installed?? Doesn't really make sense to me, and I'm probably remembering wrong.
Isn't the Pinionshaft TIR at the cam support plate the run out/endplay (.0010")?
Are you planning to go with chain or gear driving cams? If that .001" is correct, you should be perfect for gear driving, I would think.
Last edited by blueangel73; 04-18-2017 at 09:03 AM.
#16
Originally Posted by multihdrdr
Interesting because both instructions are supplied by S&S and don't "Jive"


http://assetcloud02.roccommerce.net/...s_20131230.pdf

#17
Too bad about the initial build.. That should have made 100/100 easy.. It's good that you found someone to tune the bike for this build.. You got a heck of a lot more money into it..
I would have run the SnS 625 and let the CR end up at 10.8/11.0.. I've got an older SnS 116 in a carbed dyna at 11.3 with the 625 and it pretty much makes power from 2000 and the way to 6500..
You can't adjust crank end-play when the lower end is assembled.. I'm sure Darkhorse set it for you. One thing you need to do for sure is get the primary sprocket spacing correct. Make sure you have clearance between the stator windings and the rotor. Seen a few guys get that wrong.. The spacer will be a different length then what you had.. I would imagine Darkhorse should be able to get you close with the spacer but always check alignment.
While I've not had any issues fling rings by hand, I bought one of the Summit racing ring filers that has the crank on it.. Removed the hand crank and used and electric drill.
https://www.summitracing.com/parts/sme-906000
Works pretty good but the finish on the end of the ring is a little rough.. Broke the edges with a fine diamond hone.
The following users liked this post:
mirrmu (04-20-2017)
#18
The specs I posted are shown for that kit also
That being said, I'm going to send them an email...my OCD
 won't allow the discrepancy to go unanswered.
#19
Originally Posted by Max Headflow
You can't adjust crank end-play when the lower end is assembled.. I'm sure Darkhorse set it for you. One thing you need to do for sure is get the primary sprocket spacing correct. Make sure you have clearance between the stator windings and the rotor. Seen a few guys get that wrong.. The spacer will be a different length then what you had.. I would imagine Darkhorse should be able to get you close with the spacer but always check alignment.


