
Ohlins 2-2A and FKC 102 Cartridge Installation
#1
 05-09-2016, 05:13 PM

This thread is going to be heavily edited to keep my posts on topic and informative. The first change is that the thread is no longer about the install of FKC 101/102 cartridges. If you plan to install those, DO NOT GRIND THE END OF YOUR FORK TUBES AS I DID BELOW. This thread will now be about the installation of Ohlins NIX 30mm cartridge front suspension
When doing my research on suspension upgrades I found a ton of information on the conversion of Dyna front ends, but very little regarding putting Ohlins cartridges in a Rushmore. This will be a comprehensive thread covering the purchase, installation, set up and a product review once installed.
I purchased a used set of Ohlins 2-2A's from a forum member. They were built by Howard at Motorcycle Metal and have approximately 5k miles on them. The install of the rear shocks was straight forward. I have not been able to complete the setup due to the front end being disassembled at this point.
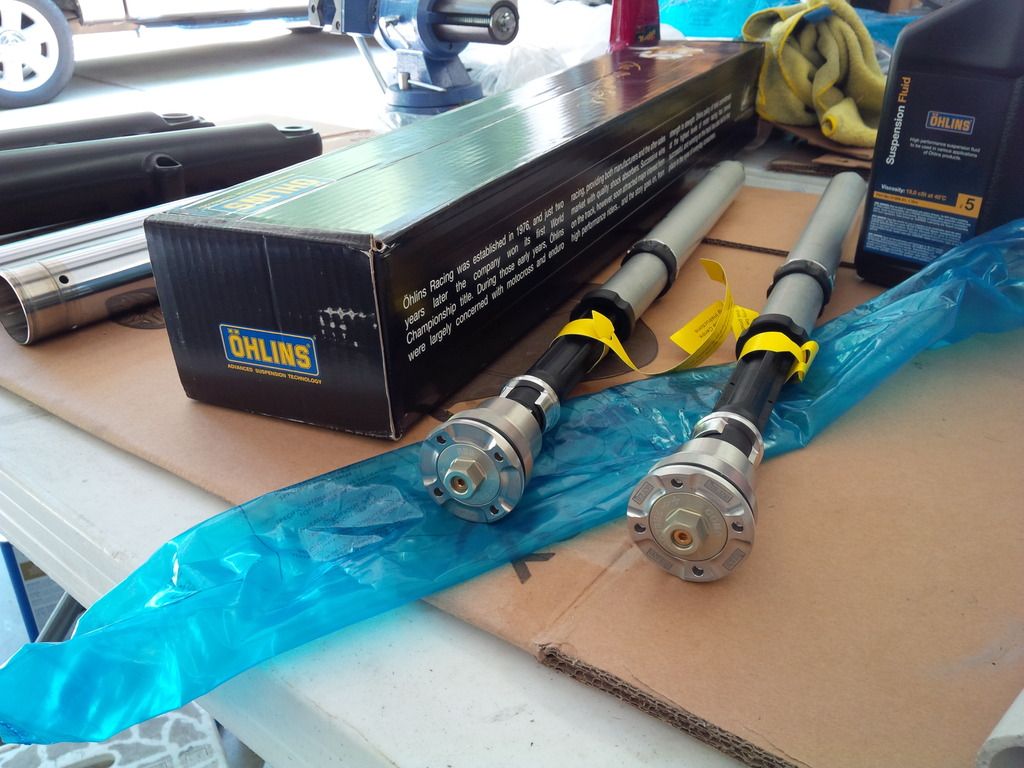
The NIX 30mm's were purchased from Howard directly. I viewed the videos on his website to familiarize myself with the disassembly and reassembly procedures. I like to have all of the tools and parts required to do a job ahead of time, but I found myself a little behind the curve on this one. Hopefully this thread will help others not end up in the same boat.
Tools to have on hand in addition to your normal selection of Harley Torx heads and hex bit wrenches:
Fork level oil gauge -
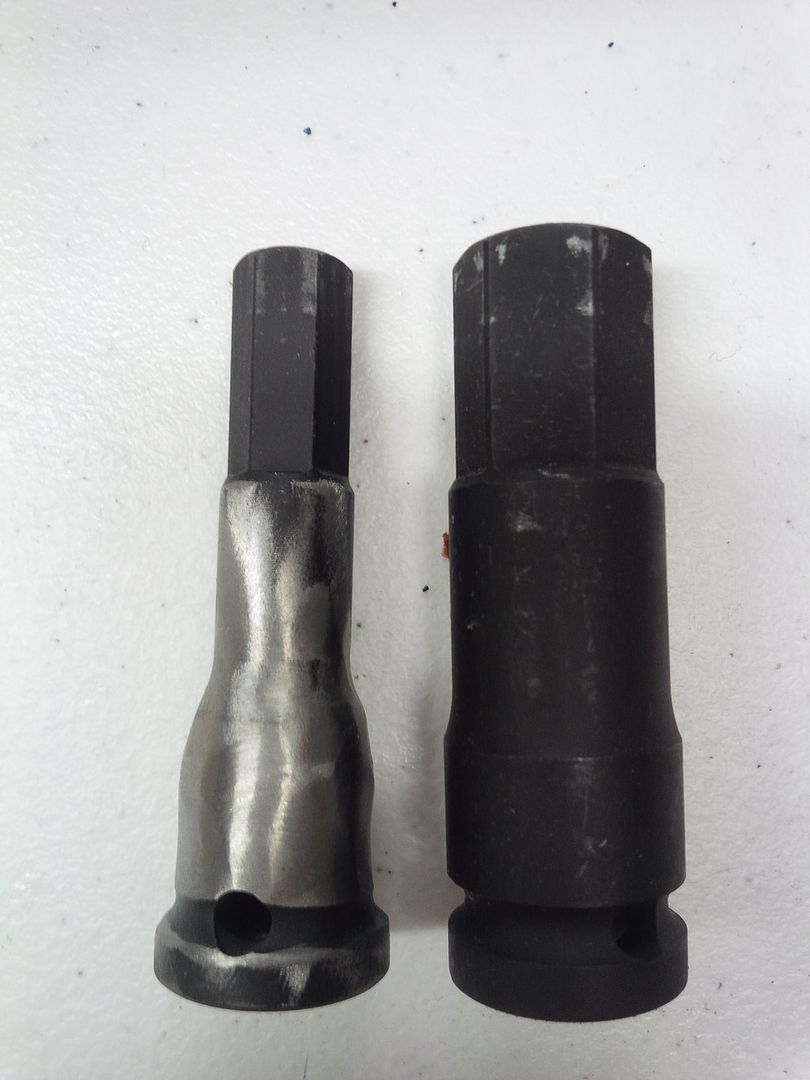
Long 12mm hex bit socket -http://www.tannerbolt.com/default.aspx?page=item+detail&itemcode=PRO%20J5441-12MXL&gclid=Cj0KEQjw9tW5BRDk29KDnqWu4fMBEiQAKj7sp3 o76lpQZ0NMjSX_LX2ASDK5LxEBmnCuZwuiDxs-PnMaAhS78P8HAQ
19mm Hex bit Socket
Adjustable Pin Spanner wrench: Found mine at Harbor Freight
I recommend watching Amy's videos on Howard's website. The high points I'm mentioning here are just supplemental hints that might help. The forks come off the bike fairly simply. If you're used to working on older bikes, it's worth noting that the fender nuts are now welded in place. No more nut locking tabs to fool with. There are two fork clamps holding each fork in place. I lowered the forks to the second clamp and then loosened the caps. This required a 19mm hex bit socket. You want to have this on hand as well as a 12mm long hex bit socket. Both of these tools can be difficult to find locally. I couldn't find them at Sears, Advance, O'reilly's, but wound up finding both at Harbor Freight.
Unfortunately, The "long 12mm" was too short.
Never fear... I have a tool for that.
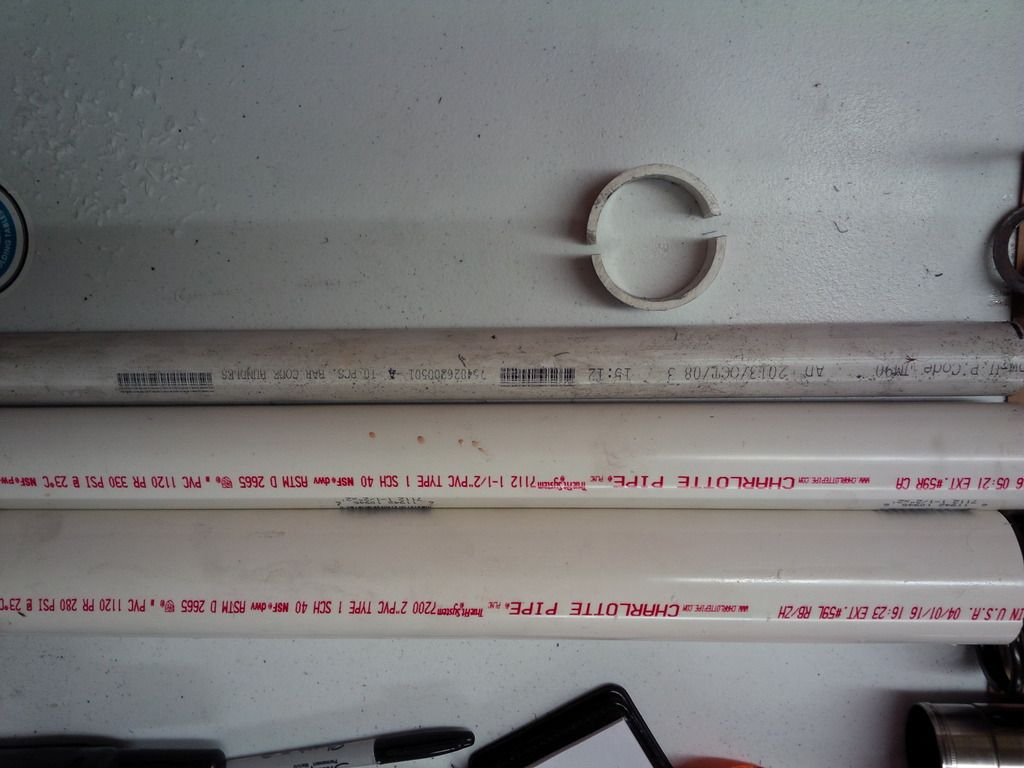
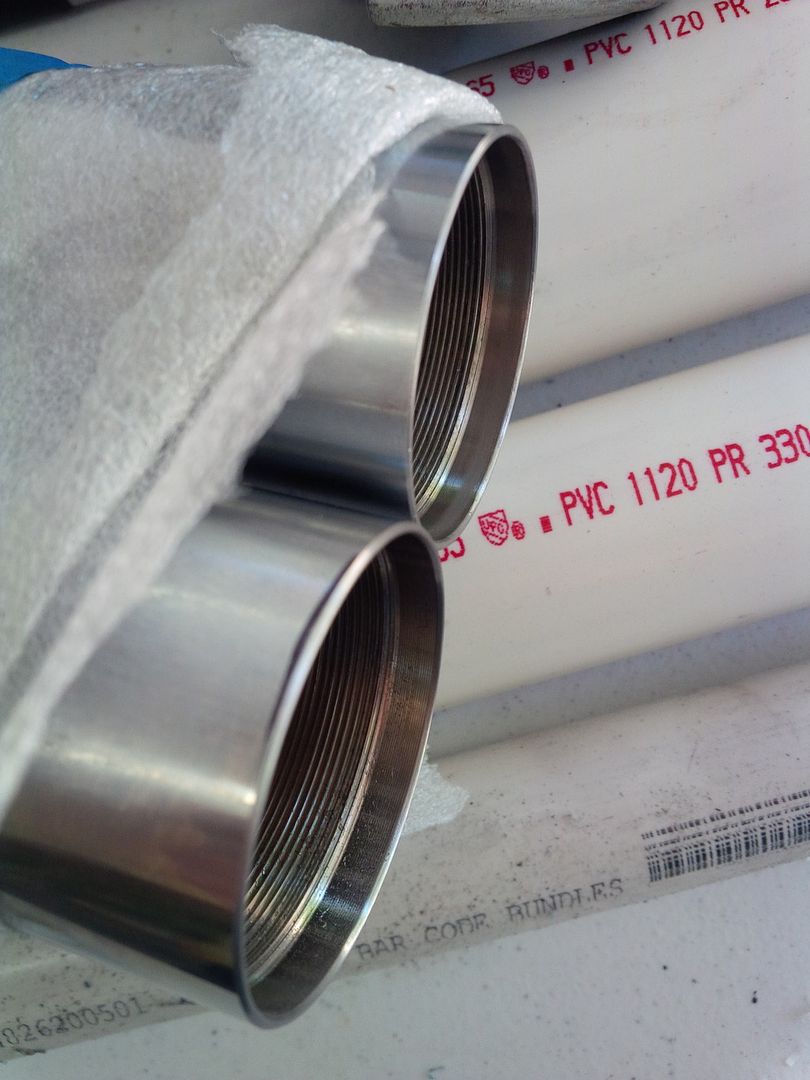
Additionally, you need a section 1", 1.5" and 2" PVC pipe to use as drivers.
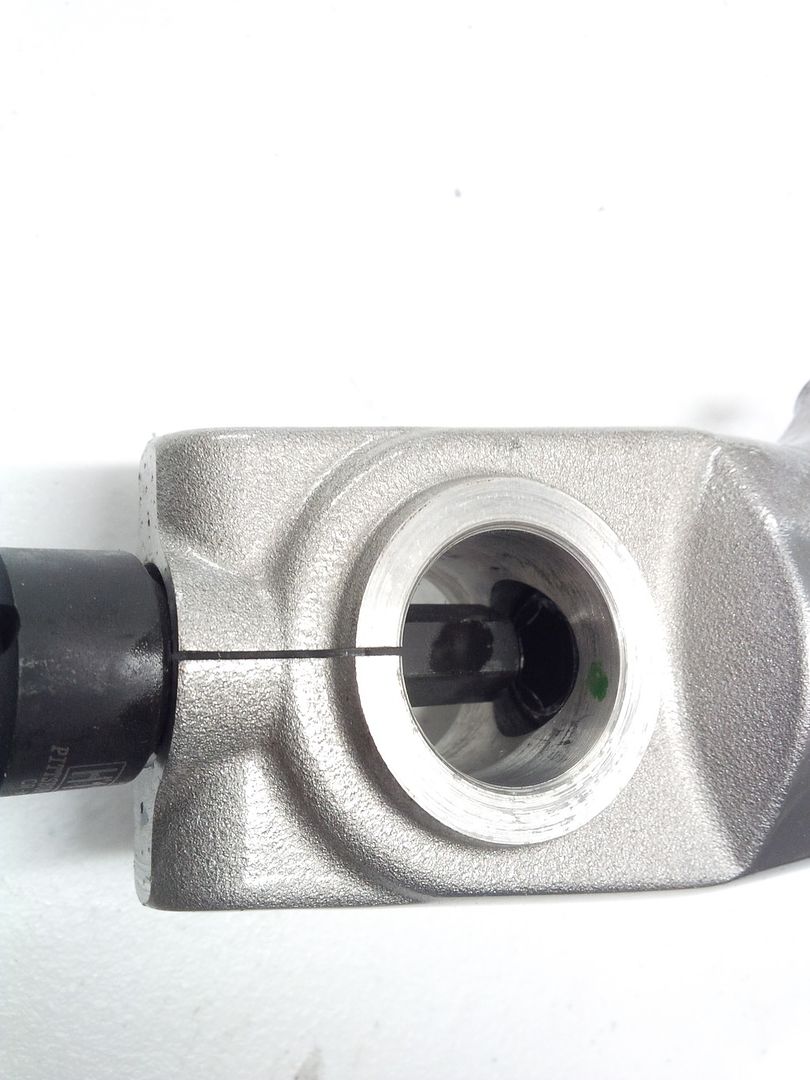
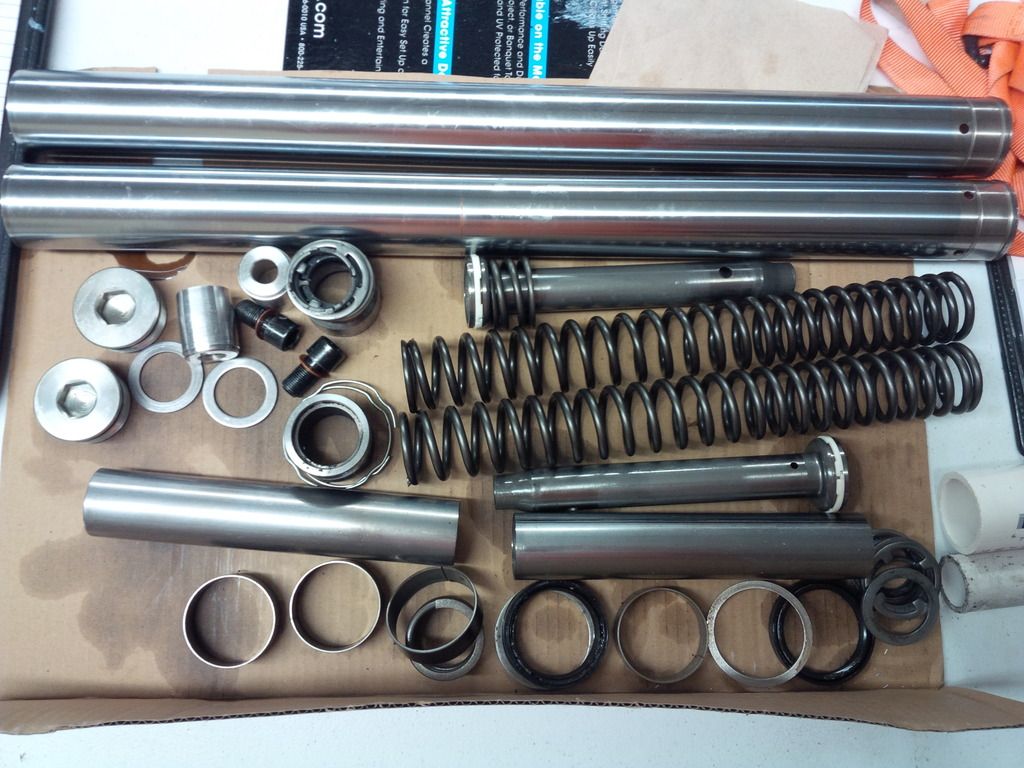
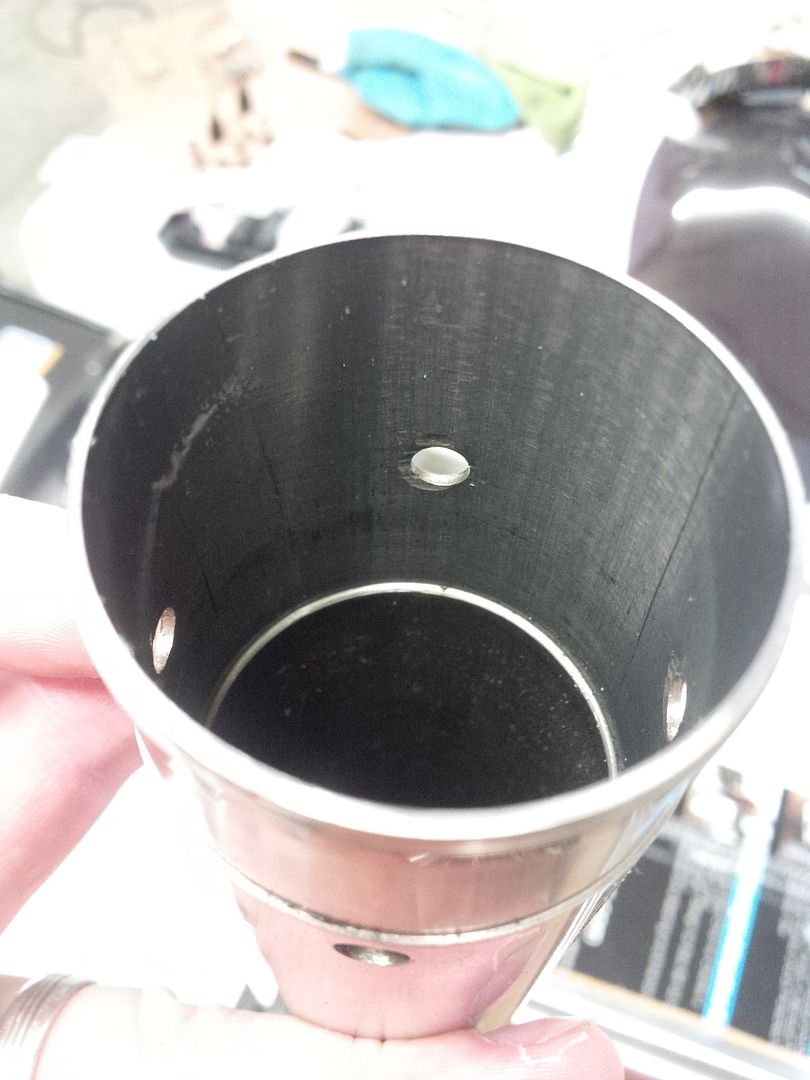
I cut a small piece of the 2" off and split it. I used it as soft jaws for the vise when holding the fork tube. After grinding the ends off and disassembling you're left with this:
That's as far as we've gotten at the moment. I'm patiently* waiting for my package to arrive from Florida. I'll update with more pics and details of the install and set up once they are received.
When doing my research on suspension upgrades I found a ton of information on the conversion of Dyna front ends, but very little regarding putting Ohlins cartridges in a Rushmore. This will be a comprehensive thread covering the purchase, installation, set up and a product review once installed.
I purchased a used set of Ohlins 2-2A's from a forum member. They were built by Howard at Motorcycle Metal and have approximately 5k miles on them. The install of the rear shocks was straight forward. I have not been able to complete the setup due to the front end being disassembled at this point.
The NIX 30mm's were purchased from Howard directly. I viewed the videos on his website to familiarize myself with the disassembly and reassembly procedures. I like to have all of the tools and parts required to do a job ahead of time, but I found myself a little behind the curve on this one. Hopefully this thread will help others not end up in the same boat.
Tools to have on hand in addition to your normal selection of Harley Torx heads and hex bit wrenches:
Fork level oil gauge -
Long 12mm hex bit socket -http://www.tannerbolt.com/default.aspx?page=item+detail&itemcode=PRO%20J5441-12MXL&gclid=Cj0KEQjw9tW5BRDk29KDnqWu4fMBEiQAKj7sp3 o76lpQZ0NMjSX_LX2ASDK5LxEBmnCuZwuiDxs-PnMaAhS78P8HAQ
19mm Hex bit Socket
Adjustable Pin Spanner wrench: Found mine at Harbor Freight
I recommend watching Amy's videos on Howard's website. The high points I'm mentioning here are just supplemental hints that might help. The forks come off the bike fairly simply. If you're used to working on older bikes, it's worth noting that the fender nuts are now welded in place. No more nut locking tabs to fool with. There are two fork clamps holding each fork in place. I lowered the forks to the second clamp and then loosened the caps. This required a 19mm hex bit socket. You want to have this on hand as well as a 12mm long hex bit socket. Both of these tools can be difficult to find locally. I couldn't find them at Sears, Advance, O'reilly's, but wound up finding both at Harbor Freight.
Unfortunately, The "long 12mm" was too short.
Never fear... I have a tool for that.
Additionally, you need a section 1", 1.5" and 2" PVC pipe to use as drivers.
I cut a small piece of the 2" off and split it. I used it as soft jaws for the vise when holding the fork tube. After grinding the ends off and disassembling you're left with this:
That's as far as we've gotten at the moment. I'm patiently* waiting for my package to arrive from Florida. I'll update with more pics and details of the install and set up once they are received.
Last edited by FNGonaRK; 05-17-2016 at 11:01 AM.
#3
05-09-2016, 06:06 PM
Oh, if this costs you money, consider it a payback for all of your posts about your Ohlins in the rear!
#4
05-09-2016, 06:45 PM
Ultimate HDF Member
#5
05-09-2016, 09:45 PM

Former Sponsor
When doing my research on suspension upgrades I found a ton of information on the conversion of Dyna front ends, but very little regarding putting Ohlins cartridges in a Rushmore. This will be a comprehensive thread covering the purchase, installation, set up and a product review once installed.
I have not been able to complete the setup due to the front end being disassembled at this point.
The FKC 102's were purchased from Howard directly.
I viewed the videos on his website to familiarize myself with the disassembly and reassembly procedures. I like to have all of the tools and parts required to do a job ahead of time, but I found myself a little behind the curve on this one. Hopefully this thread will help others not end up in the same boat.
I recommend watching Amy's videos on Howard's website. The high points I'm mentioning here are just supplemental hints that might help. The forks come off the bike fairly simply
I cut a small piece of the 2" off and split it. I used it as soft jaws for the vise when holding the fork tube.
Stop Here!!!!!!!!!!!!!
For FKC-102 or 101 Do not remove your check valve!!!!
That Video was made many years before the invention of the FKC101/FKC-102. If you listen very carefully it shows a 30mm Ohlins cartridge system that I have been installing in 49mm forks when they first came out. The 25mm FKC 101/102 are very different and require a check valve. Do not remove anything for proper installation of FKC-101/102.
JB I left you 2 different e-Mails yesterday evening before ever seeing this, one from my hotbike/Yahoo & the 2nd from motorcyclemetal e-Mail. Please call me. I will need to rectify your new problem for you.
--------------------------------- END -----------------
NO
After grinding the ends off and disassembling you're left with this:
That's as far as we've gotten at the moment. I'm patiently* waiting for my package to arrive from Florida. I'll update with more pics and details of the install and set up once they are received.
I have not been able to complete the setup due to the front end being disassembled at this point.
The FKC 102's were purchased from Howard directly.
I viewed the videos on his website to familiarize myself with the disassembly and reassembly procedures. I like to have all of the tools and parts required to do a job ahead of time, but I found myself a little behind the curve on this one. Hopefully this thread will help others not end up in the same boat.
I recommend watching Amy's videos on Howard's website. The high points I'm mentioning here are just supplemental hints that might help. The forks come off the bike fairly simply
I cut a small piece of the 2" off and split it. I used it as soft jaws for the vise when holding the fork tube.
Stop Here!!!!!!!!!!!!!
<<<<<<<<<<<<<< <> >>>>>>>>>>>>>>>>>>>>>>>
For FKC-102 or 101 Do not remove your check valve!!!!
That Video was made many years before the invention of the FKC101/FKC-102. If you listen very carefully it shows a 30mm Ohlins cartridge system that I have been installing in 49mm forks when they first came out. The 25mm FKC 101/102 are very different and require a check valve. Do not remove anything for proper installation of FKC-101/102.
JB I left you 2 different e-Mails yesterday evening before ever seeing this, one from my hotbike/Yahoo & the 2nd from motorcyclemetal e-Mail. Please call me. I will need to rectify your new problem for you.
--------------------------------- END -----------------
NO
After grinding the ends off and disassembling you're left with this:
That's as far as we've gotten at the moment. I'm patiently* waiting for my package to arrive from Florida. I'll update with more pics and details of the install and set up once they are received.
This is a Dyno run showing the differences side by side NIX 30mm Ohlins (red line as it is adjustable) and the FKC 102 with stock valving using the center right run. The NIX 30mm Ohlins is far more powerful than the 25mm piston found in FKC-101/102.

Last edited by FastHarley; 05-09-2016 at 09:58 PM.
#6
05-09-2016, 10:04 PM
Okay, so this thread just took a detour. If you are installing FKC 101-102's don't cut the end of your fork tube like I did.
If you do, you'll have to upgrade to the better NIX 30mm, or replace your fork tubes. Naturally, I chose the upgrade. I will be searching out a machine shop tomorrow to take .150" off of the threaded end of the fork tubes and then I will be awaiting my new adjustable cartridges from MM.
My stomach sunk when I read the post above. I've been excited about getting this bike back on the road. I appreciate Howard taking the late night call and getting me back on track.
Last edited by FNGonaRK; 05-17-2016 at 09:22 AM.
#7
05-10-2016, 07:47 AM
Former Sponsor
The following users liked this post:
Bam15012 (05-10-2016)
Trending Topics
#8
05-11-2016, 02:02 PM
#9
05-12-2016, 12:23 PM
Special delivery!
You'll notice a trend of me making tools. I'm not too cheap to buy the things I need, but some of these tools would be used so rarely that it just didn't make sense. The fork clamp was one such item for me. Here is my solution, yours may be better, but this worked fine.
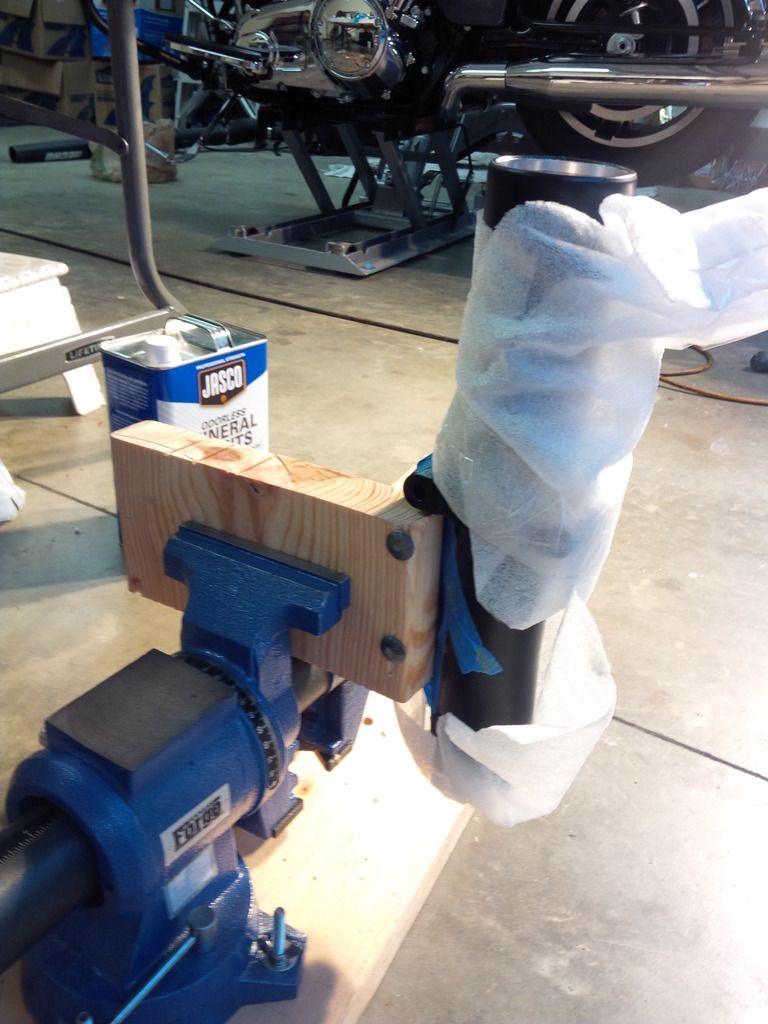
You'll notice a trend of me making tools. I'm not too cheap to buy the things I need, but some of these tools would be used so rarely that it just didn't make sense. The fork clamp was one such item for me. Here is my solution, yours may be better, but this worked fine.
Last edited by FNGonaRK; 05-17-2016 at 07:44 AM.
The following users liked this post:
Brewbiden (05-12-2016)