CGGorman's 99 Wide Glide build thread
#1
 03-11-2016, 07:01 PM

I figure it's about time for a build thread rather than scattering stuff all over and cluttering up the daily thread.
I don't know what style this build falls in to. It's not quite a bob or hot rod or chop. It's just my style. I've got lots of plans that will take a couple years to fully realize due to a relatively small disposable cash flow but I gotta start somewhere.
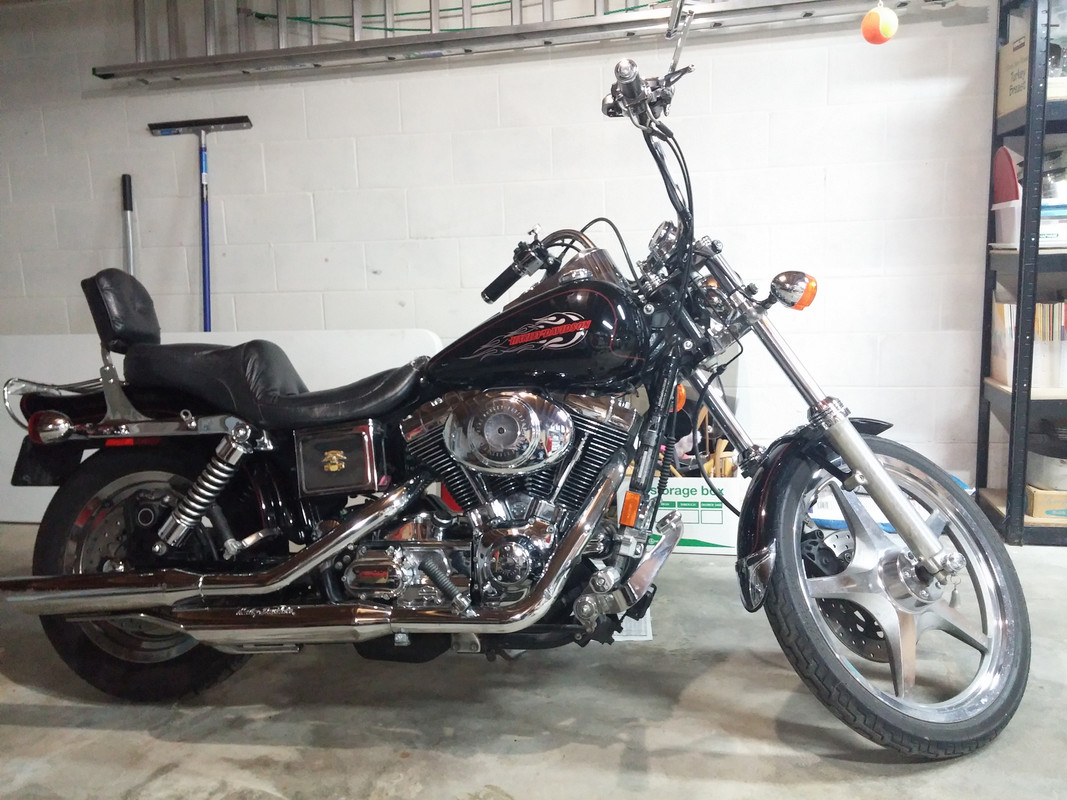
Here is the bike on the day I picked it up (April 2015):
Fairly typical millennial WG dressed with lots of catalog chrome...not my style but the price was right. It was a California commuter bike. Lots of miles but well maintained. Most notable modification was the total removal of all emmisions equipment and addition of a Mikuni HSR42 carb.
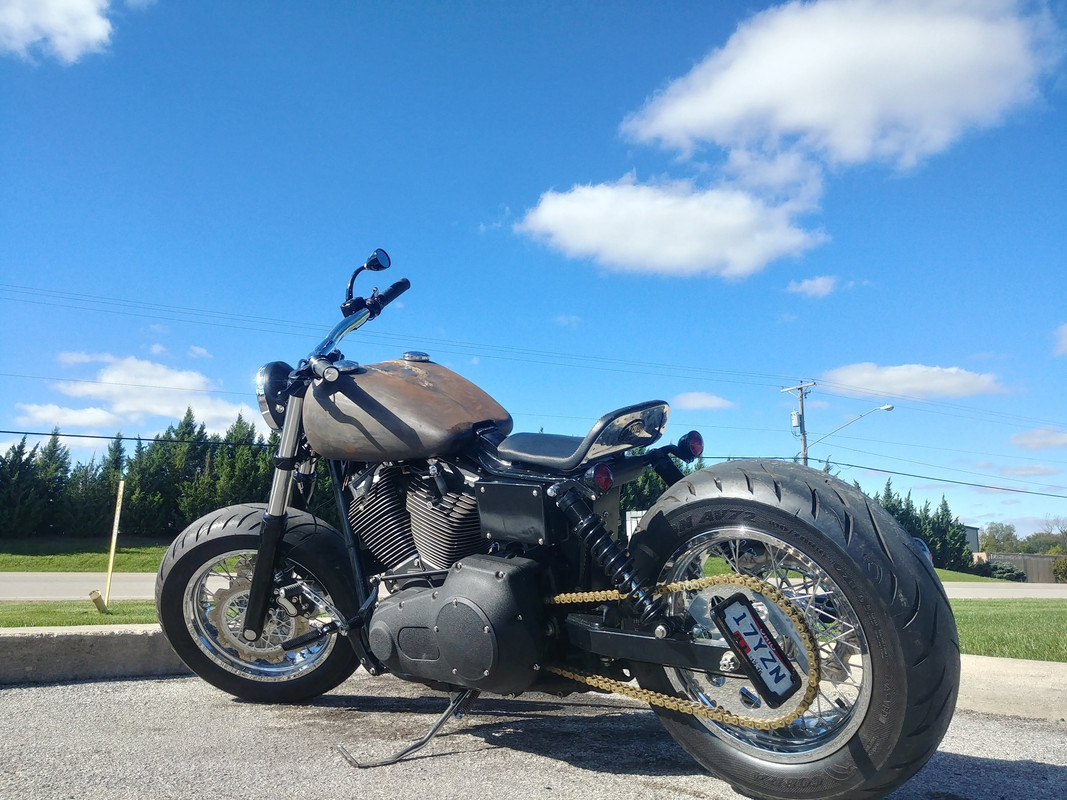
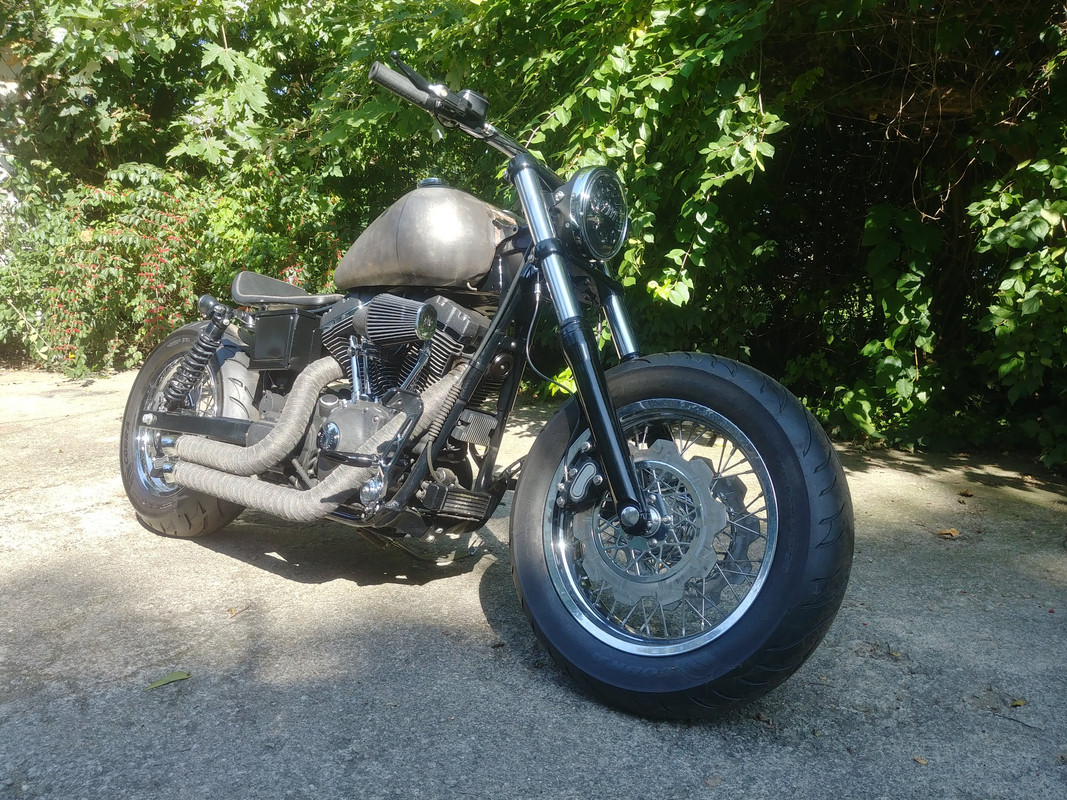
Skip ahead for TL;DR, this is what it looks like as of Summer 2019 (still plenty planned):
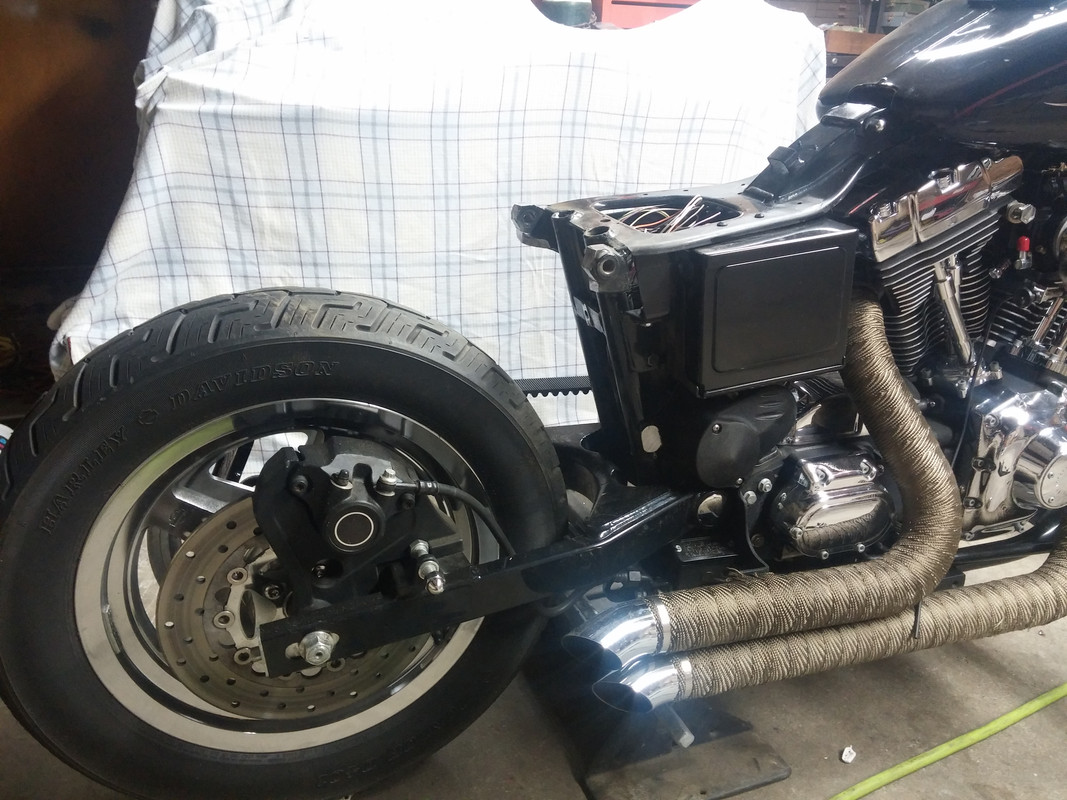
First thing I knew I had to do was get rid of all the non-functional chrome dress-up and two-up kit as well as find some more aggressive pipes.
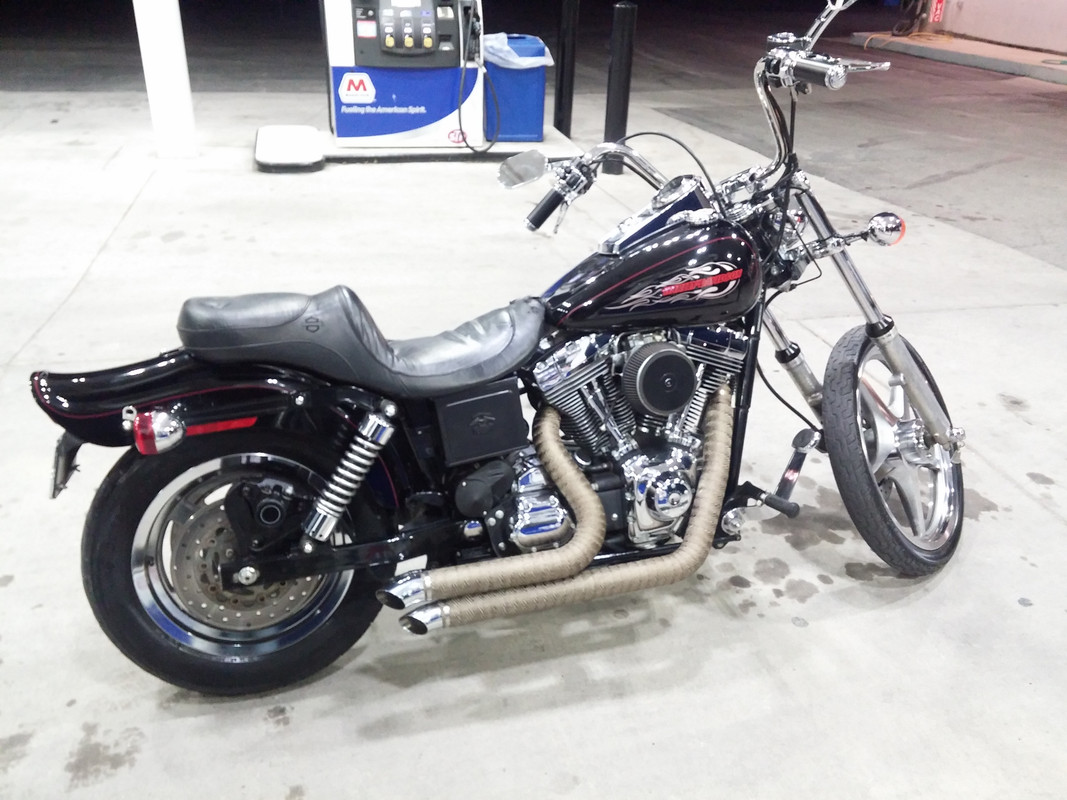
A couple week later the easy work was done and I was sourcing new drivetrain covers in black and a new sleek seat but riding as it was anyway. I ditched all the easily removable chrome, sprayed on a bit of plasti-dip to obscure the battery box, and bolted on a wrapped set of V-Twin Mfg drag pipes:
A couple more weeks and I found a nice used LePera Silhouette solo seat.
(image lost due to Photobucket ********, this is the best I still have)

Other than a few minor tweaks to the plasti-dip situation (replaced most of it with epoxy paint when the rubber started to wear thru), I rode it like that for the rest of the season. A couple thousand miles. I had bigger plans but didn't want to sacrifice saddle time making changes.
I don't know what style this build falls in to. It's not quite a bob or hot rod or chop. It's just my style. I've got lots of plans that will take a couple years to fully realize due to a relatively small disposable cash flow but I gotta start somewhere.
Here is the bike on the day I picked it up (April 2015):
Fairly typical millennial WG dressed with lots of catalog chrome...not my style but the price was right. It was a California commuter bike. Lots of miles but well maintained. Most notable modification was the total removal of all emmisions equipment and addition of a Mikuni HSR42 carb.
Skip ahead for TL;DR, this is what it looks like as of Summer 2019 (still plenty planned):
First thing I knew I had to do was get rid of all the non-functional chrome dress-up and two-up kit as well as find some more aggressive pipes.
A couple week later the easy work was done and I was sourcing new drivetrain covers in black and a new sleek seat but riding as it was anyway. I ditched all the easily removable chrome, sprayed on a bit of plasti-dip to obscure the battery box, and bolted on a wrapped set of V-Twin Mfg drag pipes:
A couple more weeks and I found a nice used LePera Silhouette solo seat.
(image lost due to Photobucket ********, this is the best I still have)
Other than a few minor tweaks to the plasti-dip situation (replaced most of it with epoxy paint when the rubber started to wear thru), I rode it like that for the rest of the season. A couple thousand miles. I had bigger plans but didn't want to sacrifice saddle time making changes.
Last edited by cggorman; 01-26-2020 at 01:21 PM. Reason: broken pics
The following users liked this post:
cvaria (03-11-2016)
#2
03-11-2016, 07:01 PM
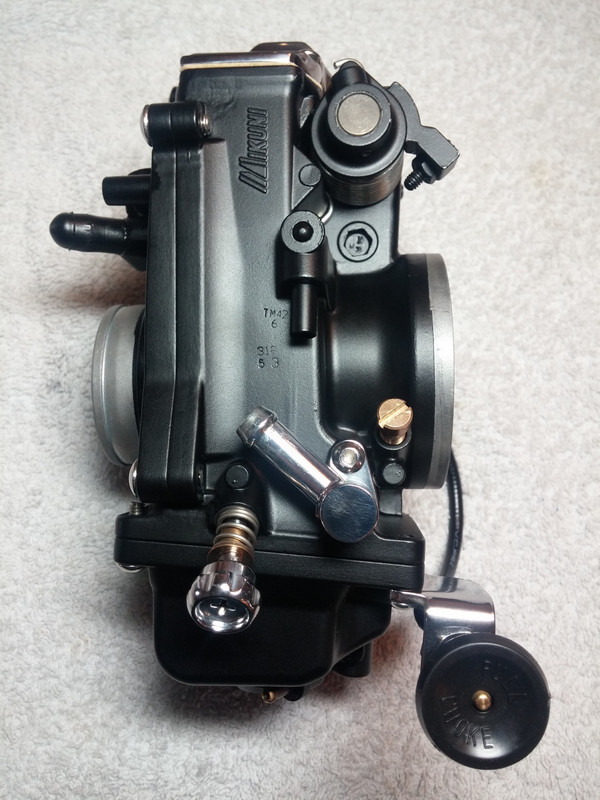
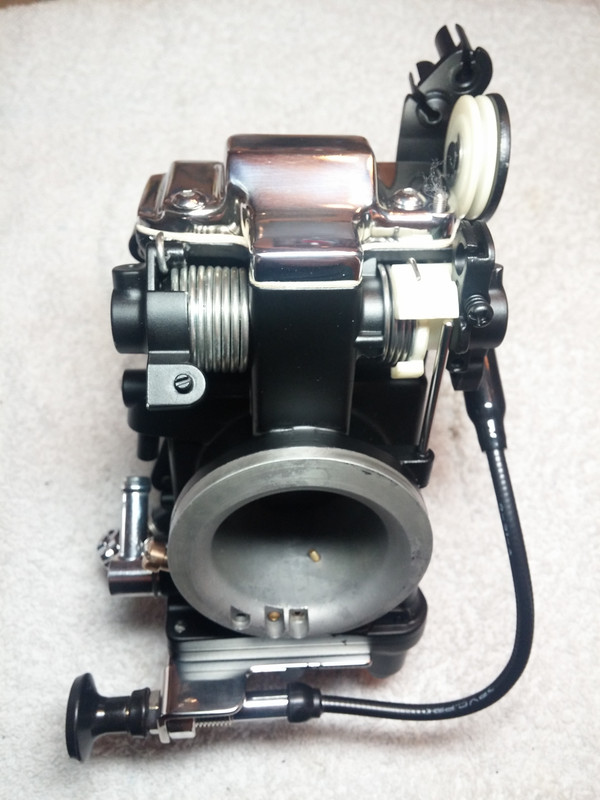
Time to do something about the carburetor... I'm a carb guy and always thought they were things of beauty. A thorough cleaning and some paint was in order. I also knew I wanted to relocate the coil so a clutch cable relocate was also in order. The air cleaner was always a nuisance for me, too. It hit me right in the side of the knee. It was a constant annoyance on the highway. A sidewinder style AC was the only option I could come up with that would guarantee me real knee room and it also would show off the carb. However, that would leave the long idle screw hanging out in the wind.
sooo....
All clean! After spending hours with a dremel sanding off casting flash, imperfections, and parting lines. Probably wasted effort to most people but I know the work that went into it and that's really all I care about.
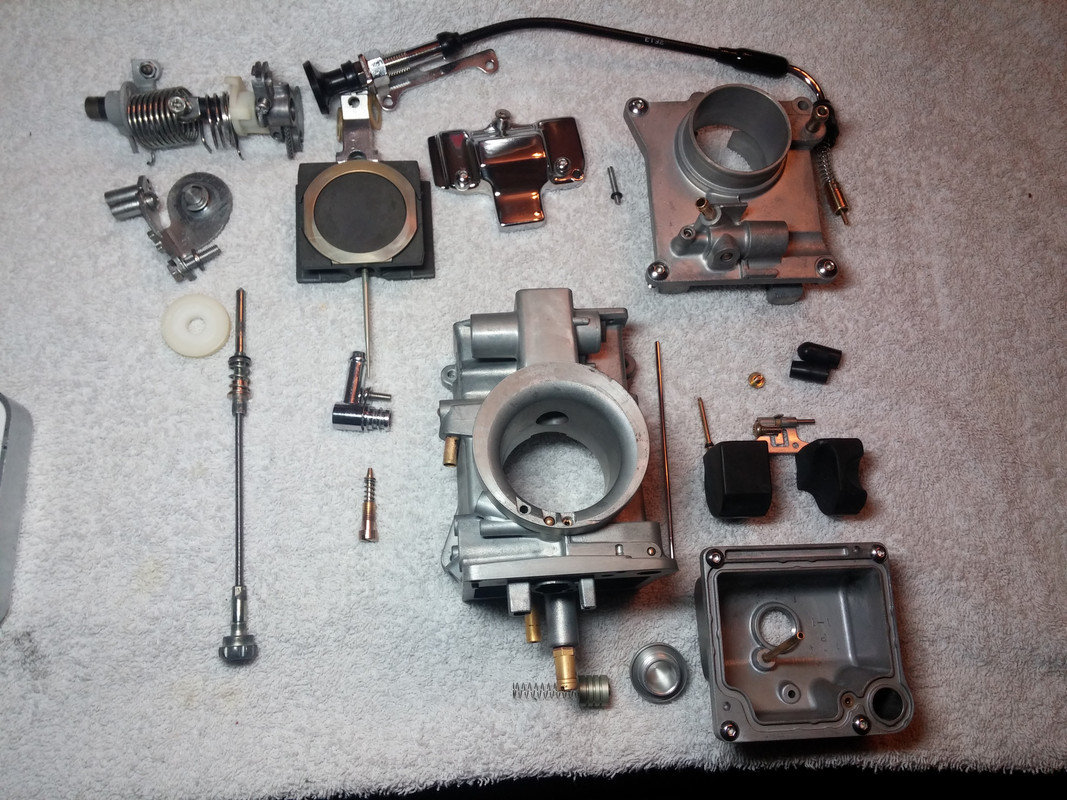
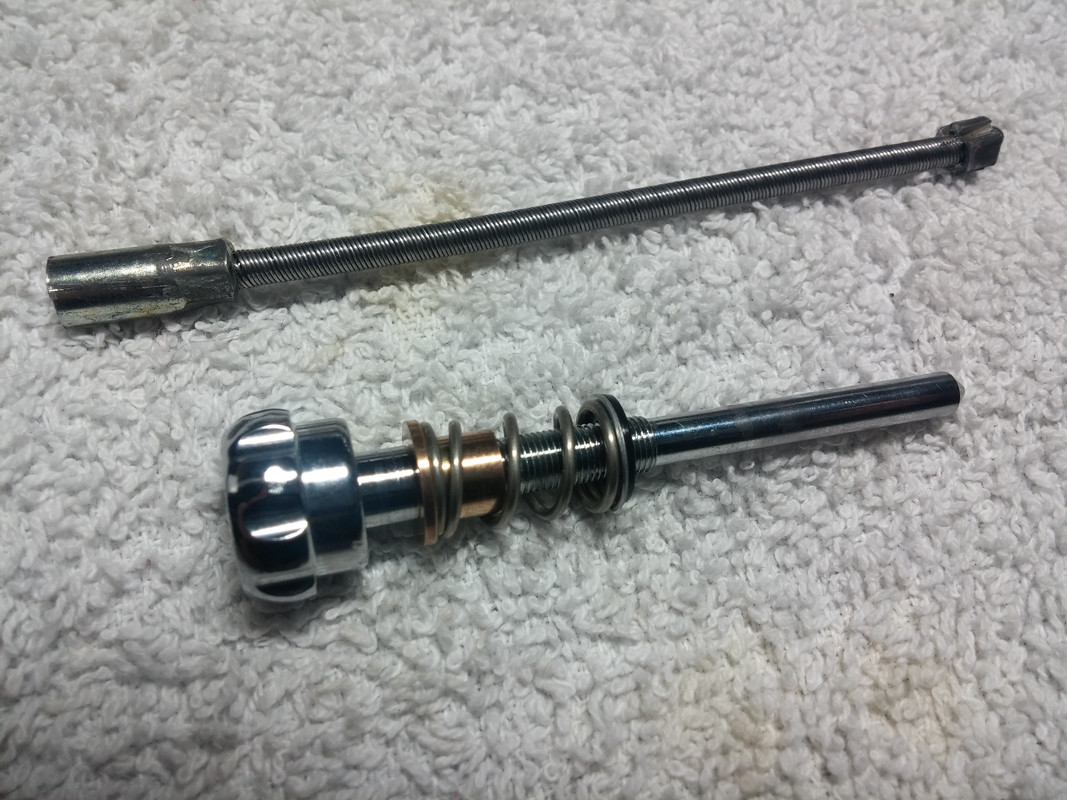
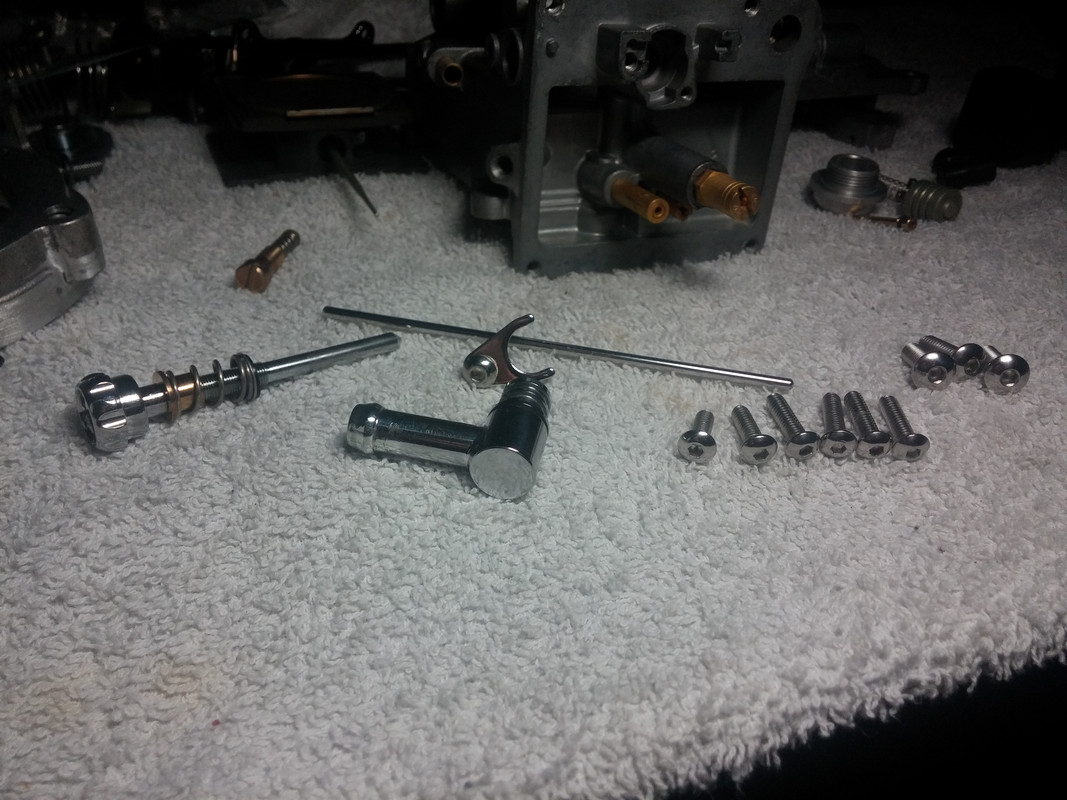
Made a custom short idle screw because I couldn't find another one I liked.
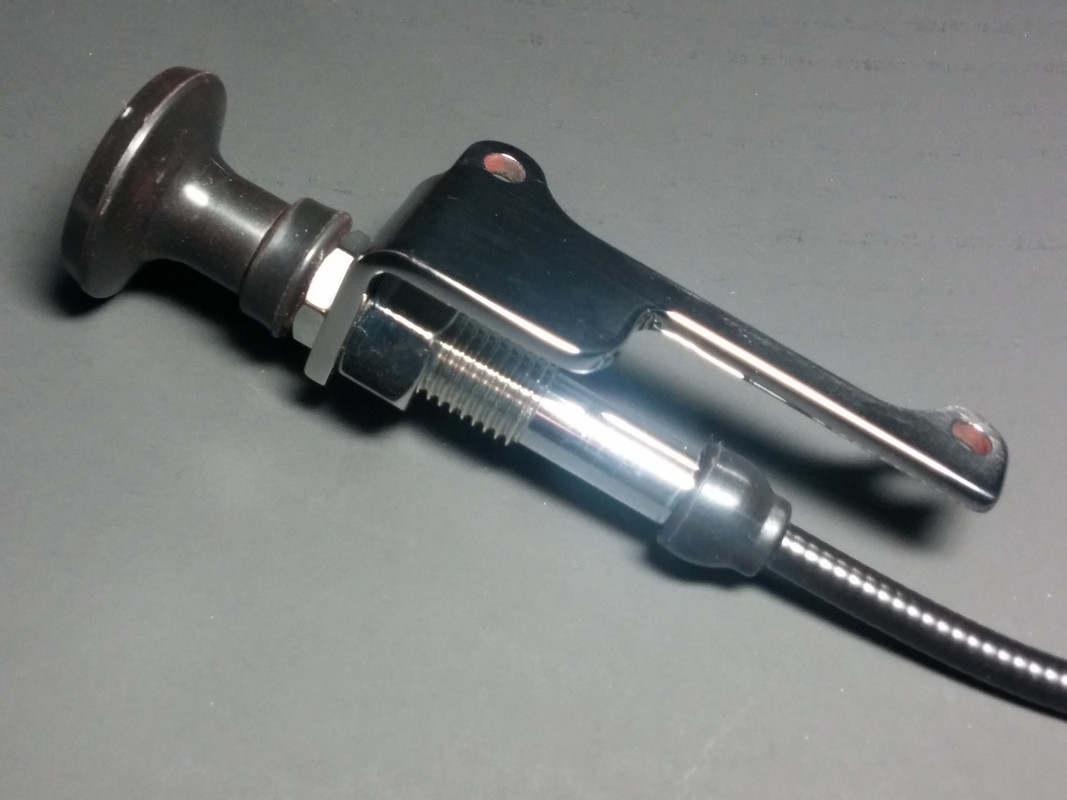
Sanded and polished the new choke cable and bracket.
Polished all the other silver bits and replaced the crap phillips screws with stainless button heads...polished of course.
Masked and painted satin black...

Test fit on the bike before moving to the next step...
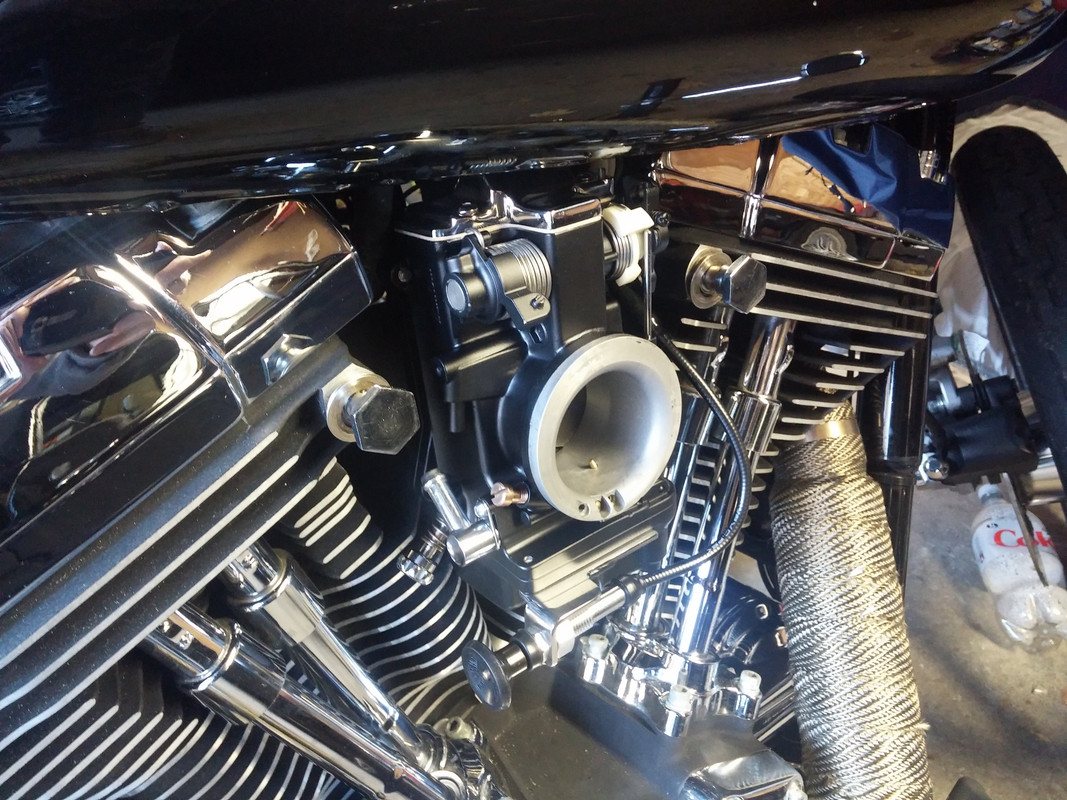
I was considering the DK Customs intake but I really don't like the stupid adapter and backing plate that I have to use with the Mikuni so I decided to make my own. Cheaper too. I didn't really want to use the 6" filter so I tried this 4" model. I didn't really like it either. I couldn't find a 5" that I liked so I ended up with the 6" after all.
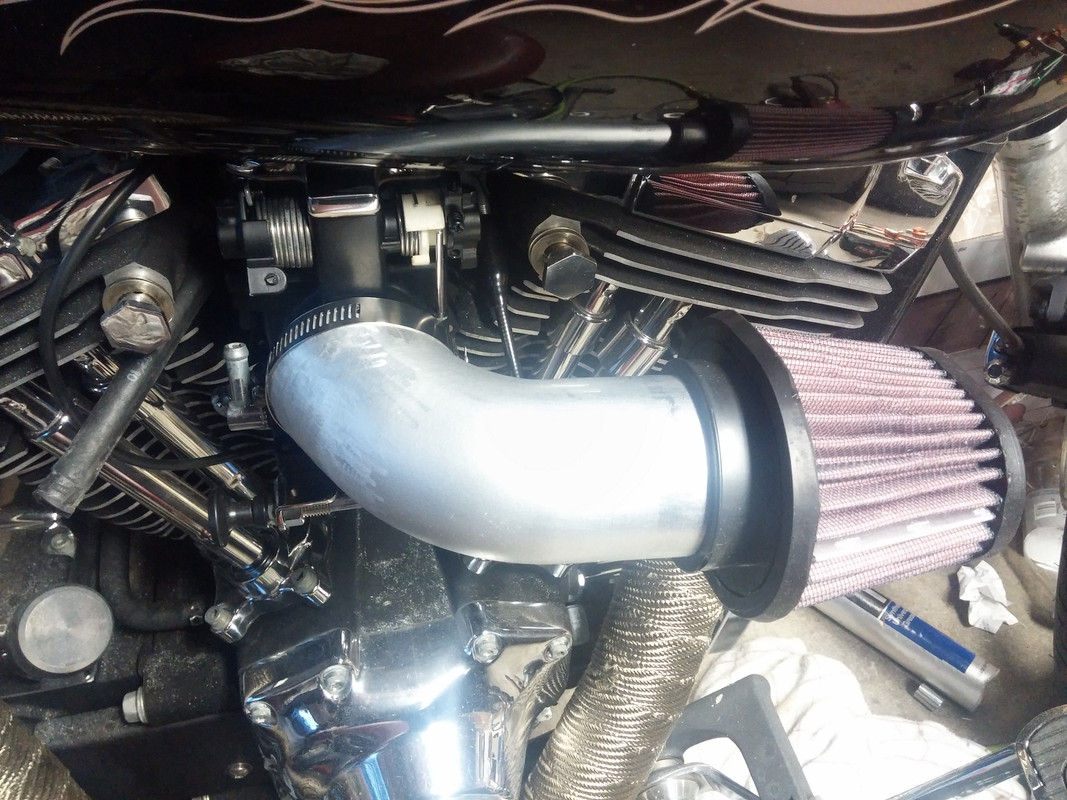
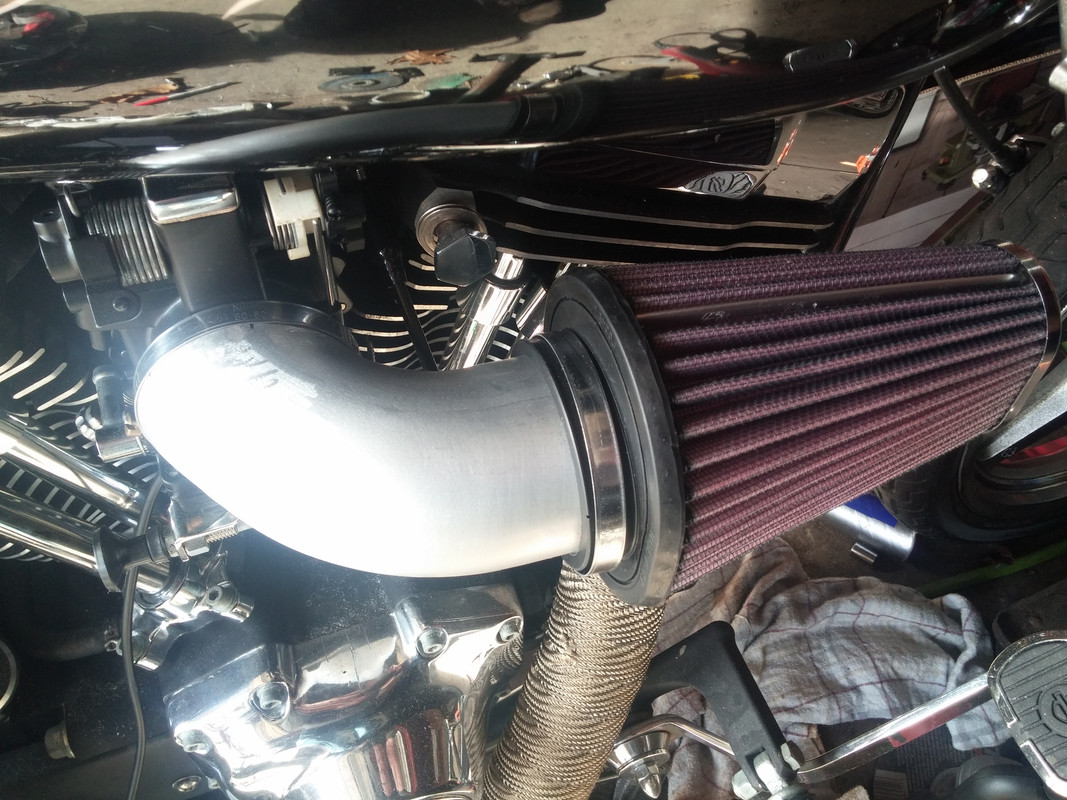
Then I decided I didn't care for the cheap looking hose clamps so I found some narrow pressed stainless ones from Wurth. There are also dowels in the carb body that lock into key slots in the tube so it doesn't walk off or droop. They are hidden under the band clamp.

Tucks in super close!
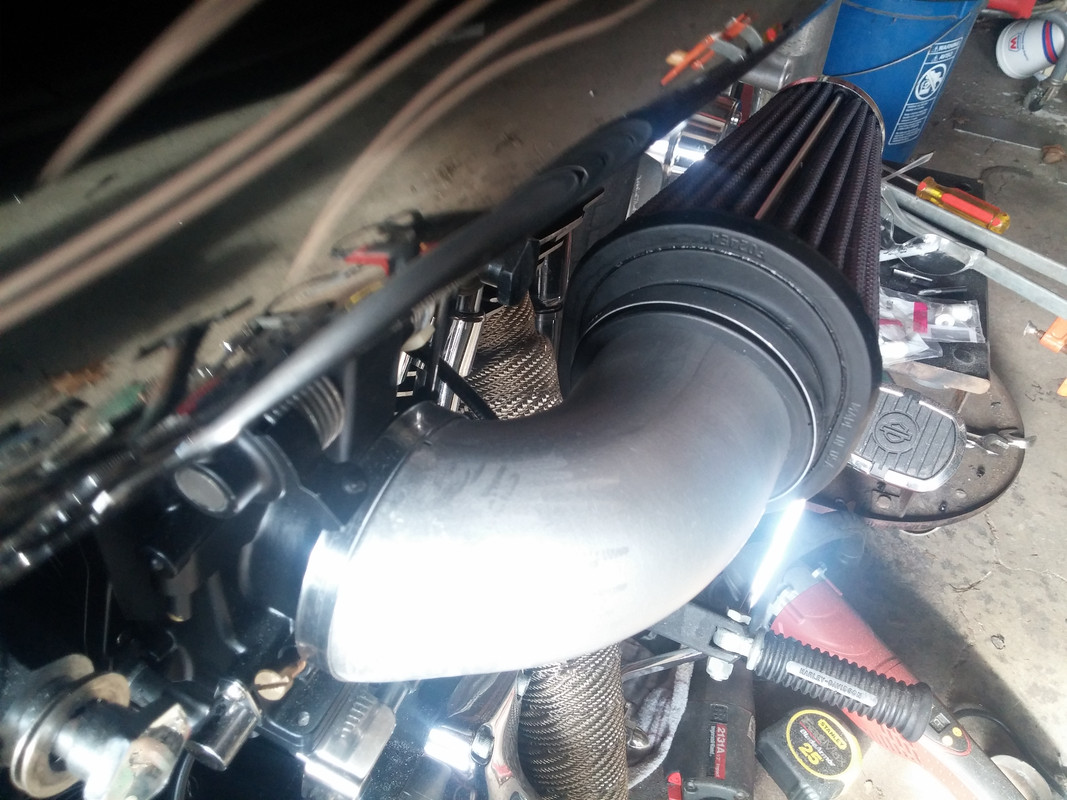
I odered the matching rain sock for the filter but I don't really want to run it all the time and I don't like the pink K&N cotton so I spent an afternoon degreasing it and dying it black. It has a slight blue tinge to it, but I can deal with that better than the pink.

sooo....
All clean! After spending hours with a dremel sanding off casting flash, imperfections, and parting lines. Probably wasted effort to most people but I know the work that went into it and that's really all I care about.
Made a custom short idle screw because I couldn't find another one I liked.
Sanded and polished the new choke cable and bracket.
Polished all the other silver bits and replaced the crap phillips screws with stainless button heads...polished of course.
Masked and painted satin black...
Test fit on the bike before moving to the next step...
I was considering the DK Customs intake but I really don't like the stupid adapter and backing plate that I have to use with the Mikuni so I decided to make my own. Cheaper too. I didn't really want to use the 6" filter so I tried this 4" model. I didn't really like it either. I couldn't find a 5" that I liked so I ended up with the 6" after all.
Then I decided I didn't care for the cheap looking hose clamps so I found some narrow pressed stainless ones from Wurth. There are also dowels in the carb body that lock into key slots in the tube so it doesn't walk off or droop. They are hidden under the band clamp.
Tucks in super close!
I odered the matching rain sock for the filter but I don't really want to run it all the time and I don't like the pink K&N cotton so I spent an afternoon degreasing it and dying it black. It has a slight blue tinge to it, but I can deal with that better than the pink.
Last edited by cggorman; 01-26-2020 at 01:33 PM.
#3
03-11-2016, 07:02 PM
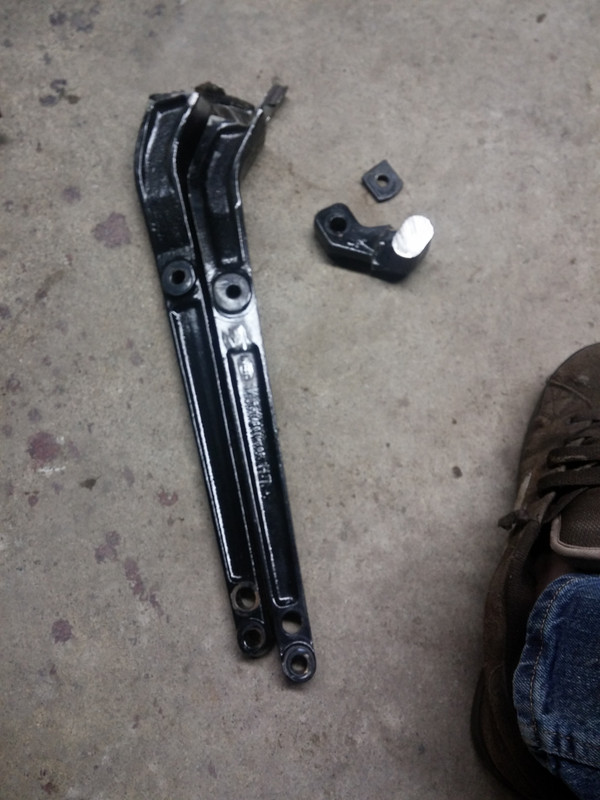
The next part of the plan was to get the rear fender disappeared and get some more rubber under the bike. Those two things required some supporting modifications to make it work. No fender means normal seats won't fit. Fender struts had to go since there was no fender and a 200 won't really fit between them anyway. No struts or fender means nowhere to mount a license plate or brake light or turn signals. A wide tire means my original wide drive belt won't work. etc....
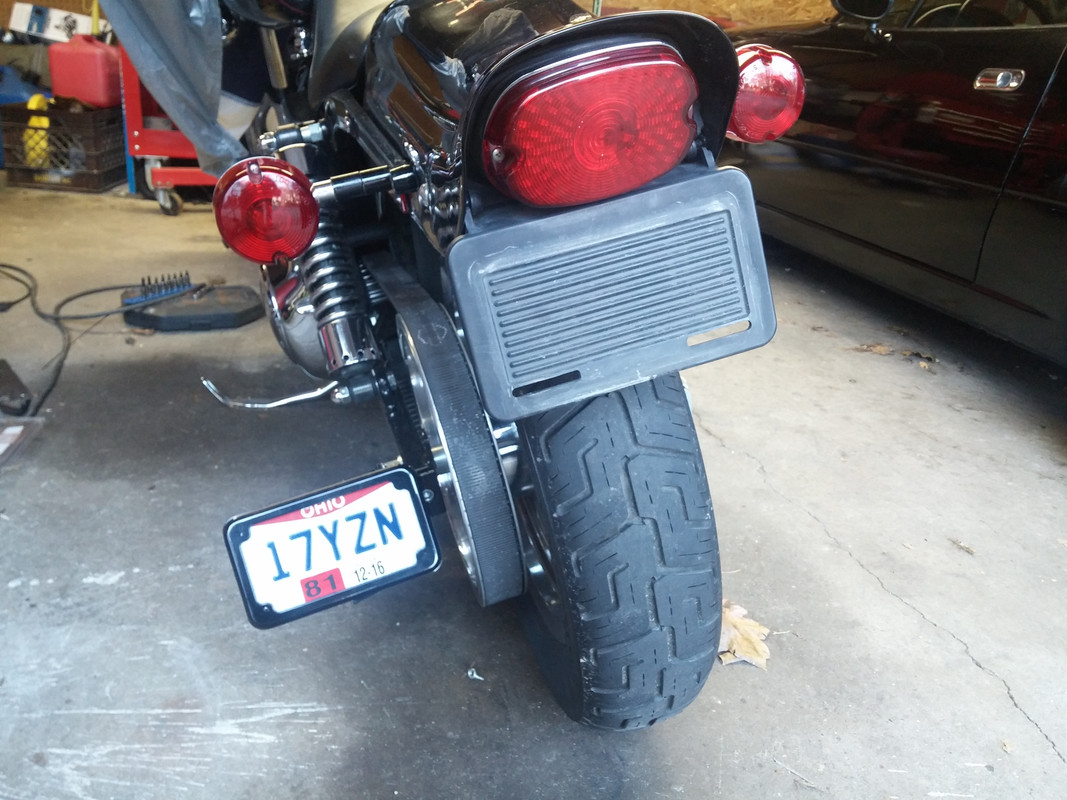
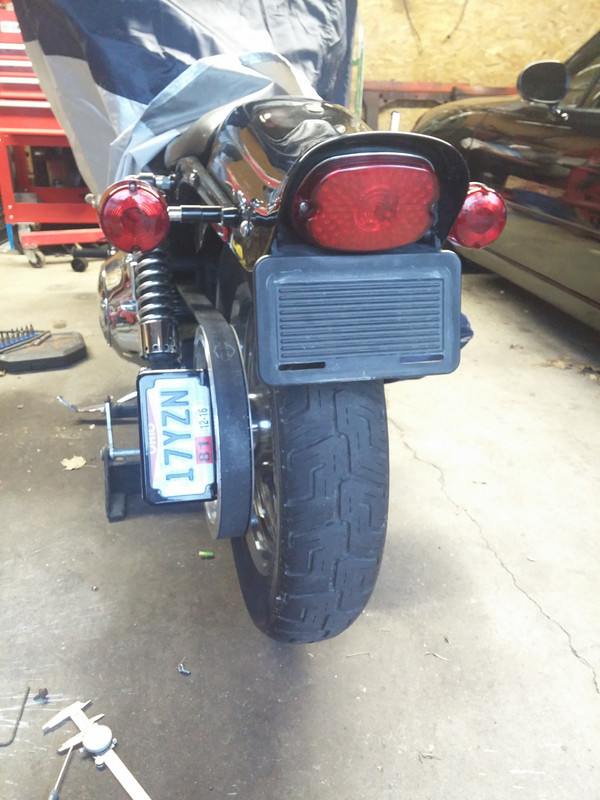
Before I tackled the wheel and tire, I wanted to be sure I had the legal stuff squared away. License plate first. After scouring the interwebs looking for clean and smart side mounts, I settled on the Cycle Visions In Close setup. I really like their swingarm mount. I wanted a vertical mount but a horizontal one came up real cheap on ebay so I snagged it. I figured I'd give it shot and knew if I didn't like it that I could drill a few holes to make it work. Once I got it, I definitely wasn't happy with the fit. More custom work!
The "in close" mount as delivered...yuck. I couldn't turn the backing plate over to get it any closer. It hit the pulley before it got within 1/2" of the mounting holes. This was the only fitment available to me as delivered.
I wanted it seriously tucked in. To get there, I needed to make a new backing plate.
The original backing plate:
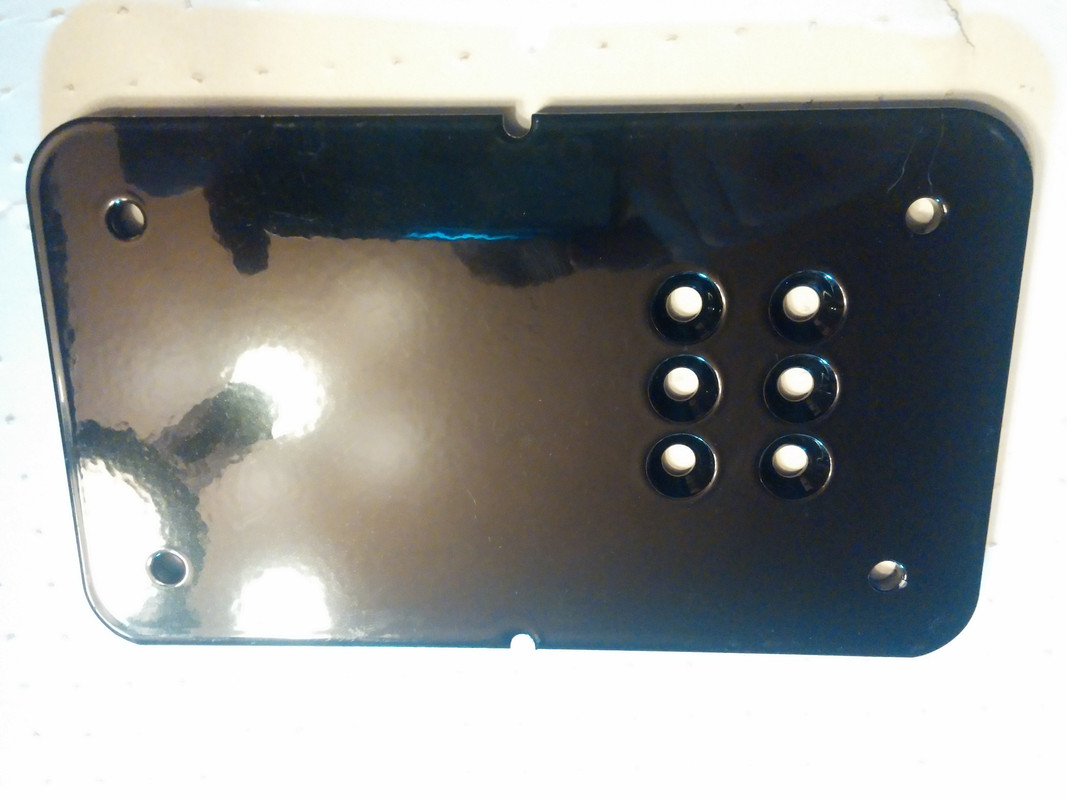
The first revision of the custom backer would allow one horizontal position and one vertical position. I really don't know why CV doesn't make their's like this. Wouldn't cost any more... I've since made a second revision with six different mounting locations 3 horizontal and 3 vertical. I talked with the local cops and they say that vertical mount is fine, but I decided to hedge my bets and machine it to accommodate both.
Revision 1
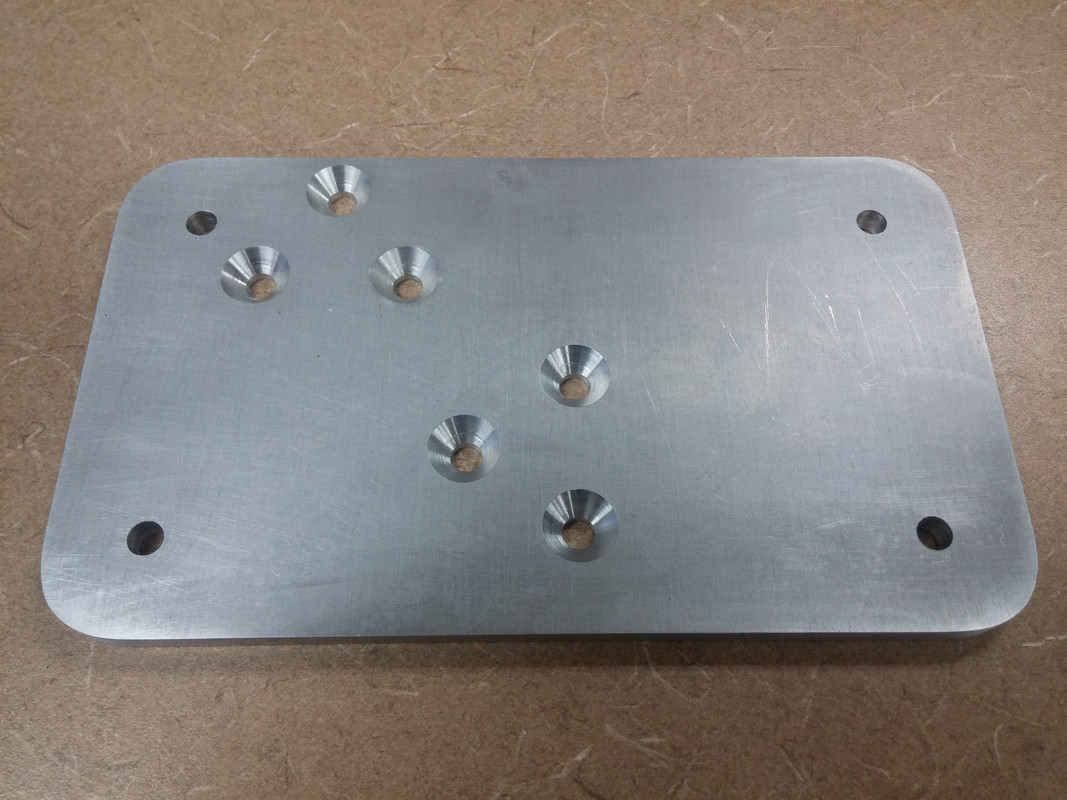
Revision 2 (a bit scuffed up from knocking around the shop for the last couple months and being mounted and removed a couple times doing fit ups.)
(pics lost to photobucket ********)

The new fit:
Before I tackled the wheel and tire, I wanted to be sure I had the legal stuff squared away. License plate first. After scouring the interwebs looking for clean and smart side mounts, I settled on the Cycle Visions In Close setup. I really like their swingarm mount. I wanted a vertical mount but a horizontal one came up real cheap on ebay so I snagged it. I figured I'd give it shot and knew if I didn't like it that I could drill a few holes to make it work. Once I got it, I definitely wasn't happy with the fit. More custom work!
The "in close" mount as delivered...yuck. I couldn't turn the backing plate over to get it any closer. It hit the pulley before it got within 1/2" of the mounting holes. This was the only fitment available to me as delivered.
I wanted it seriously tucked in. To get there, I needed to make a new backing plate.
The original backing plate:
The first revision of the custom backer would allow one horizontal position and one vertical position. I really don't know why CV doesn't make their's like this. Wouldn't cost any more... I've since made a second revision with six different mounting locations 3 horizontal and 3 vertical. I talked with the local cops and they say that vertical mount is fine, but I decided to hedge my bets and machine it to accommodate both.
Revision 1
Revision 2 (a bit scuffed up from knocking around the shop for the last couple months and being mounted and removed a couple times doing fit ups.)
(pics lost to photobucket ********)

The new fit:
Last edited by cggorman; 01-26-2020 at 01:44 PM.
#4
03-11-2016, 08:19 PM
#5
03-11-2016, 08:20 PM
Picked up a used 2000 rear hub, 3/4 bearings to fit a pre-2000 axle, stainless spokes and nipples, an aluminum 16" x 5.5" aluminum rim, Cobra 200/60-16 tire, balancing/truing jig, wheel weights, rim strip, & tube....
Dry fit prior to hub polishing and final assembly.

After polishing and before truing.
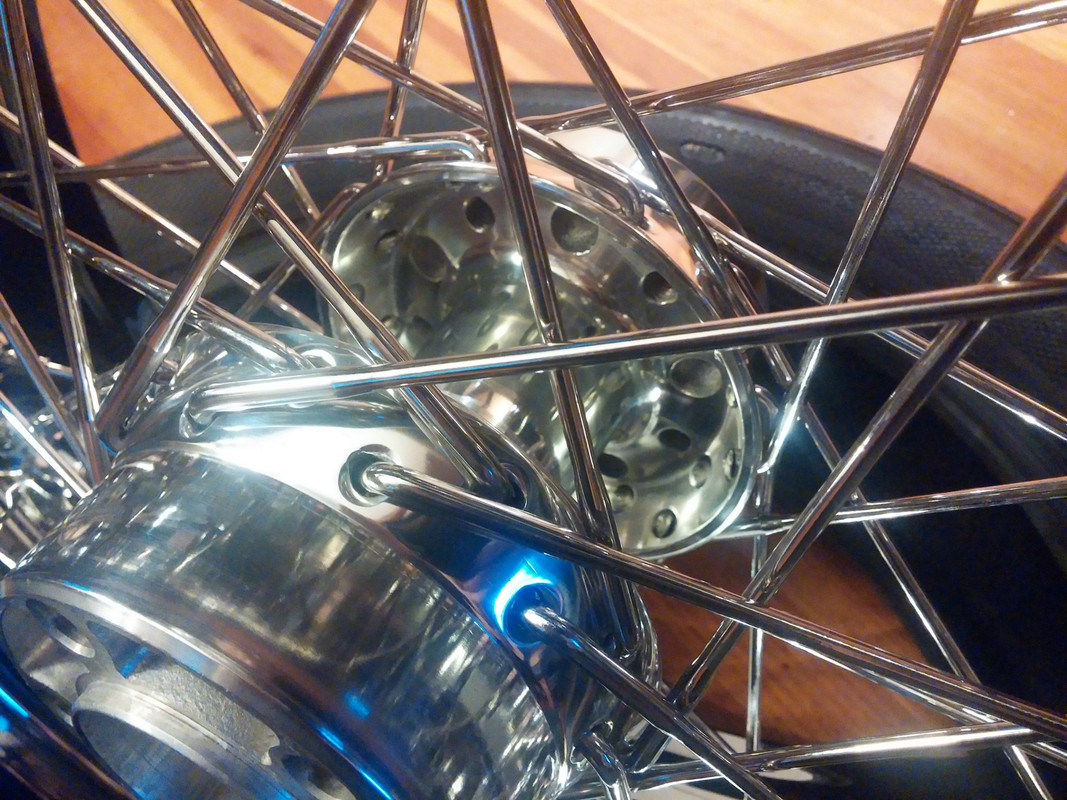
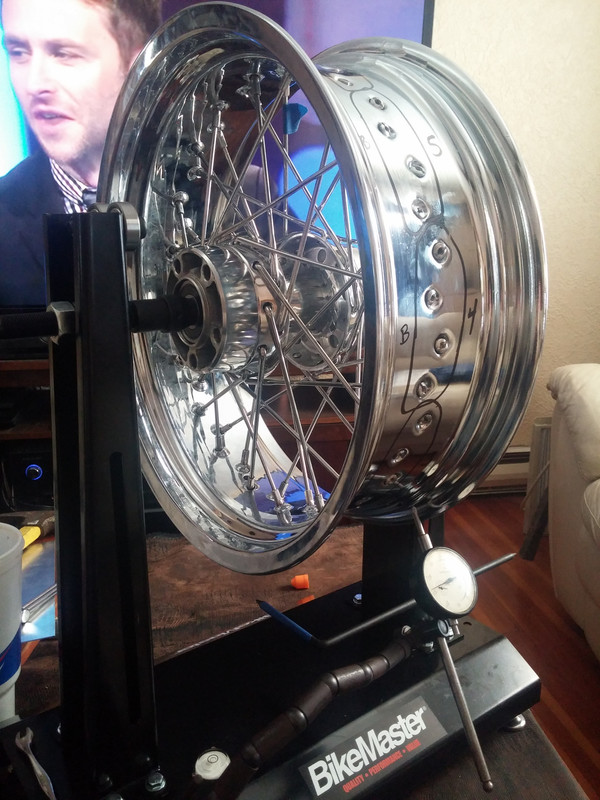
On the truing stand
Dry fit prior to hub polishing and final assembly.
After polishing and before truing.
On the truing stand
Last edited by cggorman; 01-26-2020 at 01:49 PM.

#8
03-11-2016, 10:13 PM
Extreme HDF Member
Join Date: Sep 2012
Location: Tallahassee, Florida
Posts: 12,344
Received 2,189 Likes
on
1,677 Posts
#9
03-12-2016, 07:26 PM
Got a new console painted with VHT Wrinkle Plus today. Looks good. I'm now a fan. MUCH cheaper and easier to apply than the HD stuff.
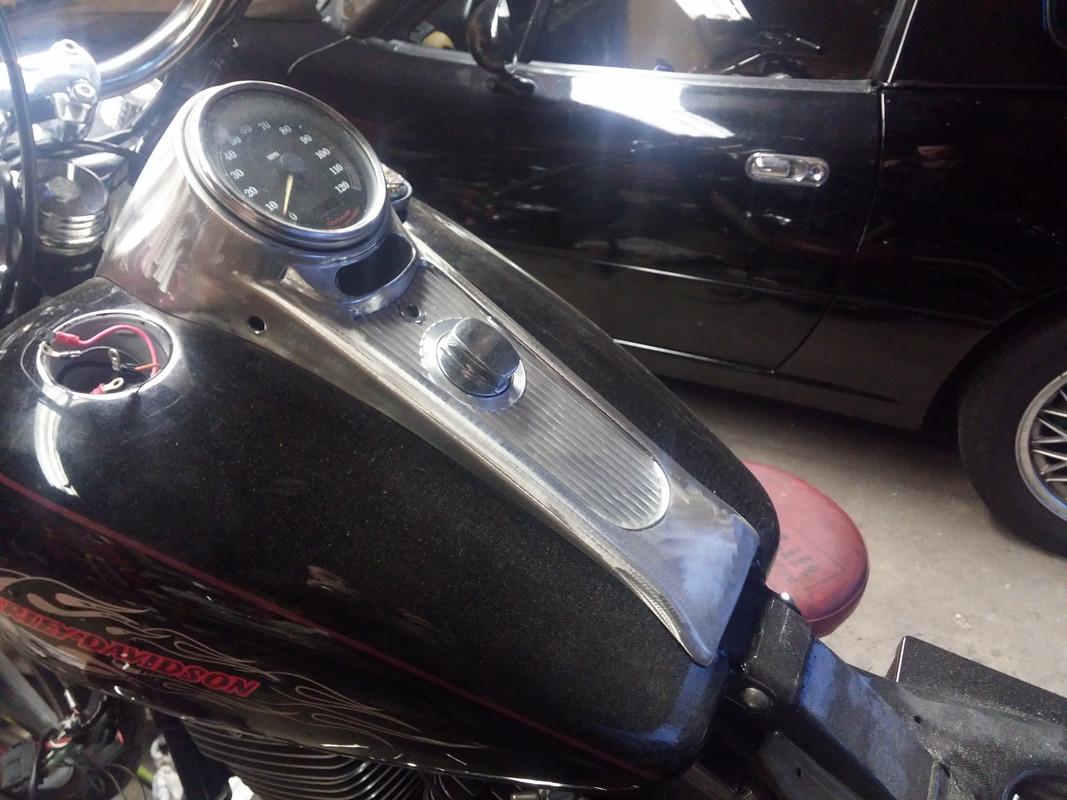
It's a custom contoured 2004+ Road King console. Took a fair amount of work to get it where I wanted it, but it's way better than the boxy thing that came on the 99.
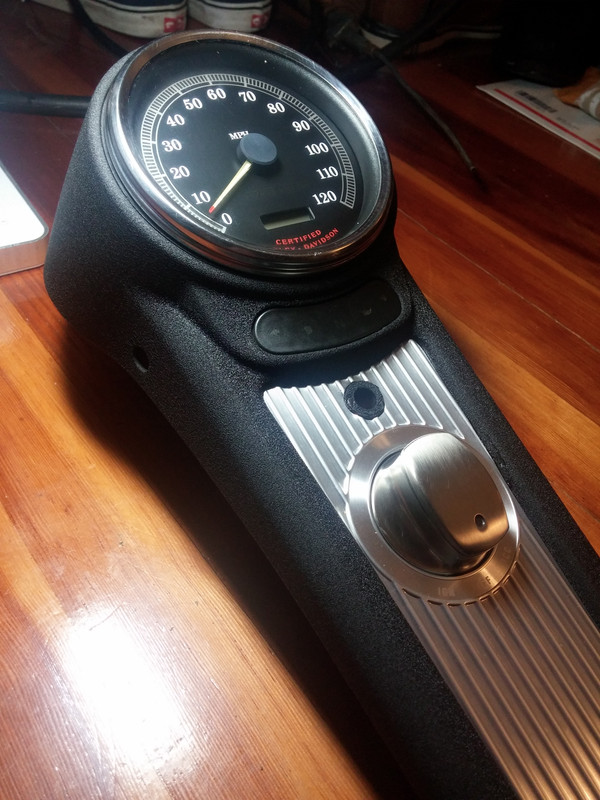
After fit up, before sand blasting and painting.
I also had to brush the ignition switch to match...

It's a custom contoured 2004+ Road King console. Took a fair amount of work to get it where I wanted it, but it's way better than the boxy thing that came on the 99.
After fit up, before sand blasting and painting.
I also had to brush the ignition switch to match...
Last edited by cggorman; 01-26-2020 at 01:52 PM.
#10
03-13-2016, 09:26 AM
Club Member
