This Is NOT A BUILD: CrossBones The 3rd
#1
 01-29-2015, 10:20 PM

Hey Gang,
As some of you know I've been working on my 2008 Crossbones for what seems like an eternity now. Ever since I purchased it brand new back in 08 I had wanted to strip it down further from stock and I finally came around to doing just that a few months back.
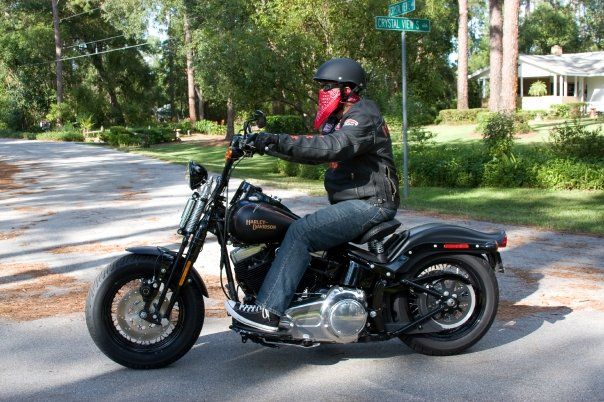
(My Bones about a month after I bought it.)
Initially, budget held me back. I was just happy to be able to afford the scoot and have the blessing of my wife to boot. After about a year or so my wife surprised me by asking that I buy her a helmet and jacket so she could ride with me (she swore she was happy to let me purchase the scoot but would never get on it herself)! So bobbing the Bones suddenly was no longer an option and my scoot took a rather ugly turn as I eBayed and Craigslisted left and right for stuff to add to it in order to make the Mrs. more comfortable on our rides together.
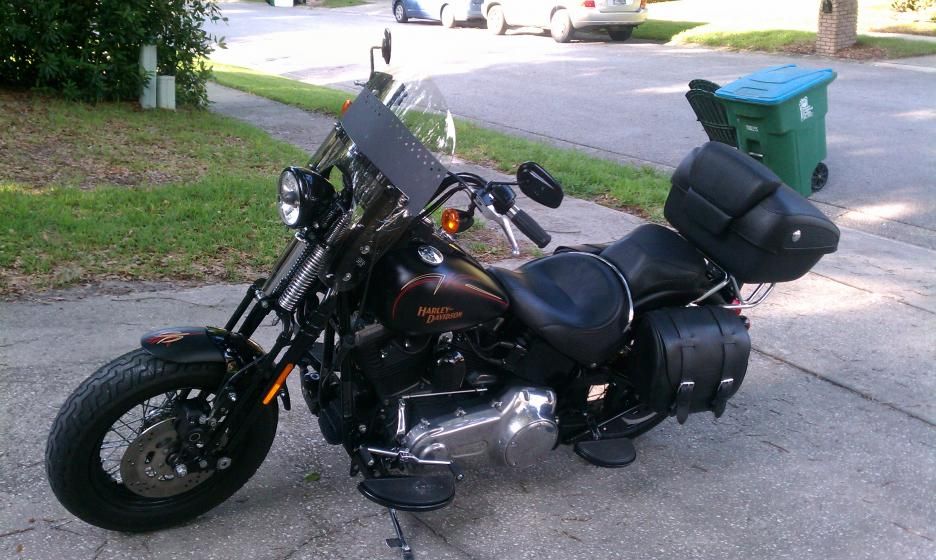
(Gosh! What was I thinking? My Bones roughly three years after purchase...)
Eventually I decided to stop attempting to make a Bobber that could tour with two people and went full-on nostalgic Springer style. It was a look that I also loved and one I felt was much more conducive to the two up riding that I was enjoying, not only with my wife but with my daughter as well...
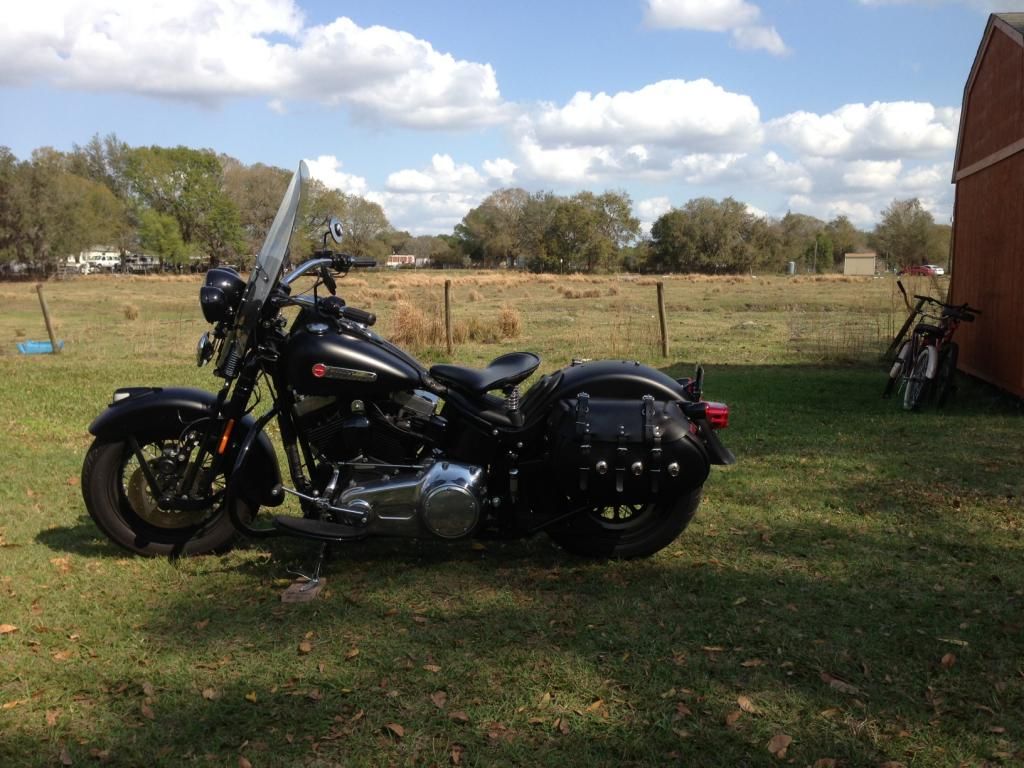
(She could tour with the best of them...)
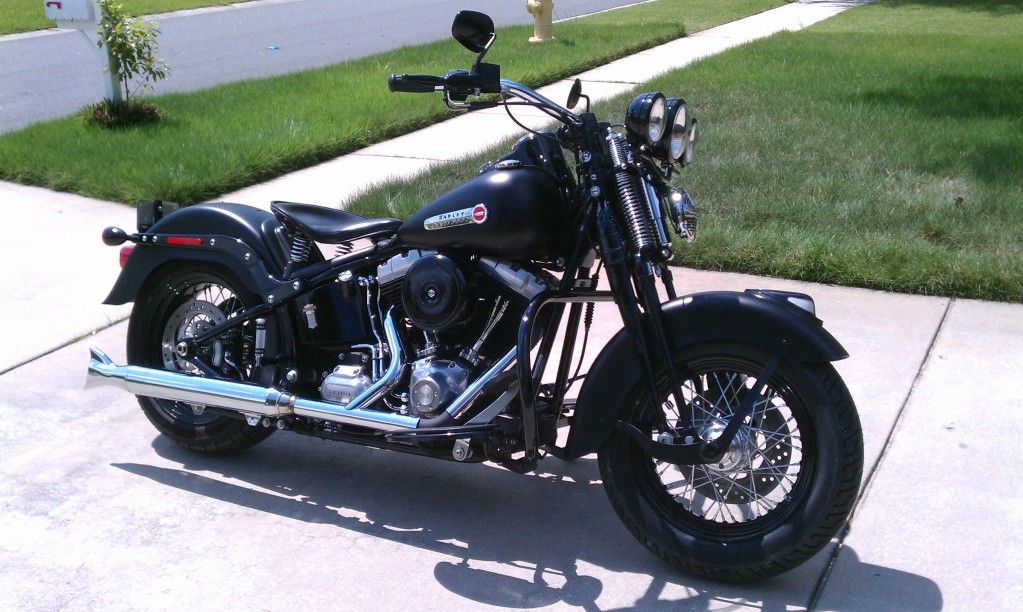
(...but still strip down to the bare essentials!)
So I thought I had my Bones sorted to where I wanted it as well as the rest of my life. Along the way my wife and I had two little boys (and future bikers for sure) and we both changed jobs, moving on to bigger, better things. And it was just when everything was all rosy that $h!t sortta hit the fan. First I got laid off from my job and struggled for a while to keep a steady income. Selling my Bones became a real possibility more than once. Then my daughter unexpectedly dropped out of college and moved out to CA with some friends to pursue her dream of doing nothing and mooching off of other people. Finally my wife decided just as unexpectedly that she no longer wanted to be a wife (or mother for that matter) and moved on. So it's now been just over two years that The Three Amigos (that's me and my two boys) have been forging on mostly on our own, with some help from my family along the way. It's been a tough and sad road a times but I consider myself a strong and optimistic character and refuse to let things drag me down. My boys deserve nothing less from me!
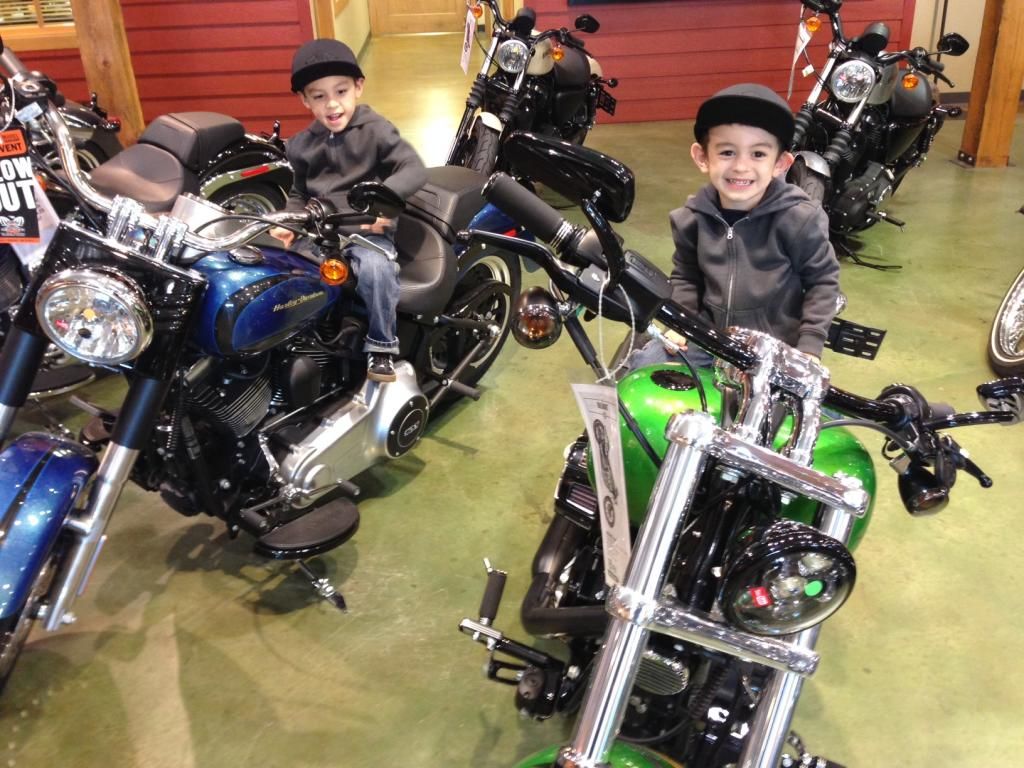
(We all have our sources of inspiration and our reasons to forge ahead. Here are all my reasons...)
So life was looking up again but suddenly I found myself without a riding partner. Then last year my brother got himself a nice pre-owned Rocker C and we quickly modded it to his liking. Before I knew it, he and I were tooling around on our scoots every other weekend. I began to really envy the stripped down nothing-but-show attitude of his Rocker and began to re-visit the idea of making my Bones into a totally solo play thing for me! Then one day I was browsing eBay for $h!ts and giggles as I often tend to do, when I came upon a brand new 2012 Softail H-D gas tank with one of their Hard Candy Custom paint jobs on it. It was the sort of thing that I liked seeing on other folks rides but never envisioned throwing something like it on my own bike. I bid on the tank not thinking much of it when before I knew it I had won the no-reserve auction for just over $350 shipped (the tank retails for $1600)! Suddenly I had the center piece for what would be the next look of my Bones. I just needed to make a plan to start the mods. As it happens the bike made those plans for me when late last year she crapped out on me. Turns out that the stator went out. I decided to make the repairs myself and thus began a rather major tear down in preparation for this project.
I won't insult REAL builders out there by calling this a "build". The mods will be rather dramatic and even though I am making some bits myself and doing most of the work on my own, I like to think of the venture as more of a "project".
Now...being a single dad with a career and a commute of over 160 miles a day, time is a RARE commodity to say the least. As such, things have been rather slow going (which I think may actually be an understatement since I can't even remember now when I actually started the work)! It's partly for that reason that I decided to go ahead and start this thread rather than waiting until the project was complete. I figured that keeping the updates coming would be a good way for me to keep track of progress and also serve as motivation moving forward. I'll do my best to document as much as I can in order to share some of the knowledge that I have been picking up along the way. I wish that up to now I had been better about taking photos of the work since there's already been some really good stuff I could have shared. The best I can do now is recap it all as best as possible and try to do a better job of this moving forward.
As I stated; the work started when I needed to replace my stator which crapped out on me after 63K miles of reliable service. I went with a new stator and regulator from H-D, feeling quite comfortable with the stock parts. It was more work than I anticipated due to the fact that the inner primary had to be removed in order to pull the rotor out. I had to loosen the oil tank to help me reach the starter with the aid of some very long extensions and an alen bit. However, once I was able to get the starter loosened from the inner primary the work went rather smoothly. I did have to make my own primary drive locking tool in order to loosen and later tighten the nut and bolt for the clutch assembly and compensator sprocket. The parts guys at the local H-D didn't have these tools in stock but brought one out from the shop so I could see how it was made. The one he showed me was for touring bikes and so was much shorter than I need but I managed to get other dimensions from it and then just took measurements from my primary to determine how long I needed to make mine. The tool worked perfectly and I was able to get the startor replaced. I installed the inner primary with new seals and gaskets. However the outer primary cover was set aside. It would later join the rest of the engine and tranny covers along with many other parts on a trip to the powder coater!
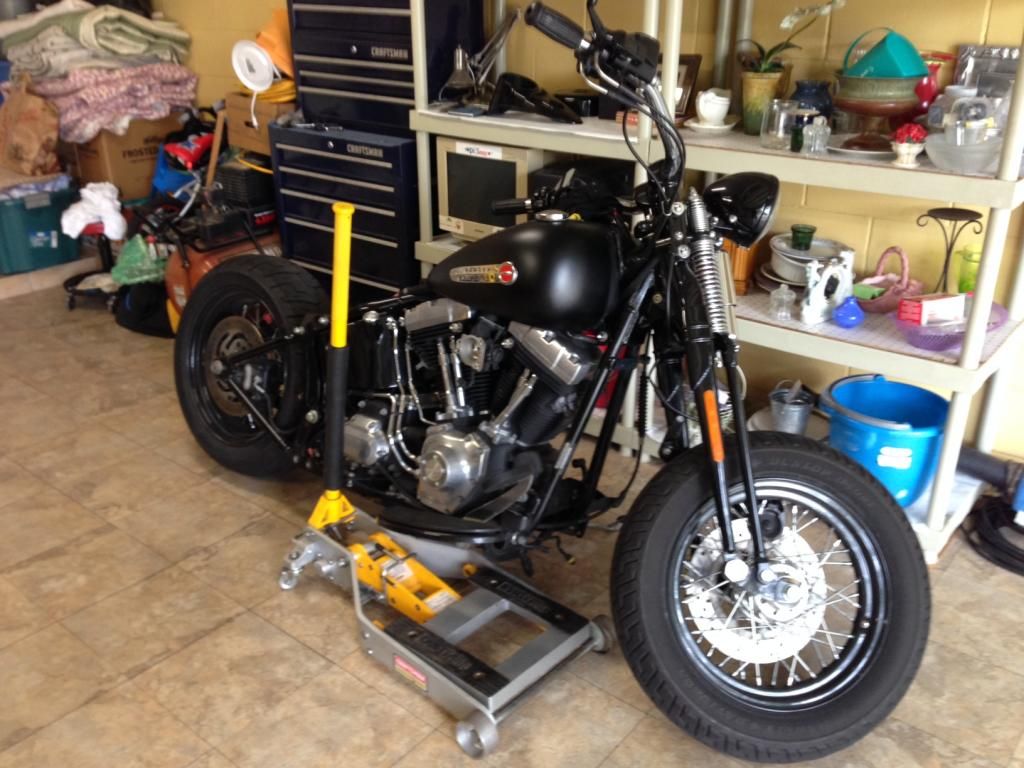
(The Project begins with basic teardown; the seat and both fenders are removed. The entire left side floorboard assembly is also removed to make way for the stator repairs. I pull the battery and remove the tank console and drain the tank. I leave the bars on and install the front wheel back on with the stock Bones' axle in order to be able to move the bike around if needed. The pipes and air cleaner all pulled as well.)

(At this point the new stator is in and the primary drive is re-assembled. I re-installed the left floorboard bracket with jiffy stand so that I could set the bike down off the jack if need be. The tank has been completely removed as well as all the engine and tranny covers. Also gone is the stock horn and the seat post/coil mount and coil. Read a bit about my stator repair and challenges here: https://www.hdforums.com/forum/softa...ater-only.html )
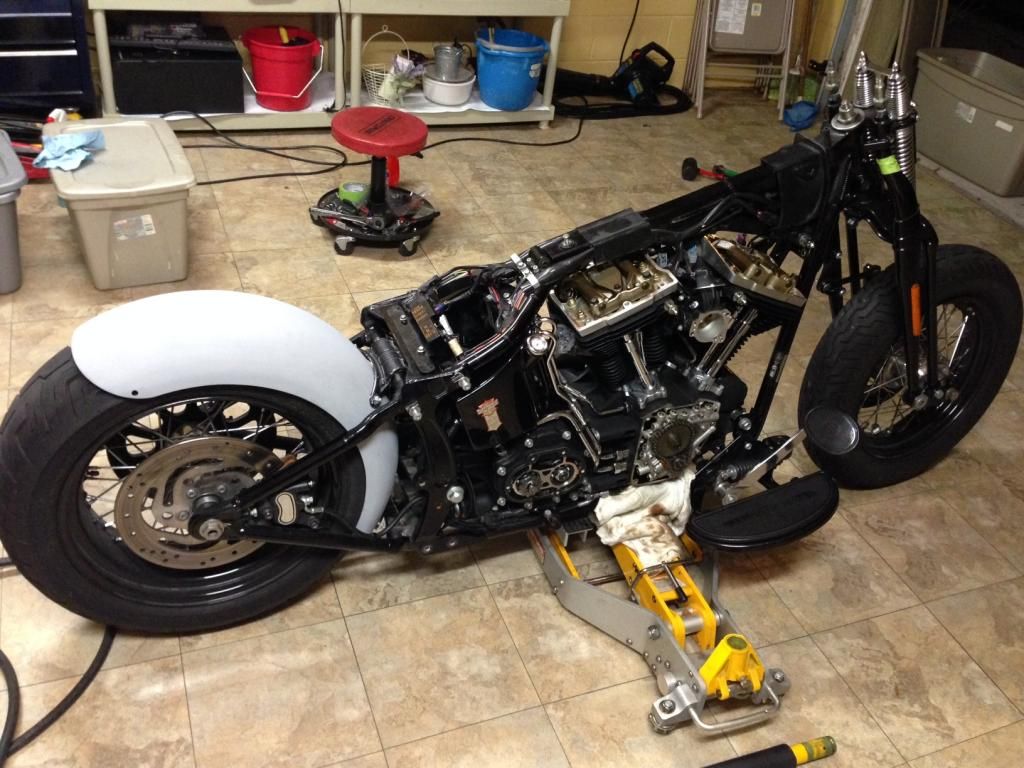
(A Forum member cuts me a deal on his used Shadetree fender. I chemically strip the paint and take an orbital sander to it to smooth out the metal a bit. I mock up the fender and find that the lower portion is a bit long so I trim it down. I begin the initial body work to smooth out the fender and get it ready for paint. Prior to this second mock up and while the oil tank is still loose I feed the ECM plug behind the oil tank where I will mount my ECM/Thundermax. At this point I also remove my handlebars, risers, top tree and headlight. Notice that the rocker boxes are still on as well as the tappet covers and pus rod tubes. I wanted to PC those as well but wasn't confident about the removal process. After posting about it on the Forums and some trial and error I got those removed as well and included them with the batch of parts to be coated. https://www.hdforums.com/forum/engin...r-removal.html )
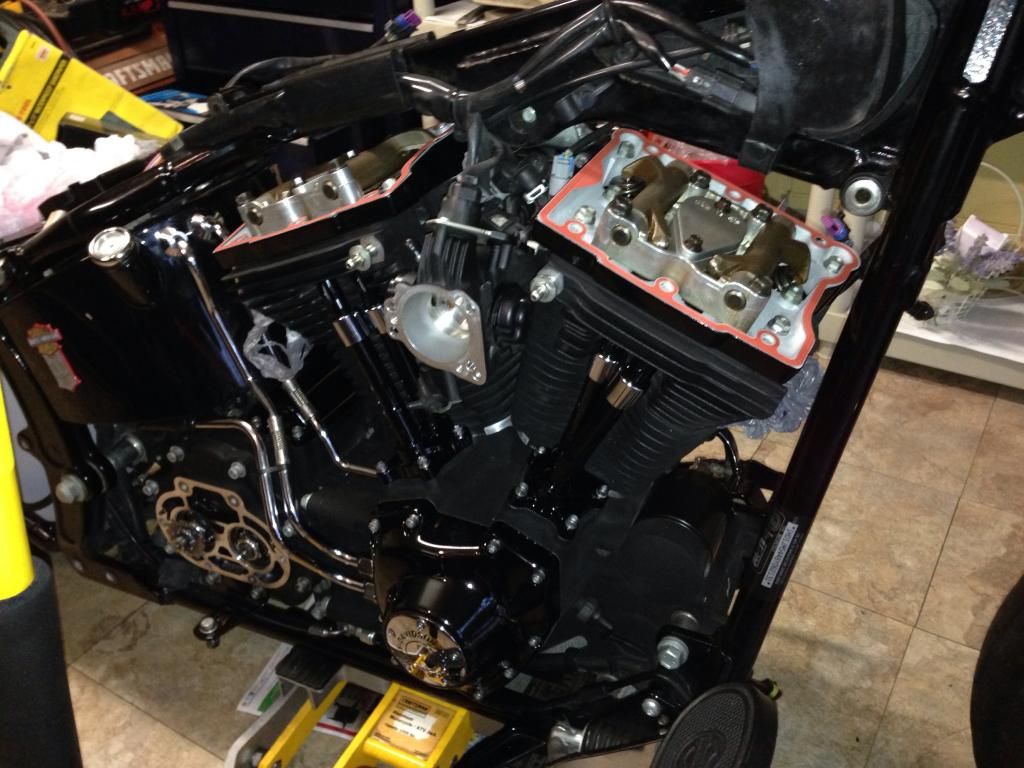
(The engine and tranny start to come together. As part of this job, I install a fresh set of breather gaskets and filters. The kit was only $13. It was recommended that I switch to newer style breathers which were not much more expensive than the rebuild kit but they were not in stock and time was precious so I went with just a "re-build". I considered new cam chain tensioners as well but mine still look pretty damn good despite having 63K miles on em so I'll give em another go. A note on removing and installing the rocker arms, support plate and push rods; the manual states that you have to rotate the engine and find top dead center for each cylinder before removing or installing these components. The procedure describes unloading the push rods until you can turn them freely with your fingers. However, despite all attempts, I was never able to get them to feel that loose. I was able to remove everything with no issues. On install, I was careful to tighten the support plate bolts by 1/4 turn increments in the specified pattern in order to seat the plate. I've every confidence that nothing was warped or bent and when I turned the engine to work on the second cylinder everything moved as smoothly as it did prior to the tear down.)
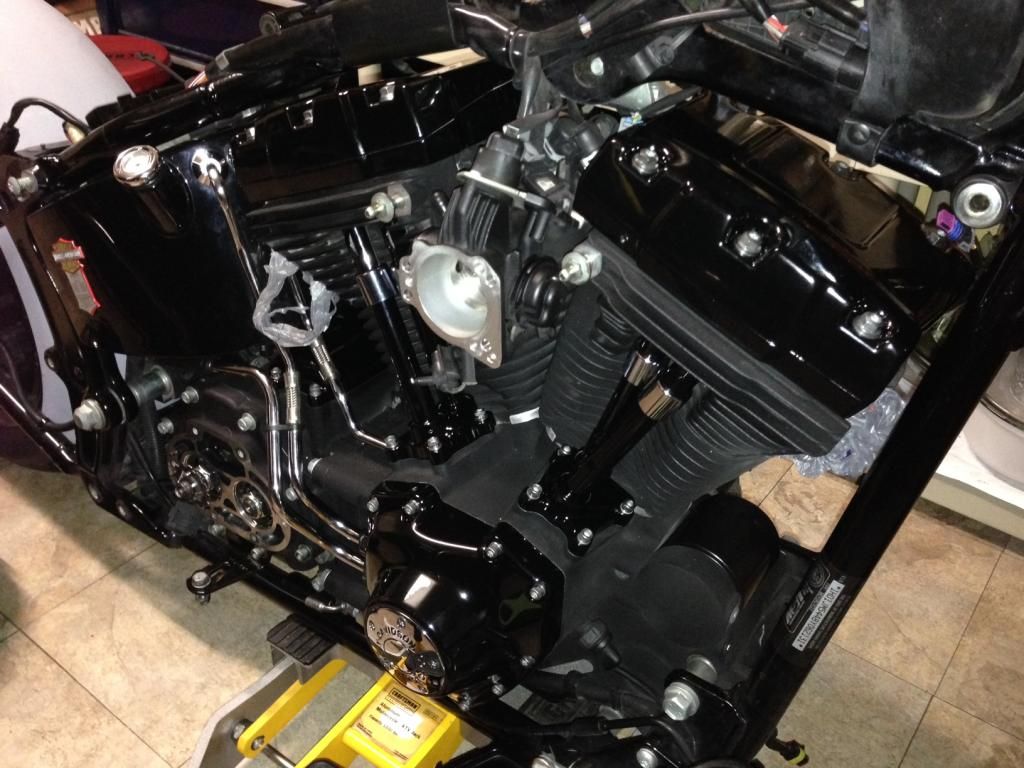
(I'm really glad I made the extra effort to get the rocker boxes off as well as the push rod tubes and lifter covers. The results wouldn't have been anywhere near as good as they are turning out if I had left them as-is.)
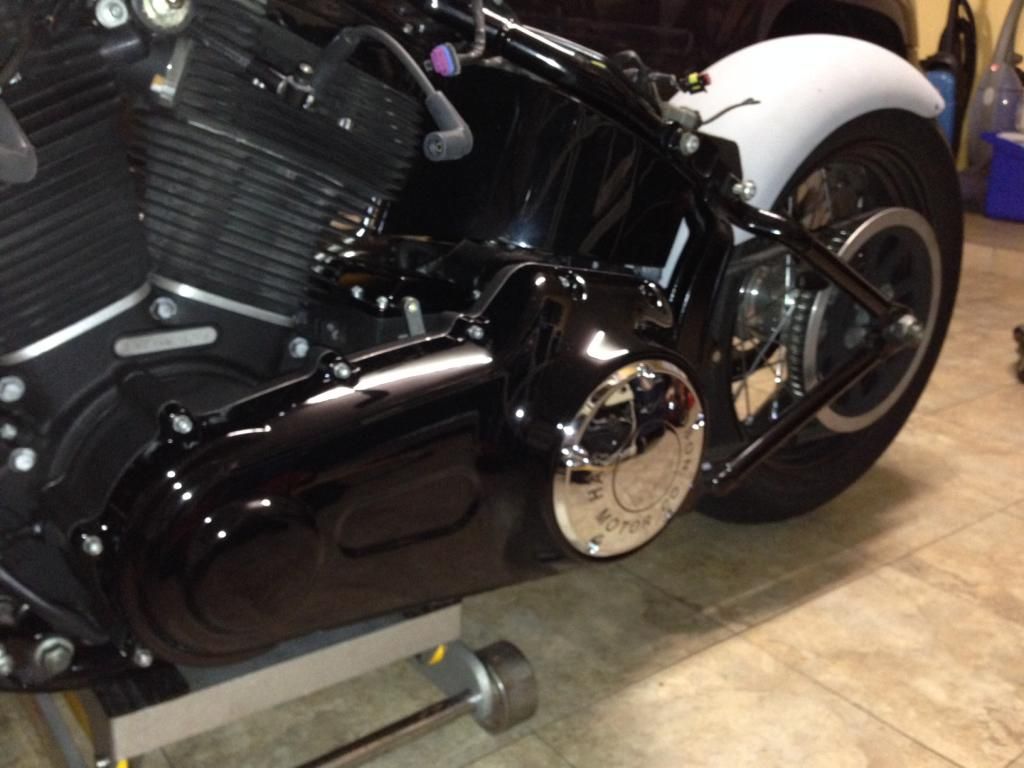
(The new primary cover and derby cover. The derby cover is only mocked up, meaning there is no gasket and the screws aren't torqued to spec. Reason being is that I still have to fill the primary with fluid and adjust the clutch when I install the new cable. Those gaskets are one-time use and pricey so for now the cover is on mostly to keep dust and what-not out of the primary while I finish things up. I thought I could use the stock gasket which is re-usable but these decorative derby covers done have the necessary grove to install the stock gasket. "Thanks" for that Harley!)
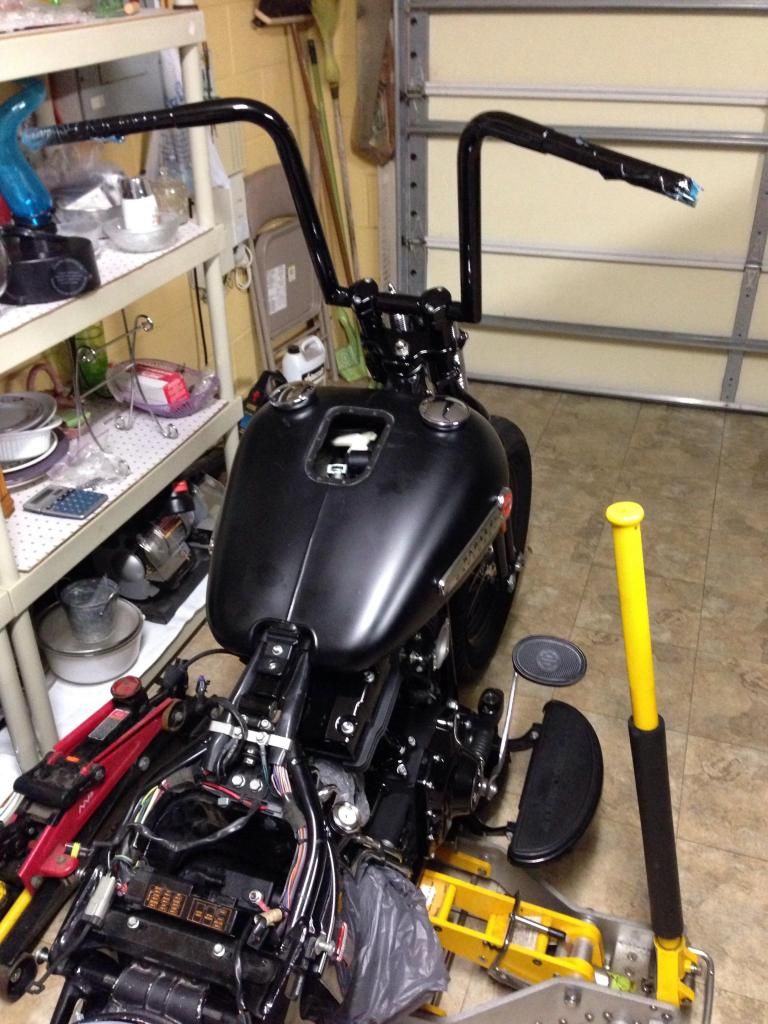
(First mock up of my new bars. Going from chrome H-D wide beach bars with 1.25 diameter risers to 14" Wild One Outlawz on my stock Crossbones 1 inch diameter risers. Wild One only offers their bars in chrome or sating black. I knew I wanted mine gloss black and fortunately I got my bars brand new from a forum member for a good enough price that once I got them coated the cost was no more than If I had purchased them new at retail price. My stock risers, caps and top tree also got a fresh gloss black powder coating. In case yall are wondering; I did not re-install my original tank. I have precious little room to store things so ever time I am done working on the bike I just set the tank back on it to keep it out of the way. You may also notice that the guts are out of the tank. They are awaiting a transplant into the new tank I will be running.)
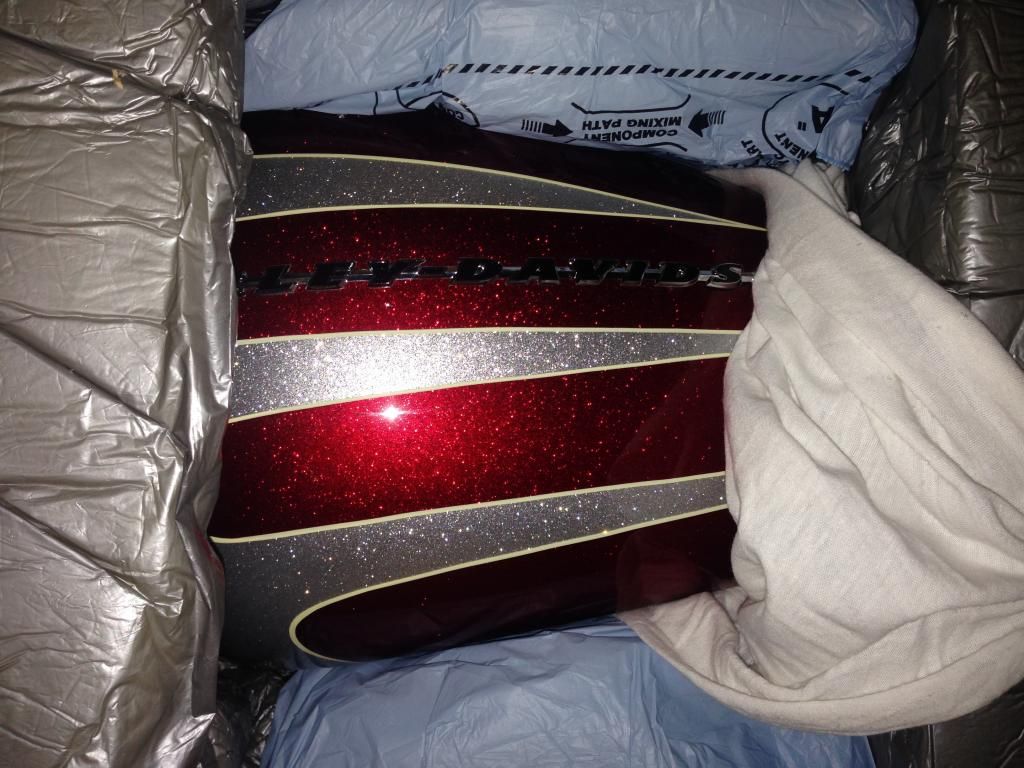
Speaking of the tank; here is a sneak-peek of the one I will be installing in the near future. It's for 2011-newer Softails which means there are a couple of differences between it and my 2008 tank but they are both compatible and will share more about the install when I get to that point.
Well I guess this is good enough for a start. If you've bothered to tag along this far, I am hoping you'll join me the rest of the way. I won't attemnpt to spell out all my plans from the beginning as I imagine much of it will change along the way as it already has to some extent. I will be more than happy to elaborate where ever necessary and am open to suggestions and insight.
Thanks and stay tuned,
Skeez
As some of you know I've been working on my 2008 Crossbones for what seems like an eternity now. Ever since I purchased it brand new back in 08 I had wanted to strip it down further from stock and I finally came around to doing just that a few months back.

(My Bones about a month after I bought it.)
Initially, budget held me back. I was just happy to be able to afford the scoot and have the blessing of my wife to boot. After about a year or so my wife surprised me by asking that I buy her a helmet and jacket so she could ride with me (she swore she was happy to let me purchase the scoot but would never get on it herself)! So bobbing the Bones suddenly was no longer an option and my scoot took a rather ugly turn as I eBayed and Craigslisted left and right for stuff to add to it in order to make the Mrs. more comfortable on our rides together.

(Gosh! What was I thinking? My Bones roughly three years after purchase...)
Eventually I decided to stop attempting to make a Bobber that could tour with two people and went full-on nostalgic Springer style. It was a look that I also loved and one I felt was much more conducive to the two up riding that I was enjoying, not only with my wife but with my daughter as well...

(She could tour with the best of them...)

(...but still strip down to the bare essentials!)
So I thought I had my Bones sorted to where I wanted it as well as the rest of my life. Along the way my wife and I had two little boys (and future bikers for sure) and we both changed jobs, moving on to bigger, better things. And it was just when everything was all rosy that $h!t sortta hit the fan. First I got laid off from my job and struggled for a while to keep a steady income. Selling my Bones became a real possibility more than once. Then my daughter unexpectedly dropped out of college and moved out to CA with some friends to pursue her dream of doing nothing and mooching off of other people. Finally my wife decided just as unexpectedly that she no longer wanted to be a wife (or mother for that matter) and moved on. So it's now been just over two years that The Three Amigos (that's me and my two boys) have been forging on mostly on our own, with some help from my family along the way. It's been a tough and sad road a times but I consider myself a strong and optimistic character and refuse to let things drag me down. My boys deserve nothing less from me!

(We all have our sources of inspiration and our reasons to forge ahead. Here are all my reasons...)
So life was looking up again but suddenly I found myself without a riding partner. Then last year my brother got himself a nice pre-owned Rocker C and we quickly modded it to his liking. Before I knew it, he and I were tooling around on our scoots every other weekend. I began to really envy the stripped down nothing-but-show attitude of his Rocker and began to re-visit the idea of making my Bones into a totally solo play thing for me! Then one day I was browsing eBay for $h!ts and giggles as I often tend to do, when I came upon a brand new 2012 Softail H-D gas tank with one of their Hard Candy Custom paint jobs on it. It was the sort of thing that I liked seeing on other folks rides but never envisioned throwing something like it on my own bike. I bid on the tank not thinking much of it when before I knew it I had won the no-reserve auction for just over $350 shipped (the tank retails for $1600)! Suddenly I had the center piece for what would be the next look of my Bones. I just needed to make a plan to start the mods. As it happens the bike made those plans for me when late last year she crapped out on me. Turns out that the stator went out. I decided to make the repairs myself and thus began a rather major tear down in preparation for this project.
I won't insult REAL builders out there by calling this a "build". The mods will be rather dramatic and even though I am making some bits myself and doing most of the work on my own, I like to think of the venture as more of a "project".
Now...being a single dad with a career and a commute of over 160 miles a day, time is a RARE commodity to say the least. As such, things have been rather slow going (which I think may actually be an understatement since I can't even remember now when I actually started the work)! It's partly for that reason that I decided to go ahead and start this thread rather than waiting until the project was complete. I figured that keeping the updates coming would be a good way for me to keep track of progress and also serve as motivation moving forward. I'll do my best to document as much as I can in order to share some of the knowledge that I have been picking up along the way. I wish that up to now I had been better about taking photos of the work since there's already been some really good stuff I could have shared. The best I can do now is recap it all as best as possible and try to do a better job of this moving forward.
As I stated; the work started when I needed to replace my stator which crapped out on me after 63K miles of reliable service. I went with a new stator and regulator from H-D, feeling quite comfortable with the stock parts. It was more work than I anticipated due to the fact that the inner primary had to be removed in order to pull the rotor out. I had to loosen the oil tank to help me reach the starter with the aid of some very long extensions and an alen bit. However, once I was able to get the starter loosened from the inner primary the work went rather smoothly. I did have to make my own primary drive locking tool in order to loosen and later tighten the nut and bolt for the clutch assembly and compensator sprocket. The parts guys at the local H-D didn't have these tools in stock but brought one out from the shop so I could see how it was made. The one he showed me was for touring bikes and so was much shorter than I need but I managed to get other dimensions from it and then just took measurements from my primary to determine how long I needed to make mine. The tool worked perfectly and I was able to get the startor replaced. I installed the inner primary with new seals and gaskets. However the outer primary cover was set aside. It would later join the rest of the engine and tranny covers along with many other parts on a trip to the powder coater!

(The Project begins with basic teardown; the seat and both fenders are removed. The entire left side floorboard assembly is also removed to make way for the stator repairs. I pull the battery and remove the tank console and drain the tank. I leave the bars on and install the front wheel back on with the stock Bones' axle in order to be able to move the bike around if needed. The pipes and air cleaner all pulled as well.)

(At this point the new stator is in and the primary drive is re-assembled. I re-installed the left floorboard bracket with jiffy stand so that I could set the bike down off the jack if need be. The tank has been completely removed as well as all the engine and tranny covers. Also gone is the stock horn and the seat post/coil mount and coil. Read a bit about my stator repair and challenges here: https://www.hdforums.com/forum/softa...ater-only.html )

(A Forum member cuts me a deal on his used Shadetree fender. I chemically strip the paint and take an orbital sander to it to smooth out the metal a bit. I mock up the fender and find that the lower portion is a bit long so I trim it down. I begin the initial body work to smooth out the fender and get it ready for paint. Prior to this second mock up and while the oil tank is still loose I feed the ECM plug behind the oil tank where I will mount my ECM/Thundermax. At this point I also remove my handlebars, risers, top tree and headlight. Notice that the rocker boxes are still on as well as the tappet covers and pus rod tubes. I wanted to PC those as well but wasn't confident about the removal process. After posting about it on the Forums and some trial and error I got those removed as well and included them with the batch of parts to be coated. https://www.hdforums.com/forum/engin...r-removal.html )

(The engine and tranny start to come together. As part of this job, I install a fresh set of breather gaskets and filters. The kit was only $13. It was recommended that I switch to newer style breathers which were not much more expensive than the rebuild kit but they were not in stock and time was precious so I went with just a "re-build". I considered new cam chain tensioners as well but mine still look pretty damn good despite having 63K miles on em so I'll give em another go. A note on removing and installing the rocker arms, support plate and push rods; the manual states that you have to rotate the engine and find top dead center for each cylinder before removing or installing these components. The procedure describes unloading the push rods until you can turn them freely with your fingers. However, despite all attempts, I was never able to get them to feel that loose. I was able to remove everything with no issues. On install, I was careful to tighten the support plate bolts by 1/4 turn increments in the specified pattern in order to seat the plate. I've every confidence that nothing was warped or bent and when I turned the engine to work on the second cylinder everything moved as smoothly as it did prior to the tear down.)

(I'm really glad I made the extra effort to get the rocker boxes off as well as the push rod tubes and lifter covers. The results wouldn't have been anywhere near as good as they are turning out if I had left them as-is.)

(The new primary cover and derby cover. The derby cover is only mocked up, meaning there is no gasket and the screws aren't torqued to spec. Reason being is that I still have to fill the primary with fluid and adjust the clutch when I install the new cable. Those gaskets are one-time use and pricey so for now the cover is on mostly to keep dust and what-not out of the primary while I finish things up. I thought I could use the stock gasket which is re-usable but these decorative derby covers done have the necessary grove to install the stock gasket. "Thanks" for that Harley!)

(First mock up of my new bars. Going from chrome H-D wide beach bars with 1.25 diameter risers to 14" Wild One Outlawz on my stock Crossbones 1 inch diameter risers. Wild One only offers their bars in chrome or sating black. I knew I wanted mine gloss black and fortunately I got my bars brand new from a forum member for a good enough price that once I got them coated the cost was no more than If I had purchased them new at retail price. My stock risers, caps and top tree also got a fresh gloss black powder coating. In case yall are wondering; I did not re-install my original tank. I have precious little room to store things so ever time I am done working on the bike I just set the tank back on it to keep it out of the way. You may also notice that the guts are out of the tank. They are awaiting a transplant into the new tank I will be running.)
Speaking of the tank; here is a sneak-peek of the one I will be installing in the near future. It's for 2011-newer Softails which means there are a couple of differences between it and my 2008 tank but they are both compatible and will share more about the install when I get to that point.

Well I guess this is good enough for a start. If you've bothered to tag along this far, I am hoping you'll join me the rest of the way. I won't attemnpt to spell out all my plans from the beginning as I imagine much of it will change along the way as it already has to some extent. I will be more than happy to elaborate where ever necessary and am open to suggestions and insight.
Thanks and stay tuned,
Skeez
Last edited by Skeezmachine; 02-03-2015 at 08:38 AM. Reason: Corrected factual errors.
The following users liked this post:
NewMexRider (01-13-2017)
#2
01-29-2015, 10:45 PM
NOT A MODERATOR


#5
01-30-2015, 06:55 AM
Road Master
Join Date: Sep 2012
Location: Corp of Discovery trail, Missouri
Posts: 875
Likes: 0
Received 10 Likes
on
10 Posts
Looking good on the transformation of your bike. I thought it looked fantastic as "old school" but some times change is good. Sounds like you have had quite a few changes in recent years but good for your boys to be with a caring father.
I remember when I was young I would hang out with my father in the garage as he would wrench on his BSA's and Triumphs. Good memories and that gave me a lifelong interest in bikes. Life goes by so fast that in no time maybe your boys will be riding partners with you and your brother.
Hope the transformation goes quickly so you can get back on the road.
#7
01-30-2015, 08:08 AM

