***HOW TO*** Progressive Drop In springs with pics
Well, I lowered the fron of my Heritage last night, and after reading tons of different reviews, experiences, and installation complaints, I figured I would do it myself in my garage and document the entire thing.
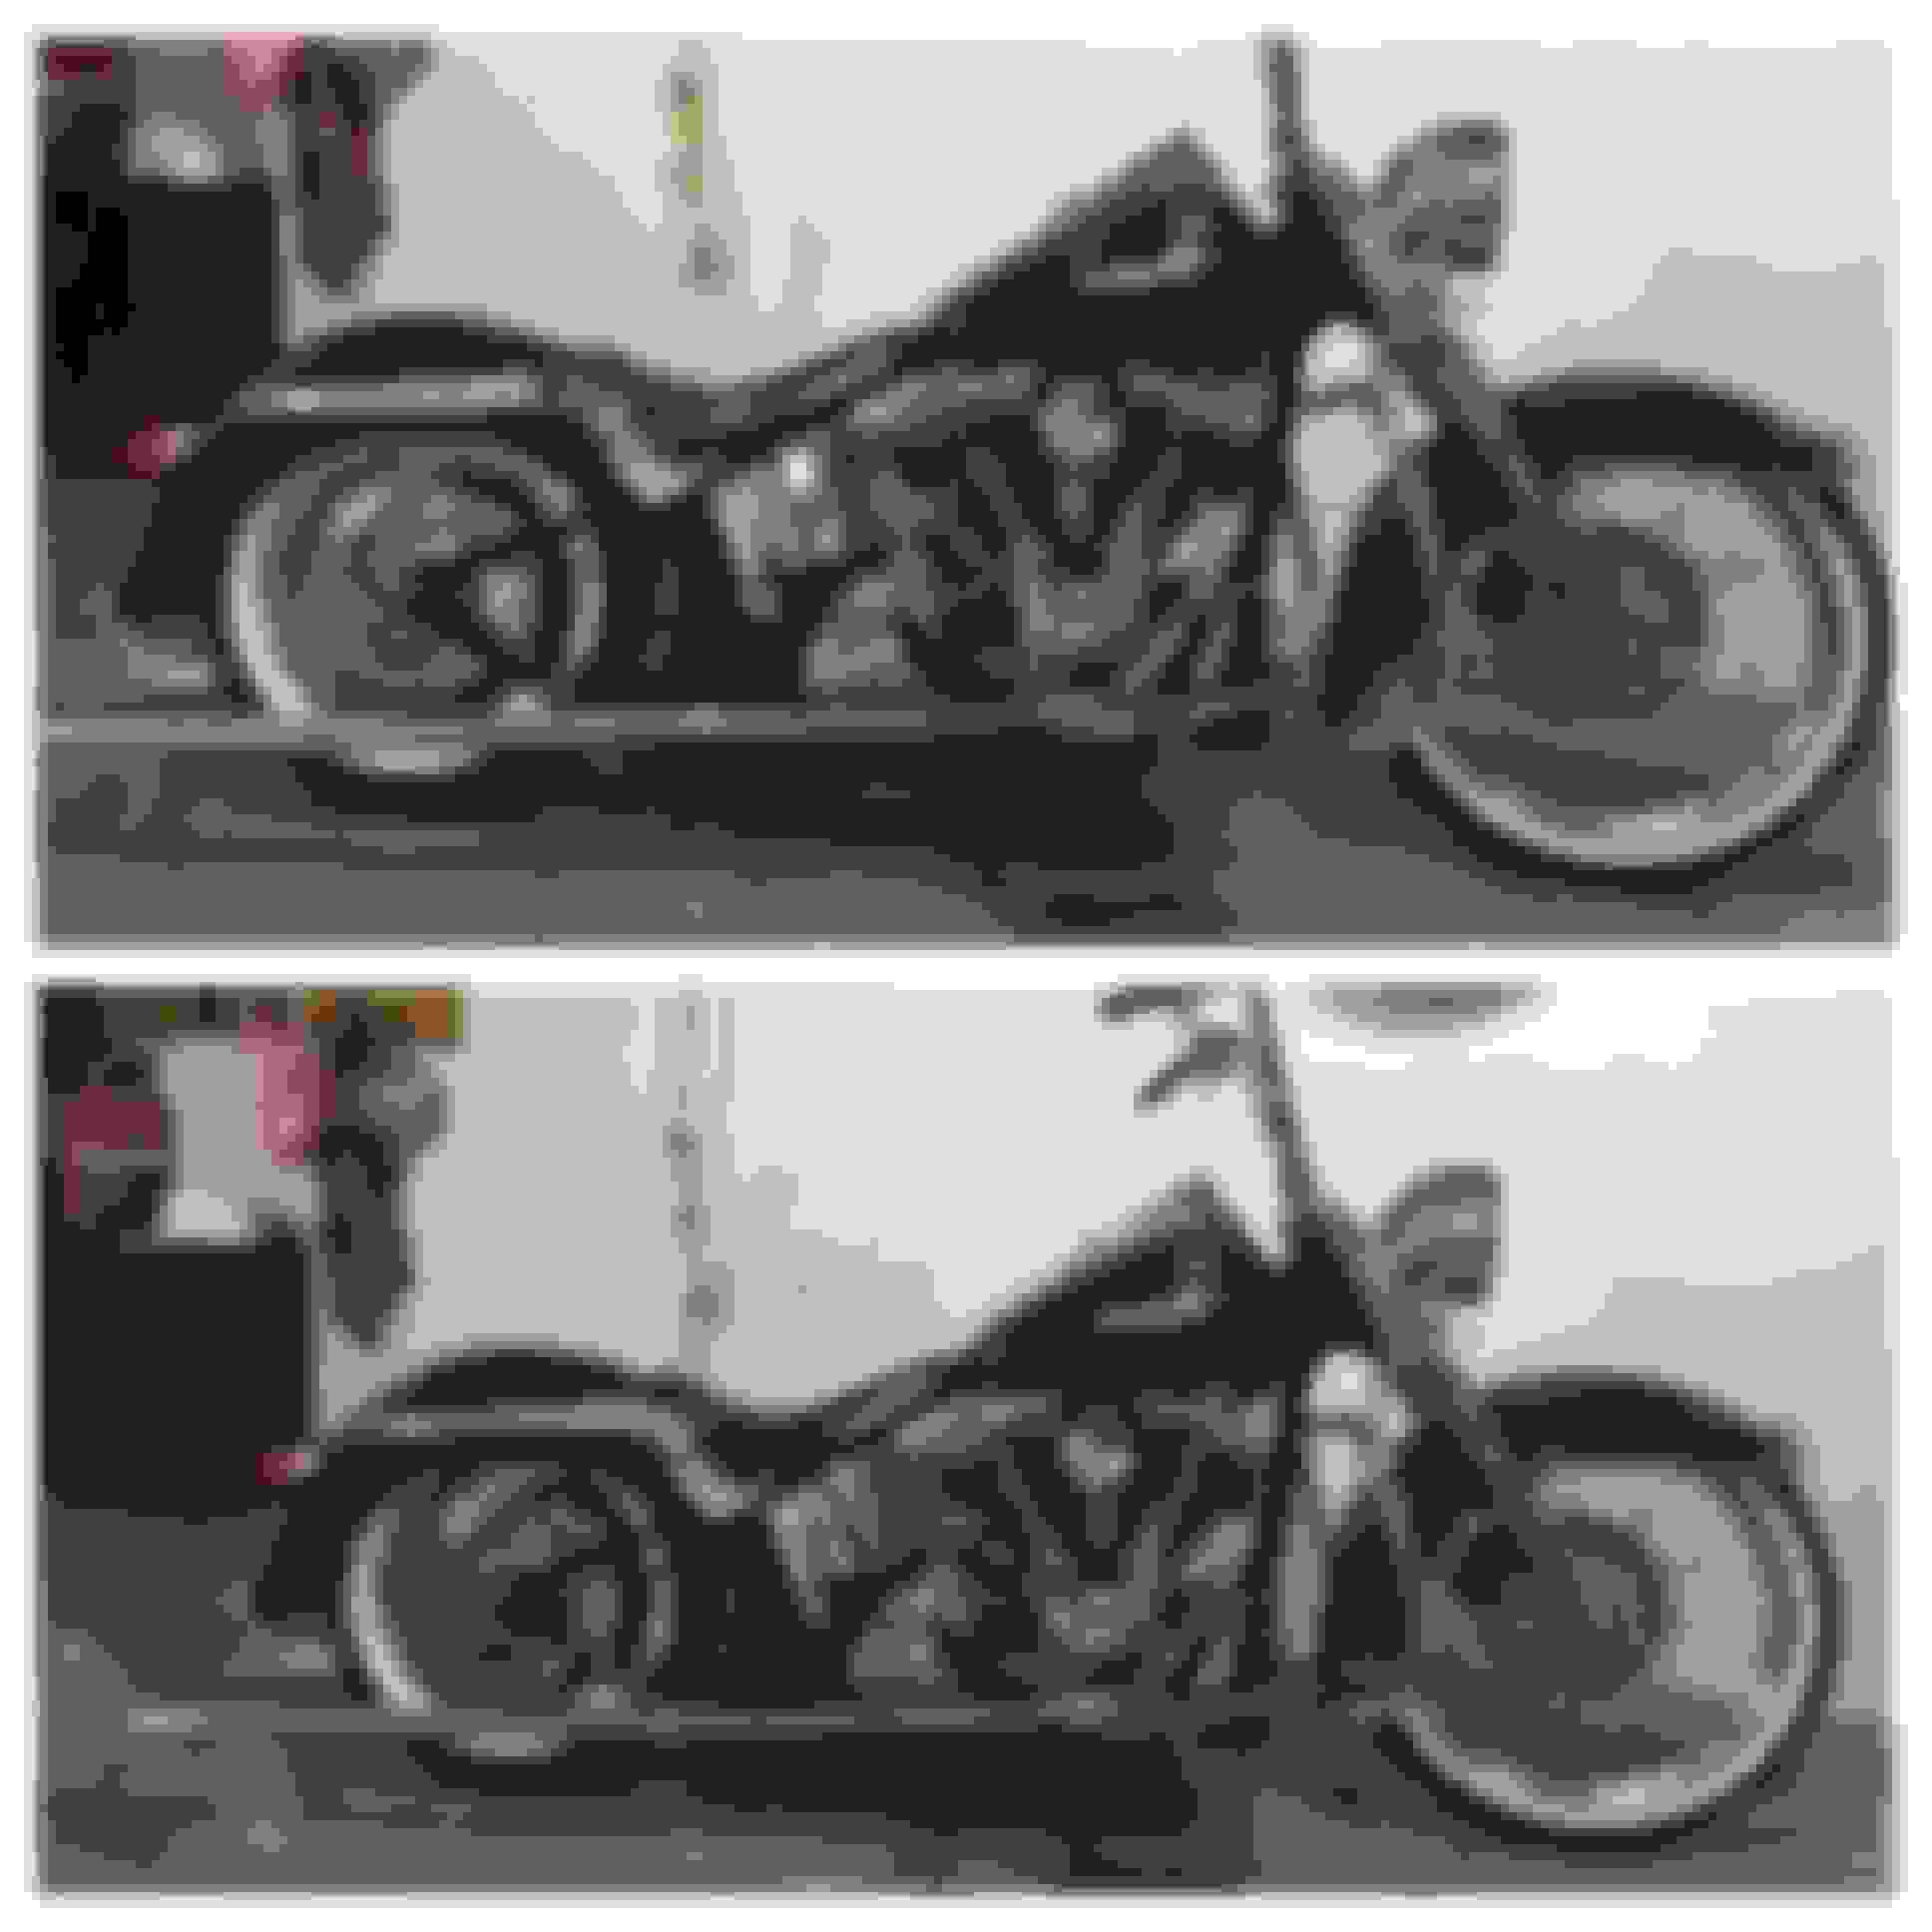
Lets start with the guinea pig, my 2000 Heritage:
After I put on the 21, I needed more drop in the front.
Next, jack your bike up. If your bike is like mine, its too low, make a ghetto ramp:
I made sure to strap it down, since there is going to be a change in balance due to realeasing the front end:
Now youre ready for fun! At this point I had the bike jacked up JUST enough to still have pressure on the front tire.
On a heritage or deluxe, you have to lose all the front end BS in order to get to the tubes. I started with the spot lights and blinkers:
Your pile will look similar to this. I didnt document the bolt removal for the headlight on the bottom and the 4 side bolts. Its self explanitory.
Your front end should look like this now:
Next I removed the small allen head that held the brake line to the bottom of the triple tree:
At this point I removed the top cap for the forks. This cap gives access to the fork tubes if you want to add fluid at any point and also snugs the forks tight in the top tripple tree.
Now this is where it gets fun and I can hopefully save you guys some time and effort. At no point did i remove wheel, fender, even brake caliper, its not necessary.
The only thing that prohibited me was the brake line. It is too short for your forks to drop far enough. I like to work smart. No need for part removal, tilt the bars forward:
Next, you need to loosen the pinch bolts on the lower tree:
While all this disassembly happens, your tire should still be resting on the floor.
Now your fork tubes should be loose. From here, you start the process of jacking the bike up while monitoring the forks to ensure they are sliding down:
First step is removing the fork tops. I used an open unded wrench for this, while the fork we slid down about 6 inches and STILL in the lower tree.
NOTE: this cap is under pressure. Not a lot, but to be safe, I put a smal towel on top of the cap while i was loosening it to prevent any projecting out:
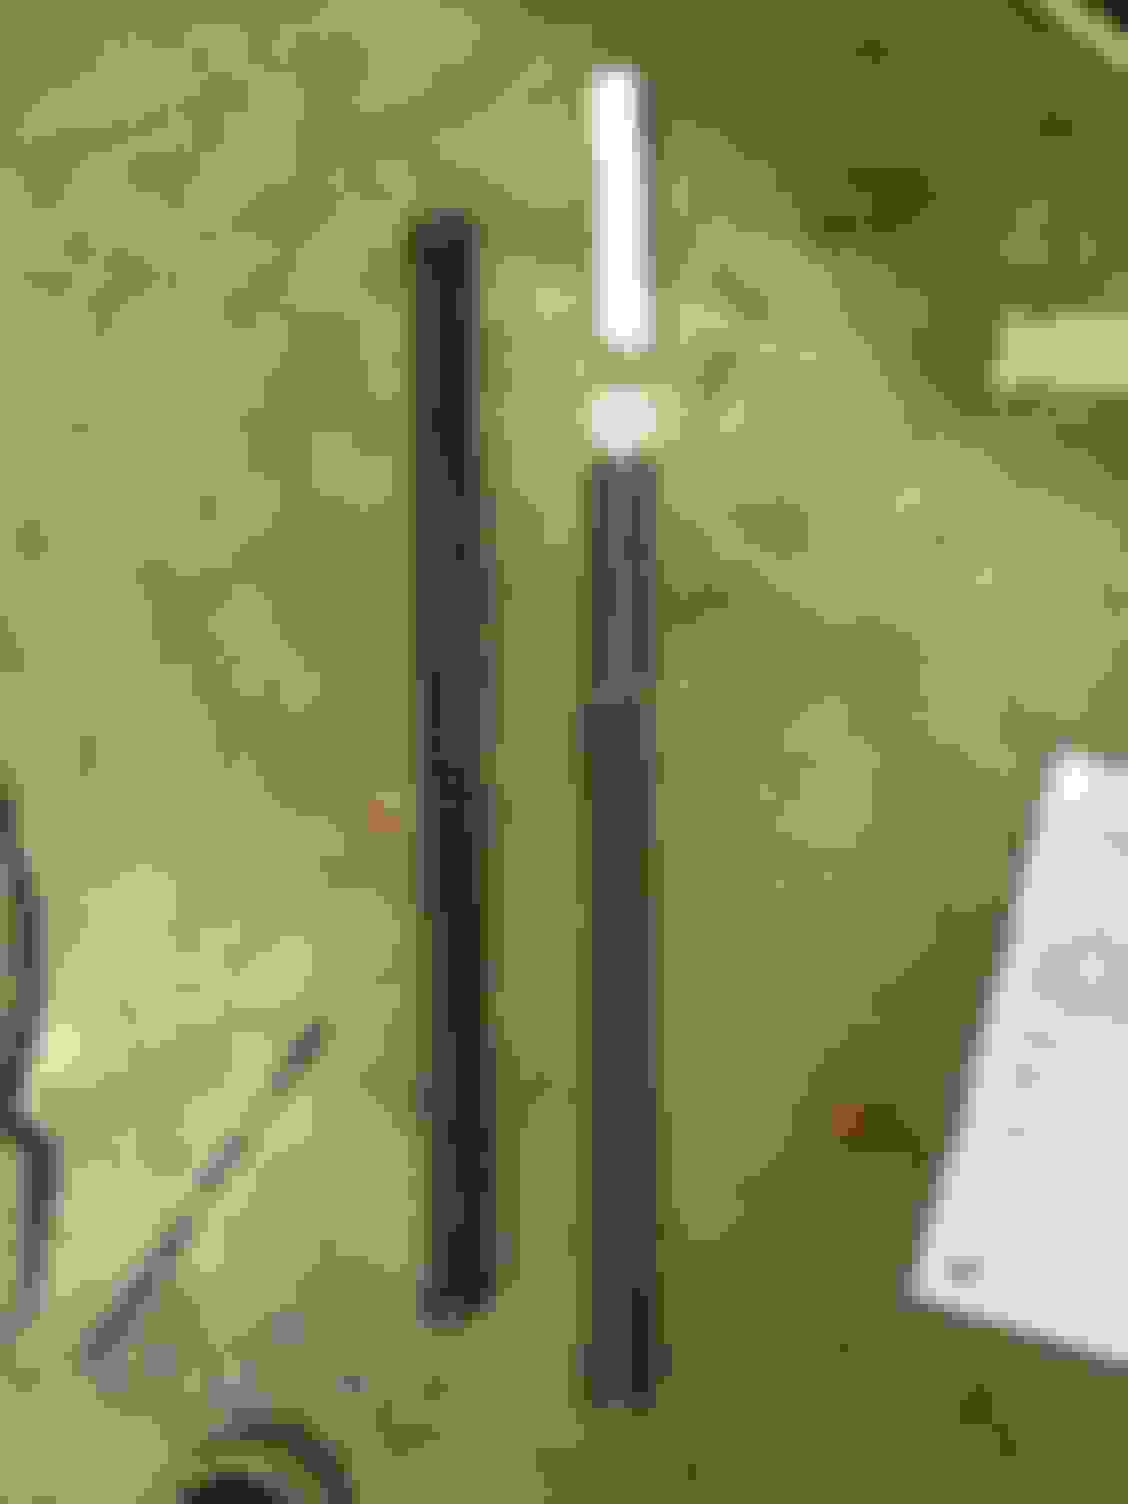
Now pull your old spring out. It is one solid unit, nothing else down there you need to get out:
The springs are soft enough to pull out of this space. Once again, there is NO NEED to drop your entire front end.
New on the right, old on the left:
This is how the new springs sit:
I went by the chart from Progressive, I cut the PVC sectons down to a total of 3 inches in length. This gives softails 2" of drop:
I wanted a good clean cut, so I used a chain pipe cutter and placed the PVC in a vise. Cut like butter:
Now you drop it all in. The largest spring first, then the compression spring, then washer, then PVC, then washer, then top cap.
Its kinda tricky putting pressure on the top cap while tightening it, but itll go in a few turns:
After that, you simply reverse all the steps to reassemble!
In following, I didnt look at a clock, but I started jacking the bike up at the begining of Bone Thugs n Harmony e1999 Eternal album, and the bike was back on the ground with a couple songs remaining and after a Wiki the total run time of it is 68 minutes. So it took about an hour for this job, including going back and forth to the tool box, taking pictures, eating pringles, and occasionaly stopping to bust a few ryhmes.
The difference is perfect. Im glad i went to the 2" option, I considered going lower, but this height is PERFECT after settling overnight. Here is a picture reference right after I took it off the jack:
The ride is FAR BETTER than stock. I didnt change fork oil either. I can later if i want to since I have the drain plug on my specific fork tubes, but after about 50 miles today, im extremely happy. I will get a few more pictures on lunch and upload them.
So if you are considering drop ins, JUST DO IT! its not scary at all and well worth the 100 bucks. Props to Progressive on a great product and good instructions. And the stickers! I wish there was more, I even put one on my car I was so impressed.
If you guys have any questions at all, please dont hesitate to ask, and hopefully this can help someone!
Excellent write up Mr.Brass, thanks for posting for everyone to ise as a reference and get out to the garage and JUST DO IT! Looks great dude, the bike needed that 2"
Great wright up and pics are extremely helpful. I just did mine last month and have installed them on my last two Deluxe. I totally agree with you on the ride quality even tho you'll have the "lowered bikes aren't safe police" chime in.
 04-17-2015, 11:41 AM