How to relocate your coil and horn.
#1
 03-29-2009, 05:30 PM

Alright, I’ll give as much detail as I can. The whole process is pretty simple; it just took a bit of creativity to get right.
First, drain the tank. Once it is drained completely, unhook the crossover line and drain whatever is left. This is the part that gave me hell. Once second it seemed empty and the next I was covered in fuel.
Remove the seat, unbolt the tank at the front and back, and remove the dash. I have been able to just flip it over and res it on the front of the risers each time I have had it off. Don’t forget to reach under the tank and unhook the fuel gauge. The tank should be ready to come off now.

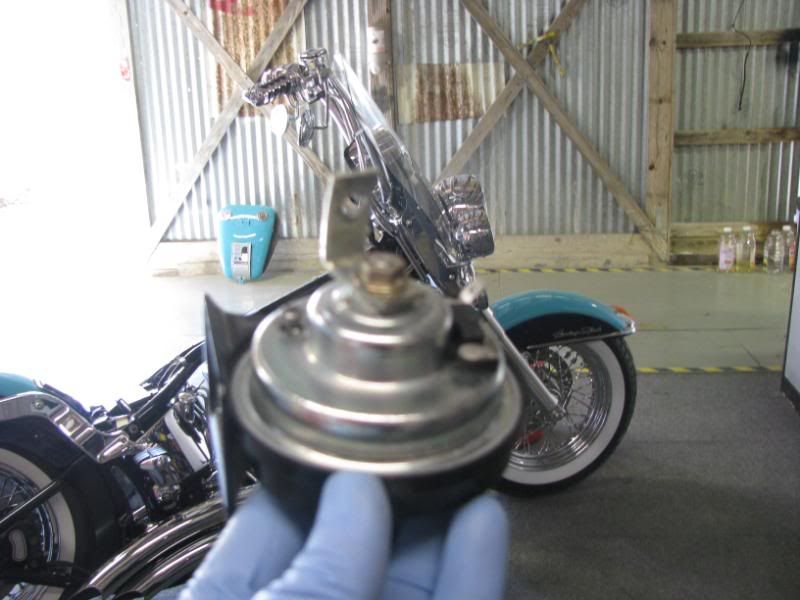
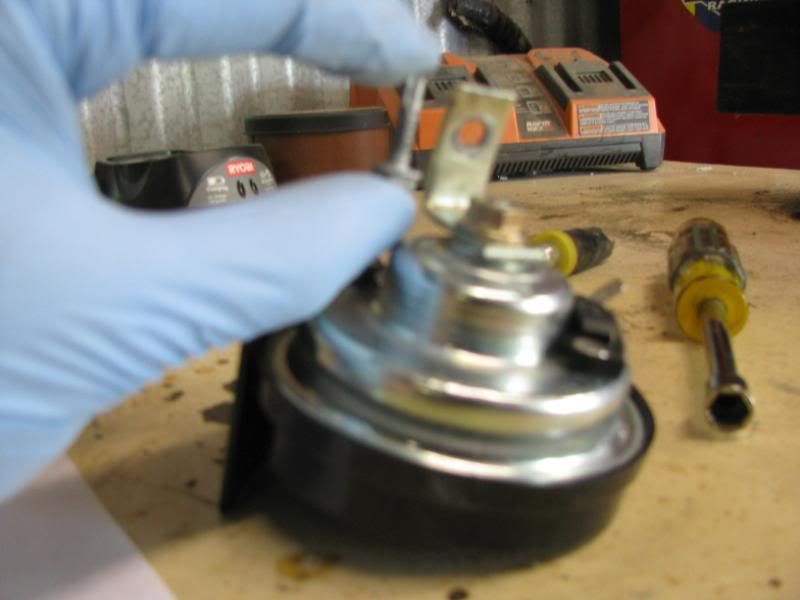
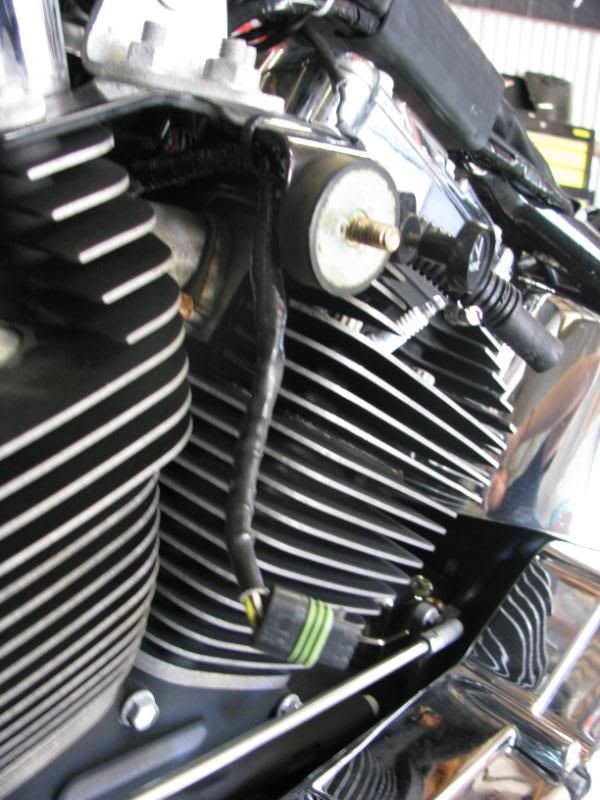
At this point, take off the horn cover. The horn wires are clipped to the cover and come right out the back. You can unplug and unbolt. Take the horn out from behind the cover and put use a 1” L bracket in the mounting bolt. Don’t tighten it all the way yet. Leave it loose and wiggle the horn around until you can see exactly how you wanted mounted. I could only get it to fit how you see in the pics. You need to get it mounted to the bike to see exactly what direction it should point. I used a 5/16” self tapping sheet metal screw to secure it to the frame. Just to be safe, I predrilled the hole beforehand. The wires for the horn will work with no extensions. They drop down to the original location right on the other side of the new location. Just route them back up and under the backbone. Plug it in, test, done.


Now for the fun!
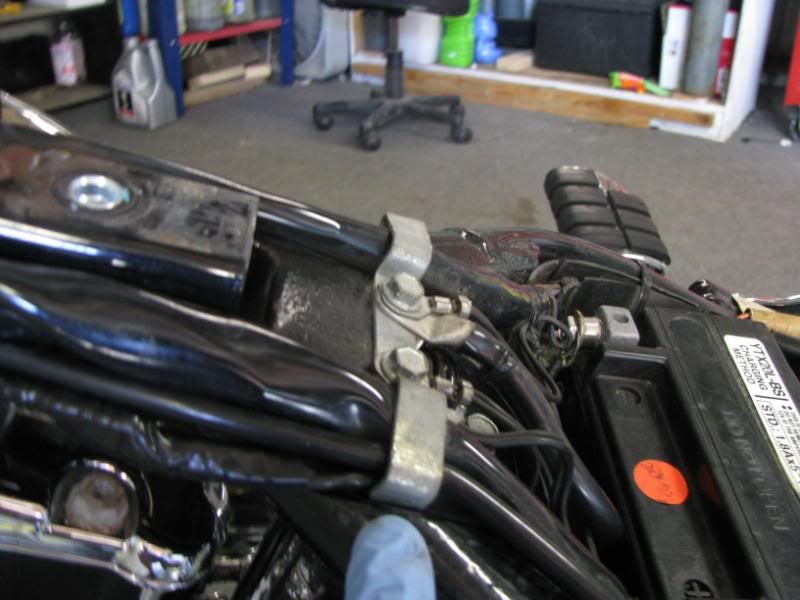
Take the cover off of the coil. It only has one little bolt on the bottom side. Unbolt the coil from the seat post and unplug it, unplug the spark plug wires also. Now is a good time to go ahead and take the seat post out. I had a hell of a time getting it out. I ended up having to unhook the front bolt in the shift linkage so it would move out of the way, as well as practically take all 3 bolts out that are on the top of the oil tank. Find the coil wires (electrical) and re-route the from below the frame to up on top and down the side with the others. I put mine under the ground mount with all the others. Go ahead and cut and splice all three wires that will run to the new coil location. I don’t remember exactly the length I spliced in, seems like it was approx. 8”. Once you get it spliced and shrink wrapped, run the new wire down the side of the frame and drop it down directly above the horn mount.

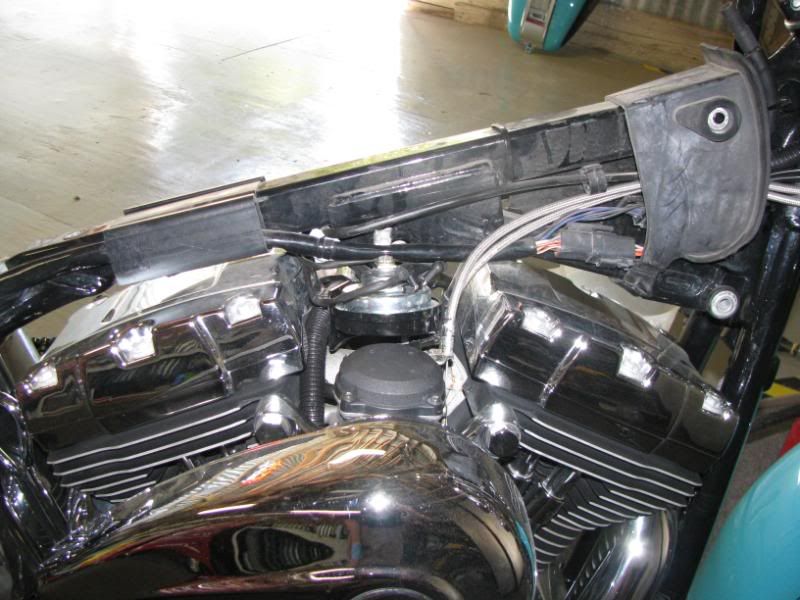
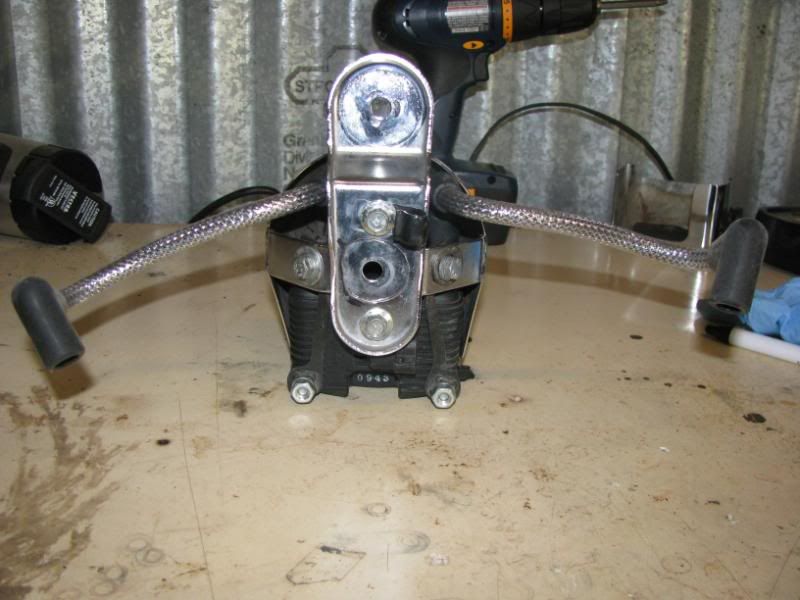
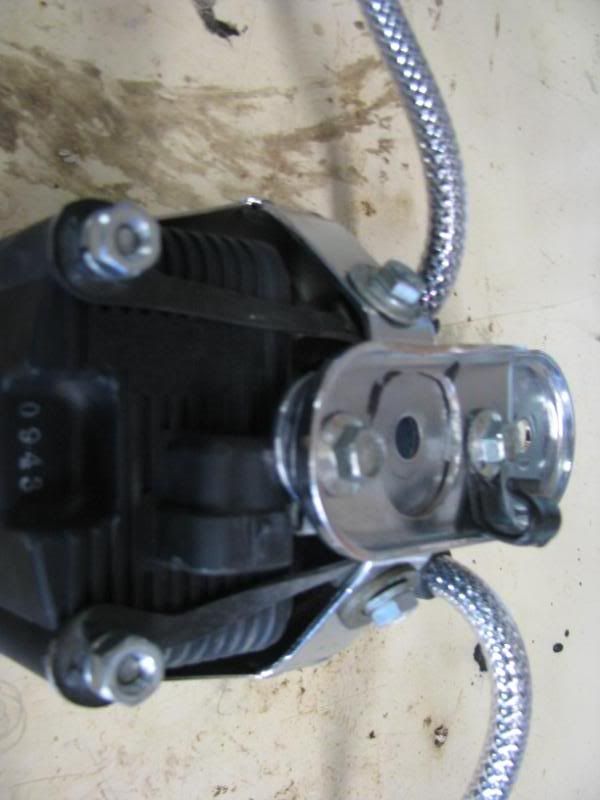
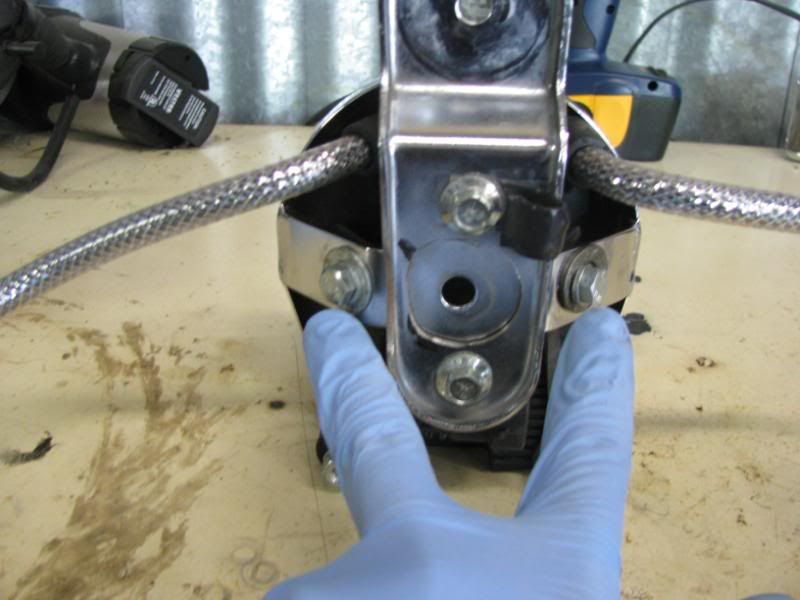
For fitting the coil under the horn cover, it just takes some lining up to get it right. I used some thin metal left from another project that was very easy to bend. I used the two existing holes on the back of the mount, which you can see me pointing to. I used a step bit and drilled them out as large as I could to give me some room to slide the coil up or down. I used the factory coil mount bolts and some nuts and lock washers I had laying around. For the top, once I had the coil approx where I wanted it I marked it and drilled the holes for the top bolts.
Pretty simple after that, just bolt everything up and put it all back together. Hopefully I didn’t leave anything out and the pics should clear it up just in case.
As far as coil wires, I used uskoolines.com. The new wires need to be 10” long with 90 degree boots on both the coil side and the plug side. I’m sure you could use 8 �” or 9” wires, but I was not sure and custom lines can’t be returned.
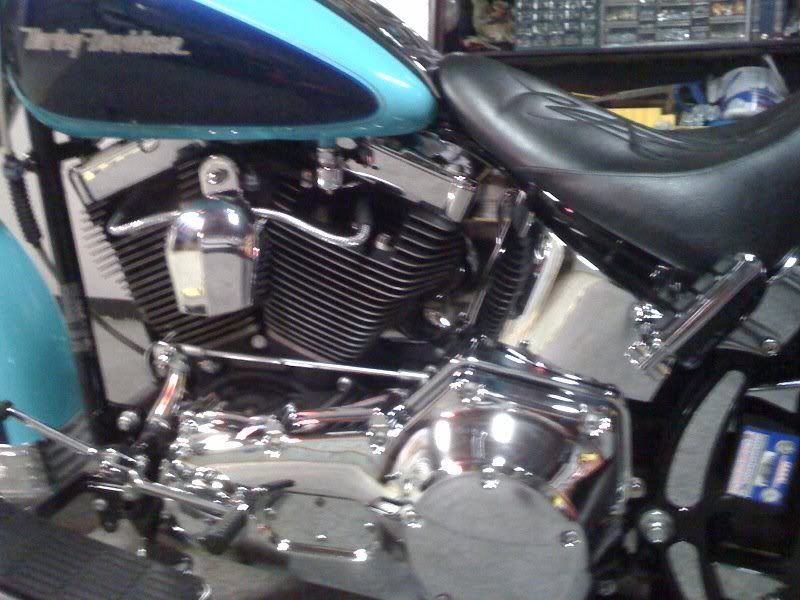
Finished look:
Good luck, and attempt at your own risk. this method worked for me, but might not for you! I won't be responsible for any damages!!!!
First, drain the tank. Once it is drained completely, unhook the crossover line and drain whatever is left. This is the part that gave me hell. Once second it seemed empty and the next I was covered in fuel.
Remove the seat, unbolt the tank at the front and back, and remove the dash. I have been able to just flip it over and res it on the front of the risers each time I have had it off. Don’t forget to reach under the tank and unhook the fuel gauge. The tank should be ready to come off now.
At this point, take off the horn cover. The horn wires are clipped to the cover and come right out the back. You can unplug and unbolt. Take the horn out from behind the cover and put use a 1” L bracket in the mounting bolt. Don’t tighten it all the way yet. Leave it loose and wiggle the horn around until you can see exactly how you wanted mounted. I could only get it to fit how you see in the pics. You need to get it mounted to the bike to see exactly what direction it should point. I used a 5/16” self tapping sheet metal screw to secure it to the frame. Just to be safe, I predrilled the hole beforehand. The wires for the horn will work with no extensions. They drop down to the original location right on the other side of the new location. Just route them back up and under the backbone. Plug it in, test, done.
Now for the fun!
Take the cover off of the coil. It only has one little bolt on the bottom side. Unbolt the coil from the seat post and unplug it, unplug the spark plug wires also. Now is a good time to go ahead and take the seat post out. I had a hell of a time getting it out. I ended up having to unhook the front bolt in the shift linkage so it would move out of the way, as well as practically take all 3 bolts out that are on the top of the oil tank. Find the coil wires (electrical) and re-route the from below the frame to up on top and down the side with the others. I put mine under the ground mount with all the others. Go ahead and cut and splice all three wires that will run to the new coil location. I don’t remember exactly the length I spliced in, seems like it was approx. 8”. Once you get it spliced and shrink wrapped, run the new wire down the side of the frame and drop it down directly above the horn mount.
For fitting the coil under the horn cover, it just takes some lining up to get it right. I used some thin metal left from another project that was very easy to bend. I used the two existing holes on the back of the mount, which you can see me pointing to. I used a step bit and drilled them out as large as I could to give me some room to slide the coil up or down. I used the factory coil mount bolts and some nuts and lock washers I had laying around. For the top, once I had the coil approx where I wanted it I marked it and drilled the holes for the top bolts.
Pretty simple after that, just bolt everything up and put it all back together. Hopefully I didn’t leave anything out and the pics should clear it up just in case.
As far as coil wires, I used uskoolines.com. The new wires need to be 10” long with 90 degree boots on both the coil side and the plug side. I’m sure you could use 8 �” or 9” wires, but I was not sure and custom lines can’t be returned.
Finished look:
Good luck, and attempt at your own risk. this method worked for me, but might not for you! I won't be responsible for any damages!!!!
Last edited by dusty2221; 03-29-2009 at 08:29 PM.

#5
03-29-2009, 10:59 PM
Outstanding HDF Member
yep! I'm looking for an alternative location for the coil..... I am going to install a tank shifter that will occupy the horn location... moving the horn under the tank (thanks dusty2221)... but where to put the coil???
any ideas???
any ideas???
#6
03-29-2009, 11:25 PM
Great job on the details and pics Dust! Thanks!
How about mounting it to the splash guard? The only problem I see is the LONG plug wires???
How about mounting it to the splash guard? The only problem I see is the LONG plug wires???
Last edited by Dustmaker; 03-30-2009 at 09:45 AM.
#7
03-29-2009, 11:28 PM
Trending Topics
#8
03-30-2009, 12:22 AM
Road Warrior

#9
07-03-2009, 10:18 PM
Road Master
How did I miss this thread! This is one of the best...thanks a million for taking the time to post this step by step...makes life a lot easier for the shade trees like me who are interested in this mod.
It turned out great...getting rid of that seat post and coil box really cleans the bike up...a lot more than I though it would. Excellent mod!!!
It turned out great...getting rid of that seat post and coil box really cleans the bike up...a lot more than I though it would. Excellent mod!!!