


Sokustom Bag Attachment

Thread Starter
|
Advanced
Joined: Jun 2009
Posts: 67
Likes: 0
From: Andover, MN
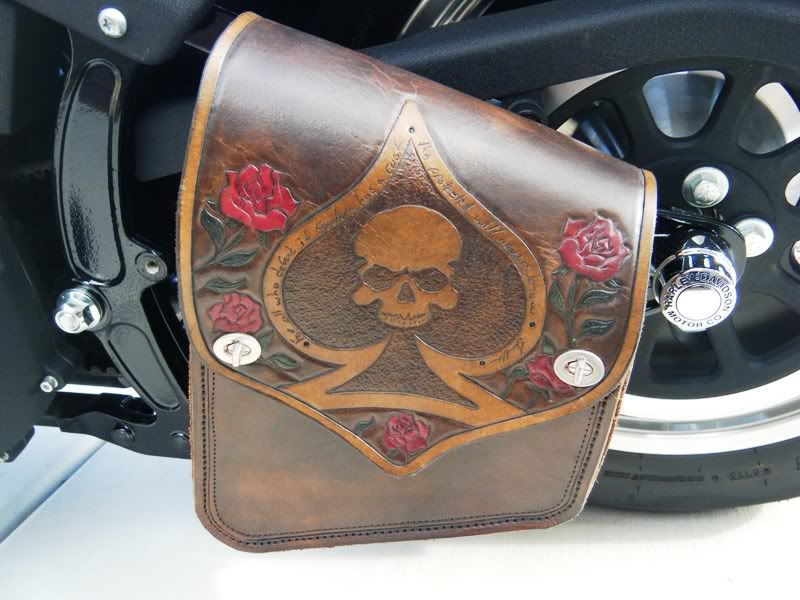
I received my swingarm bag yesterday from Shaun and I was blown away with his work. It turned out way better than I could have imagined. Now I need to attach it to my swingarm. Shaun said to attach it with zip ties, but I was wondering what everyone else use to attach the bag, hopefully something that doesn't harm the paint.
Tourer
Joined: Sep 2007
Posts: 469
Likes: 0
From: Las Vegas, NV
I thought about fabbing one of the mounts some good folks here have come up with, but just decided to use the zip ties. I have had absolutely zero issues with it.
At first I kept an eye on it thinking zip ties would break, etc., but evertyhing is and has been worry free.
I'm also not terribly worried about rubbing some paint on the swingarm. IF I ever decide to take off the solo bag AND not replace it with another one, I guess I'll have to live with touching up the swingarm.
Either way, I love having a bag there and stick my lunch in it for work, or misc stuff for day trips.
If it's a detail you dont like, then by all means you could run straps or bracket, or whatever. I've had many compliments on my bags, but no one has ever wedged their head behind there and said "man! those zip ties look like azz!" Lol
Enjoy and let us know what you come up with.
Outstanding HDF Member
Joined: Jun 2009
Posts: 2,105
Likes: 1
From: Rowlett, Texas
I bought a velcro roll, cut it into strips, wrapped it soft side down on the swingarm, and zip tied the bag over that. You can't see the zip ties for it to look like a$$. After seeing the pix that I just took, I see that my bike looks like dirty a$$ though. Guess it's time to wash.


Club Member
Joined: Sep 2009
Posts: 3,327
Likes: 1
From: South Jersey
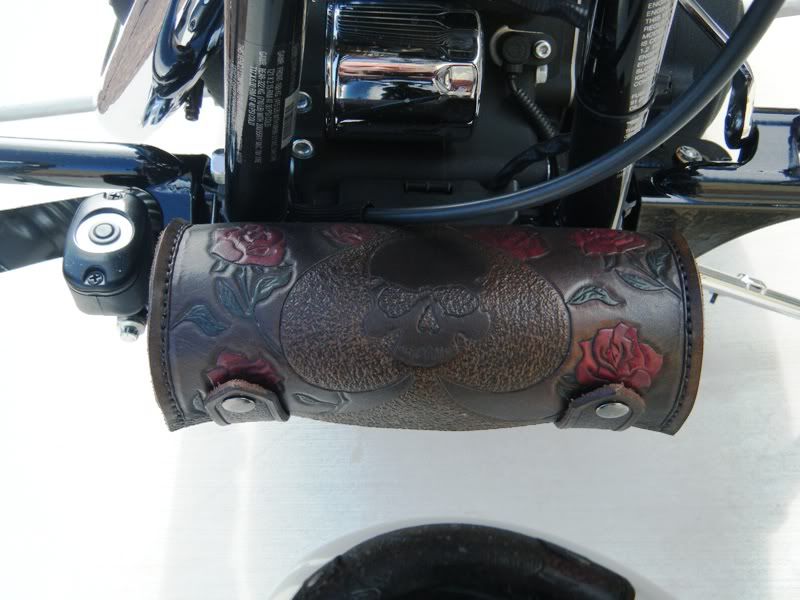
Do you have any more closer shots? That looks nice , but hard to see whats going on.
Trending Topics
Road Warrior
Joined: Dec 2008
Posts: 1,344
Likes: 1
From: NM
I used electrical tape and zip ties the first time i mounted it then 3 of the zip ties broke so i switched to steel wire over the electrical tape and haven't had any problems
HD Forum Stories
The Best of Harley-Davidson for Lifelong Riders

6 Weirdest Harley-Davidsons Ever Sold to the Public
Verdad Gallardo
7 Times Harley-Davidson Chucked Tradition Out the Window
Verdad Gallardo
7 Surprising Harley-Davidson Products that Are Not Motorcycles
Verdad Gallardo
8 Best Harley-Davidson Motorcycles Ever
Pouria Savadkouei
10 Worst Harley-Davidson Motorcycles Ever
Pouria Savadkouei
Killer Custom's Jail Break Is The Breakout That Refused to Blend In
Verdad Gallardo
Crazy Bunderbike Build Looks Amazing, But Is It Impossible to Ride?
Verdad Gallardo
Harley-Davidson Reveals Super Cool Cafe Racer Concept
Verdad Gallardo
Engraved Rebellion: Inside Bundnerbike's Glam Rock II
Verdad Gallardo
Banned
Joined: Feb 2010
Posts: 2,101
Likes: 0
From: P.R.O.K.
I basically did what others did. I used 1" coupler nuts for the forward/top and lower chain guard mounts. The rearmost chainguard mount, I used a 3/4 " spacer and a 1.5 inch bolt. This all allows the bag to sit approx 1/8th inch off the swingarm. Inside the bag is where I used plexiglass.
All hardware is 5/16 and in assembly order. (I painted all visible hardware black)
8x11 plexiglass sheet cut to fit inside bag.
Lower mount
3/4" set screw or stud (threads into chain guard/frame)
two spacer washers
1" coupler nut
Fender washer (against the bag outside)
3/4" button head bolt and a washer (inside bag)
Front mount upper
1" bolt (replaces original shorter bolt, reuse existing washer)
two spacer washers (other side of chain guard)
1" coupler nut
Fender washer (against the bag outside)
3/4" button head bolt and a washer (inside bag)
Rear mount upper
Begin inside bag
1.5" bolt and a washer
Fender (or smaller) washer against the bag outside)
3/4" spacer
Thread into existing hardware in chain guard.


Last edited by meatsack; May 22, 2010 at 05:12 PM.
Seasoned HDF Member


Joined: Jan 2010
Posts: 5,361
Likes: 117
From: auckland,new zealand
oh i thought solo bags came with leather straps?? i no some guys mount em using a plexiglass mounting board,or else sheetmetal as a backing plate,apparently helps stop them going saggy too!