Ness contrast cut fork boots and PM contrast cut calipers on a Fatboy Lo
#1
 11-20-2011, 09:50 PM


I spent the day installing some stuff on friend's bike. Air ride, Ness contrast cut fork boots, and PM contrast cut calipers front and rear. I'll post about the air ride in the proper section.
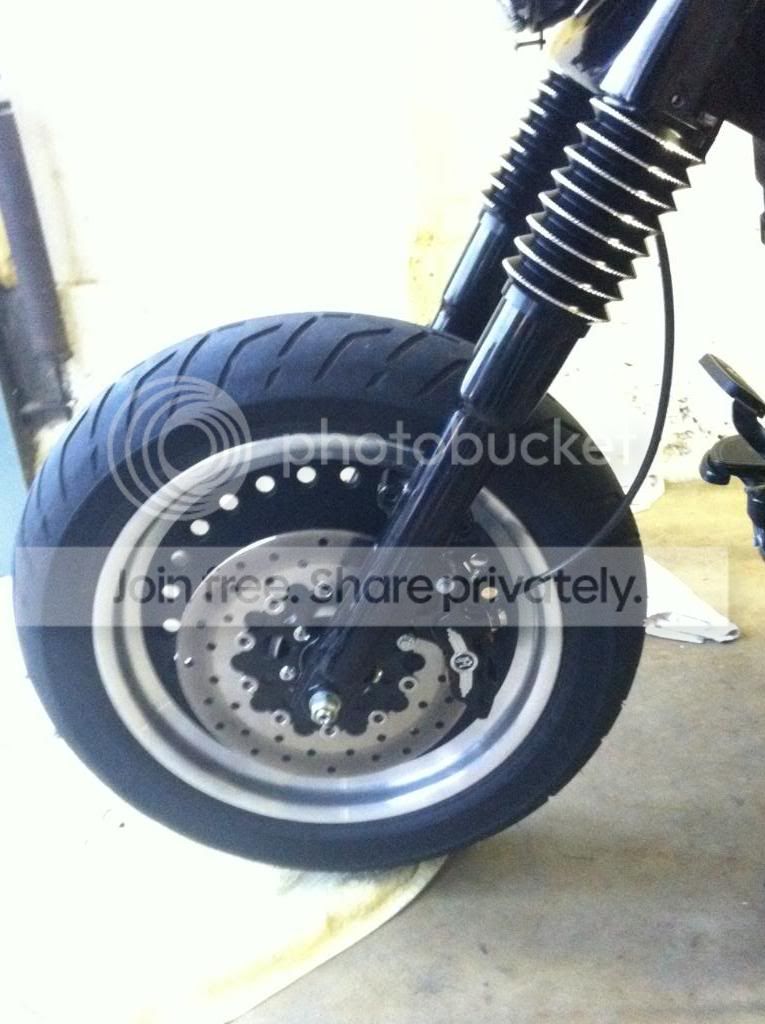
Here are the fork boots, or bellows as some folks call them.


The isntall for the fork boots was not too bad. Remove the front wheel and caliper. Remove the front fender. Remove all bolts from the fork tins. Loosen the 1 3/8" cap on the forks. Loosen the 5/8" fork pinch bolts under the front near the bottom of the tins. Remvoe the fork caps and the forks slide out. The fork boots bolt the bottom of the fork tins with 2 bolts per side.

Slide the forks back in and secure them with the fork top screws. Tighten the 5/8" pinch bolts on each side. Reassemble everything else.

The front caliper was simple. Use a 10mm 12PT socket to remove the caliper bolts. Remove the banjo bolt 3/8" 12 pt. Put the line on the new caliepr with the supplied banjo bolt (9/16" I think) Bolt caliper on using the provided spacers and chrome caliper bolts. Bleed with mity vac or however you like to bleed.

The rear caliper was the biggest hassle of the entire day. The 200 tire ont eh fatboy Lo leaves nearly no room for error, and the spacers are compeltely different than they are on my bike. One of tehm roled out while the axle was being pulled and none of teh three people there saw where it went. After trial and error for about and hour we finally figured out where it went and why we did not see where it went. It is recessed inside the swingarm on the brake caliper side where it cannot be seen at all.
Once that was figured out everything went on easy.

Once all was on just bleed the rear brake. Don't lose the master cylinder cap screw like we did, it ended up 20 feet away somehow.
It was really tough to get a good pic of the bike as we were working inc ramped quarters and it was pouring rain all day long. I'll get some next weekend when I see fuzzy math again.
This was the best I could do in the cramped quarters. No i was not even drinking. LOL

Drew
Here are the fork boots, or bellows as some folks call them.
The isntall for the fork boots was not too bad. Remove the front wheel and caliper. Remove the front fender. Remove all bolts from the fork tins. Loosen the 1 3/8" cap on the forks. Loosen the 5/8" fork pinch bolts under the front near the bottom of the tins. Remvoe the fork caps and the forks slide out. The fork boots bolt the bottom of the fork tins with 2 bolts per side.
Slide the forks back in and secure them with the fork top screws. Tighten the 5/8" pinch bolts on each side. Reassemble everything else.
The front caliper was simple. Use a 10mm 12PT socket to remove the caliper bolts. Remove the banjo bolt 3/8" 12 pt. Put the line on the new caliepr with the supplied banjo bolt (9/16" I think) Bolt caliper on using the provided spacers and chrome caliper bolts. Bleed with mity vac or however you like to bleed.
The rear caliper was the biggest hassle of the entire day. The 200 tire ont eh fatboy Lo leaves nearly no room for error, and the spacers are compeltely different than they are on my bike. One of tehm roled out while the axle was being pulled and none of teh three people there saw where it went. After trial and error for about and hour we finally figured out where it went and why we did not see where it went. It is recessed inside the swingarm on the brake caliper side where it cannot be seen at all.
Once that was figured out everything went on easy.
Once all was on just bleed the rear brake. Don't lose the master cylinder cap screw like we did, it ended up 20 feet away somehow.
It was really tough to get a good pic of the bike as we were working inc ramped quarters and it was pouring rain all day long. I'll get some next weekend when I see fuzzy math again.
This was the best I could do in the cramped quarters. No i was not even drinking. LOL
Drew
#2
11-20-2011, 09:58 PM
Tourer


Thread
Thread Starter
Forum
Replies
Last Post
digthemlows
General Harley Davidson Chat
6
09-08-2015 03:26 PM
MZBuckeye
Dyna Glide Models
30
05-22-2010 06:59 AM